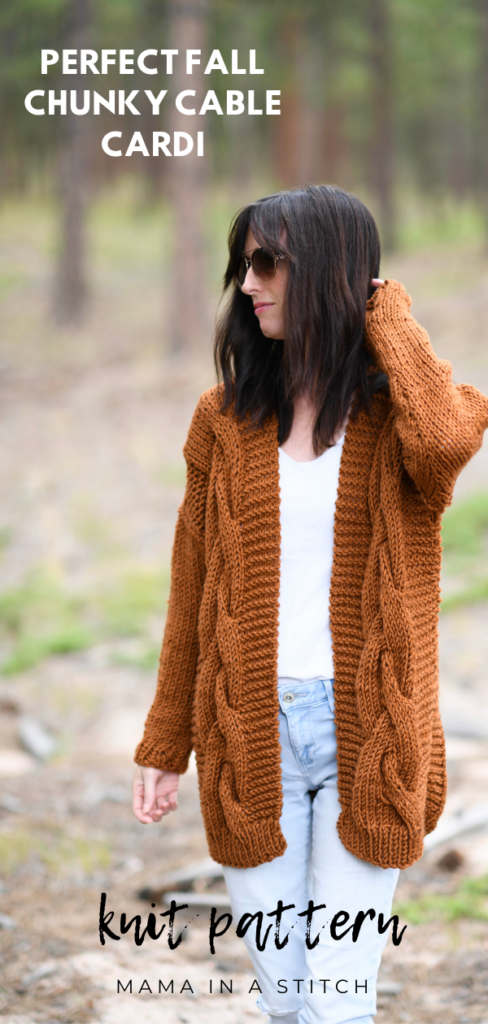
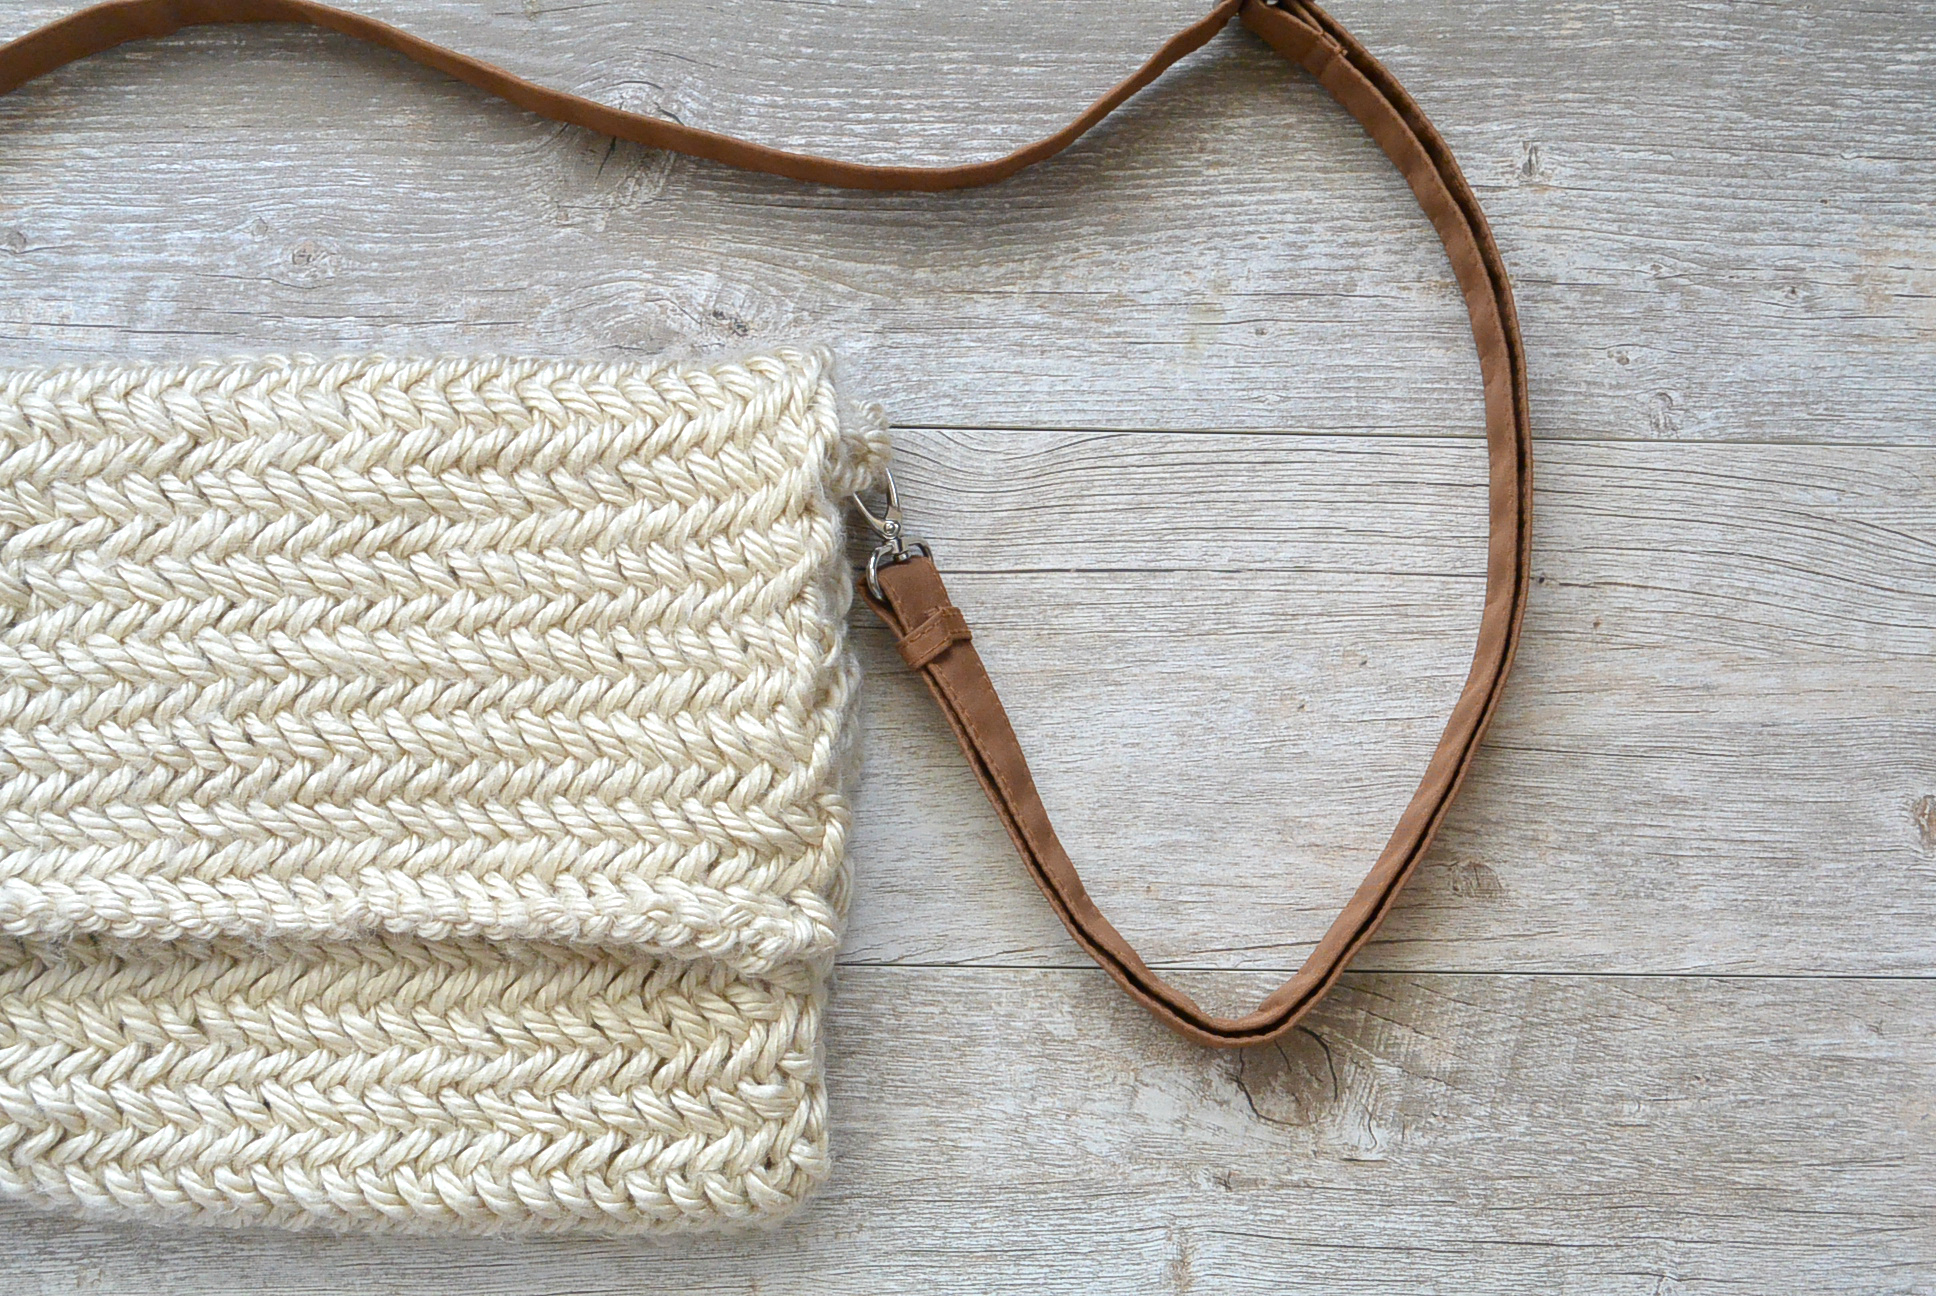
Easy Cable Knit Sweater Free Pattern
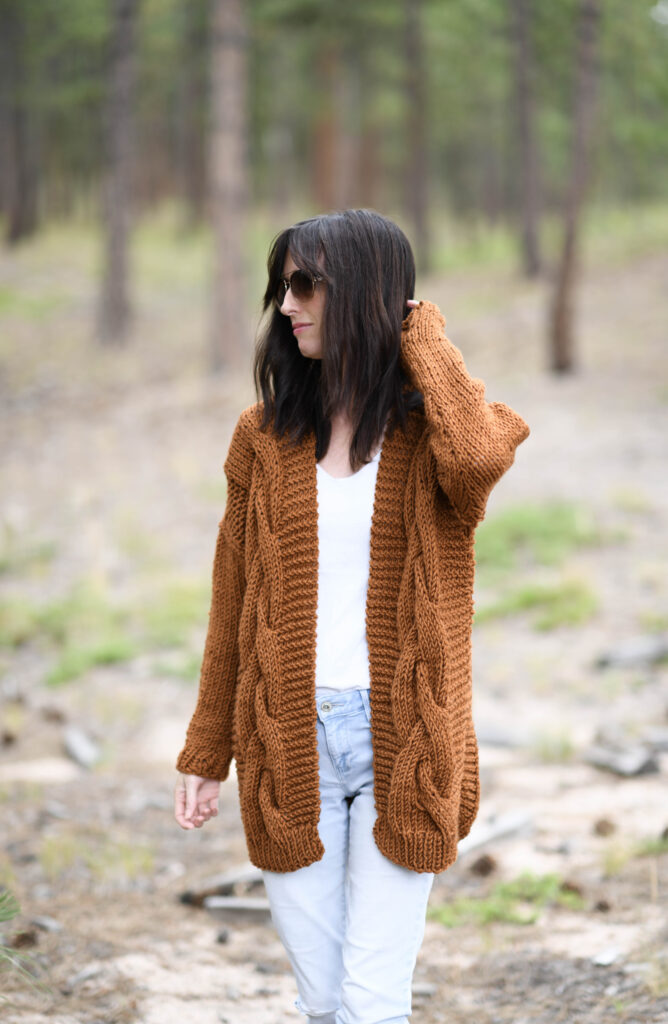
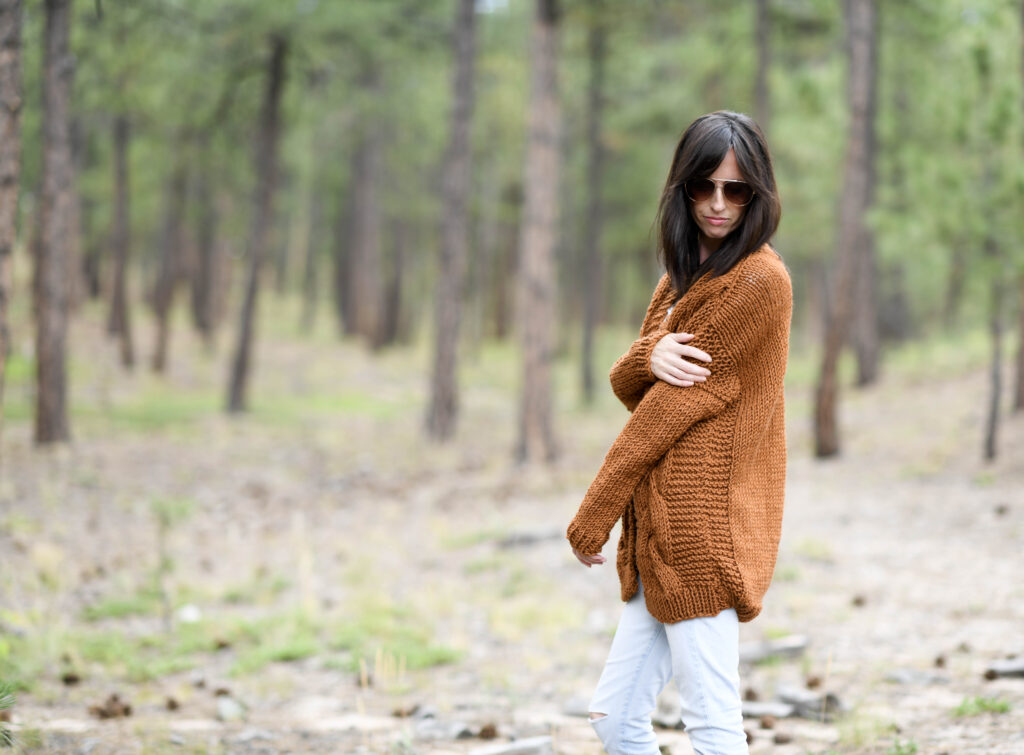
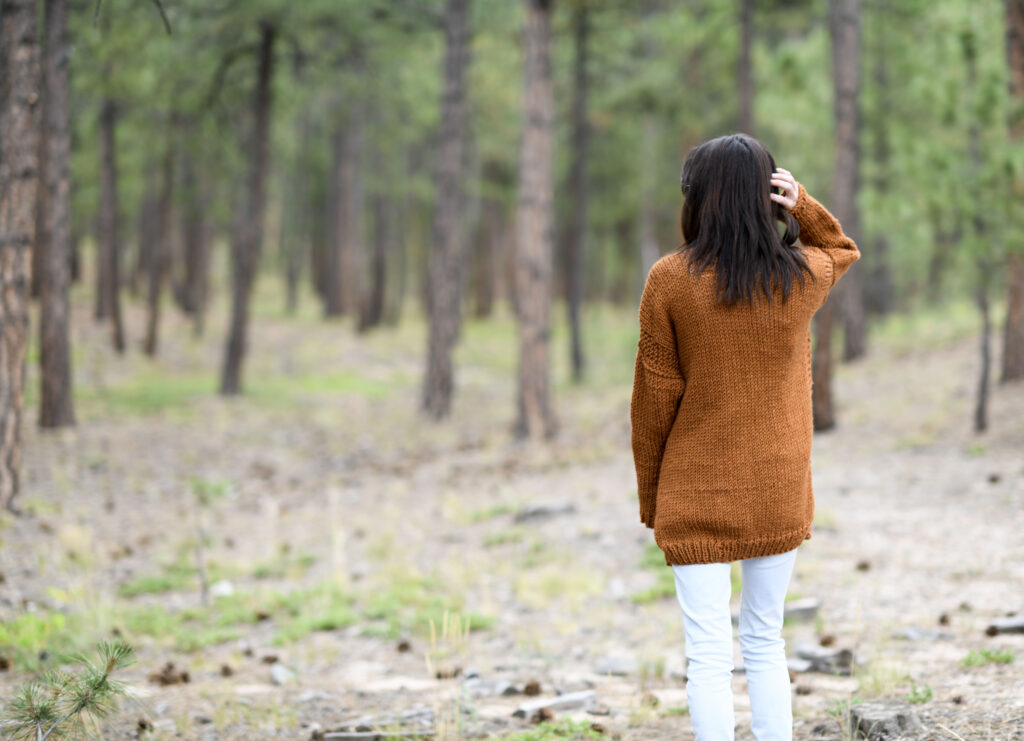
I’m super excited to share this simple cable knit cardigan pattern today. It’s something that’s been on my to-do list forever! This one works up quickly and is as easy as it gets. Read on!
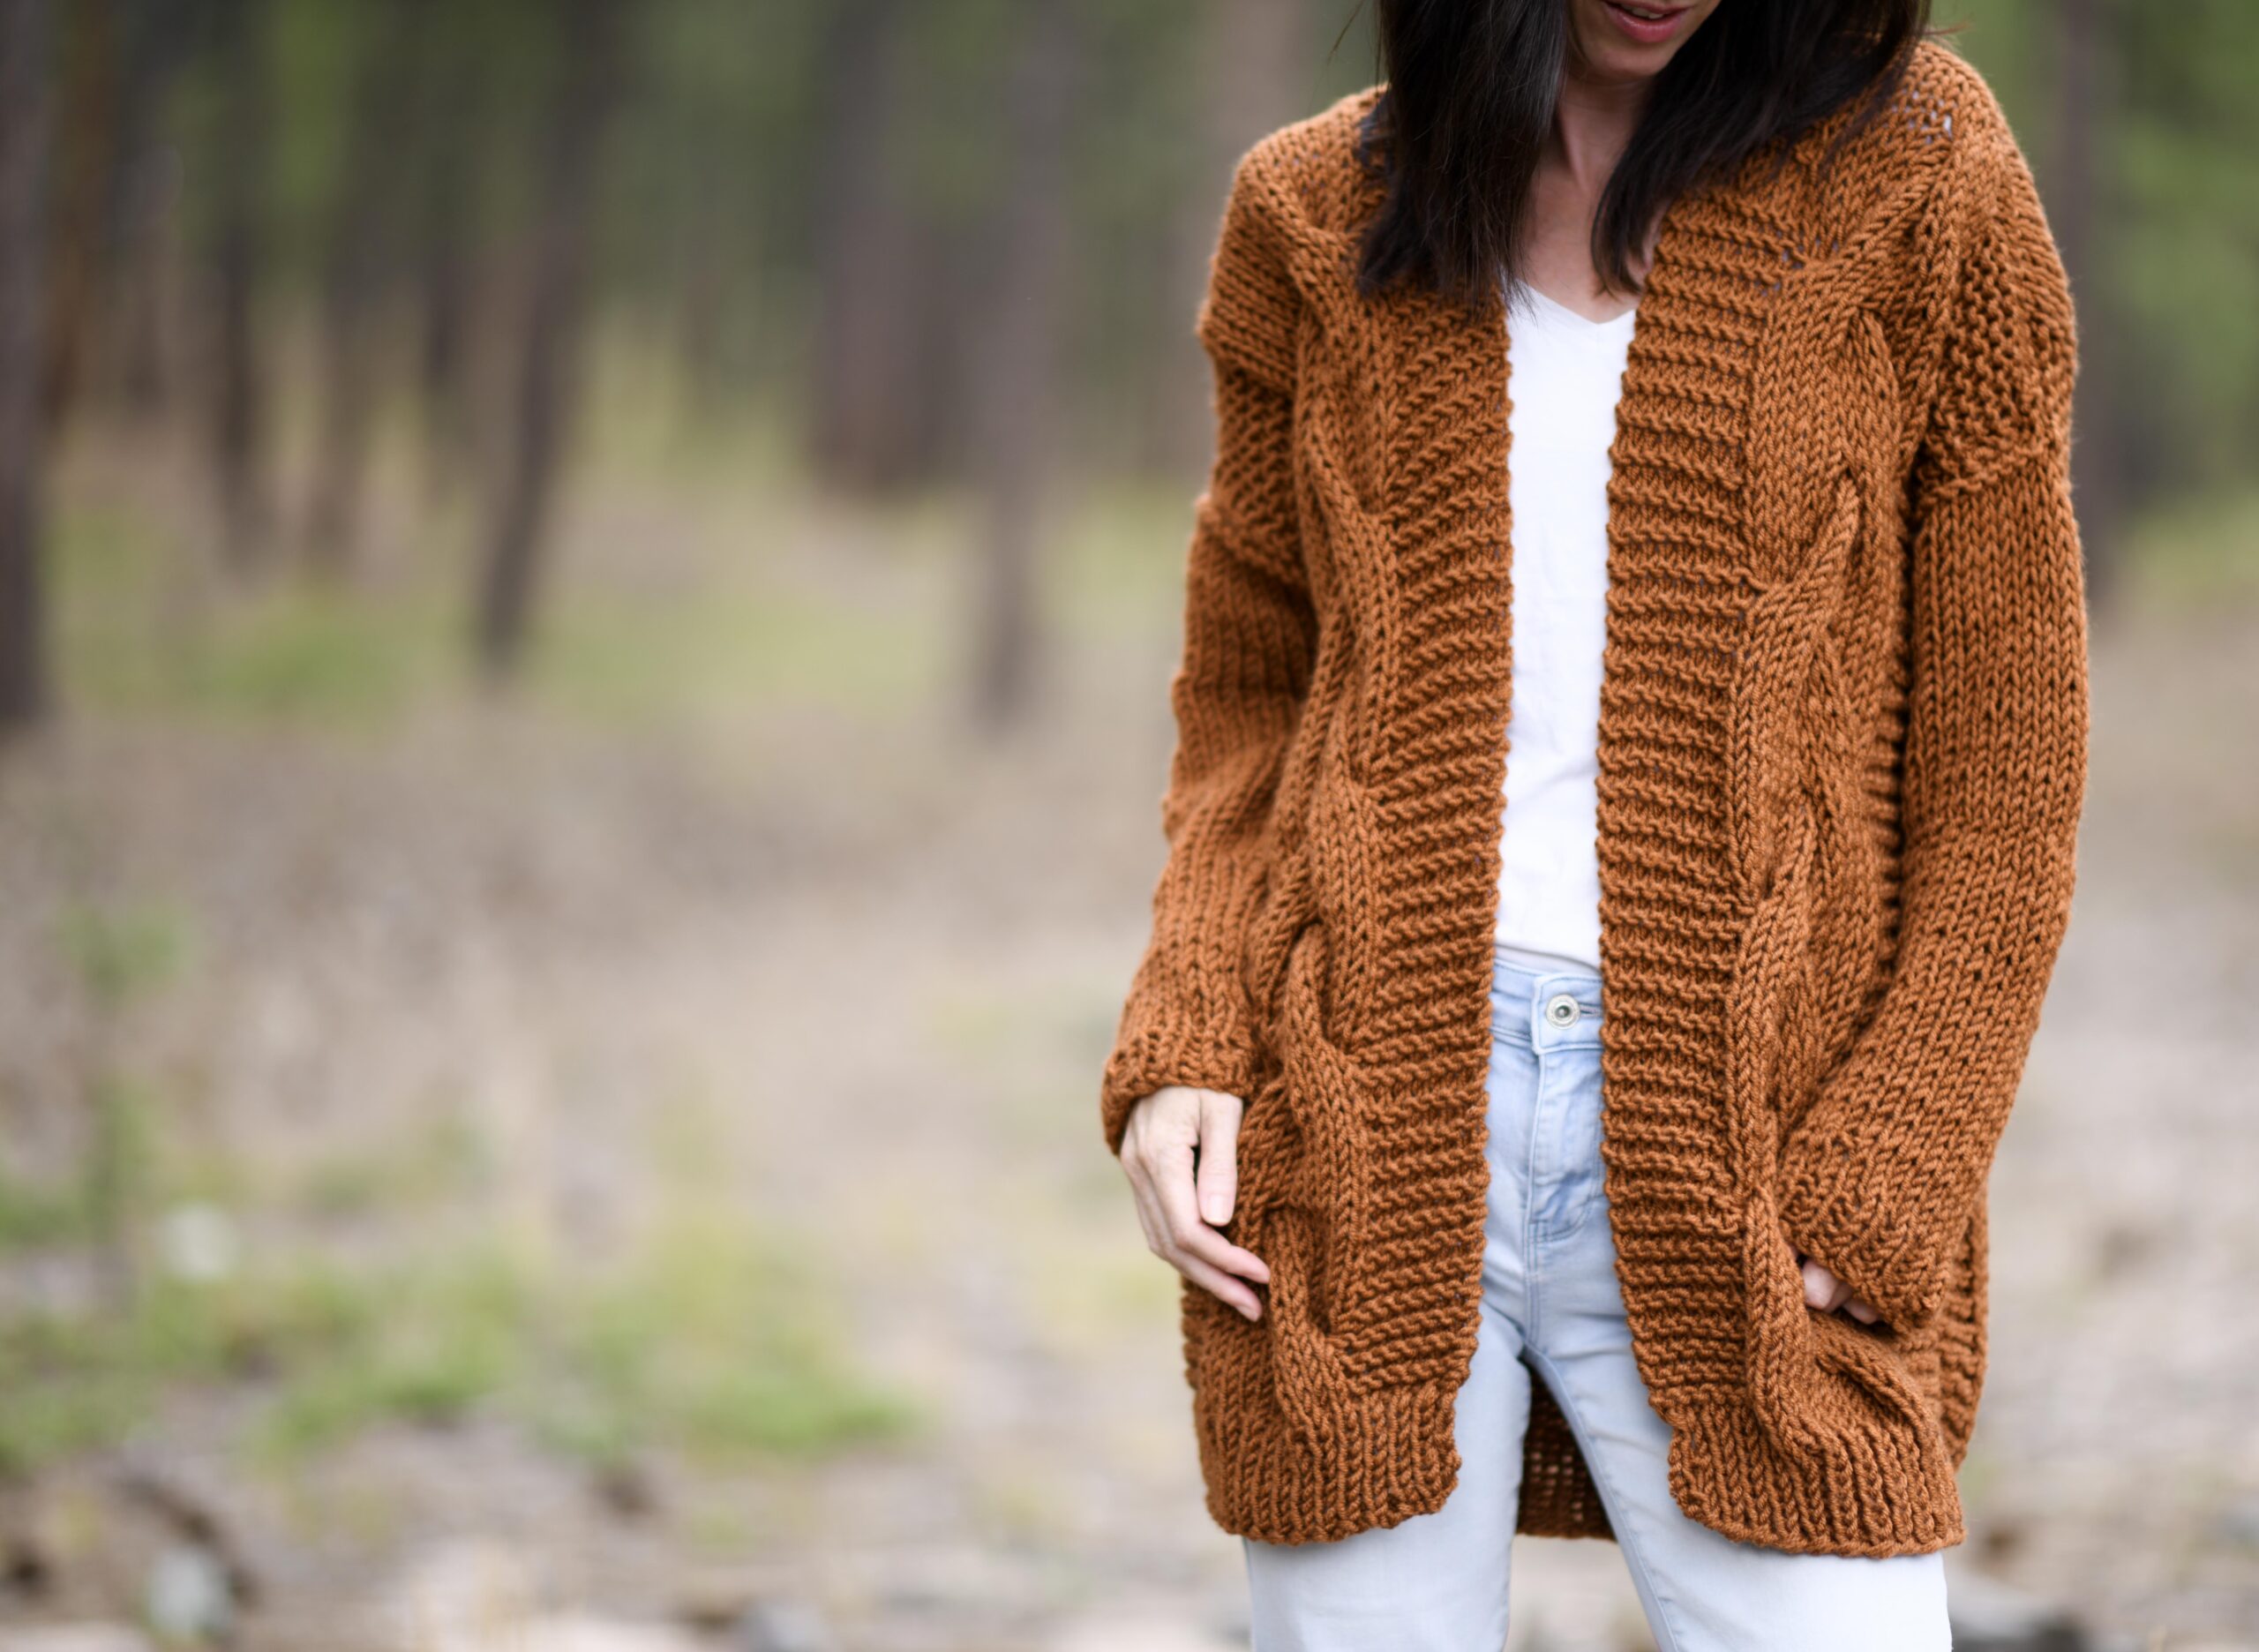
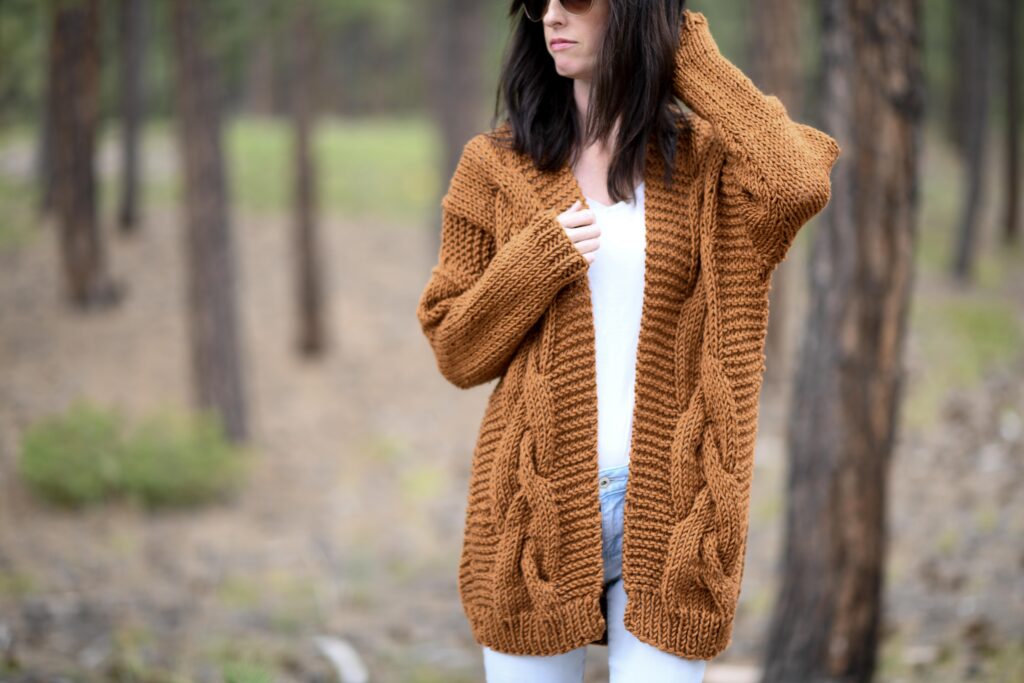
While I’ve loved working cables on various shawls, scarves and hats, I’ve never attempted to incorporate them into a sweater. BUT, here we have my first cable knit cardigan! Have you attempted a cable knit cardigan yet? If not, this is one you can likely tackle.
You can see today’s free pattern knitting pattern, the “Coziest Cable Cardigan” by scrolling down! You can also find the printable, ad-free version available for purchase in my Etsy store HERE. Enjoy!
Cables are so cool because they look really difficult, but truly are not that hard! They are kind of a goal for us knitters many times as it’s just one of those quintessential knit stitches.
What Yarn Do I Use For A Cable Knit Sweater?
As I designed this, there were a few things that I kept in mind for this sweater. I wanted it to work up in a reasonable amount of time and I wanted it to be simple, comfy and loose fitting.
A chunky #5 yarn was a perfect match. It allowed for a fairly quick knit and also created a cozy, warm fabric. A lot of you mentioned that you like the color on Instagram – I do too!
By the way, the yarn I used in this pattern’s been discontinued, but you can use any chunky yarn you like. One good choice is Lion Brand Hue + Me.
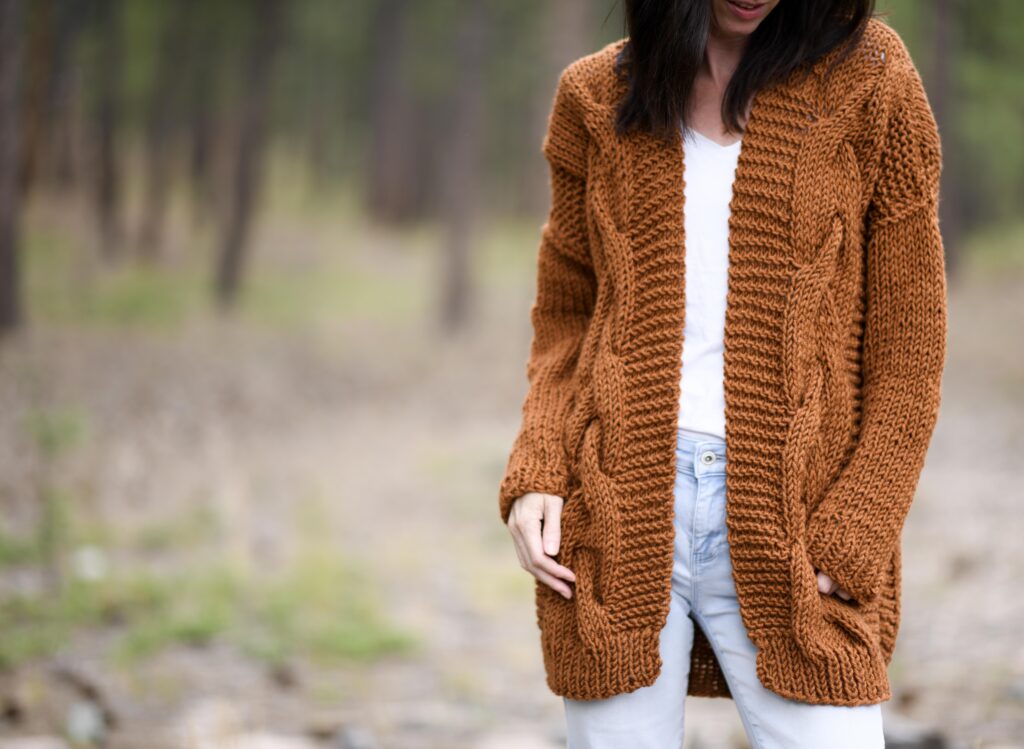
The cables also had to look right. What do I mean by that? Lol! Well, I wanted them to be relaxed cables that fit the laid back look of the entire sweater.
It took some work to get them just right as I was adding rows, taking away rows, changing the pattern, etc. Initially they were coming out too tight and looked like they belonged on the queen of England rather than my chill sweater. But finally, they turned out as planned. Aren’t the cables fun?
As usual, I’ll give you a quick run through on how this sweater is knit and how it comes together.
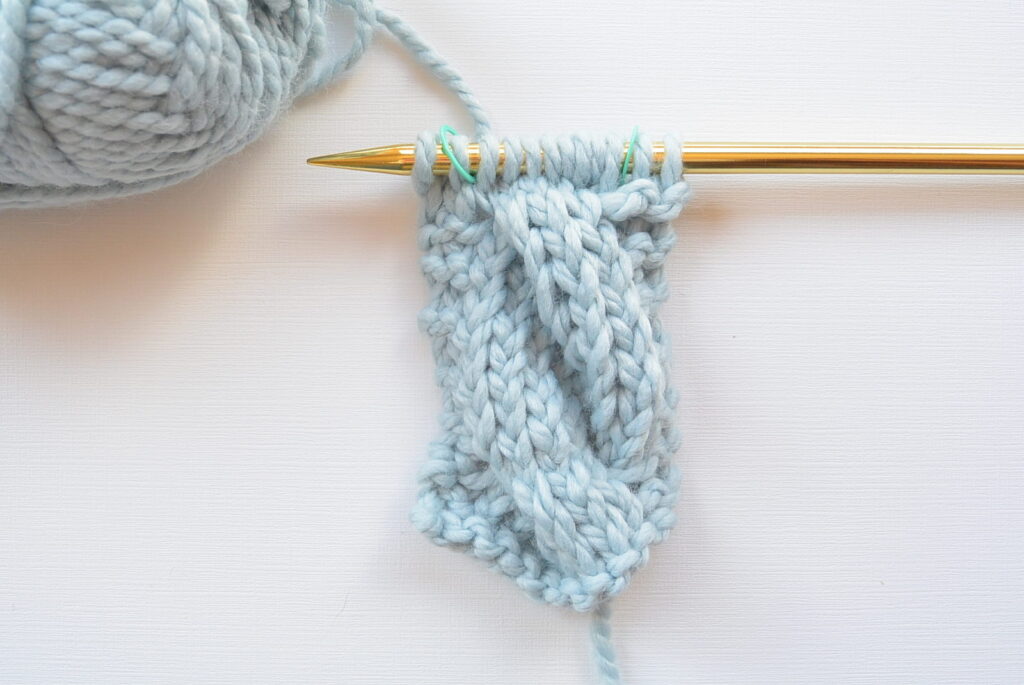
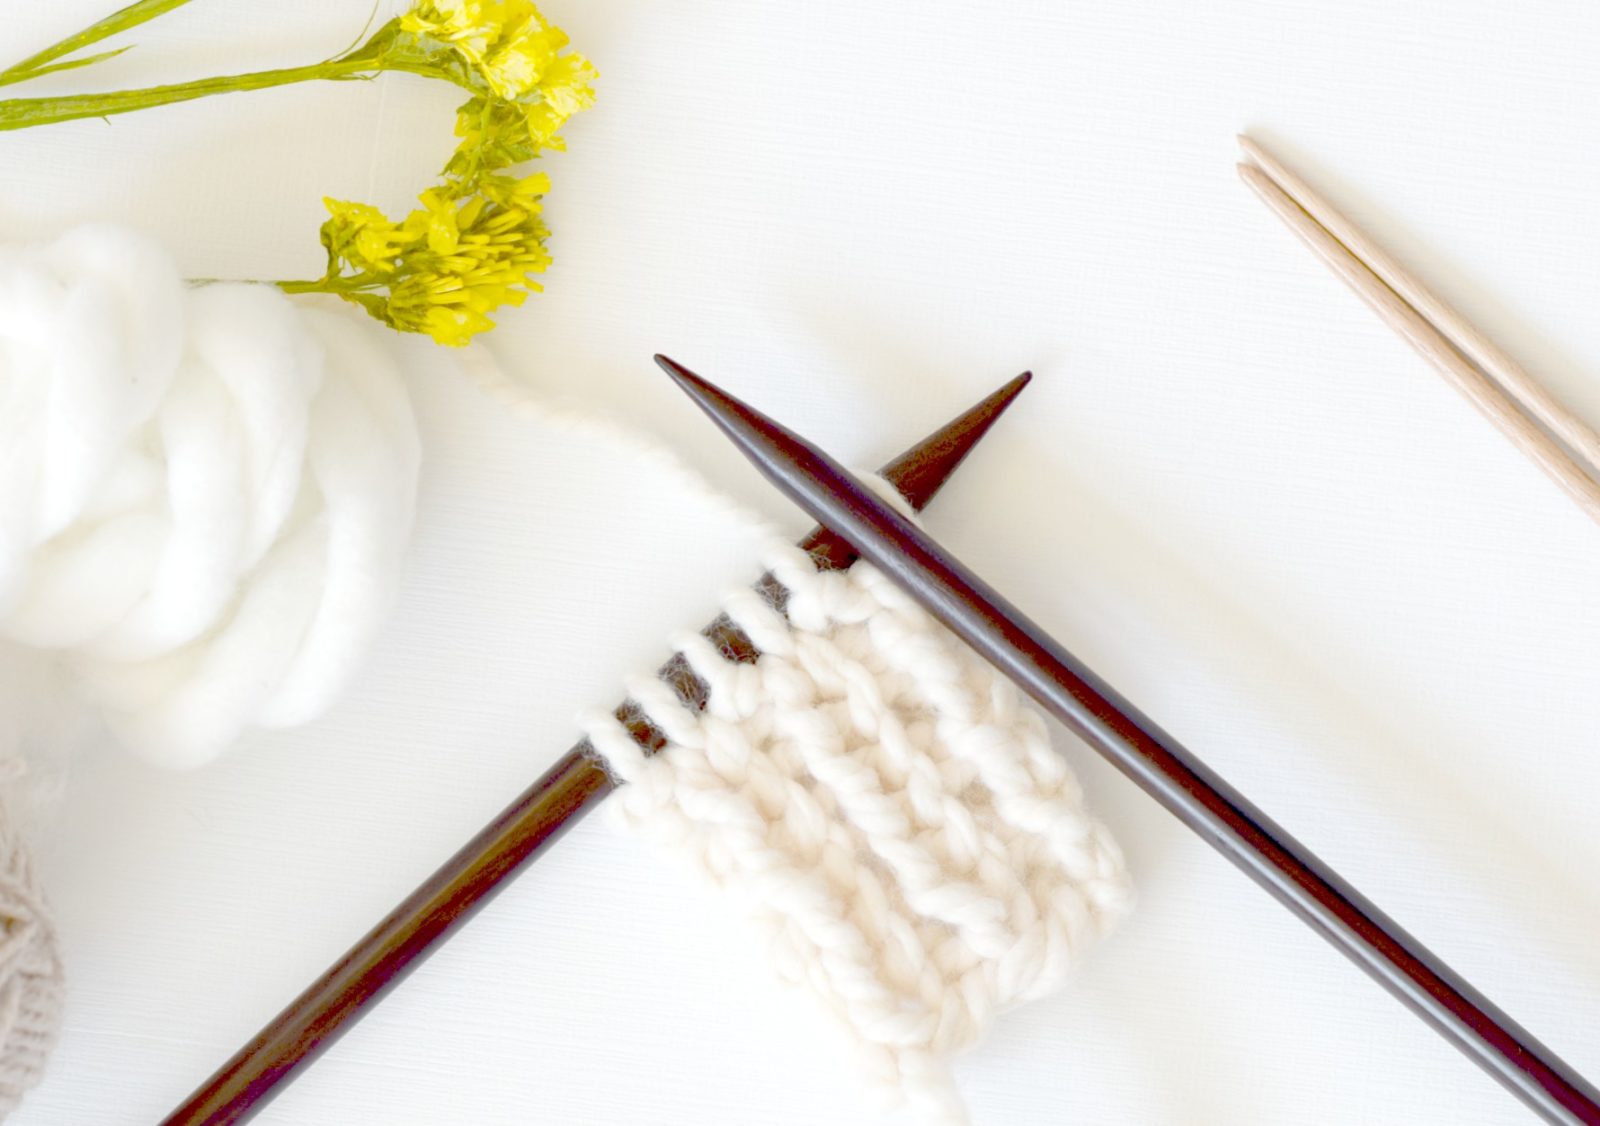
How To Knit A Cable For The Sweater
You can see my pictures below, and don’t forget to check out my tutorial on how to knit a cable HERE. Once you understand how to knit a basic cable like this one, come on back to this cardigan pattern to whip it out!
While the cable in the sweater is slightly different than the tutorial sample, it works the same way. If you understand how to cable knit the tutorial version, you’ll have no trouble with this one.
How Do I Put Together My Cardigan
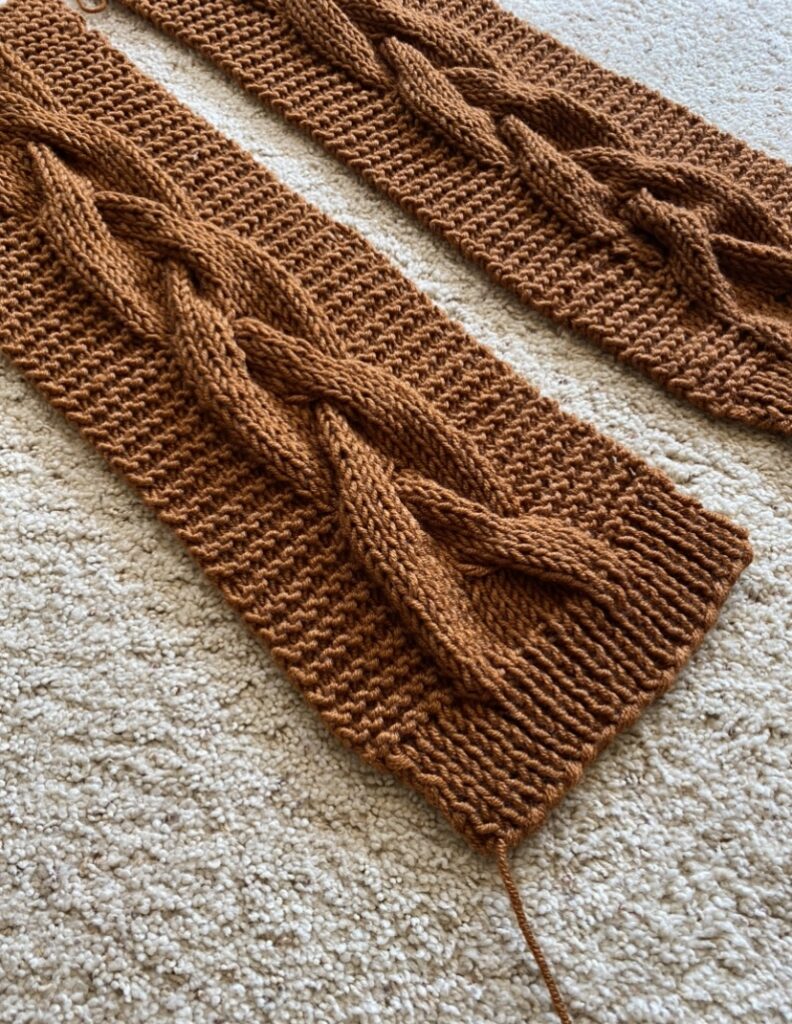
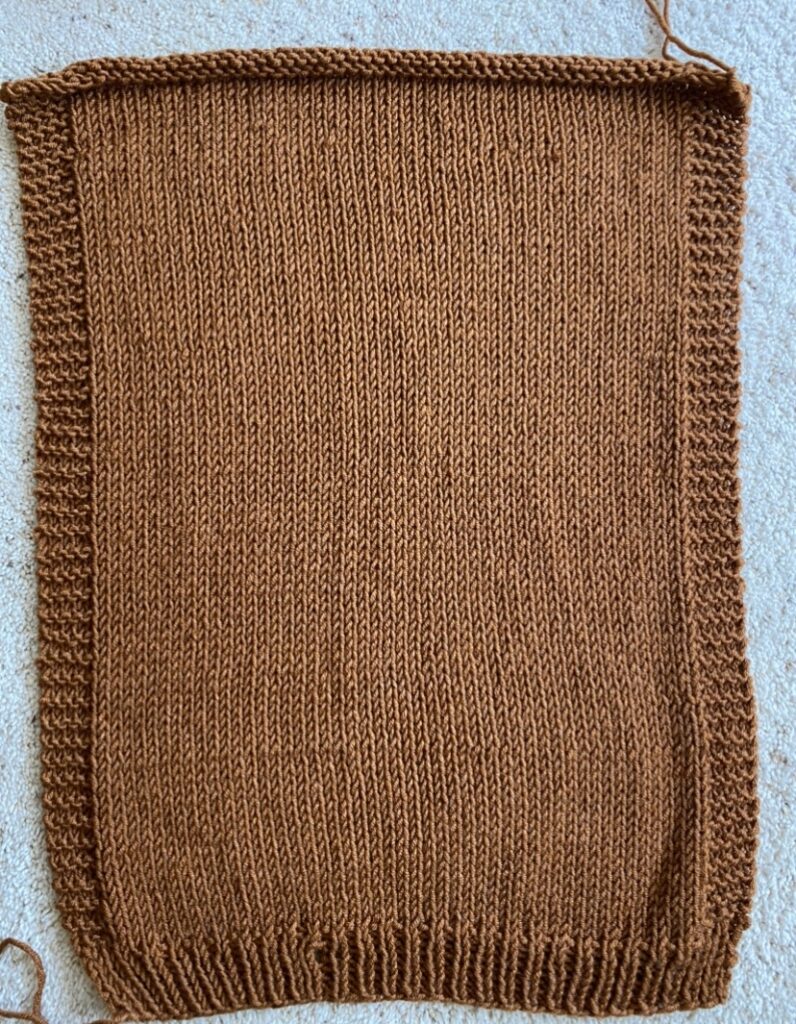
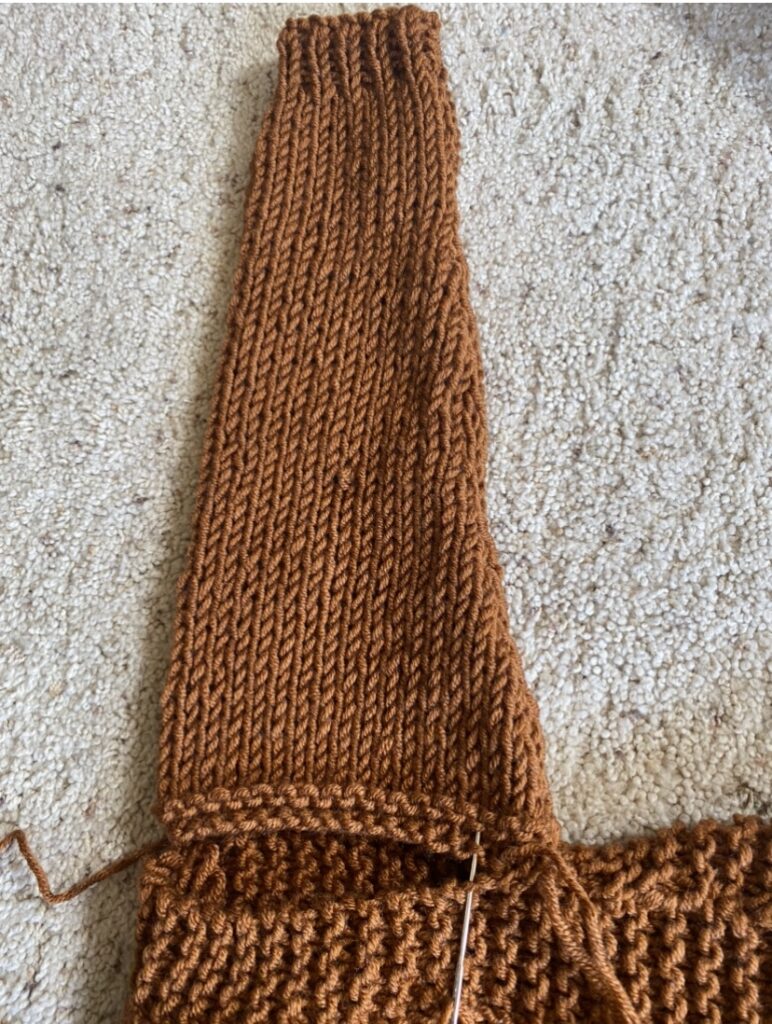
Below, you can see that the sweater is made with simple pieces that are seamed together. The only shaping that you’ll do is on the sleeves.
While I knit them flat, if you’re experienced, you can certainly knit them in the round to avoid seaming. Because they are knit flat, they are easy enough for new knitters!

Again, it’s a super simple sweater. If you’ve never tried cables, you do want to practice a bit before beginning. Once you understand how they work (from the tutorial I keep mentioning HERE – haha), come back and make this!!
Check out the free pattern below, and just a reminder that you can grab the printable, ad-free version in my Etsy shop as well HERE!
Description: Loose, cozy fabric and an oversized fit make this one of the
comfiest sweaters ever! This cardigan features minimal shaping and basic
stitching, making it a super easy project that just about anyone can be proud to
knit and wear.
Materials:
US Size 15, 10 mm 36” circular knitting needles & straight needles
(optional)
4 (4,5,6) Color Made Easy Bulky #5 Yarn in Kombucha 200 g/skein NOTE: Even though this yarn has been discontinued, you an use any chunky #5 yarn you like!
Pattern uses approximately 650 g (758 g, 876 g, 1000 g)
Cable Needle
Scissors
Tapestry Needle
Measuring Tape
Sizes: Small, Medium, Large, XL
Gauge: Approximately 11 stitches and 13 rows in 4” x 4” of stockinette
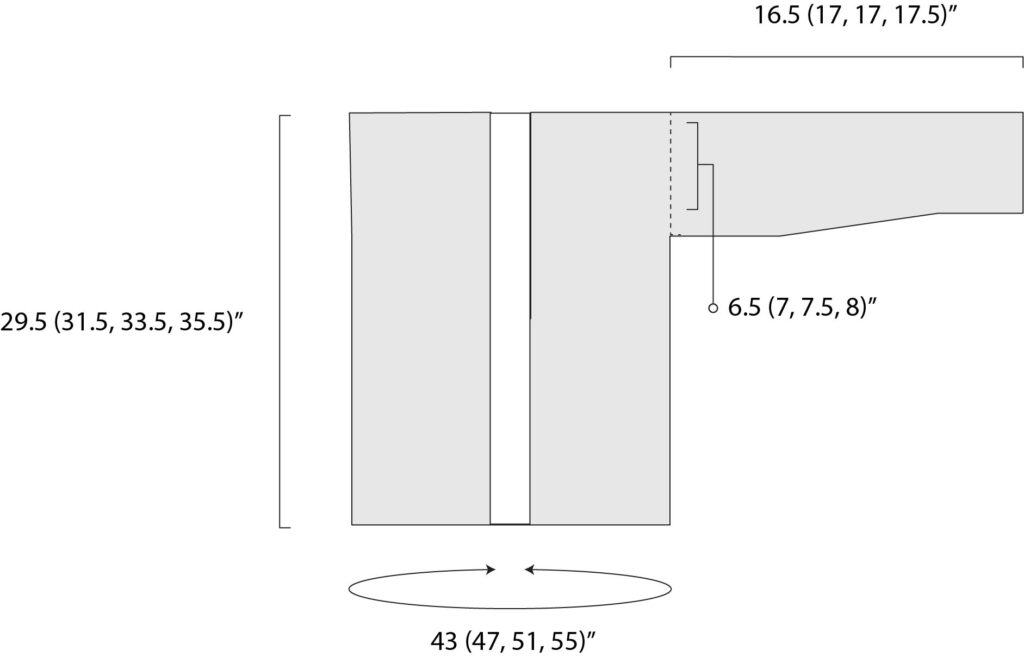
Finished Sweater Measurements:
Please follow the key throughout the pattern according to the size you are
knitting:
S (M, L, XL)
Bust Circumference (approximate):
S – 43”
M –47”
L – 51”
XL –55”
Pattern Notes: This cardigan is knit by making one rectangular panel for the
back and two rectangular panels for the front. You will knit cables along the
two front panels, working from the bottom up. Sleeves are then knit flat,
however, if you’re experienced, you can certainly modify the pattern to knit
in the round and avoid seaming. Consider blocking panels and sleeves to
shape and size before final assembly. The pattern calls for circular needles
even while it is knit flat. The circular needles are necessary to comfortably
hold all of the stitches for the back panel
Length (approximate):
S – 29.5”
M – 31.5”
L – 33.5”
XL – 35.5”
Sleeve Length:
S – 16.5”
M – 17”
L – 17”
XL – 17.5”
Sleeve Width when seamed (approximate width at widest point before blocking):
S – 6.5”
M – 7.0”
L – 7.5”
XL – 8.0”
Abbreviations (US Terms):
Abbreviations & Skills:
k – knit
p – purl
st – stitch
sts – stitches
k2tog – knit two together decrease
Cable:
A 10 stitch cable is worked within the pattern. Abbreviations and skills are as follows.
5/5 LC: 10-stitch left cable. Slip 5 sts to cable needle and hold in front, k5, k5 from
cable needle.
5/5 RC: 10-stitch right cable. Slip 5 sts to cable needle and hold in back, k5, k5 from
cable needle.
If you aren’t familiar with knitting cables, there is a helpful tutorial on the Mama
In A Stitch Blog here: https://www.mamainastitch.com/howtoknitacable/
COZIEST CABLE KNIT SWEATER CARDIGAN PATTERN
Back Panel (make 1)
*stitch count remains the same throughout the pattern
Cast on 58 (64,70,76)
1×1 Ribbing Pattern
Row 1 *K1, p1; repeat from * across the row.
Rows 2 – 7 Repeat row 1.
Stockinette Section
Row 8 Knit each st across the row.
Row 9 Purl each st across the row. (Pattern Update for row 9: you may work this as it was written and the sweater will work out just fine. However, last minute while designing the back panel, I decided to knit the first and last 5 stitches in garter stitch. This makes it slightly simpler to seam. So you would k5, purl across to last 5, k 5.)
Repeat rows 8 – 9, working stockinette stitch until entire piece measures
approximately 29.5”(31.5”, 33.5”, 35.5”).
Cast off and weave in ends.
Front Panel (make 2)
Cast on 31 (35,37,41)
*stitch count remains the same throughout the pattern
1×1 Ribbing Pattern
Row 1 *K1, p1; repeat from * across the row, ending with a k1.
Row 2 *P1, k1; repeat from * across the row, ending with a p1.
Rows 3 – 7 Repeat rows 1 & 2, ending with row 1.
Cable Pattern
Row 1 Knit each st across the row.
Row 2 K8 (10,11,13), p15, k8 (10,11,13).
Rows 3 – 8 Repeat rows 1 & 2 in that order.
Row 9 K8 (10,11,13), 5/5 LC, k13 (15,16,18).
Row 10 Repeat row 2.
Rows 11 – 18 Repeat rows 1 & 2 in that order.
Row 19 K 13 (15,16,18), 5/5 RC, K 8 (10,11,13)
Row 20 Repeat row 2.
Repeat rows 1 – 20 until piece measures approximately 29.5”(31.5”, 33.5”,
35.5”) and is the same length as the back panel.
Cast off and weave in ends.
Sleeves (make 2)
*each decrease row reduces stitch count by 2
Cast on 38 (42,44,48)
Row 1 Knit each st across the row.
Rows 2 – 4 Repeat row 1.
Row 5 Purl each st across the row.
Row 6 Knit each st across the row.
Row 7 Purl each st across the row.
Row 8 K2tog, k across to last 2 sts, k2tog. (decrease row)
Repeat rows 5 – 8 until sleeve width (as if it were seamed) measures approximately 4.25”
(4.75”, 5.25”, 5.75”) wide. Panel should measure approximately 8.5″(9.5″, 10.5″, 11.5″)
Next, continue to knit in stockinette stitch, without any decreasing, until
sleeve measures approximately 15” (15.5”, 15.5”, 16”).
Once the sleeve has reached this length, finish by knitting a 1×1 rib
pattern for the cuff for approximately 1.5” long (all sizes). The sleeve
should now measure approximately 16.5” (17”, 17”, 17.5”). Feel free to
customize the sleeve length and make them longer or shorter as desired.
Cast off and weave in ends.
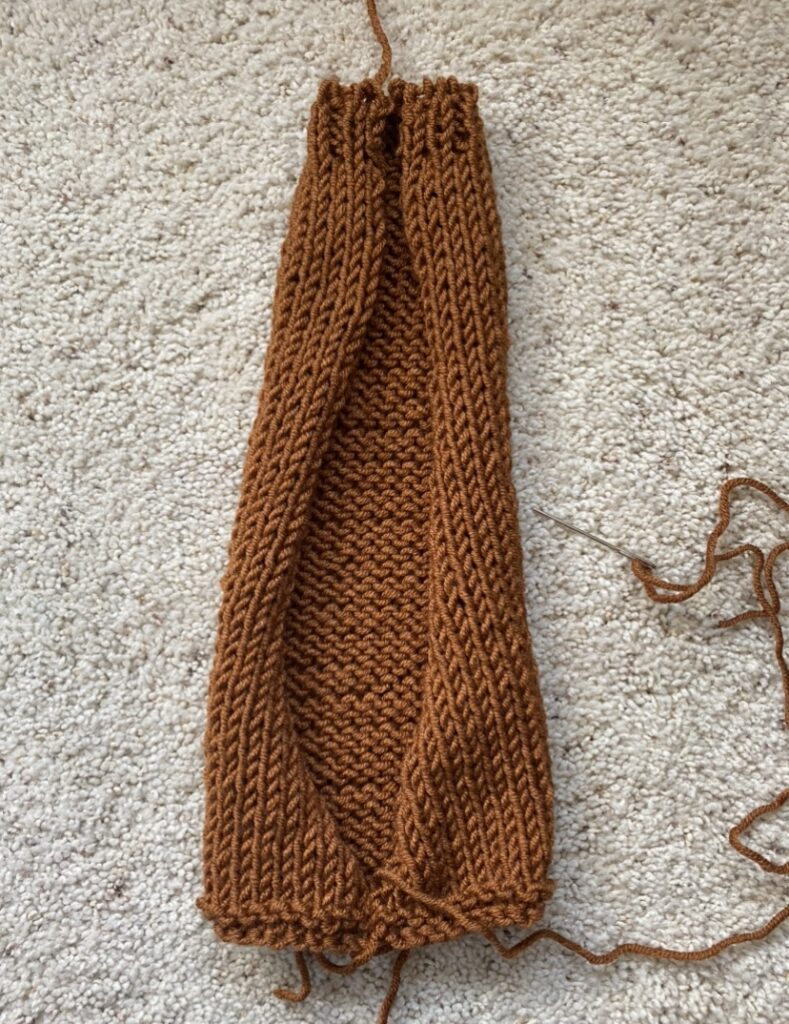
Assembly:
Place two front panels directly on top of back panel, leaving space in the
middle and outer edges aligned.
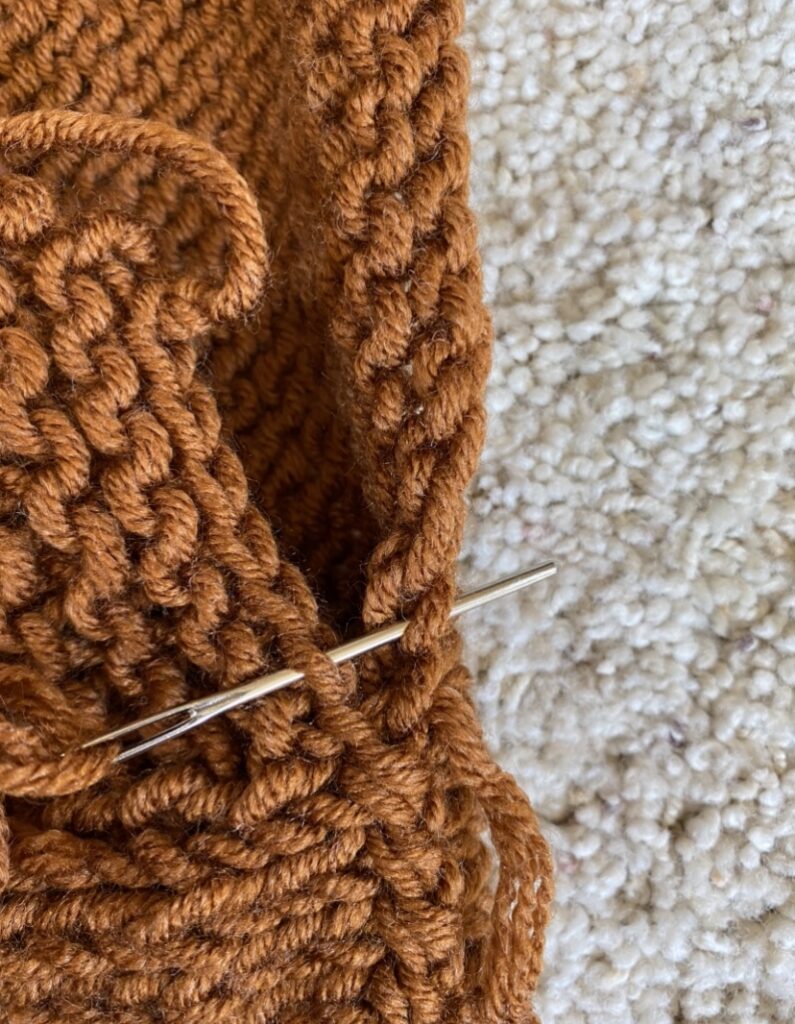
Using a simple whip stitch, sew the shoulders along the top on each side.
You may choose to sew sleeves onto cardigan before or after seaming the
sleeves.
Seam sleeves using the mattress stitch seaming method.
Seam up sides of the cardigan with a simple whip stitch.
Weave in all those ends!
CARDIGAN SCHEMATIC
Enjoy your new cardigan!
More Easy Knit Cardigan Patterns
10 Easy Knit Sweater Patterns To Try
My Comfiest Easy Knit Sweater Pattern
More Cables Knitting Patterns
Winding Cables Knit Wrap Pattern
Big Cables Throw Blanket Pattern
I would love, love, love to hear if you make a cable knit cardigan. 🙂 Feel free to tag me on Instagram @MamaInAStitch #MamaInAStitch.
Enjoy!
XO
Jessica
Thank you to the wonderful Lion Brand Yarn for sponsoring this post. All opinions are 100% my own.
If you liked this, you might also like:
Painted Sky Comfy Shrug Knitting Pattern

Breckenridge Topper Easy Knitting Pattern

This looks easy enough for me. I’m an experienced knitter but have never tried cables on a garment. I’ve made a hat and a blanket with cables. With your patterns, of course. Easy-peasy! I love your designs and the instructions are super easy to follow. Mila
Omg!! I said when I saw this beautiful sweater. Definitely I have to knit it. You make beautiful creations Jessica.
Love the pattern and think I could manage knitting it. If I wanted to knit a size small – how many yards of yarn would I need? I’m having a hard time configuring out the grams as you listed (in case I can’t obtain that particular yarn.). Thank you.
Jessica,
This is beautiful and just my style!!!
I will be hopping over to Etsy to purchase this patter.
Love it! Would you have the Pattern and yarn for that beautiful orange cable hat that was on instagram?
Love this! I can’t wait to make it. I just made a shawl with Color Made Easy but this must use a bulky version. Love, love, love this
I just finished seaming this all together this morning. Now I know I dislike seaming more than weaving in my ends…LOL. Just wondered what you thought on this ….I seamed my sleeves and then attached to the sides, now I’m wondering if things would have been easier if I had seamed the sides with sleeves first and then seamed up the sleeves? I’m a decent knitter, but sweaters are still new for me. Thanks. (PS I didn’t realize I had some Color Made Easy in my yarn stash, so I’ll have to make another one for my other daughter.)
Made this in Mustard color, perfect for fall ! Was so easy and fun! Thank you!