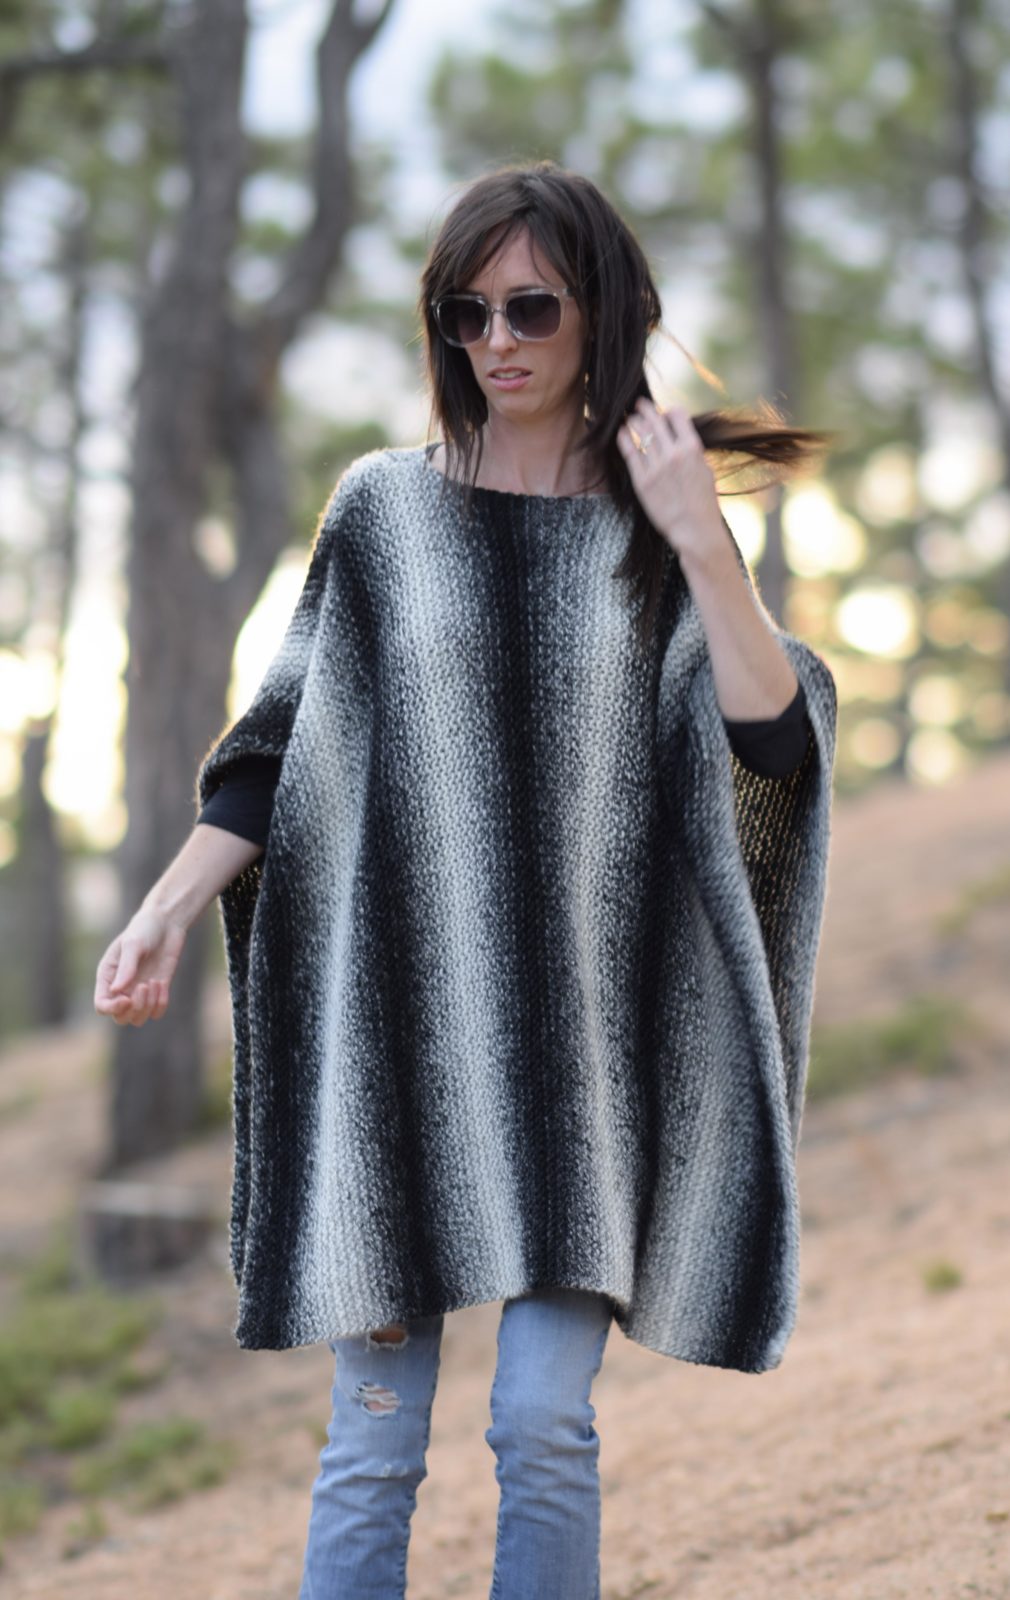
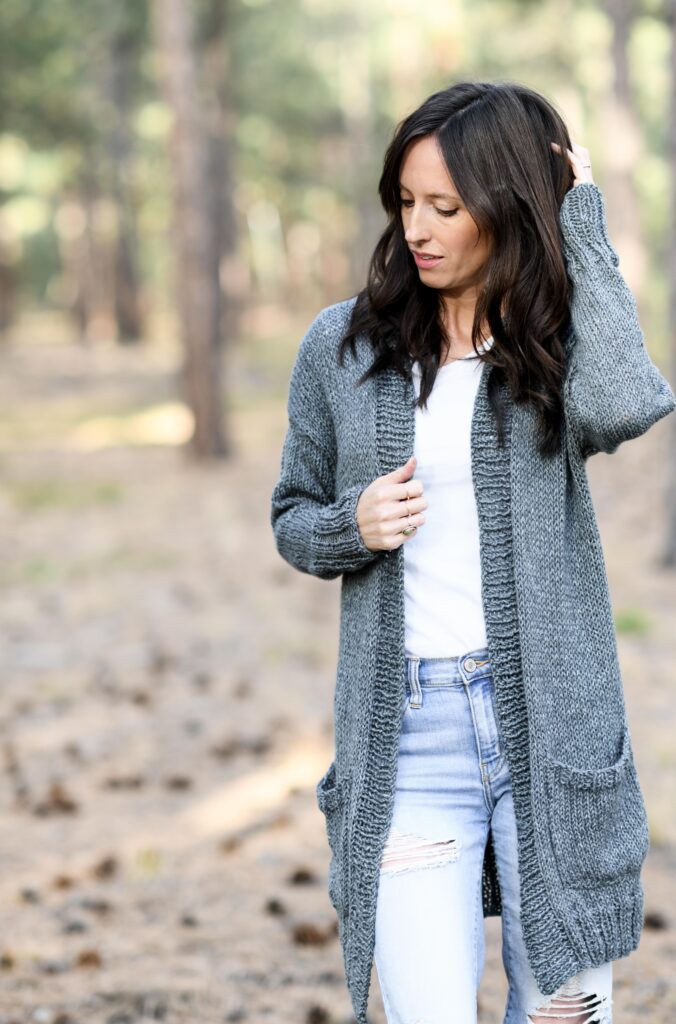
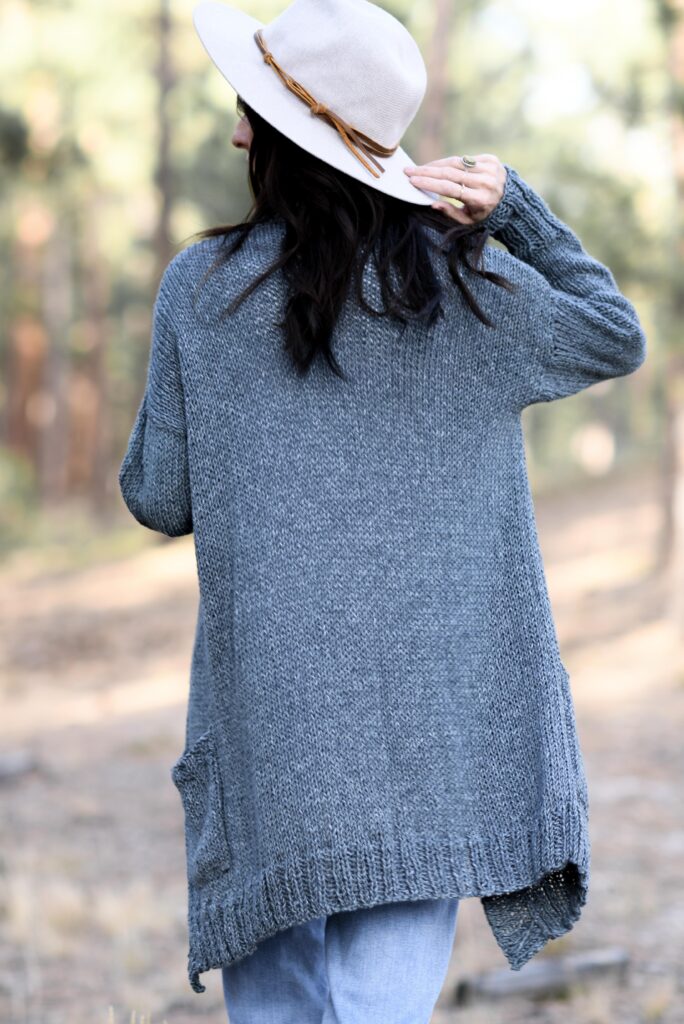
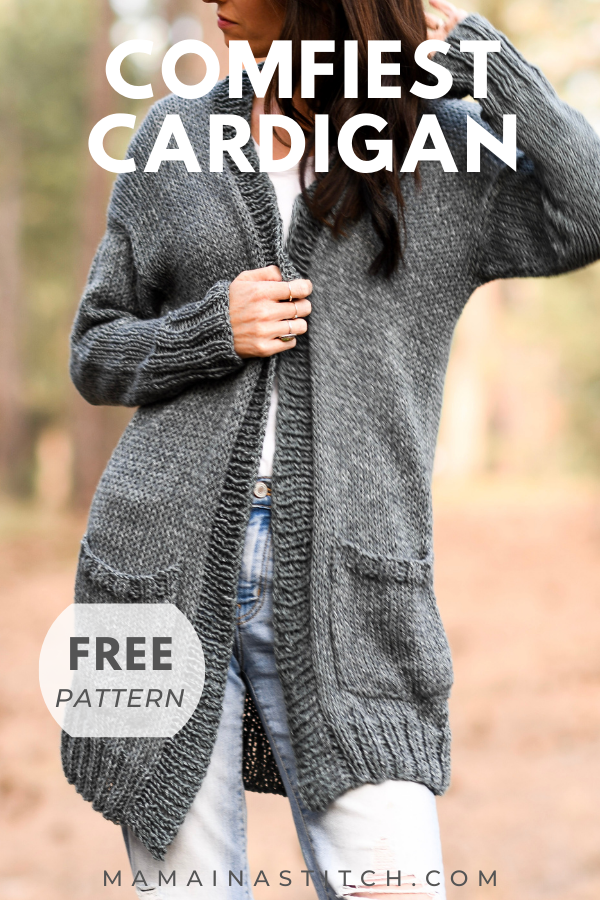
How To Knit A Cardigan – My Comfiest Knit Cardigan

If you’re looking for a beginner friendly, easy knit sweater cardigan pattern, you’ve come to the right place! This sweater is knit flat and it uses the easiest knit stitches only. It’s also become one of the most popular patterns on the blog.
Scroll down to see the entire free pattern below, or you may choose to purchase the pattern from Etsy HERE or the kit from Lion Brand HERE. Enjoy!
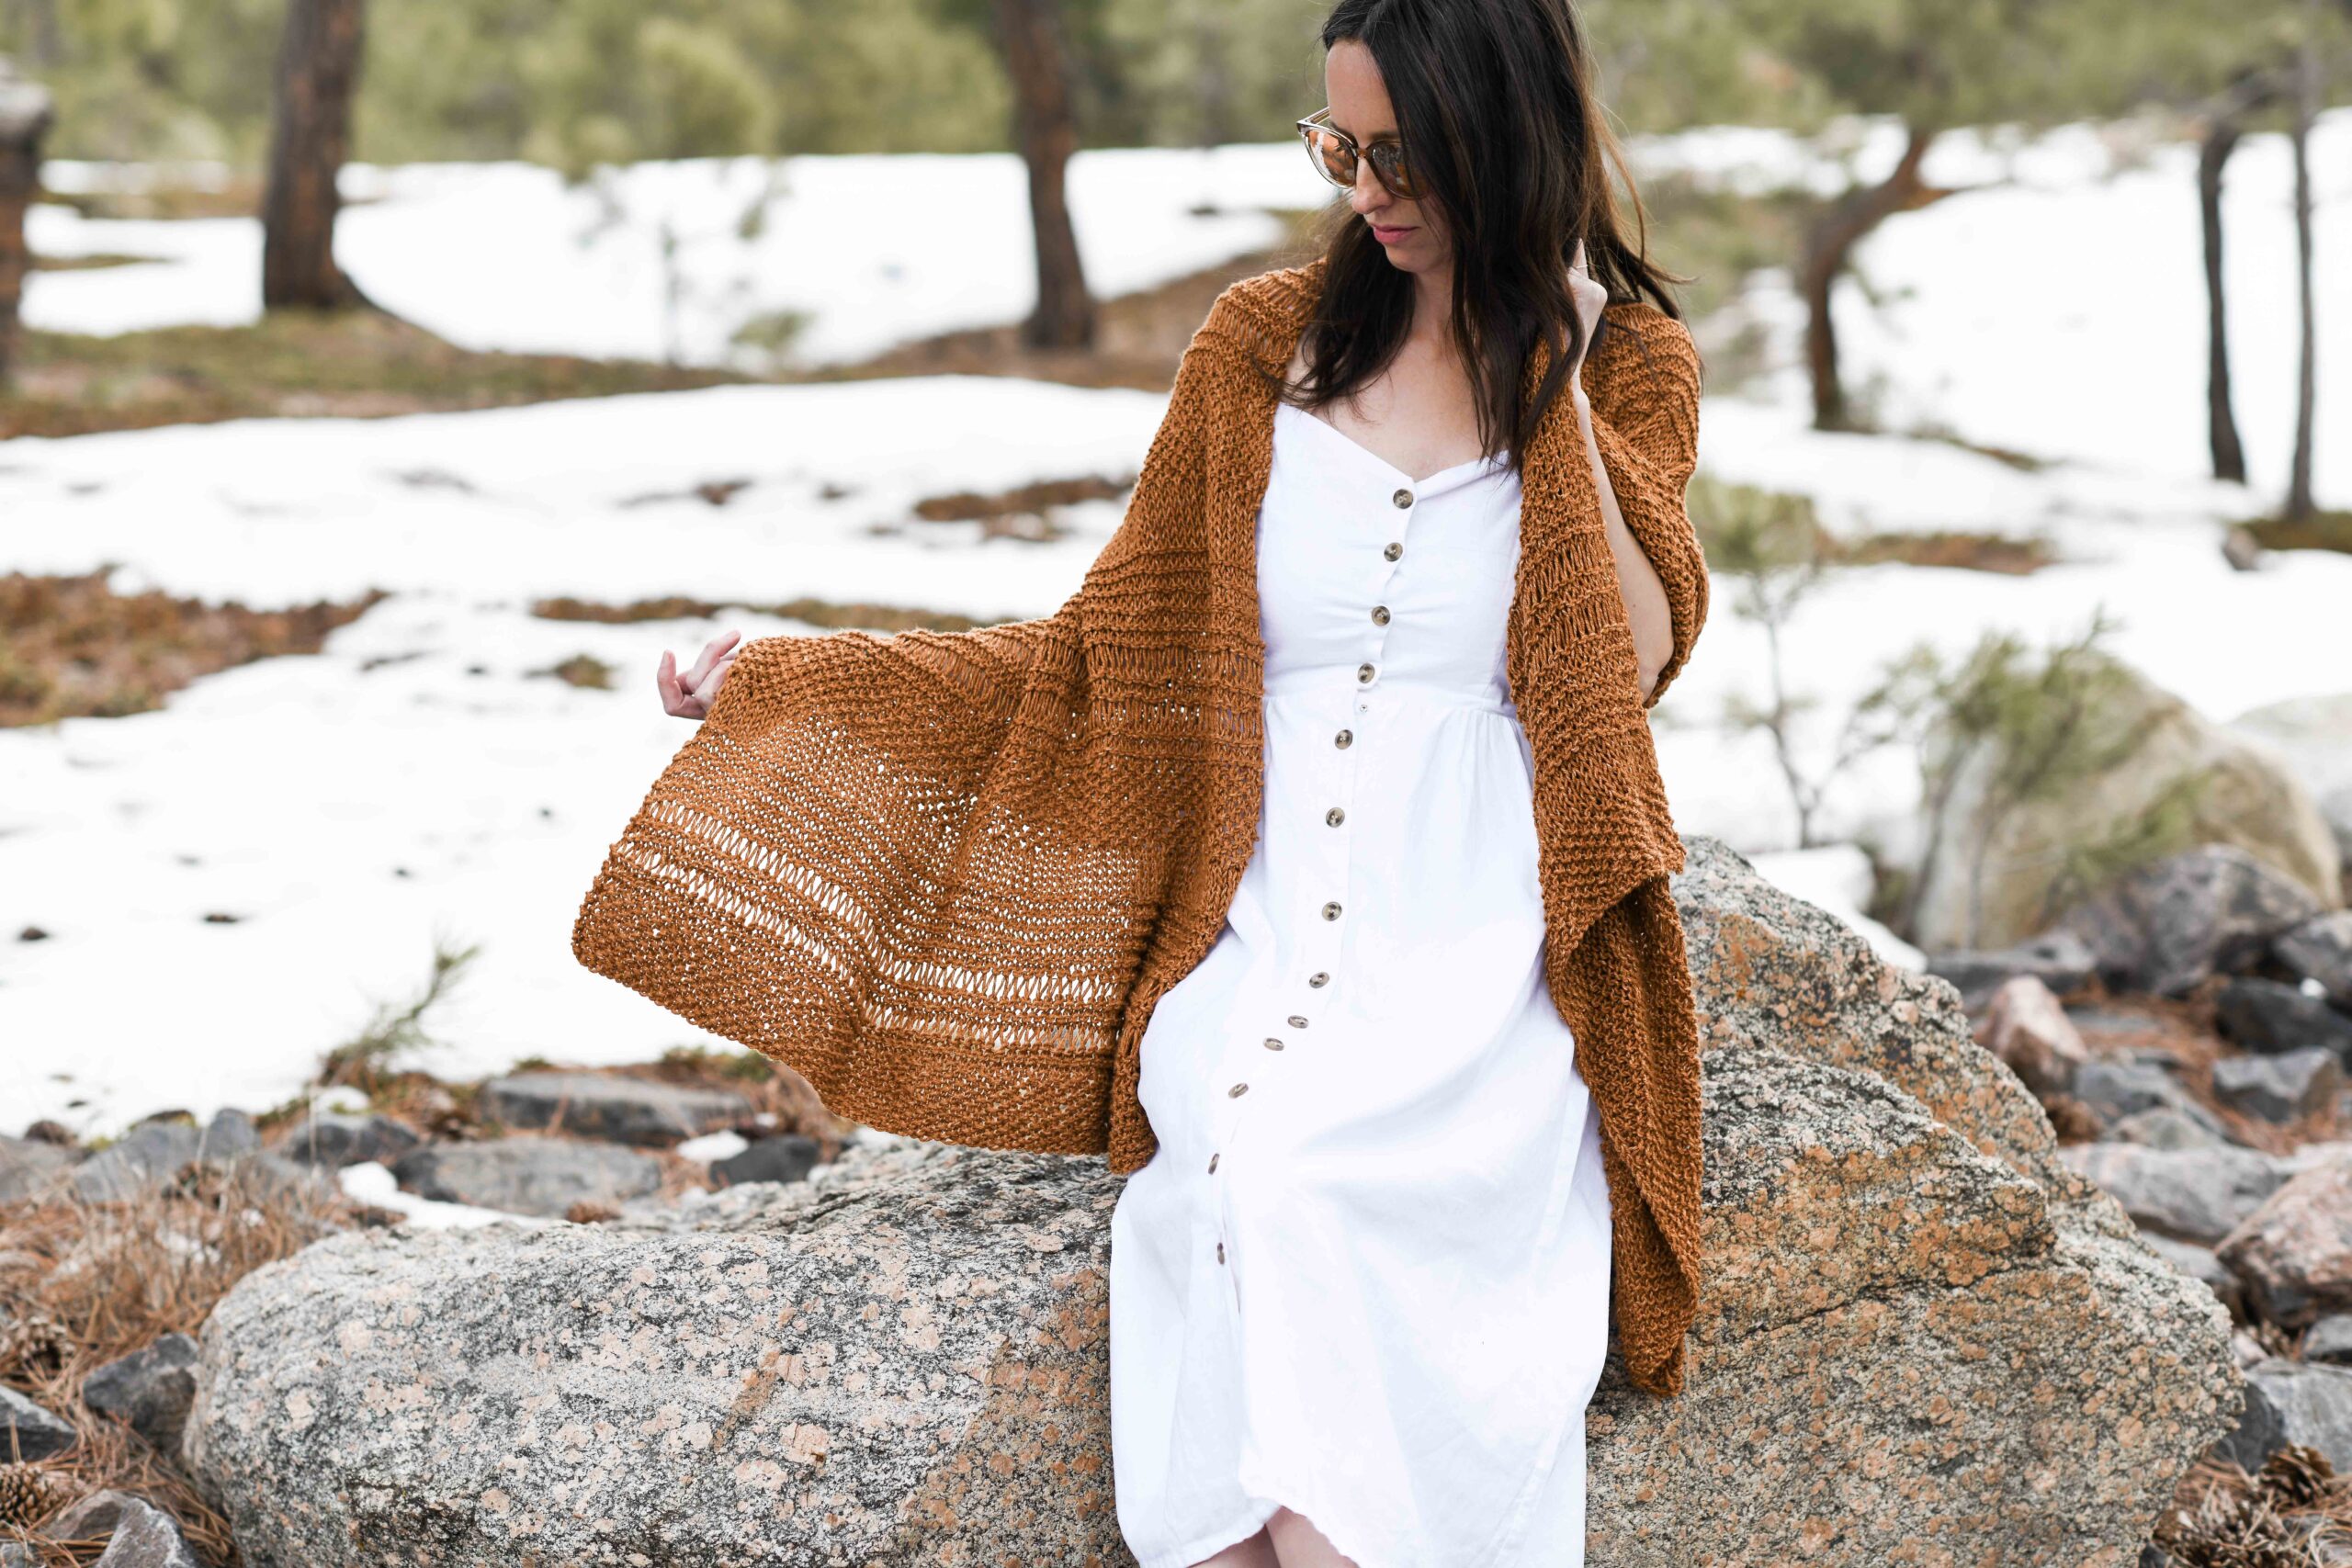
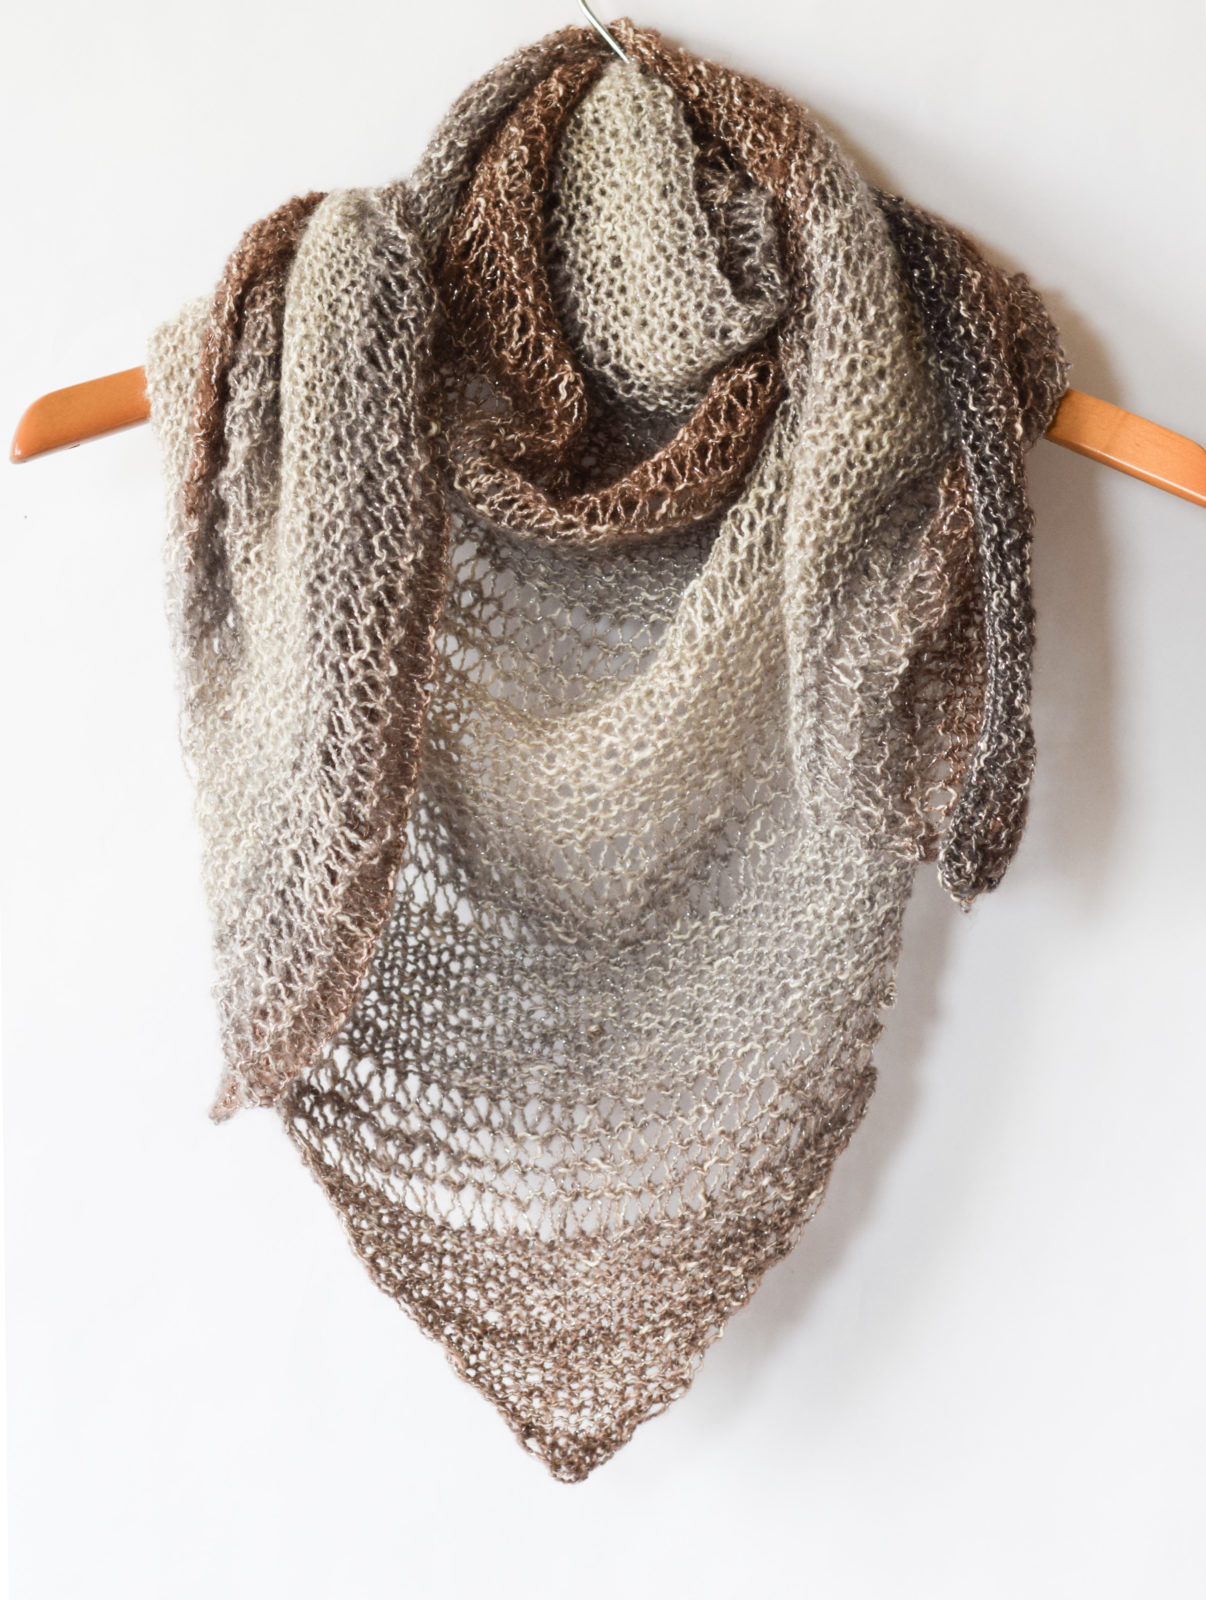
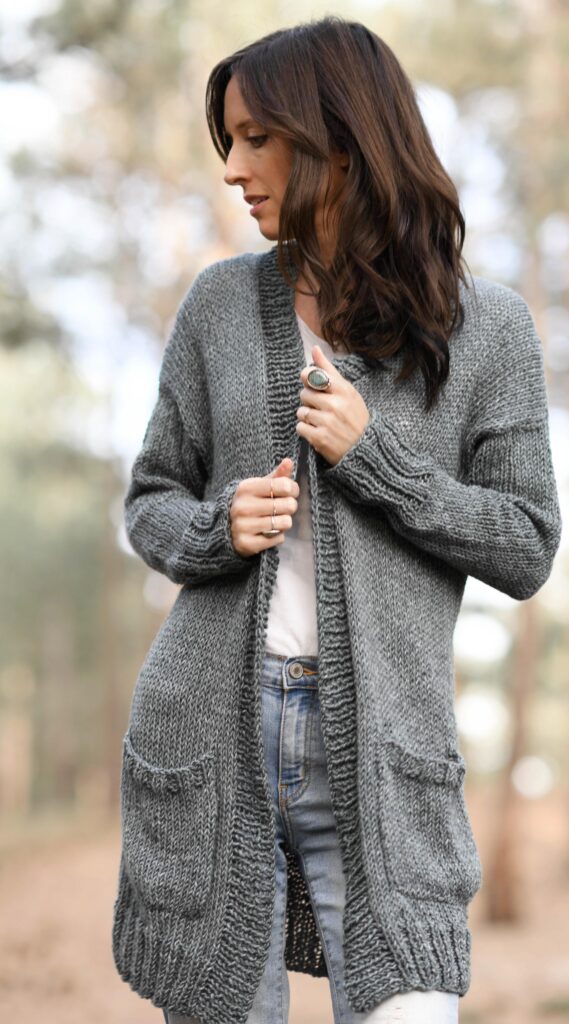
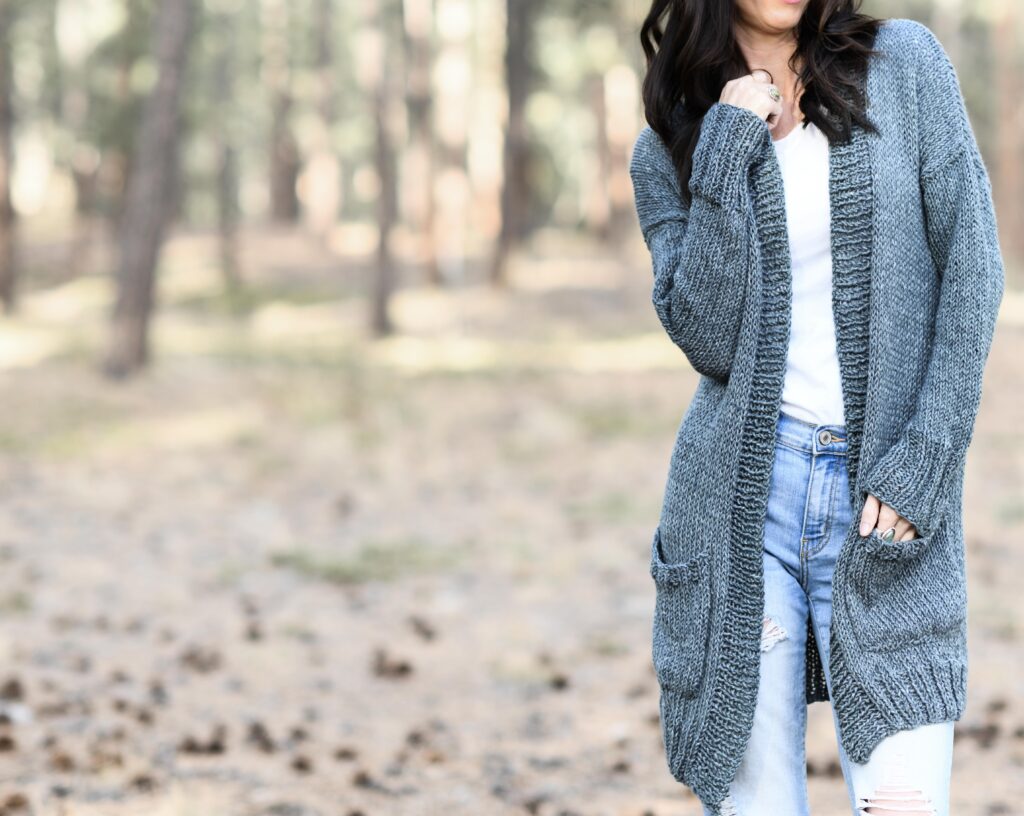
Okay! Helloooo long, comfy cardigan made for anybody, anywhere. 🙂 After sharing the Coziest Cable Cardigan knitting pattern, I wanted to make a lighter weight version that many of you requested.
Today’s cardigan is a bit lighter, has amazing drape, and can be used in just about any climate. It’s also SO easy and makes for a great first sweater project. Basically I’d wear it everyday if I could. 🙂
Update! If you like this, check out My Big Comfy Ribbed Cardi Knitting Pattern as well!
How Do I Knit A Easy Cardigan?
There are many ways to knit sweaters and cardigans, but I find the construction of this one to be the easiest for beginners as it’s knit flat. You essentially will be making one large rectangle for the back, two large rectangles for the front panels, and two lightly shaped sleeves.
You only need know how to knit a basic decrease (knit two together), and feel comfortable with knit and purl stitches.
After you knit all your three rectangles and sleeves, you will seam and sew all the pieces together to assemble the sweater.
For this pattern, you will pick up stitches to make the inner edging. There are a lot of tutorials on YouTube that will show you how to pick up stitches in knitting.
By the way, just because it’s made of rectangles doesn’t mean it’s less of a sweater! If you look at many of the trendy, in style sweaters at stores, the construction is exactly the same. You don’t need all kinds of shaping to make a perfect cardigan. 🙂

How Do I Seam My Knit Cardigan?
Some of you have asked for tutorials on seaming, so I wanted to link to a couple of them here. When you seam stockinette, you want to use a mattress stitch seam (here from Purl Soho).
Definitely use the mattress stitch seam to sew up the sides and the sleeves of this cardigan. Whip stitch seams (here) can also work with sewing together knit pieces but when you’re seaming stockinette, the mattress stitch is the way to go.
What Yarn Do I Use To Knit This Sweater?
This cardigan uses a worsted weight #4 yarn. While you can use any worsted weight yarn that you like, if you like softness and drape, I can’t say enough about Lion Brand Jeans. Paired with the large needles, it really created an incredibly drapy, almost slinky fabric that is so nice on the skin.
The Jeans yarn is also very affordable, and washable, which is a plus for a garment that’s going to be worn a lot!
I used the color Vintage, which to me has a grey blue look to it but I like many of the other colors as well. (I used a couple of the other color options for my Boxy T Shirt and Azul V Mesh Poncho)
So, let’s get to the pattern. 🙂 Remember that you can also find the ad-free, printable version for purchase in my Etsy shop HERE.
Pattern Description: Introducing the comfiest cardigan that you’ll want to wear everyday! Featuring amazing drape, a super soft fabric and cozy pockets, this roomy sweater is both cute and practical. With just minimal shaping, it’s an awesome project for newer knitters! The weight of this cardigan makes it perfect for any climate, whether you’re staying home or heading out.
Skill Level: Beginner +
Materials:
US Size 11 8.0 mm 29” circular knitting needles
4 (5,6,7,8) skeins Lion Brand Yarn Jeans in Vintage 100 g/skein (Convenient kit available here)
Pattern uses approximately 390 (456, 542, 648, 750) grams total
Measuring Tape
Tapestry Needle
Scissors
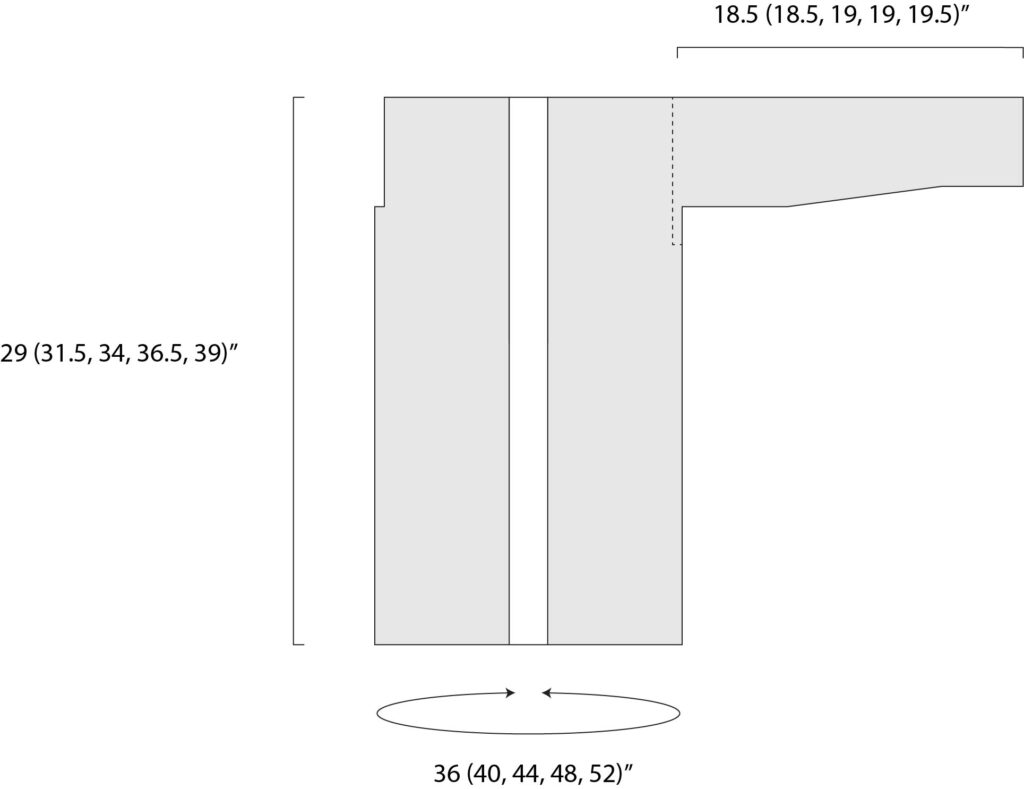
Dimensions (approximate):
Small, Medium, Large, XL, XXL
Please follow the key throughout the pattern according to the size you are crocheting:
S (M, L, XL, XXL)
Bust Circumference (approximate finished measurements):
S –36”
M – 40”
L – 44”
XL – 48”
XXL – 52”
Length:
S – 29”
M – 31.5”
L – 34”
XL – 36.5”
XXL – 39”
Abbreviations & Skills:
k – knit
p – purl
st – stitch
k2tog – knit two together (decrease)
2 x 2 rib pattern – You should know how to work a 2 x 2 rib pattern.
1 x 1 rib pattern – You should know how to work a 1 x 1 rib pattern. (For row 1, you will work a knit stitch, followed by a purl stitch, repeating this pattern across the row. For row 2, you will knit the knit stitches and purl the purl stitches)
Gauge:
Approximately 16 stitches and 16 rows in 4” x 4” of stockinette stitch (blocked)
Notes:
You will knit a back panel, two front panels and two sleeves. Each front and back panel is knit from the bottom up and all pieces of the cardigan are knit flat. These are each sewed and seamed together to finish. If you’re experienced and would like to knit the sleeves in the round to avoid sewing and seaming, you may do so. The collar is created by picking up stitches along the inside edges of the front panels and back neck area of back panel. This is a very forgiving pattern and you can adjust the sizing to make it your own! Feel free to knit for more or fewer rows to make it longer or shorter (keep yarn needs in mind).
My Comfiest Easy Knit Cardigan Pattern Instructions
Back Panel
Cast on 72 (80, 88, 96, 104) stitch count remains the same throughout back panel pattern
Rows 1 – 12 Work 2 x 2 rib pattern.
Row 13 Knit each st across the row.
Row 14 Purl each st across the row.
Repeat rows 13 & 14, working stockinette stitch until panel is approximately 29” (31.5”, 34”, 36.5”, 39”) long.
Cast off and weave in ends.
Front Panel Pattern (make 2)
Cast on 28 (32, 36, 40, 44) stitch count remains the same throughout front panel pattern
Rows 1 – 12 Work at 2 x 2 rib pattern.
Row 13 Knit each st across the row.
Row 14 Purl each st across the row.
Repeat rows 13 & 14, working stockinette stitch until panel is approximately 29” (31.5”, 34”, 36.5”, 39”) long.
Cast off and weave in ends.
Sleeve Pattern (make 2)
Cast on 48 (52, 56, 60, 64) sts
Row 1 Knit each st across the row.
Row 2 Purl each st across the row.
Row 3 Knit each st across the row.
Row 4 P2tog, purl across to last 2 sts, p2tog.
Repeat rows 1 – 4 until there are 28 (32, 36, 40, 44) sts left on needle.
Next, knit in stockinette stitch until sleeve is 13” (13”, 13.5”, 13.5”, 14”)
Ribbed Cuff
Next, work a 2 x 2 rib pattern until sleeve measures approximately 18.5” (18.5”, 19”, 19”, 19.5”) long.
Cast off and weave in ends.
Pockets (make 2)
Cast on 22 stitches
Row 1 Knit each st across the row.
Row 2 Purl each st across the row.
Repeat rows 1 & 2, working stockinette, until piece measures 6”.
Next, work a 2 x 2 rib pattern for approximately 1/2”.
Cast off and weave in ends.
Block to shape and size as desired.
Assembly & Seaming
Place two front panels directly on top of back panel, leaving space in the middle and outer edges aligned.
Seam panels together at shoulders.
Sew sleeves onto the cardigan. Fold and sew sleeves using a mattress stitch seam.
Seam sides of front and back panels with mattress stitch seam.
Sew pockets onto cardigan.
Collar
Pick up stitches evenly along entire collar area (pick up one stitch at each row)
Work a 1 x 1 rib pattern until collar measures approximately 2.5” wide
Cast off and weave in ends.
I hope this was easy enough for you to make and that you can proudly wear it for years to come!
More Easy Knit Cardigan Patterns
Big Sweater Coat Knitting Pattern
Painted Skies Shrug Sweater Knitting Pattern
Telluride Kimono Knit Cardigan
And here is a collection of all of my easiest sweater patterns:
I sure hope you loved this sweater and enjoy wearing it for years to come!
I’d love to see if you make one – just tag me on Instagram @mamainastitch #mamainstitch. Happy knitting and making my friends!
XO,
Jessica