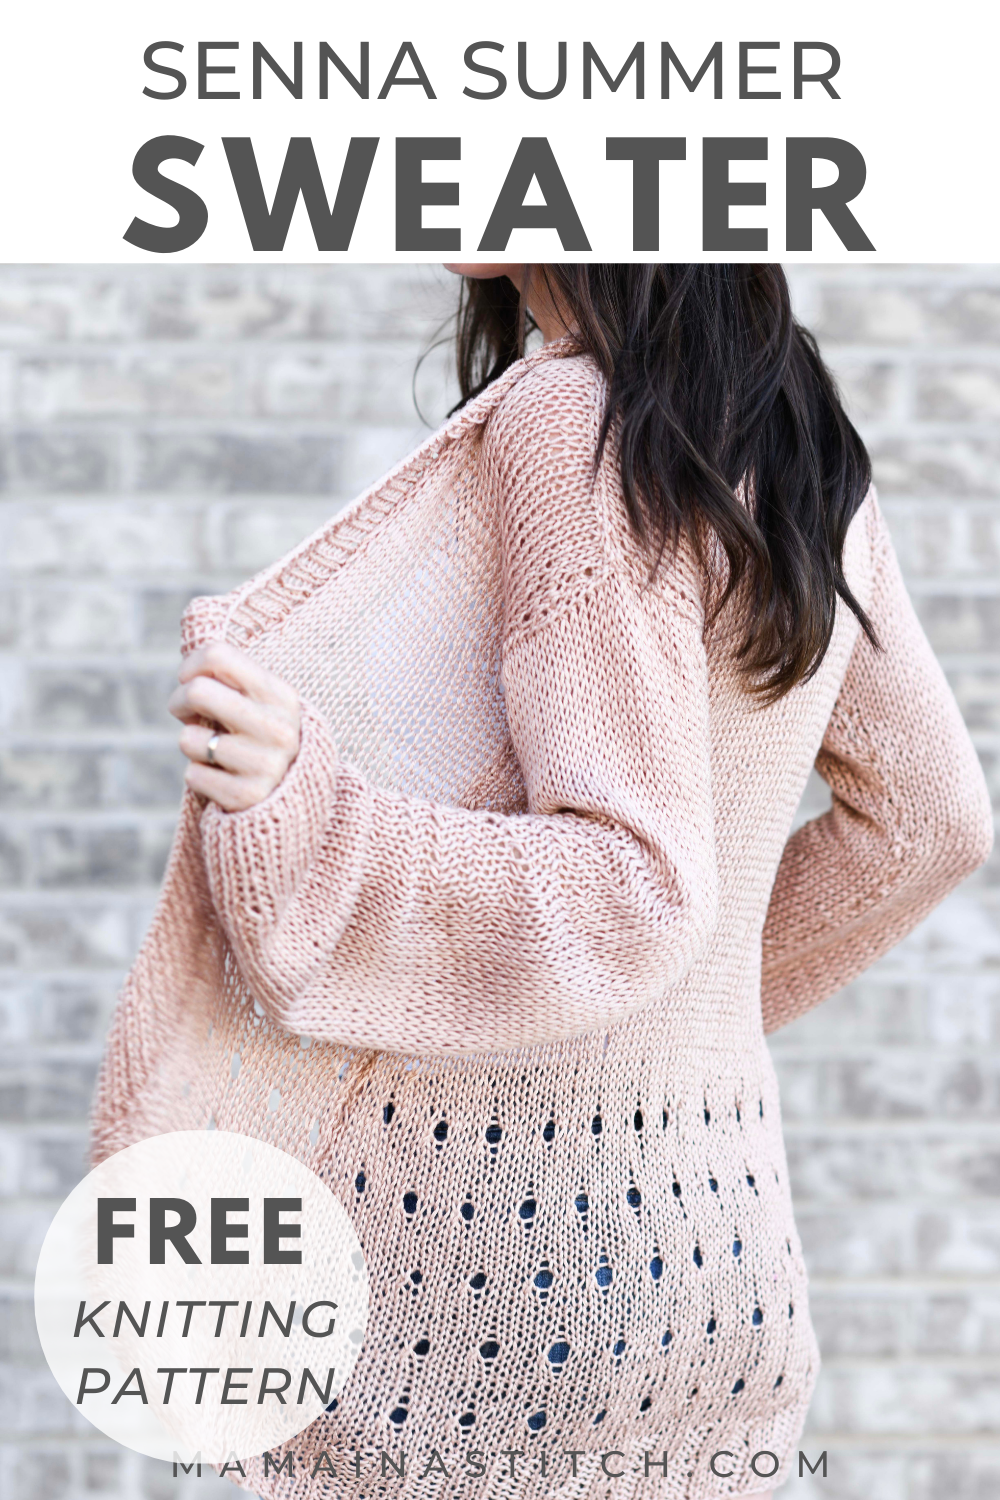
Summer Sweater Knitting Pattern
You can find the free knitting pattern for the “Senna Summer Sweater Knitting Pattern” below, or the kit is available from Lion Brand HERE, and the ad-free, printable pattern from Etsy can be found HERE. UPDATE: Please note the updated corrections in the pattern that are in the color red (the sizes available and Row 17).
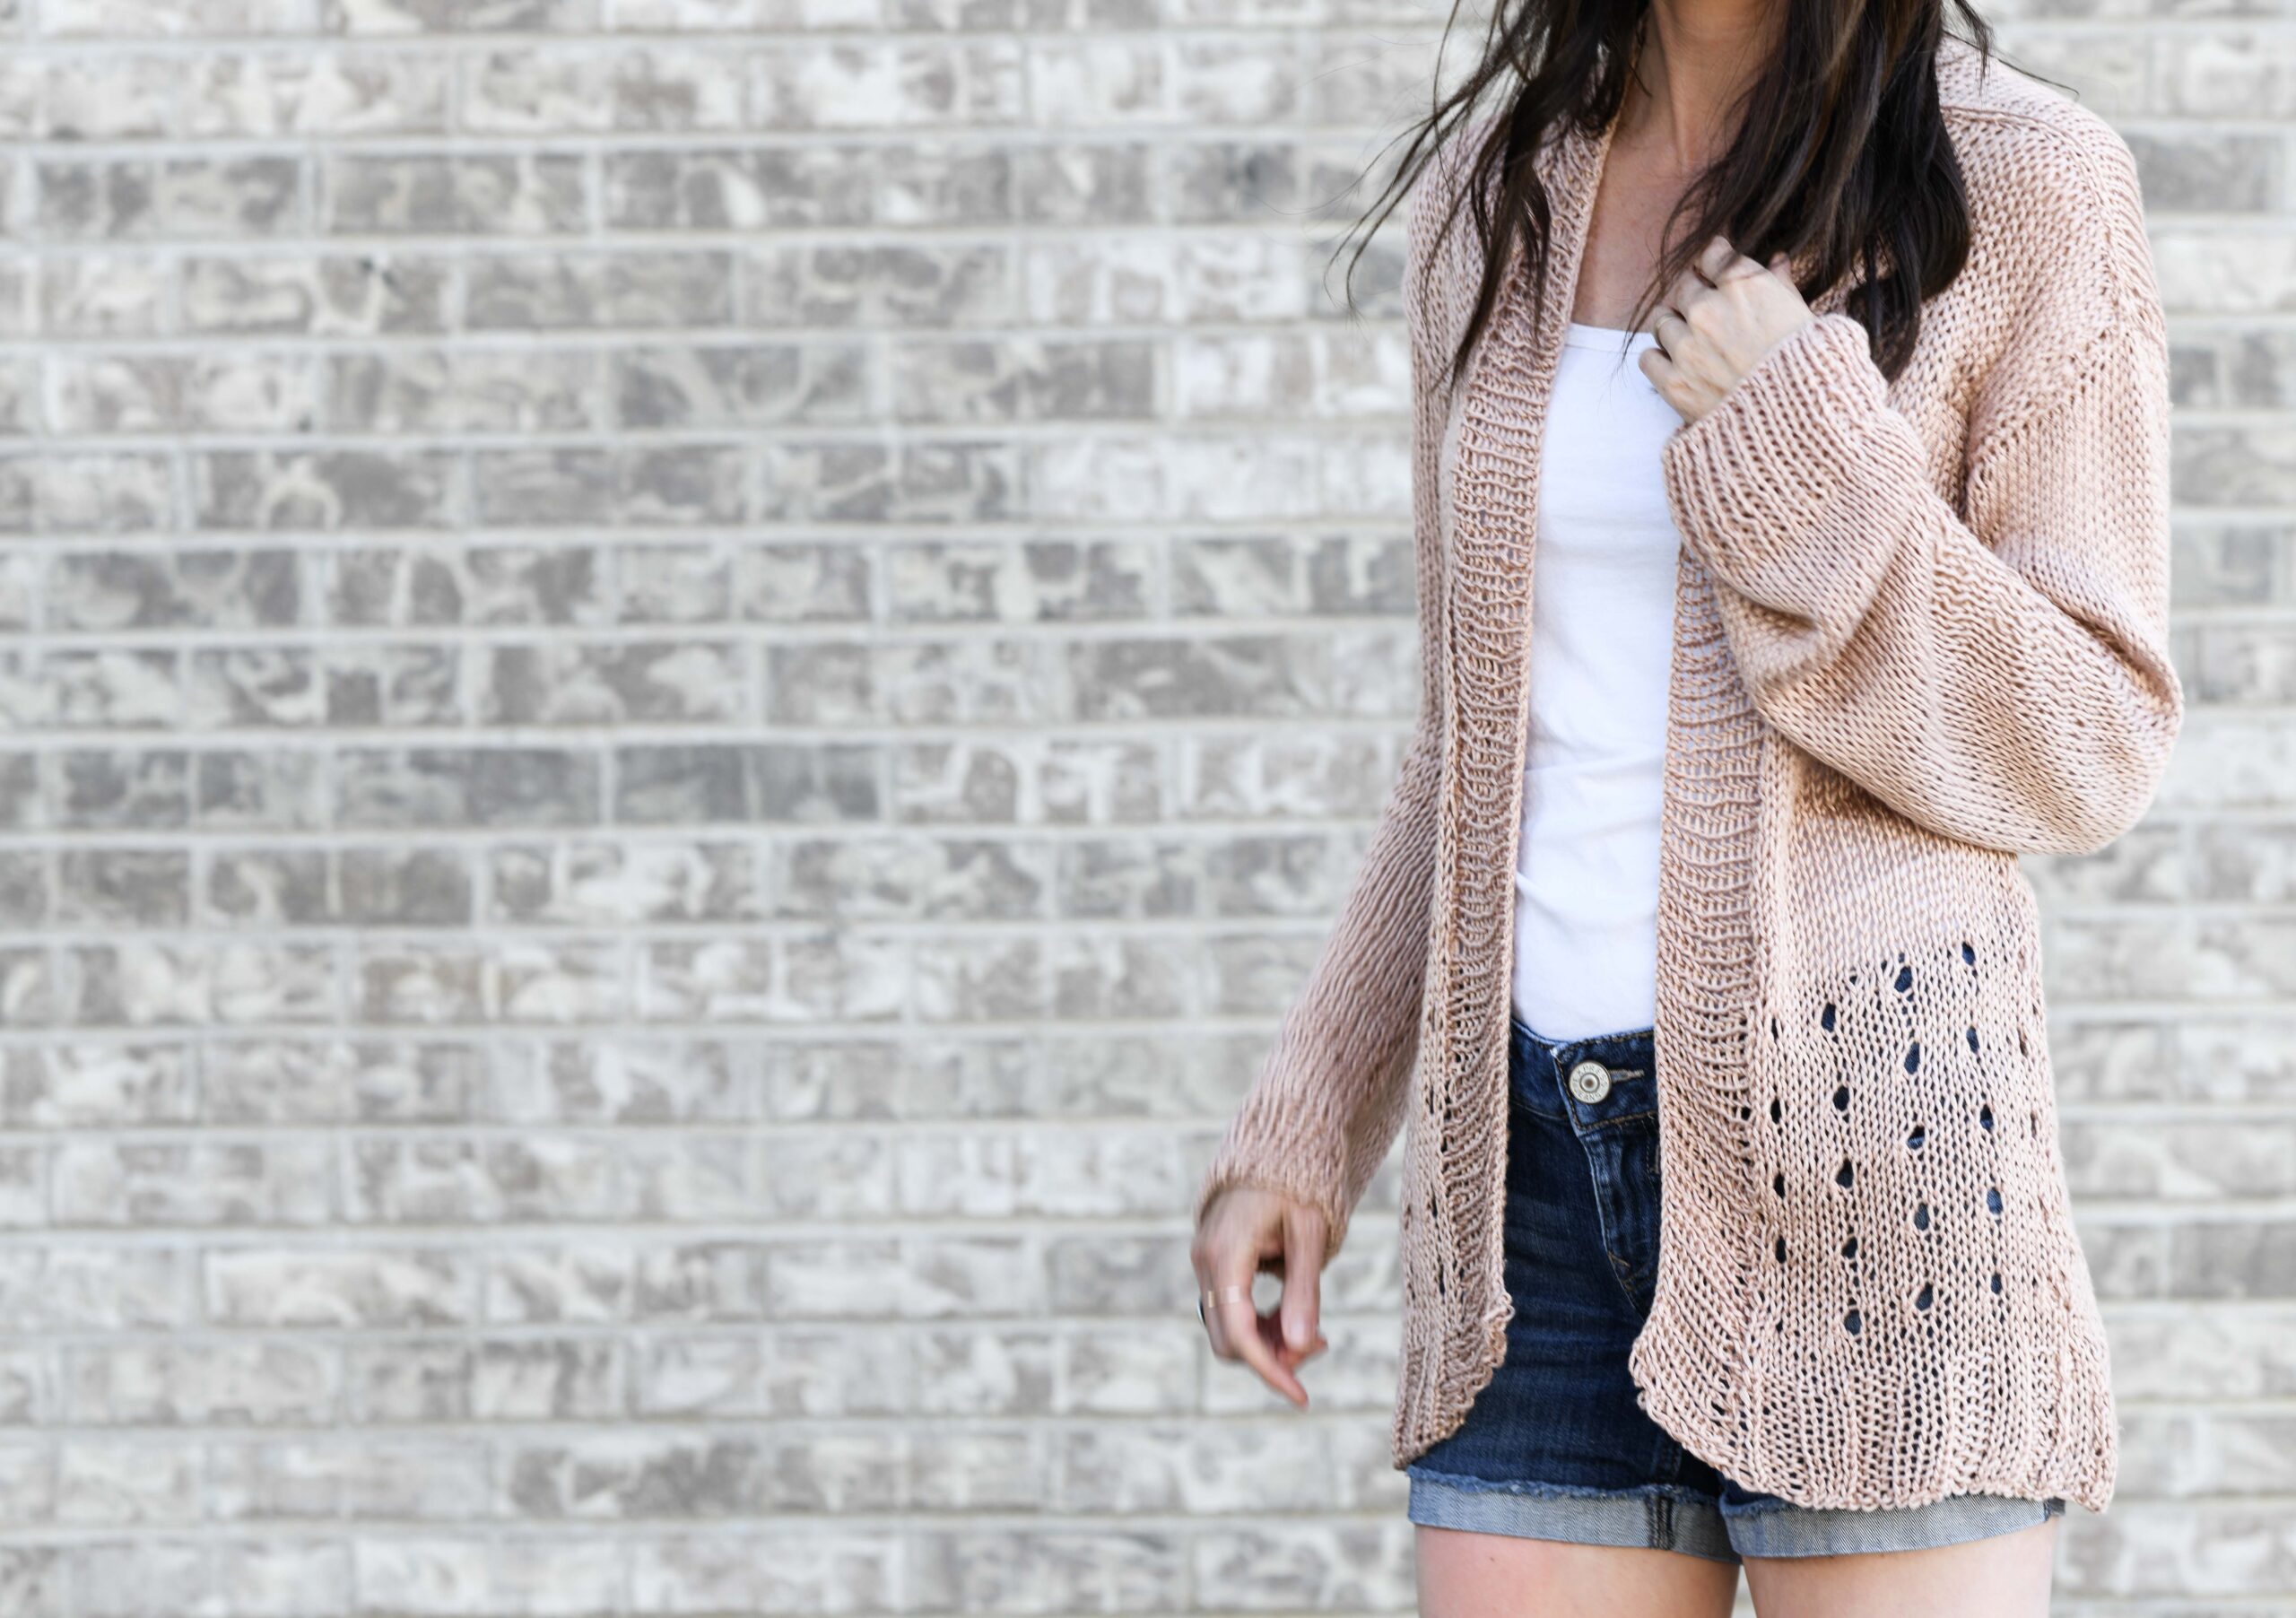
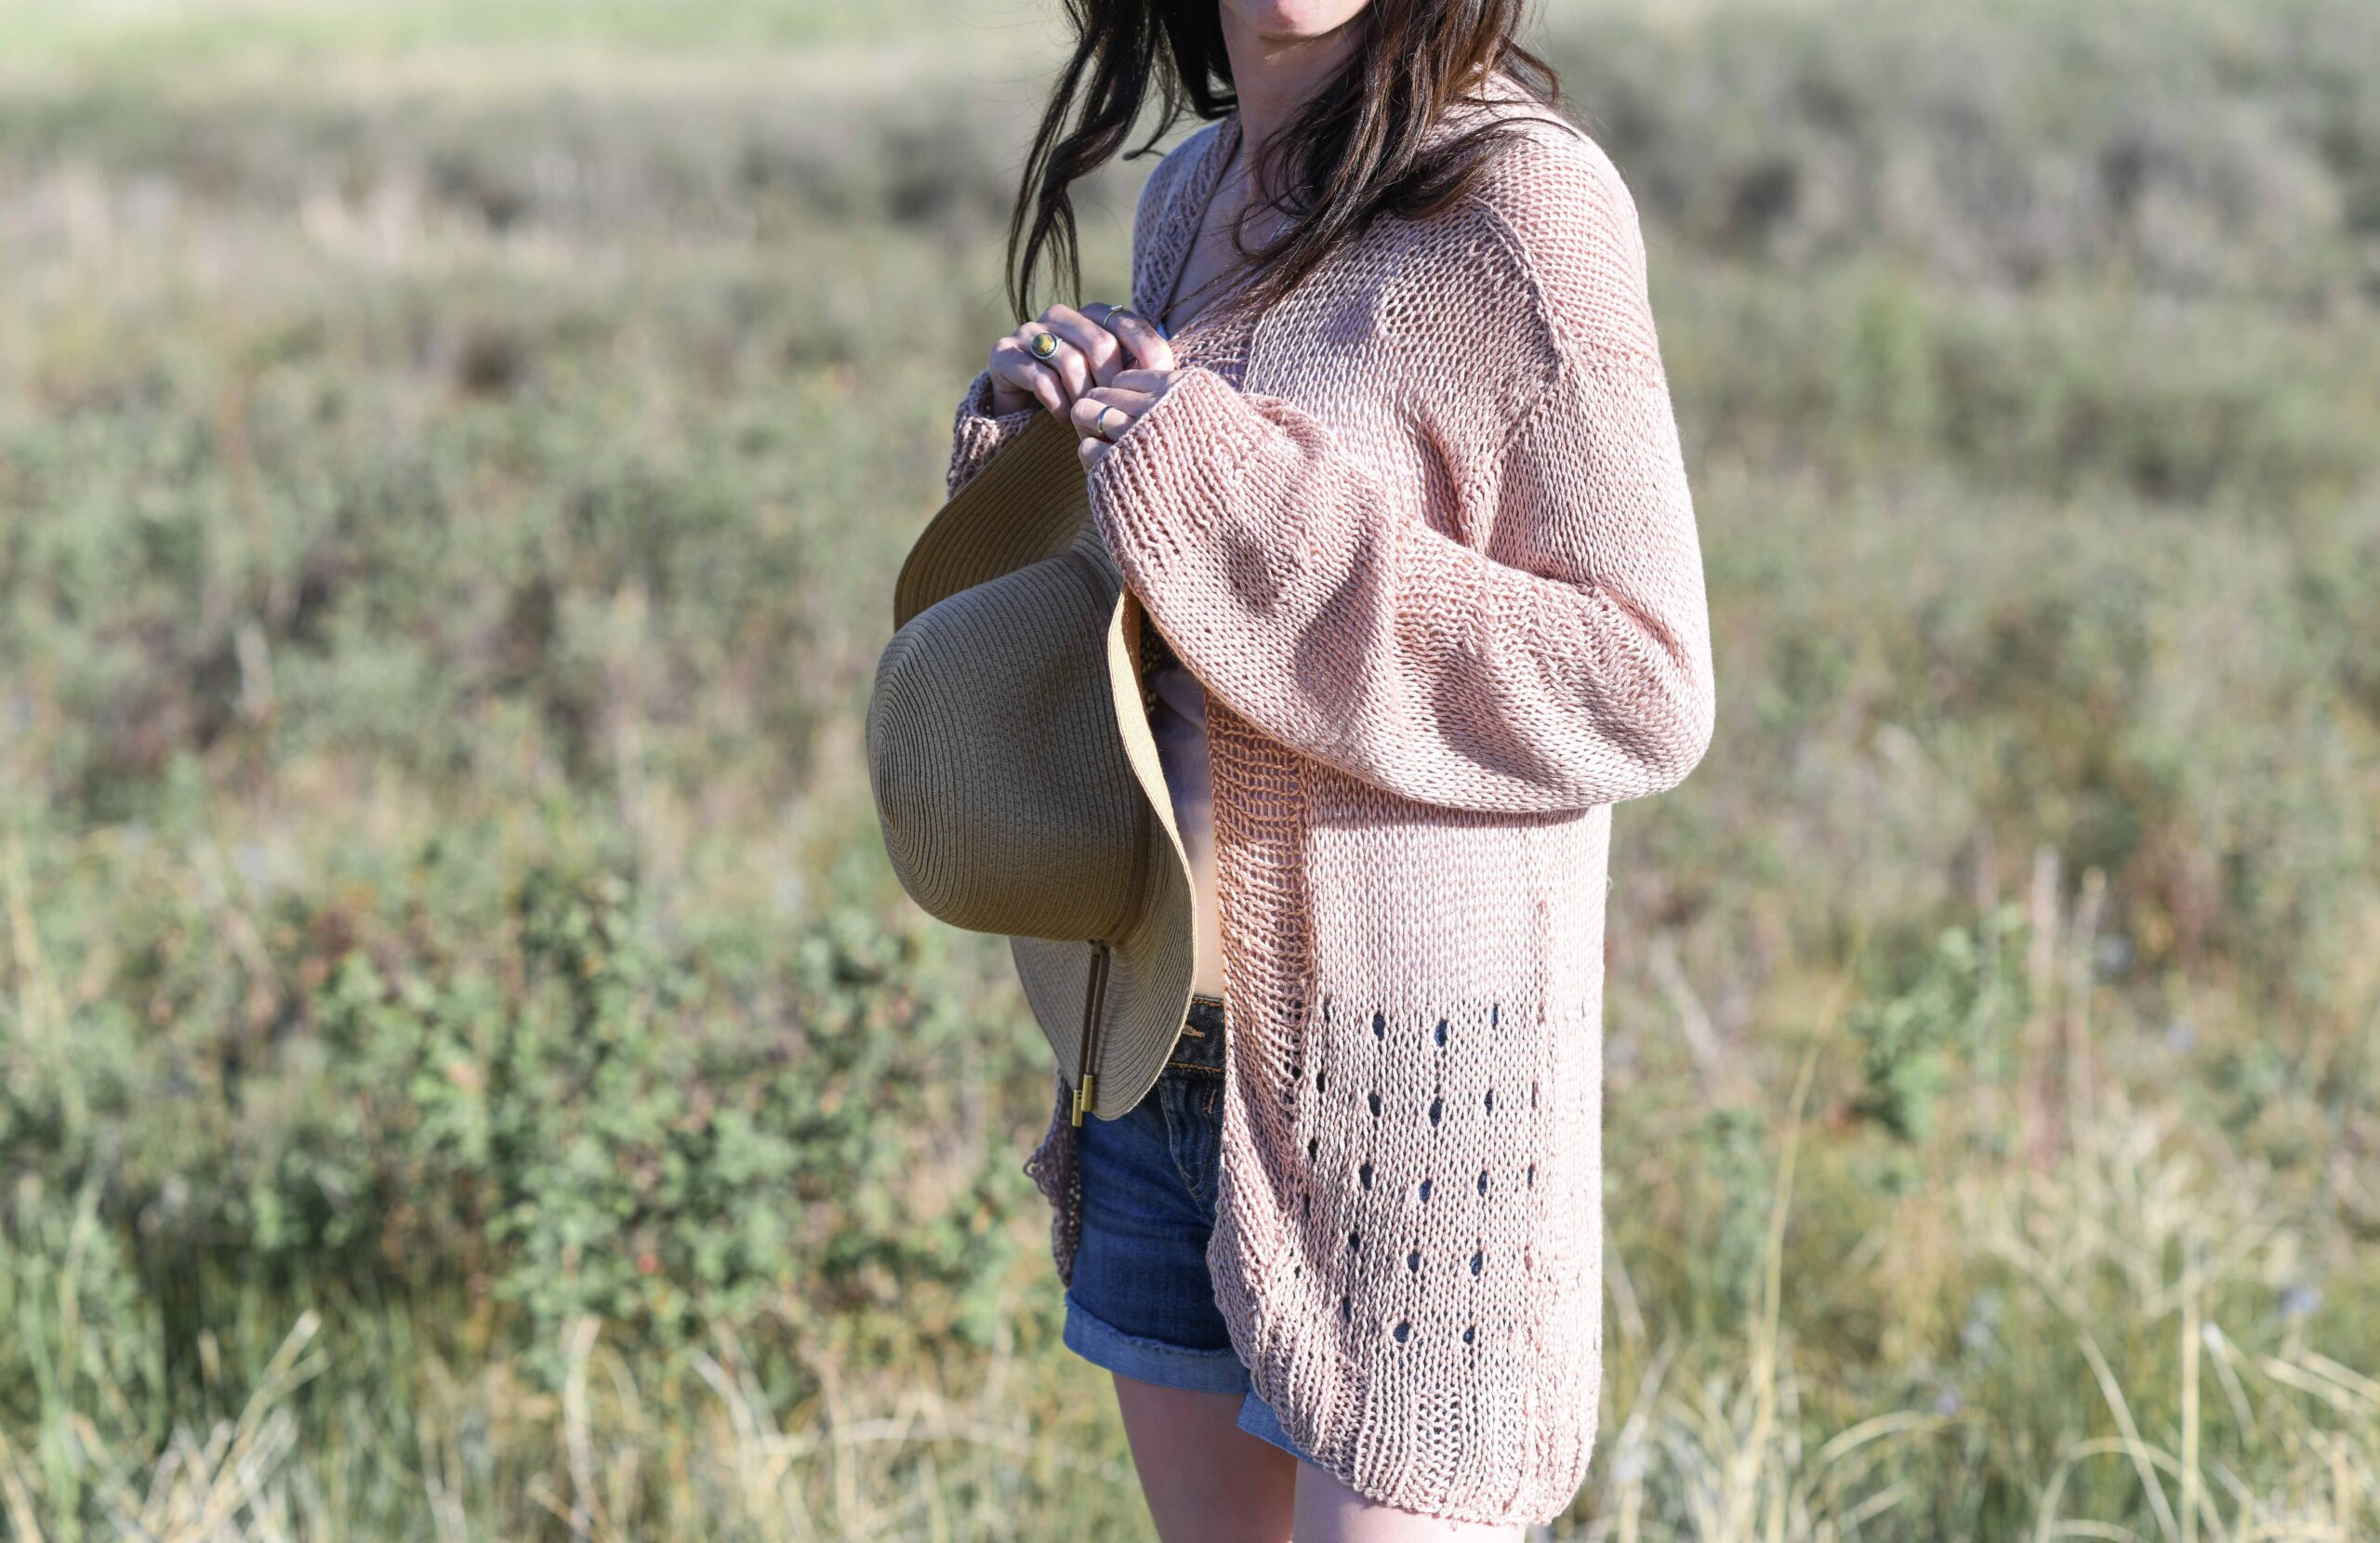
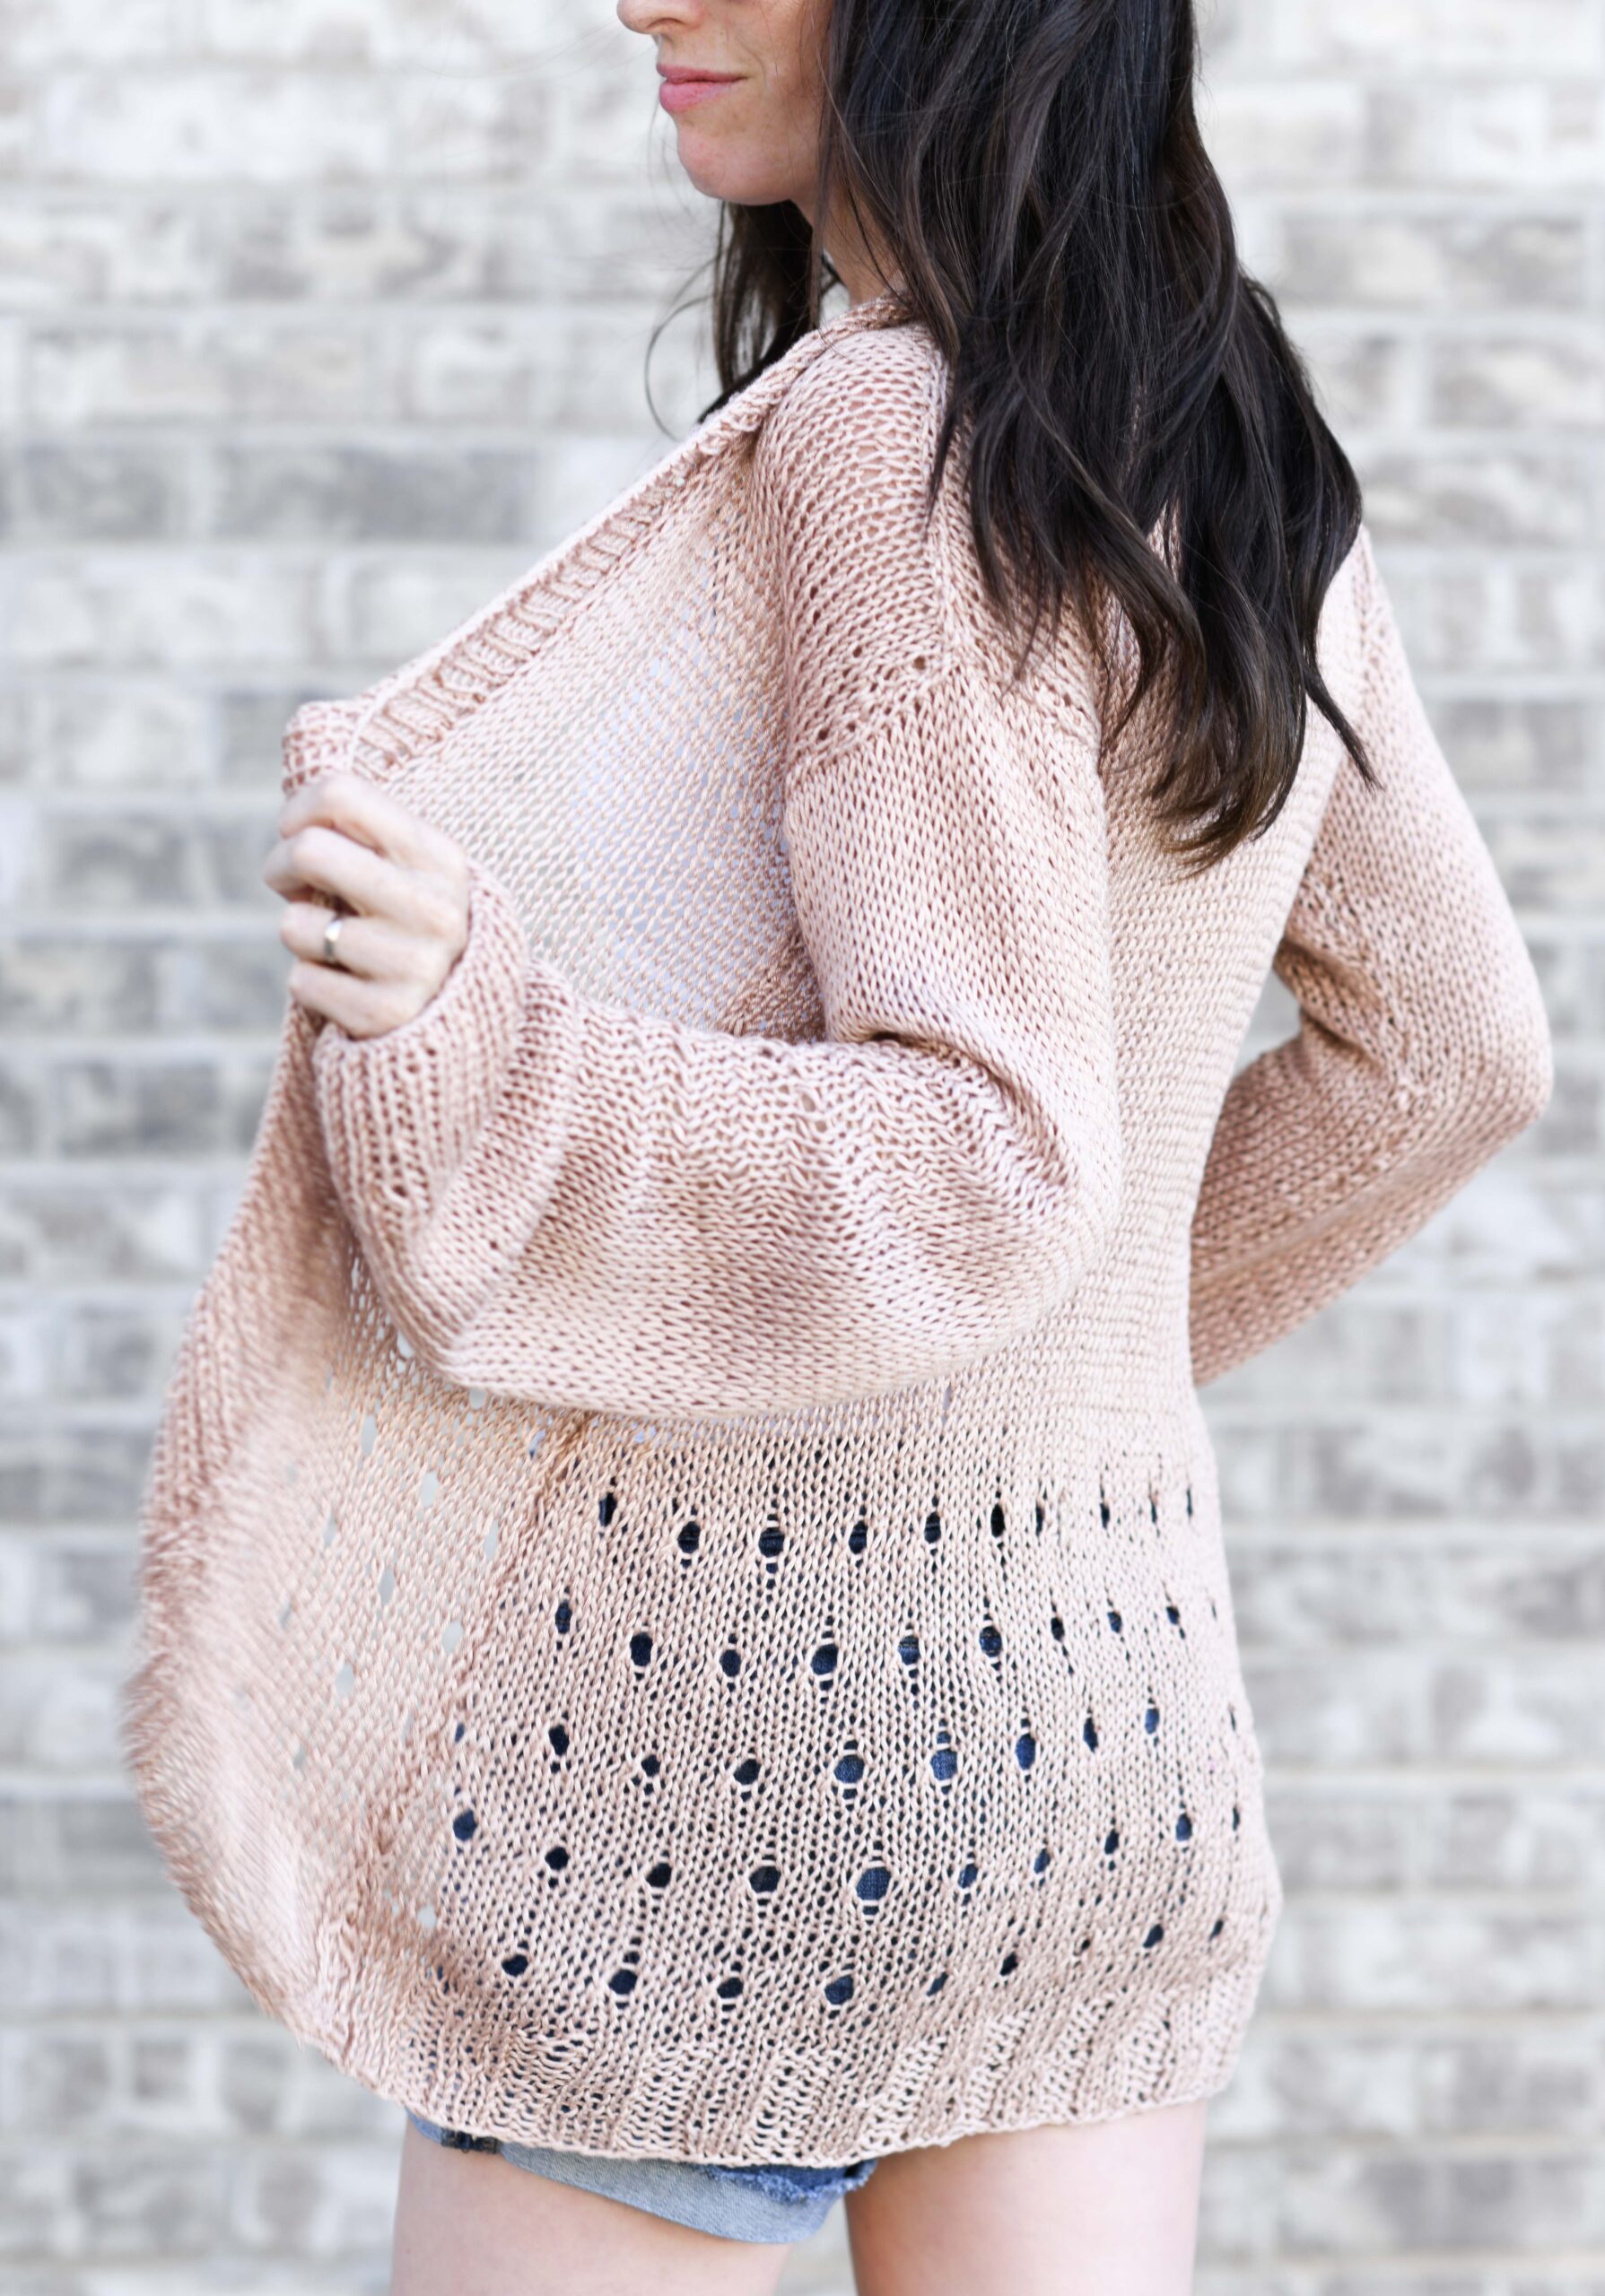
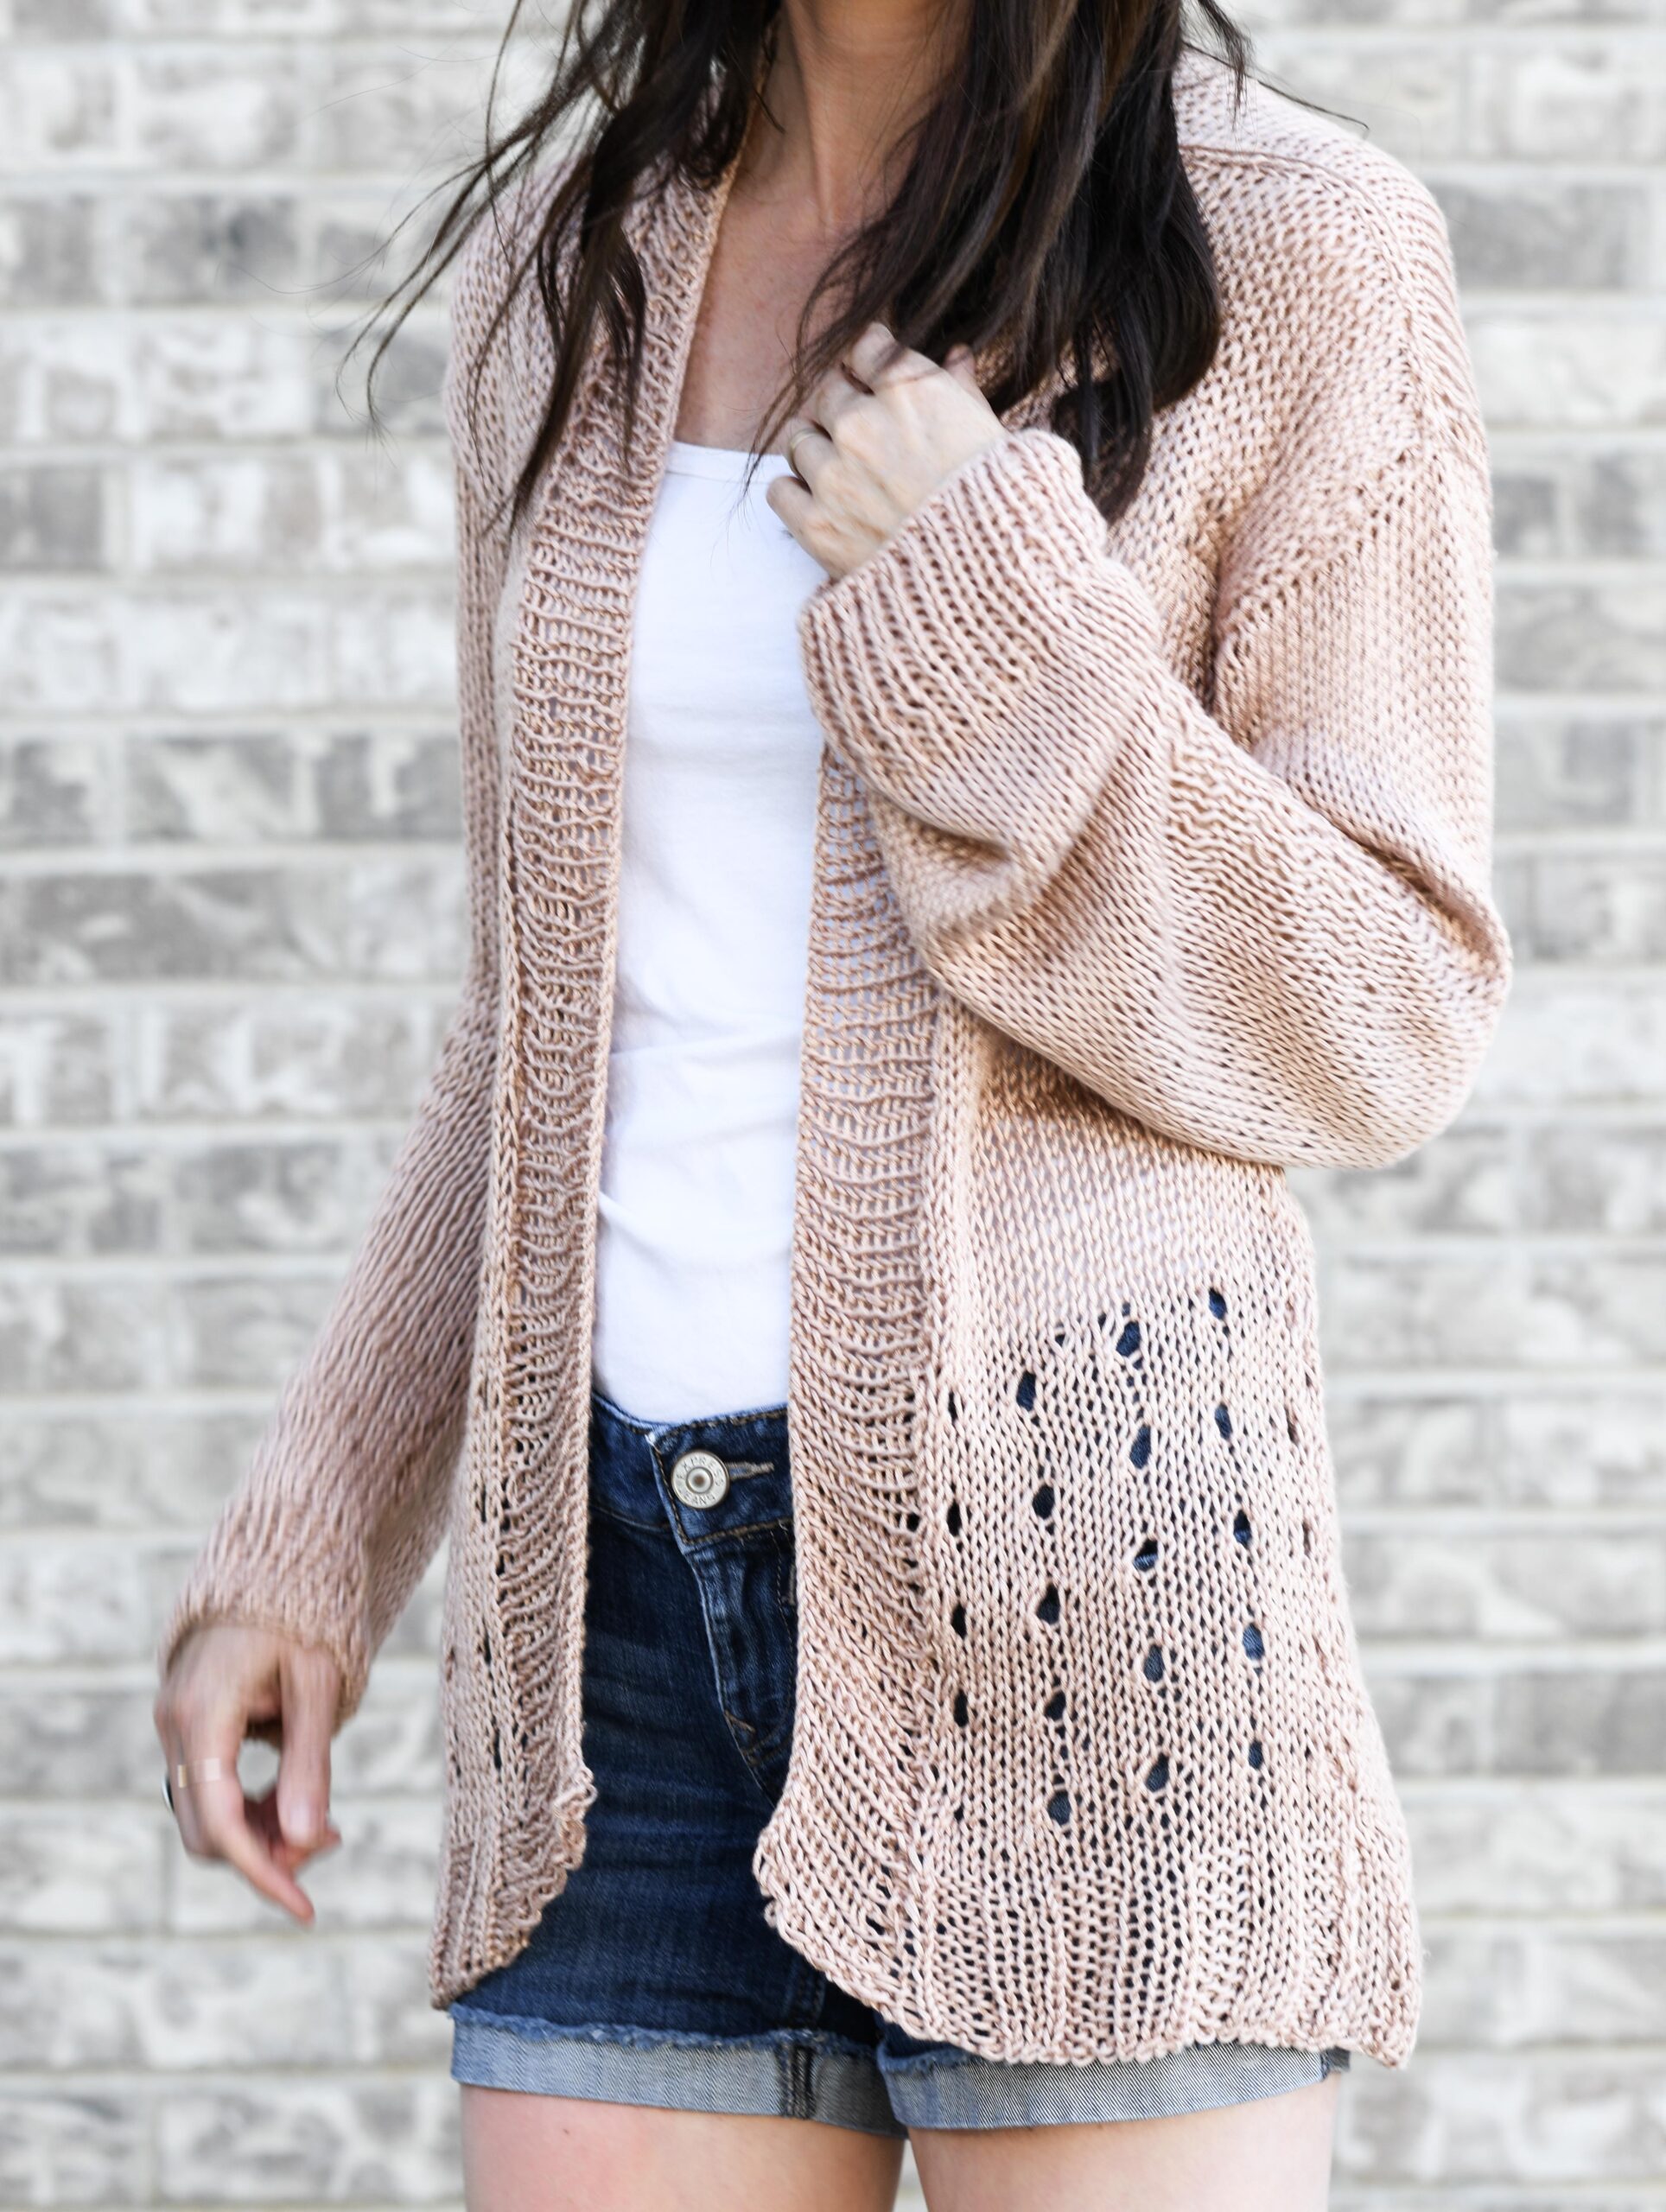
This “Senna Summer Sweater” is light, airy, and is created with a simple construction. I designed it with a bamboo yarn (Truboo) that’s super soft on the skin and has a luxurious look and feel. The pretty little eyelet details are easy to knit and make it look fancier than it is. 😉 And it’s definitely nice for summer, in my opinion!
The entire sweater is made with basic shapes (a lot like My Comfiest Knit Cardigan HERE) so it’s pretty doable for newer knitters. Read more about the sweater and how it’s made below!
Last year when I made the Verano Longline Cardigan, there were several knitters who reached out to me and asked for a knit version. While there are some differences, my hope is that this sweater will fit the bill!
Like the Verano, it’s made with the Truboo Yarn, which is silky, light, and really nice to wear in warm weather. I found it much easier to use metal than wood needles for this project as the yarn tended to want to “stick” a bit more to the wood needles.
As you’ll see, you’ll be using a larger needle than what the yarn label calls for. Why you ask? 🙂 I do this with quite a few of my patterns and there’s a couple of reasons. One is that I like how the fabric turns out, as it really makes the stitches stand out and it also gives it an airier look and feel to the final fabric. The second reason is that it works up quicker on larger needles.
If you follow me, you know I’m a fan of quick and simple. We don’t have to sacrifice beauty to make it a little quicker! Some folks don’t love using the larger needles, and some folks do. With this sweater, it really makes it feel fancy and feminine in my opinion.

If you remember My Comfiest Knit Cardigan (one of the most popular on the blog), you will see that there are many similarities here! They are both made with basic shapes so that even newer knitters can enjoy the pattern. And they are both made with a larger needle.
You literally will knit three rectangles for the front panels and back, and then two lightly shaped sleeves. They are all knit FLAT! And don’t fear the shaping – it’s just very basic decreases where you knit two stitches together. Boom!
If you were to ask which is easier, I’d say My Comfiest Knit Cardigan is a touch easier. The Jeans yarn is a little more forgiving on the needles, and you also don’t have to count rows for the eyelet detail. Those are two minor little differences that make this summer sweater just a bit more advanced. It’s a great step up from scarves!
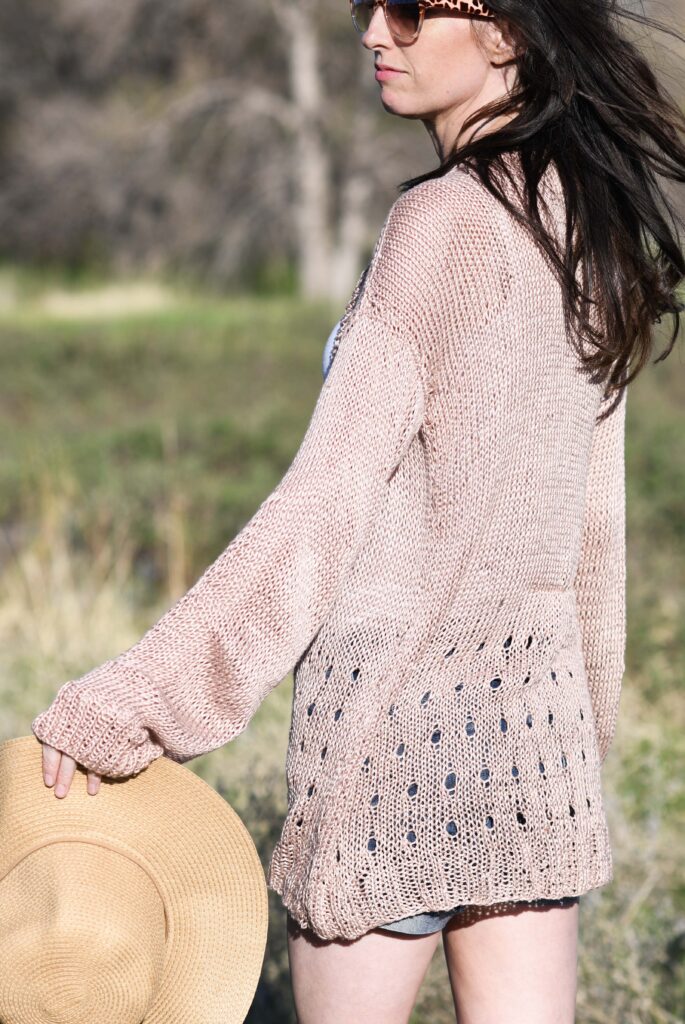
This project does feature a lighter fabric for warm weather than my other knit sweaters and also has the pretty little eyelet details (adding to the airy effect). I didn’t add pockets to this one either as that just seemed to add more weight. The whole goal was to make a light cardigan we can wear in the hotter seasons of the year. I hope those of you in warmer climates can enjoy this one as I know a lot of sweaters are meant for the cool winters. It is sooooo soft!
So let’s get to knitting!
As mentioned previously, you can see the free summer sweater pattern below, or you may choose to purchase the ad-free, printable version HERE.
Pattern Description: Drapey, silky, and light, this cardigan is a beautiful blend of understated femininity and trendy design. The loosely knit bamboo fabric and eyelet details help make this the perfect summer sweater. Dress it up with a summer maxi, or dress it down with your casual cut-offs and sandals. The sweater is knit flat and features light shaping on the sleeves only, making it a great project for newer knitters!
Skill Level: Easy
Materials:
US Size 10.5, 6.5 mm 29” circular knitting needles
4 (5, 6, 7, 8) skeins Lion Brand Yarn Truboo Light #3 yarn in Tan 100g/skein Grab the kit HERE available in several color options
Pattern uses approximately 360 (442, 532, 630, 737) grams total
Measuring Tape
Tapestry Needle
Scissors
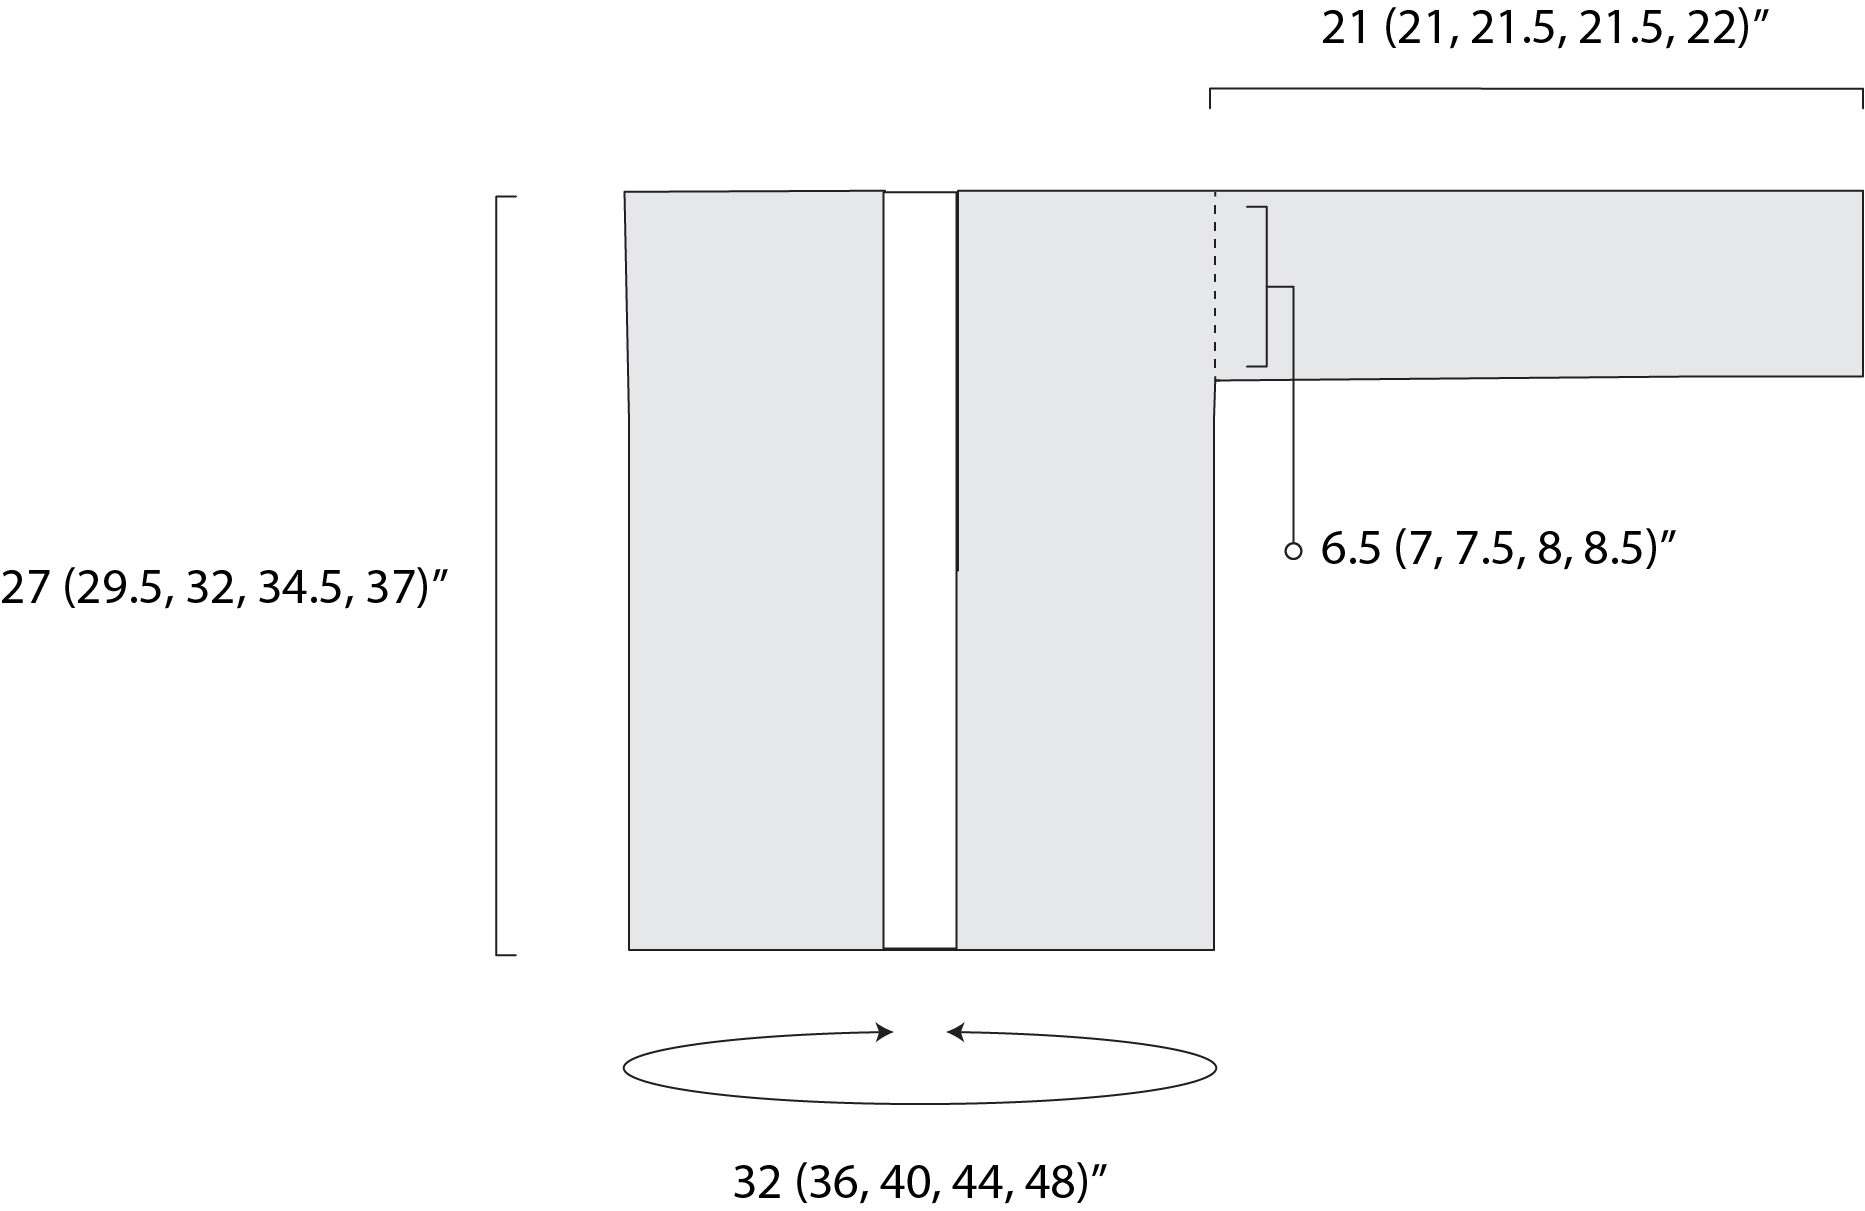
Dimensions (approximate):
Small, Medium, Large, XL, XXL
Please follow the key throughout the pattern according to the size you are knitting:
S (M, L, XL, XXL) There is very little positive ease.
Bust Circumference (approximate finished measurements):
S –32”
M – 36”
L– 40”
XL – 44”
XXL – 48”
Length:
S – 27”
M – 29.5”
L– 32”
XL – 34.5”
XXL – 37”
Abbreviations & Skills:
k – knit
p – purl
st – stitch
yo – yarn over
k2tog – knit two together (decrease)
3 x 3 ribbing – You should know how to work a rib pattern. You will work a 3 x 3 rib pattern on the front and back panels.
Stockinette Stitch – work one row of knitting following by one row of purling.
Gauge:
Approximately 17 stitches and 15 rows in 4” x 4” of stockinette stitch.
**Important: Adjust needle size and/or tension as needed in order to obtain gauge and ensure the sizing turns out correctly**
Notes:
To make this beautiful sweater, you will knit a back panel, two front panels and two sleeves. Each front and back panel is knit from the bottom up and all pieces of the cardigan are knit flat. These panels are each sewed and seamed together to finish. If you’re experienced and would like to knit the sleeves in the round to avoid seaming, you may do so. The collar is created by picking up stitches along the inside edges of the front panels and back neck area of back panel.
This is a very forgiving pattern and you can adjust the sizing to make it your own! Feel free to knit for more or fewer rows to make it longer or shorter (keep yarn needs in mind). To adjust the width sizing, cast on more or fewer stitches while keeping a multiple of 3 stitches.
Consider testing a variety of needle types on a swatch before beginning. You might find it easier to knit with this yarn on metal needles than with wood needles, or vice versa. The needle size is larger than what the yarn calls for on the label, and this gives the fabric an airier and lighter feel.
All of the panels and sleeves are knit flat even though the pattern calls for circular needles. The circular needles are needed to hold all of the stitches. On some of the smaller sizes, you may be able to fit the stitches on long, straight needles. In that case, feel free to use your straights!
Senna Summer Sweater Pattern Instructions
Back Panel
Cast on 69 (78, 87, 96, 105) stitch count remains the same throughout back panel pattern
Rows 1 – 12 Work 3 x 3 rib pattern.
Row 13 Knit each st across the row.
Row 14 Purl each st across the row.
Rows 15 – 16 Repeat rows 13 & 14.
Row 17 *K3, yo, k2tog. Repeat from * across the row to last two stitches, k2.
Row 18 Purl each st across the row.
Next, repeat rows 13 – 18 until piece measures approximately 10”, ending with row 18.
Next, work stockinette stitch, knitting one row followed by purling the next row, until entire panel is approximately 27” (29.5”, 32”, 34.5”, 37”) long.
Cast off and weave in ends.
Front Panel Pattern (make 2)
Cast on 27 (33, 36, 42, 45) stitch count remains the same throughout front panel pattern
Rows 1 – 12 Work 3 x 3 rib pattern.
Row 13 Knit each st across the row.
Row 14 Purl each st across the row.
Rows 15 – 16 Repeat rows 13 & 14.
Row 17 *K3, yo, k2tog. Repeat from * across the row to last two stitches, k2.
Row 18 Purl each st across the row.
Next, repeat rows 13 – 18 until piece measures approximately 10”, ending with row 18.
Next, work stockinette stitch, knitting one row followed by purling the next row, until entire panel is approximately 27” (29.5”, 32”, 34.5”, 37”)
Cast off and weave in ends.
Sleeve Pattern (make 2)
Cast on 60 (64, 68, 72, 76) sts
Row 1 Knit each st across the row.
Row 2 Purl each st across the row.
Rows 3 – 6 Repeat rows 1 & 2, in that order.
Row 7 K2tog, knit to last 2 sts, k2tog.
Row 8 Purl each st across the row.
Row 9 Knit each st across the row.
Row 10 Purl each st across the row.
Repeat rows 7 – 10, ending on row 7, until there are 48 (52, 56, 60, 64) sts left on needle.
Next, knit in stockinette stitch, without decreasing, until sleeve is approximately 18” (18”, 18.5”, 18.5”, 19”) long.
Ribbed Cuff
Next, work a 1 x 1 rib pattern until sleeve measures approximately 21” (21”, 21.5”, 21.5”, 22”) long.
Cast off and weave in ends.
Block to shape and size if desired either before or after assembly.
Assembly & Seaming
Place two front panels directly on top of back panel, leaving space in the middle and outer edges aligned.
Seam panels together at shoulders with a simple whip stitch or your preferred seaming method.
Fold and sew sleeves using a mattress stitch seam.
Sew sleeves onto the cardigan.
Seam sides of front and back panels with mattress stitch seam.
Collar
Pick up stitches evenly along entire collar area, along the inside edges of both front panels and the neck of the back panel (pick up one stitch at each row). If you’ve never picked up stitches, you can find some great tutorials and videos by conducting a simple online search.
Work a 1 x 1 rib pattern until collar measures approximately 2.5” wide
Cast off (loosely!) and weave in ends.
Enjoy your new, beautiful summer sweater!
And that’s it!!
Isn’t that a simple, fun little sweater? I hope that you enjoyed it and would love to hear if you make one on Instagram @mamainastitch!
XO,
Jessica
Thank you to Lion Brand Yarn for sponsoring this post. All opinions are 100% my own.

This is STUNNING Jessica!! You are such a gifted lady. Too many project to finish already lol. Could you take a break from putting out amazing patters so I can catch up ??!!!!
I love LOVE everything you make. You are inspiring.
I can’t wait to make this one.
The instructions for the lace part say *yo, k2tog* but the picture shows *k3, yo,k2tog*
Thought you should know.
Btw I have quite a few of your patterns ❤️
Love this! So glad to be seeing designs for warmer weather!
So happy you like it, Amanda!
Ahh thank you so much!! I hear ya! I won’t be posting as many new patterns over the summer because life is too busy. So maybe you’ll get your catch up time. Haha! We all have too many projects, including me! Thanks for your sweet words.
Great catch! My * was in the wrong spot. Thank you for reaching out about it! I guess I was seeing cross eyed in the final edits! Ugh!