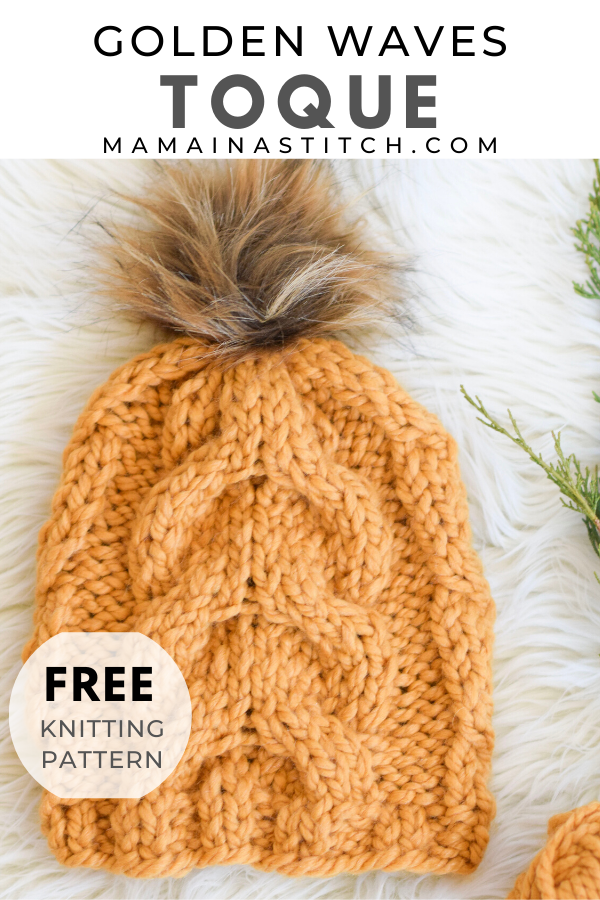
How To Knit A Cable Hat – Golden Waves Toque

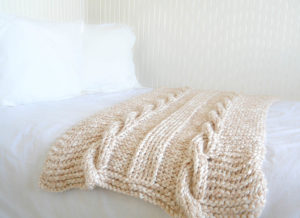
So it’s officially hat season and I was in need of a new, cozy beanie. I thought it might be fun to take some of my favorite cables from the Winding Cables Knit Wrap and integrate them into a chunky, mustard hat. If you’ve never tried cables or just plain enjoy them, you’ll really like this project! I’m going to link to my cable tutorial below so you can practice and make this in no time. 🙂 (Scroll down to see the free pattern, or you can find the ad-free, printable version in my Etsy shop HERE)

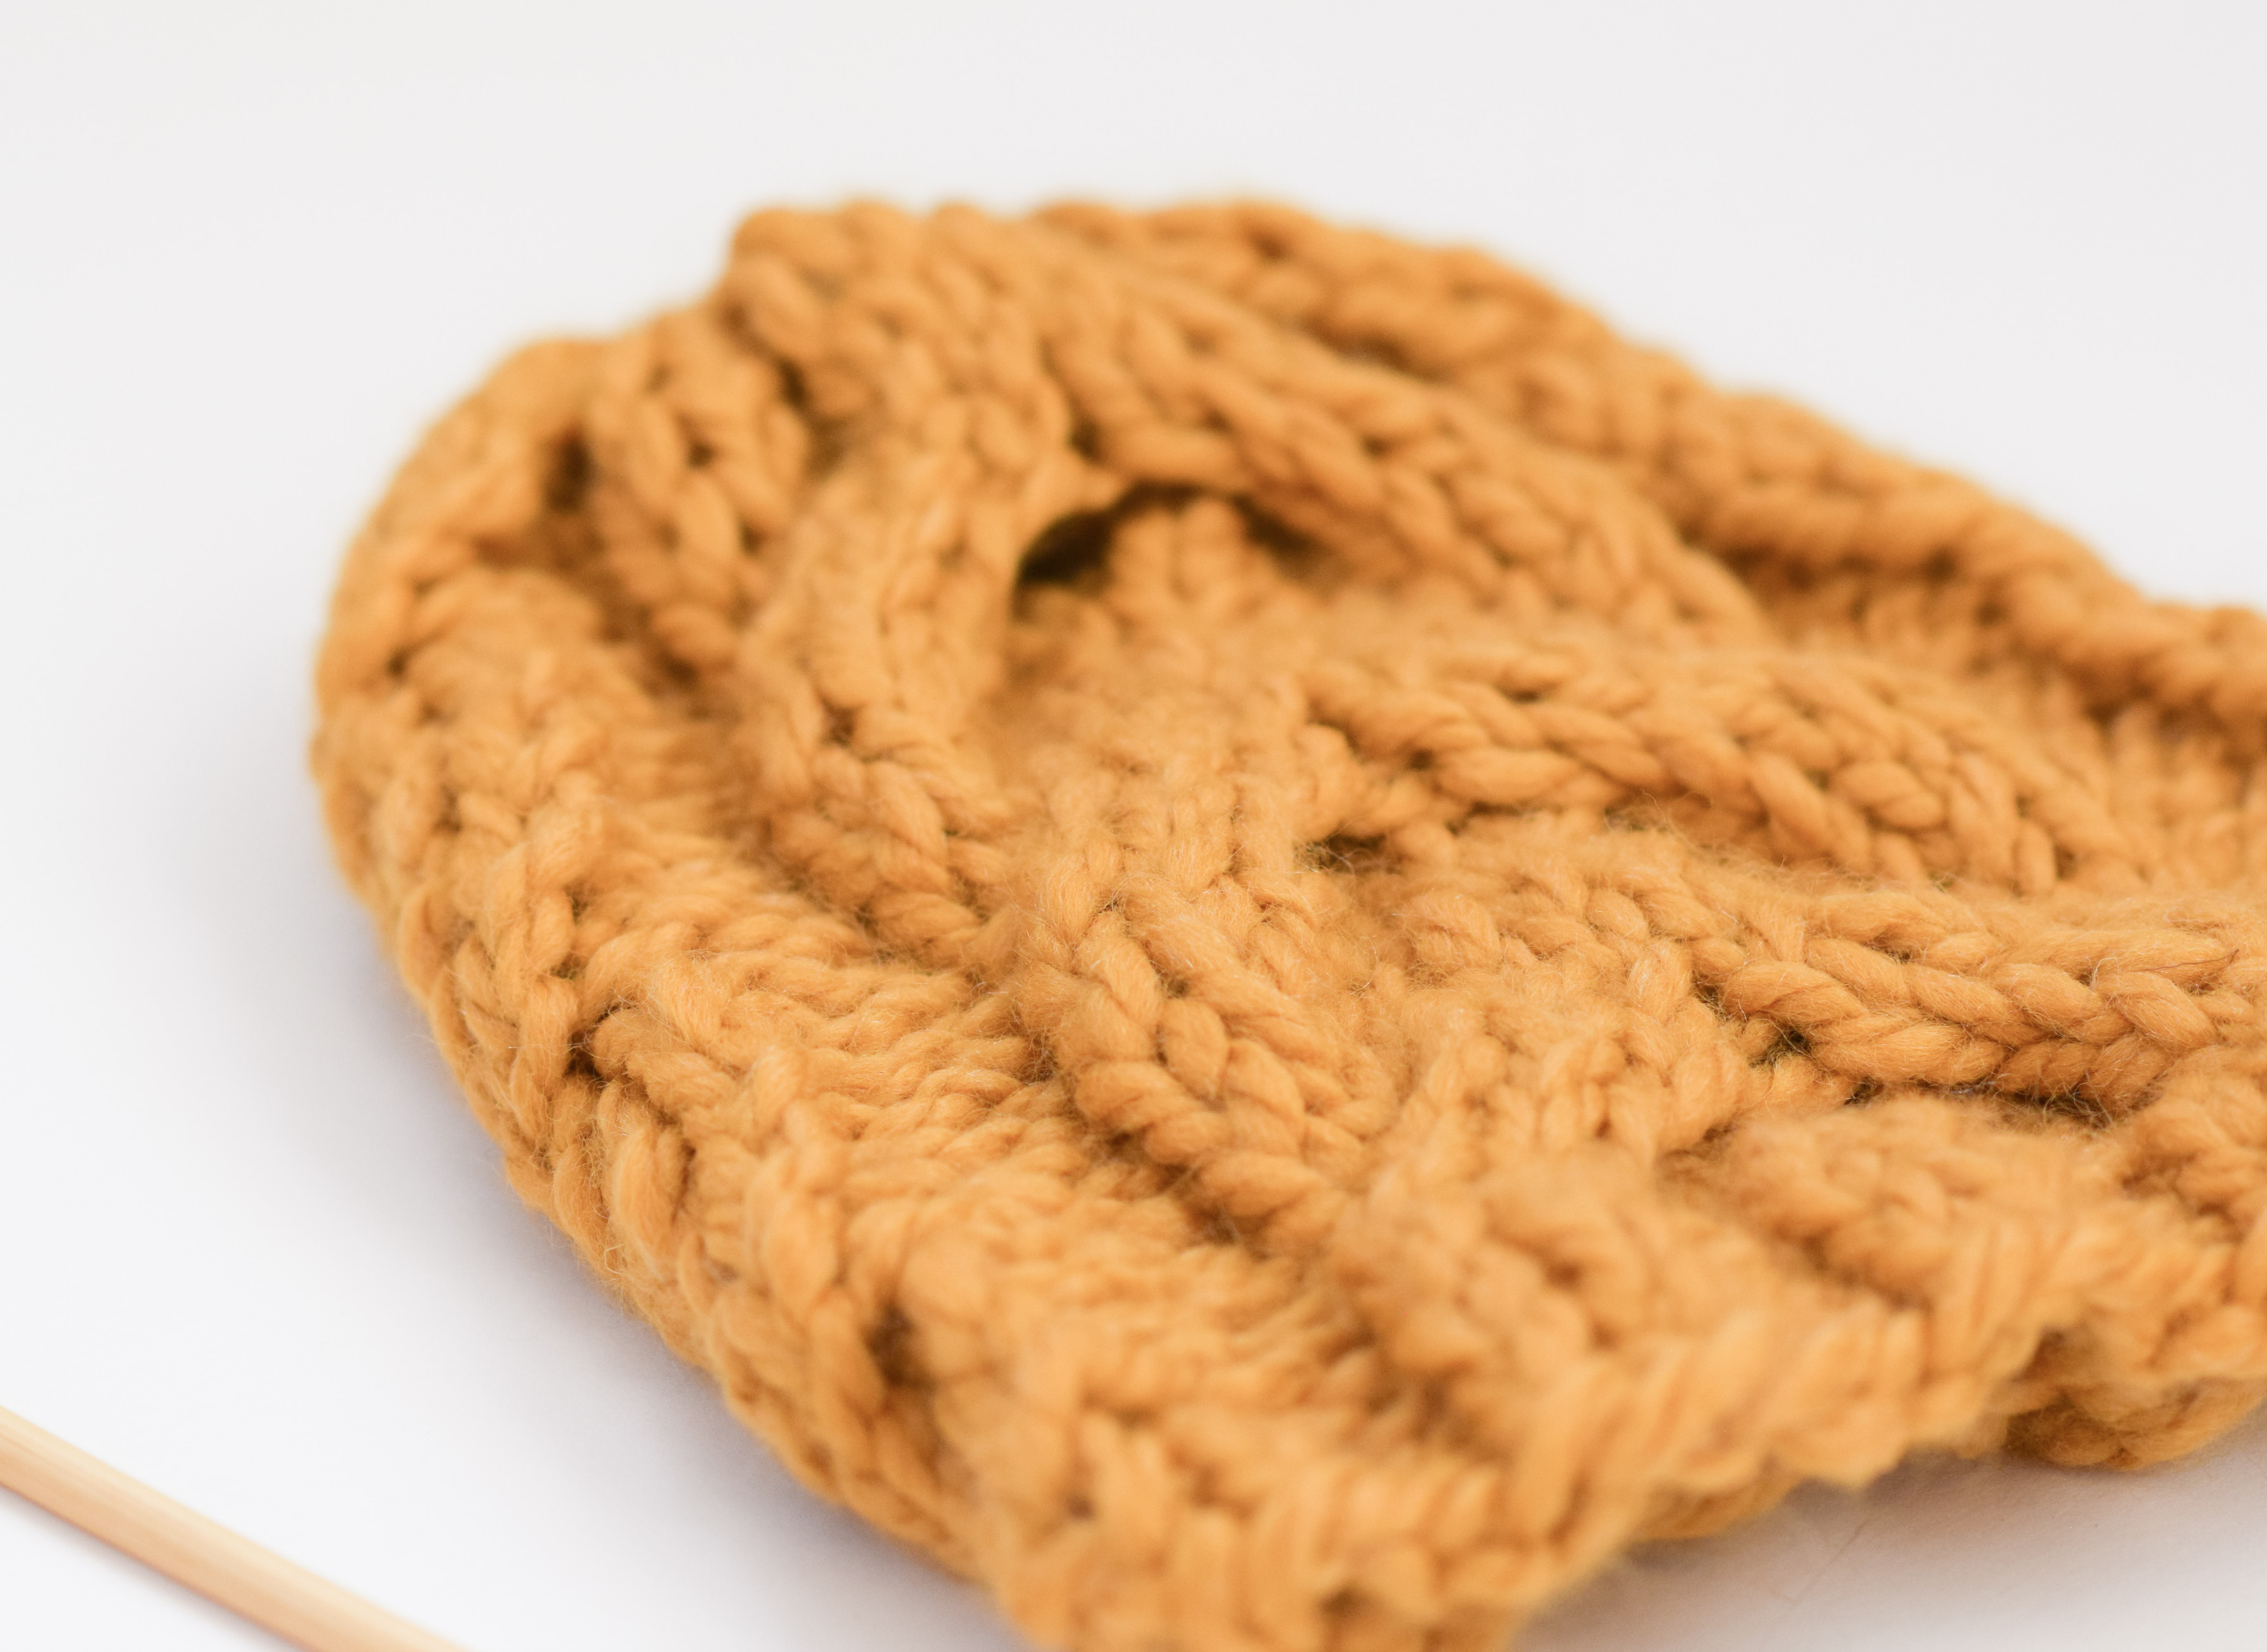
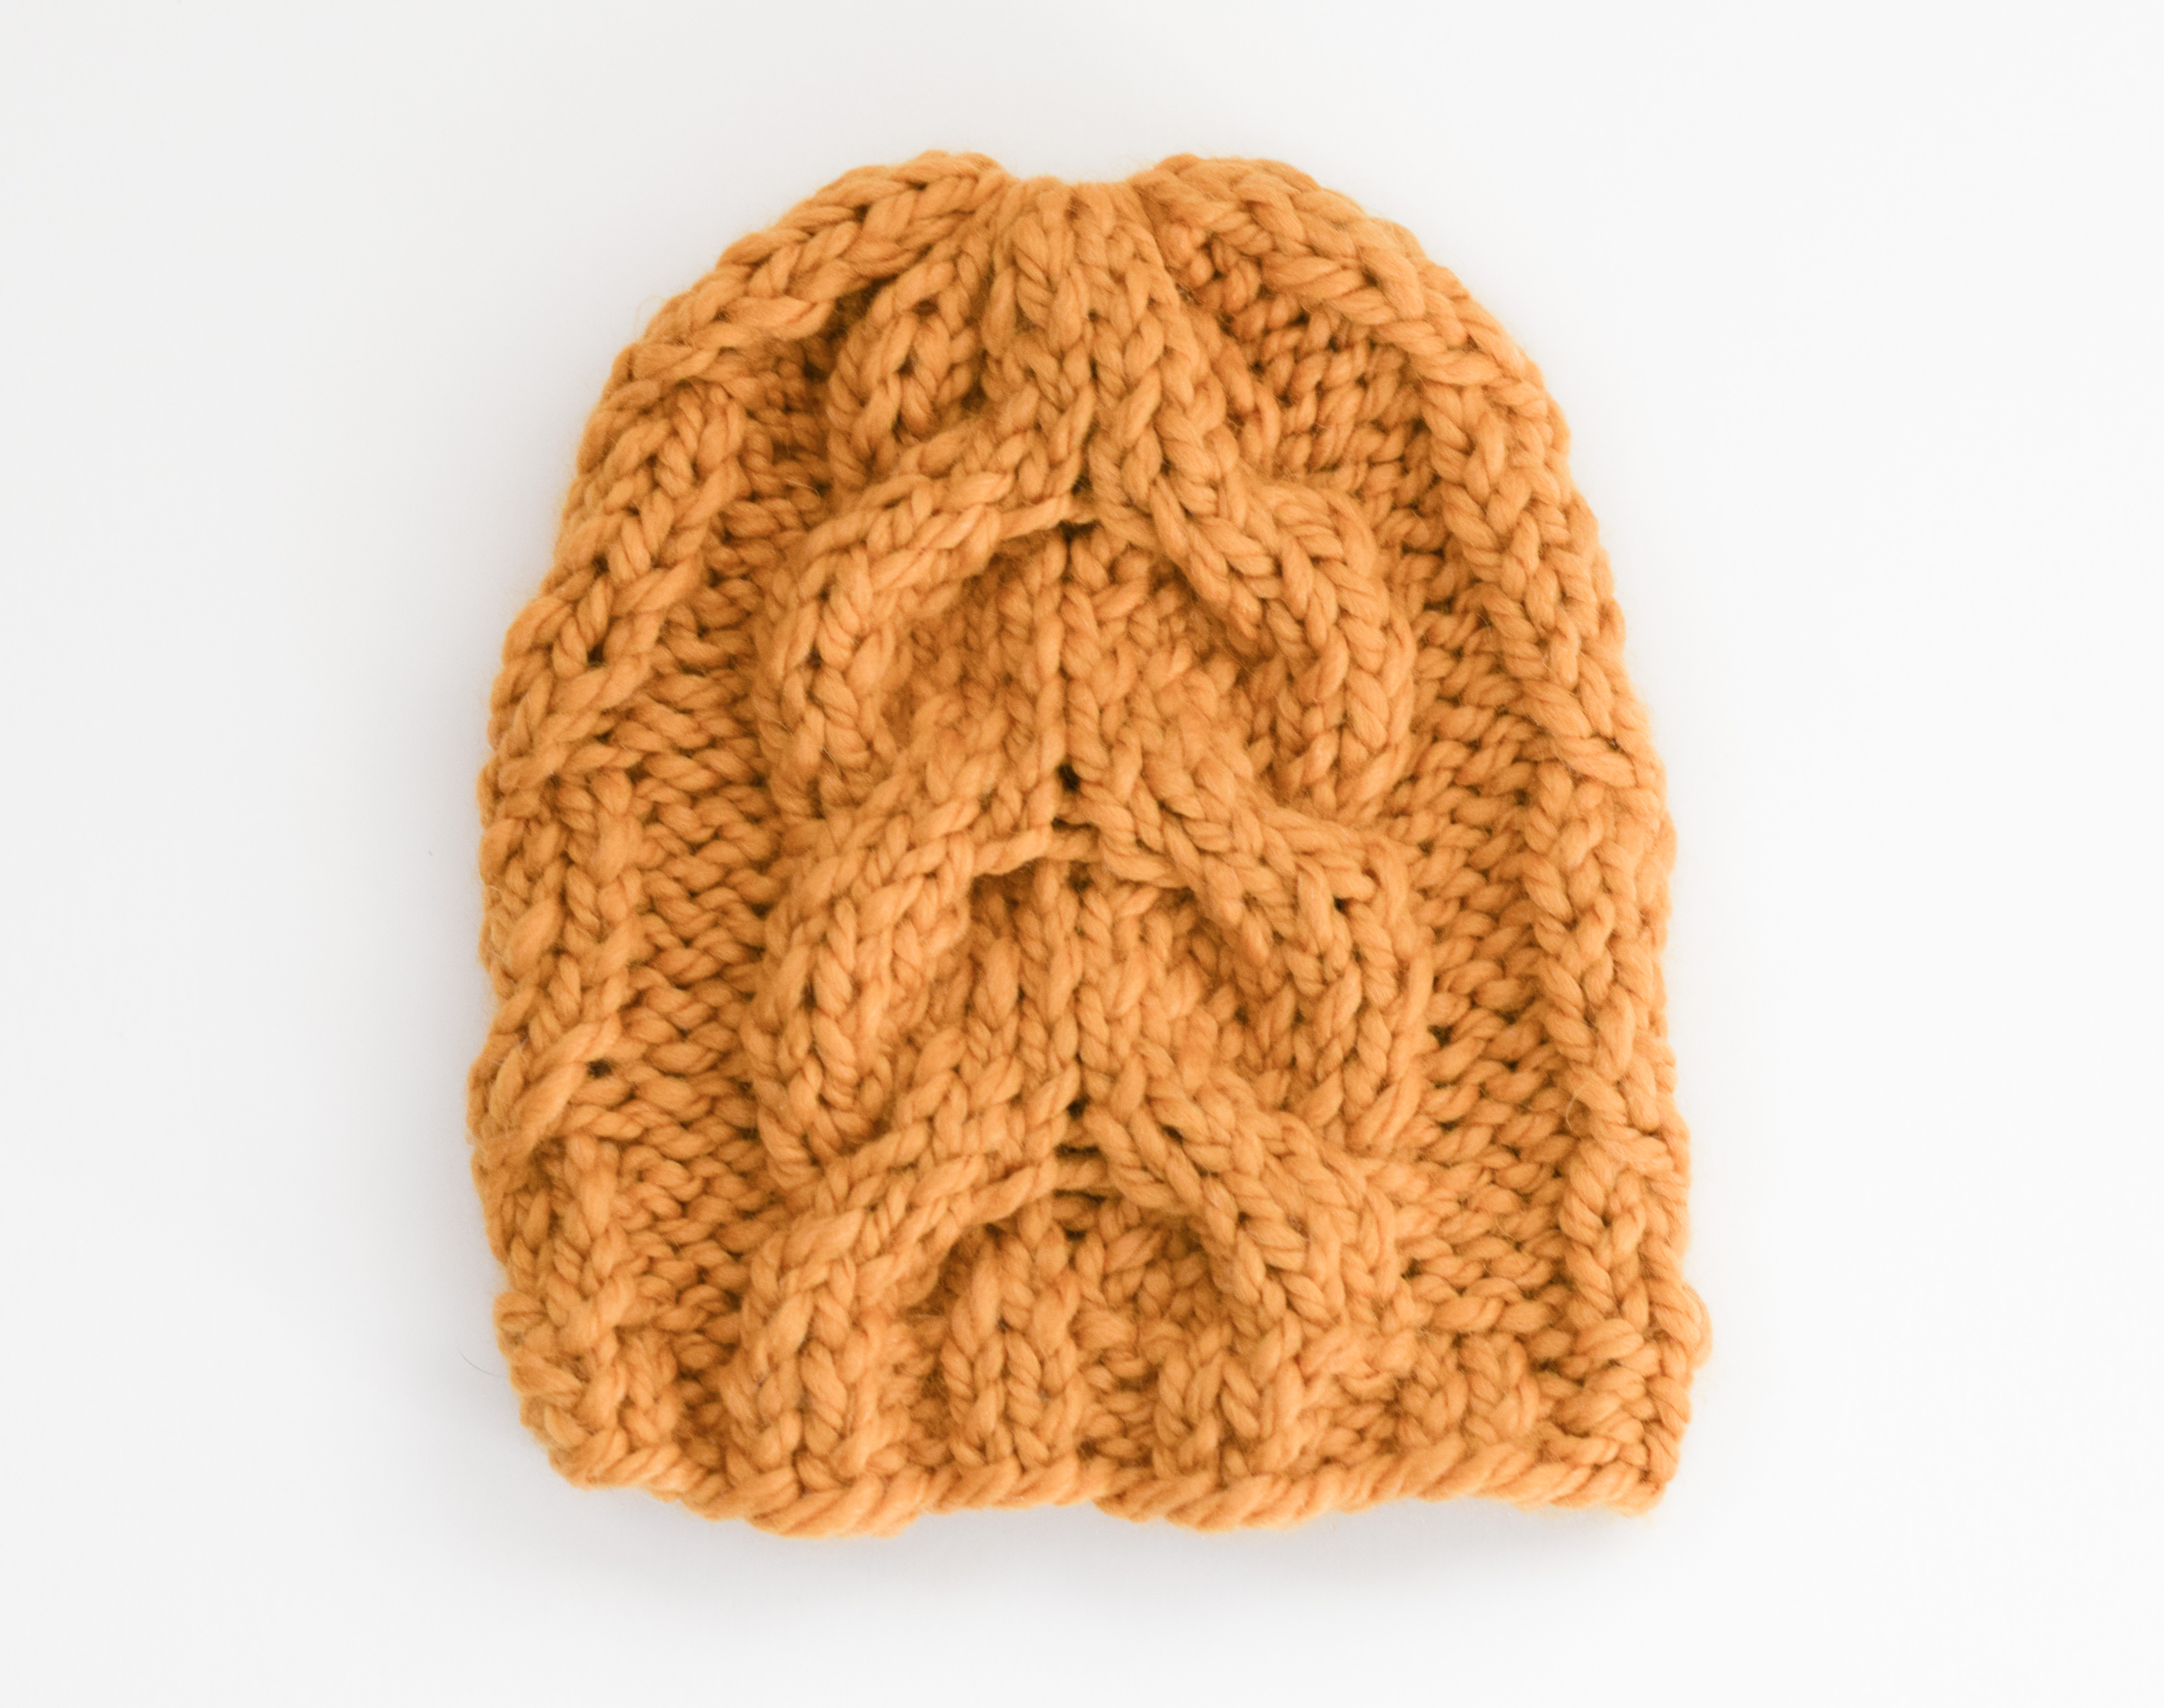
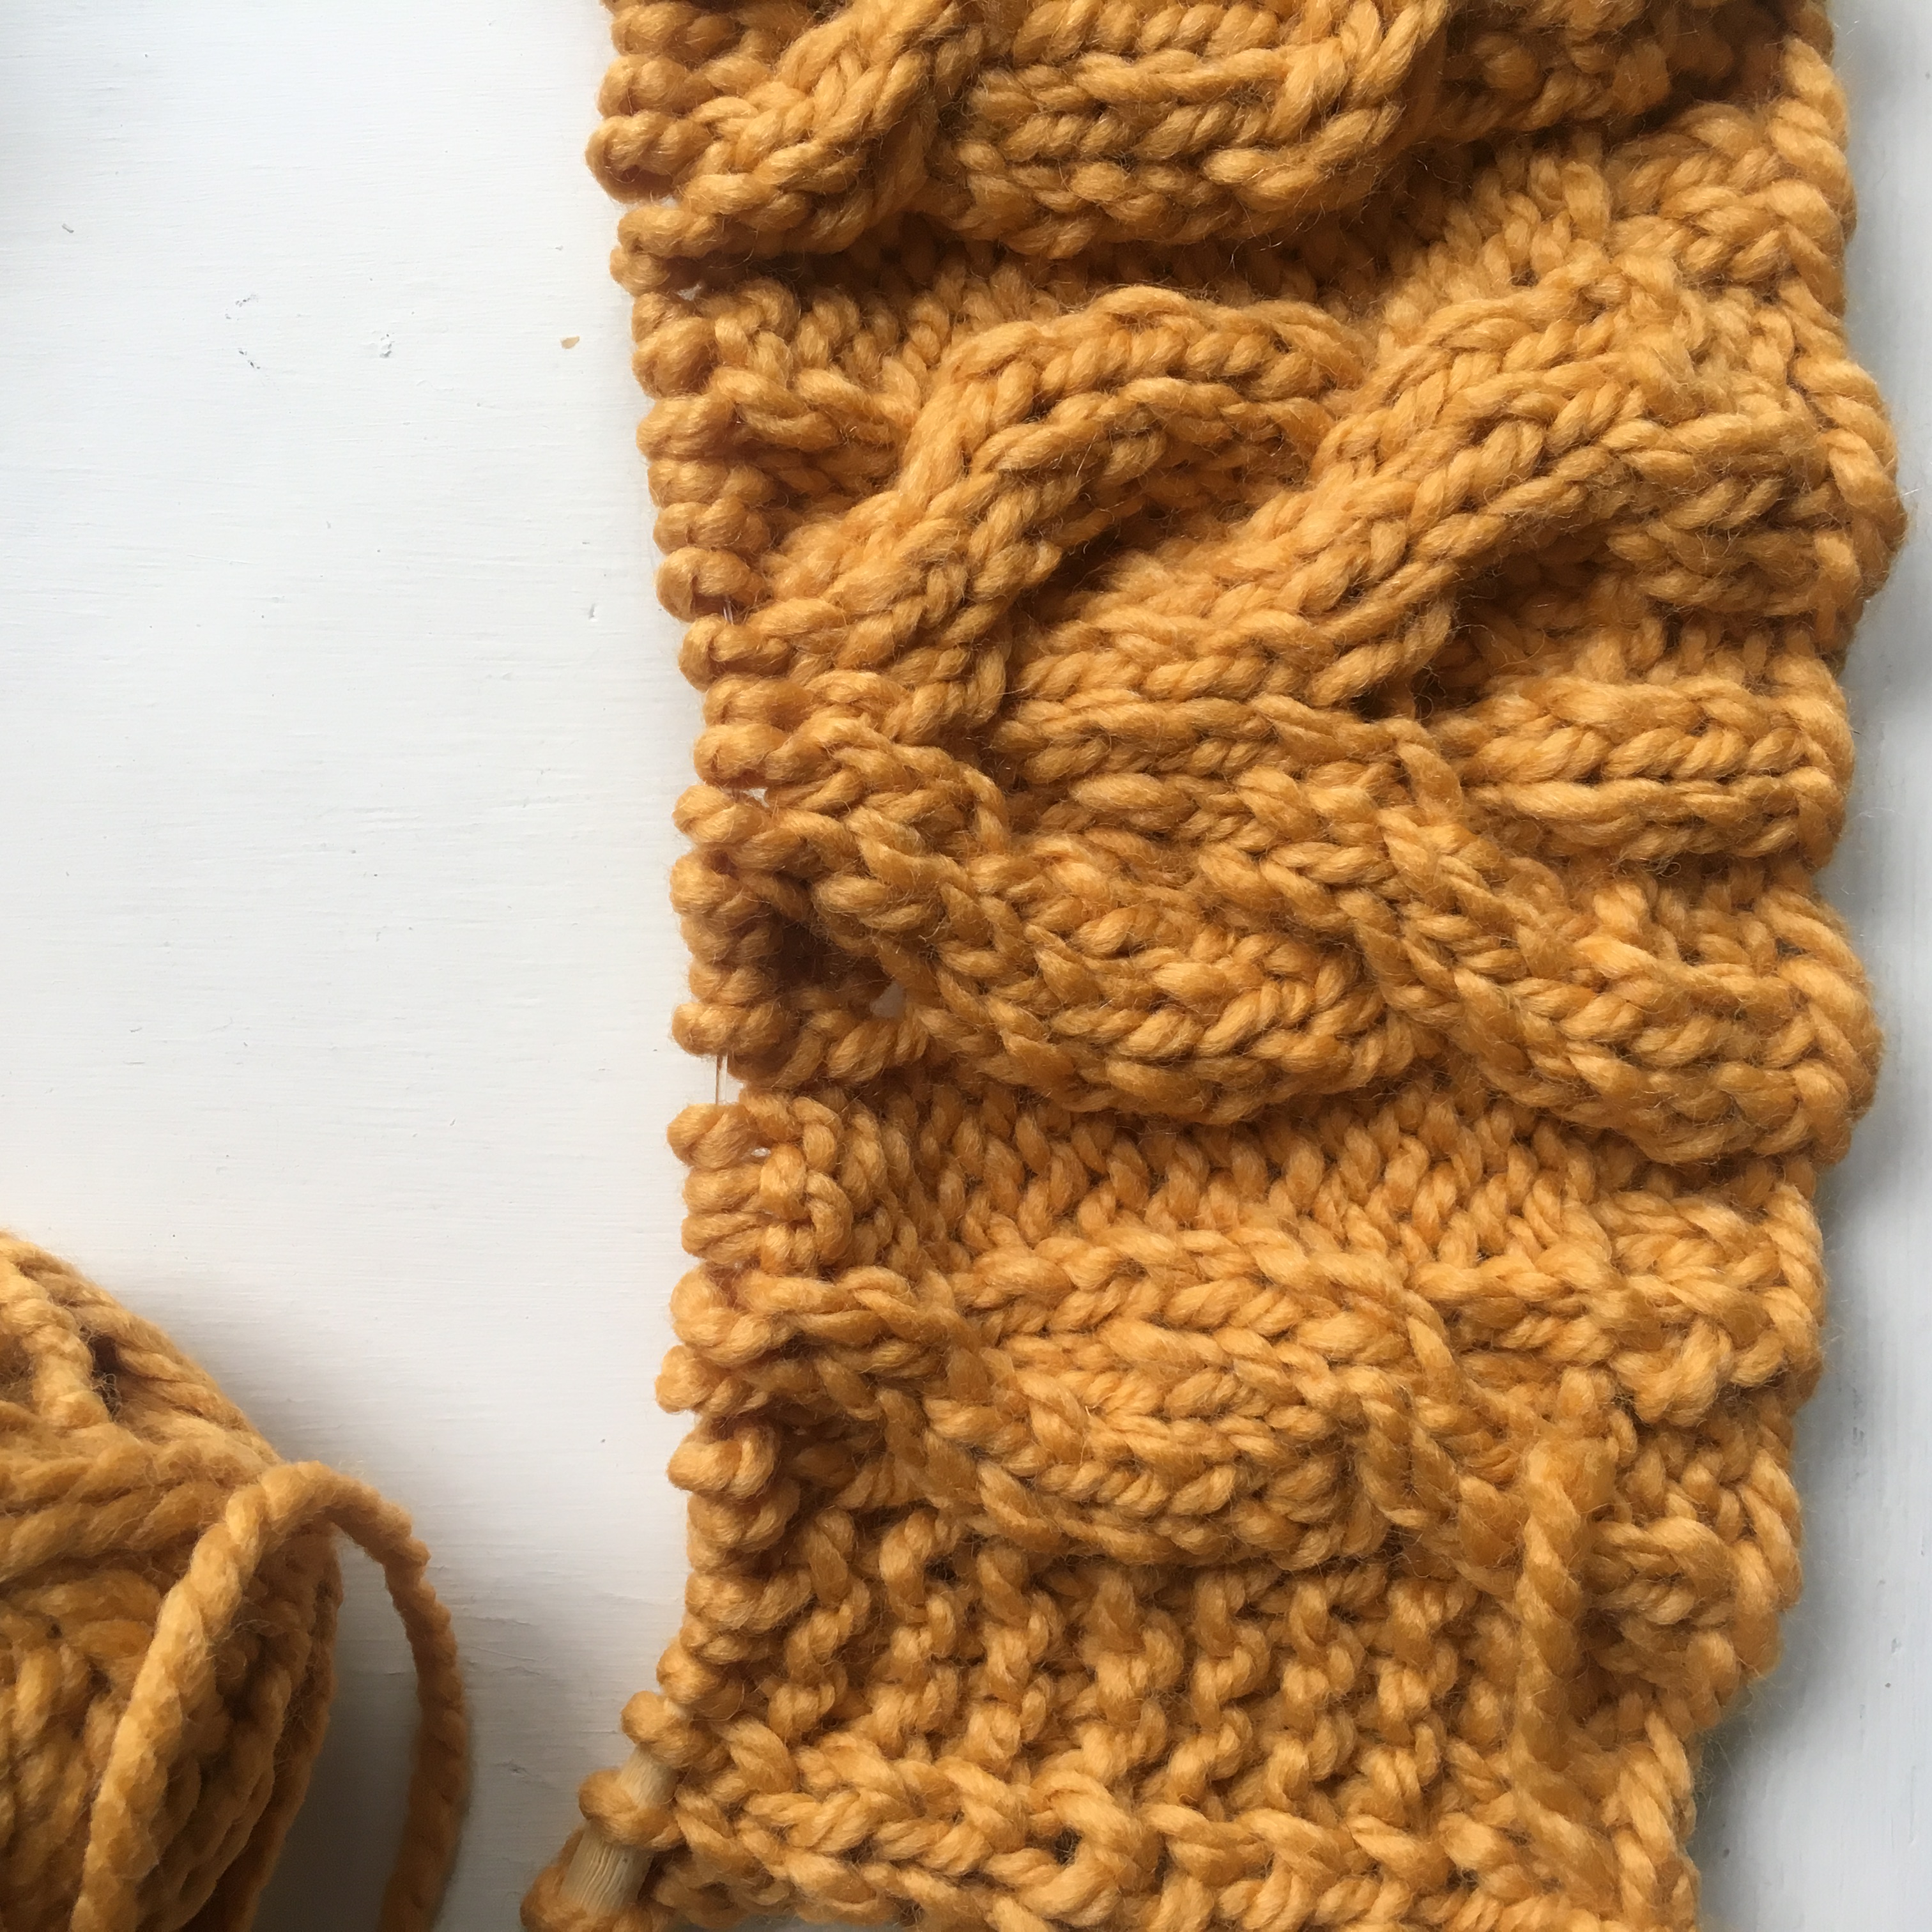
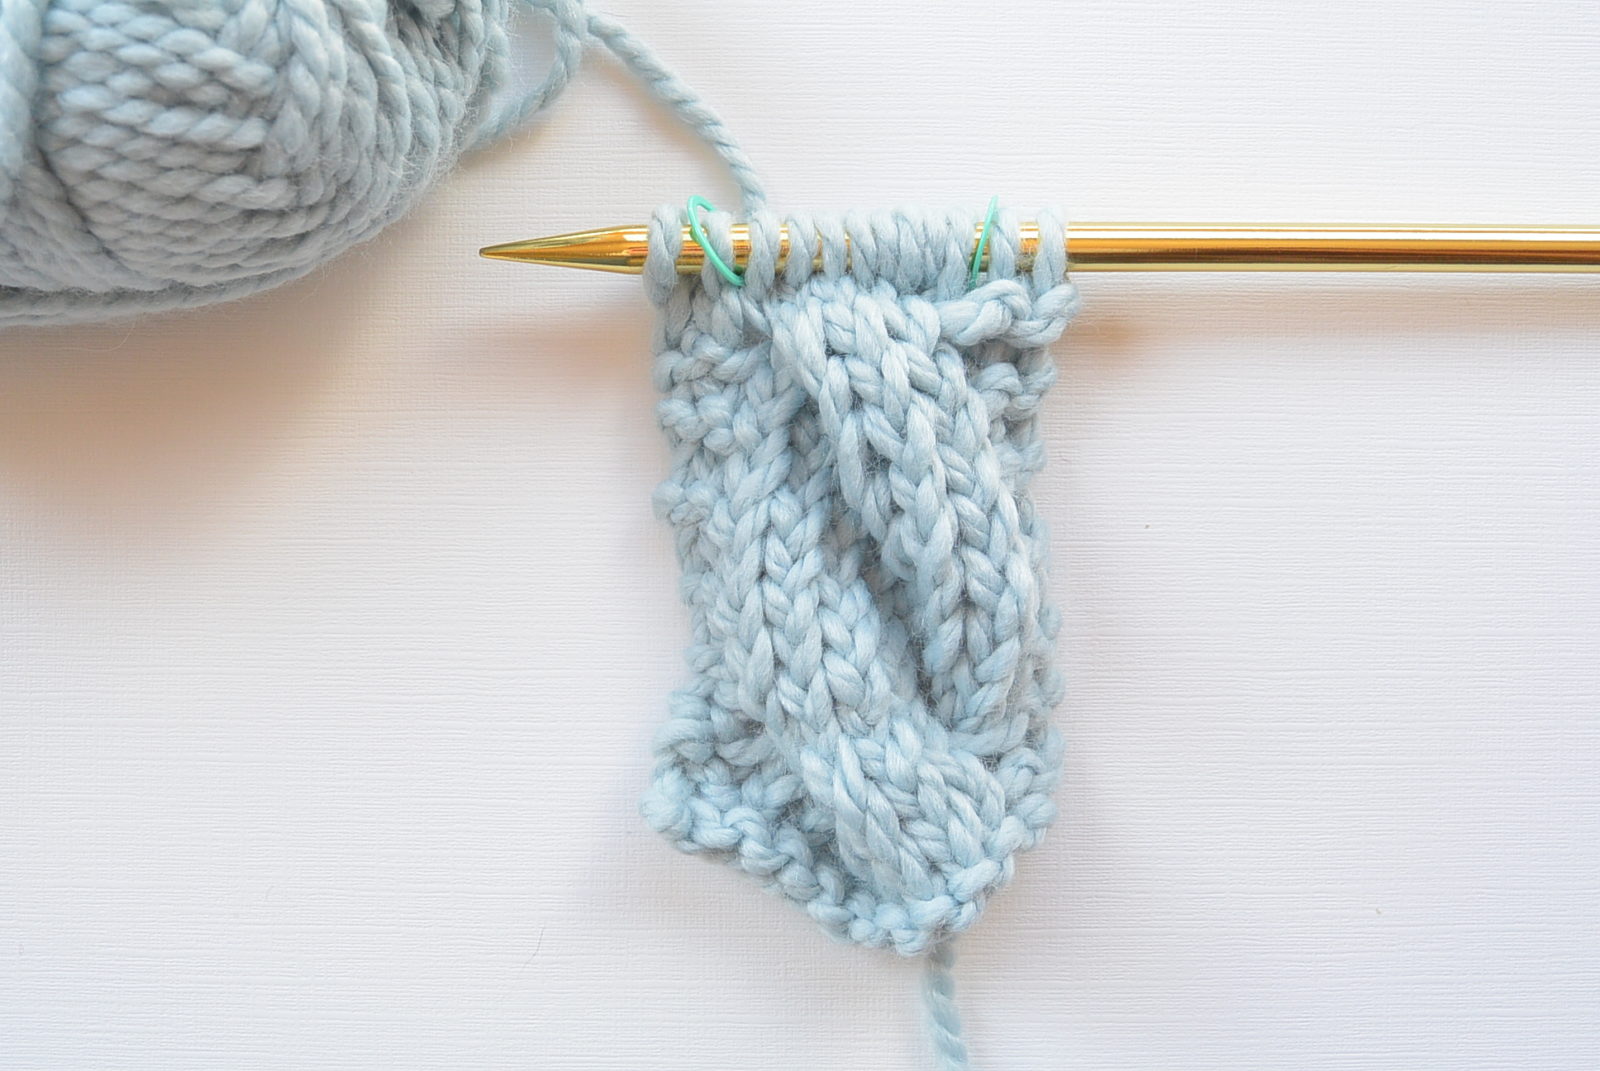
Above: This particular hat features a big, pretty inverted cable in the center and two smaller cables on each side. It’s flanked with reverse stockinette and some garter stitching.
In some of my previous blog posts I’ve talked about how cables seem intimidating, but they are super easy.
This hat is knit flat, so if you know how to knit and purl, you can definitely make it.
Unfortunately, my hubby wasn’t available to be my photographer for this one. While you can’t see how it looks when worn, I can assure you that it’s even cuter on than when it’s laying flat. I just love it!
So, before you get started, take a look at my “How To Knit A Simple Cable” blog post HERE.
That post explains exactly how it works and how you read the pattern. It is seriously SO EASY once you understand it. Basically, when you get to a “cable row”, you will slip a few stitches onto a separate needle to “hold” them. You then knit from you’re regular knitting needle, and then knit the stitches you’re holding. Give it a try and you’ll see how simple it can be. Even the big, glorious inverted cable on this hat isn’t difficult. 😉
You will also find some helpful photos at the bottom of this post showing how the hat came together!
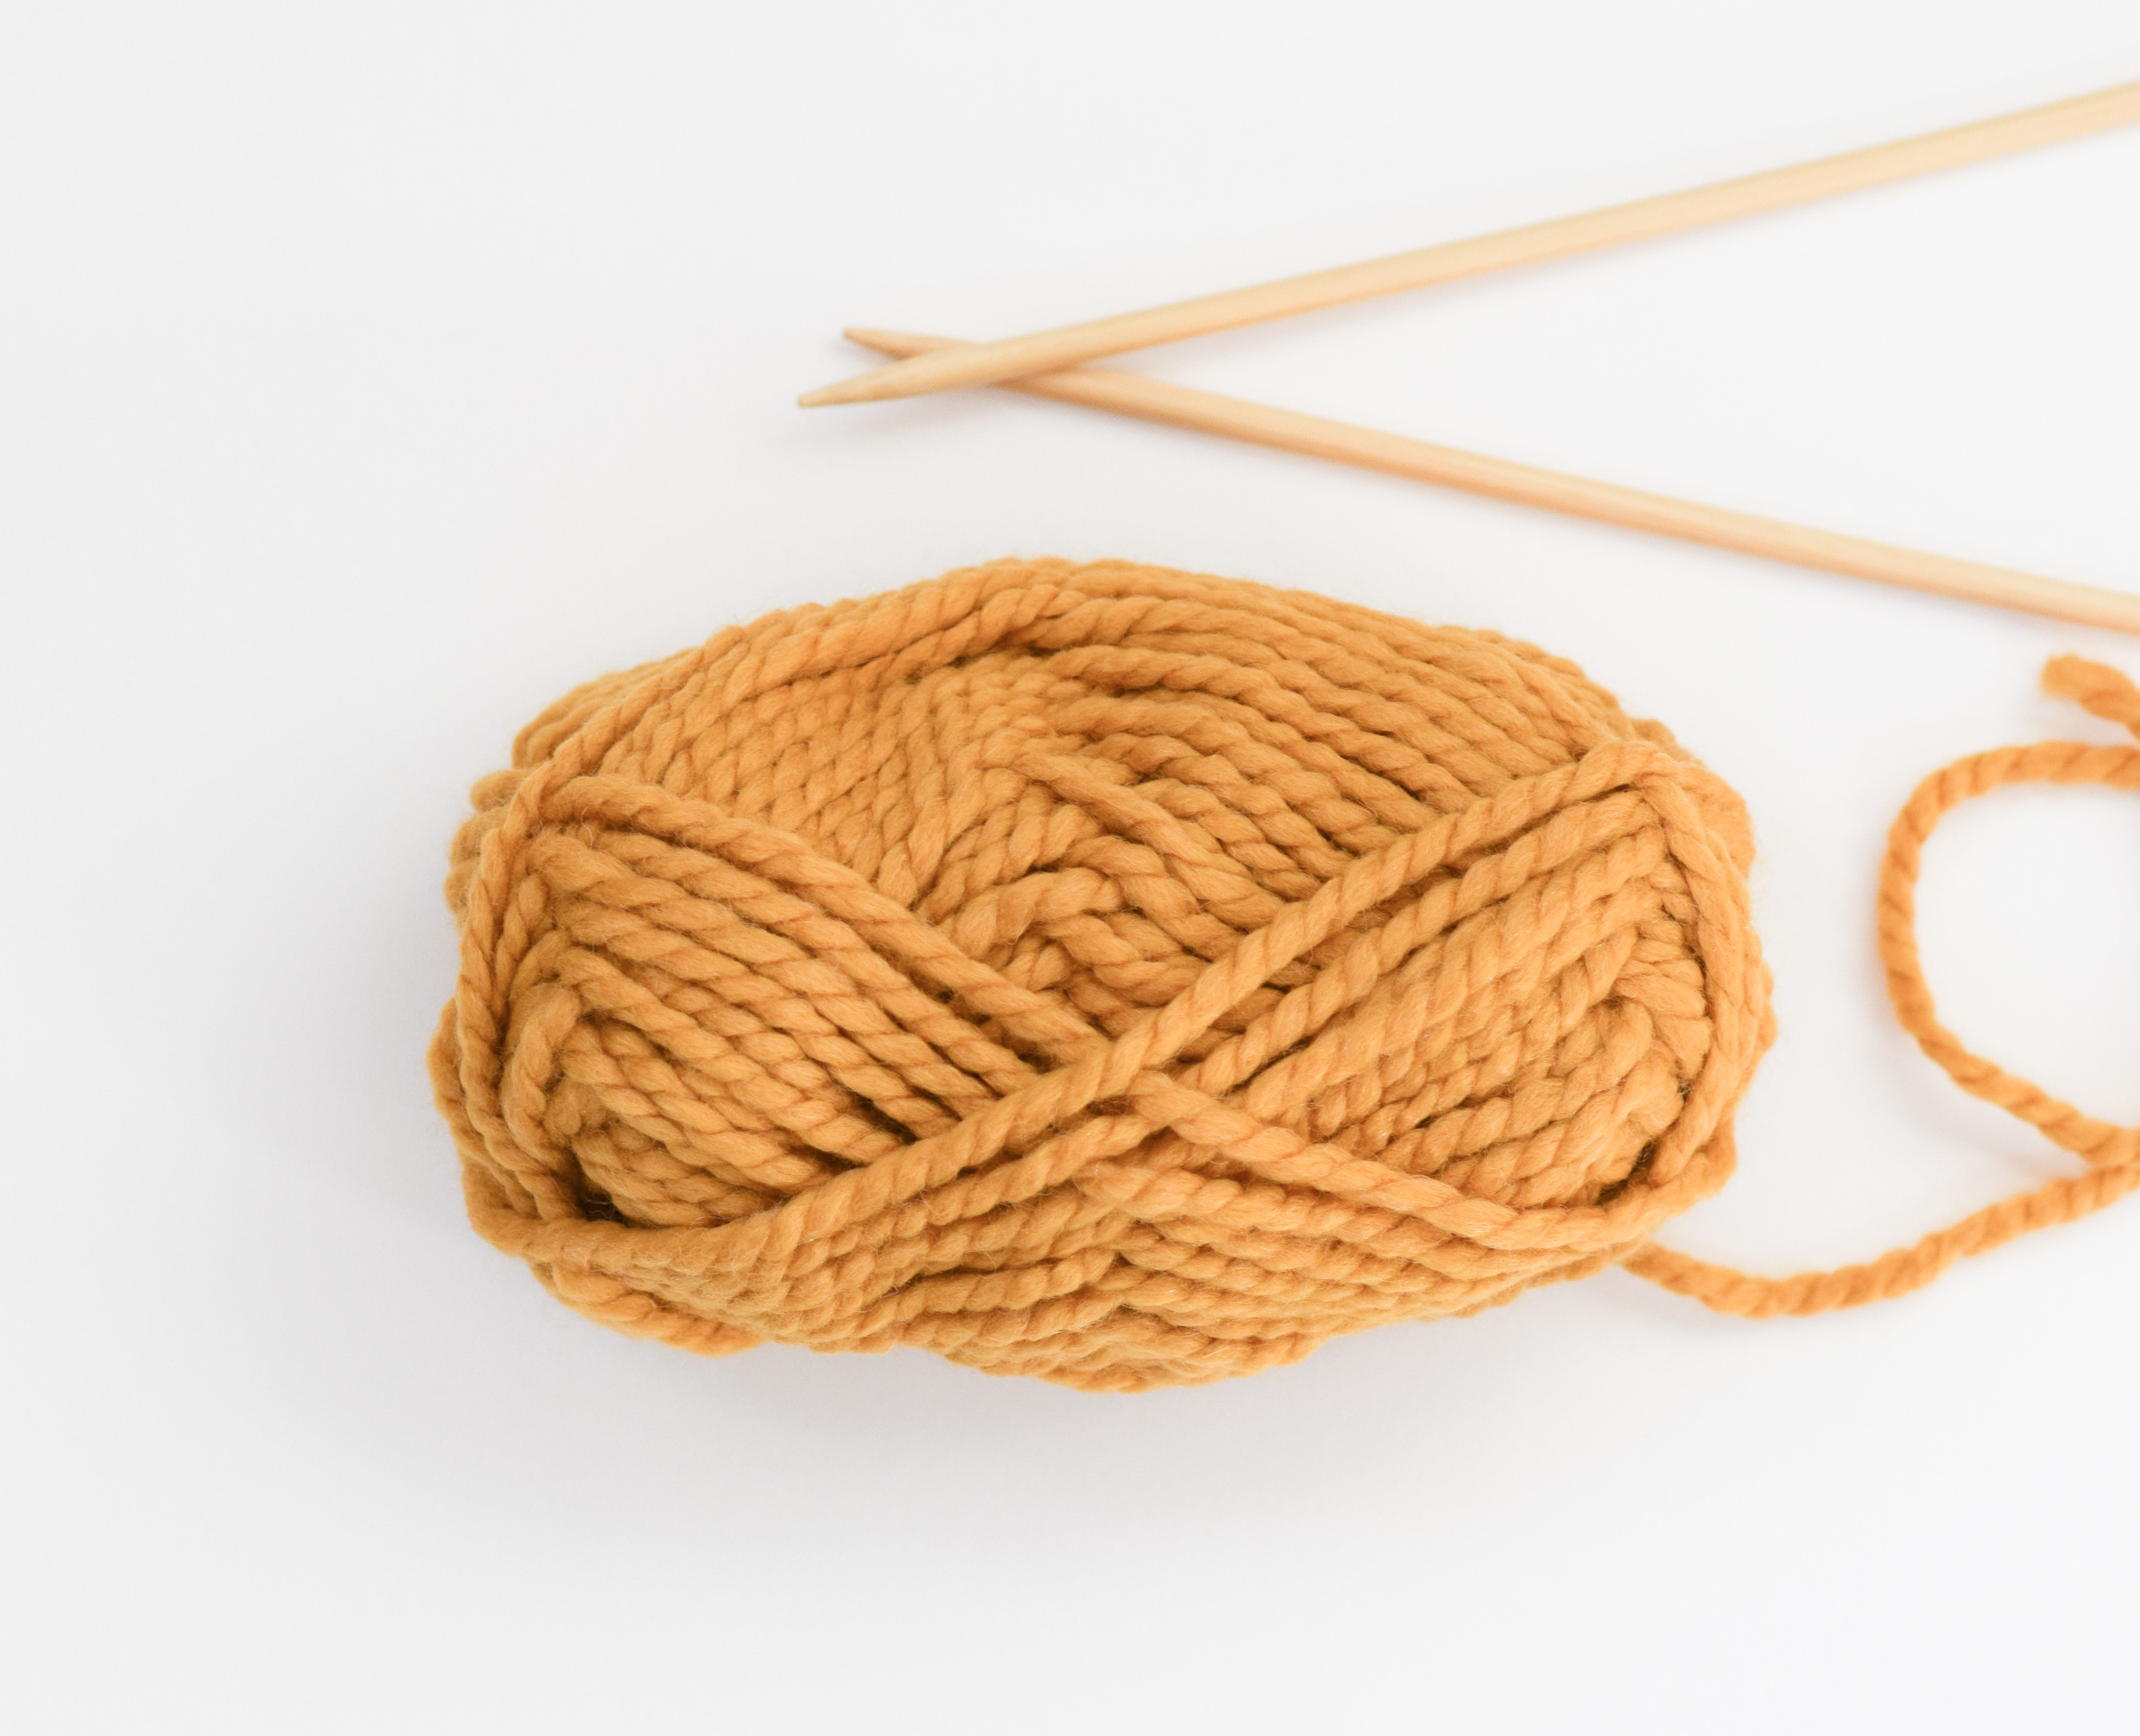
Above: If you follow me, you know this is probably my all time favorite yarn. Lion Brand Wool Ease Thick & Quick HERE.
Alright, let’s get to how you’ll knit this cable hat!
You’ll find the entire free pattern below or you may choose to purchase the ad-free, printable version from ETSY here. If you’re a Mamas Maker Member, your printable is waiting HERE.
Golden Waves Toque – Free Knit Hat Pattern
Description:
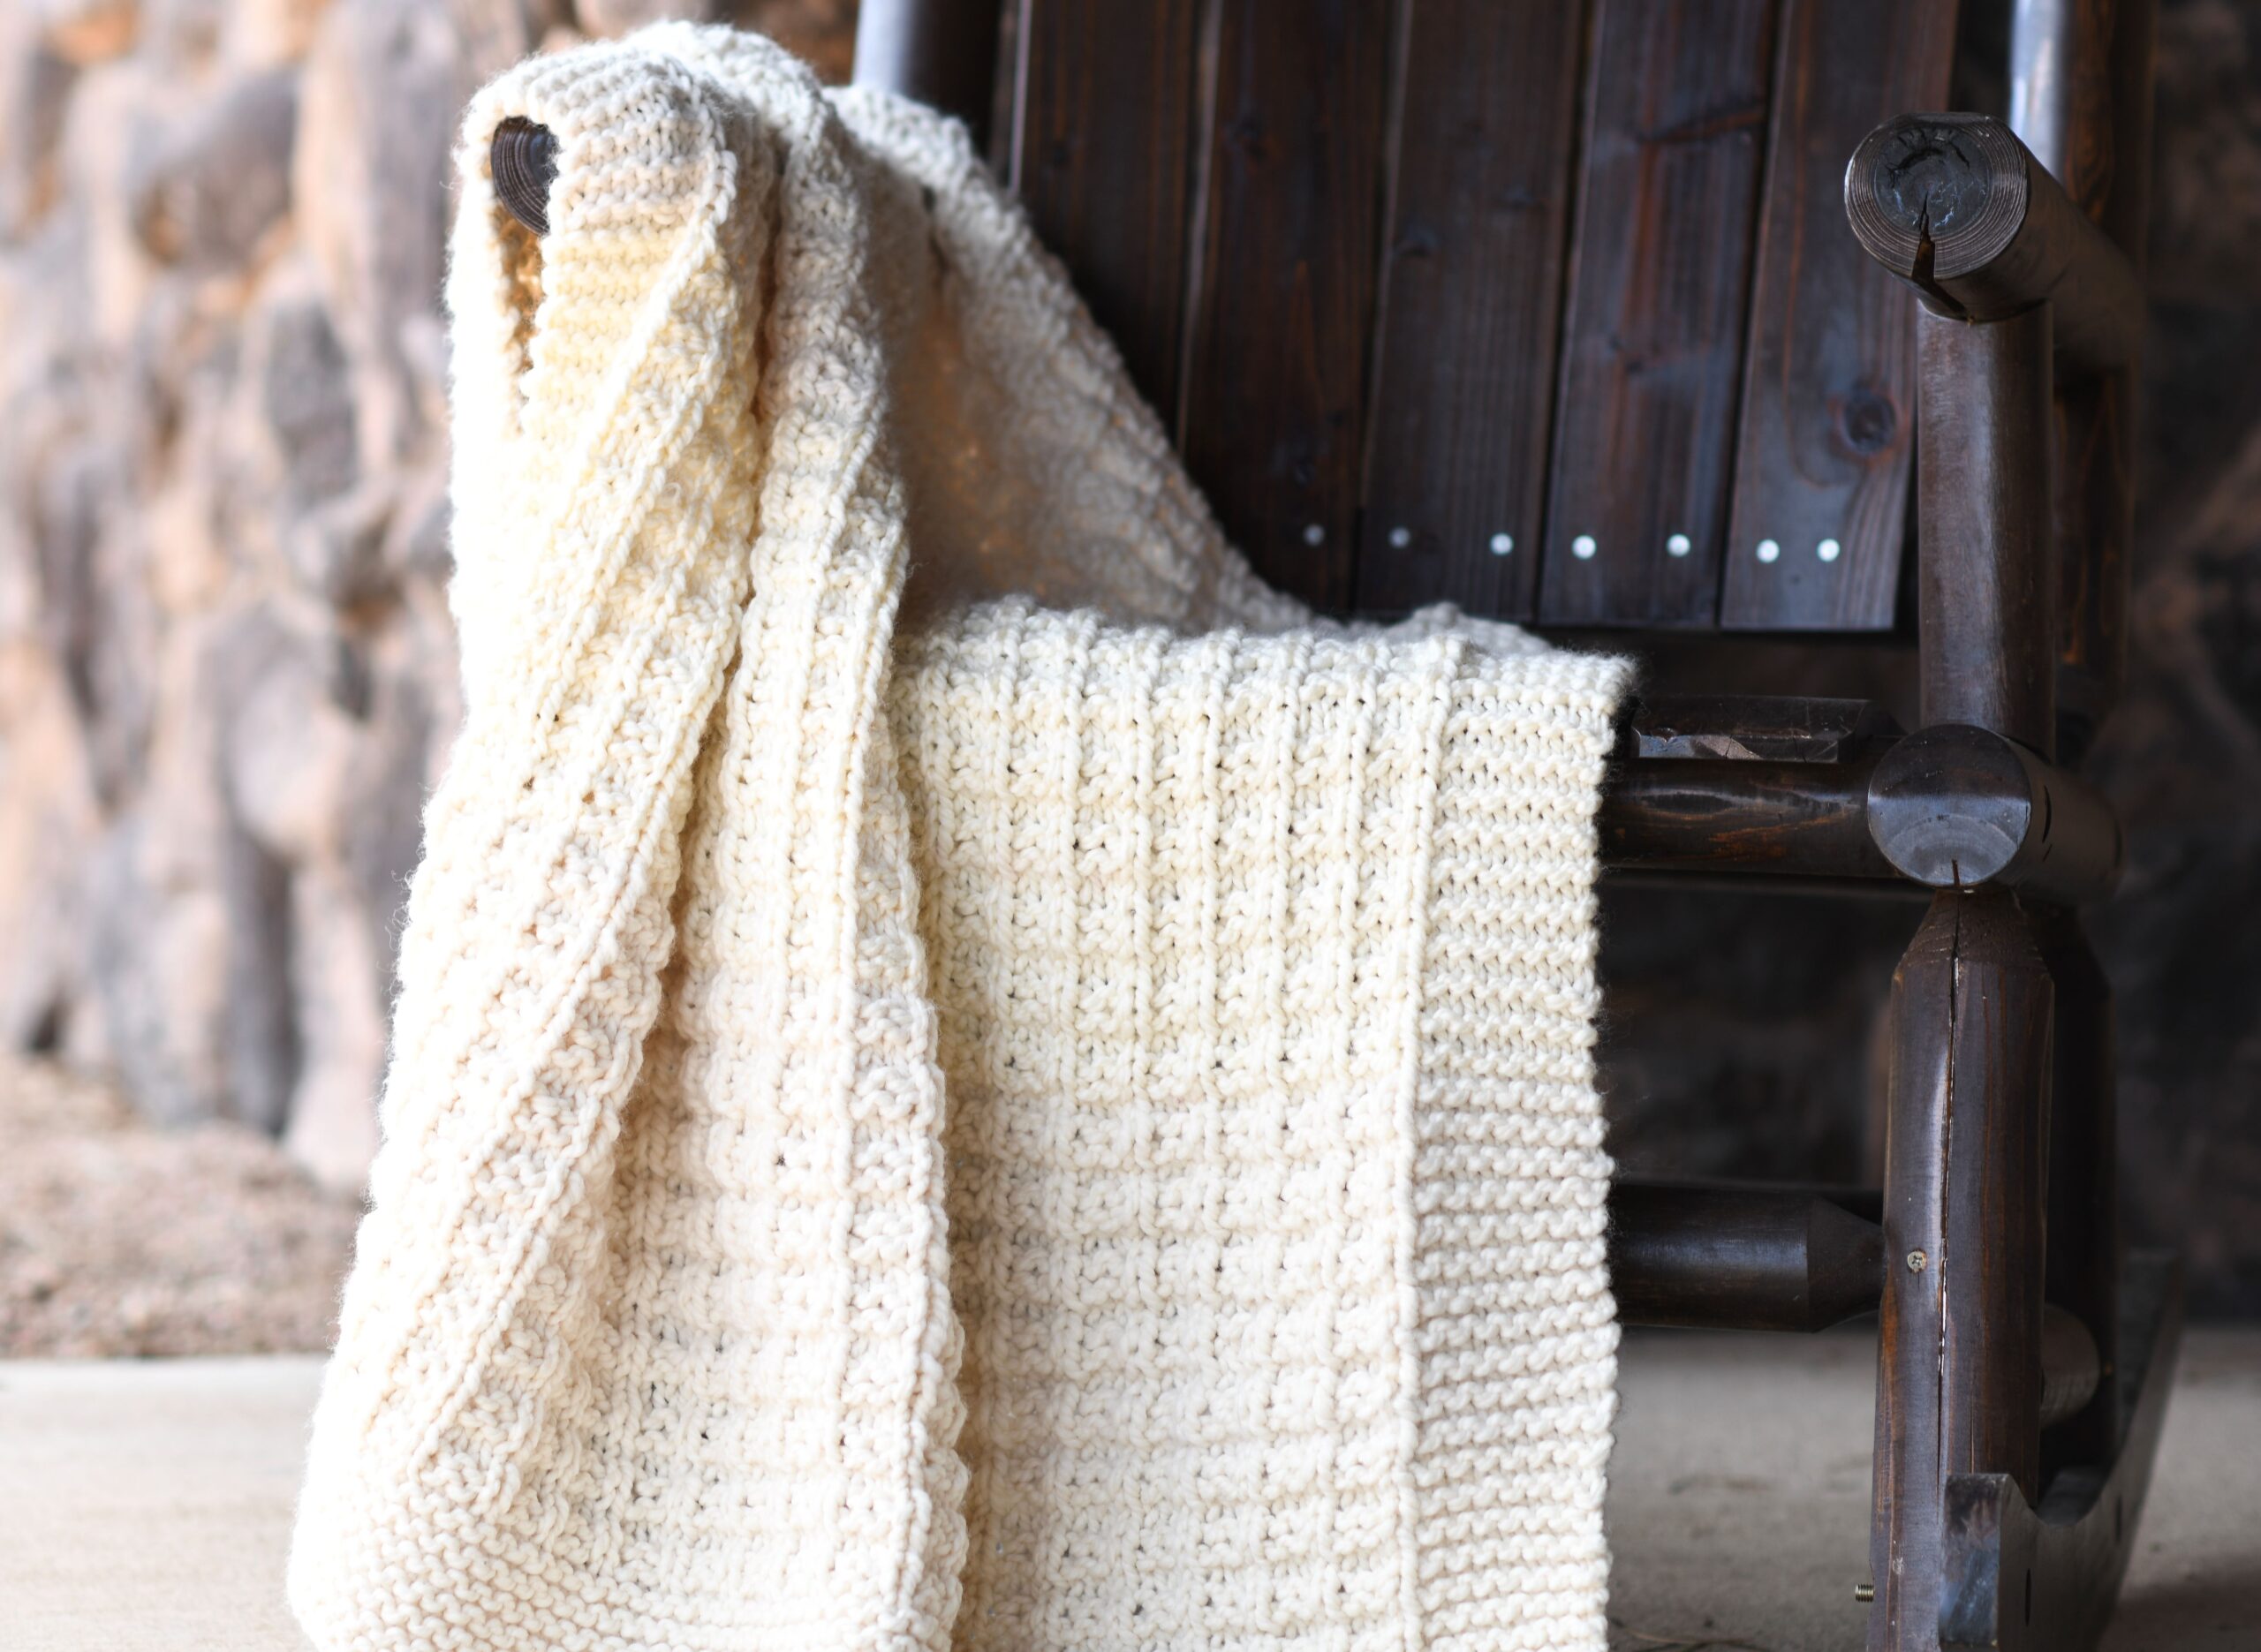
This squishy, warm, golden toque features an inverted cable on the front and smaller cables on each side. The texture and beauty of this hat isn’t only impressive, but it’s super fun and quick to make.
You will need:
US Size 15 knitting needles (circular or straight)
1 skein Lion Brand Thick & Quick in Mustard (HERE)
Scissors
Tapestry Needle
Cable Needles (optional – you just need something to hold your stitches)
Optional: Pom
Size:
Women’s Size approximately 9″ wide x 10″ tall NOTE: I like my hats to fit snug as they tend to stretch. However, if you need to make yours wider, simply cast on an additional 4 sts or consider going up a needle size. The extra two stitches on either end will be the same as the beginning and ending stitches in the pattern.
Gauge:
Approximately 8 sts (garter stitch) in 4″
Abbreviations & Skills:
k – knit
p – purl
Single 4 stitch cable
2/2 RC – 4 stitch right cable. Slip 2 stitches to cable needle and hold in back, k2, k2 from cable needle
2/2 LC – 4 stitch left cable. Slip 2 stitches to cable needle and hold in front, k2, k2 from cable needle
Inverted Double Cable
3/3 RC – 6 stitch right cable. Slip 3 stitches to cable needle and hold in back, k 3, k3 from cable needle.
3/3 LC – 6 stitch left cable. Slip 3 stitches to cable needle and hold in front, k3, k3 from cable needle.
PATTERN
Cast On 40 sts
Ribbed Bottom Edging
Rows 1 – 4 K2, p2 across the row
Body
Row 1 K6, p1, k4, p3, k12, p3, k4, p1, k6
Row 2 P3, k3, k1, p4, k3, p12, k3, p4, k1, k3, p3
Row 3 Repeat row 1
Row 4 Repeat row 2
Row 5 K6, p1, 2/2 LC, p3, 3/3 LC, 3/3 RC, p3, 2/2 RC, p1, k6
Row 6 Repeat row 2
Row 7 Repeat row 1
Row 8 Repeat row 2
Now, repeat rows 1 – 8, in that order, 2 more times.
Next, repeat rows 1 & 2.
Next, draw the yarn through the loops on your needle. Cinch them all together to close.
Seam
Now you will seam up the hat! Using a length of yarn and your tapestry needle, you will work a mattress stitch seam to sew the hat together.
Step 1: Cast on and work the ribbed edge. Next, get started with your cables!
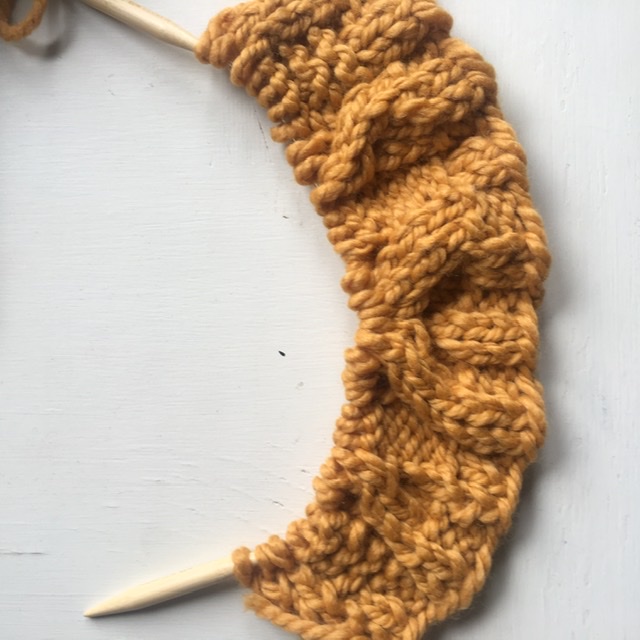
Step 2: Follow the pattern and repeat rows 1 – 8 as instructed
Step 3: Once finished knitting, pull yarn through loops on the needles
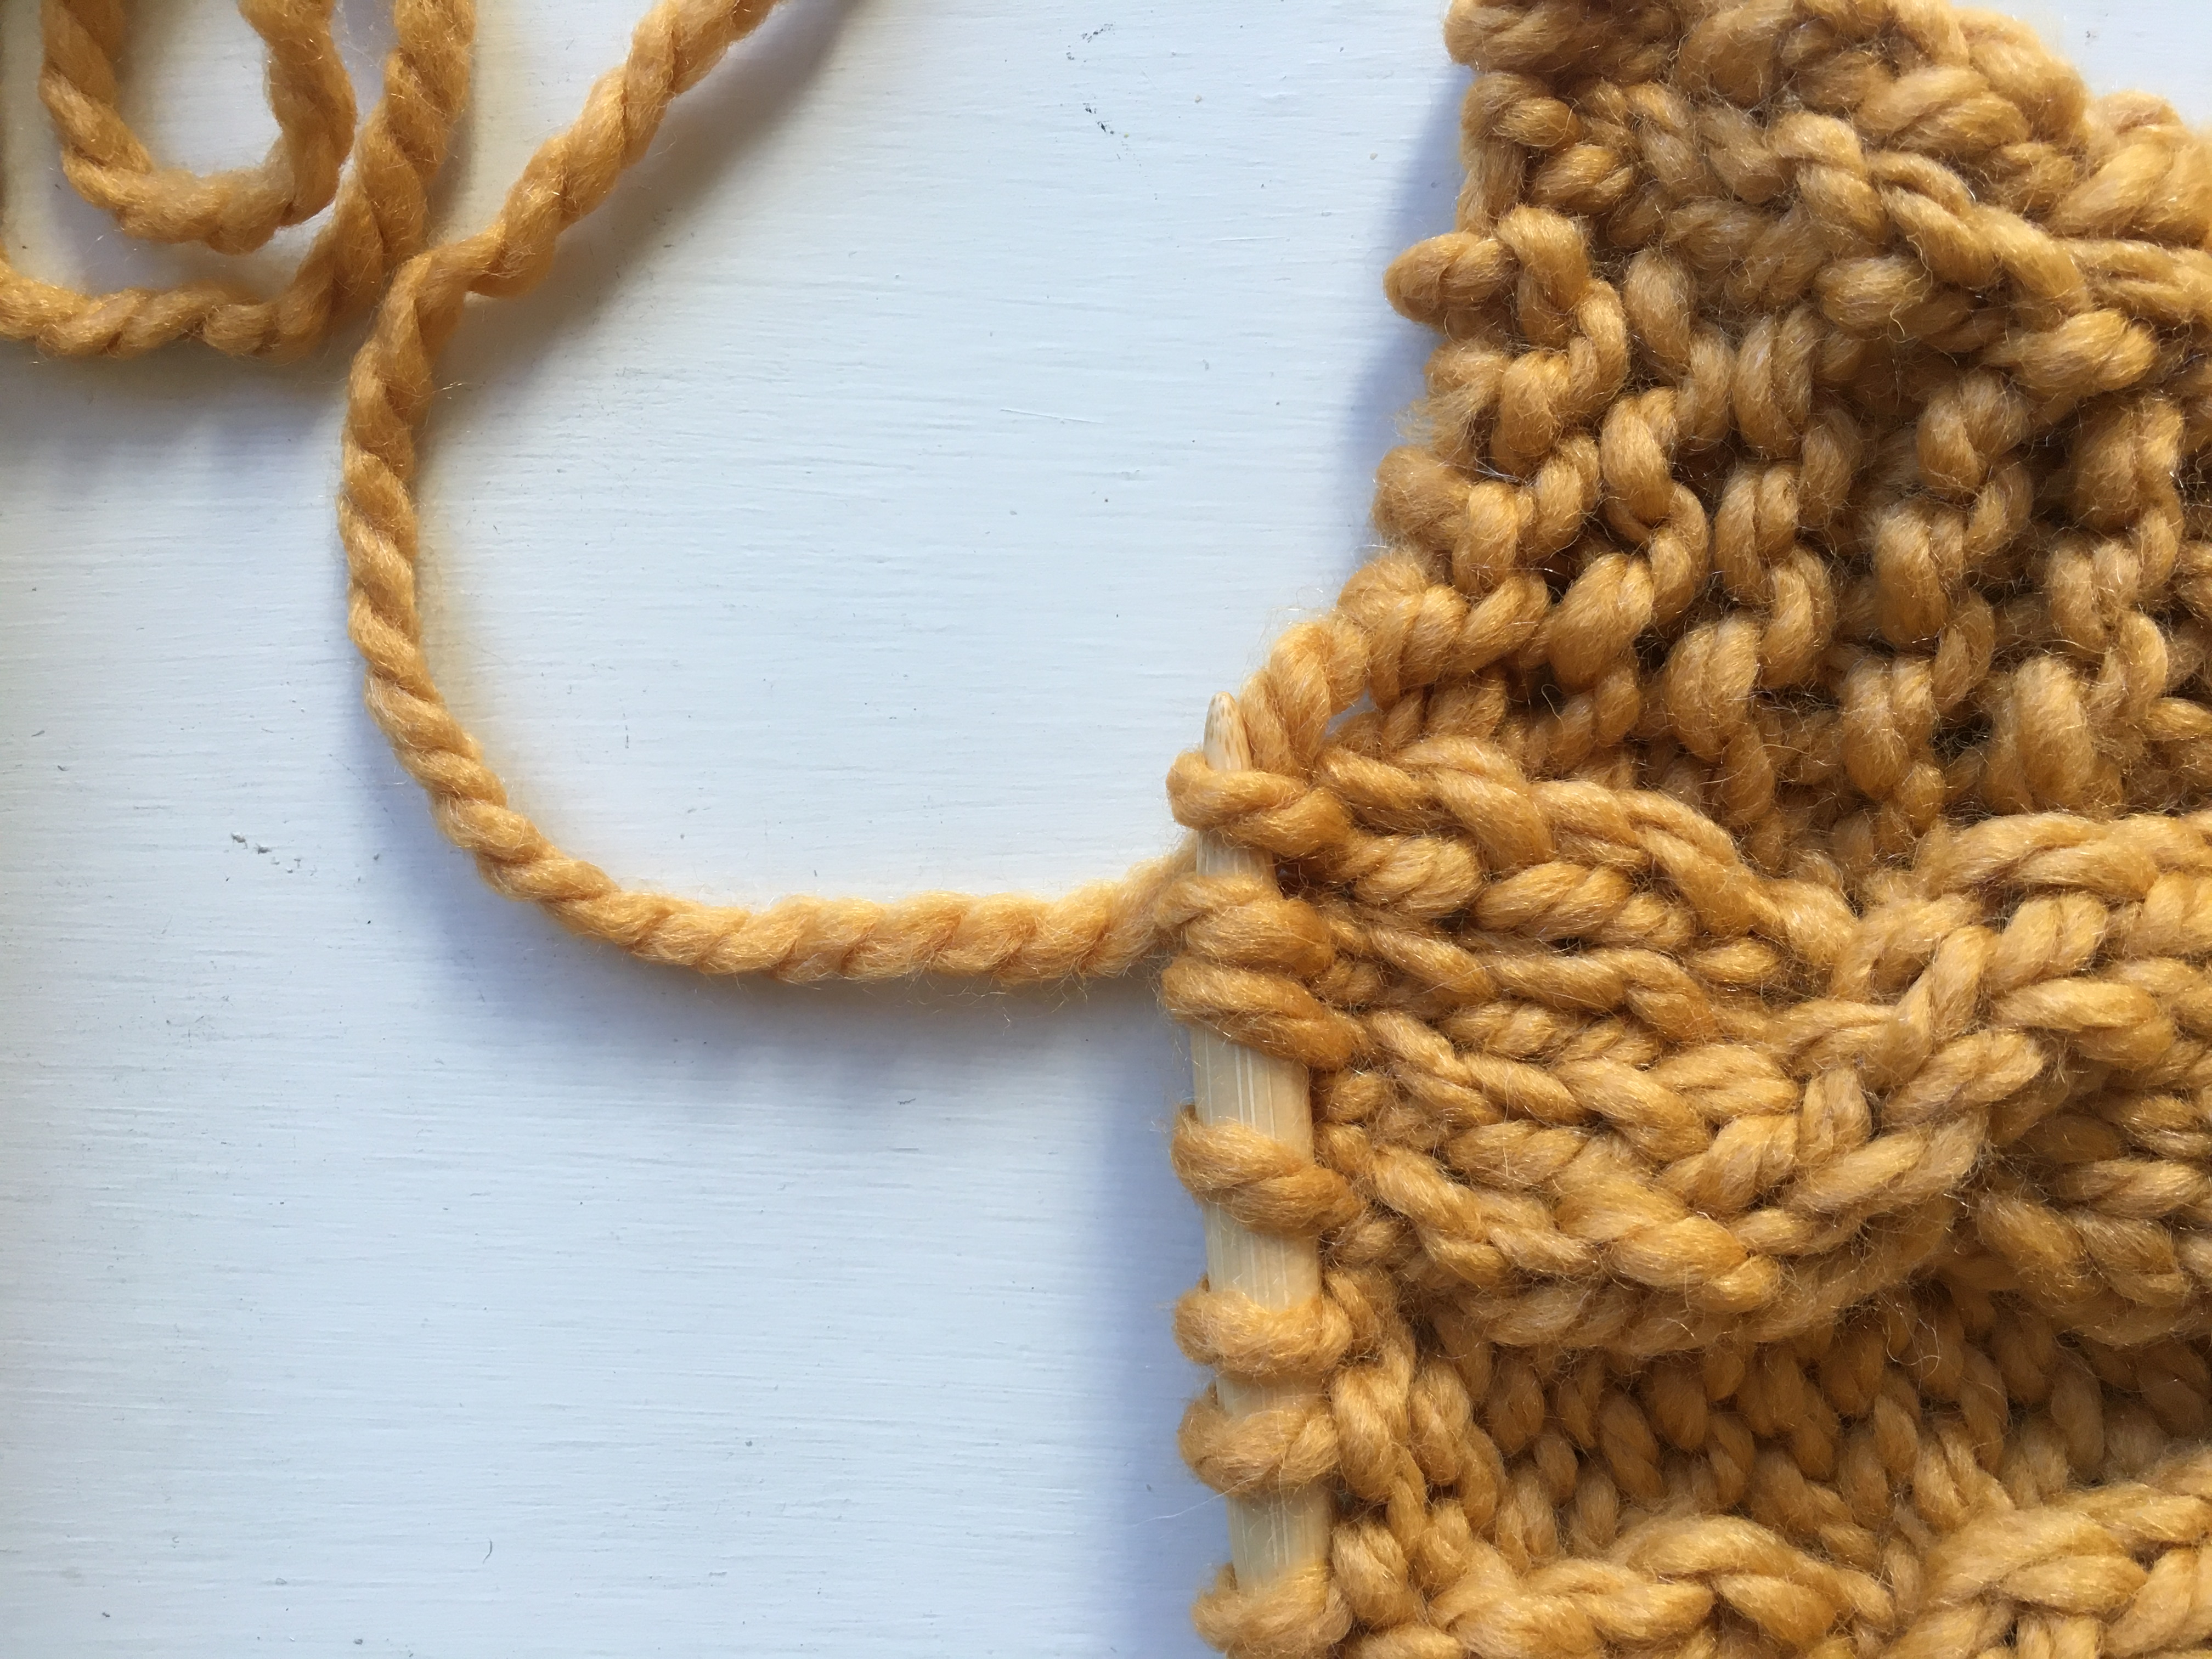
Step 4: Cinch the top closed and tie off.
Next, use the mattress stitch seam (since it’s stockinette) to sew up the two sides together.
Add a pom or leave it plain. I still don’t know which look I prefer, but I’m leaning toward liking it more with the pom. How about you?
I’d love to see if you make one! Simply tag me on Instagram @mamainastitch #mamainastitch
Enjoy cabling my friends!
XO
Jessica
Want more cables?

How do you make it longer so it’s slouchy.
You can just continue the pattern repeat for as long as you’d like. So repeat rows 1 – 8 until it’s the length you’d like. Great question!
I am not familiar with the Mattress Stitch per name. Can you advise, please
Perfect! I’m making a poncho out of this exact yarn and color and pattern! Made a green one but I love this gold color! Can’t wait to do a matching hat..thank you!
As with all of your patterns, this hat is beautiful. Any chance of a crochet version?
Do you by any chance have the circumference of this hat, even a guess. I would just like a ballpark idea so I know if more or less needs to be cast on for a teen size and a larger size adult head. Thank you so much in advance.
What adjustments would I make for knitting in the round?
When you say US Size 15 knitting needles do you mean 15 mm or US 15 = 25 mm?
It’s about 18” around or a little over that.
US 15 is 10 mm
I prefer to knit in the round. What adjustments do I need? Thank you !!
I’m assuming the knitting needles are US 15, not 15 mm? Please advise.
Wow! I love this hat. The color makes it very on trend, too. I’m sure it is very easy to knit. I think I’m going to try this pattern for a scarf or a cowl. I’ve got yarn for a scarf and a hat and I think this pattern is perfect.
Are you going to make a couple of patterns for kids soon? I’d love to have a similar easy hat pattern for pre-school kids for Xmas. Maybe a sweater, too? I made the cat hat and the bunny hat for my grandniece when she was a toddler. I recommend them for people who are looking for patterns to make as presents.
Is it possible to have a cuff, for added warmth, by doubling the ribbed section? Or do you think it would detract from the cabling?
I finally learned how to do cables! Tysm!
Thank you for this adorable hat pattern. Can’t wait to get started on it. And I casted my vote for you! Your the best!!
Amazing!! Congrats Natalie!!!!
I have been trying to make this hat but; the stitch count is off. cast on 40 row 1 of the body is 42 stitches and so on…. help…
Sorry – I’m not understanding your question. Where are you seeing 42? Or how are you getting it? Many people have made this without an issue but I do want to understand if there’s something I’m missing. Thanks!
Can you recommend a source and/or brand of furry Poms? One that can survive the washer and not come out ruined?
You could definitely add a cuff! I think it would be awesome!
I’m not answering your question but I’ve got a tip for attaching fake fur and yarn poms. Instead of sewing them on, I use a transparent sew-on push button in plastic. It’s easy to remove the pom before washing and the hat can be worn without the pom, too, for another style option.
Thanks so much for the tip!!
I’ve made two of these hats so far and have one to go. They knit up so quickly! My seaming is improving too! Thank you.
I love your patterns especially the toques Where can I buy the Pom poms made of look alike fur and the white fur looking Pom Pom ?
Great hat! I can’t wait to make it. Can it be knit in the round and if so, are there any adjustments needed to the pattern? Thank you.
I have finished the hat & thank you for this great pattern. However, I do not understand the final 2 steps of drawing yarn through loops on the needle (??) & then using the mattress seam to stitch the two sides of the hat together (???). I have looked at the pictures you posted (thanks!), but I am still copletely clueless as to how to proceed. Do I bind off at the end, or not? Do I cut a piece of yarn in order to draw yarn through the loops on the needle? Please, someone, help, or I will not be able to finish this hat. Thank you so much! :0)
I answered my own question about cinching the top of the hat by using this You Tube video, FYI, if anyone else is as clueless as me! Hope it helps someone out there in knitting land! :0)
I love this hat and pattern a lot. Thank you so much. I made my small dog Maverick a sweater using this pattern. I repeated the pattern 5 times instead and decreased at the top to make a collar by k2 p2 four rows. I made a second piece plain and shorter for under belly. I mattress stitched it together, added small cuffs for sleeves. It looks lovely on my little dog. We match on walks.
do you have a pattern for balaclava toi knit for winter for men
How adorable!! I’d love to see a photo – feel free to email one to me at mamainastitch@gmail.com