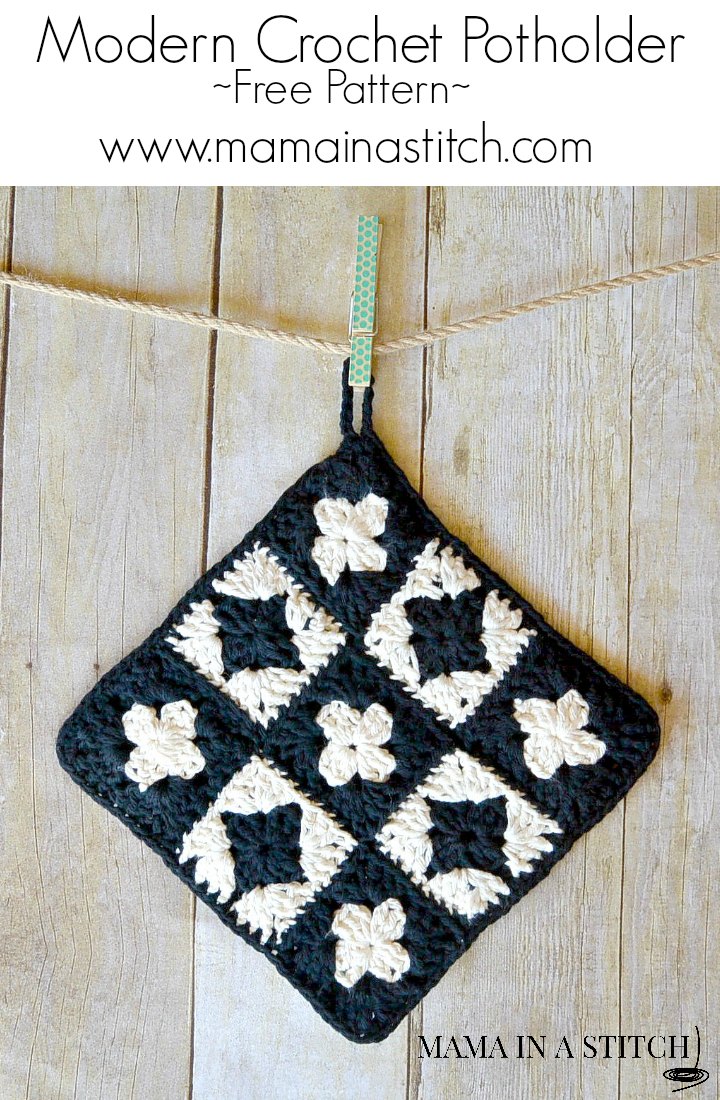
Granny Square Potholder Crochet Pattern
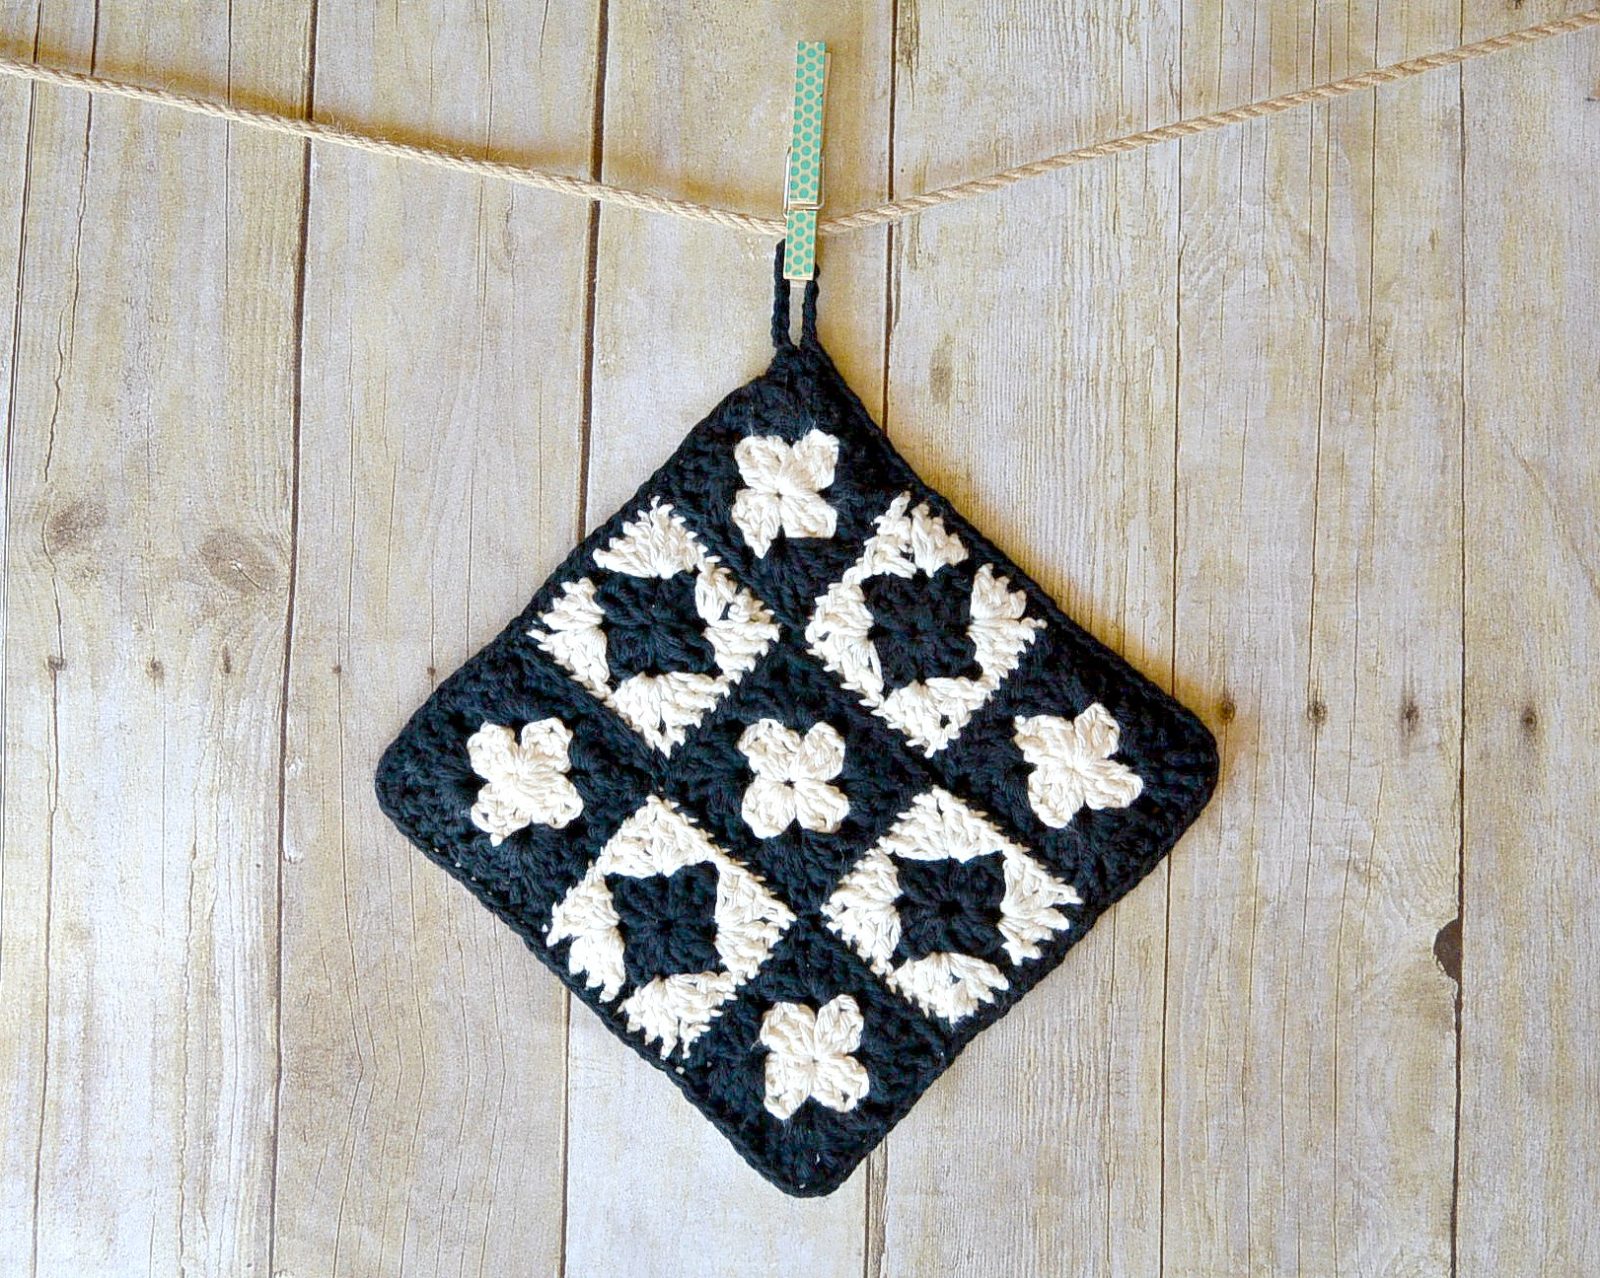
Today’s crochet pattern is a two-for-one pattern! You start with a simple granny square and combine several of them to make a modern-vintage crochet potholder. This granny square crochet pattern is perfect even for beginners to make.
I’ve been going back and forth between this granny square crochet pattern potholder project and my knitting project for a while. In fact, the two projects were neck and neck for a while, and I wasn’t sure which would get done first.
Goodness though, granny squares are addictive, so this modern granny square ended up being the winner. Doesn’t everyone work on multiple projects spread out around their houses at the same time? 😉
I’ve been noticing some really outstanding potholders lately. After admiring a few, I realized that I have never actually made one myself. How is that possible when there are so many cool vintage crocheted potholders that I find beautiful?
I decided that I wanted to make something with a vintage feel but a modern vibe. As I thought about how to pull in the vintage quality, using granny squares came to mind. It just doesn’t get more vintage-ish than a granny square, right?
As for the modern aspect, well, I decided to go with a black and white color scheme. It’s modern, classic, and goes with just about everything!
If you love granny squares too, check out this fun Boho Fringe Granny Square Crochet Purse pattern!
Materials You’ll Need For This Granny Square Crochet Pattern Potholder
- 1-2 skeins of Black Worsted Weight Yarn ( I used Lily Sugar N Cream in Cotton)
- 1 Skein Cream Worsted Weight Yarn
- Scissors
- Tapestry Needle
- Size G Crochet Hook
How To Make This Modern Granny Square Crochet Potholder
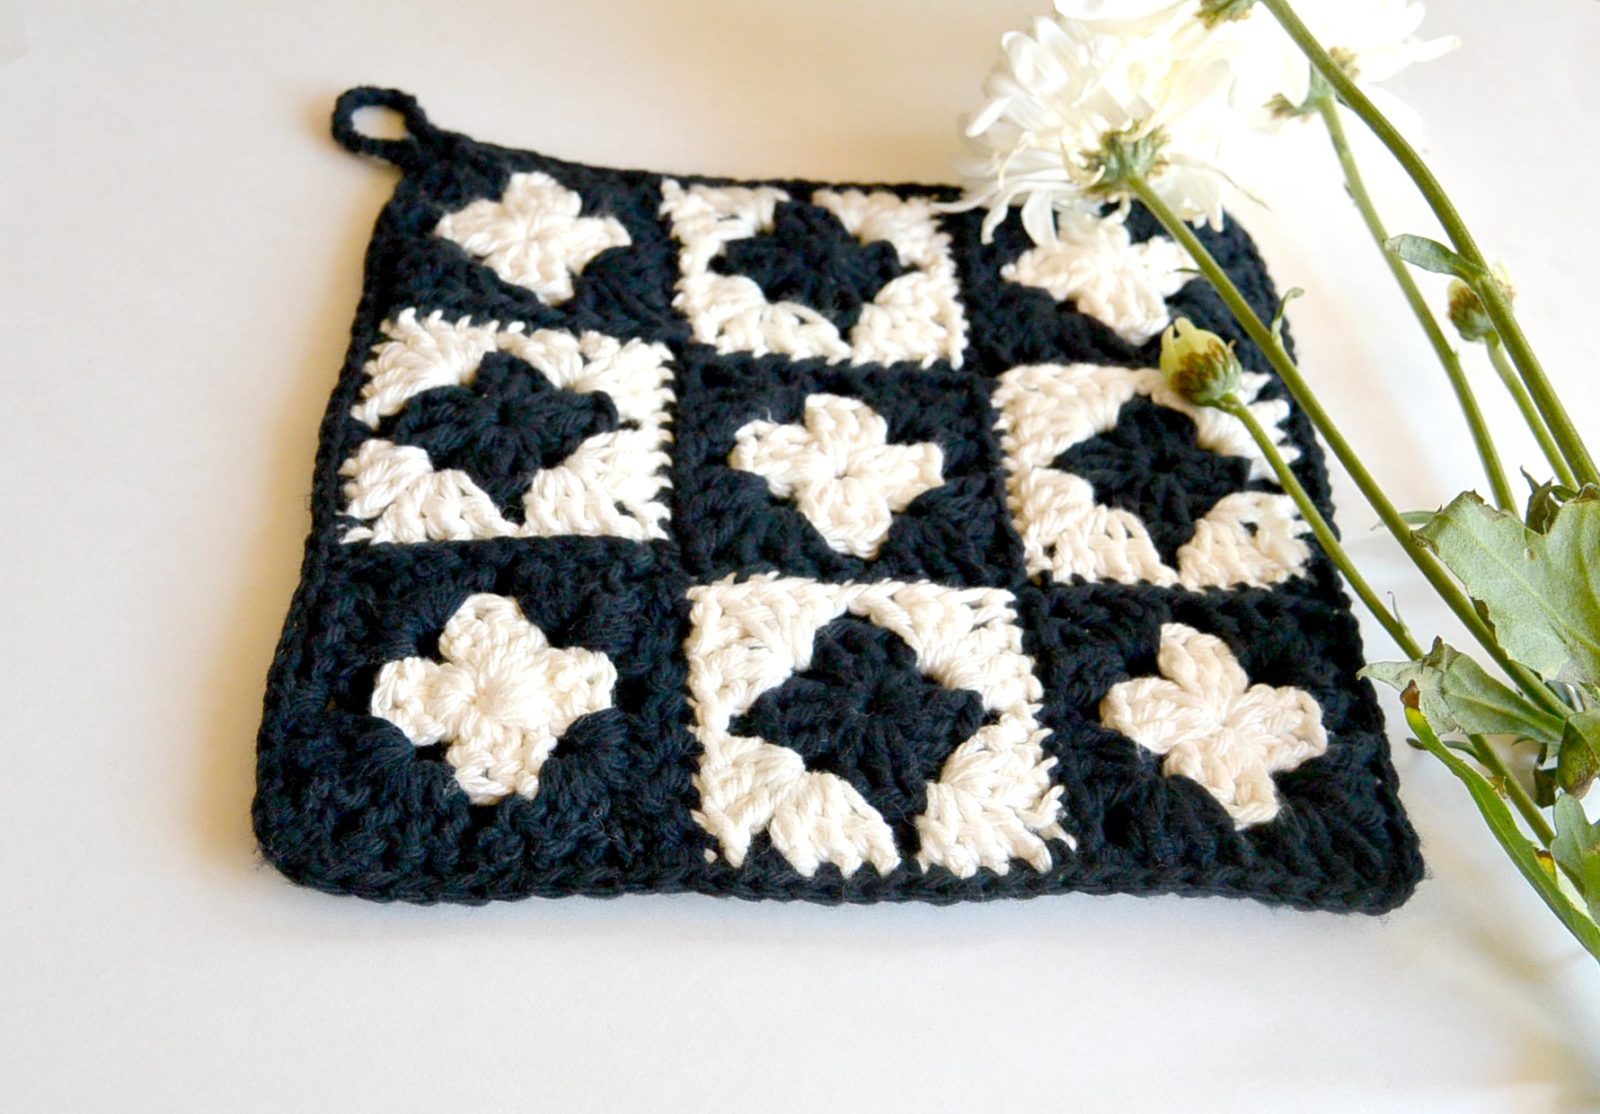
This is the perfect size potholder. Really. I took out my favorite potholders from my kitchen cabinet, and shockingly it worked out that 9 of these little granny squares made up the perfect size.
How To Make Granny Squares
If you’ve never made a granny square, you may want to watch a YouTube tutorial in addition to following my instructions. Although the process is simple, I’m a visual learner, so I understand how helpful it can be to actually see it in action.
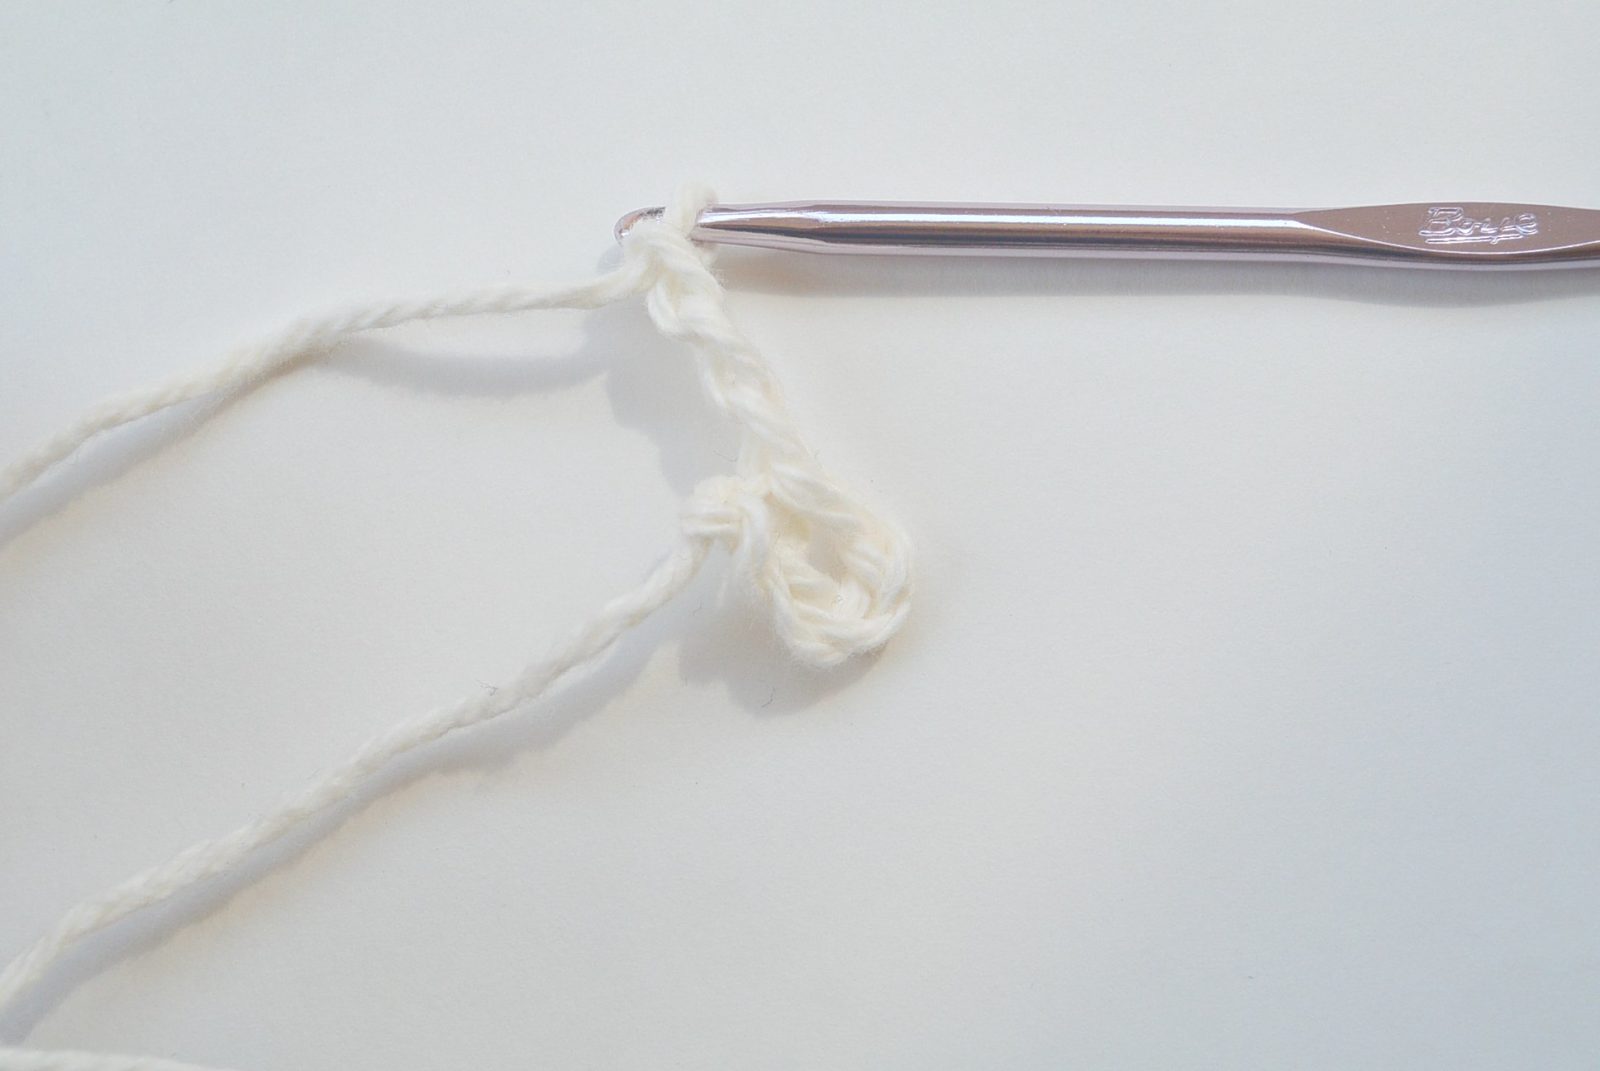
- Chain 4 with cream (or black) and join with a slip stitch to form a ring.
- Insert your hook into the ring, pull up yarn, and chain 3 (counts as 1 Double Crochet).
- Make two more double crochets in the ring (Total of three double crochets).
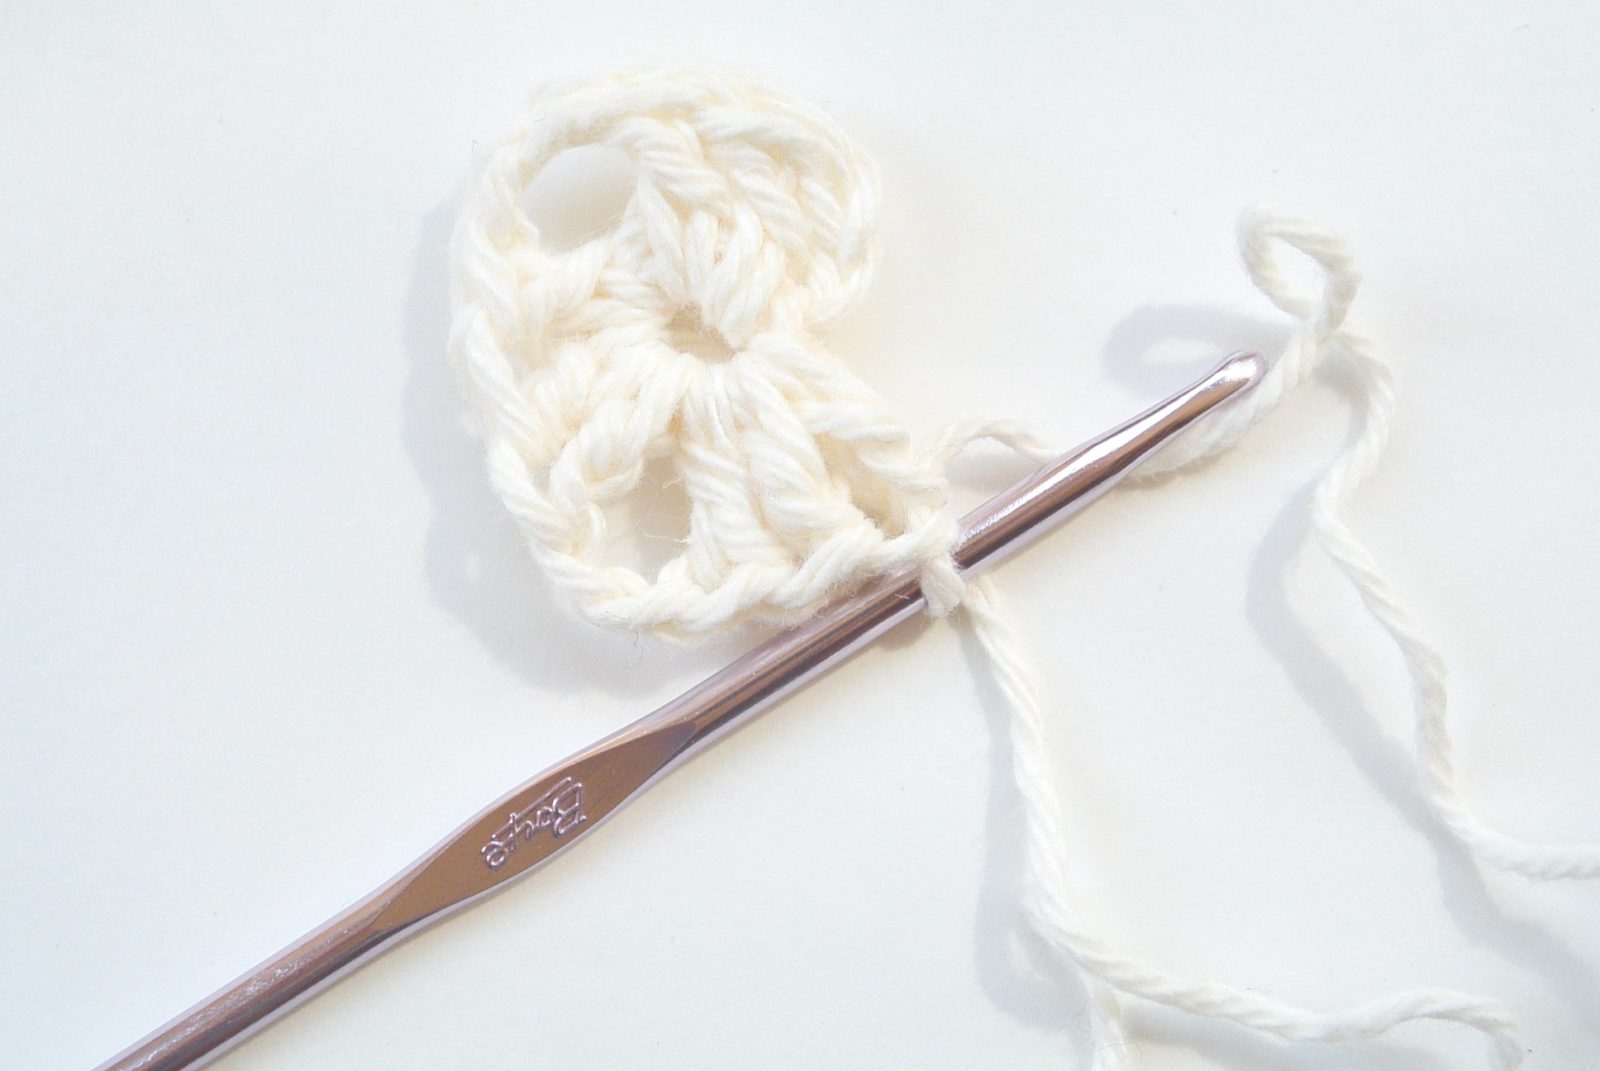
- Chain 2.
- Make three double crochets in the ring.
- Chain 2.
- Make three double crochets in the ring.
- Chain 2.
- Make three double crochets in the ring.
- Chain 2, and slip stitch to join at top of first double crochet stitch.
2nd Color
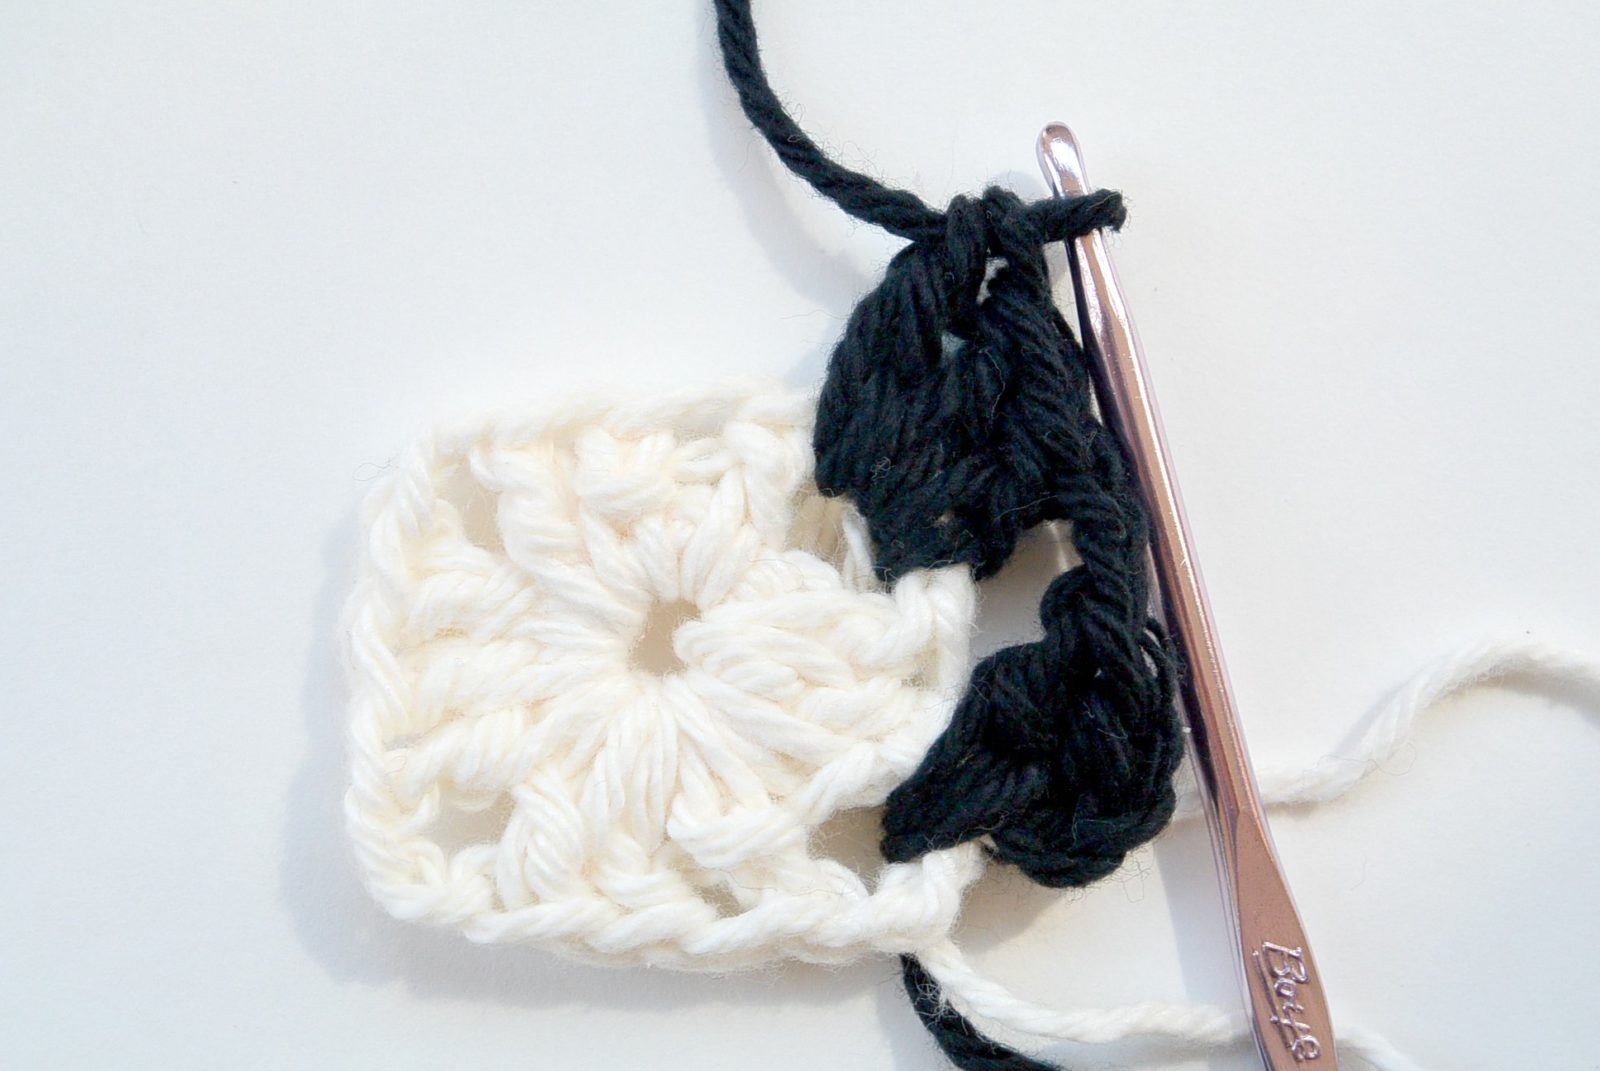
- Change to color black (or cream) by slip stitching and attaching to any of the corners, Chain 3 (counts as first double crochet).
- Double crochet 2 more in the corner (total of 3 double crochet in 1st corner).
- Chain 1.
- Double crochet 3 times in the next corner, Chain 2, Double crochet 3 times again in corner (2nd corner).
- Chain 1.
- Double crochet 3 times in corner, Chain 2, Double crochet 3 times again in corner (3rd corner).
- Chain 1.
- Double crochet 3 times in corner, Chain 2, Double crochet 3 times again in corner (4th corner).
- Chain 1.
- Double crochet 3 times in 1st corner, Chain 2, join to first double crochet stitch.
You now have your completed square with four-chain-2-corner spaces, and four-chain-1 spaces. Tie off and weave in all the ends.
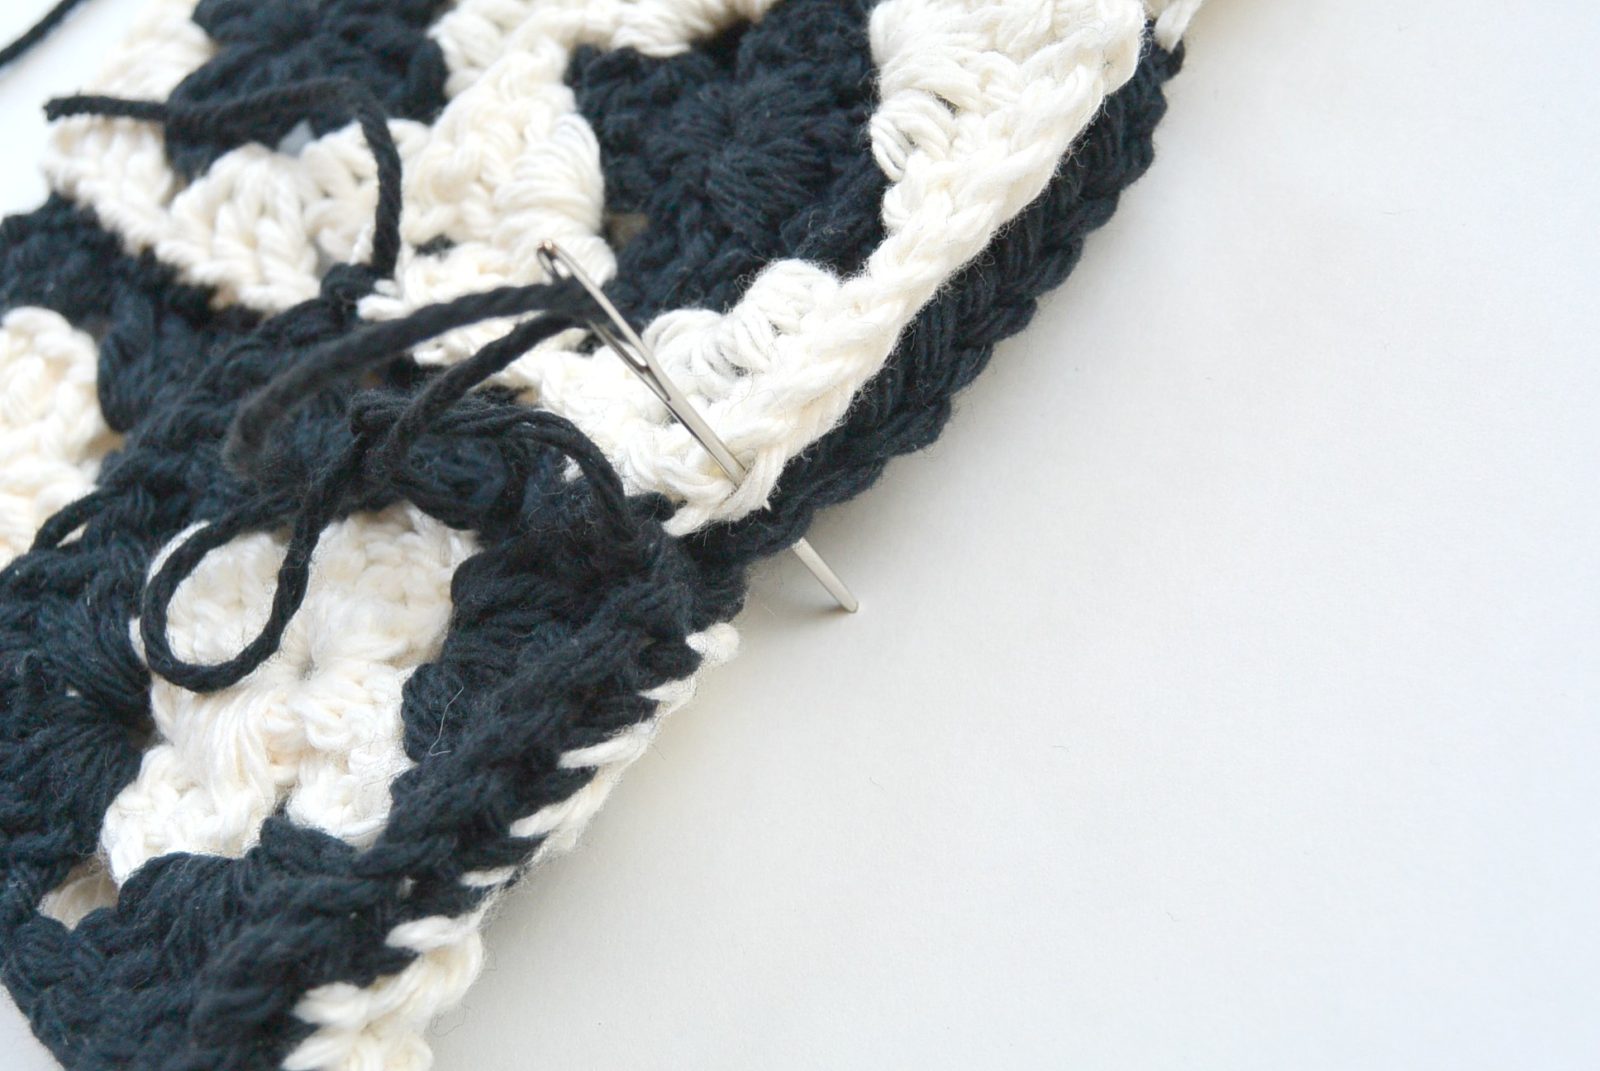
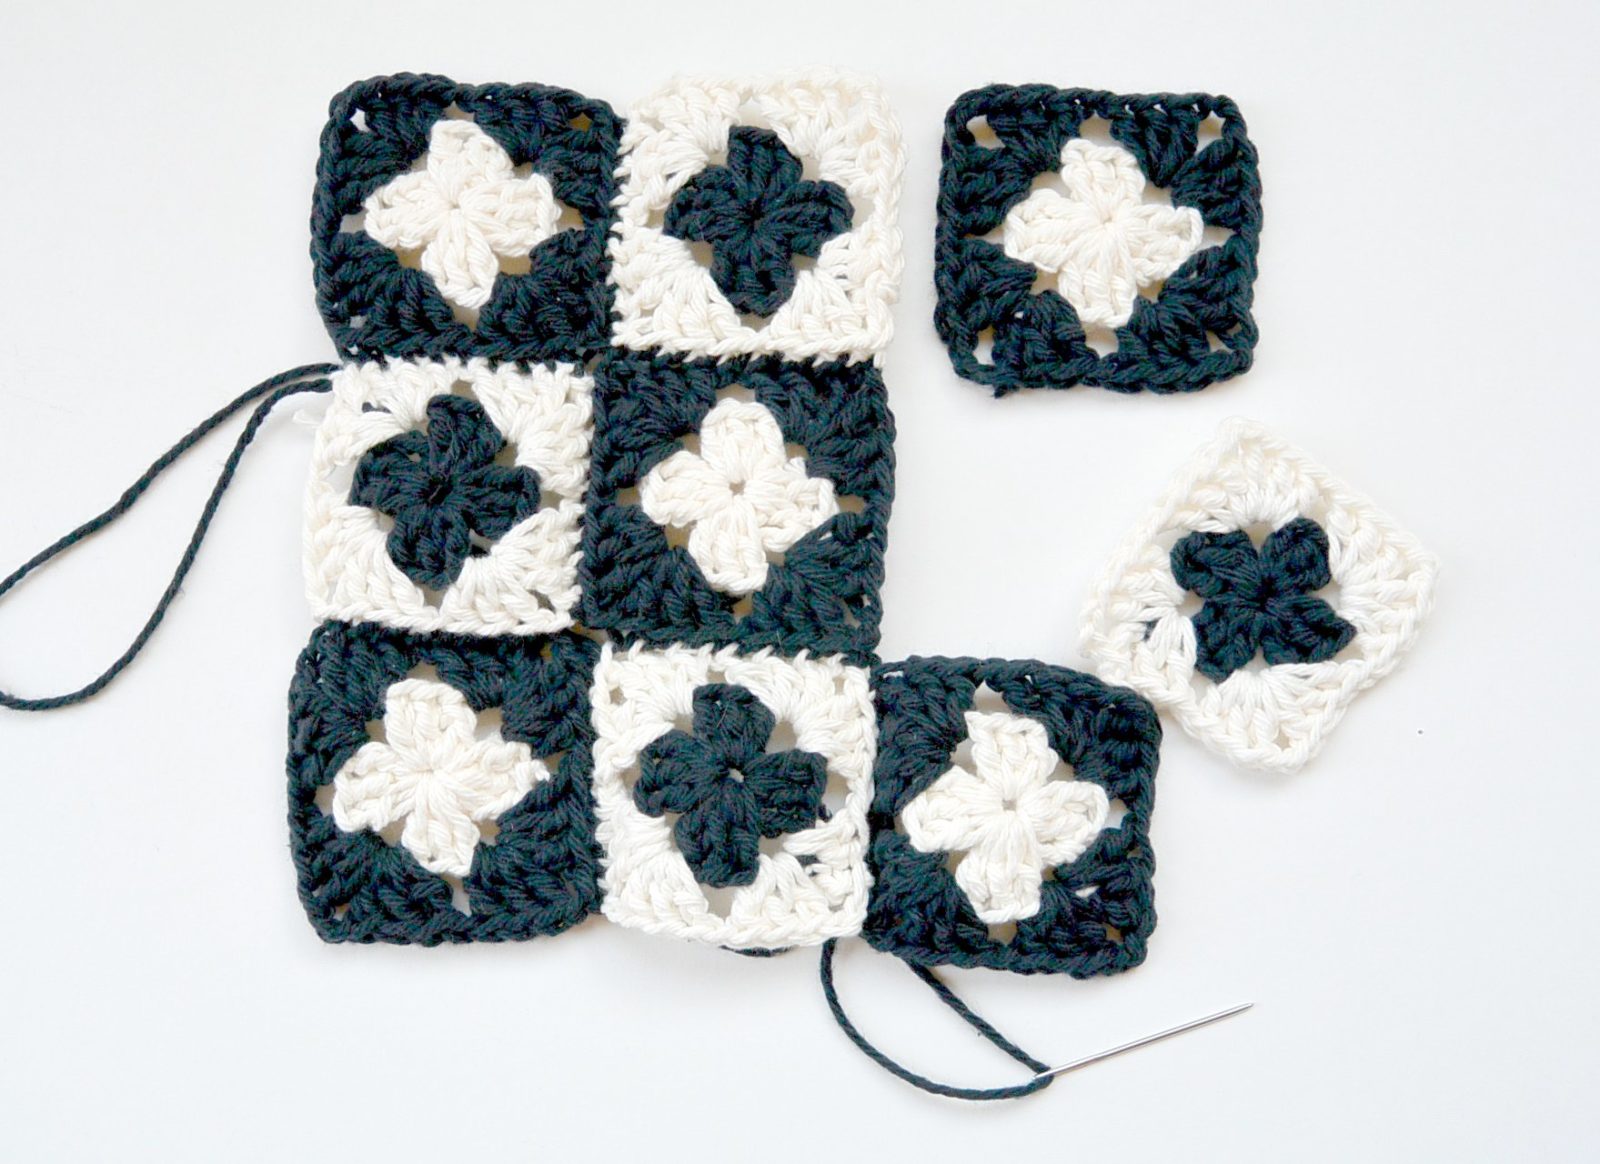
You will make 9 squares, and then seam them together with an invisible stitch using your tapestry needle.
If you’ve never done this, I’d look it up on YouTube as there are awesome tutorials. It is very easy, and you can see how it is done in the picture below.
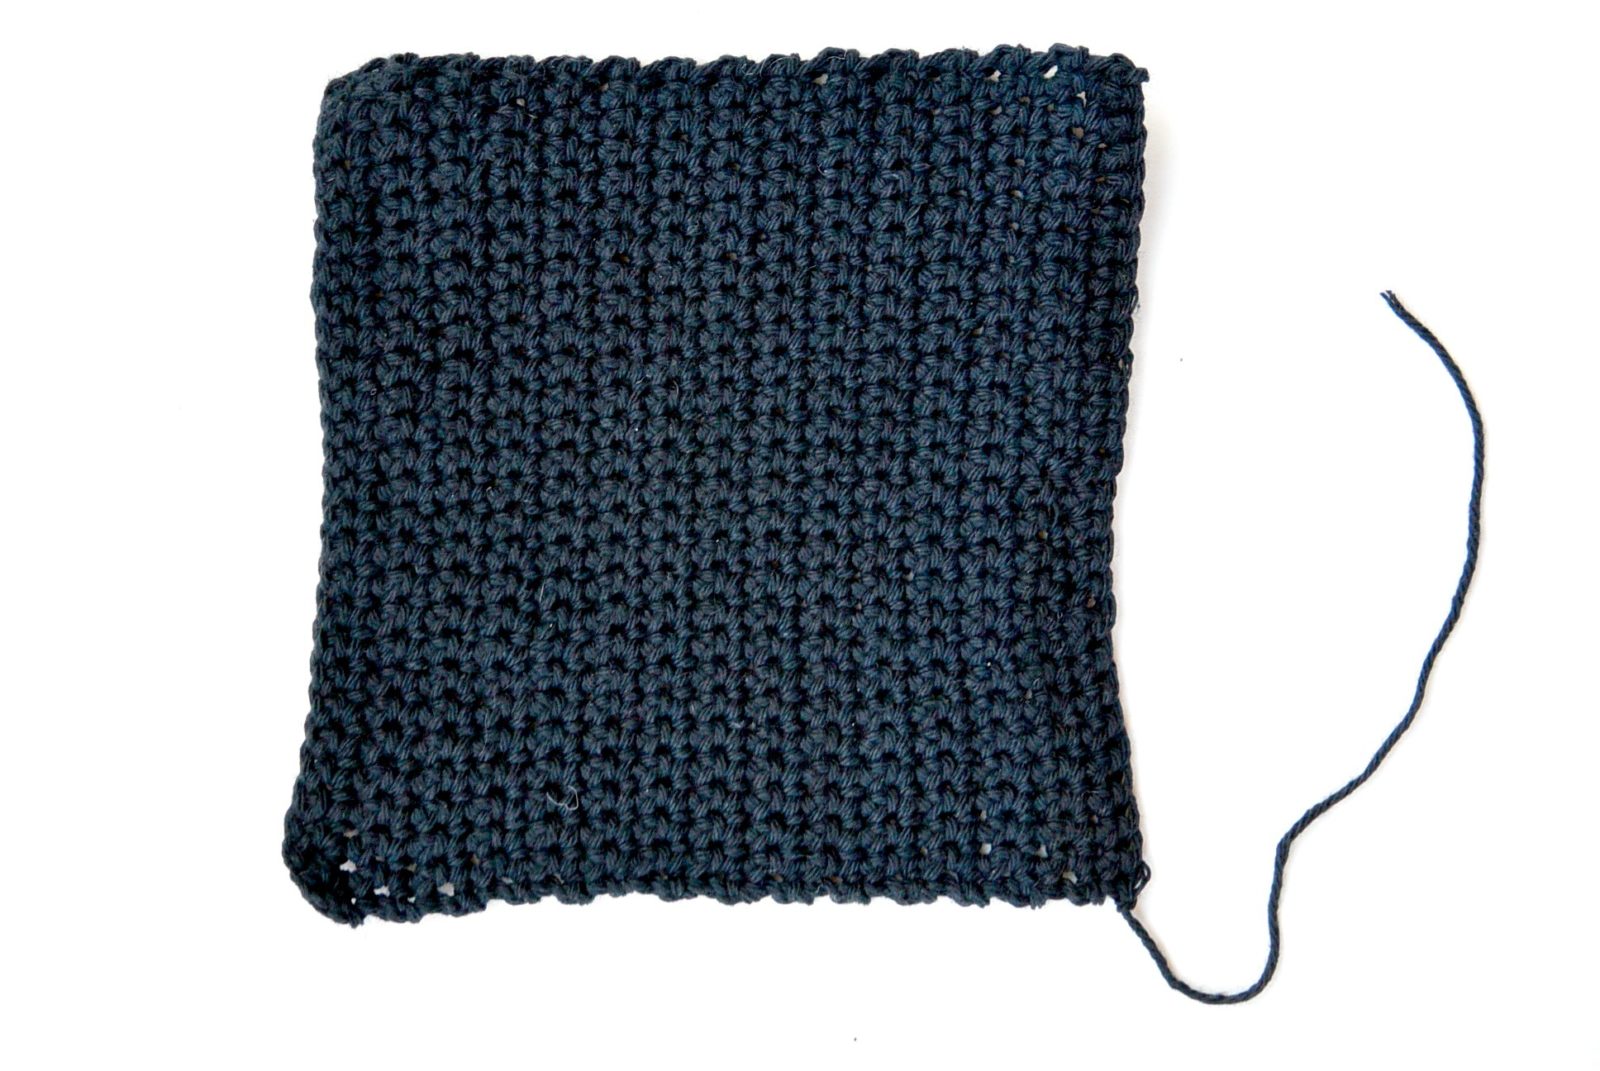
How To Make The Back Side Of Your Potholder
- Chain 28 with your G hook, and black yarn
- In second chain from hook, single crochet across row (27)
- Continue until you reach the same height as your granny square side
How To Put The Two Sides Together
- Once your two sides are complete, place the right sides of your two pieces together.
- Attach your yarn to a corner by pulling yarn up and making a slip stitch.
- Single crochet around the edges, putting your hook through both sides to secure them together. Make sure you are lining up the stitches the best way that you can.
- When you reach the final corner, make a chain long enough for a loop. Attach the chain with a slip stitch.
- Tie off and weave in the ends.
Granny Square Crochet Pattern Notes
This project is a simple one because this potholder is just made in two large pieces.
The front piece contains 9 granny squares stitched together with an invisible seam while the back piece is one single crocheted piece. Then they’re both seamed with a single crochet seam. So I guess it is really 10 total pieces that make up this project.
If you know how to make a basic granny square, you won’t need my instructions for the front side. Simply make 9 granny squares and seam them together.
FAQs
Naturally, with a project like this one, I would expect that you might have a few questions. Check below to see if the answer to your question is already there. If it isn’t, feel free to leave your question in the comments!
What can you make with granny squares?
At one point, granny squares were a common way to make afghans, and that’s about all they were used for. But in the last few years, the range of projects that incorporate granny squares has grown exponentially.
Granny squares are now a fun way to create many different types of projects! Use them to make:
Is a granny square easy to make?
Yes! Granny squares are an ideal project for beginners to make. They’re easy to learn, come together quickly, and provide a quick sense of fulfillment as you use them to make fun crochet projects!
That’s it for this project! I hope you enjoy it, and as always, let me know if you have any questions or if I can improve the pattern in any way.
If you enjoyed this project, feel free to follow me on Facebook or subscribe to my newsletter in order to see all of my patterns (which are always free). You can also find me on Pinterest! Thanks for hanging out!
More Crochet Patterns You’ll Love
- Mandala Crocheted Blanket Bag Pattern
- How To Crochet A Hand Towel
- Done In A Day Quick Crochet Blanket
- How To Crochet A Fur Throw Blanket
- Luxe Bobbles Crochet Throw Blanket Pattern

This is very nice and I like the color combination!
Thank you so much….I figure black and white can go with everything.
So SO cute! Love this potholder, very beautiful design 🙂
Hi Jessica! I think this potholder is the best of both..Modern and Vintage ! Great pattern and instructions, and I love the black and white color scheme. I am going to try it in yellow and white for a house warming gift 🙂
Hi Paula! Oh good, I’m so glad you think it is modern and vintage. After I wrote that is is modern, I debated, thinking maybe it will only be ME thinking it’s modern. Ha ha! I think the yellow and white is going to be STUNNING! Feel free to post a pic to my Facebook page when you finish. I’d love to see it. Hope you have a lovely Sunday, Paula, and thank you for sharing your thoughts.
Hi Bethany! Thanks for swinging by, and for your sweet compliment about my potholder! It means a lot to me. 🙂
I LOVE you’re work and especially love Ruby! Thank you for you’re site and I look forward to learning and seeing all your new things!
Xoxo
Kristi
Hi Kristi!! Thanks so much for taking the time to let me know you like my site! Yes, Ruby is seriously as sweet as she is cute-you should get one! They are awesome dogs!
Aawweee!!! Yes, I’ve had a English Bulldog in the past, and when she passed, I swore I’d never own another breed of dog ever! Bulldogs are the BEST! Gotta save up for them though, because they are seriously pricey! A Frenchie will be my next one day, just like Ruby! Thank you for acknowledging my post, you are truly a super woman!!!!
Hi Kristi,
It’s true….they are so expensive! I hear you about not wanting to get another dog after losing one….it is heartbreaking. But bulldogs are the best, aren’t they?! Thanks for taking the time to comment Kristi!
I have made these potholders years ago. The pattern called for 18 squares to be seamed together. There were to many spaces and to easy to get burned I found out that they did not make very good potholders, so used them as decorations in the kitchen. I love this pattern as the one side is solid and covers the spaces in the granny pattern. I have made them for my grandchildren and they just love them, as do I. Thanks for posting this pattern.
Hi: Love this pattern; just one question: In your instructions to put the two sides together, you say “place right sides together.” Any chance you mean “wrong sides”?