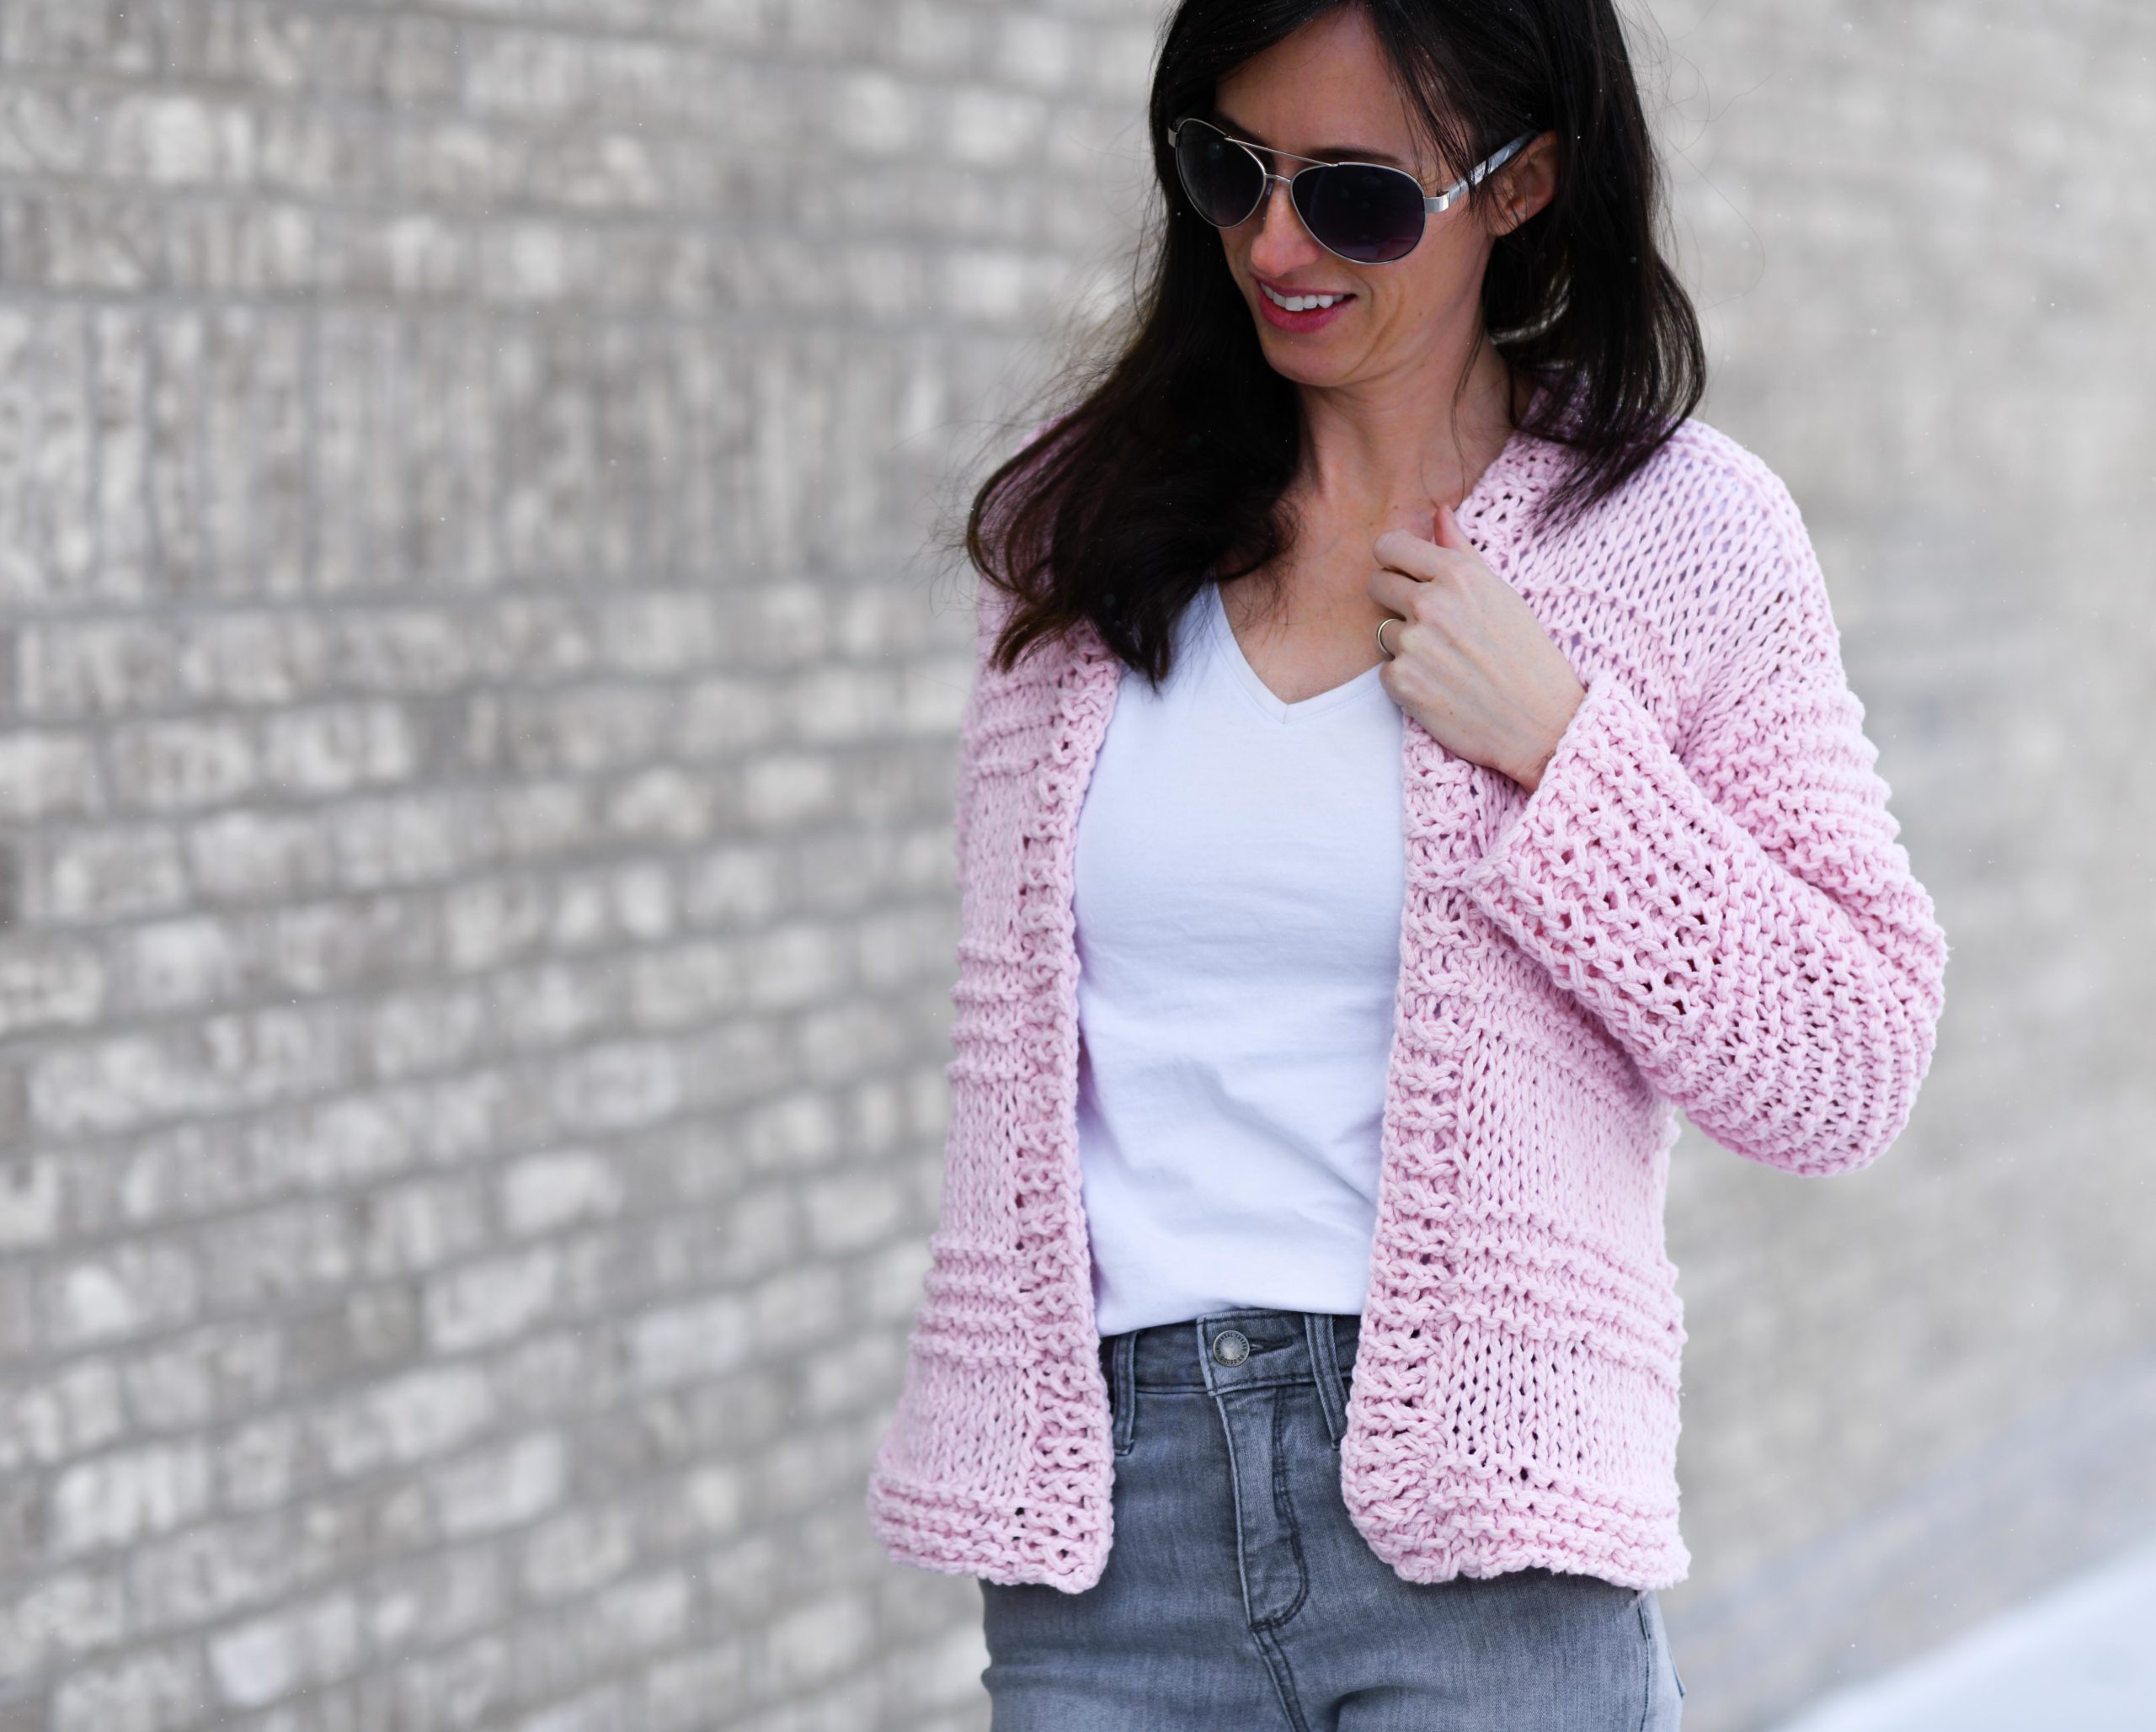
My Big Comfy Ribbed Cardigan
This easy knit sweater pattern is so fun to make and is the coziest thing ever!
You can see the full, free pattern below, or you may choose to purchase the ad-free, printable version on Etsy HERE or the kit from Lion Brand Yarn HERE.
I love summer projects, but my heart is with fall and winter knits (like my last two knit cardigans HERE & HERE). How about you? There’s something about yarn, pumpkin spice, fire places, and chunky projects that just win the race.
I’ve been wanting to create a ribbed cardigan for years, so it was really fun finally putting this design together!
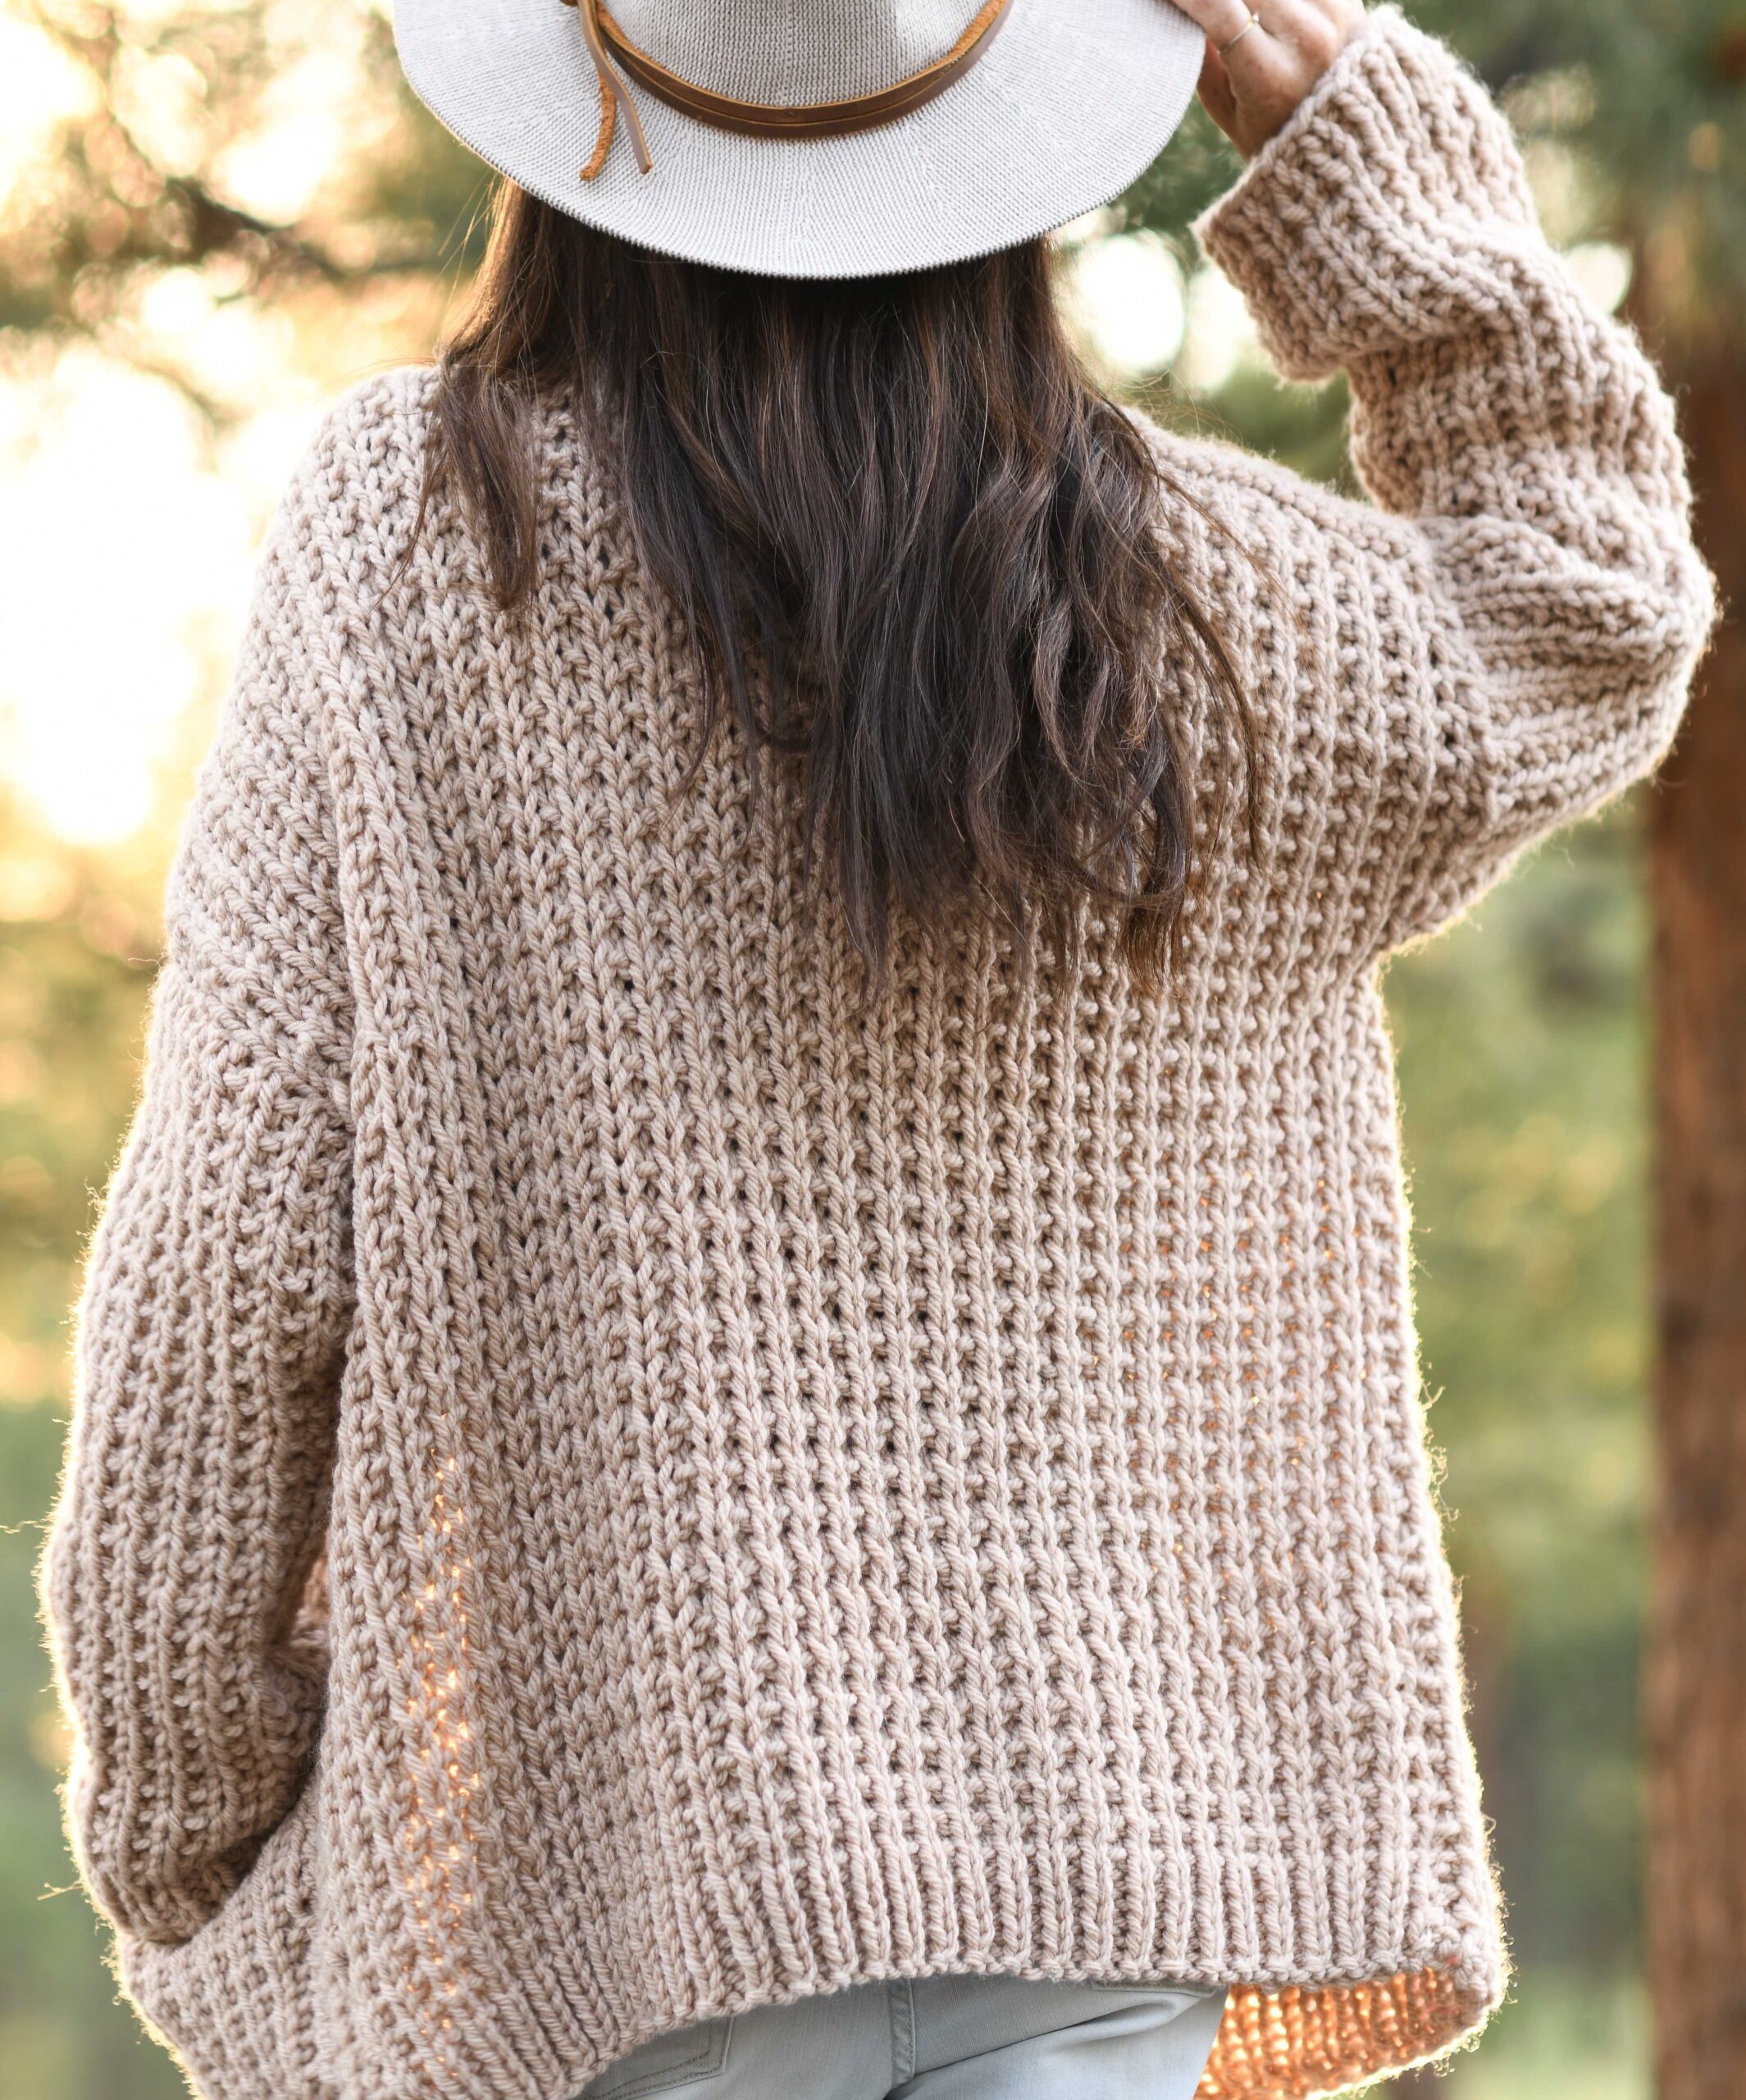
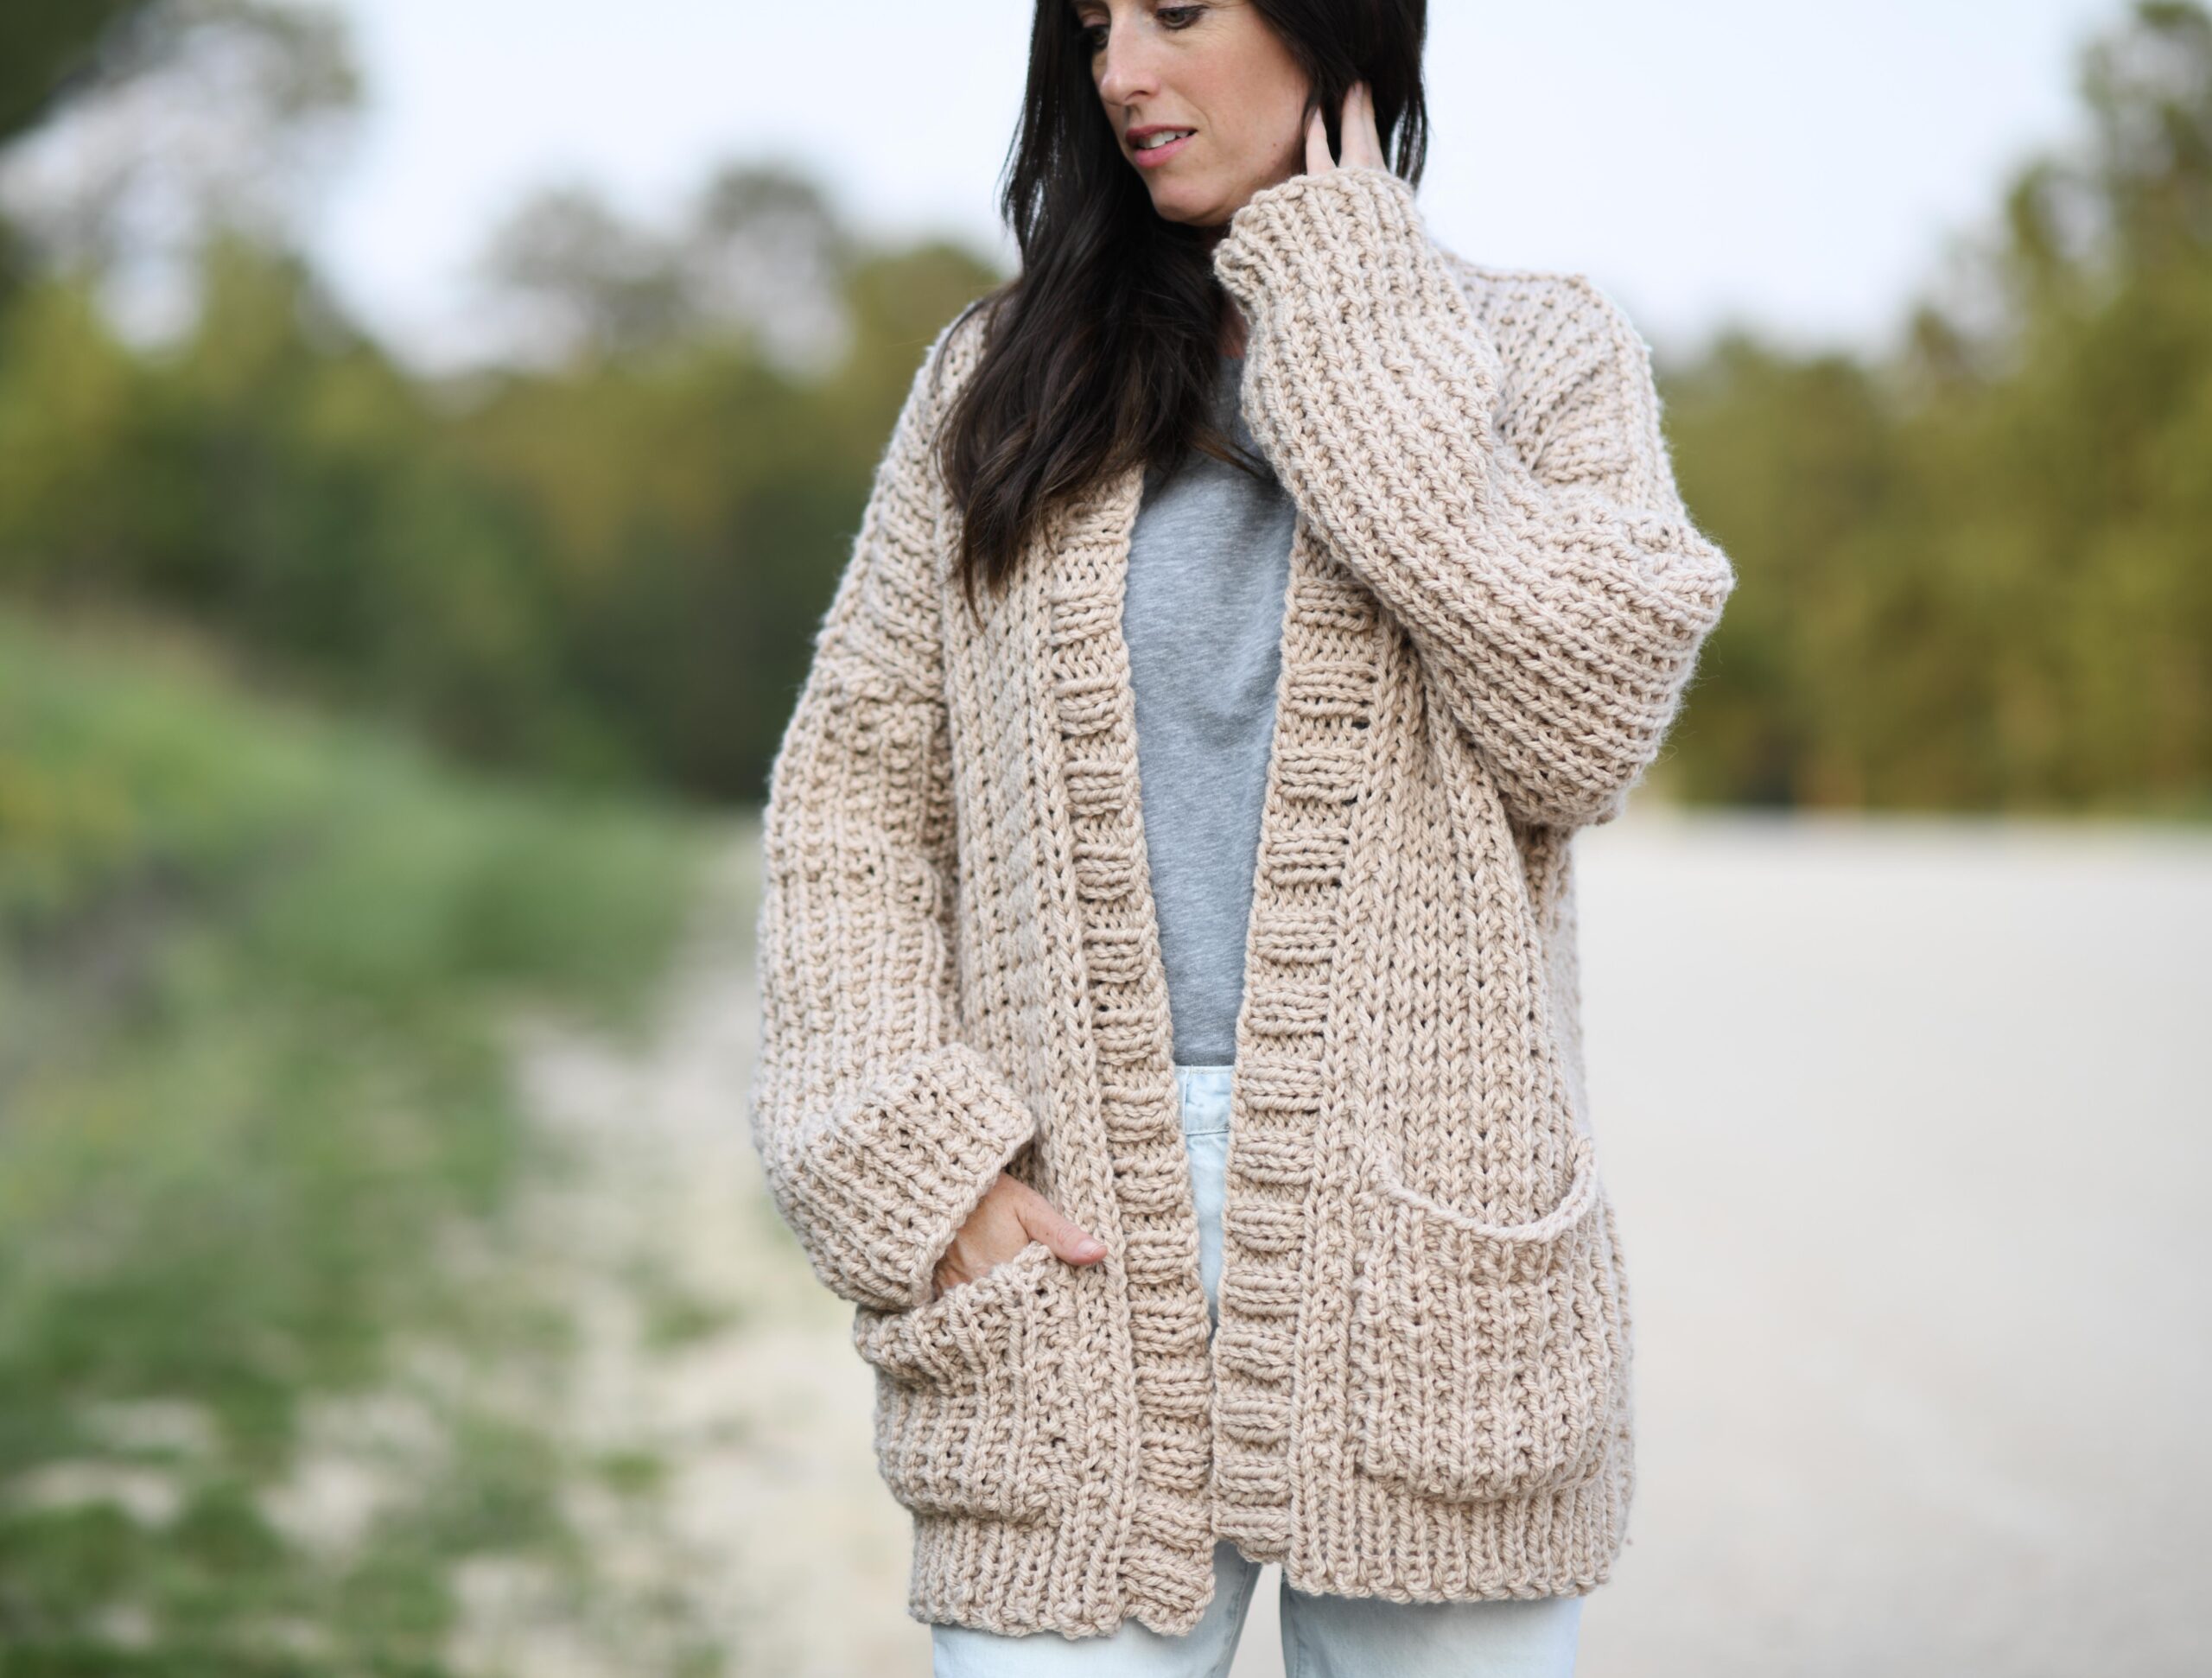
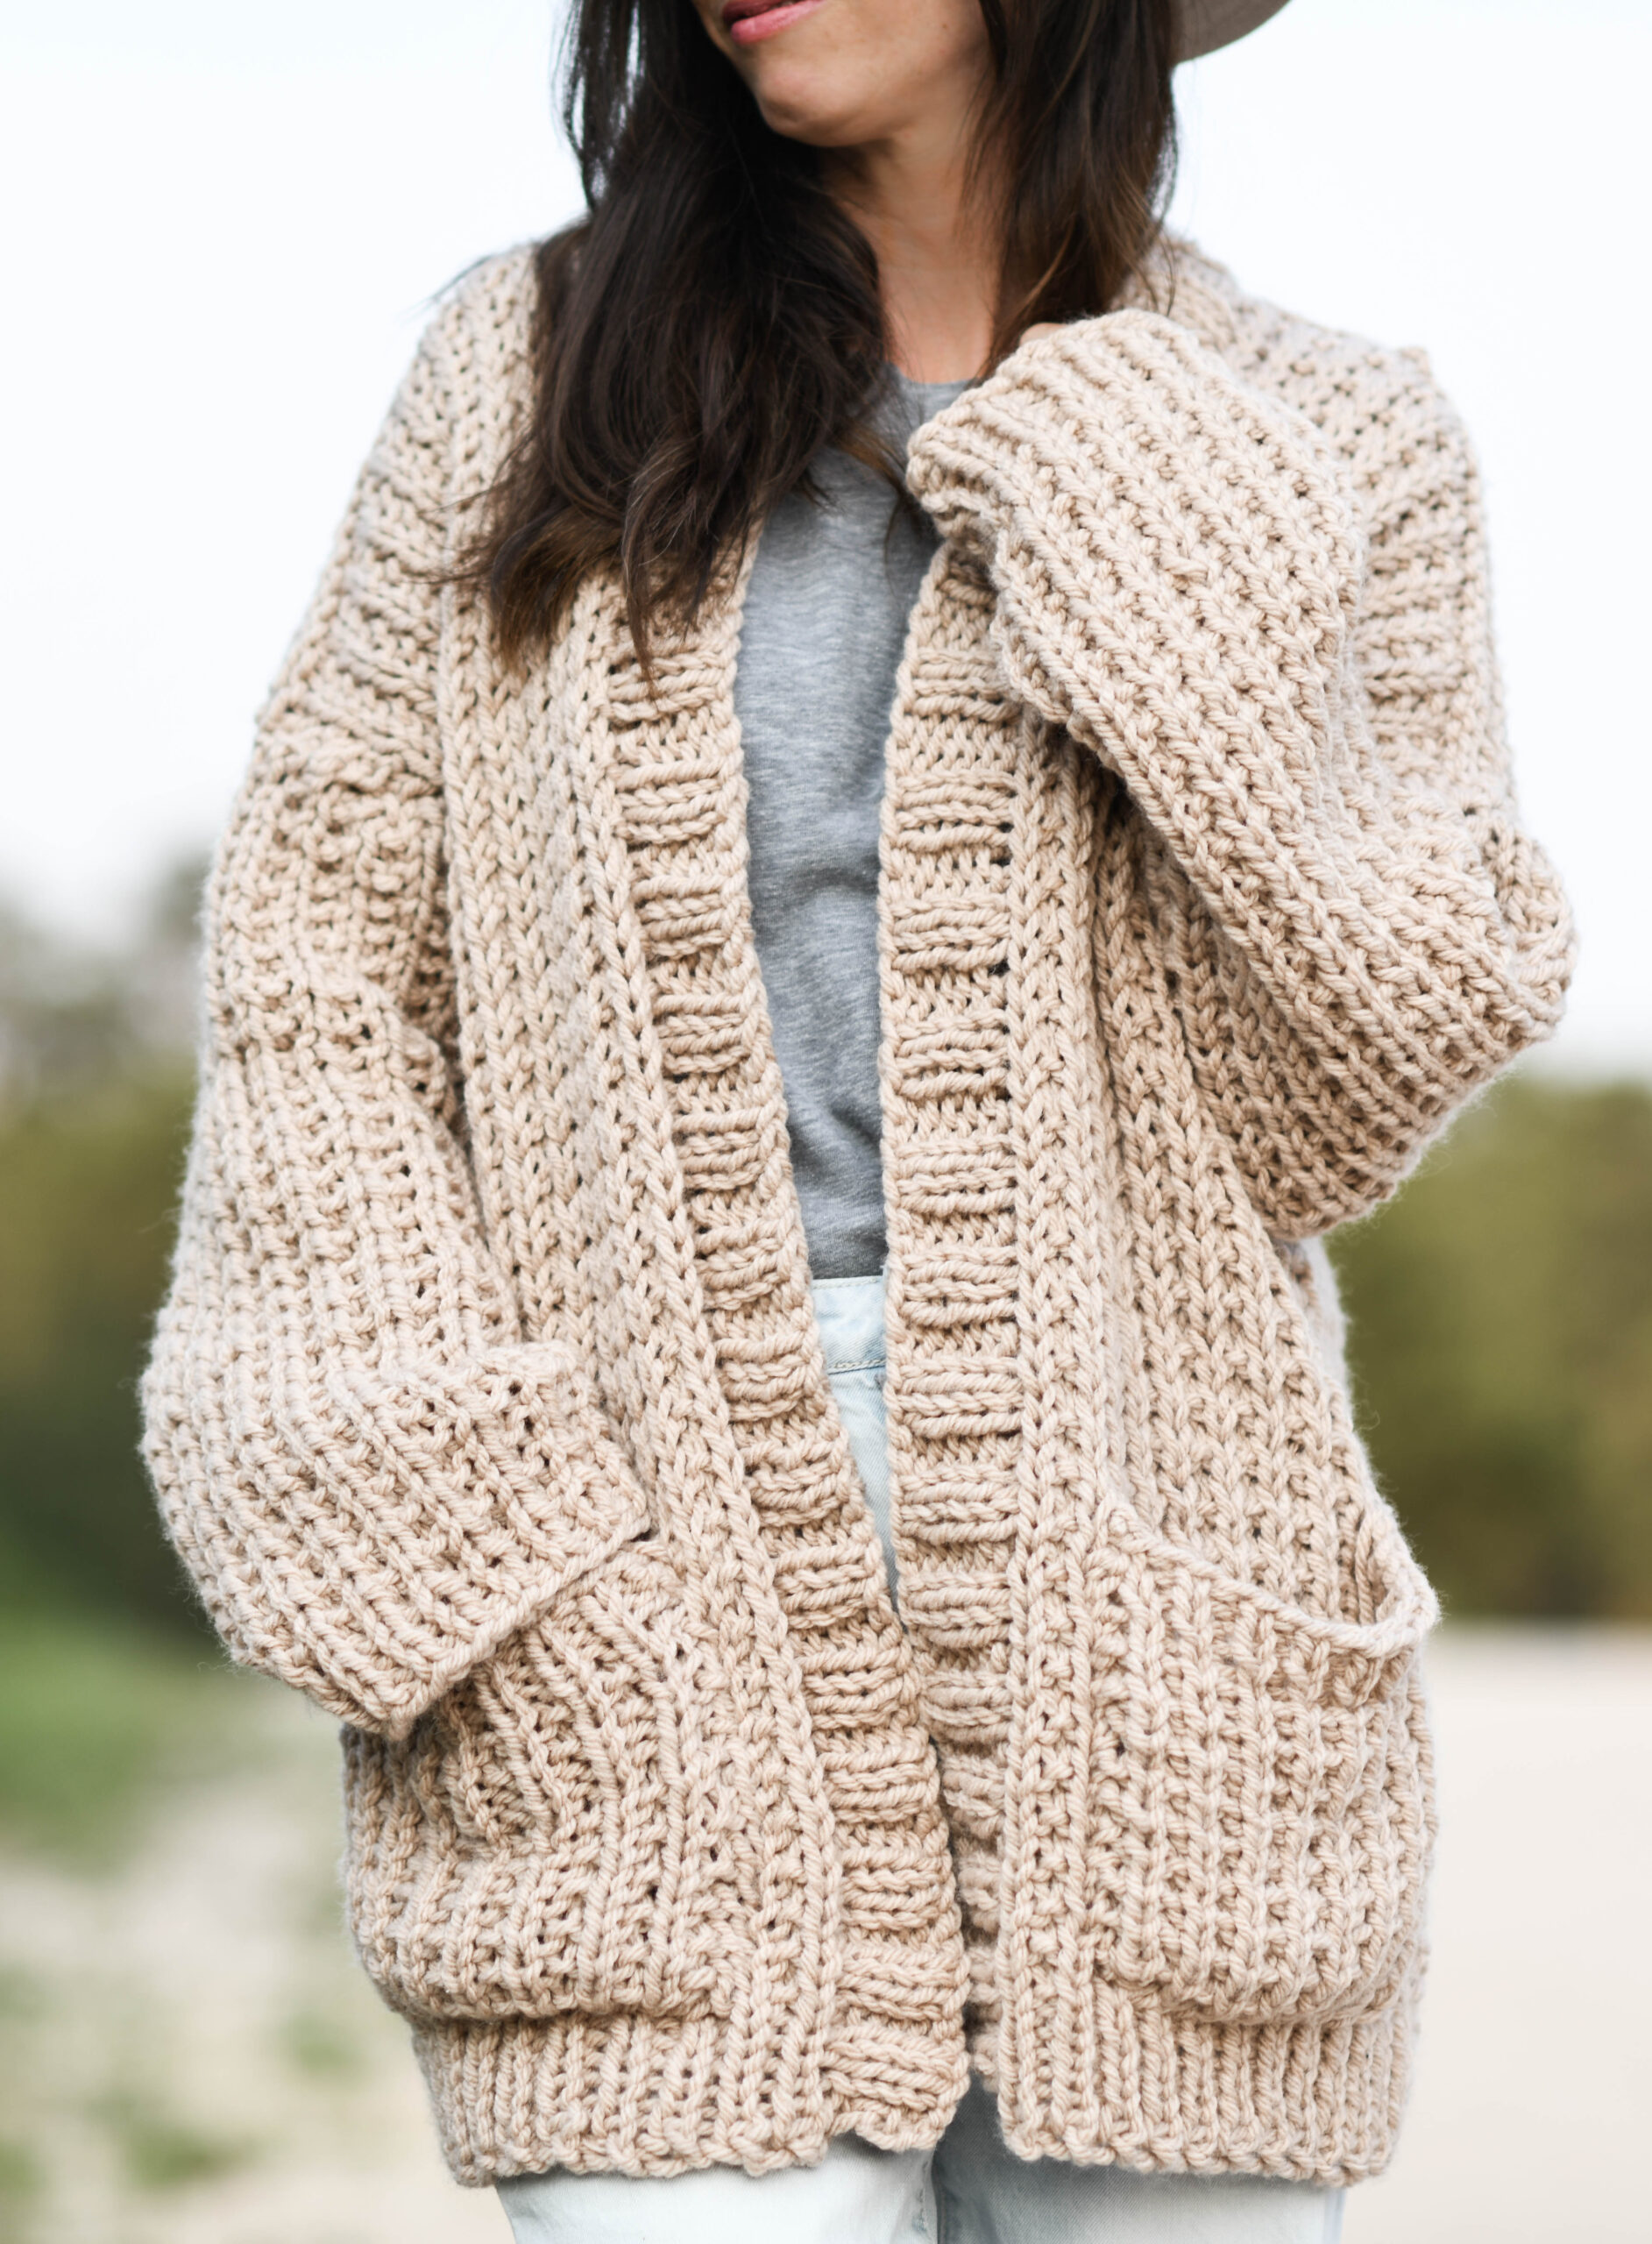
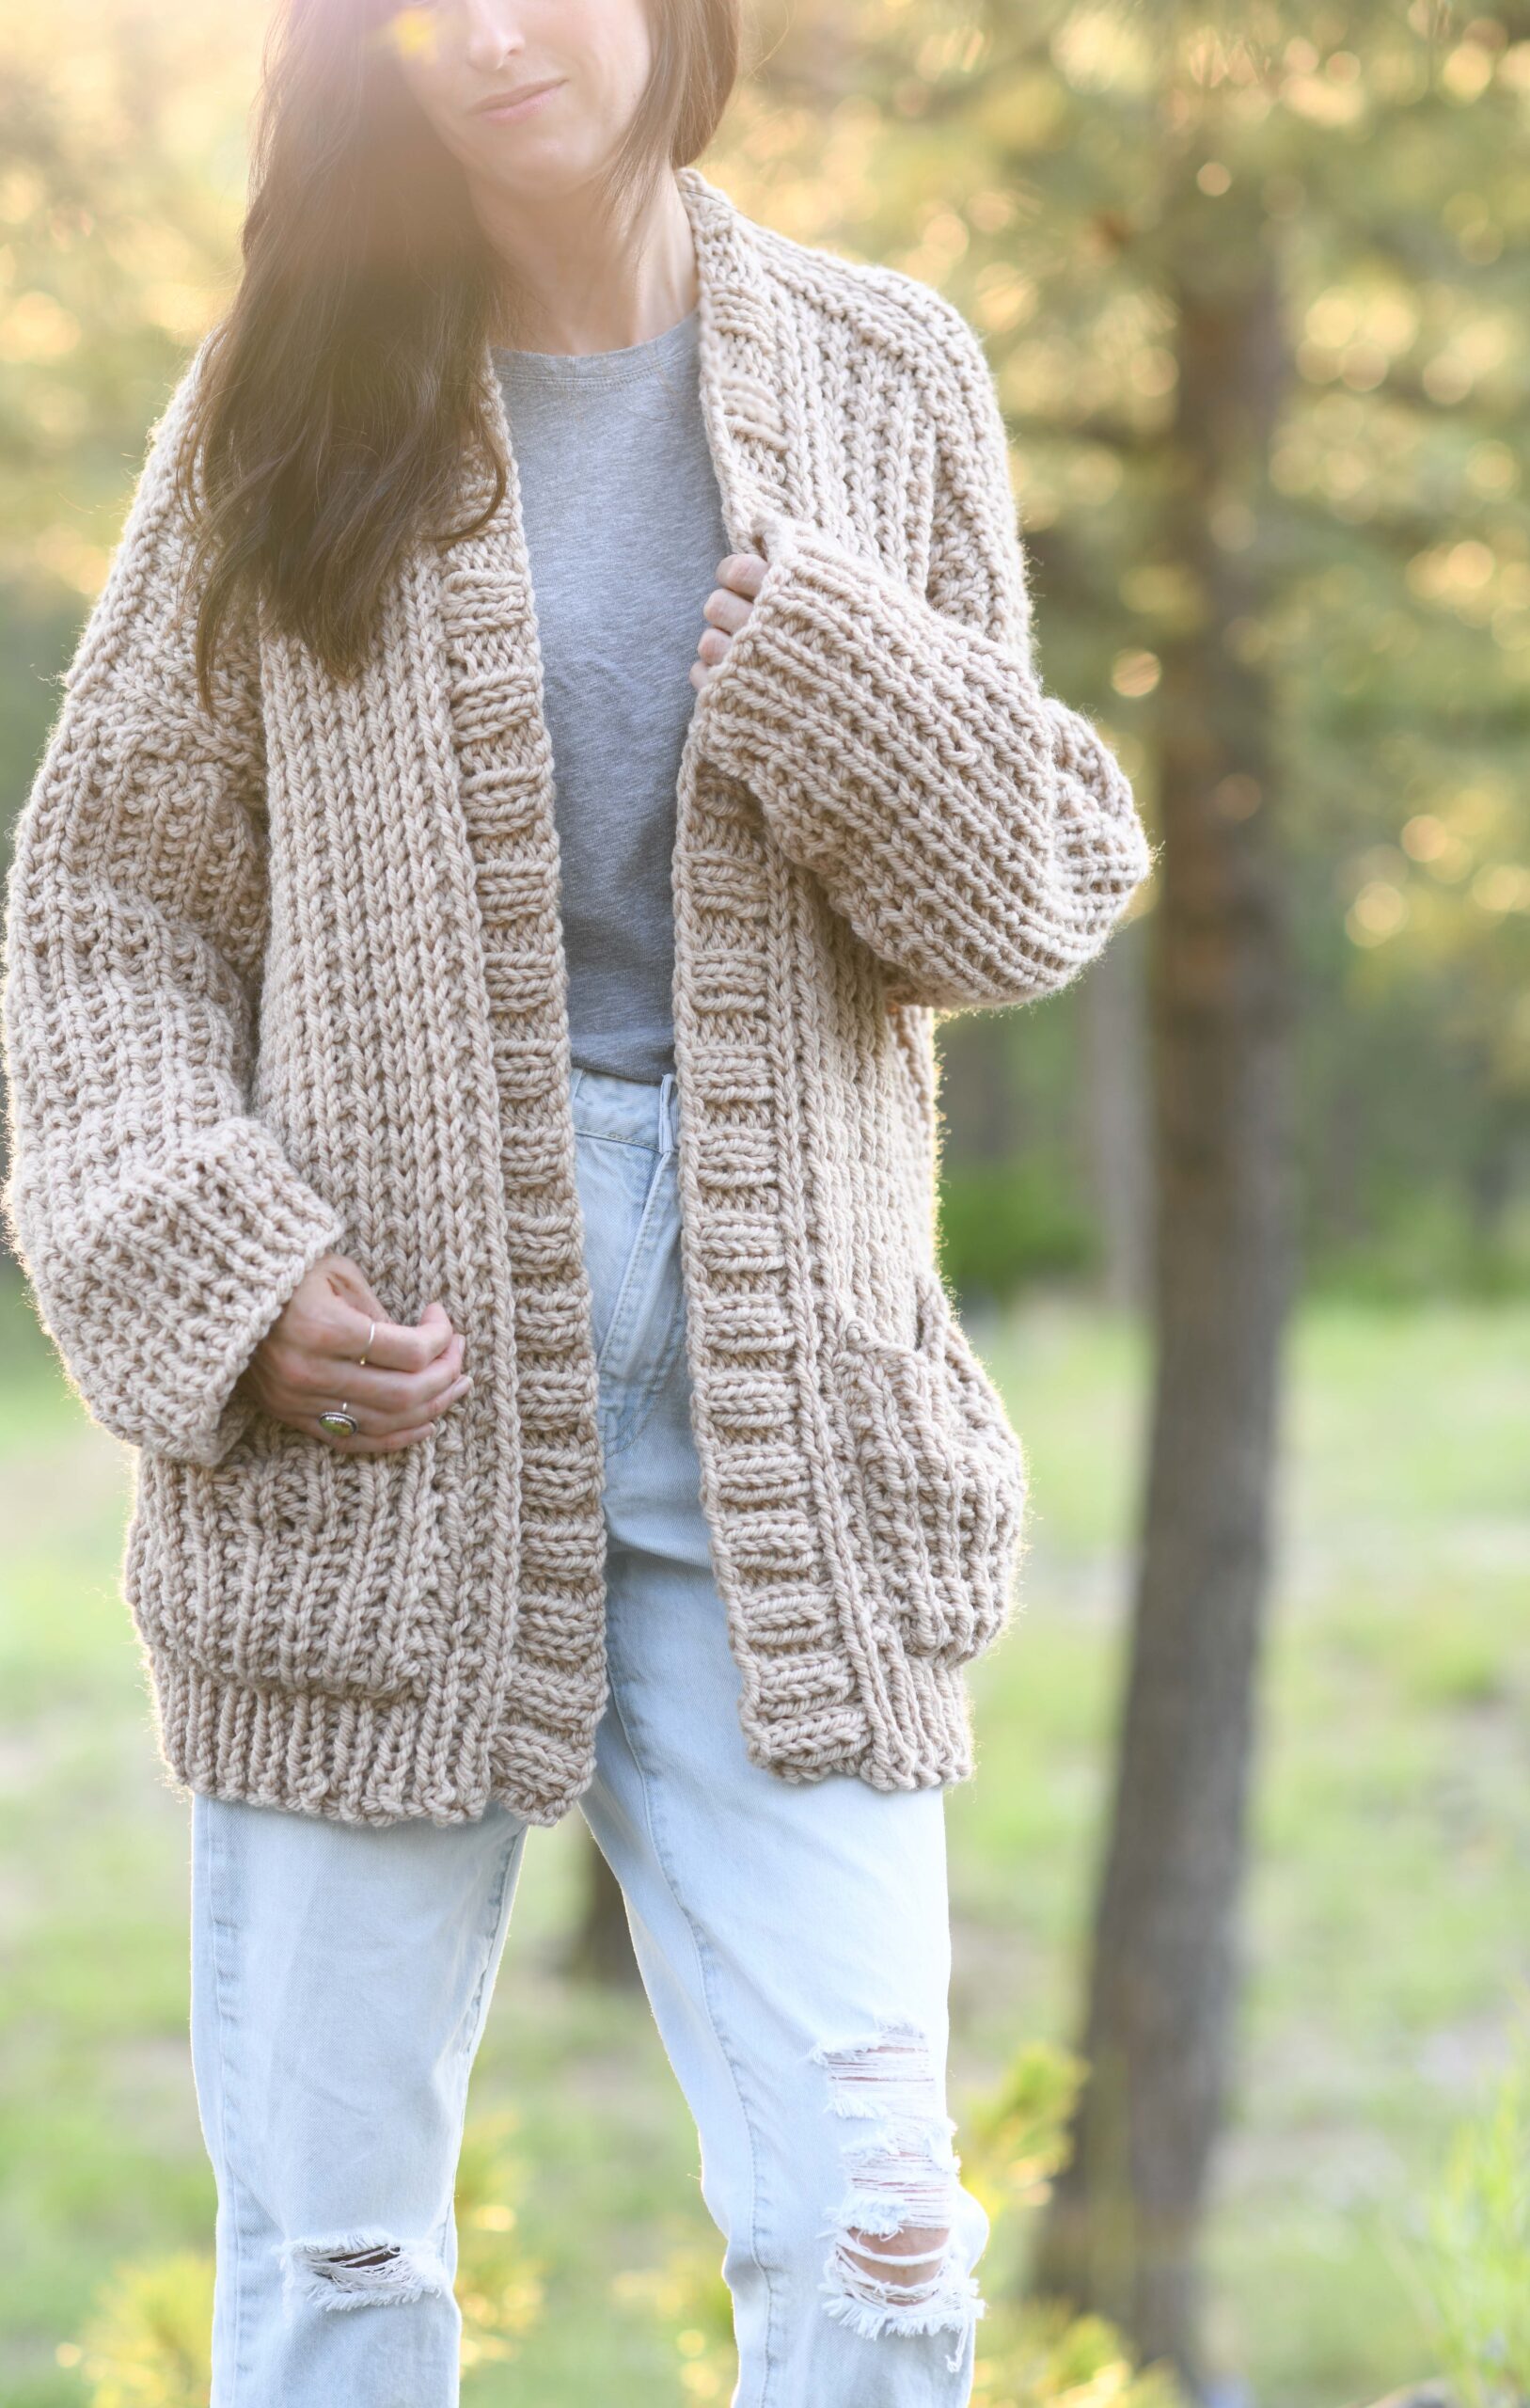
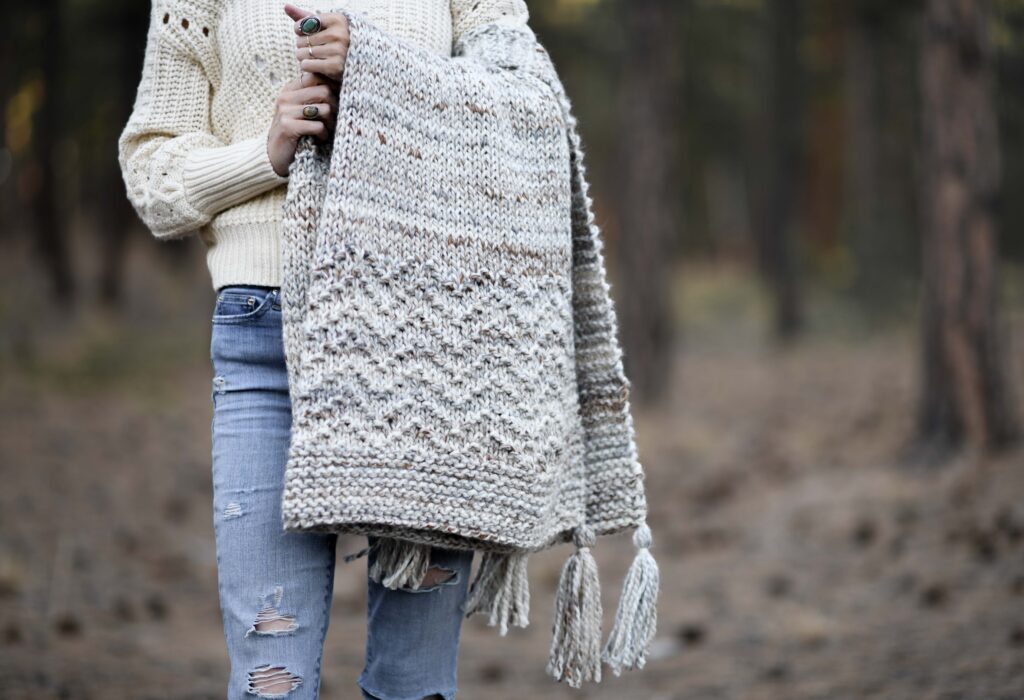
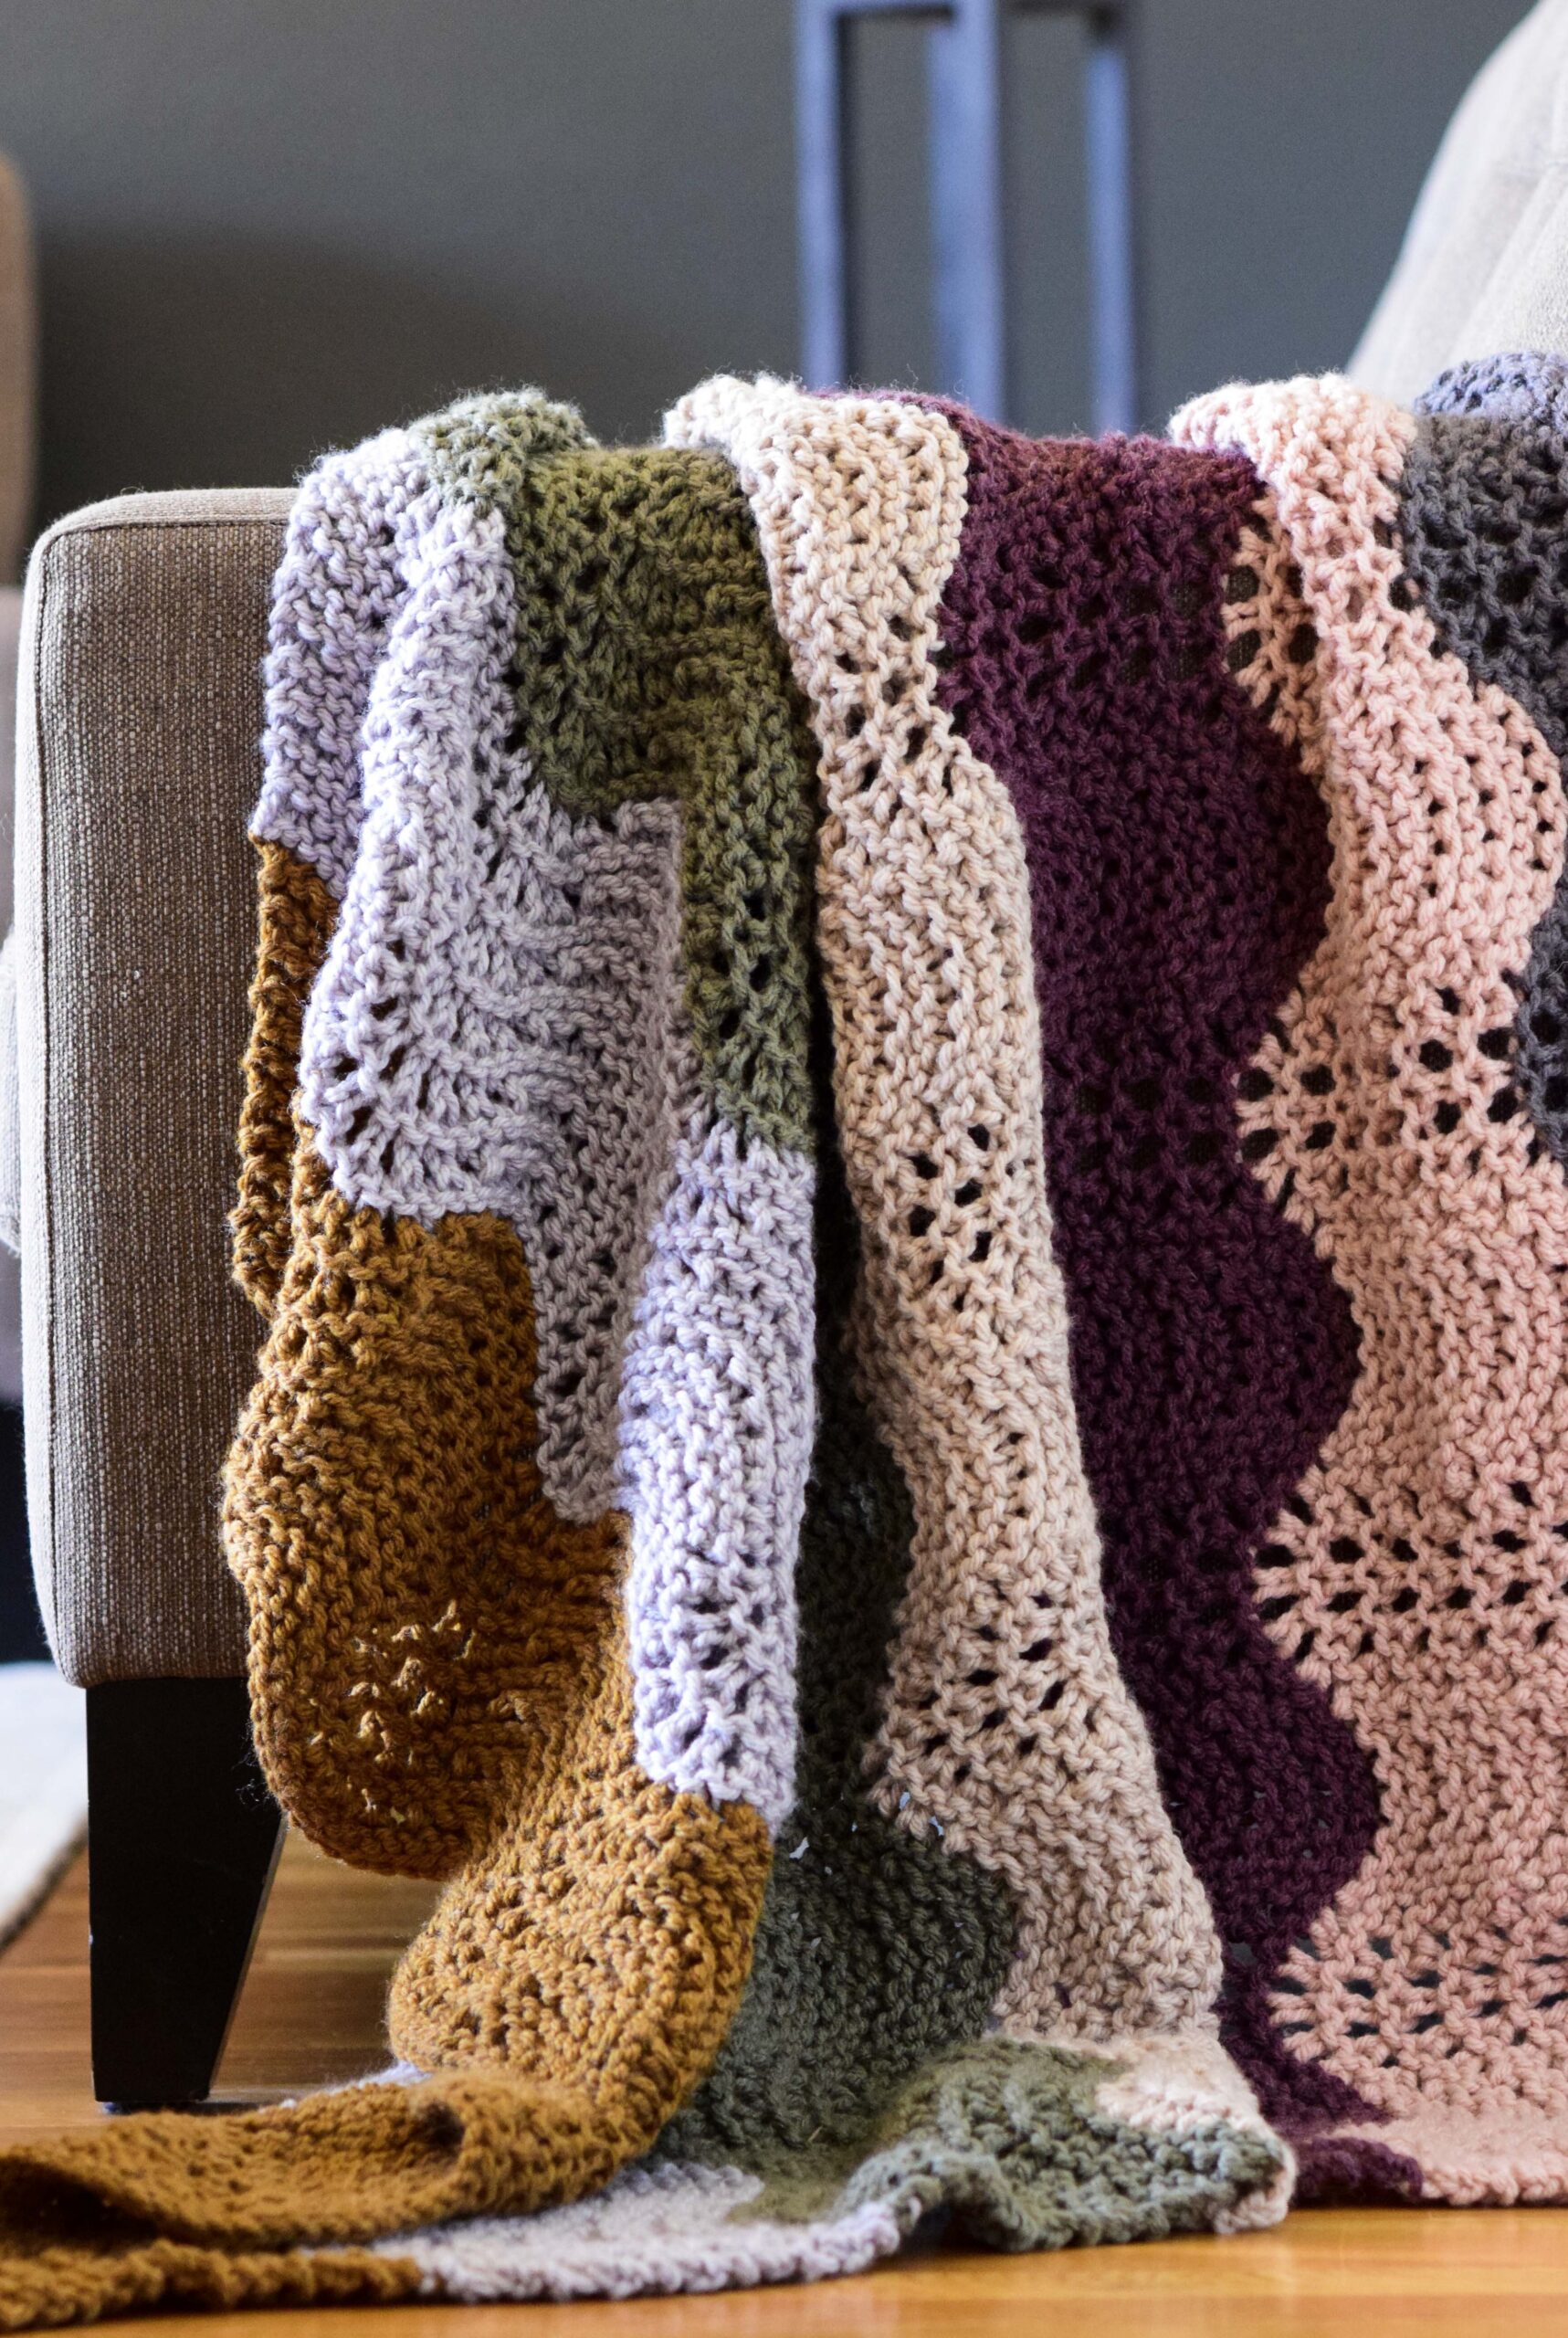
Don’t you think the broken rib stitch is so pretty and cozy? It’s an easy two row repeat, so it’s great for relaxing with your favorite show. 🙂
The sweater is oversized and squishy, so you can easily layer it with long or short sleeves underneath. If you want to make it longer or shorter, you’ll simply knit for more or fewer rows on each of the front and back panels.
This cardigan has many similarities to my Moonbow Slouchy Knit Cardigan, but has some significant differences as well! It is actually even more oversized and squishy than the Moonbow.
Also, because the collar is picked up and knit, it has one more layer of skill which adds a very finished detail. The rib pattern itself really makes this one stand out in my opinion!
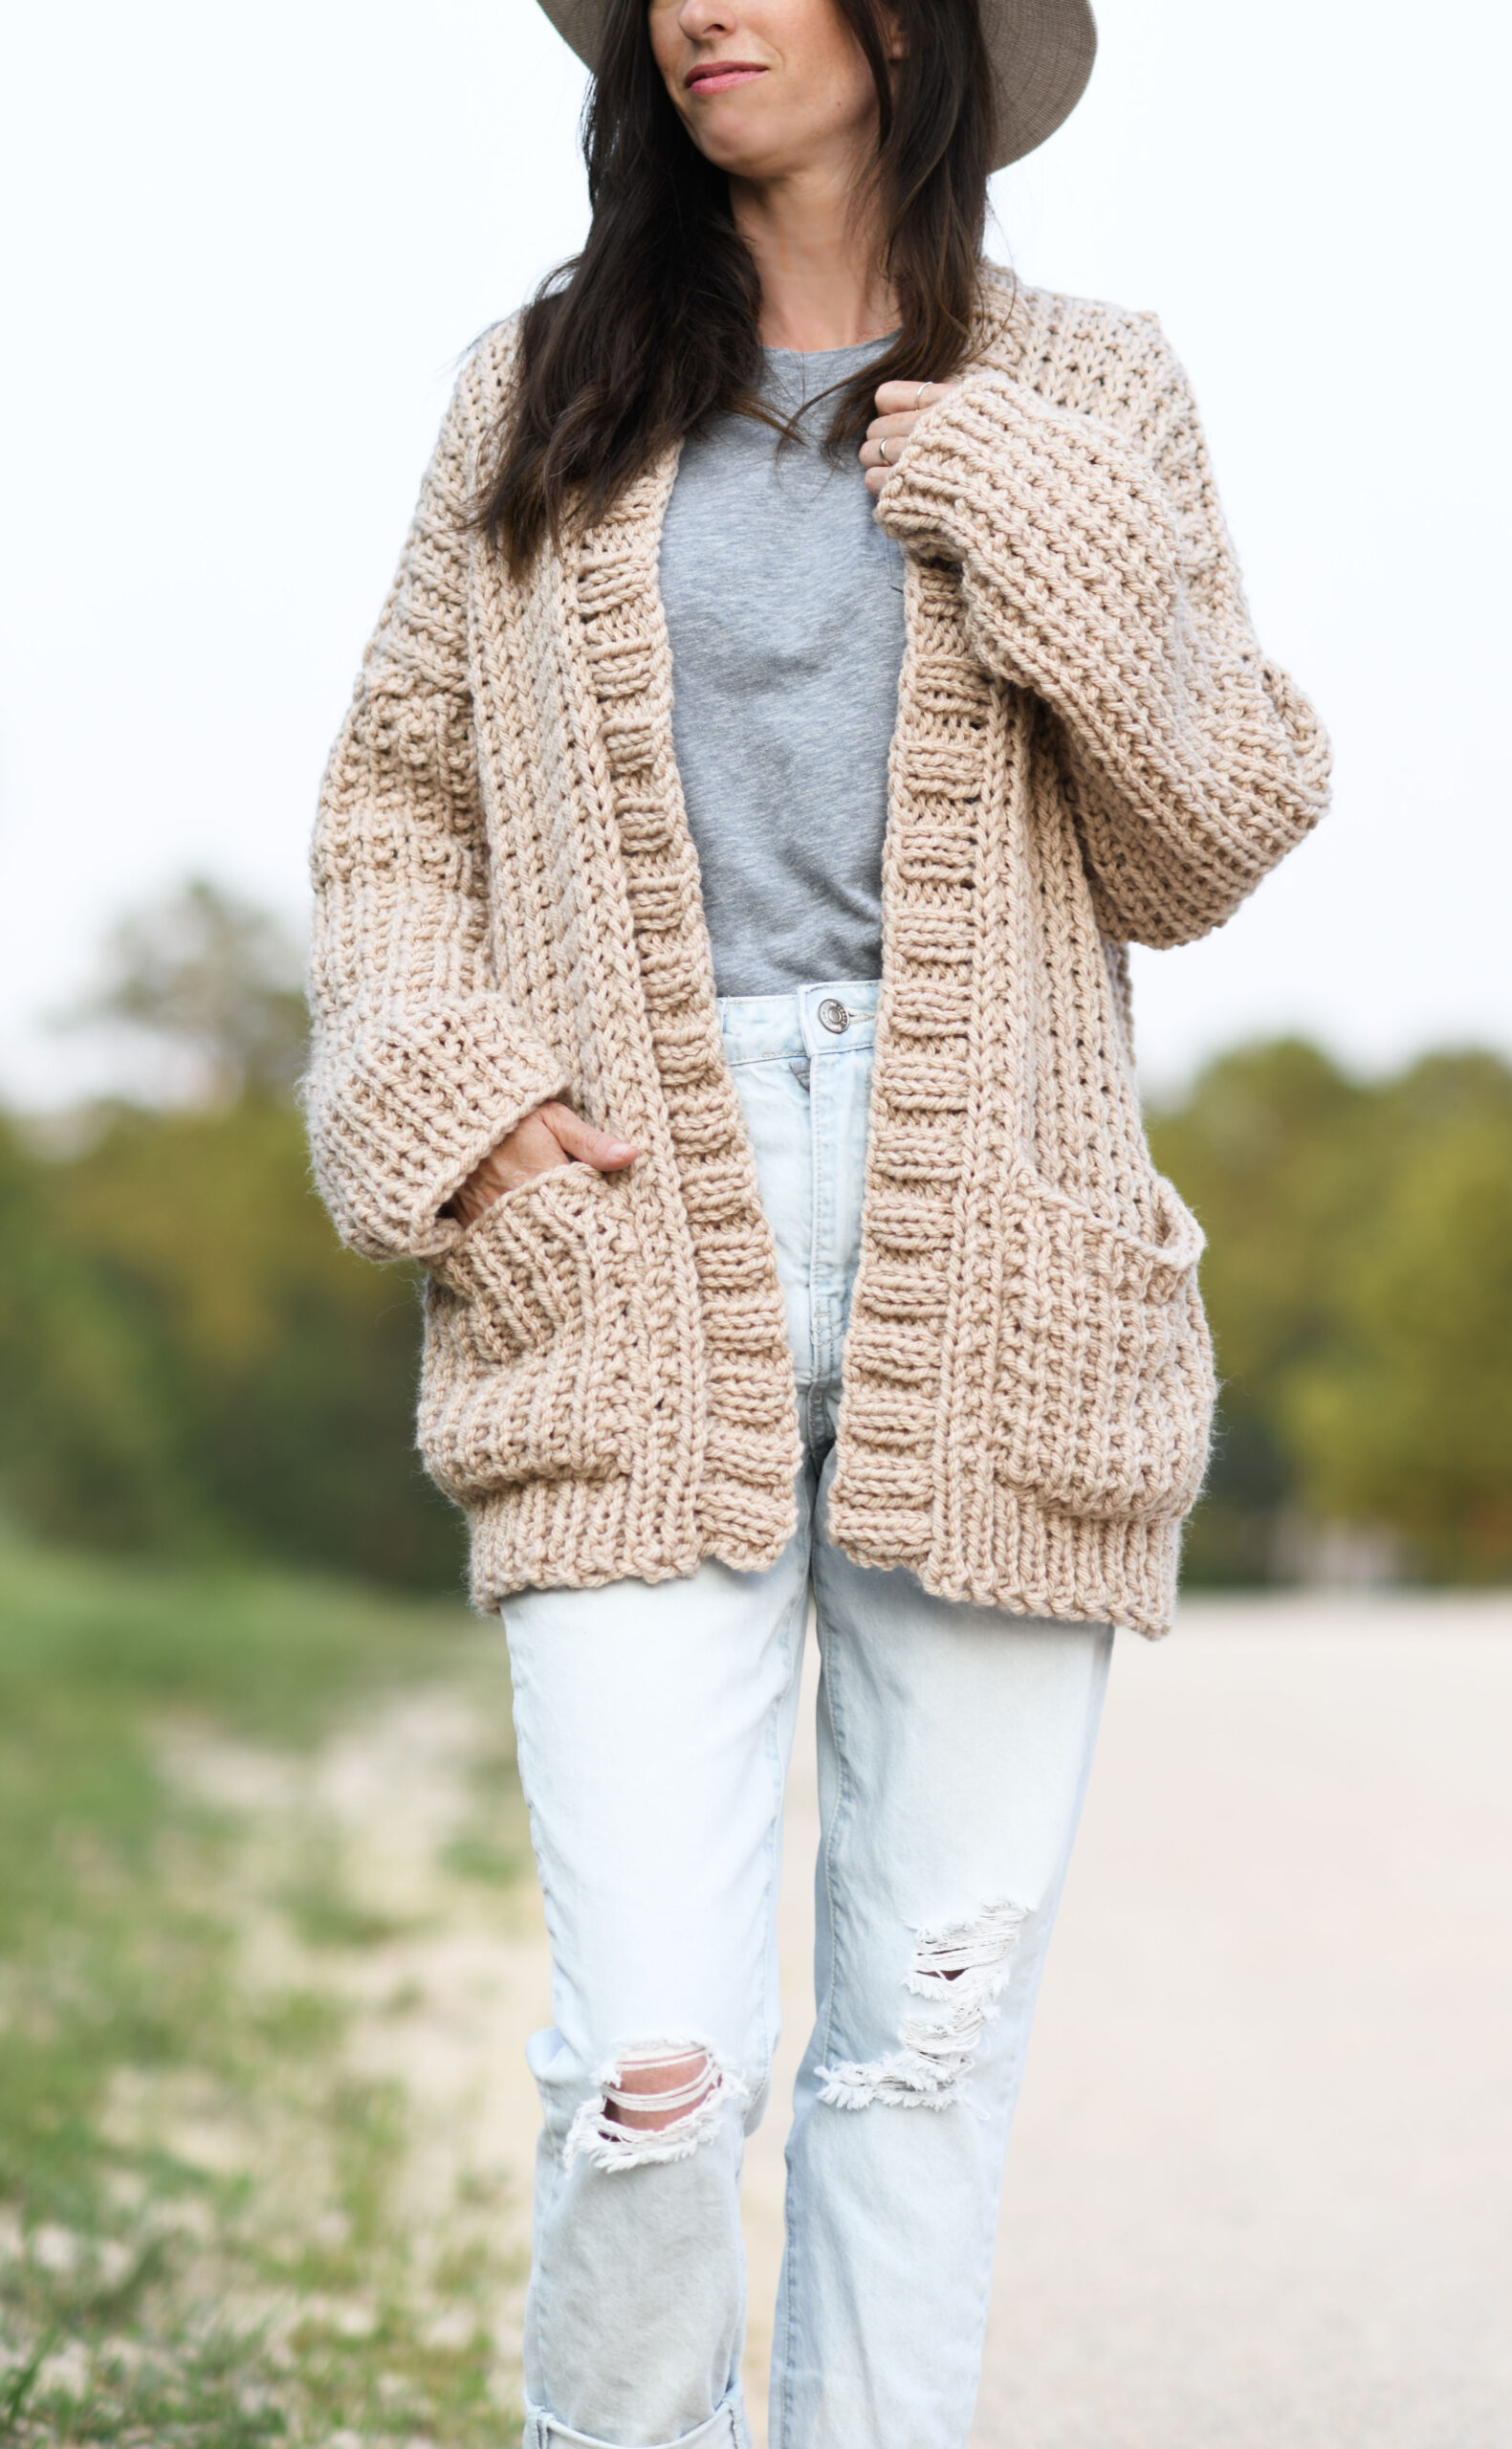
The construction is a lot like my other knit cardigan patterns in that it’s knit flat, in panels, and then seamed to finish. This keeps it easy for new knitters and it also gives it the roomy shape that I really enjoy.
You will simply need to make some basic decreases on the sleeves to complete the light shaping. AND, if you’re experienced, you can certainly modify the sleeves to knit them in the round to avoid seaming.
If you’re new to knitting, of if you’re a beginner, I always suggest you read through the entire pattern before beginning.
Definitely check out the notes section and the assembly section because those will give you the best idea on how it’s put together. I think you’ll find it’s easy to make!
For the neckline and collar section, you will pick up stitches and knit. This is the part that I receive the most questions about! It’s SO easy, but if you’ve never done it, of course it’s helpful to see it done. I found a video that will help you understand what you will do for that part of the pattern on YouTube HERE How To Pick Up And Knit Stitches Nancy Wynn. For my pattern, you will pick up one stitch for each stitch and work a 2×2 ribbing pattern.
So, are we ready to get started on this cozy, ribbed, glorious cardigan?
Again, check out the full free pattern below, or you can purchase the ad-free, PDF Formatted, printable pattern on Etsy HERE.
Description: Cozy ribbing and an oversized fit come together to make your
comfiest new fall cardigan! The cuddly rib stitching and squishy fabric is perfect
for curling up at home or keeping warm when you’re out. It’s an easy knit with
minimal shaping and it works up quickly too. Super cute with jeans and your
favorite t-shirt!
Materials:
US Size 15, 10 mm 36” circular knitting needles & straight needles (optional)
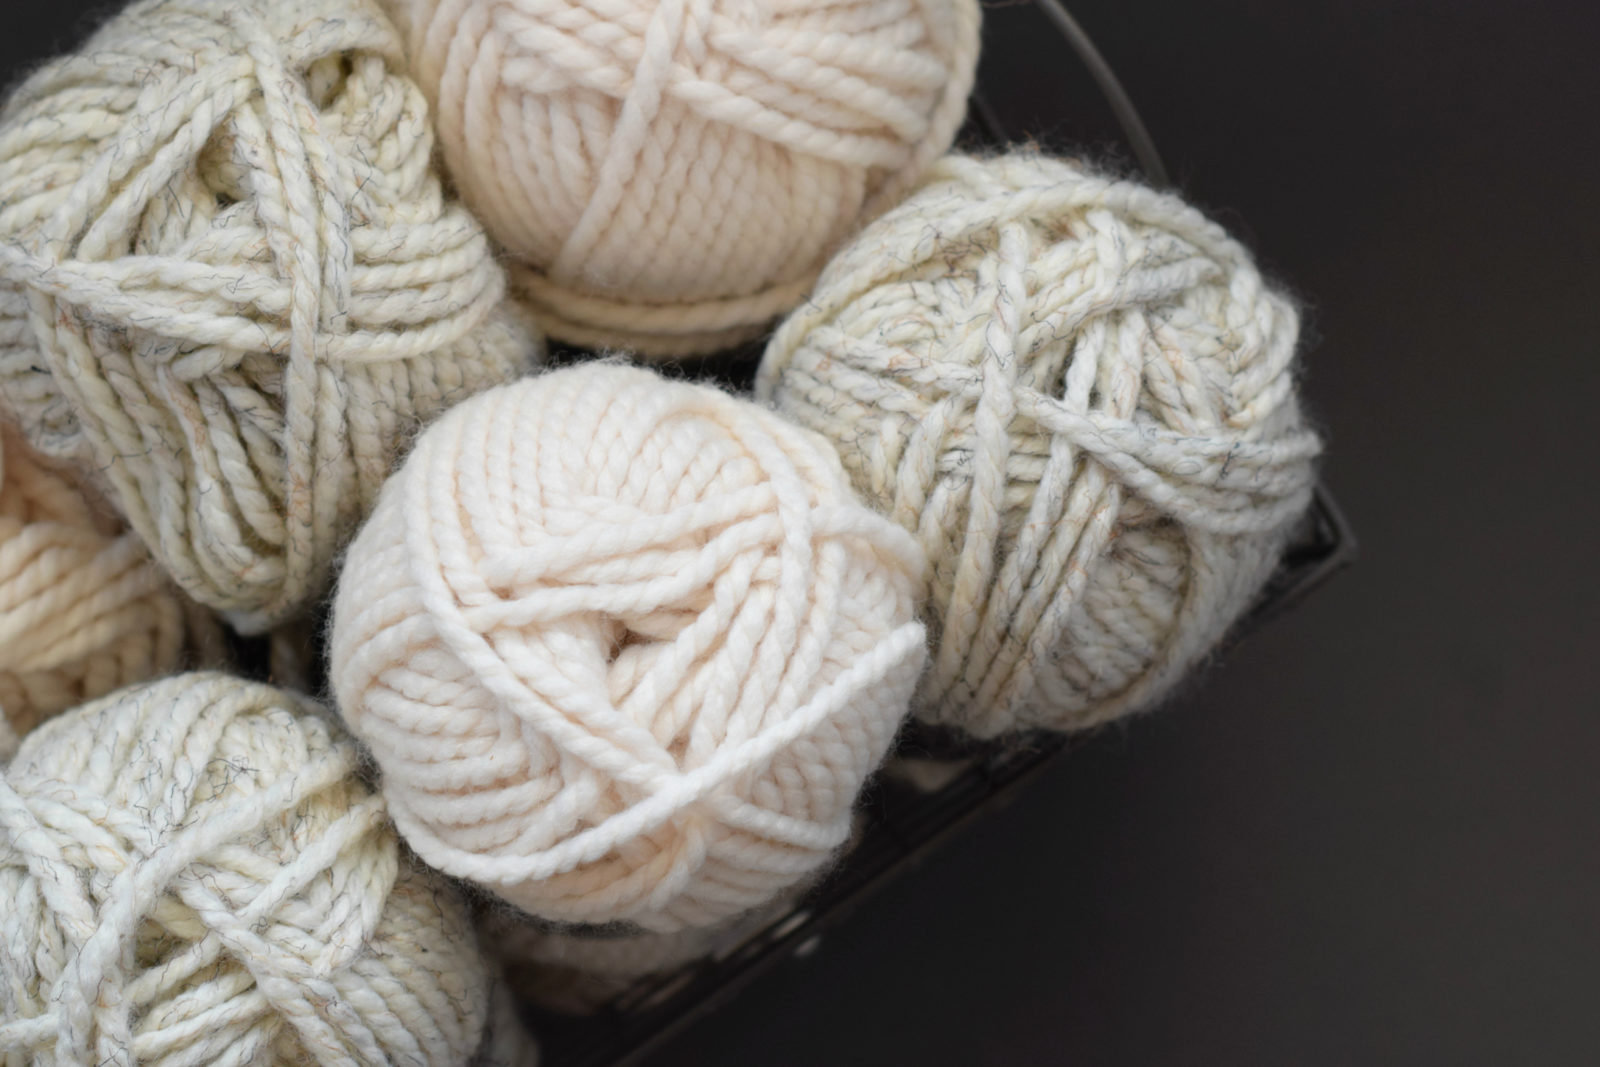
6 (7,8,9) Lion Brand Yarn Hue & Me chunky #5 yarn in Desert 125 g/skein KIT FROM LION BRAND HERE (available in several color options)
Pattern uses approximately 740 g (833 g, 966 g, 1109 g)
Scissors
Tapestry Needle
Measuring Tape
Sizes: Small, Medium, Large, XL
Gauge: Approximately 10 ½ stitches and 13 rows in 4” x 4” of broken rib
stitch
Please follow the key throughout the pattern according to the size you are
knitting:
S (M, L, XL)
Note: There is a lot of positive ease. Model is wearing a size small and has a
32” bust.
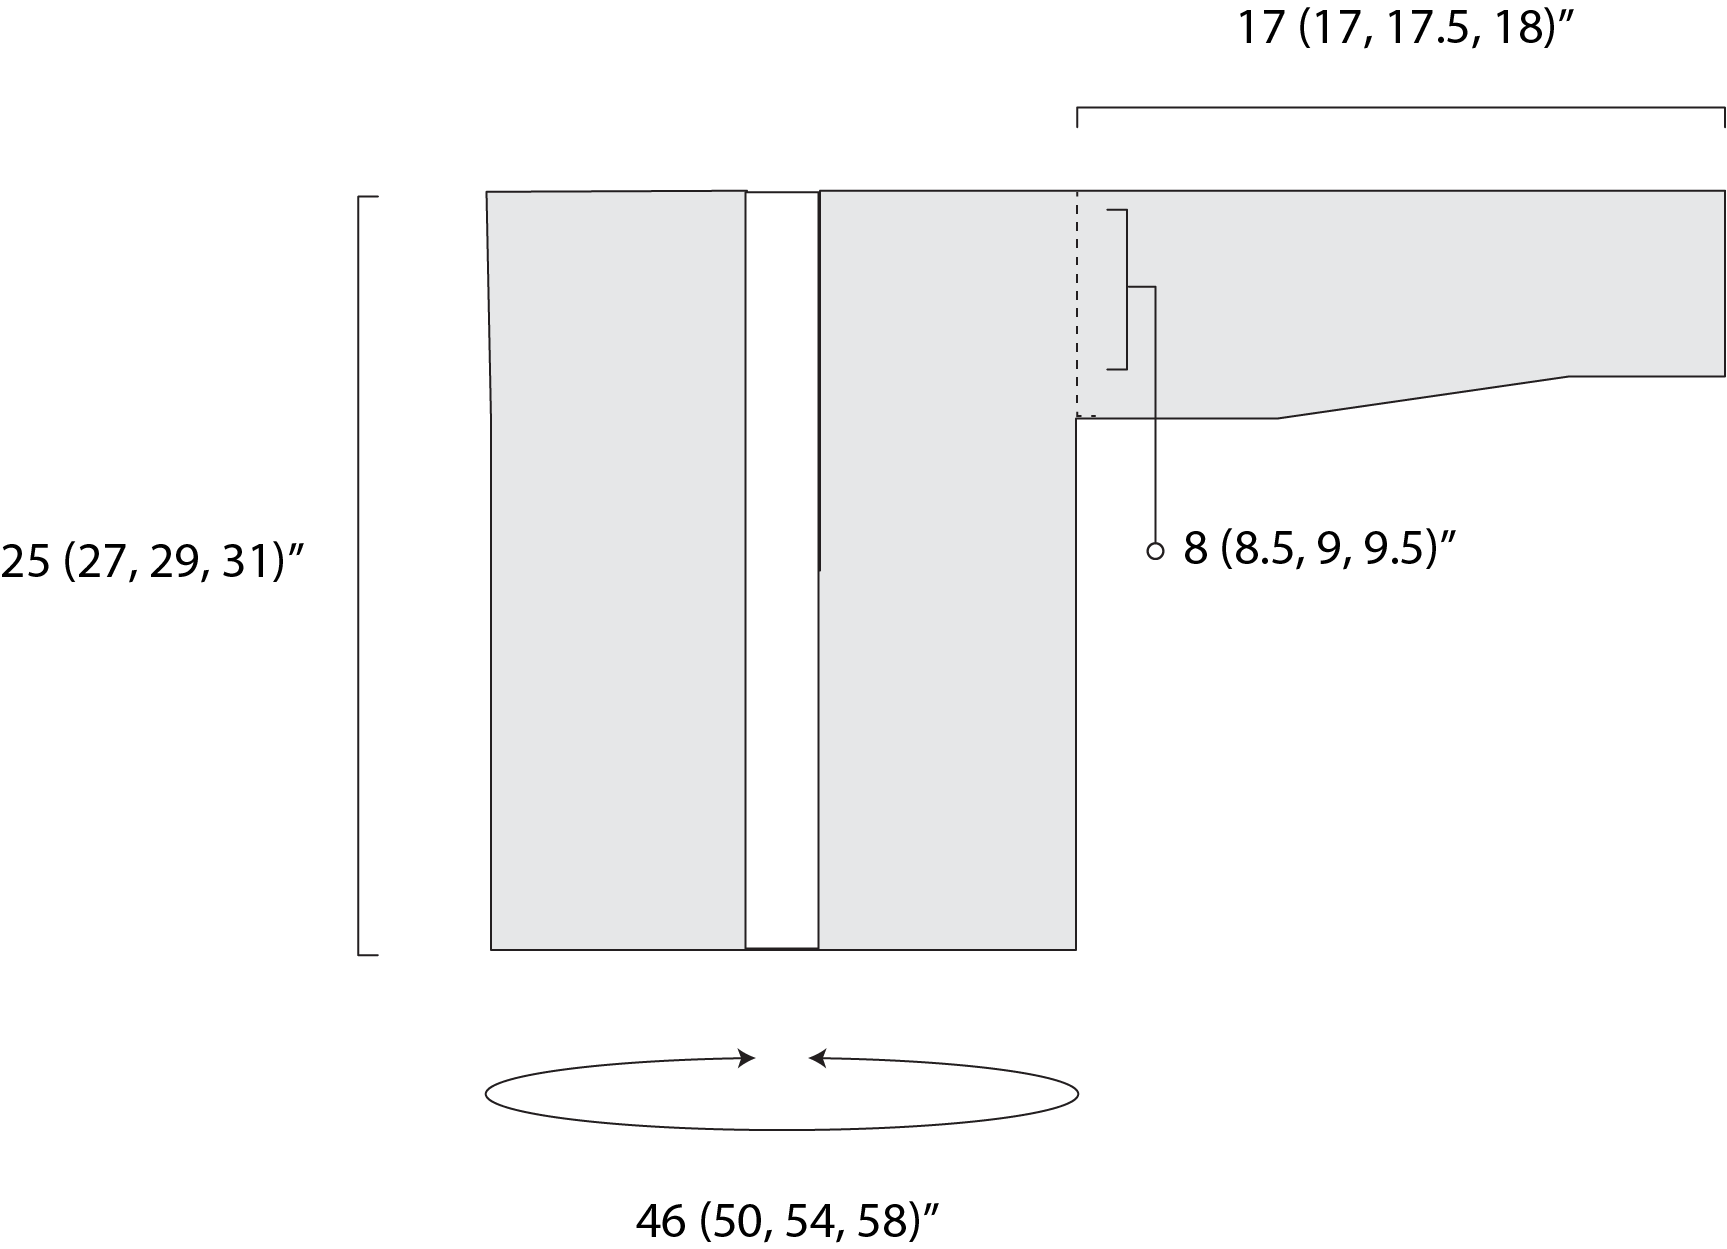
Bust Circumference (approximate):
S – 46”
M –50”
L – 54”
XL –58”
Length (approximate):
S – 25”
M – 27”
L – 29”
XL – 31”
Sleeve Length:
S – 17”
M – 17”
L – 17.5”
XL – 18”
Sleeve Width when seamed (approximate width at widest point):
S – 8”
M – 8.5”
L – 9”
XL – 9.5”
Abbreviations & Skills:
k – knit
p – purl
st – stitch
sts – stitches
k2tog – knit two together decrease
*You should understand how to work rib stitch patterns including a 1 x 1 rib stitch
and a 2 x 2 rib stitch.
Pattern Notes: This cardigan is knit flat by making one rectangular panel for the back and two rectangular panels for the front (see schematic). Sleeves and pockets are also knit flat. The panels are seamed to finish. If you’re experienced, you can
certainly modify the pattern to knit the sleeves in the round and avoid seaming. The collar is knit by picking up stitches and knitting a 2 x 2 rib pattern. Consider blocking panels and sleeves to shape and size. The pattern calls for circular needles even while it is knit flat. The circular needles are necessary to comfortably hold all of the stitches. If you have difficulty picking up all stitches along the neck and collar line to knit the collar, you may work halfway up each side and seam the two halves of the collar at the back of the neck. Enjoy!
My Big Comfy Ribbed Cardigan Knitting Pattern
Back Panel (make 1)
*stitch count remains the same throughout the pattern
Cast on 60 (64, 68, 72)
1×1 Ribbing Pattern
Row 1 *K1, p1; repeat from * across the row.
Rows 2 – 7 Repeat row 1.
Broken Rib Stitch Section
Row 8 Knit each st across the row.
Row 9 *K1, p1, repeat from * across the row.
Repeat rows 8 – 9, working broken rib stitch until entire piece measures
approximately 24”(26”, 28”, 30”) then continue as indicated below.
Next, finish with two final rows of knit stitches (garter stitch).
Cast off and weave in ends.
Front Panel (make 2)
*stitch count remains the same throughout the pattern
Cast on 26 (28, 30, 32)
1 x 1 Ribbing Pattern
Row 1 *K1, p1; repeat from * across the row.
Rows 2 – 7 Repeat row 1.
Broken Rib Stitch Pattern
Row 8 Knit each st across the row.
Row 9 *K1, p1, repeat from * across the row.
Repeat rows 8 – 9 until piece measures approximately 24”(26”, 28”, 30”).
Next, finish with two final rows of knit stitches (garter stitch). The back panel
and front panels should be the same length.
Cast off and weave in ends.
Sleeves (make 2)
*each decrease row reduces stitch count by 2
Cast on 38 (40, 42, 44)
Row 1 Knit each st across the row.
Rows 2 *K1, p1, repeat from * across the row.
Rows 3 – 8 Repeat rows 1 & 2, in that order, working the broken rib stitch
pattern.
Row 9 K2tog, k across to last 2 sts, k2tog. (decrease row)
Row 10 *P1, k1, repeat from * across the row.
Row 11 Knit each st across the row.
Row 12 *P1, k1, repeat from * across the row.
Row 13 K2tog, k across to last 2 sts, k2tog.
Row 14 *K1, p1, repeat from * across the row.
Row 15 Knit each st across the row.
Row 16 *K1, p1, repeat from * across the row.
Row 17 K2tog, k across to last 2 sts, k2tog.
Repeat rows 10 – 17, in that order only until sleeve measures approximately
10” (11”, 12”, 12”) wide (not long) before seaming.
Next, continue to knit the broken rib stitch pattern, without any decreasing, until
sleeve measures approximately 16” (16”, 16.5”, 17”).
Finish by knitting a 1 x 1 rib pattern for the cuff for approximately 1” long (all sizes).The sleeve should now measure approximately 17” (17”, 17.5”, 18”). Note that this is a generous length. Feel free to customize the sleeve length and make them longer or shorter as desired.
Cast off and weave in ends.
Pockets (make 2)
Cast on 18 (18, 20, 20) sts (you’re knitting from the bottom up)
Row 1 Knit each st across the row.
Row 2 *K1, p1, repeat from * each across the row.
Repeat rows 1 & 2, working in broken rib stitch until piece measures approximately
5.5” long.
Finish by working four final rows of 1 x 1 ribbing.
Cast off and weave in ends.
Assembly
Place two front panels directly on top of back panel, aligning outer edges and
leaving space in the middle.
Using a simple whip stitch, sew the shoulders along the top on each side.
You may choose to sew sleeves onto cardigan before or after seaming the sleeves.
Seam sleeves using a whip stitch or your preferred method.
Seam up sides of the cardigan with a simple whip stitch.
Place pockets on the lower, center of each front panel. Sew with a whip stitch
leaving the top of the pockets open. The 1 x 1 rib stitch should be at the top.
Collar – Neckline
Pick up stitches evenly along entire collar/neckline (pick up one stitch at each row)
keeping an even stitch count. (See my link to a video in the blog post above that will show you how to pick up and knit stitches)
Work a 2 x 2 rib stitch pattern until collar measures approximately, 2” wide or
desired width.
Cast off and weave in all those ends!
In the schematic below, you can more easily visualize how the cardigan is put together. The two front panels lay on top of the back panel. The sleeves are seamed and attached.
Schematic:
Enjoy your new COZY RIBBED cardigan!
I really hope you enjoy this big, comfy, ribbed cardigan as much as I do. Cheers to cool weather knitting, my friend!
XO,
Jessica
More Easy Knitting Patterns:
10 Easiest Knit Sweater Patterns HERE
Tierra Stitchy Hoodie Knitting Pattern
LOVE this!
Beautiful ❤️!
Bummer. I was hoping it was crocheted!! Maybe next time.
Hi Jessica ,
I am currently making your Breckenridge sweater , almost done the first panel . Loving how light and airy it feels ! Now I am really anxious to finish it , one to be able to wear it and two because now I have seen this new cardigan you have made and just LOVE IT !! I think I will have to work on both sweaters at the same time , lol . Yup , that’s what I’m going to do . I will order the yarn and as soon as it arrives I will be casting on , lol . Thanks for another great pattern ; ) .
This looks so comfy and warm. It’s still summer but I feel like start knitting something to wear when it’s cold. Maybe this one? Jessica, I love your patterns.
I love all of your patterns, both knit and crochet. You are a very talented person, keep up the good work and thanks for sharing with us!
Love it!!!! Great project to start ! Thanks and have a nice weekend!!
Well, all I have to say is: purchasing more yarn is all your fault…that’s what I’m telling everyone. This is a must make sweater. Sweaters are about all I wear in the winter…California weather lol, and this one will serve me very well. Thank you.