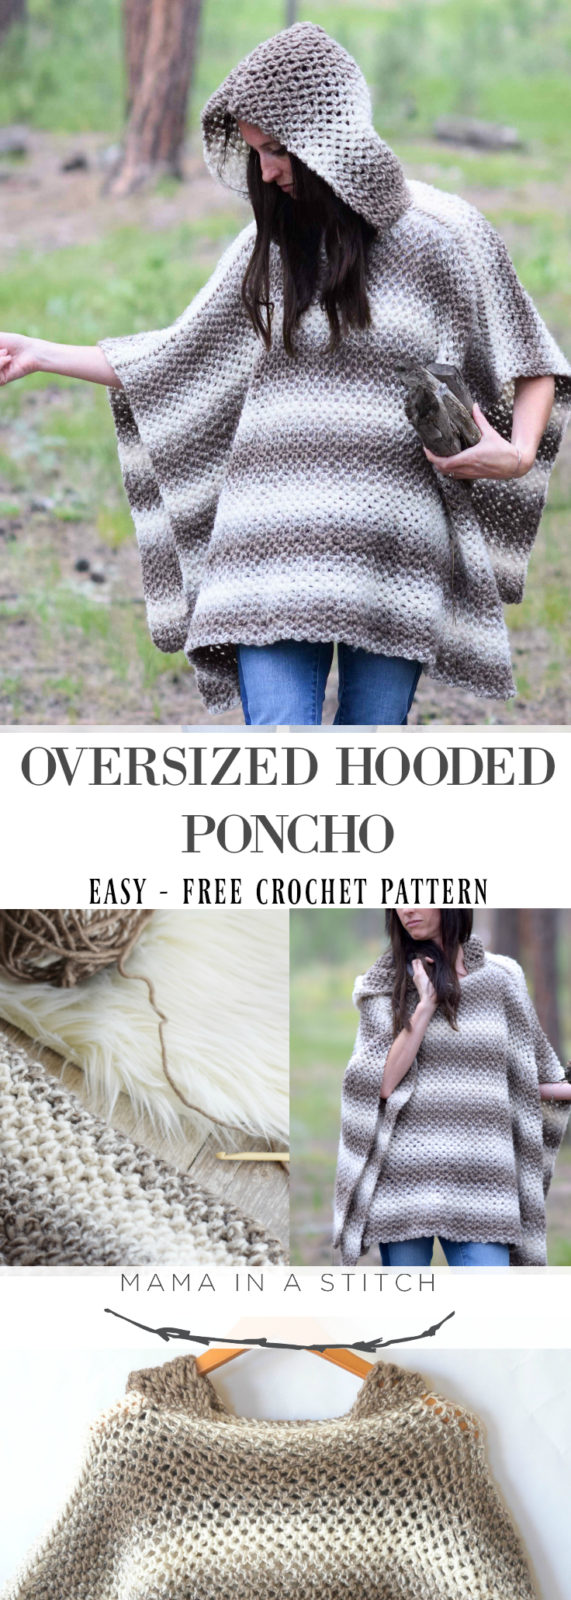
Driftwood Oversized Crochet Hooded Poncho Pattern
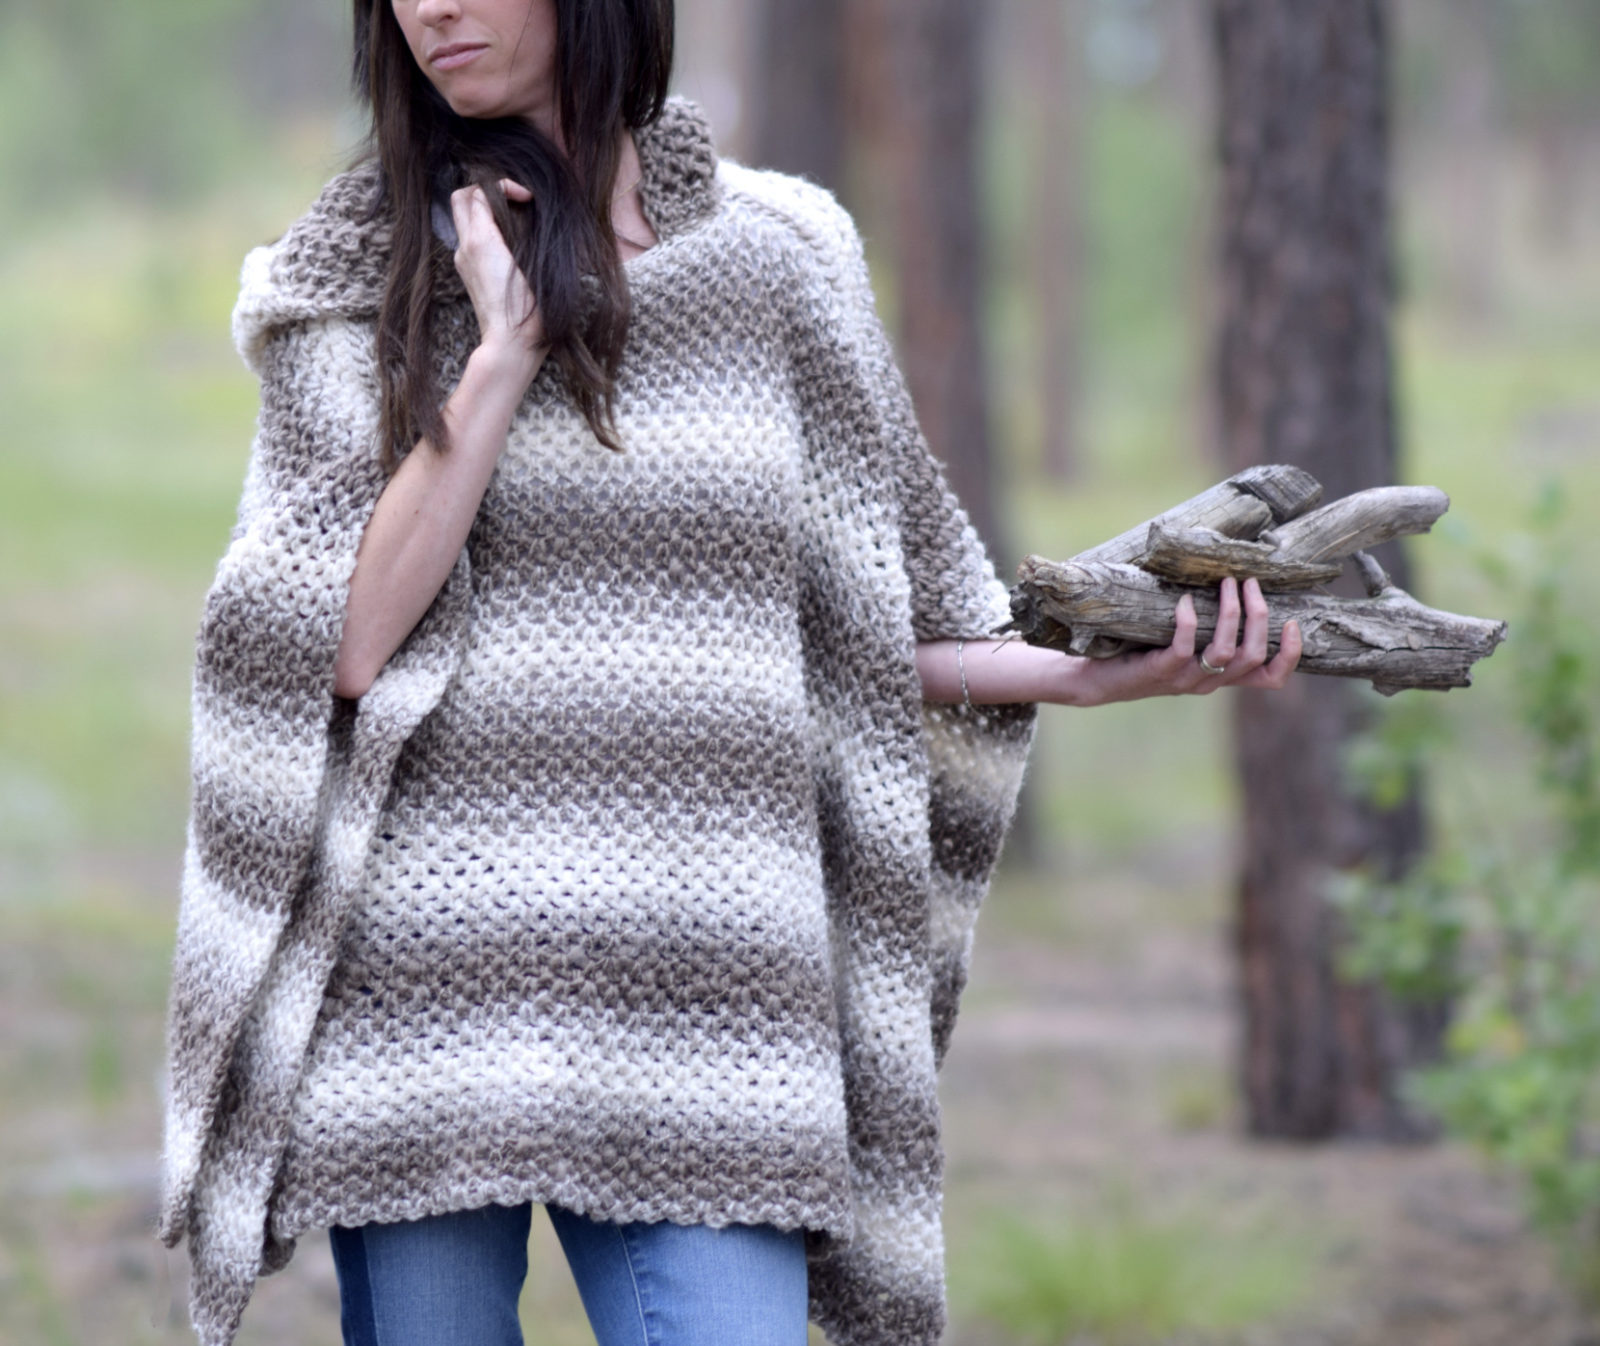
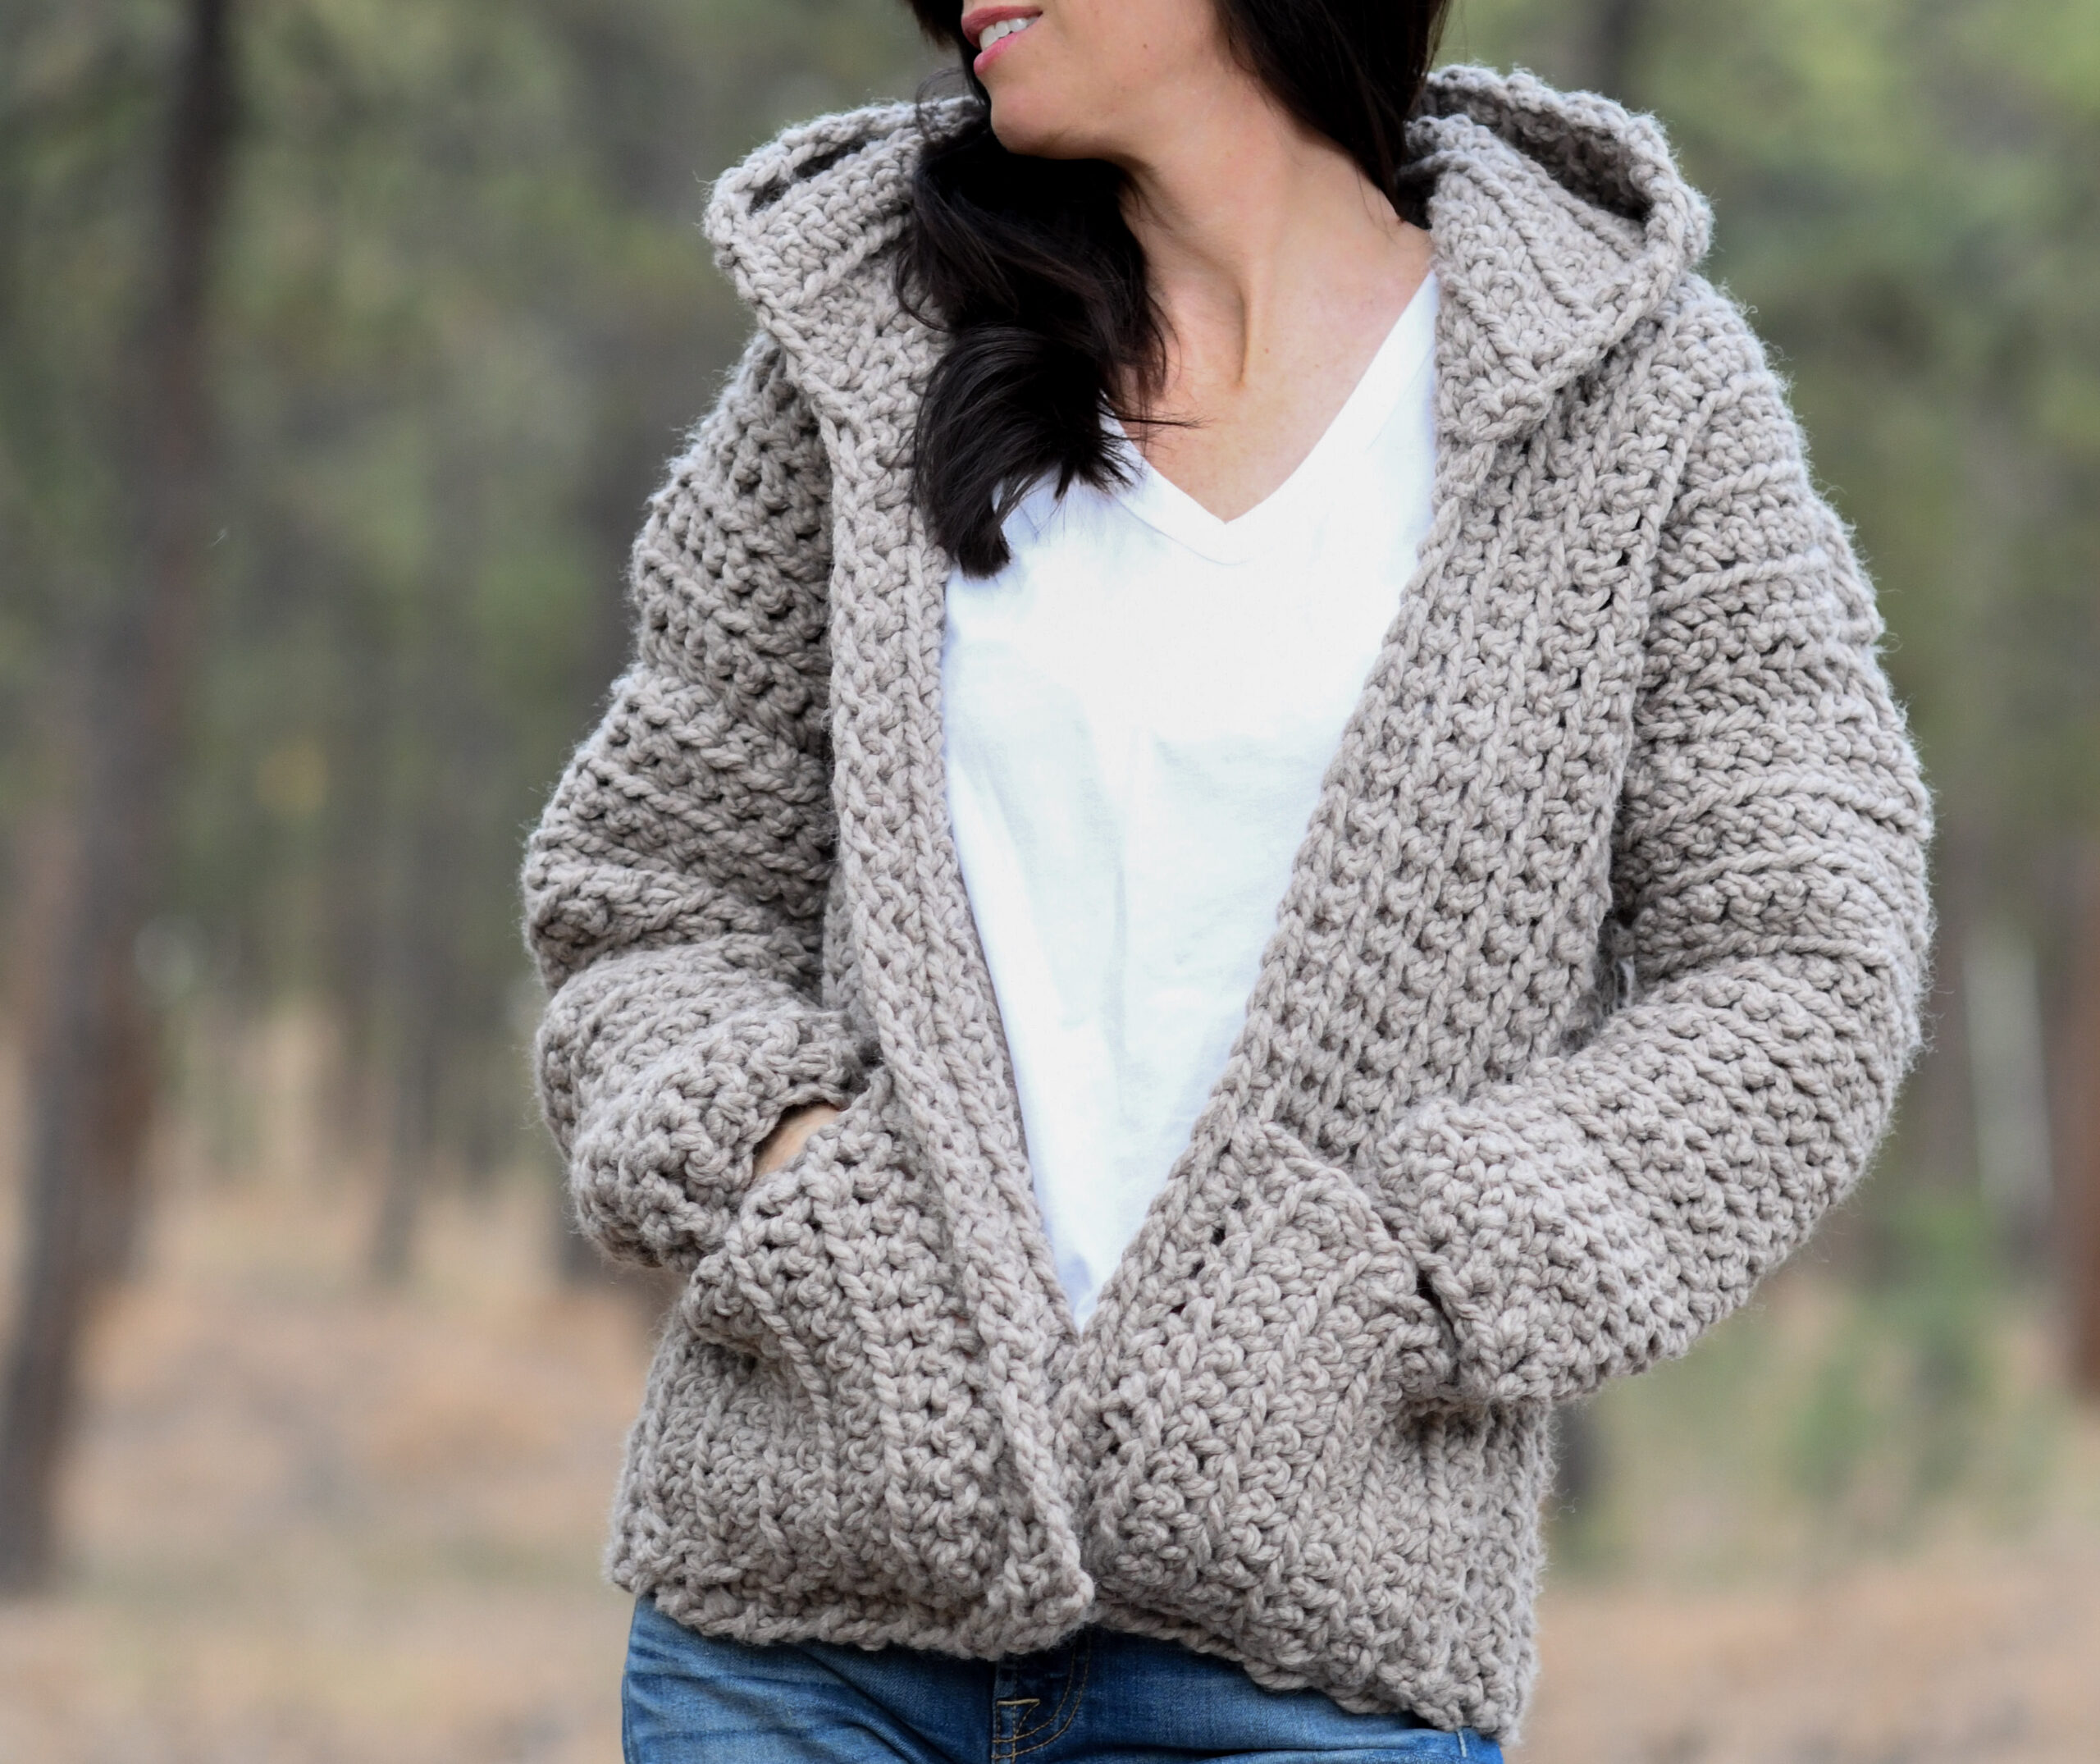
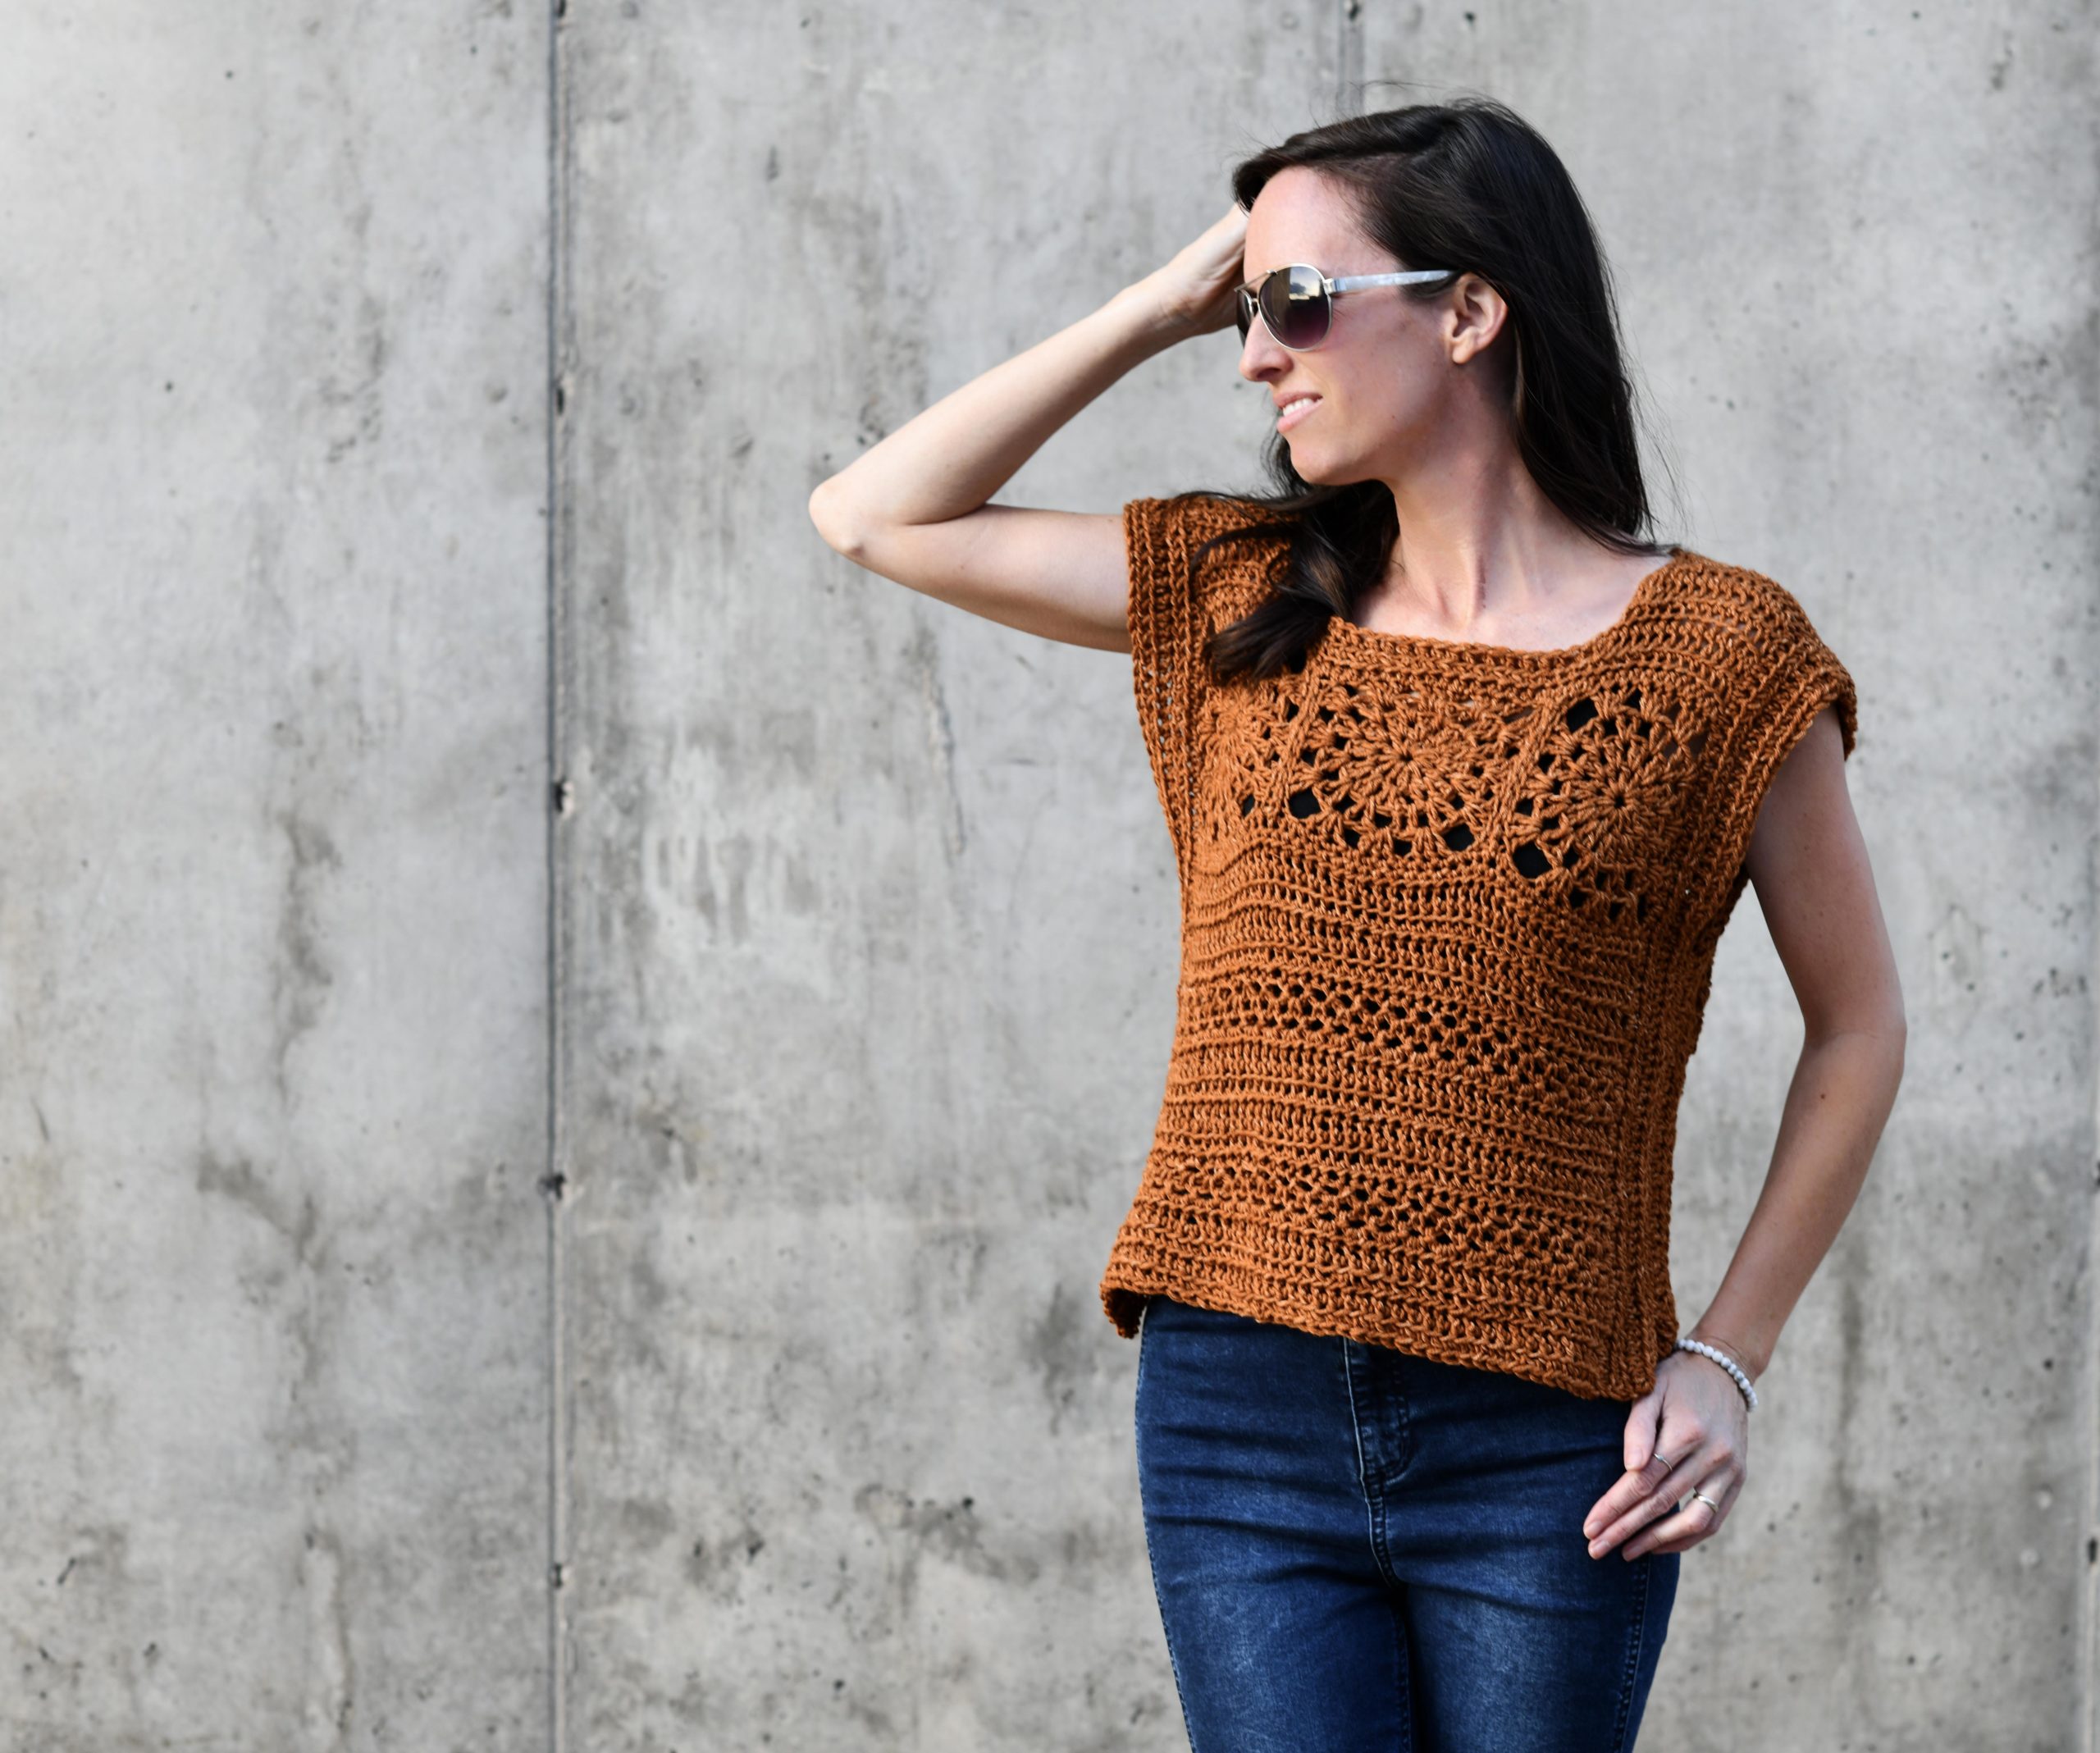
This gorgeous, easy crochet poncho uses a beautiful yet simple crochet stitch and color changing yarn. It’s so cozy and easy to make! See the full free pattern below!
Who likes cozy?! It’s oversized, warm, comfortable and most importantly – EASY. AND it’s official. I’ve caught fall crochet fever with several of you and am accepting and embracing it. I’m just as bad as the craft stores that have already putting out Christmas stuff. 🙂
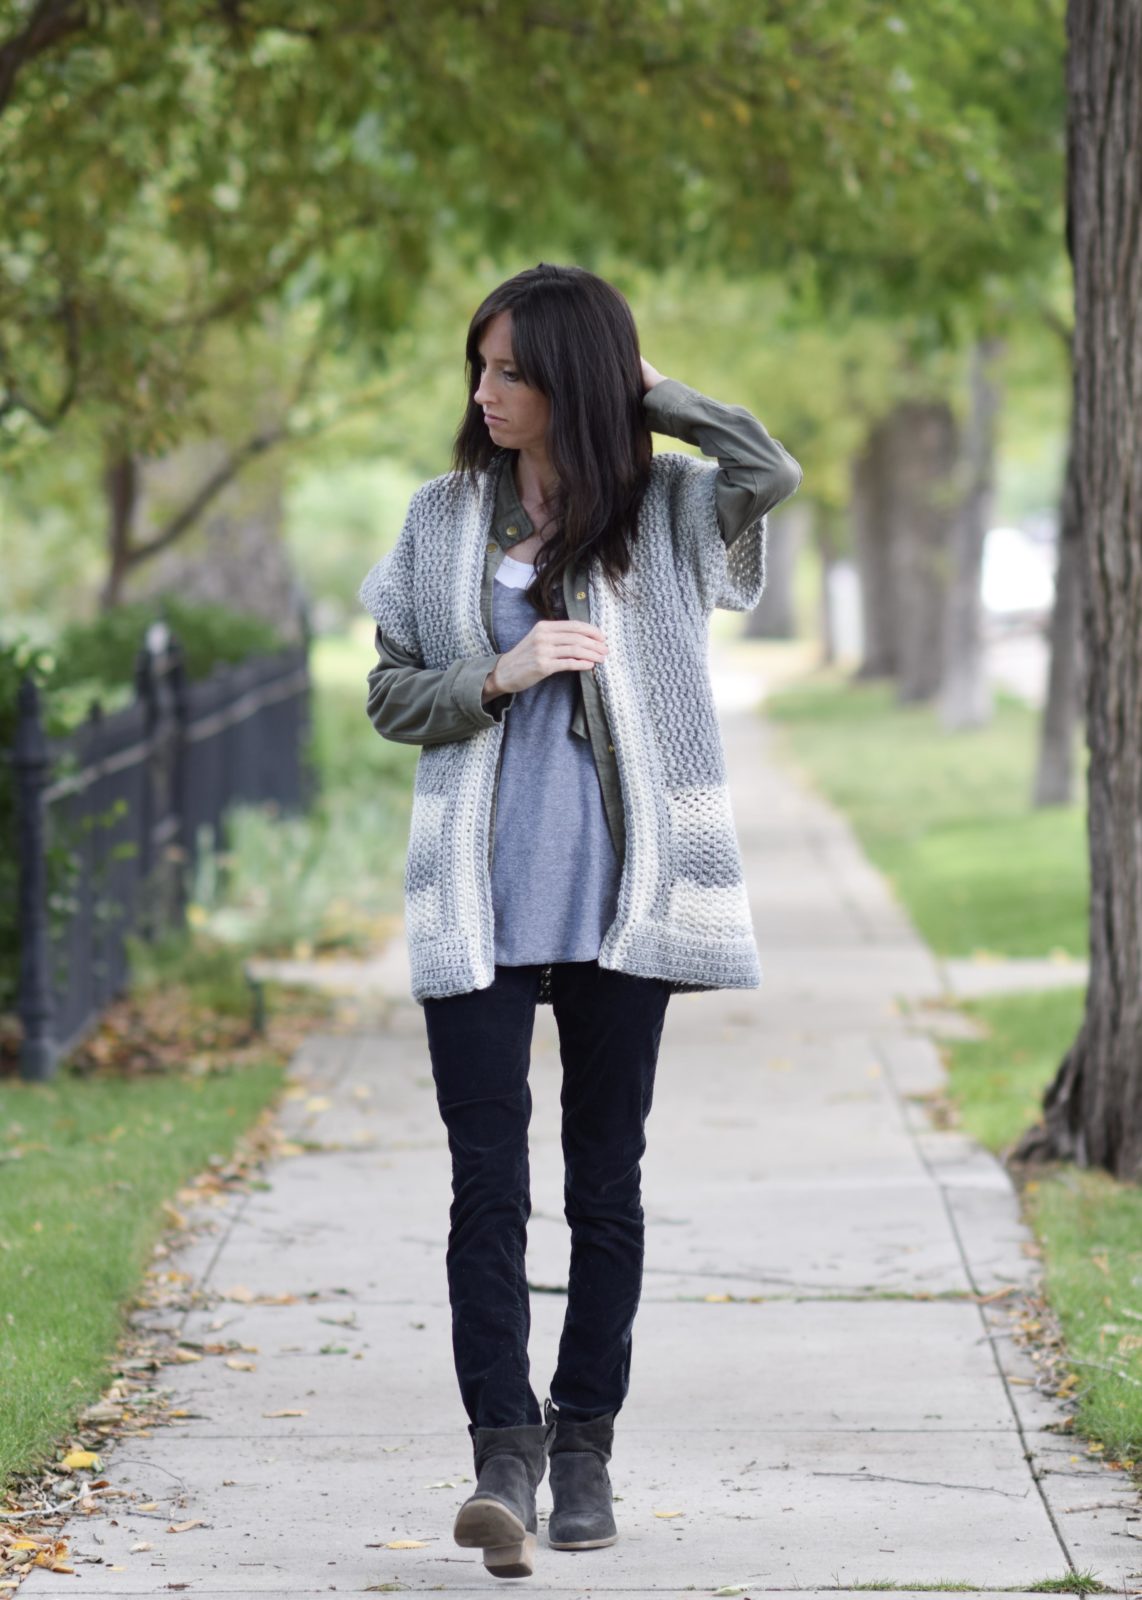
You guys, this is so comfortable. If you want to curl up in something that has an easy, light fit but is super warm and cozy, this could be it. While I love the blanket sweaters, I find this poncho to meet and even exceed them in the comfortable wear department.
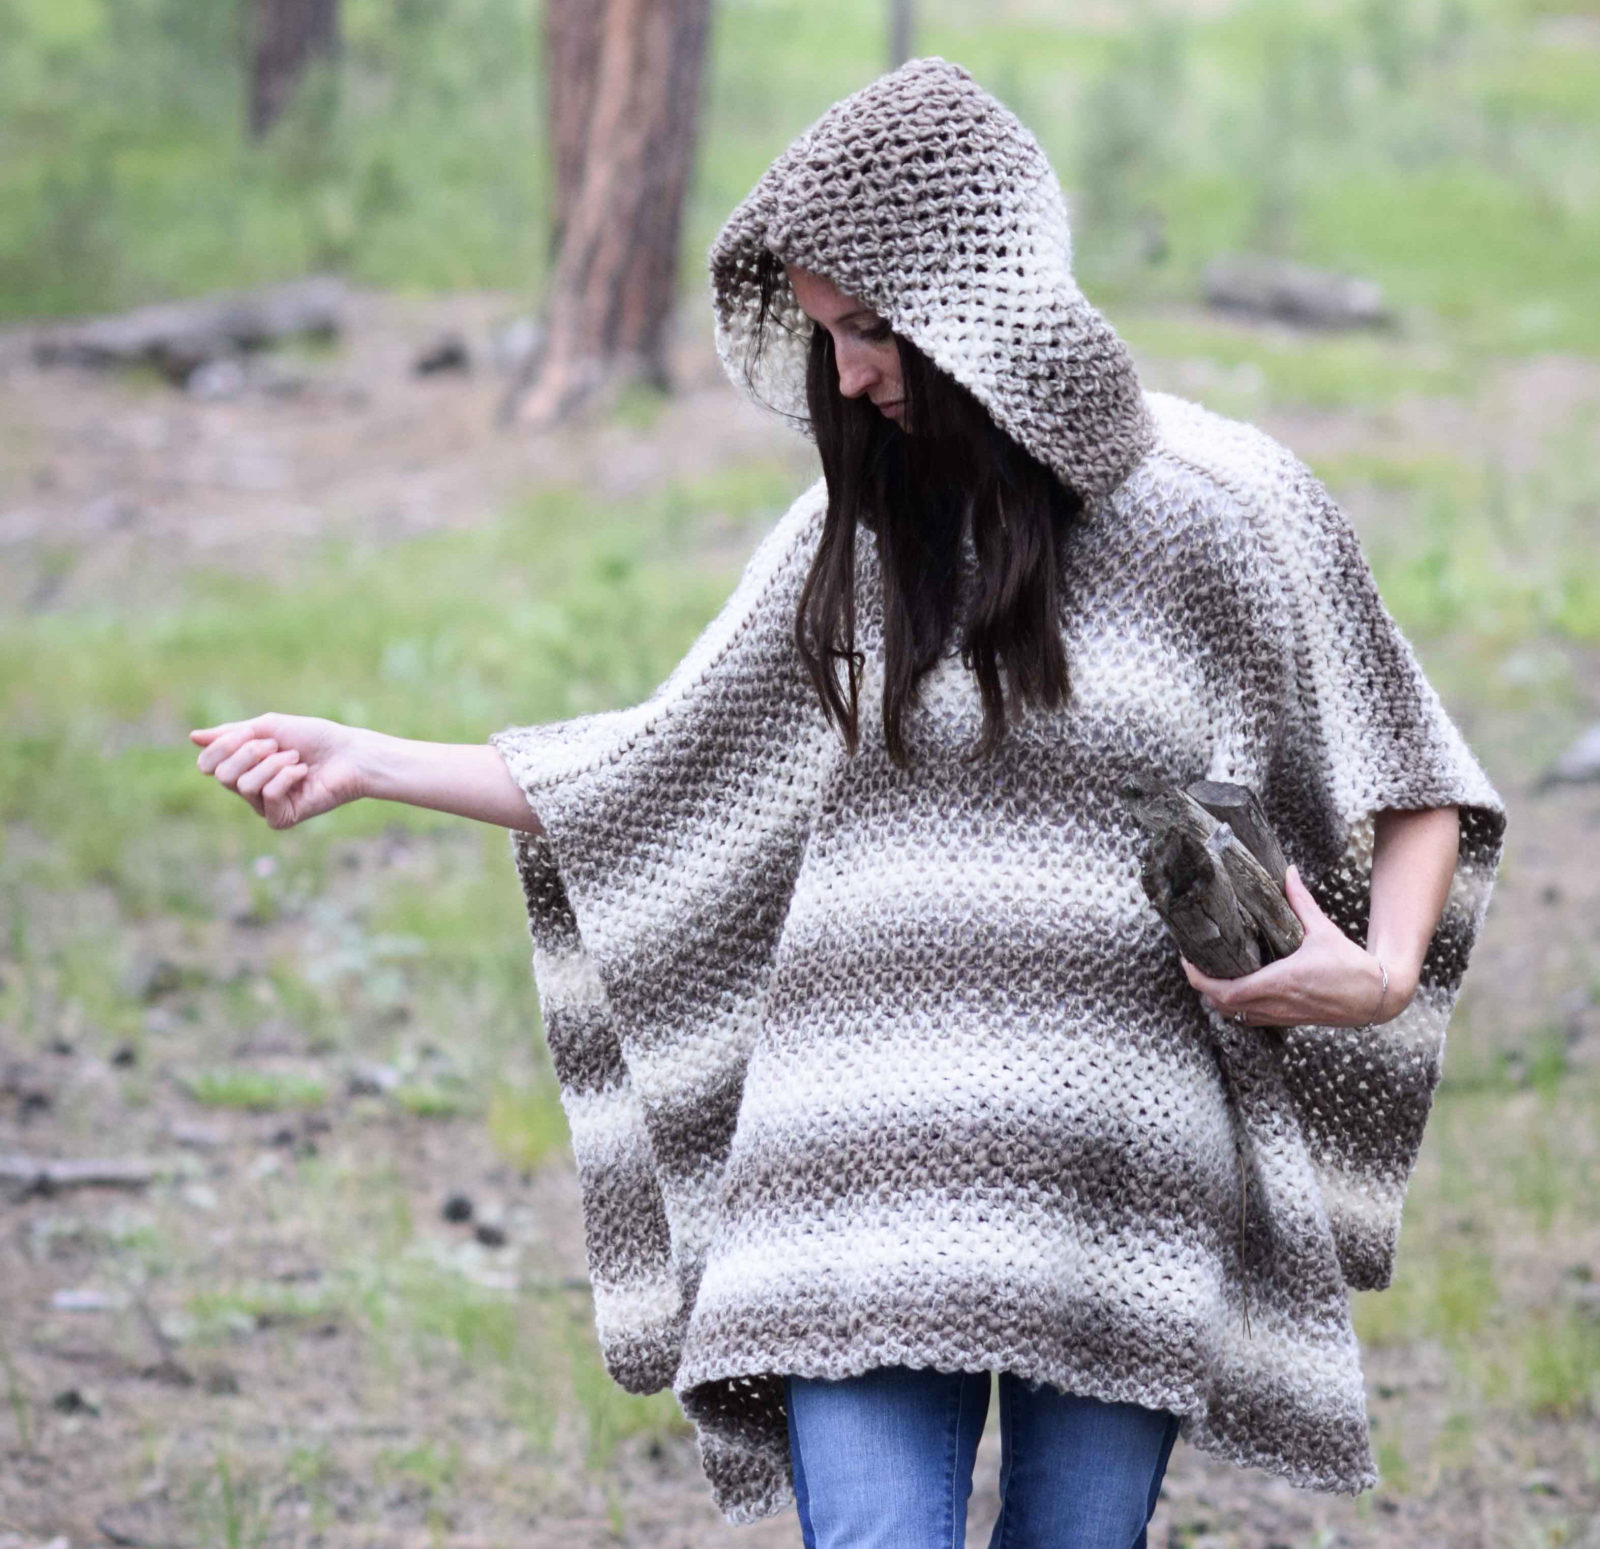
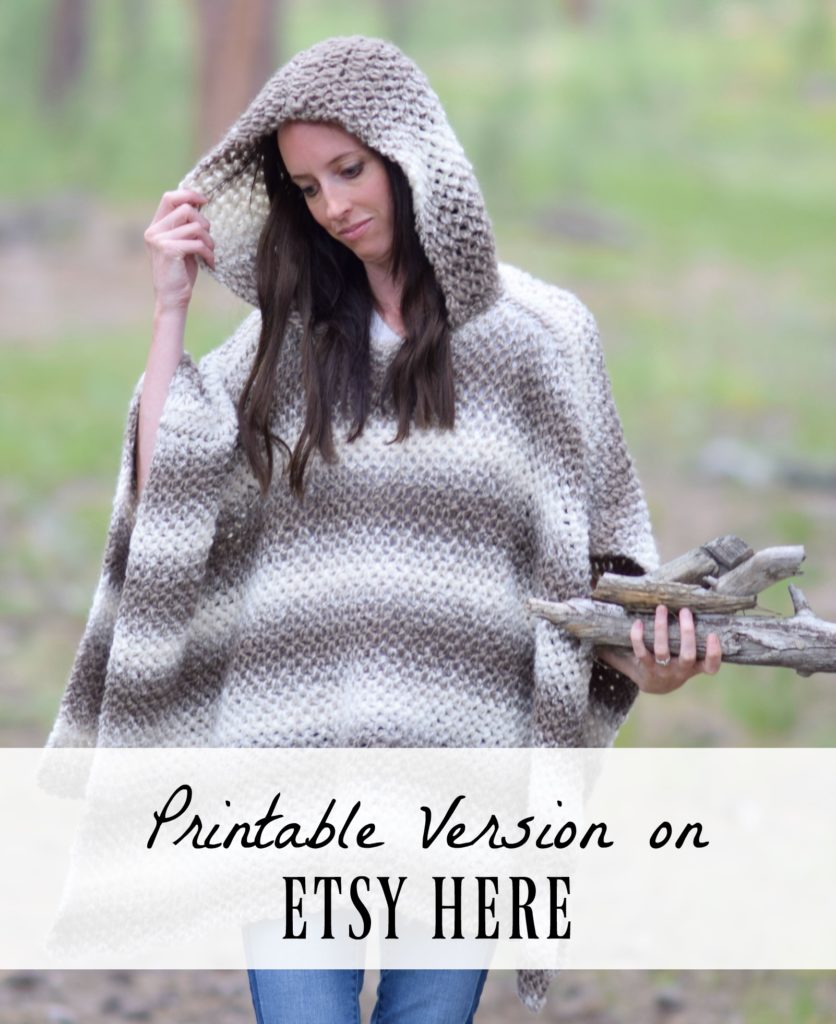
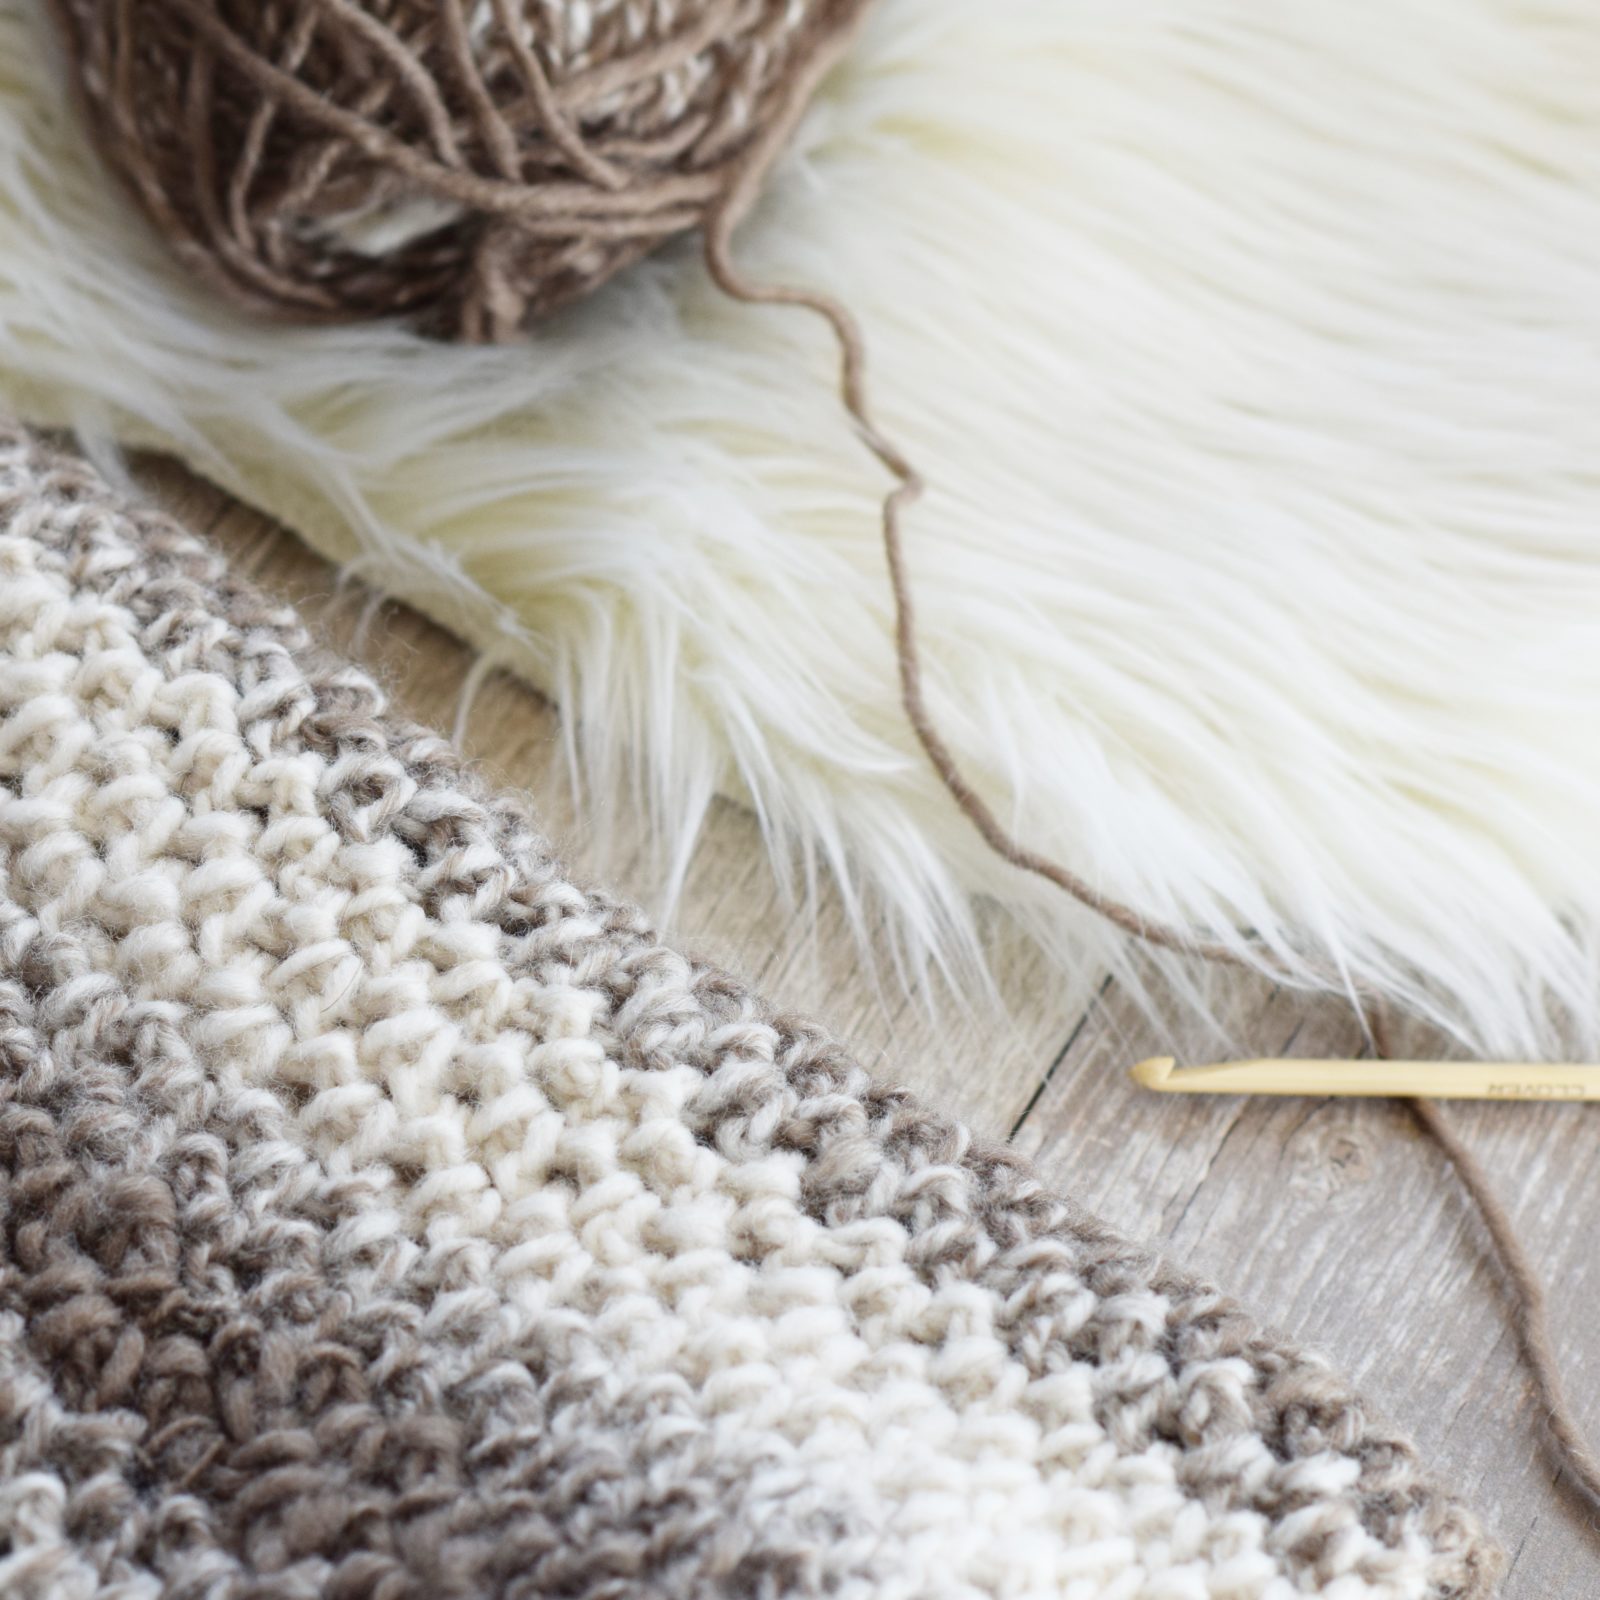
It uses just four skeins of the beautiful Lion Brand Scarfie yarn and works up with a super simple and “knit like” stitch pattern. The hood adds a touch of warmth and comfort but it’s completely optional. What do you think? You can scroll down to see the pattern for free or you may purchase an ad-free, printable version from my Etsy shop HERE.
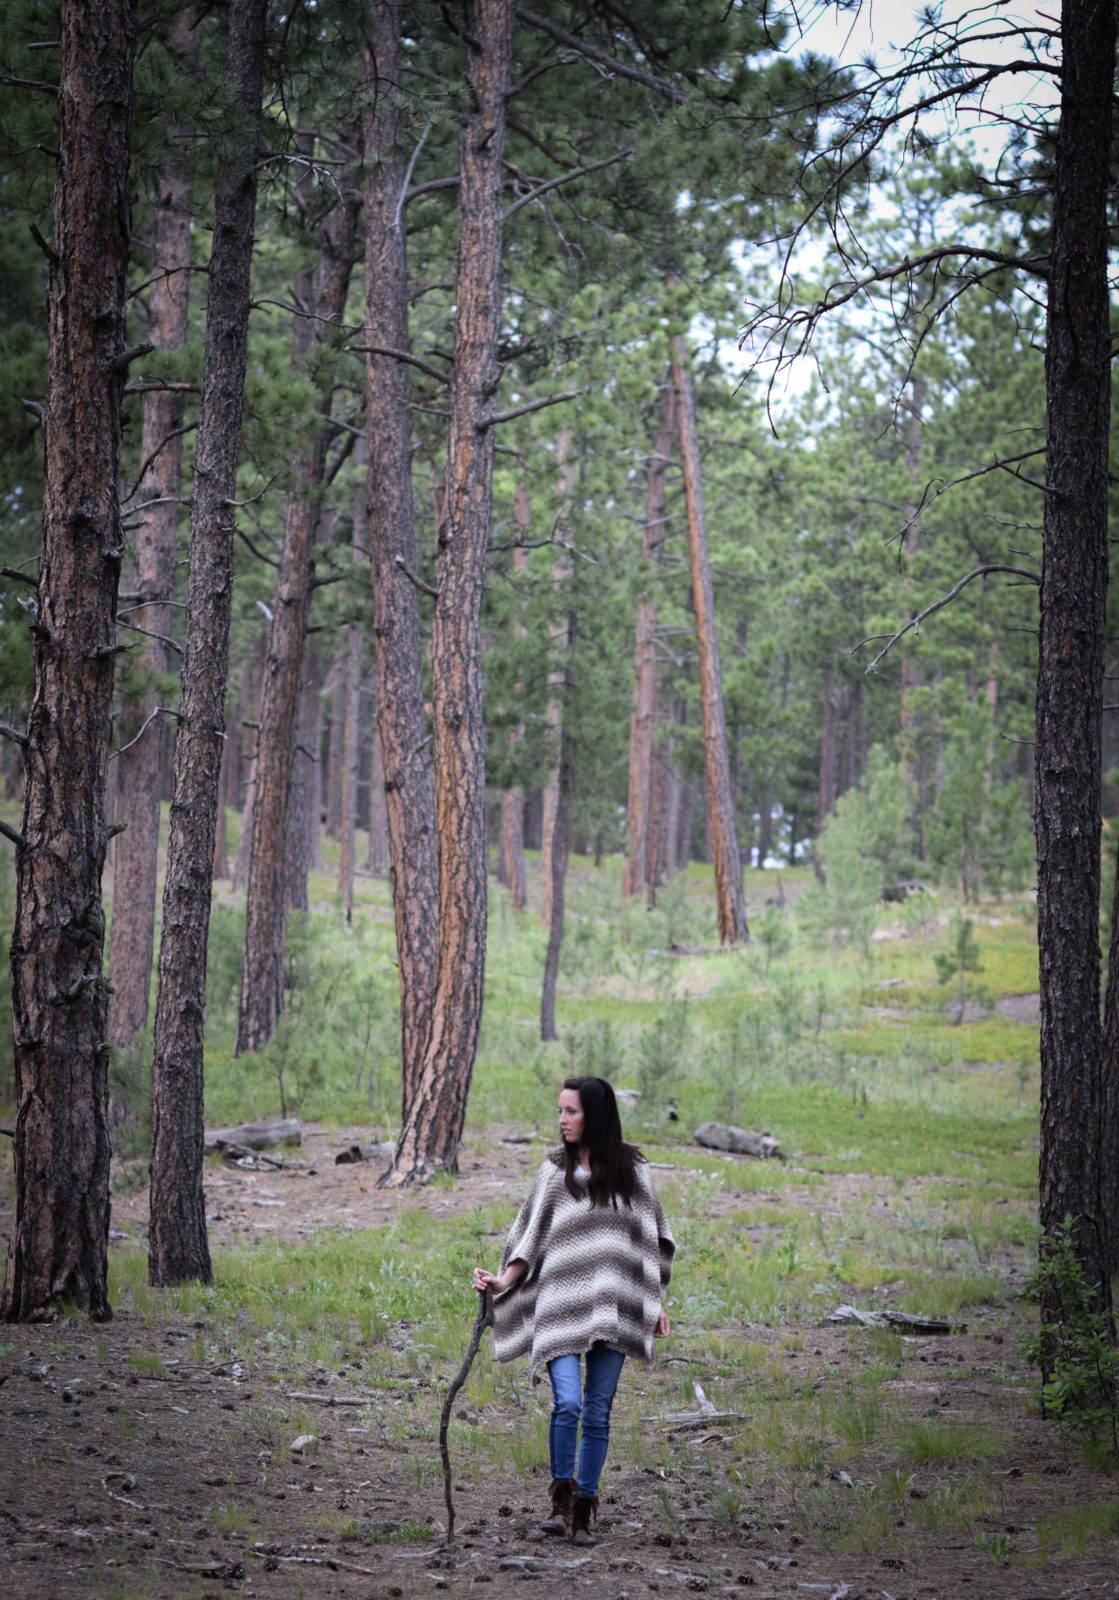
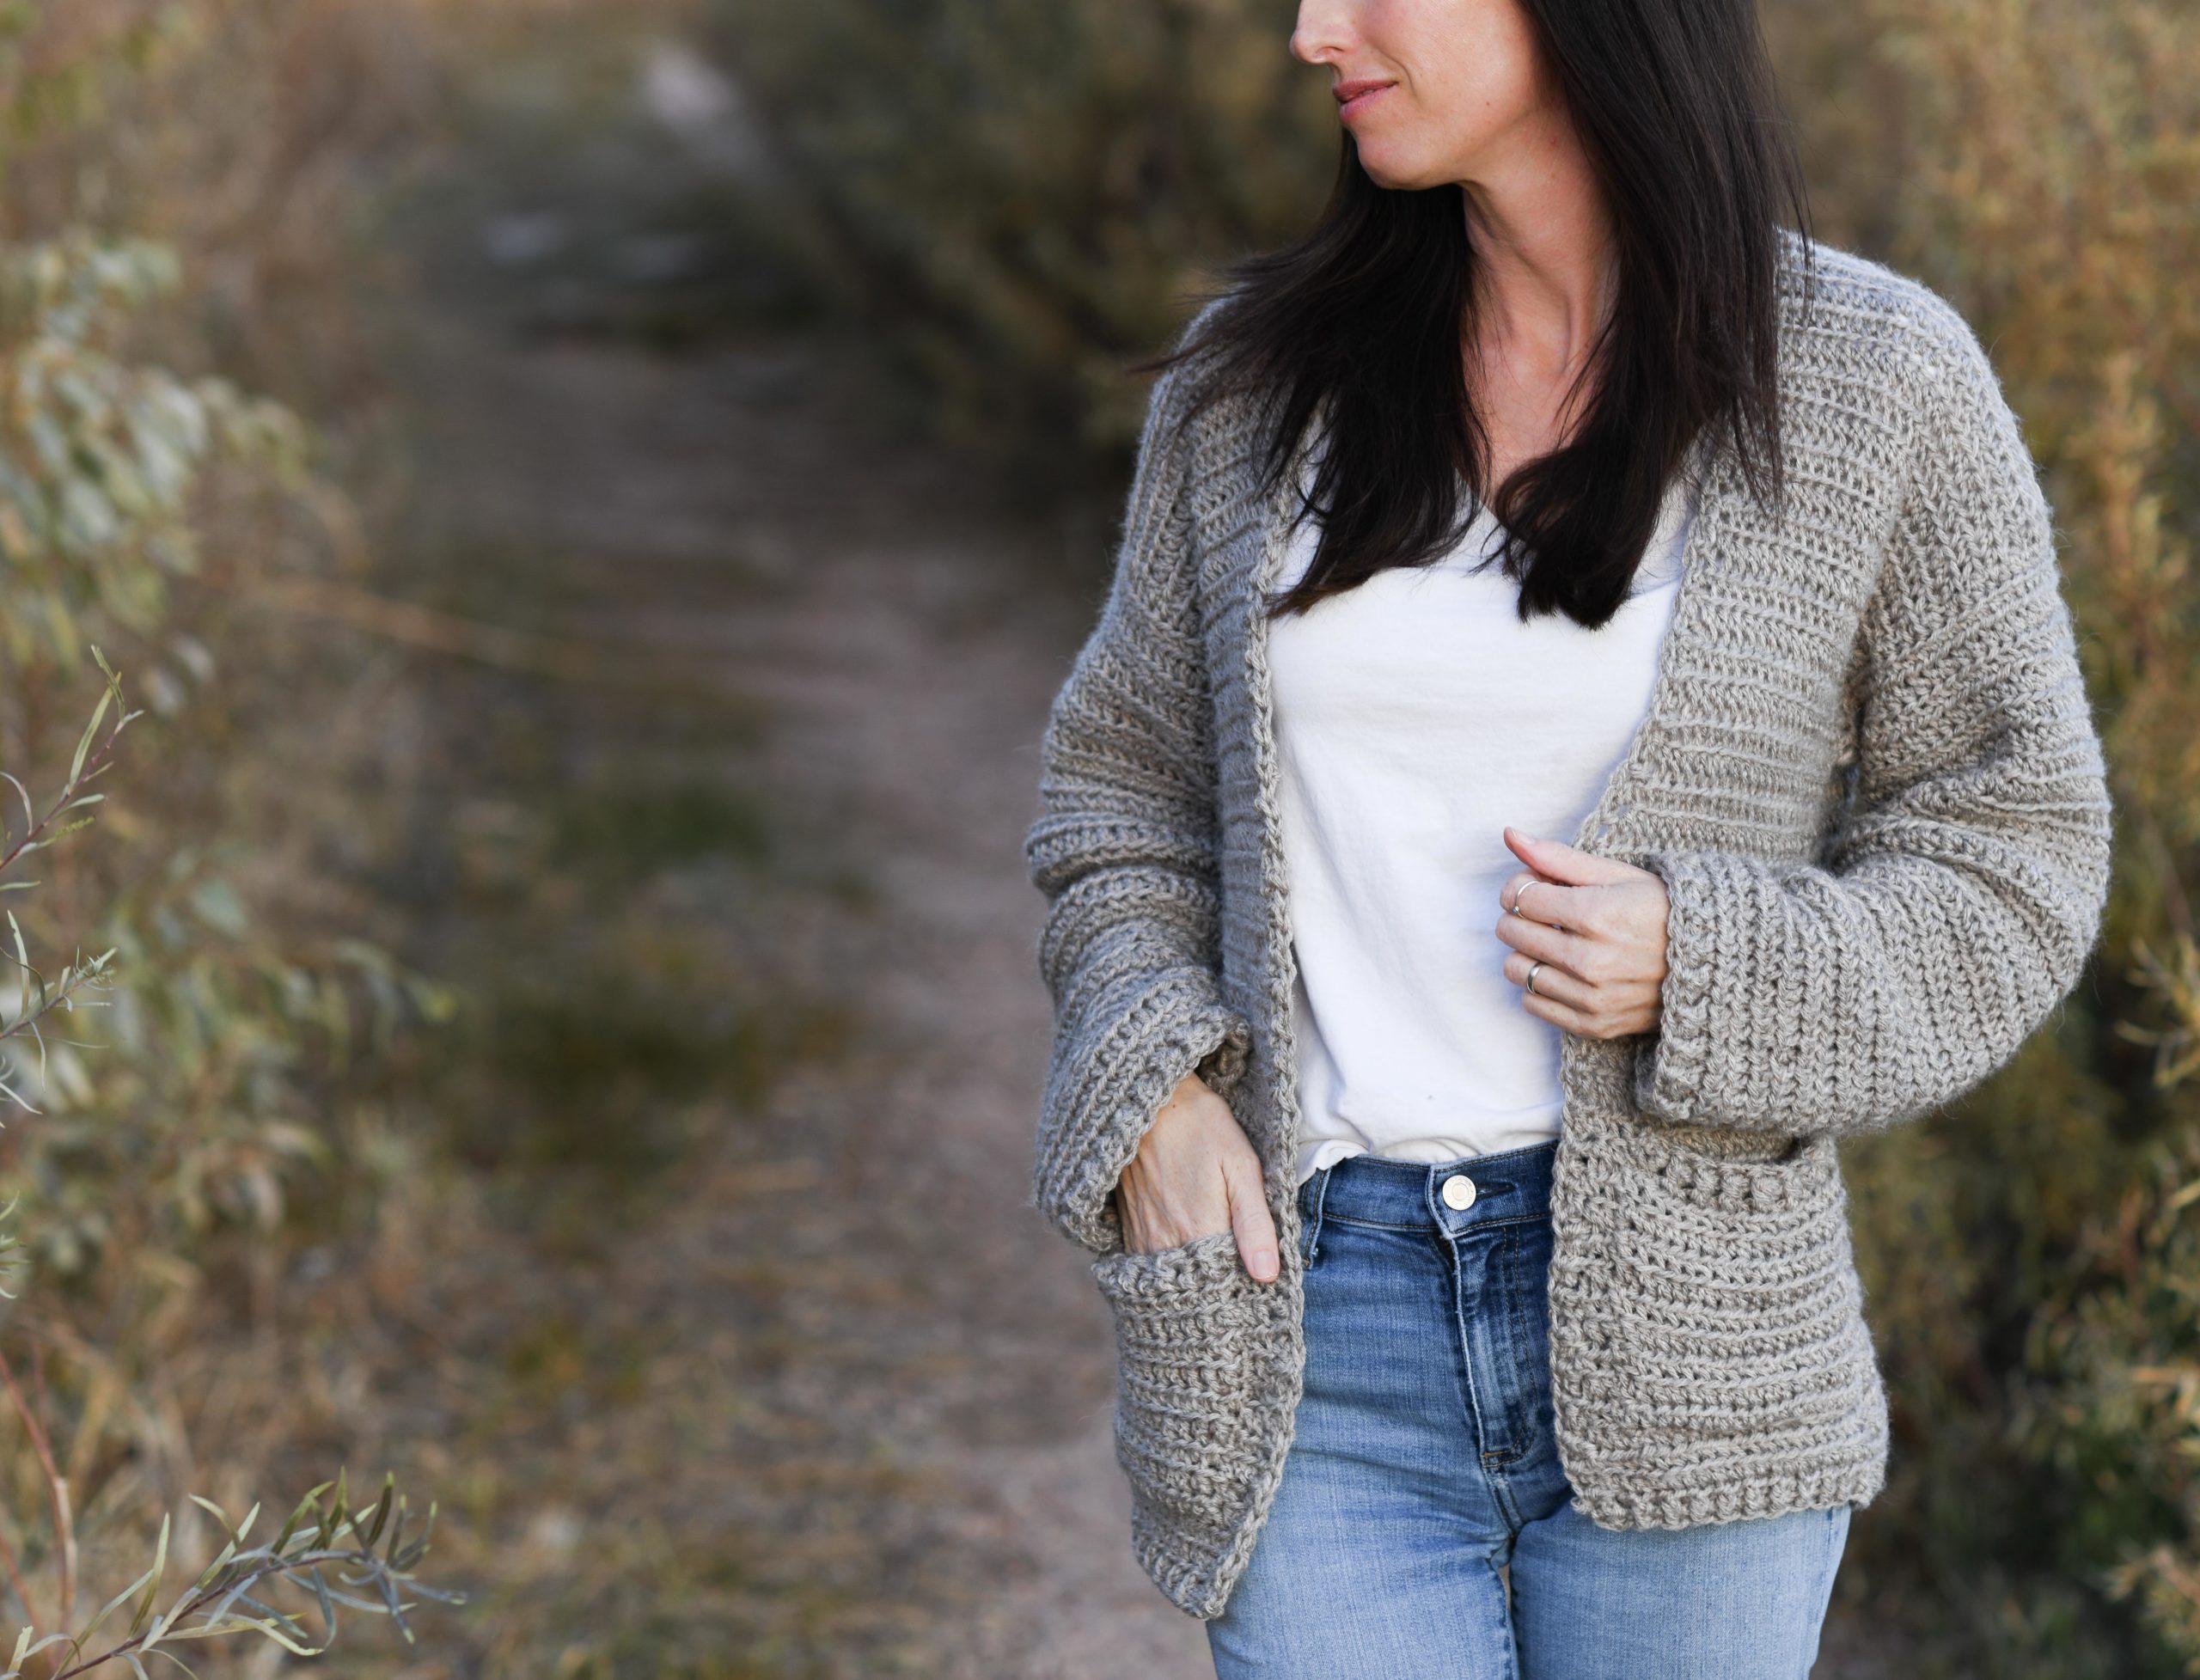
If you follow me here on the blog, you already know that myself and my family are outdoors as much as possible.
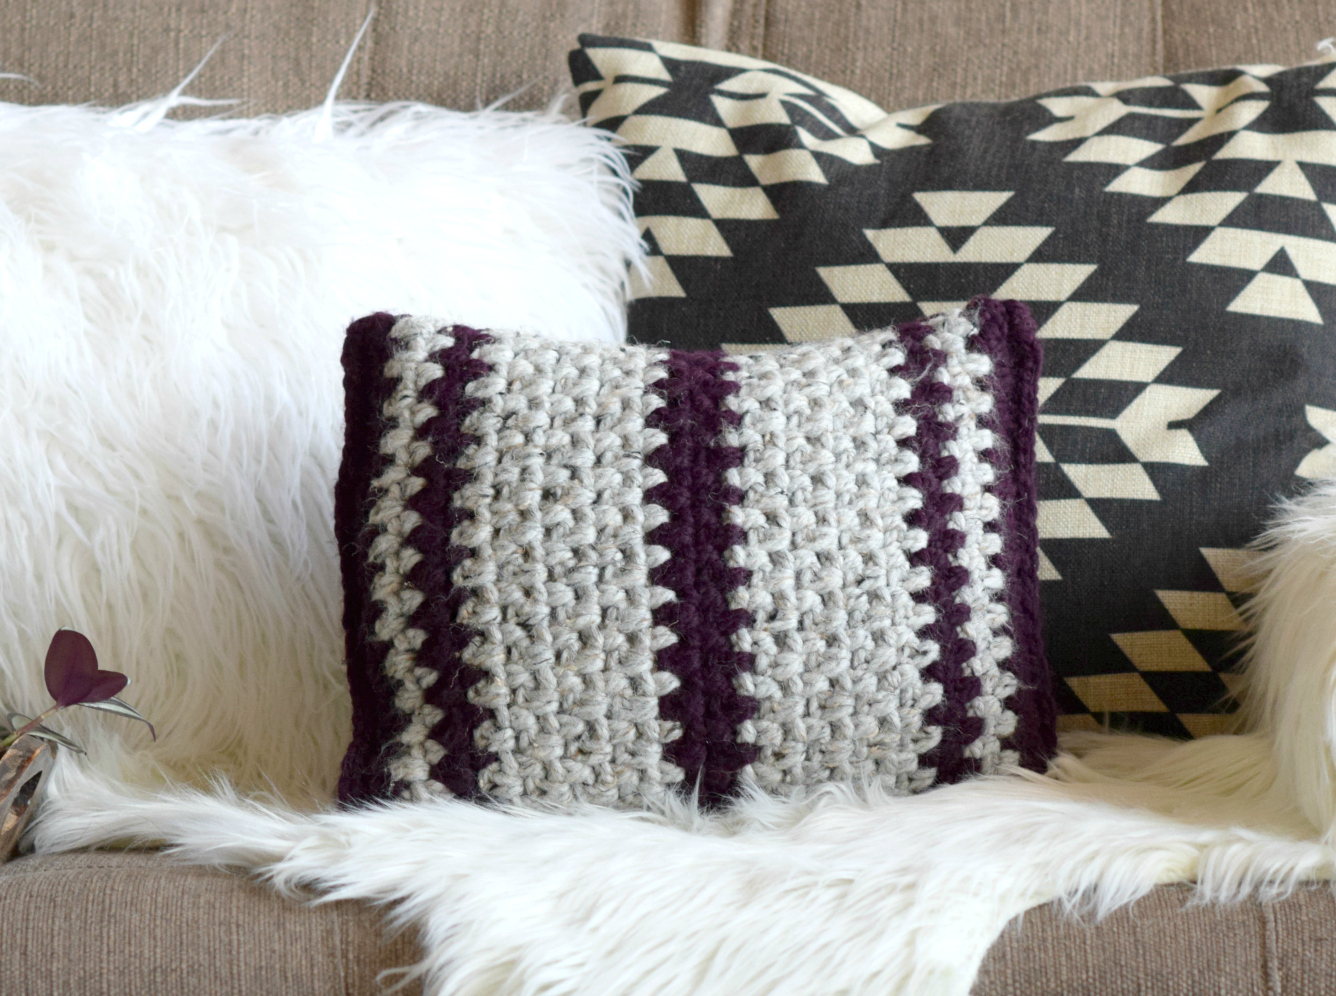
This poncho really reminds me of the colors of the forest and the beauty in the mountain environment. It’s such a great piece to throw on over whatever you’re wearing and head out into the fall or winter chill don’t you think?
So here we go!
Official little explanation:
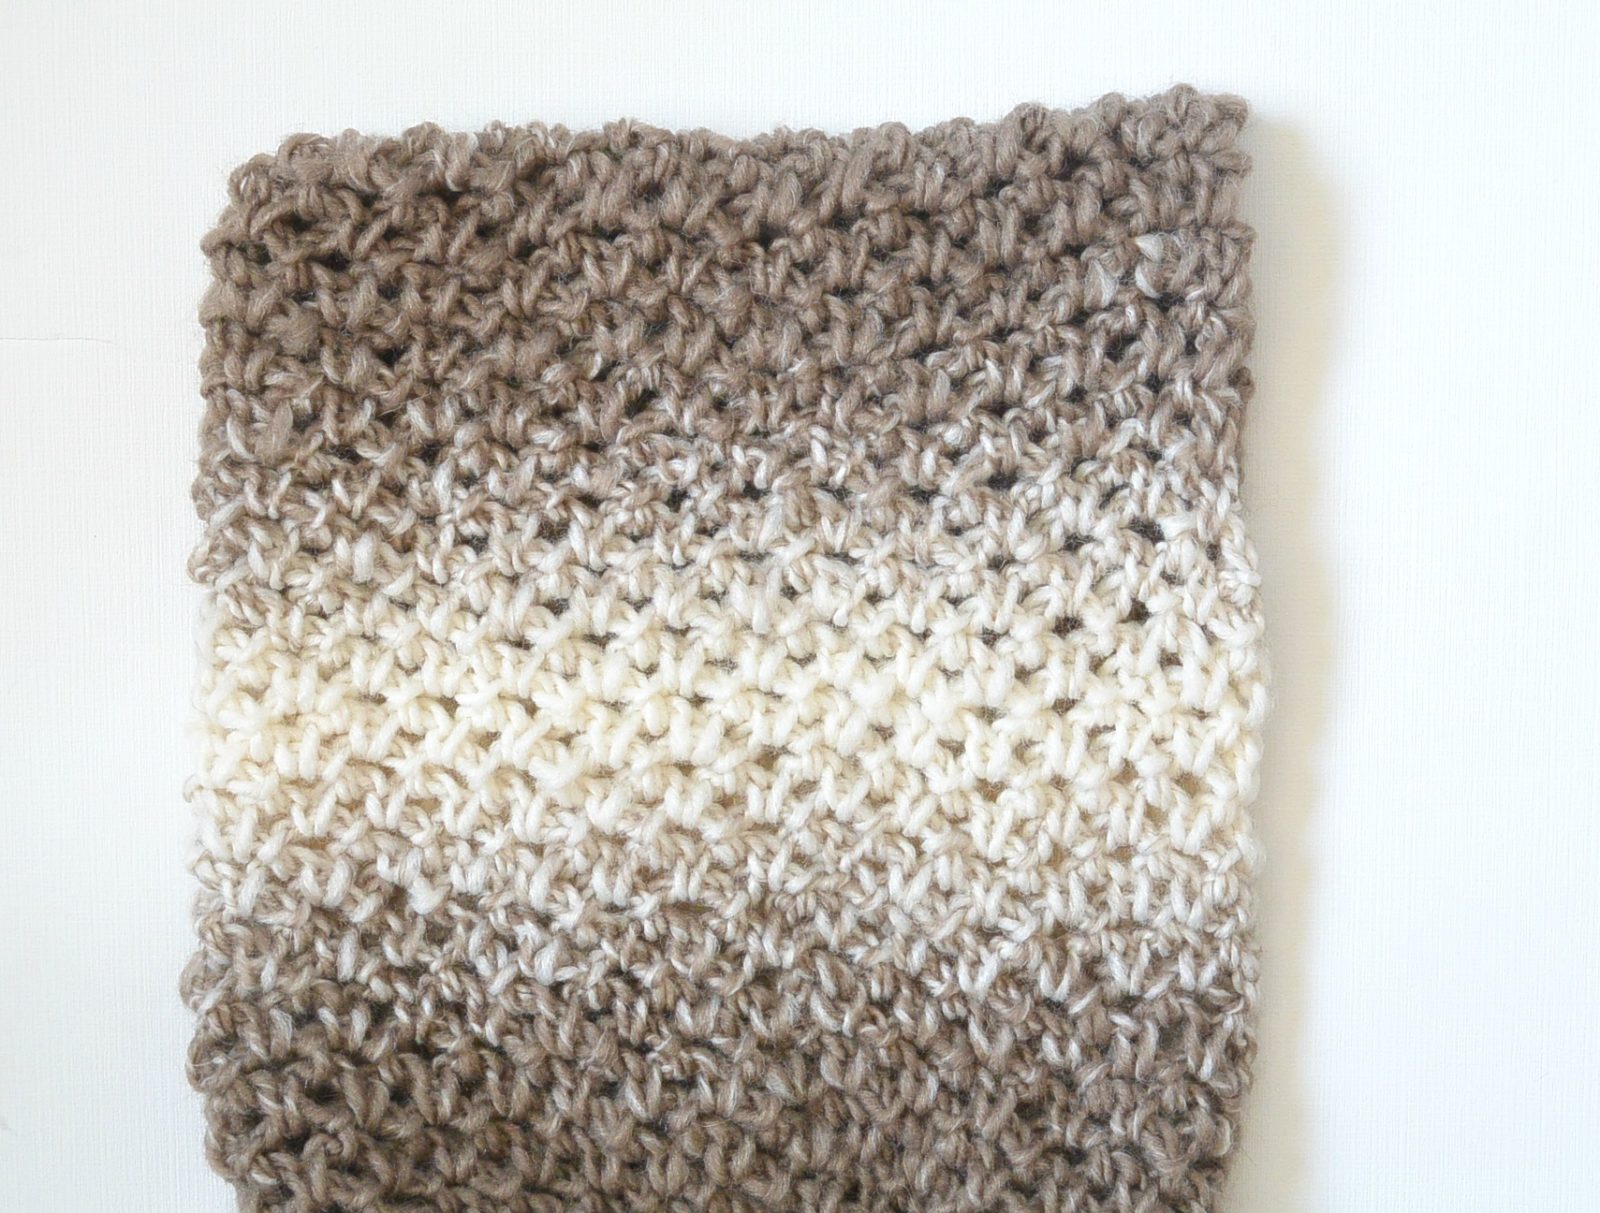
Cozy comfort meets eye catching style with this oversized hooded poncho. Not only will your poncho be noticed, you’re also sure to be warm and comfortable with the relaxed fit and easy wear. The simple stitch pattern creates a “knit-like” look and the construction is straight forward making it a fun project for fireside or tv crochet.
You will need:
4 skeins of Lion Brand Scarfie in Cream/Taupe (150 g/skein) Pattern uses 593 g
Size K 6.5 mm crochet hook
Scissors
Tapestry Needle to weave in ends and seam
Size:
One size fits most (make it wider by starting with a longer chain, and longer by adding more rows)
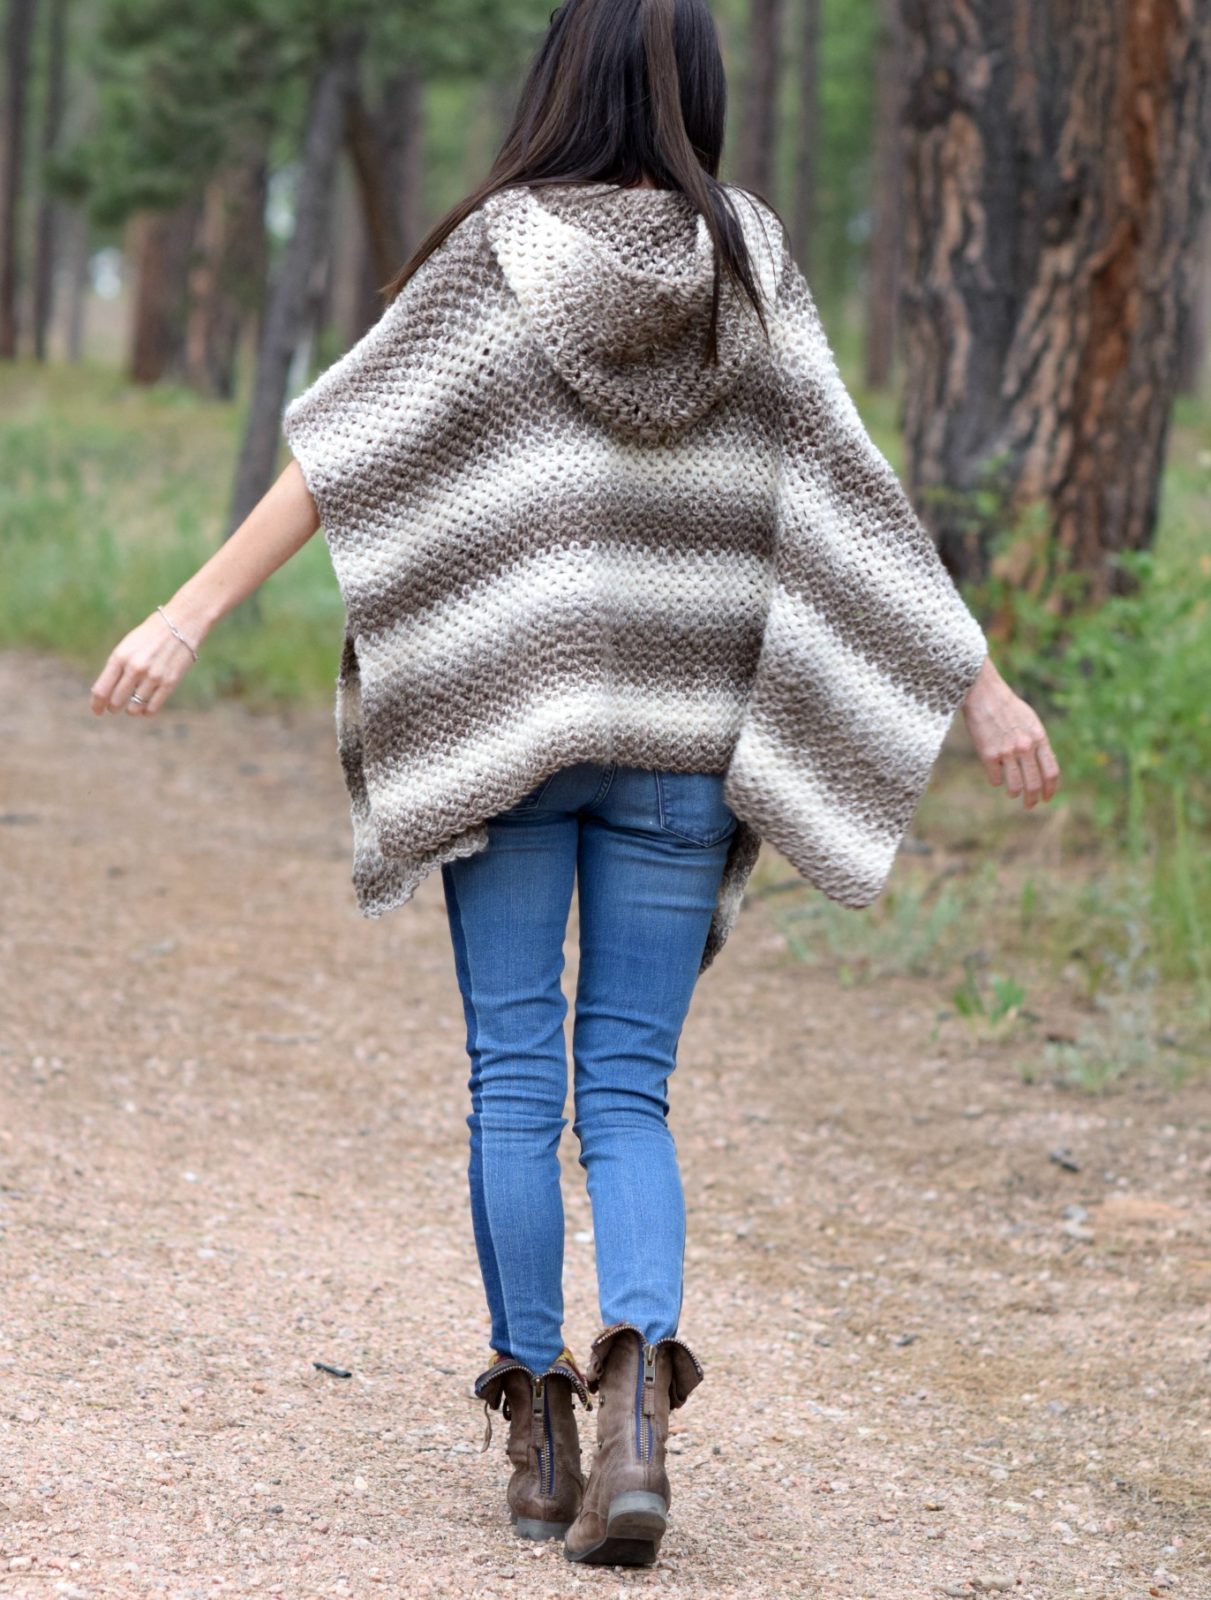
Poncho measures approximately 36” across and 21 ½” from top to bottom. Hood measures approximately 12 ½” tall and 10” inches deep.
Skill Level:
Easy +
Gauge:
Approximately 2 ¾ stitches per inch and just under 3 ½ rows per inch *If your tension is looser or tighter, your piece can turn out to be larger or smaller. You might want to measure after several rows to ensure it’s the size that you’d like.
Skills & Abbreviations:
sc – single crochet
ch – chain
sl st – slip stitch
sk st – skip stitch
st – stitch
Notes:
This pattern is worked flat in two panels (rectangles) and seamed at the shoulders to finish. The hood is crocheted as a rectangle, then folded and seamed along the top.
Further help with the stitch used in this pattern, including a video tutorial, can be found on my blog at https://www.mamainastitch.com/how-to-crochet-an-easy-mesh-stitch/ Please refer to the “Small Mesh Stitch” in that tutorial as there are two separate stitch patterns shown. 🙂
Driftwood Oversized Hooded Poncho Crochet Pattern
Ch 101
Row 1 Sc across, ch 2, turn (100 stitches)
Row 2 Skip the first stitch in foundation row and slip stitch into next stitch; *ch 2, sk st, sl stitch into next stitch; repeat from * across to last stitch. Ch 2, turn. (100 stitches)
Row 3 Sl st into 1st group of ch 2 stitches below, *ch 2, sl st into next group of ch 2 stitches below. Repeat from * across. Ch 2, turn. (100 stitches)
Repeat row 3 until piece measures 21.5” inches tall (or for a total of approximately 74 rows). Tie off and weave in ends.
Repeat the pattern above to make the second panel.
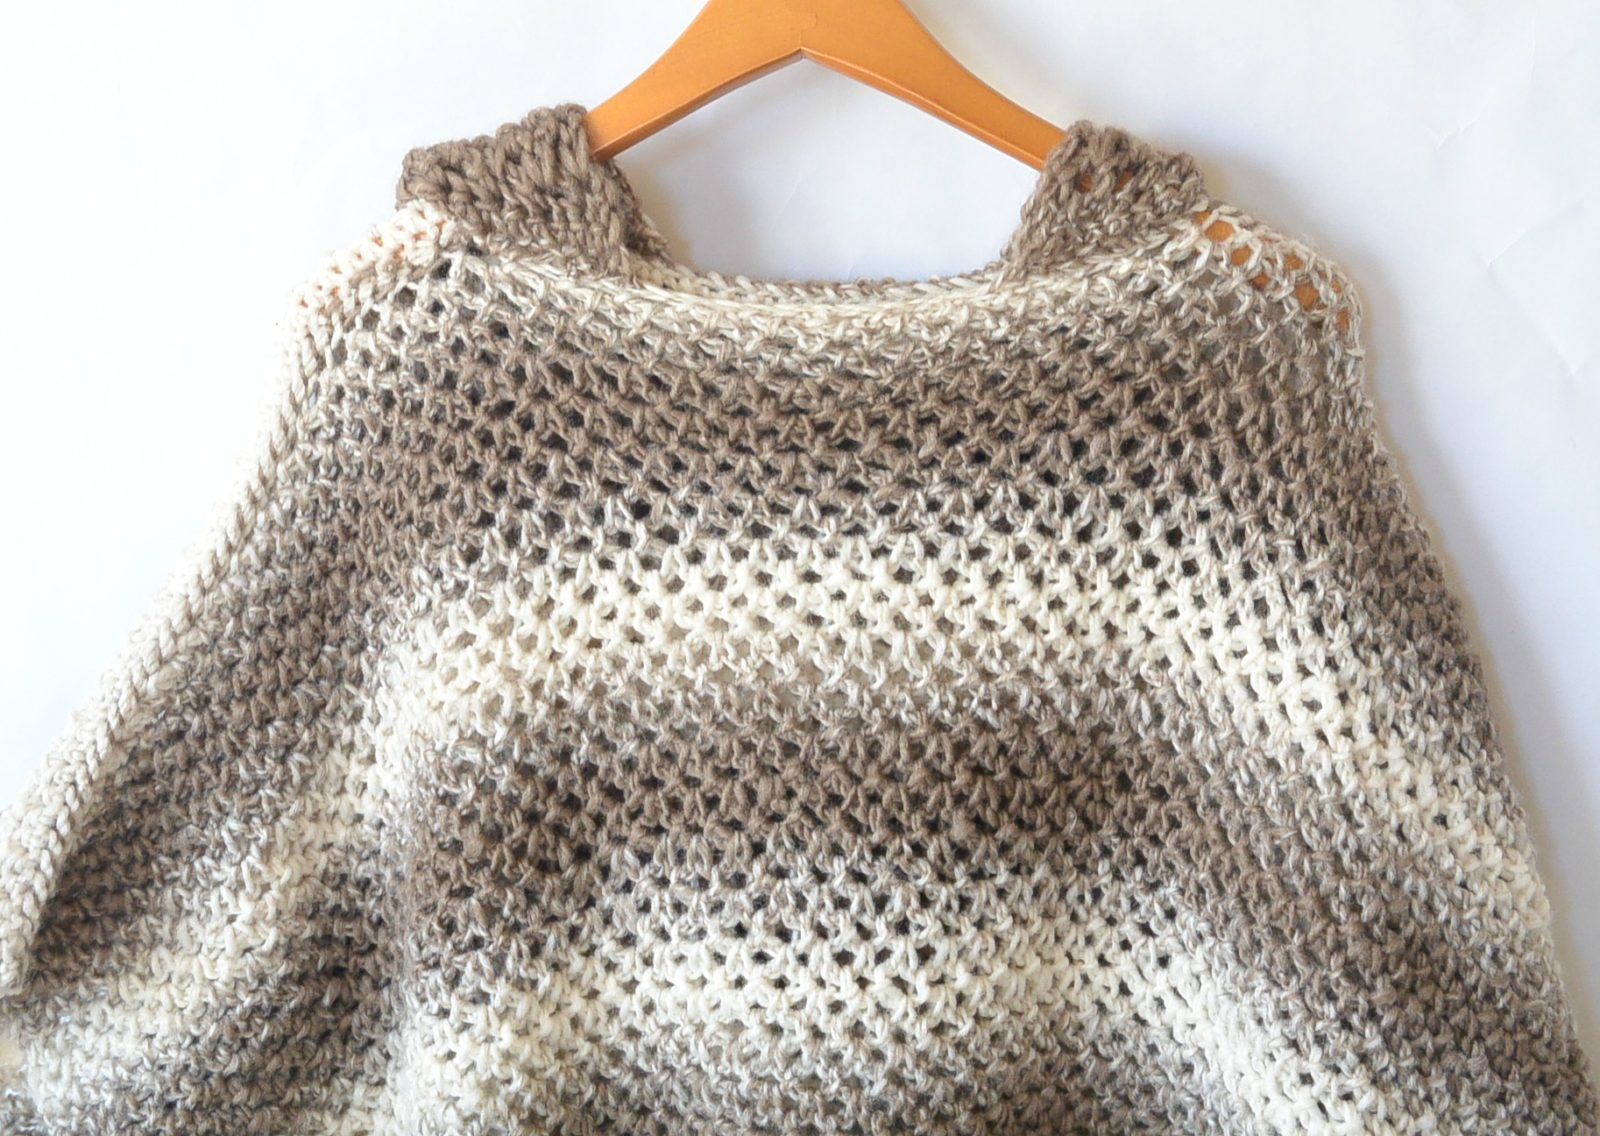
Seam:
Place panels one on top of the other. Seam along each shoulder, leaving a 10¾” wide space in the center for the head and neck opening (If your poncho is 36” wide, you will seam just over 12.5 inches inward on each side of the poncho). Tie off and weave in ends.
Hood:
There are two ways that you can make and attach the hood, so feel free to choose what you find to be the easiest:
Crochet hood first and attach to poncho:
With this method, you will crochet a rectangle and seam the top to create the hood. You will then attach it to the poncho with a simple whip stitch.
Ch 57
Row 1 Sc across, ch 2, turn (56 stitches)
Row 2 Skip the first stitch in foundation row and slip stitch into next stitch; *ch 2, sk st, sl stitch into next stitch; repeat from * across to last stitch. Ch 2, turn. (56 stitches)
Row 3 Sl st into 1st group of ch 2 stitches below, *ch 2, sl st into next group of ch 2 stitches below. Repeat from * across. Ch 2, turn. (56 stitches)
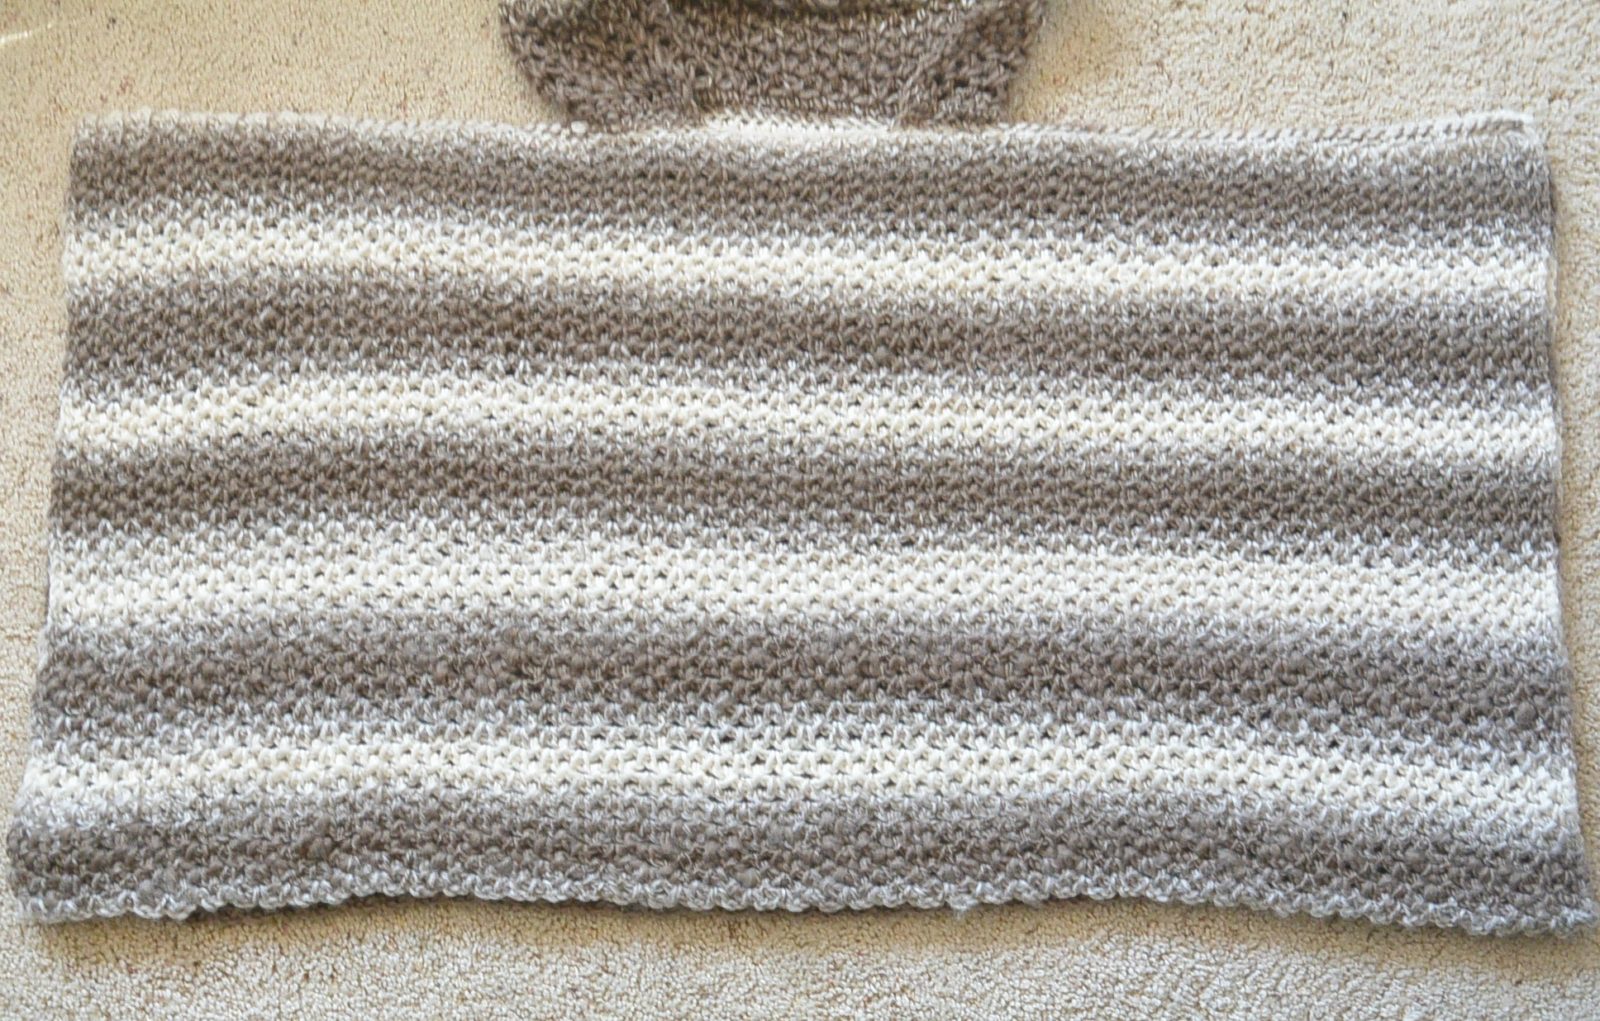
Repeat row 3 until your piece measures approximately 12.5” tall or as tall as you’d like. The rectangle should measure approximately 20” in length and 12 ½” tall. Fold rectangle in half to create a hood that measures approximately 10” x 12 ½”. Seam top of hood closed.
Next, carefully whip stitch seam the bottom of the hood to the poncho evenly around the neckline leaving an opening in the front (as pictured below) of approximately 4 ¾ inches. Check it every few inches to make sure that the hood is going to be centered. If it helps, you can secure it around the neck with safety pins or otherwise and crochet and release the pins as you go. It can be a challenge to make sure that it’s centered, so this is a help to keep it in place as you work around the neckline.
*The other option is to lay the poncho flat on a table or floor as pictured below. Attach yarn approximately 2 ¾ inches in, on the left, front side of the poncho neckline. Single crochet evenly around until you’ve worked around the neck and have reached 2 ¾ inches inward on the opposite side (56 stitches around). From there, work the same stitch pattern as is worked for the poncho over those 56 stitches until the hood reaches approximately 12.5” inches in height. Seam the top of the hood closed.
Above: The rectangle has been crocheted, folded and seamed at the top to create the hood.
Above: The hood has been seamed evenly to the neckline, leaving an opening in the front.


I hope that you enjoy this easy crocheted poncho, and if you make one I’d love to hear about it. Do you have any ponchos in your wardrobe?
Have a lovely day friends!
XO
Jessica
More Easy Crochet Poncho Patterns:
I love this Jessica. I have been eyeing that scarfie yarn for some time now but it’s so expensive ( $9.99 a skein here). I would have to use Michael ‘s coupon and go back four times to be able to afford it. This looks like it could be a go to to grab when you run out this fall. I love that you take so many photos of your project so we can really see it ” in action” I will have to watch your video to see how to do the stitch. I’m not good with skipping a stitch without messing up but your videos explain the how to so well. Really loves this. Thank you!
Hi!
Is there any way you could turn this amazing poncho into a knit pattern?
Thanks!
I agree with Natashia. I really love this poncho. Could you make a knit version?
Oh this looks AHMAZING! I can’t wait to try it. I have so many projects going, but this one is worth adding to my pile!
Janelle
I hear ya Kathy – those coupons can be a life saver! Our hobby certainly gets expensive. And yes, if you watch the tutorial make sure to see the right version. I include two different mesh stitches in the video, and it’s the small mesh stitch that I used for this pattern. I think you’ll be able to get it! I know how working into chains can be tough. Thanks for all your kind support as always!
Hi! I will definitely keep it in mind and always take requests. 🙂 I have a billion other projects on the list of course (don’t we all) but I will for sure keep it mind! Thanks for letting me know you’d be interested in a knit version!
Thanks Janelle! I’m so happy you like it! I hear ya – I have too many going on also.
I’ve had a long dry spell, not knitting or crocheting anything lately. Your beautiful poncho makes me want to grab needles or hooks and get with it again, thank you for the pattern
Thanks soooo much for another free pattern! I love this! I will probably make TWO! One for me and one for my teenage daughter. My daughter doesn’t like wool, so I am going to substitute…..but it should still come out nice.
I made her one of your other patterns…the Baja Blanket Sweater (in original colors, but I did have to substitute since I couldn’t get all the same yarn in the stores near me…but no one but us will ever know.LOL). That one was super fast to make. I borrowed it once and a lady I know said she wanted one! (Have not made hers yet). I am also going to make one with white, burgundy. light gray and dark gray, and probably more in other color combos.
Thanks again!!! Your patterns are AWESOME!!!!
Hi Jessica! Thank you so much for this beautiful pattern! I, too, have been looking for a pattern that’s large and repetitive to help me unwind after a very stressful day. I already have a list of family and friends who will be receiving one of these lovely, cozy ponchos for Christmas! Thank you again for so generously sharing your beautiful creations with us.
Thank-you Jessica, Lovely pattern and FOB. I would also be interested in a knitting version. Have you ever considered a project combining both needlecraft methods? Other than knitting for the majority (body) of the project and crochet for an edging have not seen the combination.
Best, ^..^ ^..^
Such a cute poncho! Thanks for sharing!
Jessica, I love this!!! Coincidence that I just bought a beautiful 6.5 hook from BQueen. I know what my next project is. Thank you for all your beautiful patterns!
I I tried the tutorial and it says unavailable. I will try again later. It looks so easy I’m sure I will get it. Thanks again for all your hard work!
Oh no! I’m not sure what happened Kathy. I just checked it and it was working from my end. Here is the link directly to the YouTube video:
And the blog post again:
https://www.mamainastitch.com/how-to-crochet-an-easy-mesh-stitch/
You might have to copy and paste it into the browser. Please let me know if you have questions Kathy – I’d love if you’d be able to do this stitch. 🙂
Hi Sylvia….sometimes we need a break and that’s okay. I’m glad this has maybe inspired you. I hope you’re doing well!!
That’s so great to hear that you enjoyed the Baja Blanket Sweater and that folks have liked the one you made!! Thanks so much for letting me know! I’d love to see what your poncho looks like when you substitute the yarn out for something different. I’m sure it will be beautiful. Thanks for your kind words Robin!
Hi Barbi – Thank YOU for taking the time to write me! You’re welcome of course – it’s fun for me to share. This is definitely a pattern that is easy to unwind with. Have a great weekend!
Is there a Yarn I can substitude with As a senior & etc cant afford exspensive yarns
you can get it much cheaper on Amazon!
How can this be made for a plus size woman?
When you measure for the length, are you laying the piece flat to measure for the 21 1/2 inches?
I am making this now………….enjoying it very much. Thank you for such a wonderful pattern.
What I need to do to make the poncho a push size?
So glad to hear you’re liking it! You’re so welcome Sandi.
You can make it larger by starting with a longer chain ( but keep an odd stitch count) and crochet for more rows. This way you can make it as long and wide as you want. Hope this helps!
Start with a longer chain with an odd stitch count and crochet for more rows. You can make it as wide and long as you want.
Thank you for sharing your beautiful patterns with us. I made several blanket sweaters and love then. I actually use them as my winter coat here in Tucson. This poncho is gorgeous and I can see wearing it this winter. Thanks again for sharing. Hugs. Lois.
You’re welcome Lois – it’s a lot of fun to post these projects and meet people like you. I’m so glad you’re able to use the blanket sweaters there in Arizona!
Question…did you have to pay special attention to joining the yarn regarding the striping? Were you able to just join where one ball ended and another began? Thanks so much for this pattern. The yarn is so soft and I am having so much fun making this So easy yet so lovely one would think it was harder to make. 🙂
Great question! I addressed this issue in the Light Frost sweater but I need to note it above here as well. Yes, to get the striping to work out you want to join a new skein with the color that you are working on. So try to match the color of the current stripe with the section of the yarn with that same color. Most of the time my skeins have worked out naturally, but occasionally I have one that I need to wind up some yarn (and save it) to get to the color needed to match my current stripe. I hope this helps and I’m so happy that you’re finding the pattern to be easy. 🙂 Let me know if you have any other questions!
I love your ponch! Just wondering if you will be redoing the pattern as a knit pattern?
True, but I’d rather make my own because it’s a hobby, and I can make it in whatever colors I want.
I love the pattern. I made this poncho and it came out great. Just much smaller than shown.?
Okay….thank you. That is just what I did. Although the stripe section where I joined looks to be a bit smaller width wise, I don’t think it is all that noticeable. I figure when I am done with both pieces I will eyeball the best side to put on the front! Again, thank you! Ready to start my other piece. This really doesn’t take all that long to do and it is the first time for trying this yarn (although I have nearly bought it a couple times)…………happy I did because it is lovely.:)
Hi Lisa! I’m so glad that you like it! Since it came out smaller there’s a few things that could have happened but most likely you have tighter tension. Gauge can really make a difference with size – the good thing is that if you need to make it longer you can simply crochet more rows.
I think she meant that you can get the yarn cheaper on Amazon, not the poncho its self.
Where can I find the instructions for the Baja blanket sweater some of the ladies mentioned would love to try it thanks.
Hi Melody,
You can find it here:
https://www.mamainastitch.com/baja-blanket-sweater-crochet-pattern/
The pattern calls for 4 skeins cream/taupe does that mean a total of 4 or 4 each?
It is 4 total of the “cream taupe” color.
Beautiful! Your lovely photos make me want to come hike the Rockies. Love it good job!
Aww! Thank you Kristyn!
Hi Jessica. I’m hoping to make this for my sister, but wanted to check with you first about other ombre-effect yarn options you could recommend. My sister is worried that the horizontal stripes will emphasize her weight, which is why we would welcome your input. She is leaning towards Sirdar Imagination Chunky, but it only comes in 100g balls – falling short of the 150g weight of the Lion Brand Scarfie yarn. Also, the Sirdar’s length is only 160m compared with the Scarfie’s 285m. Could you also suggest how much additional yarn I would need to buy in the Sirdar (or one of your suggestions) – bearing in mind that my sister would like me to lengthen the poncho for her to cover her behind. And can you also tell me what I need to do to lengthen the poncho for her.
Cannot thank you enough for your anticipated help, and for making your patterns freely available to everyone. They’re gorgeous!
Not sure what I am doing wrong but I am using Deborah Norville Serentity Chunky for this pattern and I an on my 5th skein and it still is only 15 in long.. I am using a K hook and my stitches are not tight, can you give me some insight on this? Is it the yarn I am using? I really love the pattern and REALLY want to make myself this hooded poncho. Thanks so much for you help!!
Hi Melissa! I’m not sure how many yards or grams are in the Deborah Norville that you’re using but the skeins of Scarfie are huge. Most likely there is simply much less yarn in each skein that you’ve got. I list the grams per skein in my pattern and how many the pattern calls for….in addition, Scarfie is a chunky yarn. Hope you can get it figured out and can make yourself this poncho!
Hi! You’re welcome, I’m happy to share these patterns. I always say, you can use any yarn that you’d like as long as it’s comparable. Everyone has their own style and colors that they like, so feel free to be creative with what your sister wants. If the skeins are smaller, you of course need to do the math and purchase more skeins to equal the amount of yarn that I used in the pattern. And if you’re making it longer, then you need to even add to that. In order to lengthen the poncho, it’s so easy. You’ll simply continue the stitch pattern for more rows on each panel. Be sure to make each panel the same length. I wish you the best and am sure your sister is so appreciative of you making something so special for her!
Do you have any suggestions on making this poncho in a plus size? I am moving back to PA the end of this year after being in Arizona for almost 8 years. I know I’m going to need super warm clothes.
1st of all I love this poncho. It’s definitely my style and you look fabulous wearing it.
I just finished my 1st panel did 101 ch but i didn’t get 36″ I got 23, Also the 21″ length was to short for me and I’m barely 5ft 1in so I made it a little longer so it can be as long as yours I went with24″ either my tension is super tight or I got defected yarn it’s thin in a lot of places and chunky in other places. I wonder if anyone else has this problem
Still loving the pattern, so fun to do and how ever my poncho turns out. I still plan to rock it
Essentially you need to start with a longer chain, and crochet for more rows on each panel. This is the way you can make it larger. 🙂
Hello, I am a guy who loves to knit. Would this poncho be ok for a guy? Also, how would I know if you have made a knit version. I have my yarn and am ready to go with the crochet patter now.
Thanks for the pattern and your generosity in sharing it.
Lorenzo
Hi Lorenzo,
If you subscribe to my newsletter (you can find a place at the bottom of the blog post to do so) you’ll be notified once the knit version is ready. I think this can certainly be for a man as well. There are no gender rules for my patterns and I believe this one in particular would be a good choice for a gentleman, especially if it’s something that you’d like to wear. It’s nice to hear from a guy that likes to knit! Thanks for reaching out.
Yes, please make this in a knit pattern – absolutely something I have to have in my wardrobe! LOVE your patterns!!
I got my Lion Brand Scarfie yarn at WalMart for $6.84 a skein.
Would love a knit version of this!
Coming soon! ( Just might not have the hood – the poncho will be larger though )
Hey I’m about halfway done with the poncho and I am wondering if you blocked it when you were done.
I didn’t but you certainly can!
Ok thanks. I love the pattern by the way!
Aww! So glad to hear you’re enjoying it Sheila. 🙂
I love this poncho but would want the stripes to run vertical, like in your knit version. I will have to see if I can figure out how to do that. Thanks for the great pattern!
I love this hooded poncho! I am currently working on it using the hot pink and black scarfie yarn and it is working up beautifully! I just wanted to ask a question about the length. How tall are you? I am 5’7 and I really like the length of the poncho on you so I am just wondering if I will need to adjust the length of mine at all to achieve this. Also, will it stretch out length wise after wearing it a few times? Thank you for the help and all the hard work you do to create such gorgeous patterns for us to enjoy!
Hi! It does stretch a little when you wear it Kara. I’m 5′ 5″ so you certainly can add some extra inches if you’d like. Also, if you are larger in general (I’m a small or xs) you might want to add some length. So glad you liked this pattern! And you’re welcome of course. It’s fun to share. 🙂 Thank YOU for your kind words!
Hi Jessica,
This might sound like a silly question ,but how would I “shrink” the pattern to fit my 11 year old granddaughter?
You could start with a shorter chain and crochet for fewer rows on each of the panels. 🙂
i have same problem as patty’s comment from aug 27 regarding measurements. But since I just started I’m going to begin again to obtain wider width. How will this affect amount of skeins needed? Love this pattern thank u Jessica!
Hi, Thanks so much for this free pattern. I love the feel of the scarfie yarn and the mesh stitch makes it so soft and drapey. I’ve made one panel and my dimensions are the same as yours (36″ x 20 something) but it still seems so short. I’m plus size so I know I will need more but I’m making it for my regular size daughter and it’s barely past her belly button. I wonder if the model in the pics is just really really small? LOL! Anyway no problem to buy a couple more skeins and add length. Such a versatile pattern! Thanks again!
Hi Jackie! I’m so happy you’ve liked it and I’m glad you’ve figured out how to make it work for your daughter and thanks for your feedback! You’re right, I am small for sure and since it’s one size it will wear differently on everyone. I did try it on a few friends of different sizes and while slightly different when worn by larger folks, it still worked and looked cool in my opinion. I hope your daughter loves it and thanks so much for reaching out! Have a lovely day!
Without knowing exactly how much width you’re adding Anita, I don’t know how much more yarn you will need. But certainly plan for more!
Some of the clerks will let you use the coupon on 4 separate transactions. Never hurts to ask.
I purchased the kit for this poncho from lion brand. I was so excited about this pattern. I’m 2 days in making it and I will just have to wonder. I’m 5’3” and 112 lbs not a big person. Is your model some kind of little person? There is no way that the measurements you give make the poncho that is pictured. At 21 1/2 inches this thing will sit at my waist I’ll almost have to double it to fit like the picture. My width is exactly like the pattern 36” and I’m even a little worried it will be wide enough. Just for anyone making this know it’s a beautiful pattern so far but you’ll need more yarn to make it like the picture and to accommodate the loss of yarn to match up the colors so your strips stay the same.
Hi Brenda – I’m about 5′ 5.5″ and about 105 pounds, but I believe I have a long waist.
You should be able to wind the yarn and save for later in the portions that you’re talking about as you try to keep the striping the same. Since the skeins sometimes start with various colors, it is true that you have to save yarn for later to keep the striped pattern going. No doubt that some people will want their poncho longer, and thanks for sharing your insight about it! It is easy to make it longer by just adding more rows, though you do indeed need to keep yarn amounts in mind.
I’ve recently gotten coupons for Michaels, AC Moore, and JoAnn that were for 25% off the full purchase, and could even be used for sale items (but not doorbusters). As you can imagine, I stocked up! Now I can dig into my stash (unless I find another coupon or sale for something I don’t already have). Also, those three stores will let you use the other stores’ coupons. Finally, if the coupon is only for one item, I bring my husband with me and that way we can get two. We then go back to different registers and can get two more. The cashiers are usually cool enough to ignore us!
I had the exact same problem with the sizing. I did the 74 rows and that is not even close to the size you are wearing. I looked at yours and noticed there is roughly 5 rows of white and I went against that for the sizing. That helped me a lot.
Thanks for the suggestions for others Amy!
I am chaining 101 at beginning as called for, however, getting to the end, after single crocheting, I end up with 4 or 5 nor stiches. Is there a part at the beginning of the pattern that I should need skipping summer stitched to begin in a different stitch? This yarn isn’t easy to unravel with breaking. Thanks…
does anyone know this answer
The pattern is very forgiving….so as long as you’re not increasing each and every row, you are good to go. Just ensure you have the same stitch count for each row (even if the number is slightly different that my count)
Made this with Caron Tea Cakes yarn, a wool/acrylic blend. Took just over 6 skiens, thank goodness for sales/coupons. The pattern was easy to follow and looks great! Ive recieved a ton of compliments on this poncho.
I bet it’s beautiful! Thanks Amanda for letting us know!
Hi there. I will admit I didn’t read all the comments. I want to start by saying I love this pattern. I’m just having a counting problem. Is the chain 2 at the beginning of each row counted? I’m going to watch tutorial now. Thank you.
Hi. I would love to try this pattern as we are heading in to winter here. I understand making a longer chain with an odd number for a plus size, but do we still make the hood the same size or would we need to make that larger too? If we do need to enlargen the hood, how many stitches do we do? Thanks so much.
I am a self taught beginner in crocheting. I LOVED this pattern, even though my yarn choice cost me a small fortune, lol! Thank you for sharing your expertise!
Oh dear! Haha – these projects can sure get pricey, no doubt! You’re welcome for the pattern and I’m so happy you enjoyed it!
Hello Jessica,
Will you do a full video tutorial with this amazing puncho it’s so beautiful. I will be having ago at this tonight.
Cheers
Michelle
Hey Michelle! So glad you like it! I’m not going to get around to doing a video for this one. But thanks for reaching out and let me know if you hvd any questions!
I would like to make this but have one question. The directions say to make the panel until it is 21-1/2 inches. The poncho looks longer than that in the pics. Help?!?
You can make it as long as you like! I’m 5’5″ ish and 105 lbs, so some folks might want to make it longer if they are taller or larger.
is there away to make this a plus size or should this be good enough size for someone who is a 1x? i definatly want to make this for my sister for her birthday.
this pattern is so beautiful! thank you for making so many amazing free patterns question for you! do you use a new skein with each panel? even if you have some left over from the previous one? i just wanna make sure i don’t try to finish a skein up + have it ruin the pattern. thank you!!
You do want to make sure that your stripes work well….so if you finish a skein on brown, you want to make sure you start with that same brown. So if you have to wind some of the yarn and save it for later to get to the right color, that is what you’ll want to do! The two panels don’t have to necessarily match perfectly though. Hope this helps and you’re welcome for the pattern!
I was wondering if I should crochet the chain long enough to drape over my shoulders or just past the width of my shoulders. Thank you
I am making this ponch for my daughter. She can’t wear wool so I am using Homespun Stripes. I love how it is working up. It did end up even larger (daughter’s preference). It is at the end where I am putting it together. Thank you for the pattern.