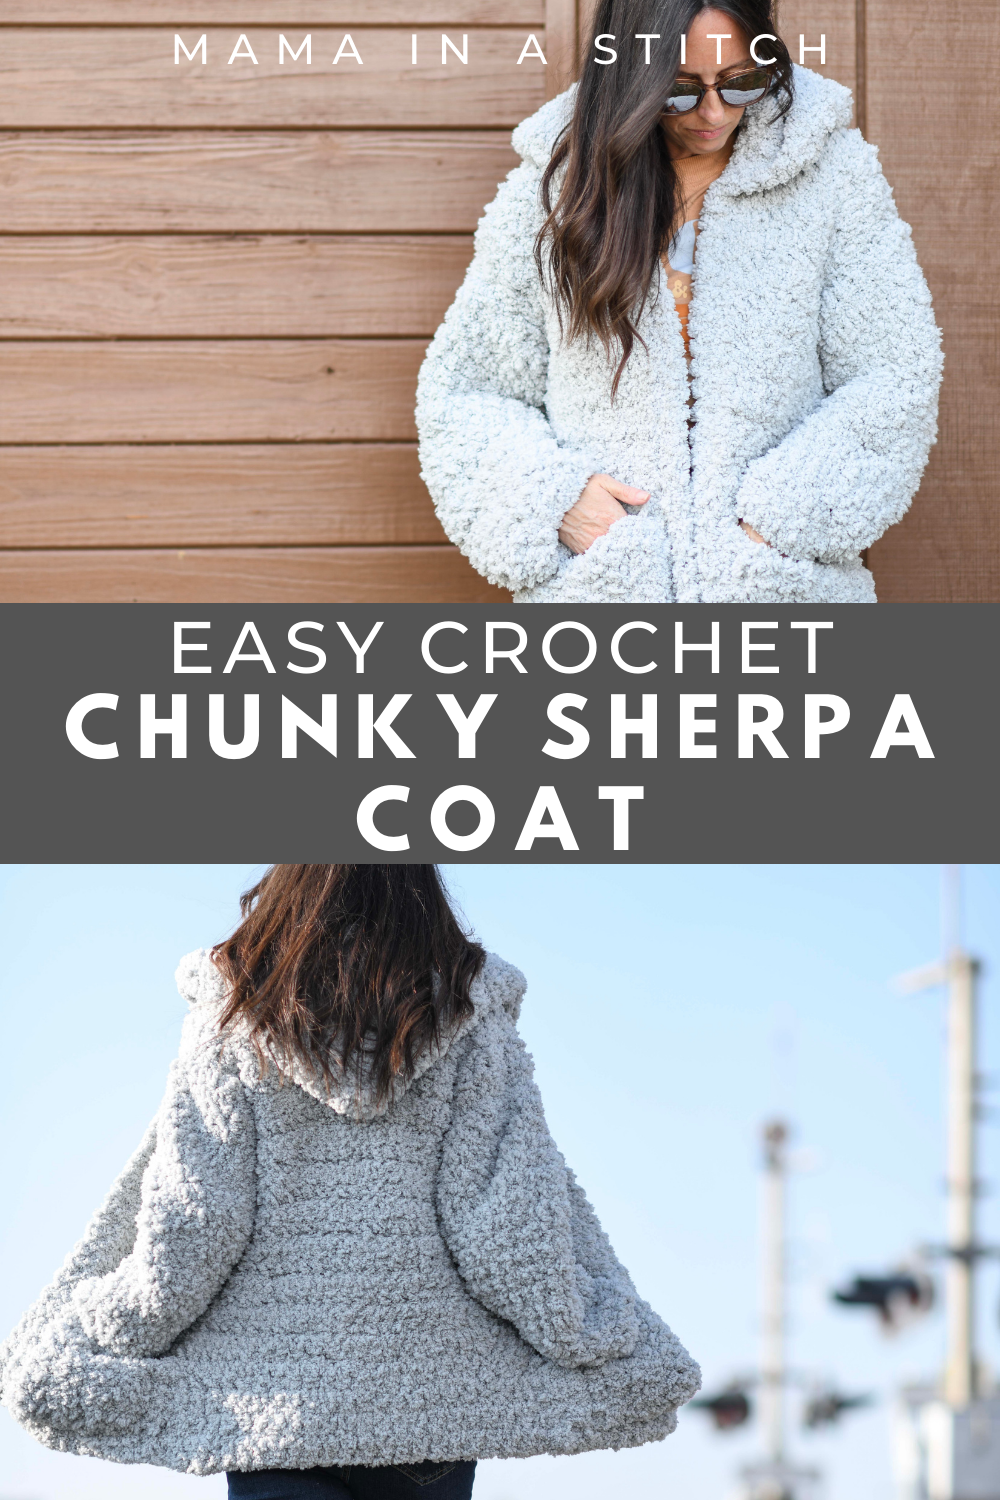
Sherpa Coat Crochet Pattern
Introducing My Chunky Sherpa Coat Crochet FREE Pattern! This is an easy pattern that creates a cozy, cuddly, sherpa coat. The entire coat is made with the basic single crochet stitch, and there is very little shaping, making it relatively super simple. You can check out the free pattern below, or you may choose to purchase the ad-free, printable pattern from Etsy HERE or the kit (available in many colors) from Lion Brand Yarn HERE. AND if you love this coat, you may also like My Sherpa Bucket Hat Crochet Pattern HERE!
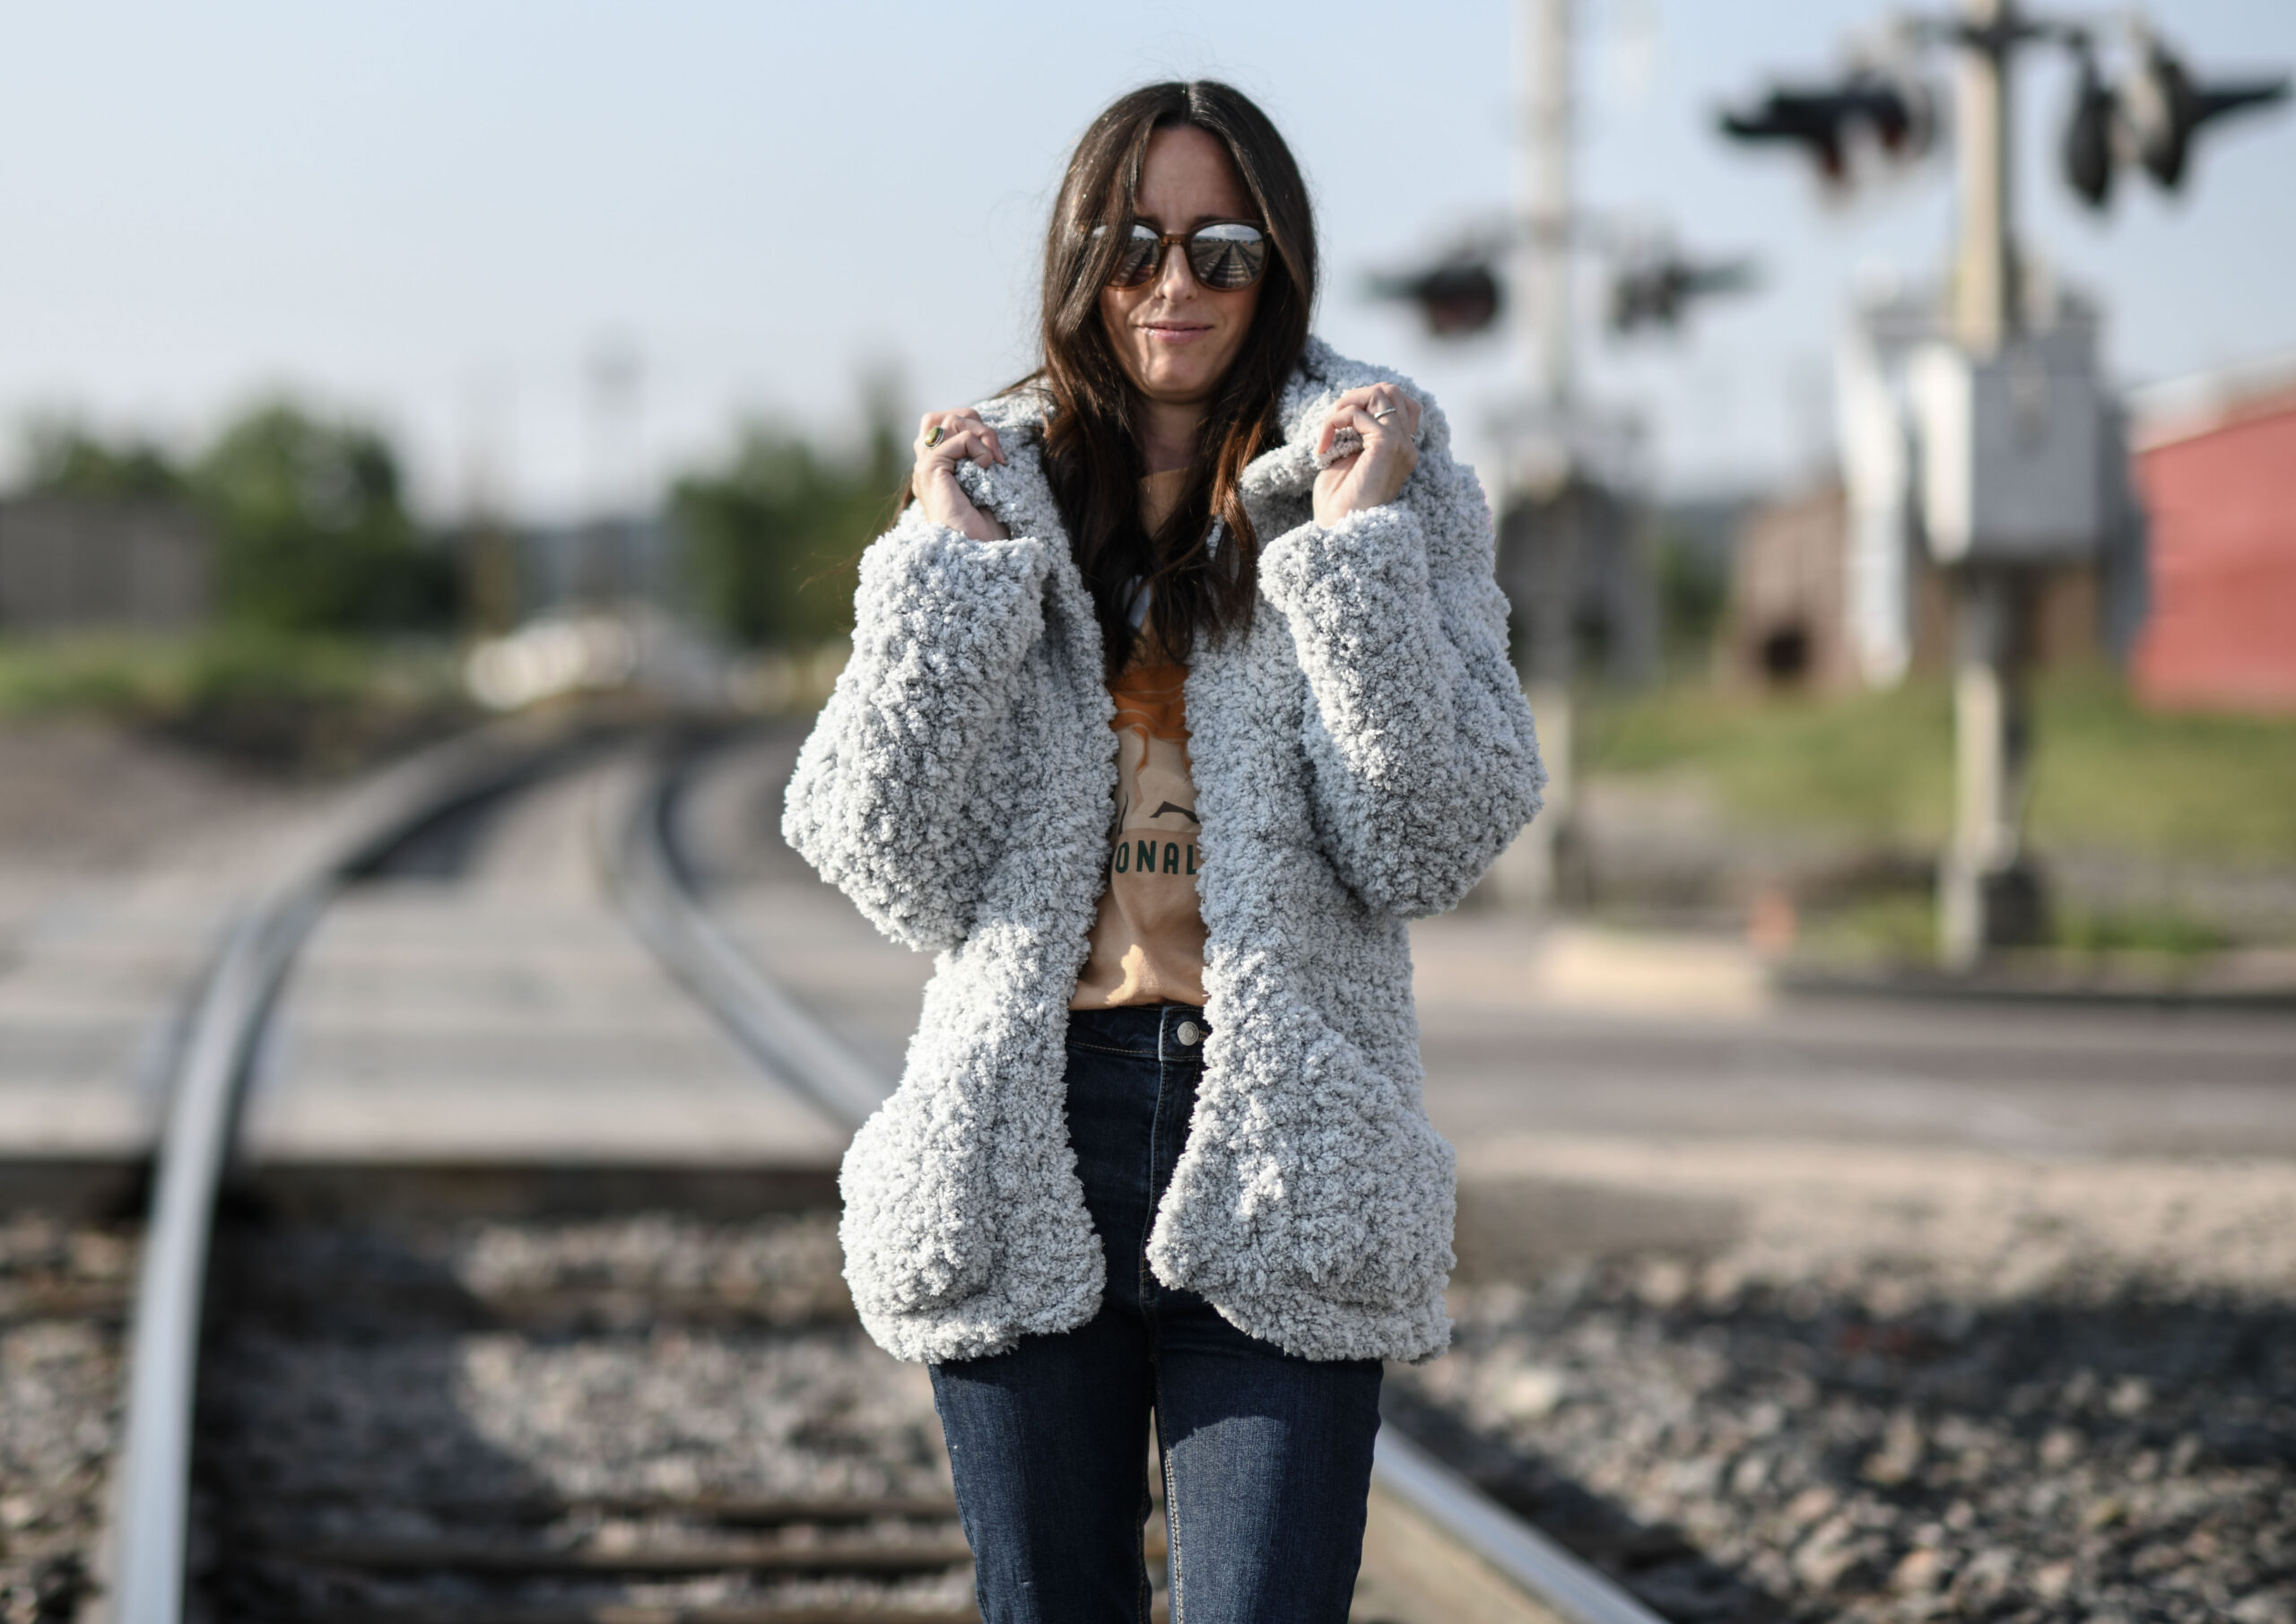
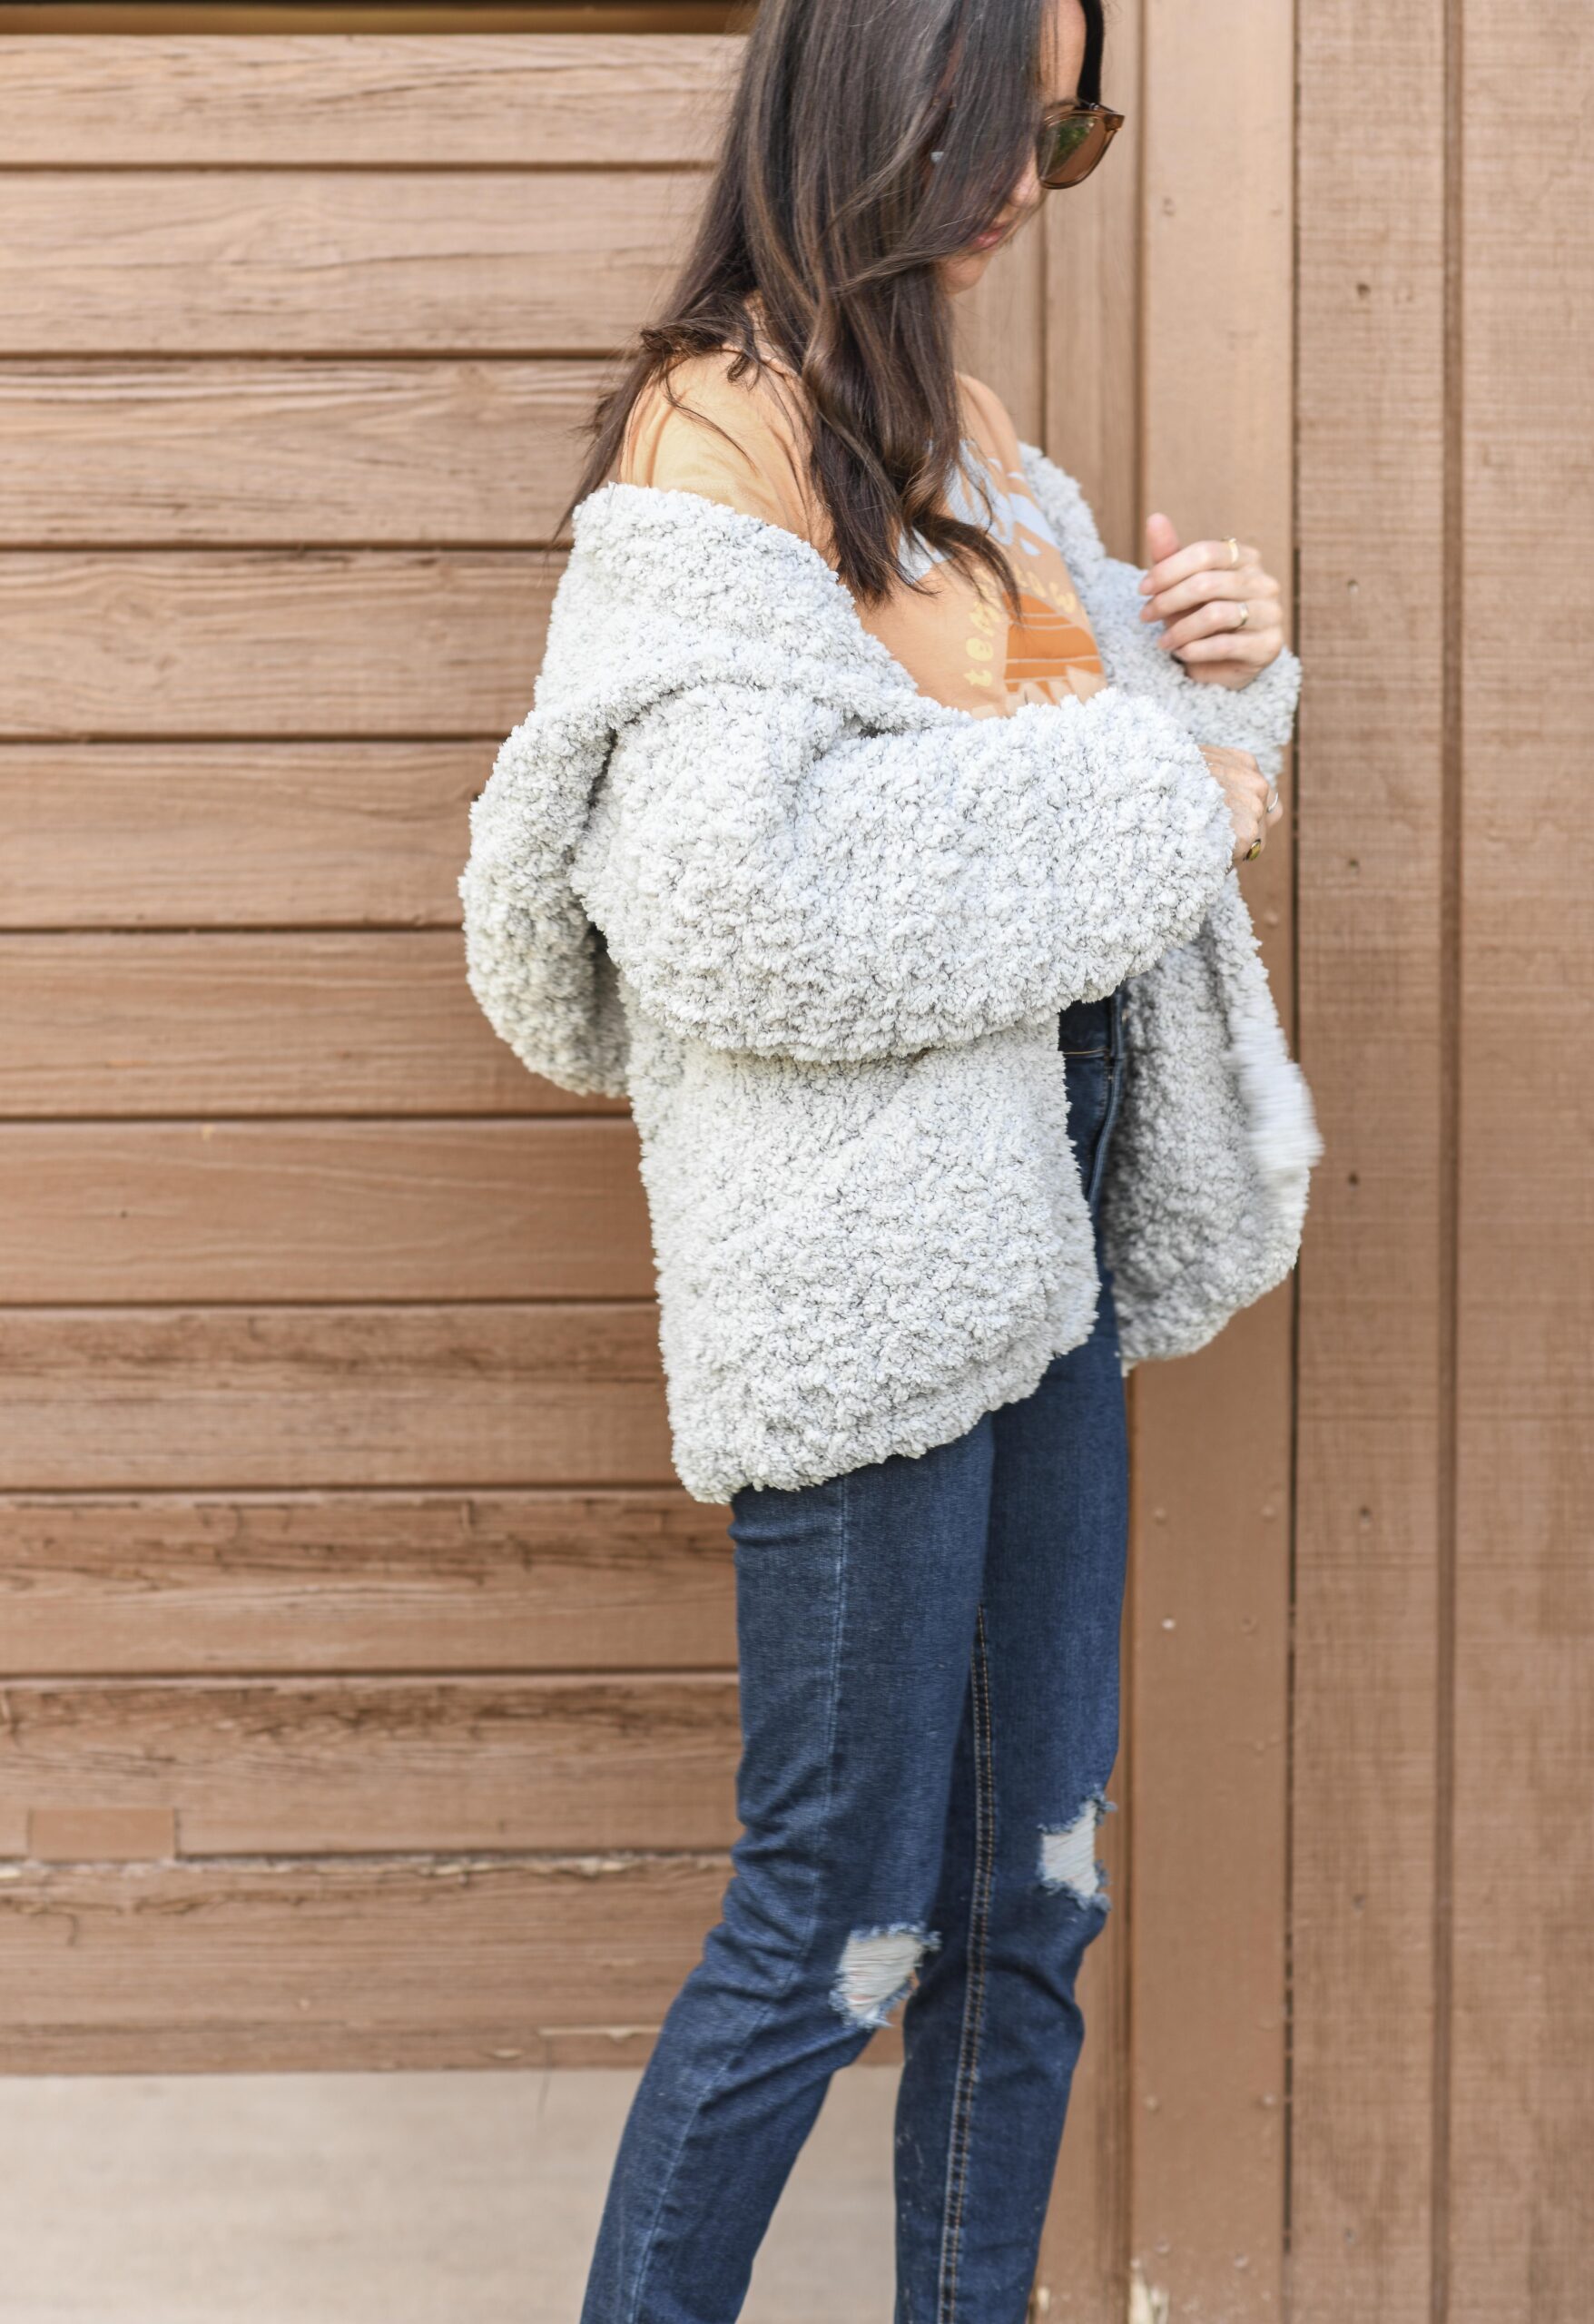
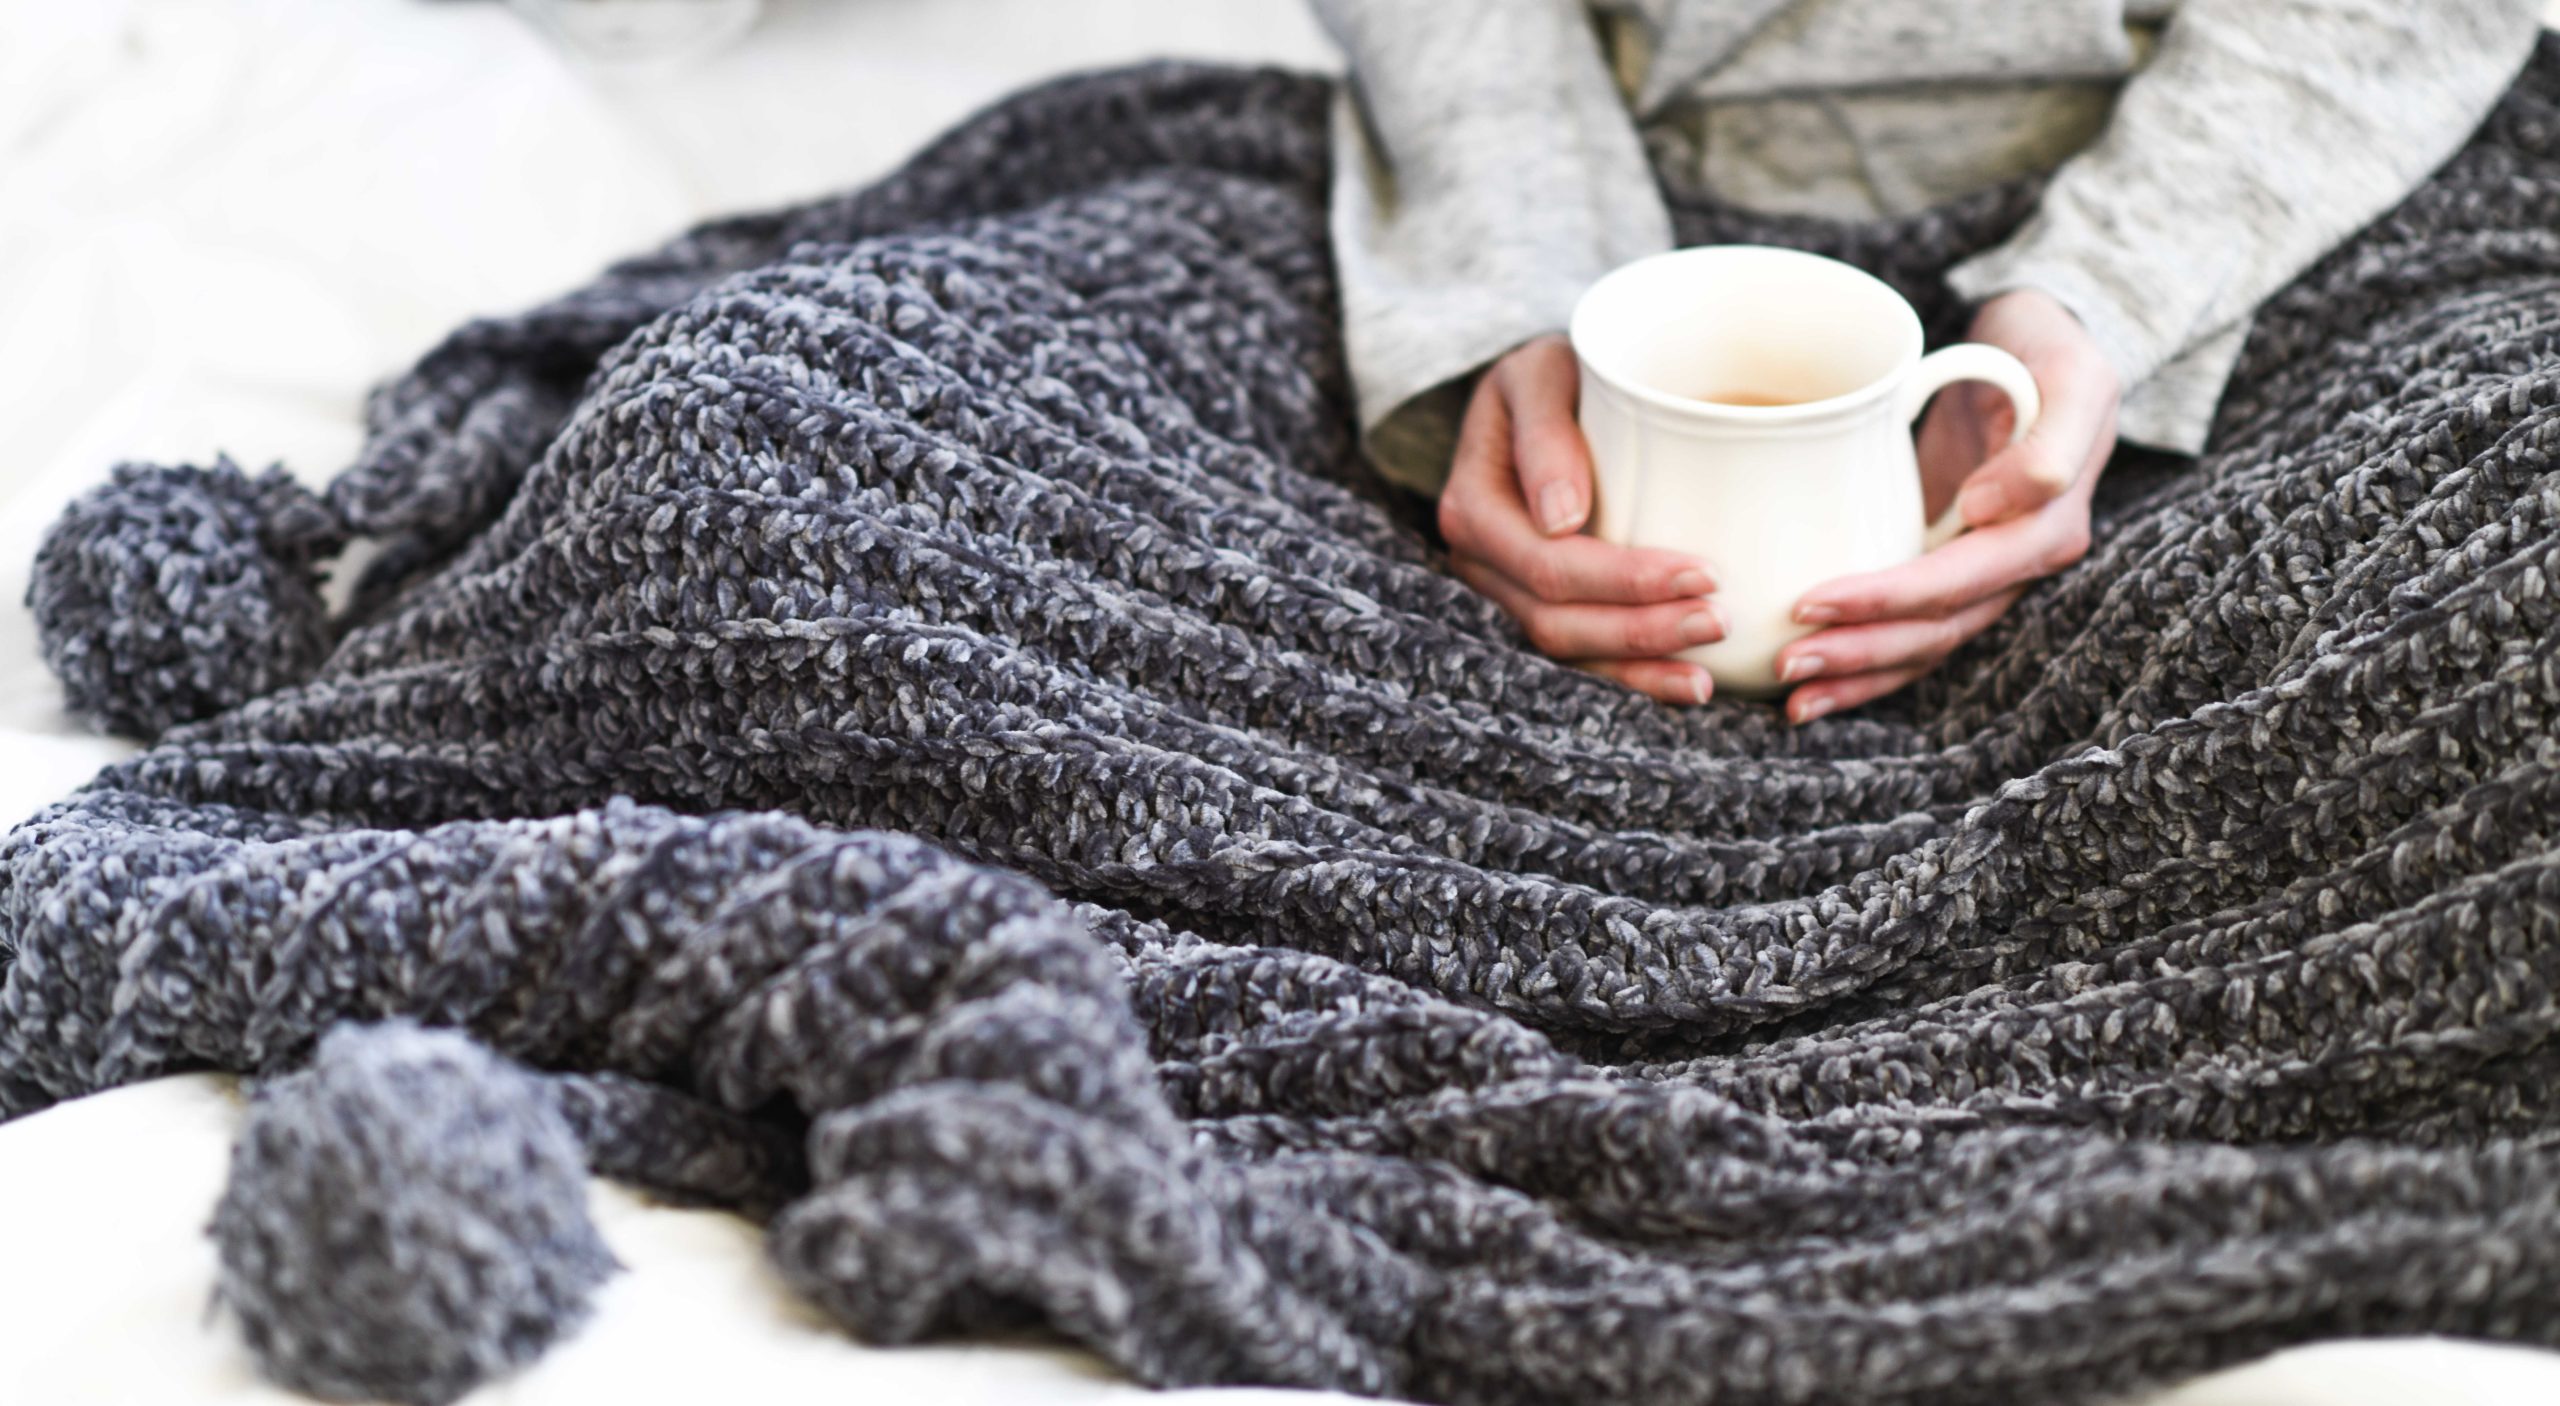
If you are looking for the ultimate, plush, warm jacket for fall and winter, this could be it! I’m so thrilled about this new yarn and want to make ALL the things with it now.
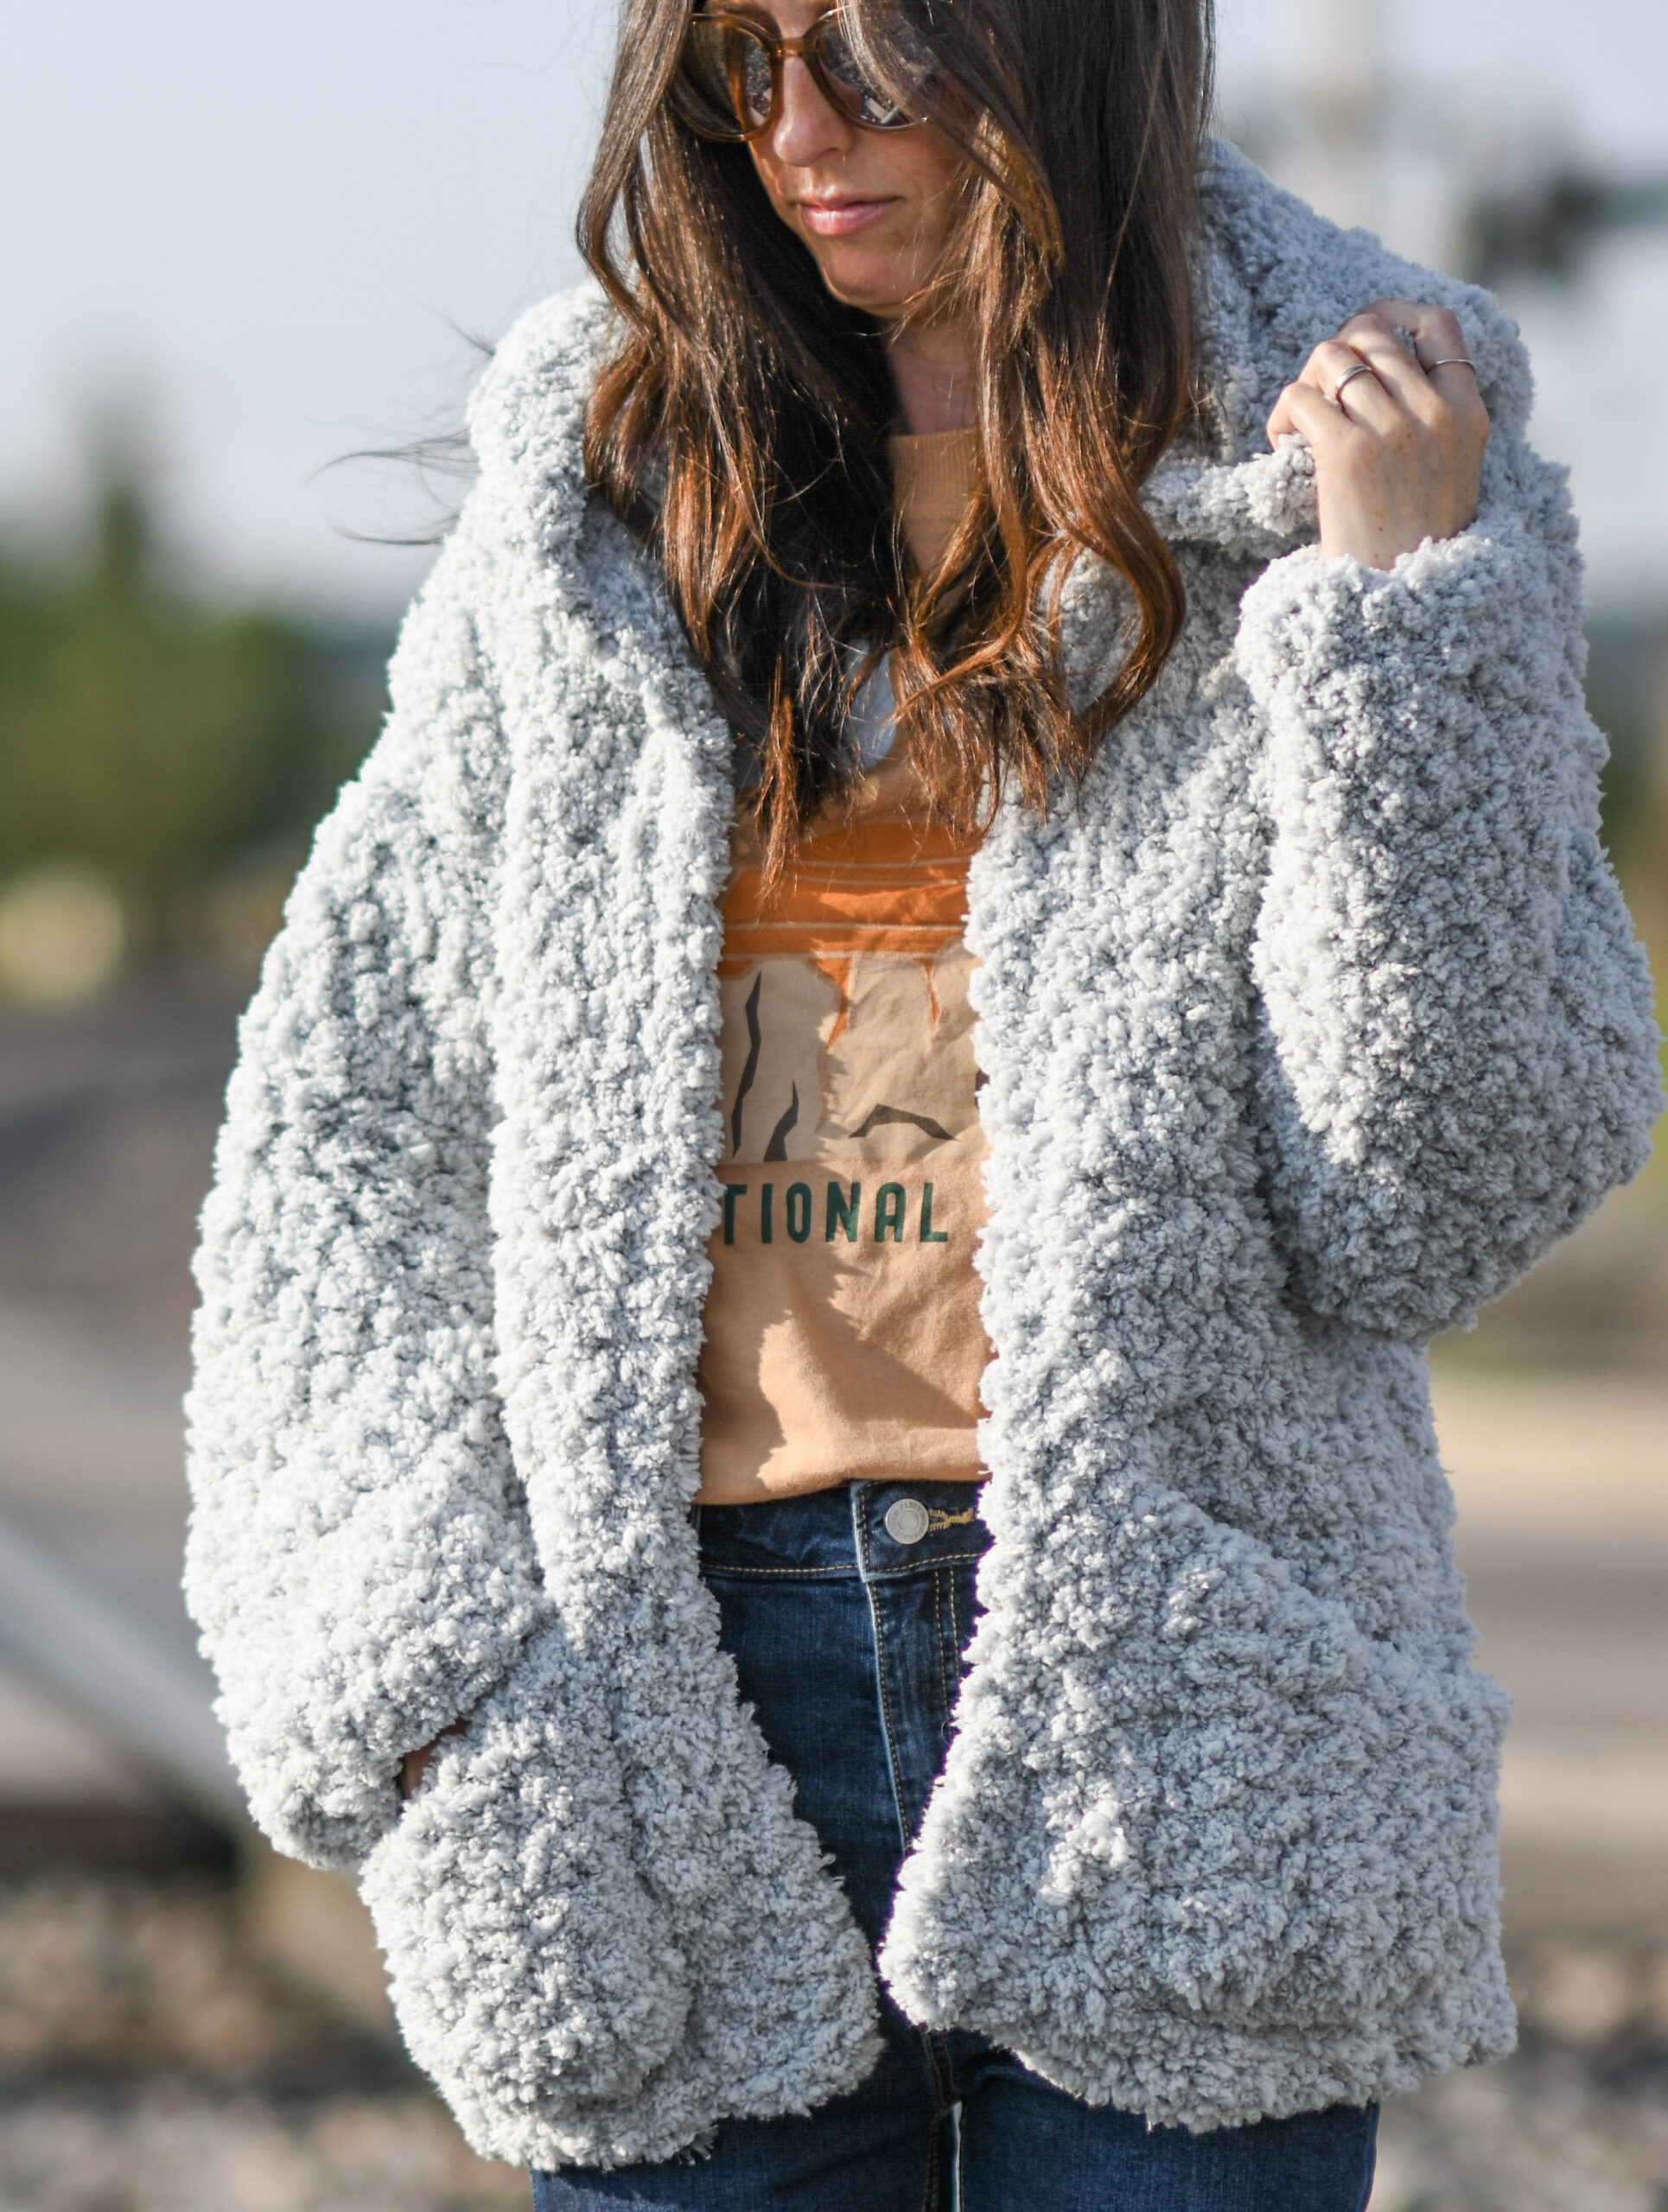
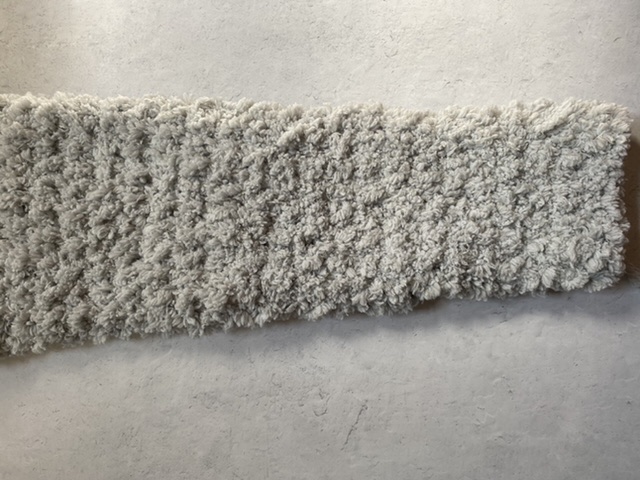
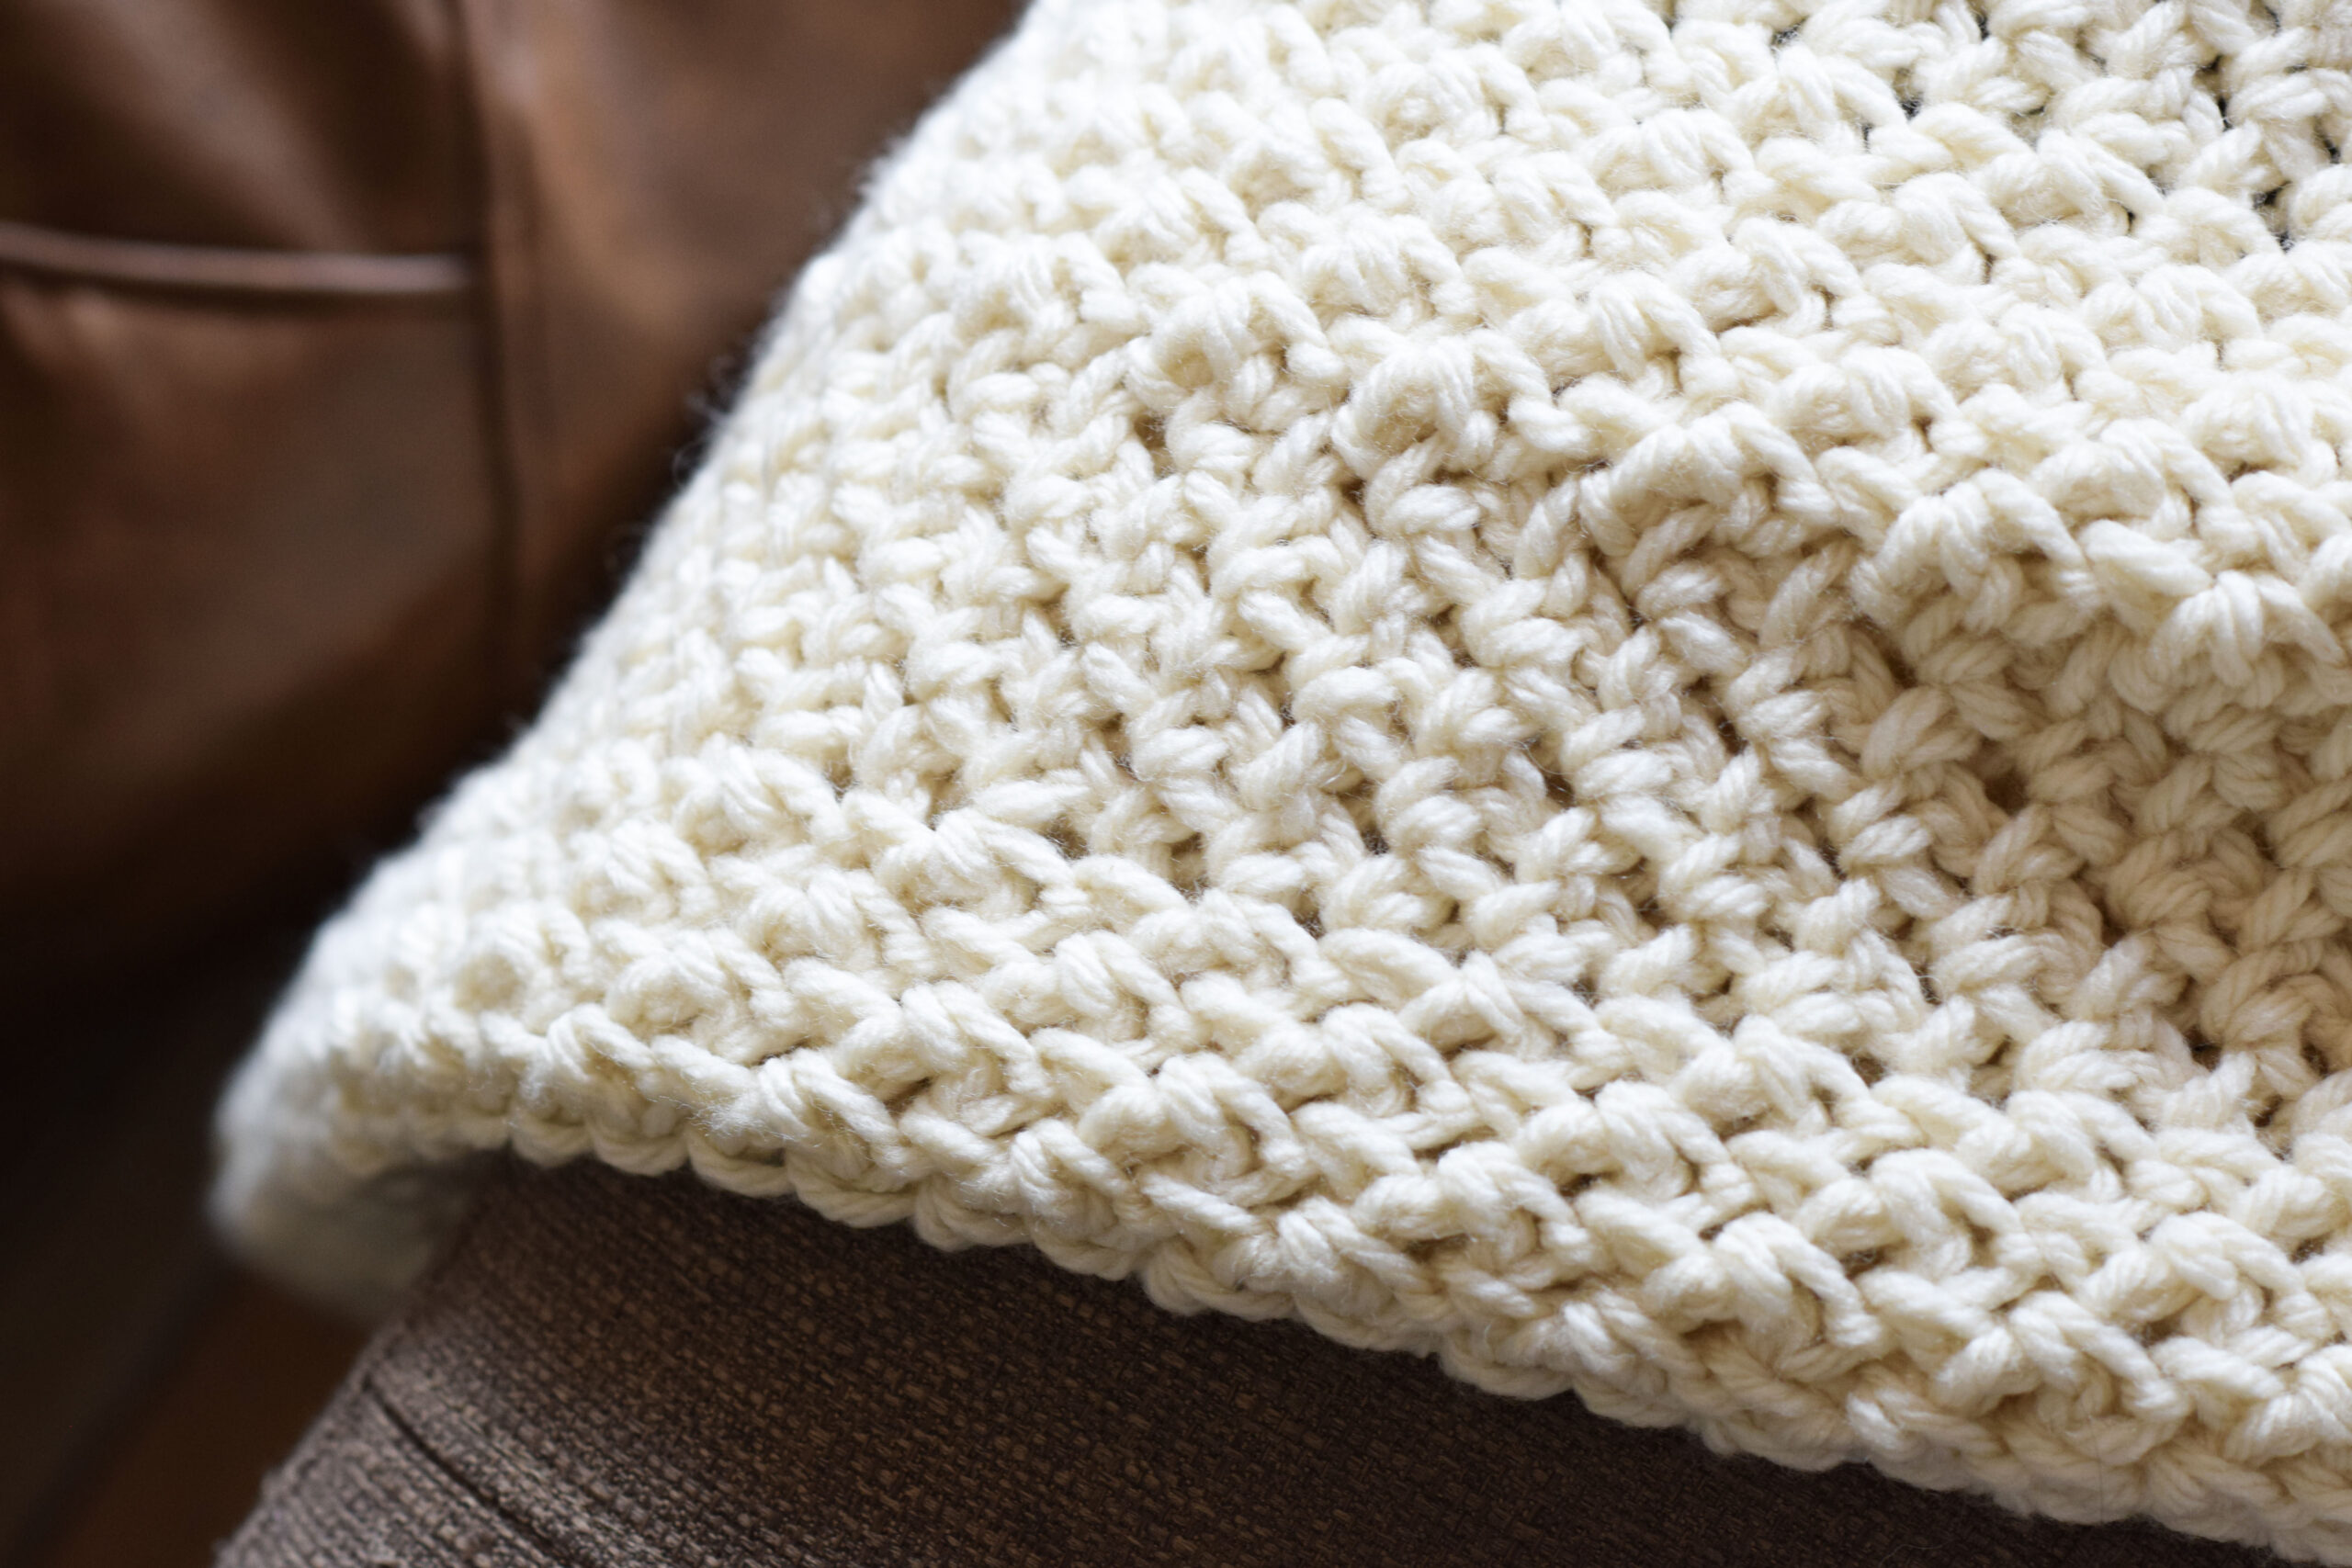
Right off the bat, there are always questions about whether or not you can see the stitches with yarn like this. I was curious about how the Sherpa Fleece yarn would work up as well! As you can imagine, you definitely can’t see the stitches. It’s similar to when you work with faux fur (like my coat or vest).
When you work with yarn like this, you’ll feel for the stitches, rather than really see the stitches. For this reason, I don’t recommend this pattern for total beginners. However, if you’re good with a few different crochet stitches, you can grab this yarn and with a little practice, it’s super easy. If you’re looking for some tips, here is a video tutorial from B Hooked that gives you some helpful info for working with a yarn like this. I actually didn’t have to practice too much at all. It crochets up just as fast for me as any other yarn!
How Do I Crochet A Sherpa Coat?
First, you’ll get the correct yarn. This Sherpa Fleece from Lion Brand Yarn is ideal, and it works up quickly as it’s listed as “jumbo”. Pick a color that you like, and off you go! I love this yarn because it didn’t shed for me AT ALL. Not even a little.
Once you’ve got your yarn, make sure you grab a good hook (size Q) for this pattern. This is a large hook that works well with the yarn.
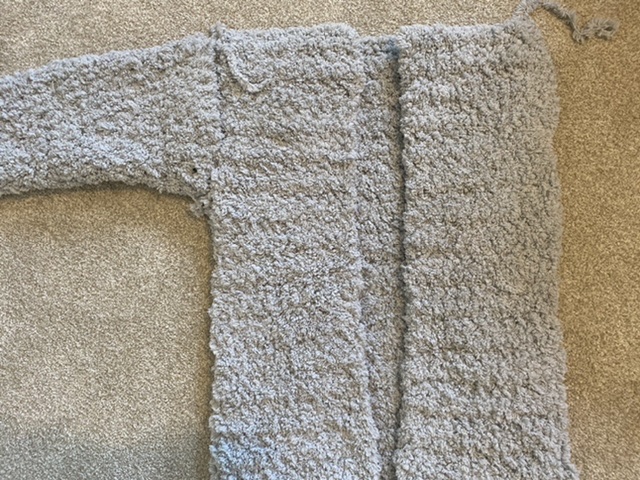
Next, you’ll want to start on the pattern! It’s cool because the coat is made with basic shapes which are seamed together at the end to finish. Since it’s a little tough to see the stitches, it’s really helpful that the coat is crocheted with basic rectangles for this pattern. There is just some light shaping on the sleeves (crocheted in the round) and the pockets (crocheted flat).
You’ll start by crocheting a front panel, back panel, two sleeves and a couple of pockets as well as a hood (optional). Once you’ve got all your rectangles, you’ll whip stitch them together to finish. Yay!
Ready to dive into this fleecy wonder? Here we go!
See the full, free pattern below, or you may purchase the ad-free, printable version from Etsy HERE.
My Chunky Sherpa Coat Crochet Pattern
Description: Get ready to cuddle up in this cozy, chunky, sherpa fleece coat!
Using jumbo yarn and a large hook, it works up quickly and easily using only
single crochet stitches. Featuring slanted pockets and a roomy optional hood,
it’s perfect for fall and winter alike. This ultra soft coat will be your new
wardrobe staple and the yarn doesn’t shed.
Materials:
US Size Q, 15 mm crochet hook
6 (7, 7, 9, 10, 12) Lion Brand Yarn Go For Fleece Sherpa #7 jumbo yarn in
Pearl Grey 184 g & 89 yd per skein (Kit including yarn here) NOTE THAT THE SMALL SIZE CALLS FOR 6 skeins and it used to be 5. Several folks have run short with 5, so a skein has been added to be sure you’re all set.
Pattern uses approximately 850 (1057, 1287, 1539, 1814, 2111) grams
Scissors
Stitch Markers
Tapestry Needle
Measuring Tape
Sizes: Small, Medium, Large, XL, 2X, 3X
Gauge: Approximately 5 ½ sts and 4 rows in 4” x 4” Adjust tension or hook
size to obtain correct gauge as needed.
Please follow the key throughout the pattern according to the size you are
crocheting: S (M, L, XL, 2X, 3X)
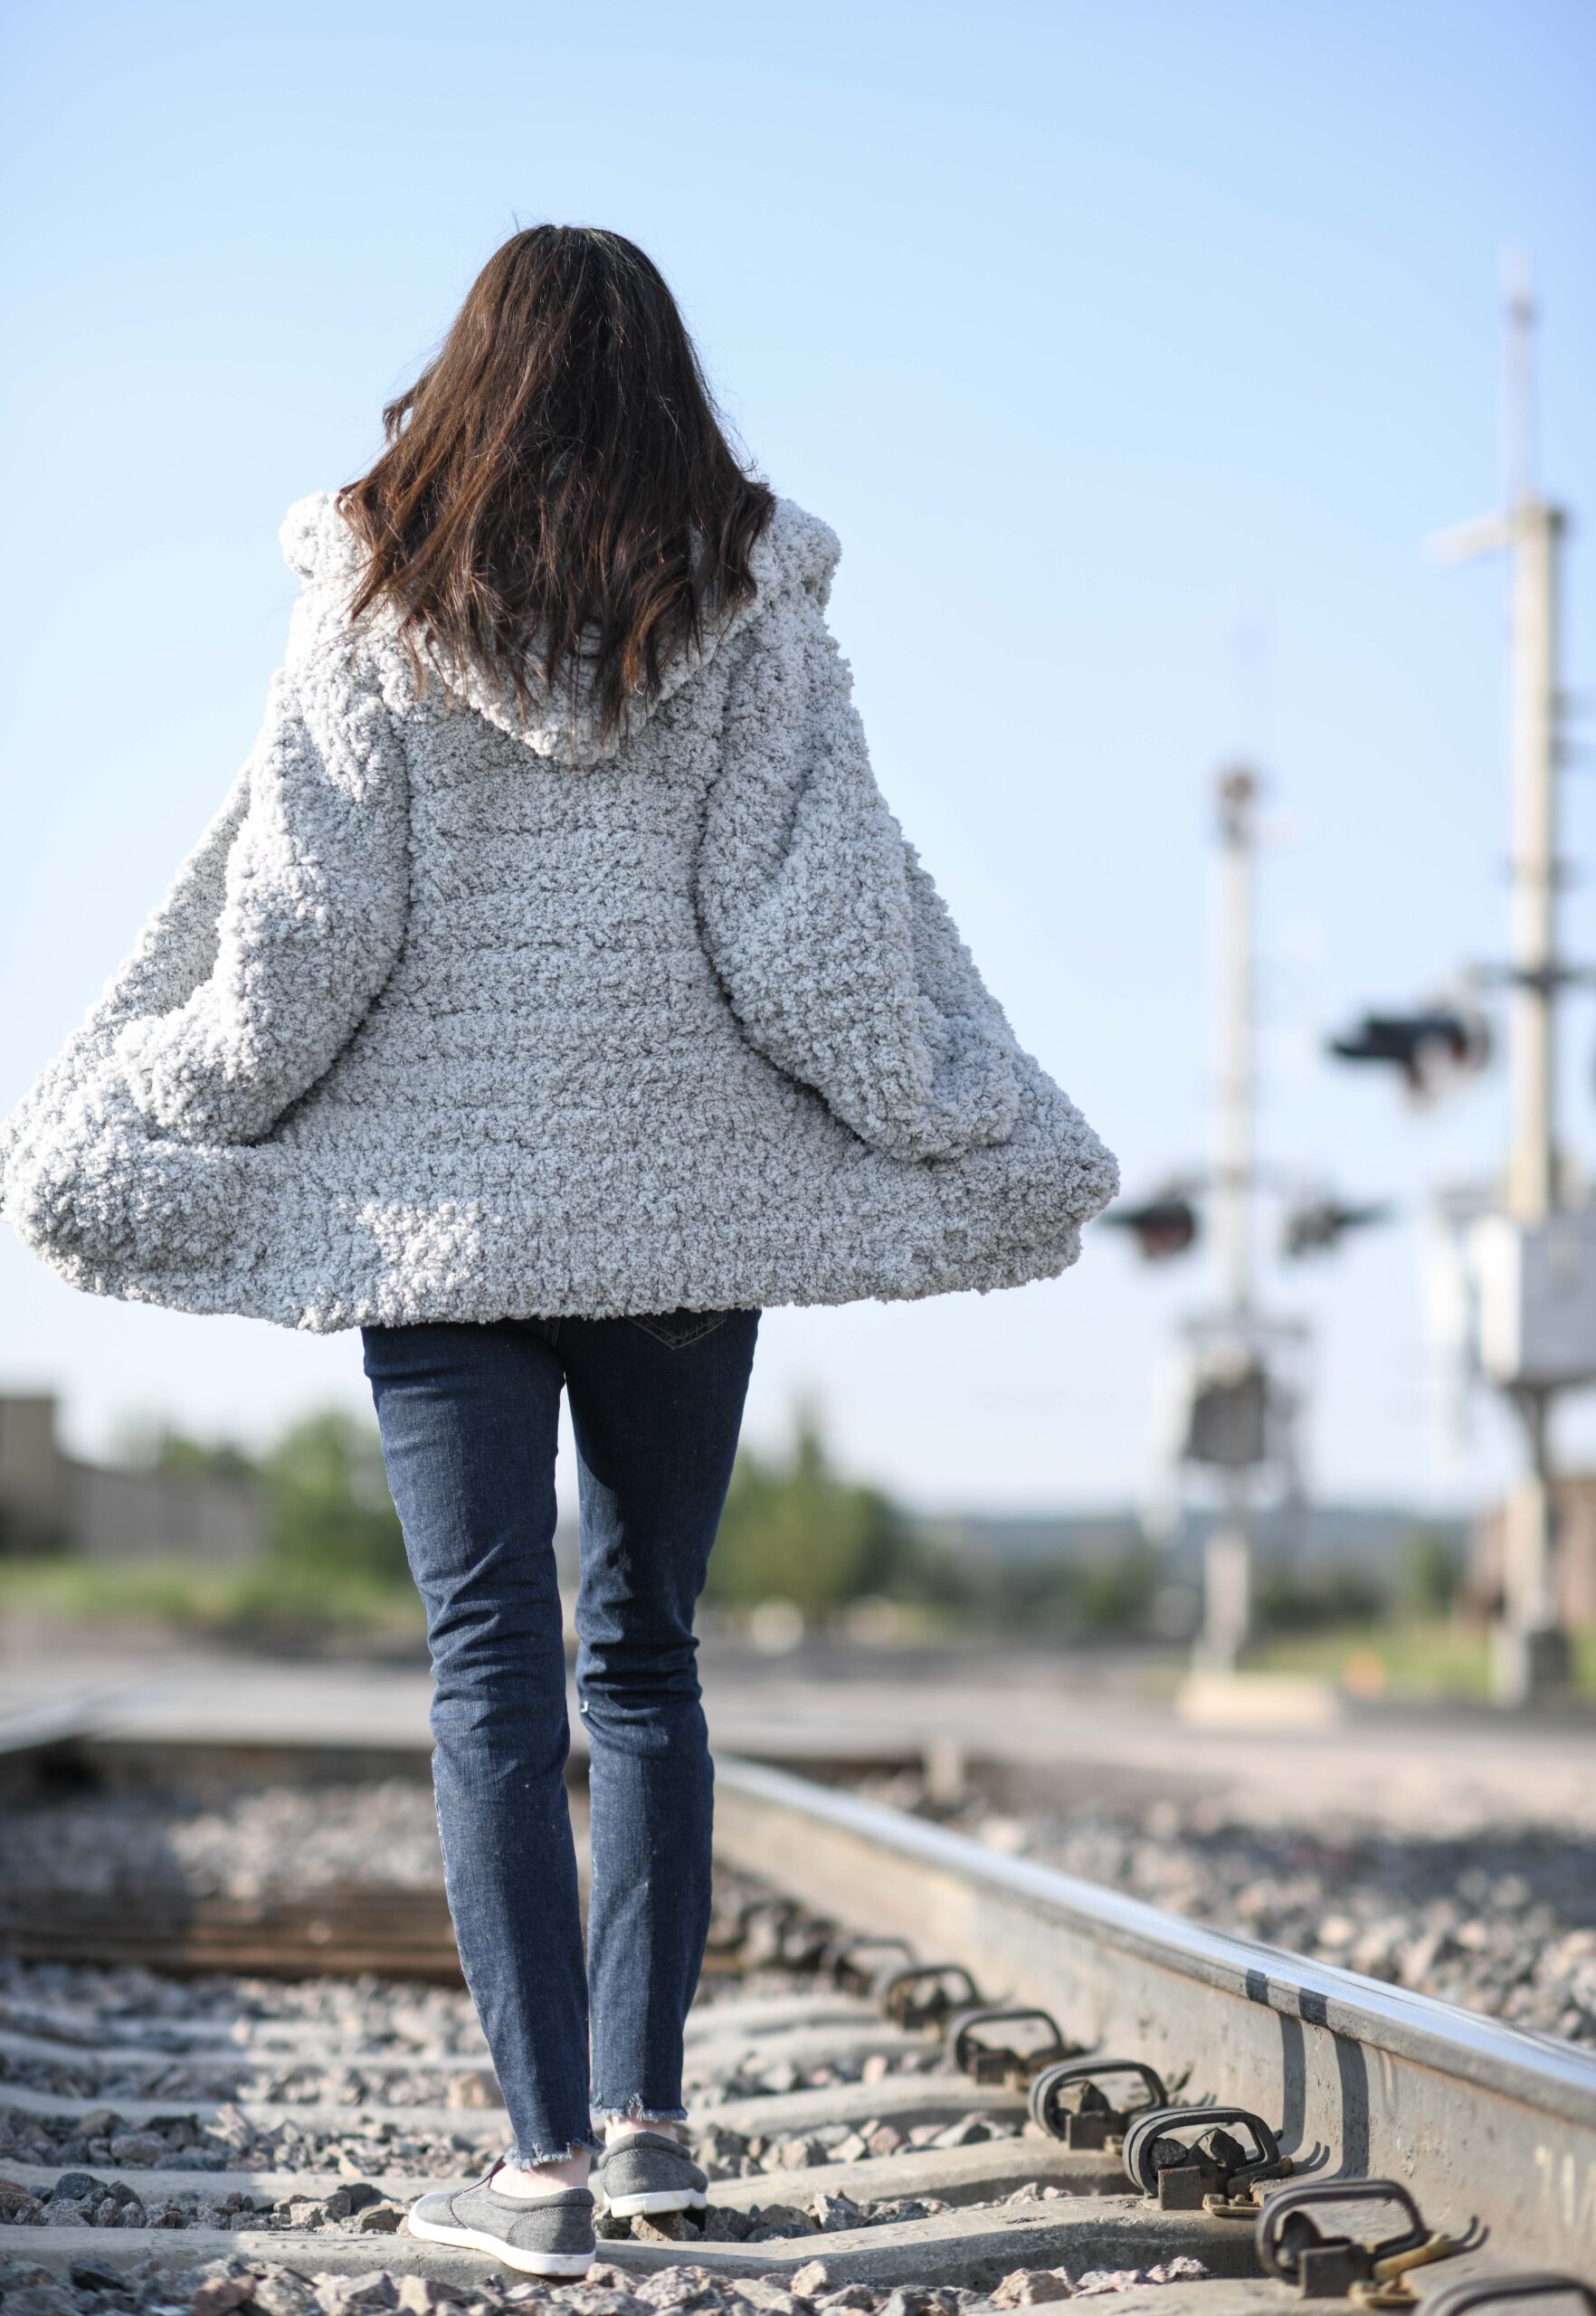
Coat has little positive ease. Model is wearing a size small and has a 32” bust.
Bust Circumference Finished Measurements (approximate):
S – 36”
M – 40”
L – 44”
XL – 48”
2X – 52”
3X – 56”
Length (approximate):
S – 25”
M – 28”
L – 31”
XL – 34”
2X – 37”
3X – 40”
Sleeve Length:
S – 17”
M – 17”
L – 17.5”
XL -18”
2X – 18.5”
3X – 18.5”
Sleeve Width when seamed (approximate width at widest point):
S – 8”
M – 8.5”
L – 9”
XL – 9.5”
2X – 10”
3X – 10.5”
Abbreviations & Skills:
ch – chain
sc – single crochet
sc2tog – single crochet two stitches together (decrease)
st – stitch
sts – stitches
*You should know how to crochet in the round and how to mark your rounds.
Pattern Notes: This coat is crocheted by making one rectangular panel for the
back, two rectangular panels for the front, and a rectangle that is folded and
seamed for the hood. There is no shaping on the panels and only light shaping on
the sleeves and pockets. Sleeves are crocheted in the round. The panels are
seamed together to finish. Due to the nature of the sherpa yarn, you won’t be
able to see the individual stitches. As you crochet, you will feel for the stitch
rather than look for where to make the next stitch. Consider practicing on a
swatch before beginning to avoid some frustration. Because you won’t be able to
see your stitches, I suggest leaving the ends out until your coat is finished in case
any adjustments need to be made. Weave in your ends after assembly. Enjoy!
MY CHUNKY SHERPA COAT PATTERN
Back Panel (make 1)
*stitch count remains the same throughout the pattern
Chain 26 (29, 32, 35, 38, 41)
Row 1 Sc in each st across the row. 25(28, 31, 34, 37, 40) sts
Row 2 Ch 1, turn, sc in each st across the row.
Repeat row 2 until panel measures approximately 25”(28”, 31”, 34”, 37”, 40”)
Tie off.
Front Panel (make 2)
*stitch count remains the same throughout the pattern
Chain 12 (13, 15, 16, 18, 19)
Row 1 Sc in each st across the row. 11 (12, 14, 15, 17, 18) sts
Row 2 Ch 1, turn, sc in each st across the row.
Repeat row 2 until panel measures approximately 25”(28”, 31”, 34”, 37”, 40”) and
is the same length as the back panel. Tie off. Repeat pattern to make a total of 2
front panels.
Sleeves (make 2)
*Sleeves are crocheted in the round
*Mark each round.
*Sleeves are crocheted separately and seamed onto the coat during assembly. If
you’re experienced, you may crochet the sleeves directly onto the coat.
*If you have challenges with twisting when joining in the round, you may work
round one as a row (keep stitch count from round 1), and then join to crochet the
remainder of sleeve in the round.
Chain 24 (25, 26, 27, 28, 29) join to crochet in the round.
Round 1 Sc in each st around. 24 (25, 26, 27, 28, 29)
Round 2 Repeat round 1.
Round 3 Sc2tog, sc in each st around. 23 (24, 25, 26, 27, 28)
Repeat rounds 1 – 3, in that order until sleeve is approximately 17” (17”, 17.5”, 18”,
18.5”, 18.5”) or desired length. Stitch count will decrease by one stitch every third
row. Count stitches to ensure decreasing is correct.
Once the sleeve has reached the indicated length, you may adjust the width of the
sleeve at the wrist. If you like a tighter fit, simply work a few decreases (sc2tog)
before finishing. Finally, skip a stitch, slip stitch into next stitch, and tie off to
finish.
Repeat this pattern for the second sleeve.
Hood (optional)
Chain 30 all sizes
Row 1 Sc in each st across the row. 29 sts
Rows 2 Ch 1, turn, sc in each st across the row.
Repeat row 2 until panel measures approximately 14” (all sizes).
Tie off. (You will fold the hood and seam during assembly)
Pockets (make 2)
*Pockets are crocheted from side to side. The decrease edge is the top of the pocket.
Ch 11 (all sizes)
Row 1 Sc in each st across. (10 sts)
Row 2 Ch 1, turn, sc2tog, sc in each st across (9 sts)
Row 3 Ch 1, turn, sc in each st across.
Row 4 Ch 1, turn, sc2tog, sc in each st across (8sts)
Row 5 Ch 1, turn, sc in each st across.
Row 6 Ch 1, turn, sc2tog, sc in each st across (7 sts)
Row 7 Ch 1, turn, sc in each st across.
Row 8 Ch 1, turn, sc2tog, sc in each st across (6 sts)
Row 9 Ch 1, turn, sc in each st across.
Repeat row 9, 1(1, 2, 2) more times.
Tie off.
Assembly
Place two front panels directly on top of back panel, aligning outer edges and
leaving space in the middle for the head and neck.
Using a simple whip stitch, sew the shoulders along the top on each side.
Sew sleeves onto cardigan using a simple whip stitch or your preferred method.
Seam up sides of the cardigan with a simple whip stitch. Place pockets on the lower, center of each front panel as pictured with the shaped, decrease edge at the top and the original chain edge next to the opening of the front of the cardigan. Sew onto panel with a whip stitch, leaving top of pocket open.
Oversized Hood (optional)
Fold hood in half widthwise and whip stitch seam the top closed. Place hood along
the top, center of the coat. The opening of the hood should be at the front of the
coat. Pin the hood in place if necessary in order to sew it evenly onto the coat.
Sew the hood evenly across, working along the upper portion of the two front
panels and the neck area of the back panel.
Neckline / Collar
Attach yarn at bottom inner corner of front panel. Single crochet along inside
edge of front panel, up and around the neck, hood (if you made one), and down to
the opposite side. You may crochet as many rows as you like to make the
collar/neckline as wide or narrow as desired. A wide collar/neckline is extra cozy!
Pictured coat has three rows of stitches. Tie off and weave in ends.
Enjoy your new, cozy coat!
I wish you guys a great fall and winter in our cuddly crocheted sweaters and coats!! I’d love to see your sherpa coat on Instagram, just tag me @mamainastitch #mamainastitch.
XO,
Jessica
This post was sponsored by Lion Brand Yarn. All opinions are 100% my own.
If you liked this, you might also like:
Hi Jessica
I love your knitting patterns and have knitted quite a few – ranging from summer tops to cardigans to blankets. I really love this pattern, but can’t crochet to save my life!! Any chance of you doing it as a knit pattern?? I appreciate you doing the sweater, but it’s this hoodie I really love.
Thanks – you are so inspiring