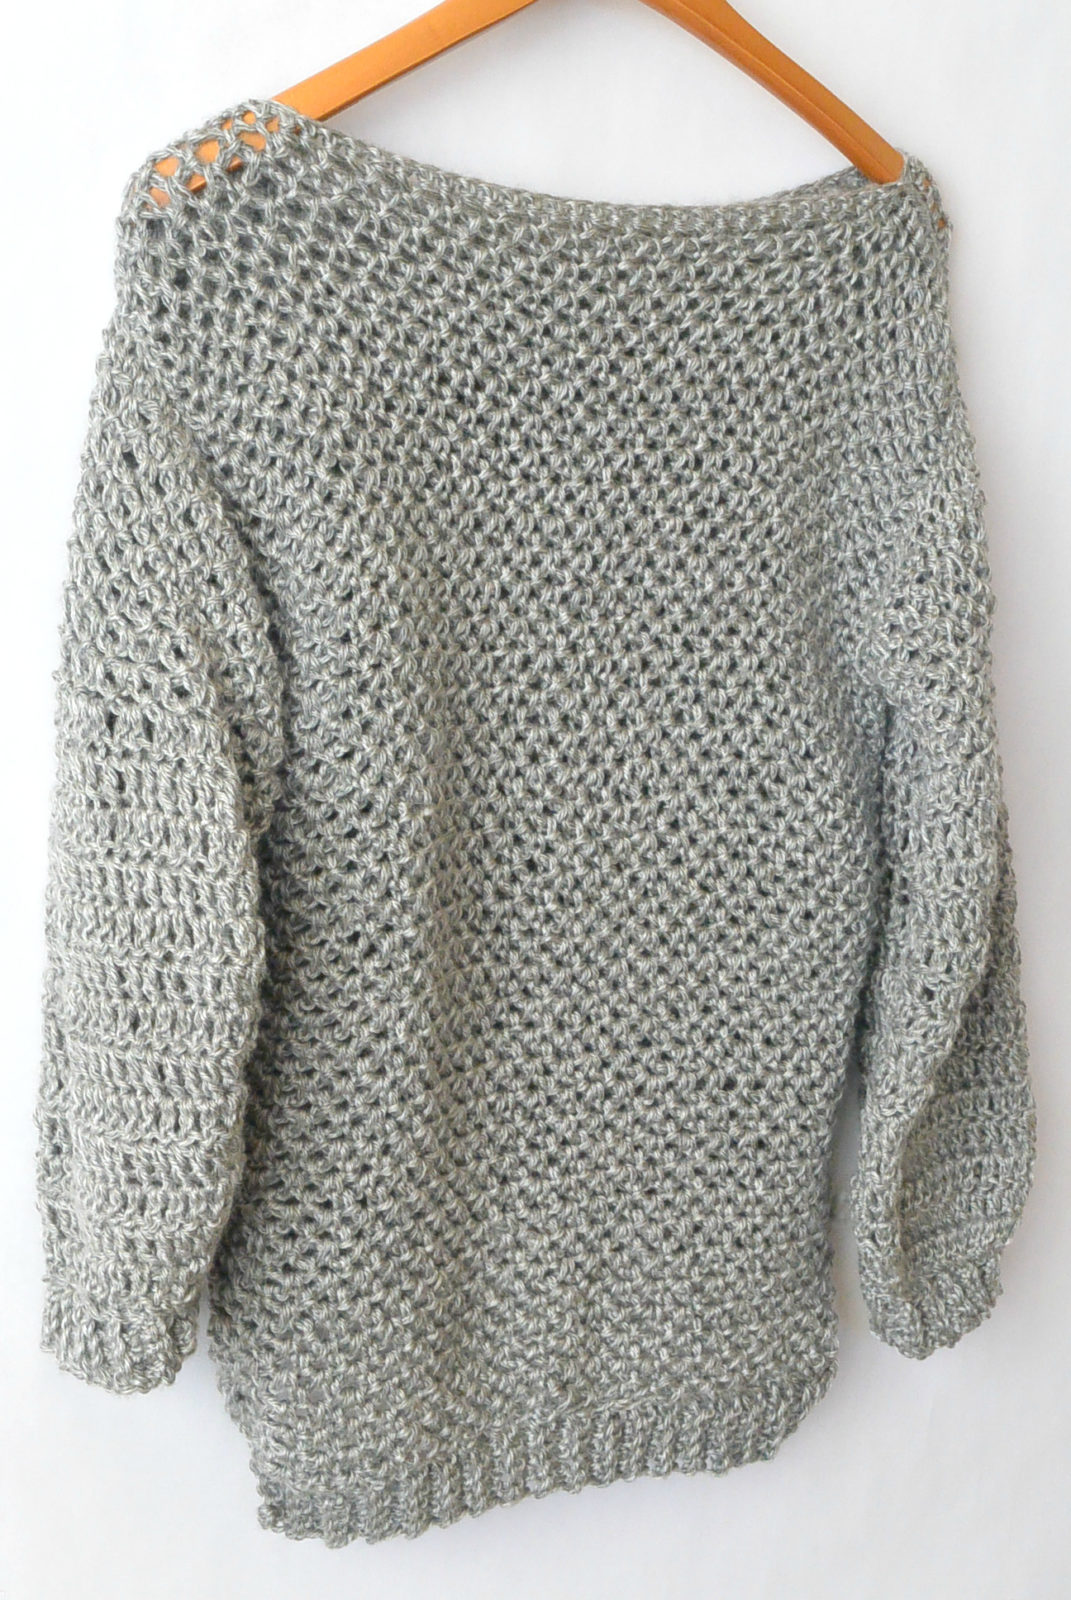
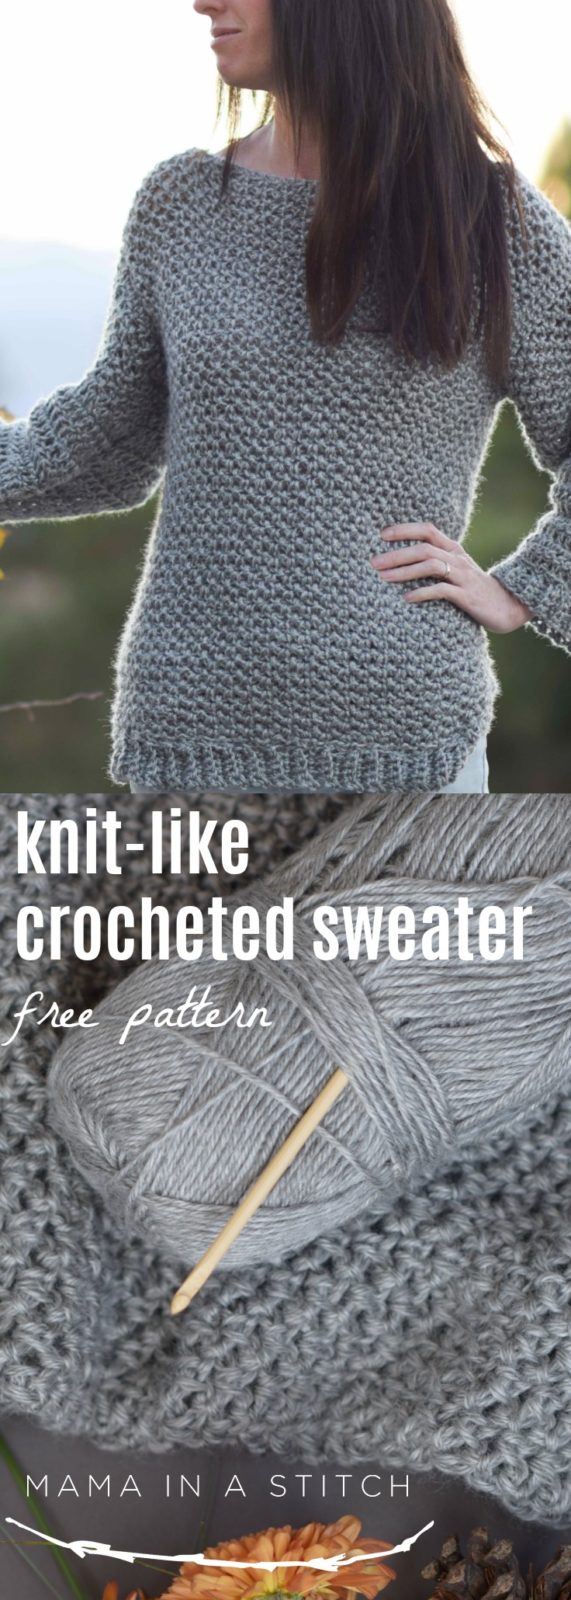
How To Make An Easy Crocheted Sweater (Knit-Like)
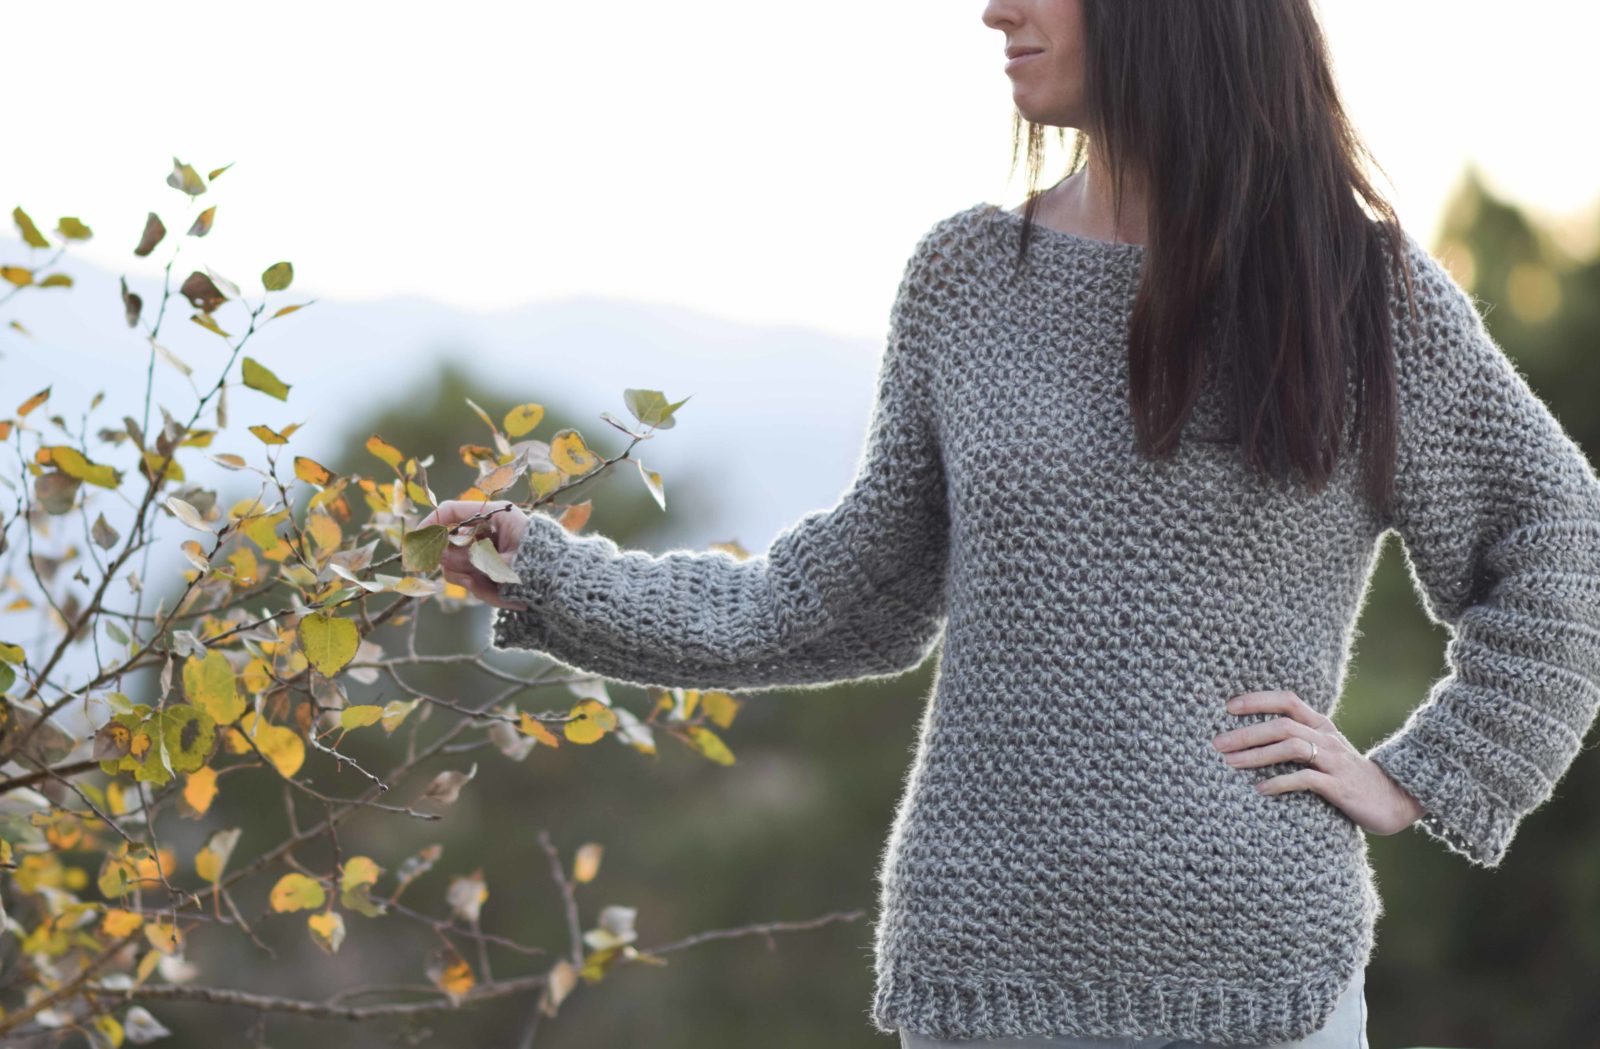
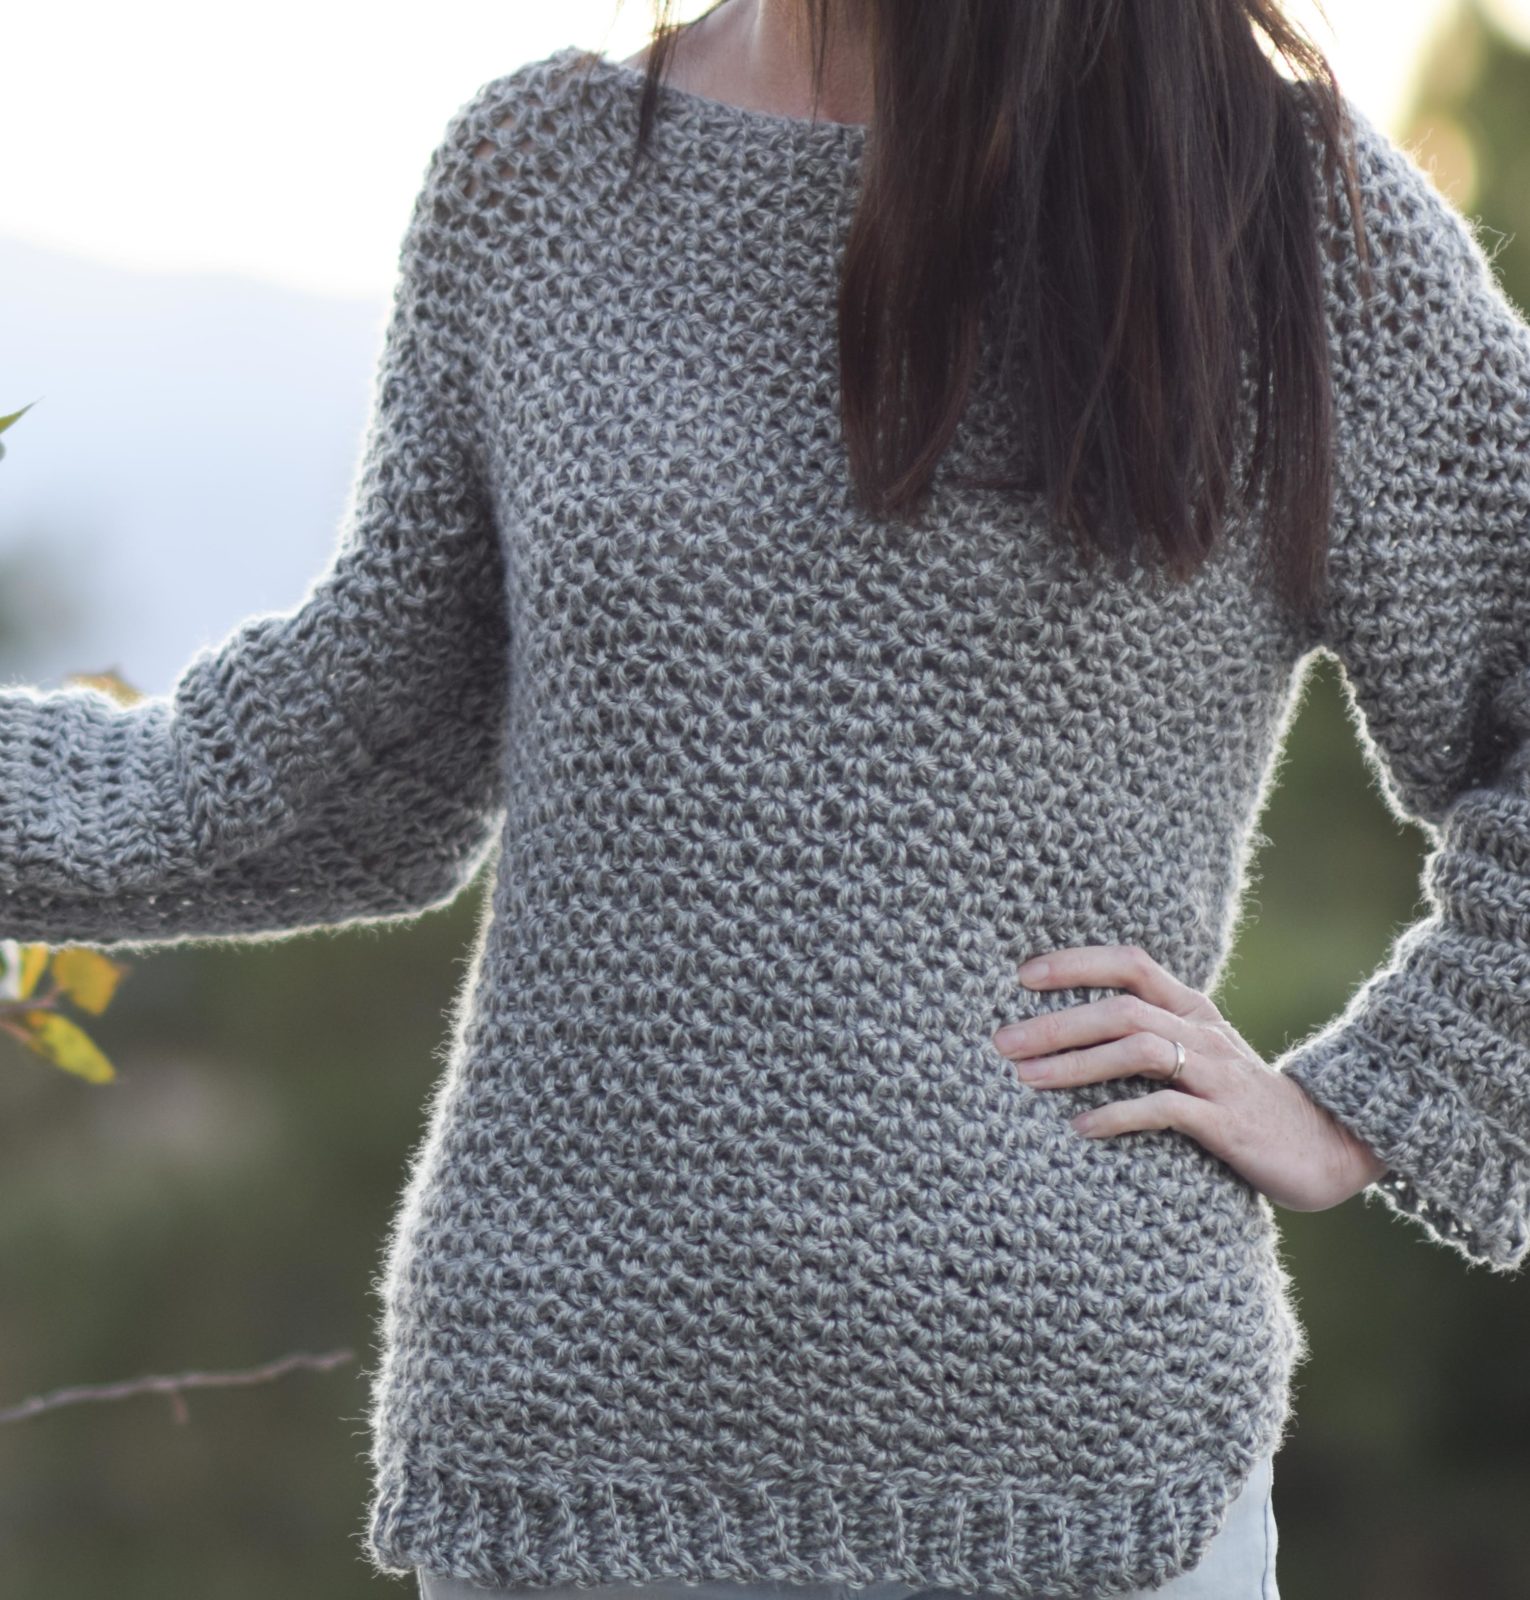
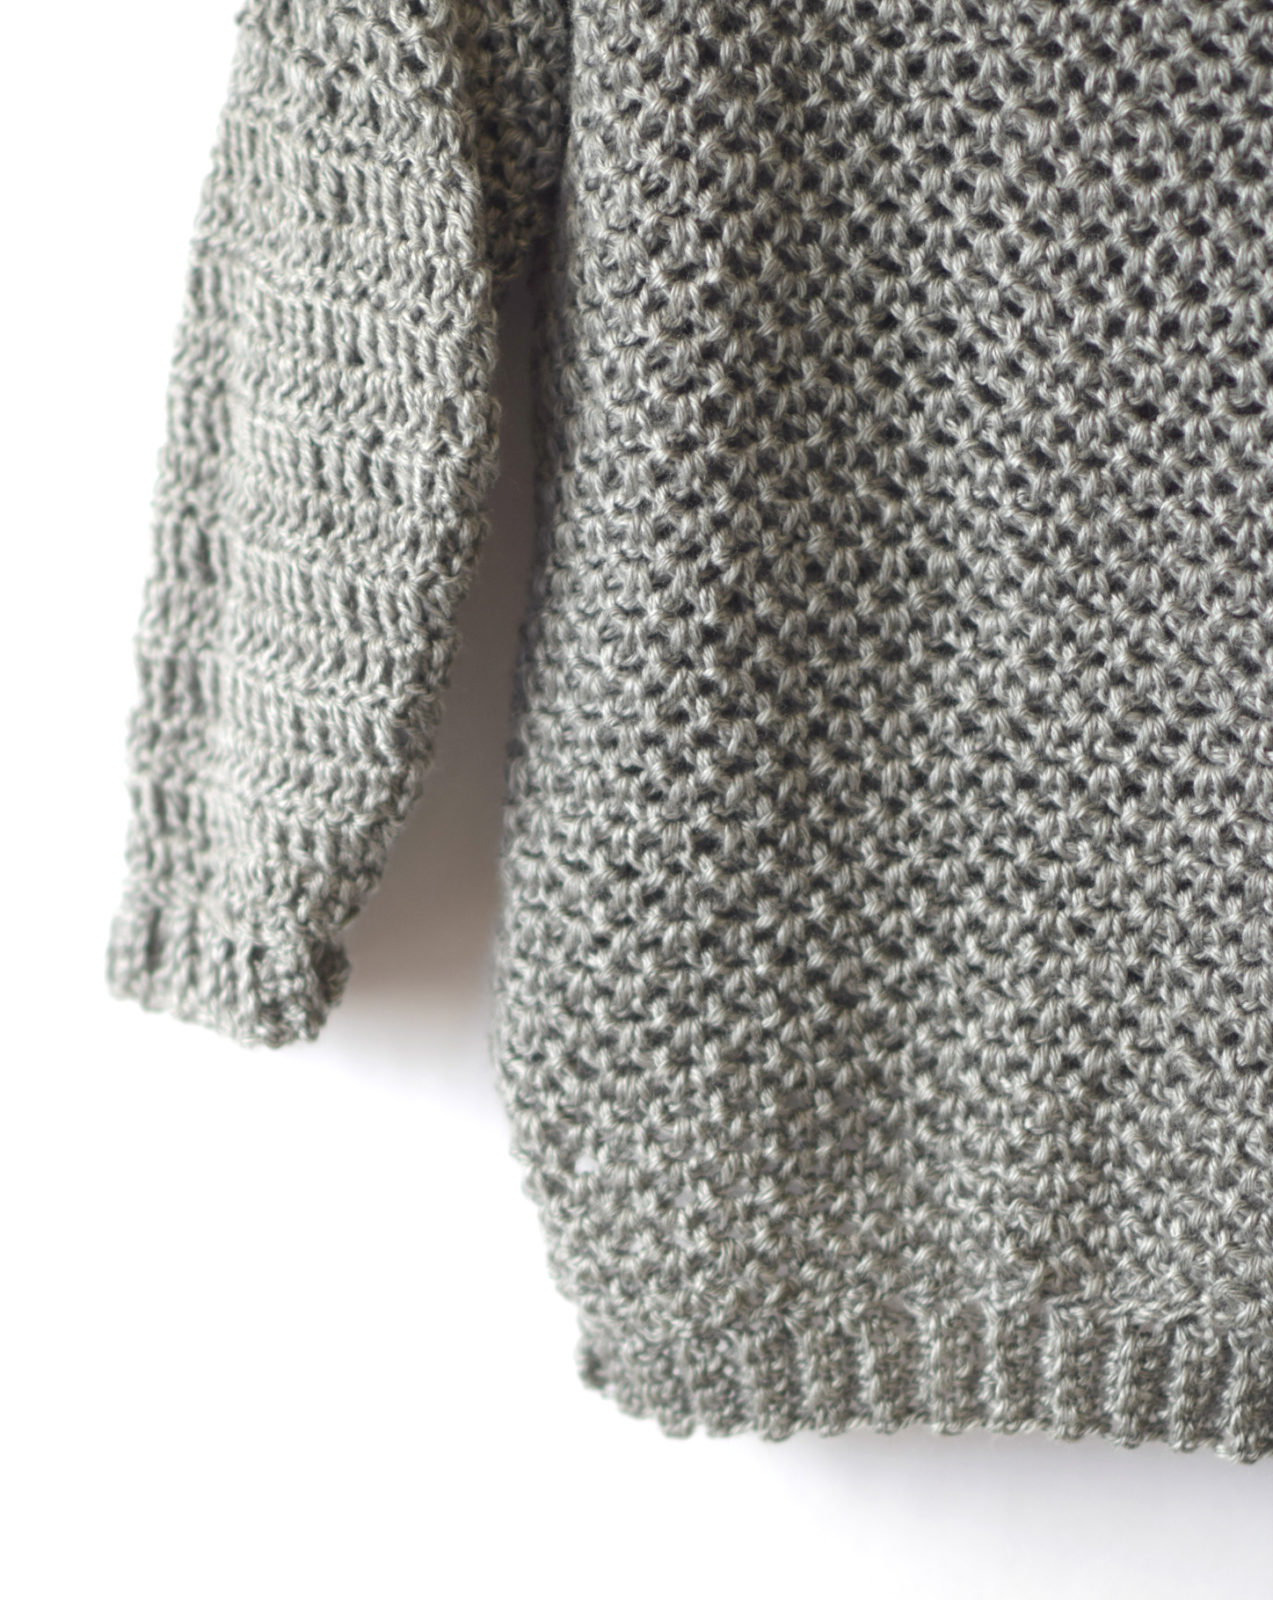
You may know that at this point, I’ve made quite a few cardigans, kimonos and blanket sweaters but have yet to share a traditional crocheted pullover. So here we go…..today I want to share how I made this super easy crocheted sweater that almost appears to be knit. Of course, sweaters can get pretty fancy and even tricky depending on how much shaping is involved. The stitch work can be complicated and when you combine all of that together, sweaters look daunting! However, after designing so many pieces made up of basic squares and rectangles, this fall I wanted to finally design a legit sweater with the same idea. You guys, this project is something that just about anyone can do if you know your basic crochet stitches. With this particular sweater, I used single crochet stitches, double crochet stitches and chain stitches. And wait for it……there is NO SHAPING. I just used a few different sized hooks to shape the arms, but no increasing or decreasing. That translates to easy. 😉
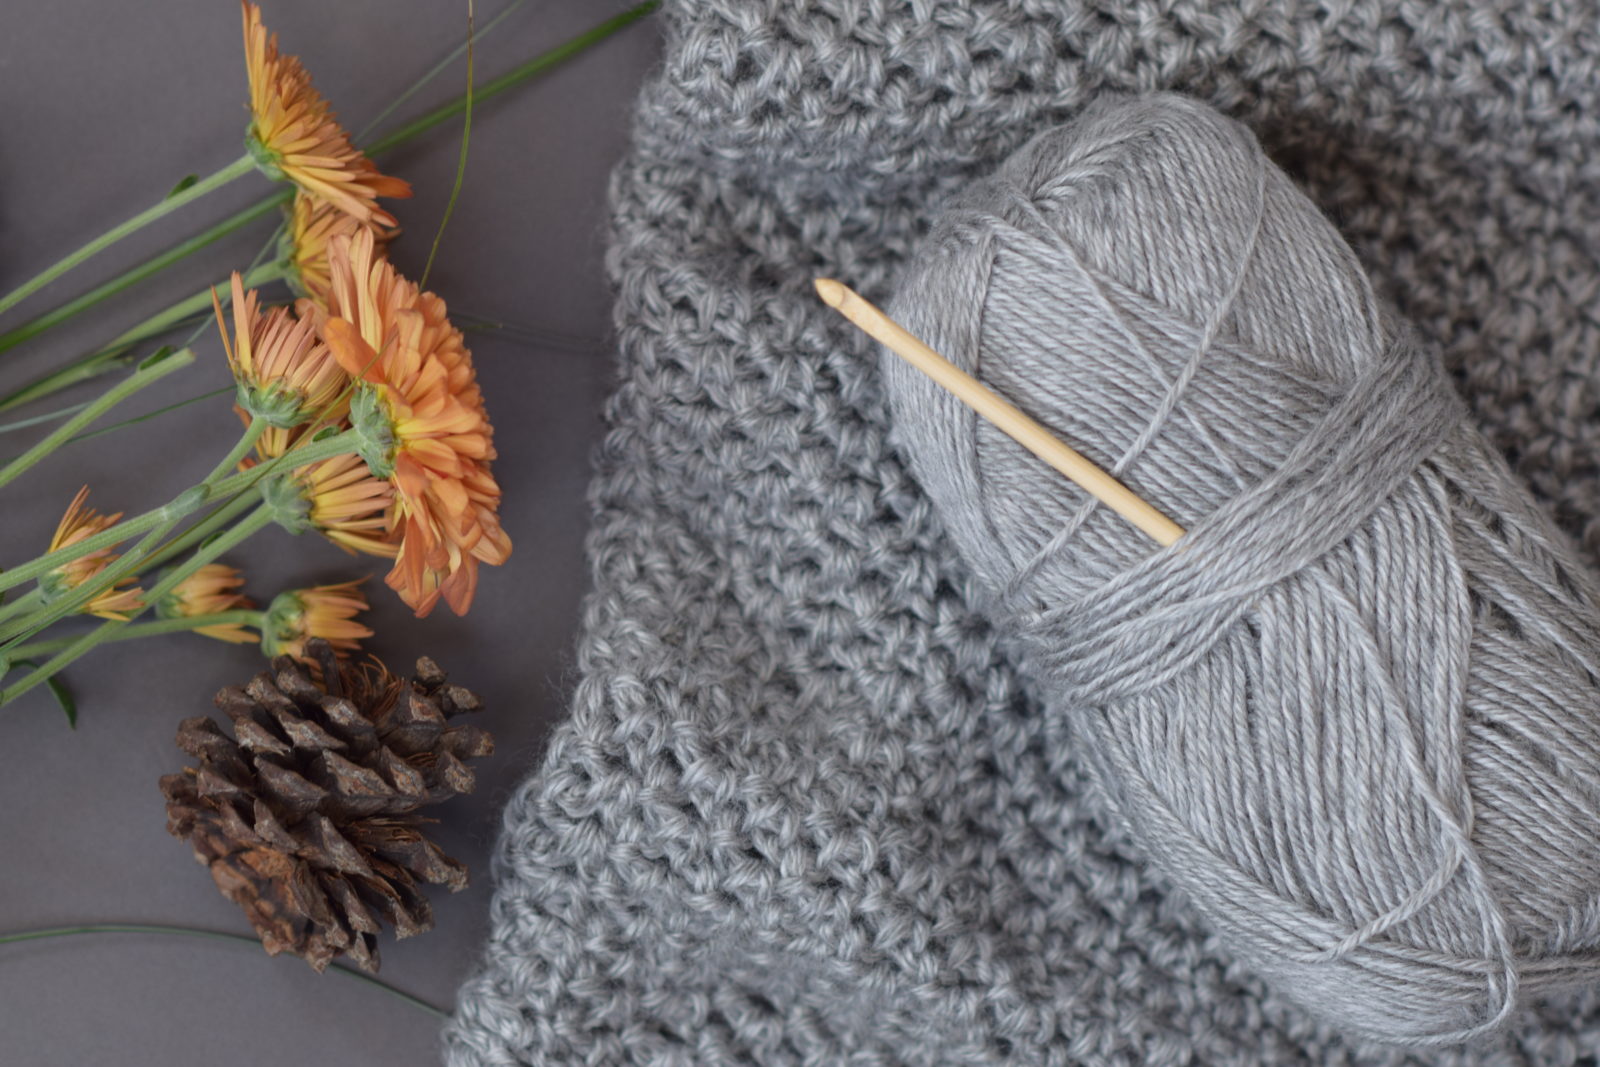
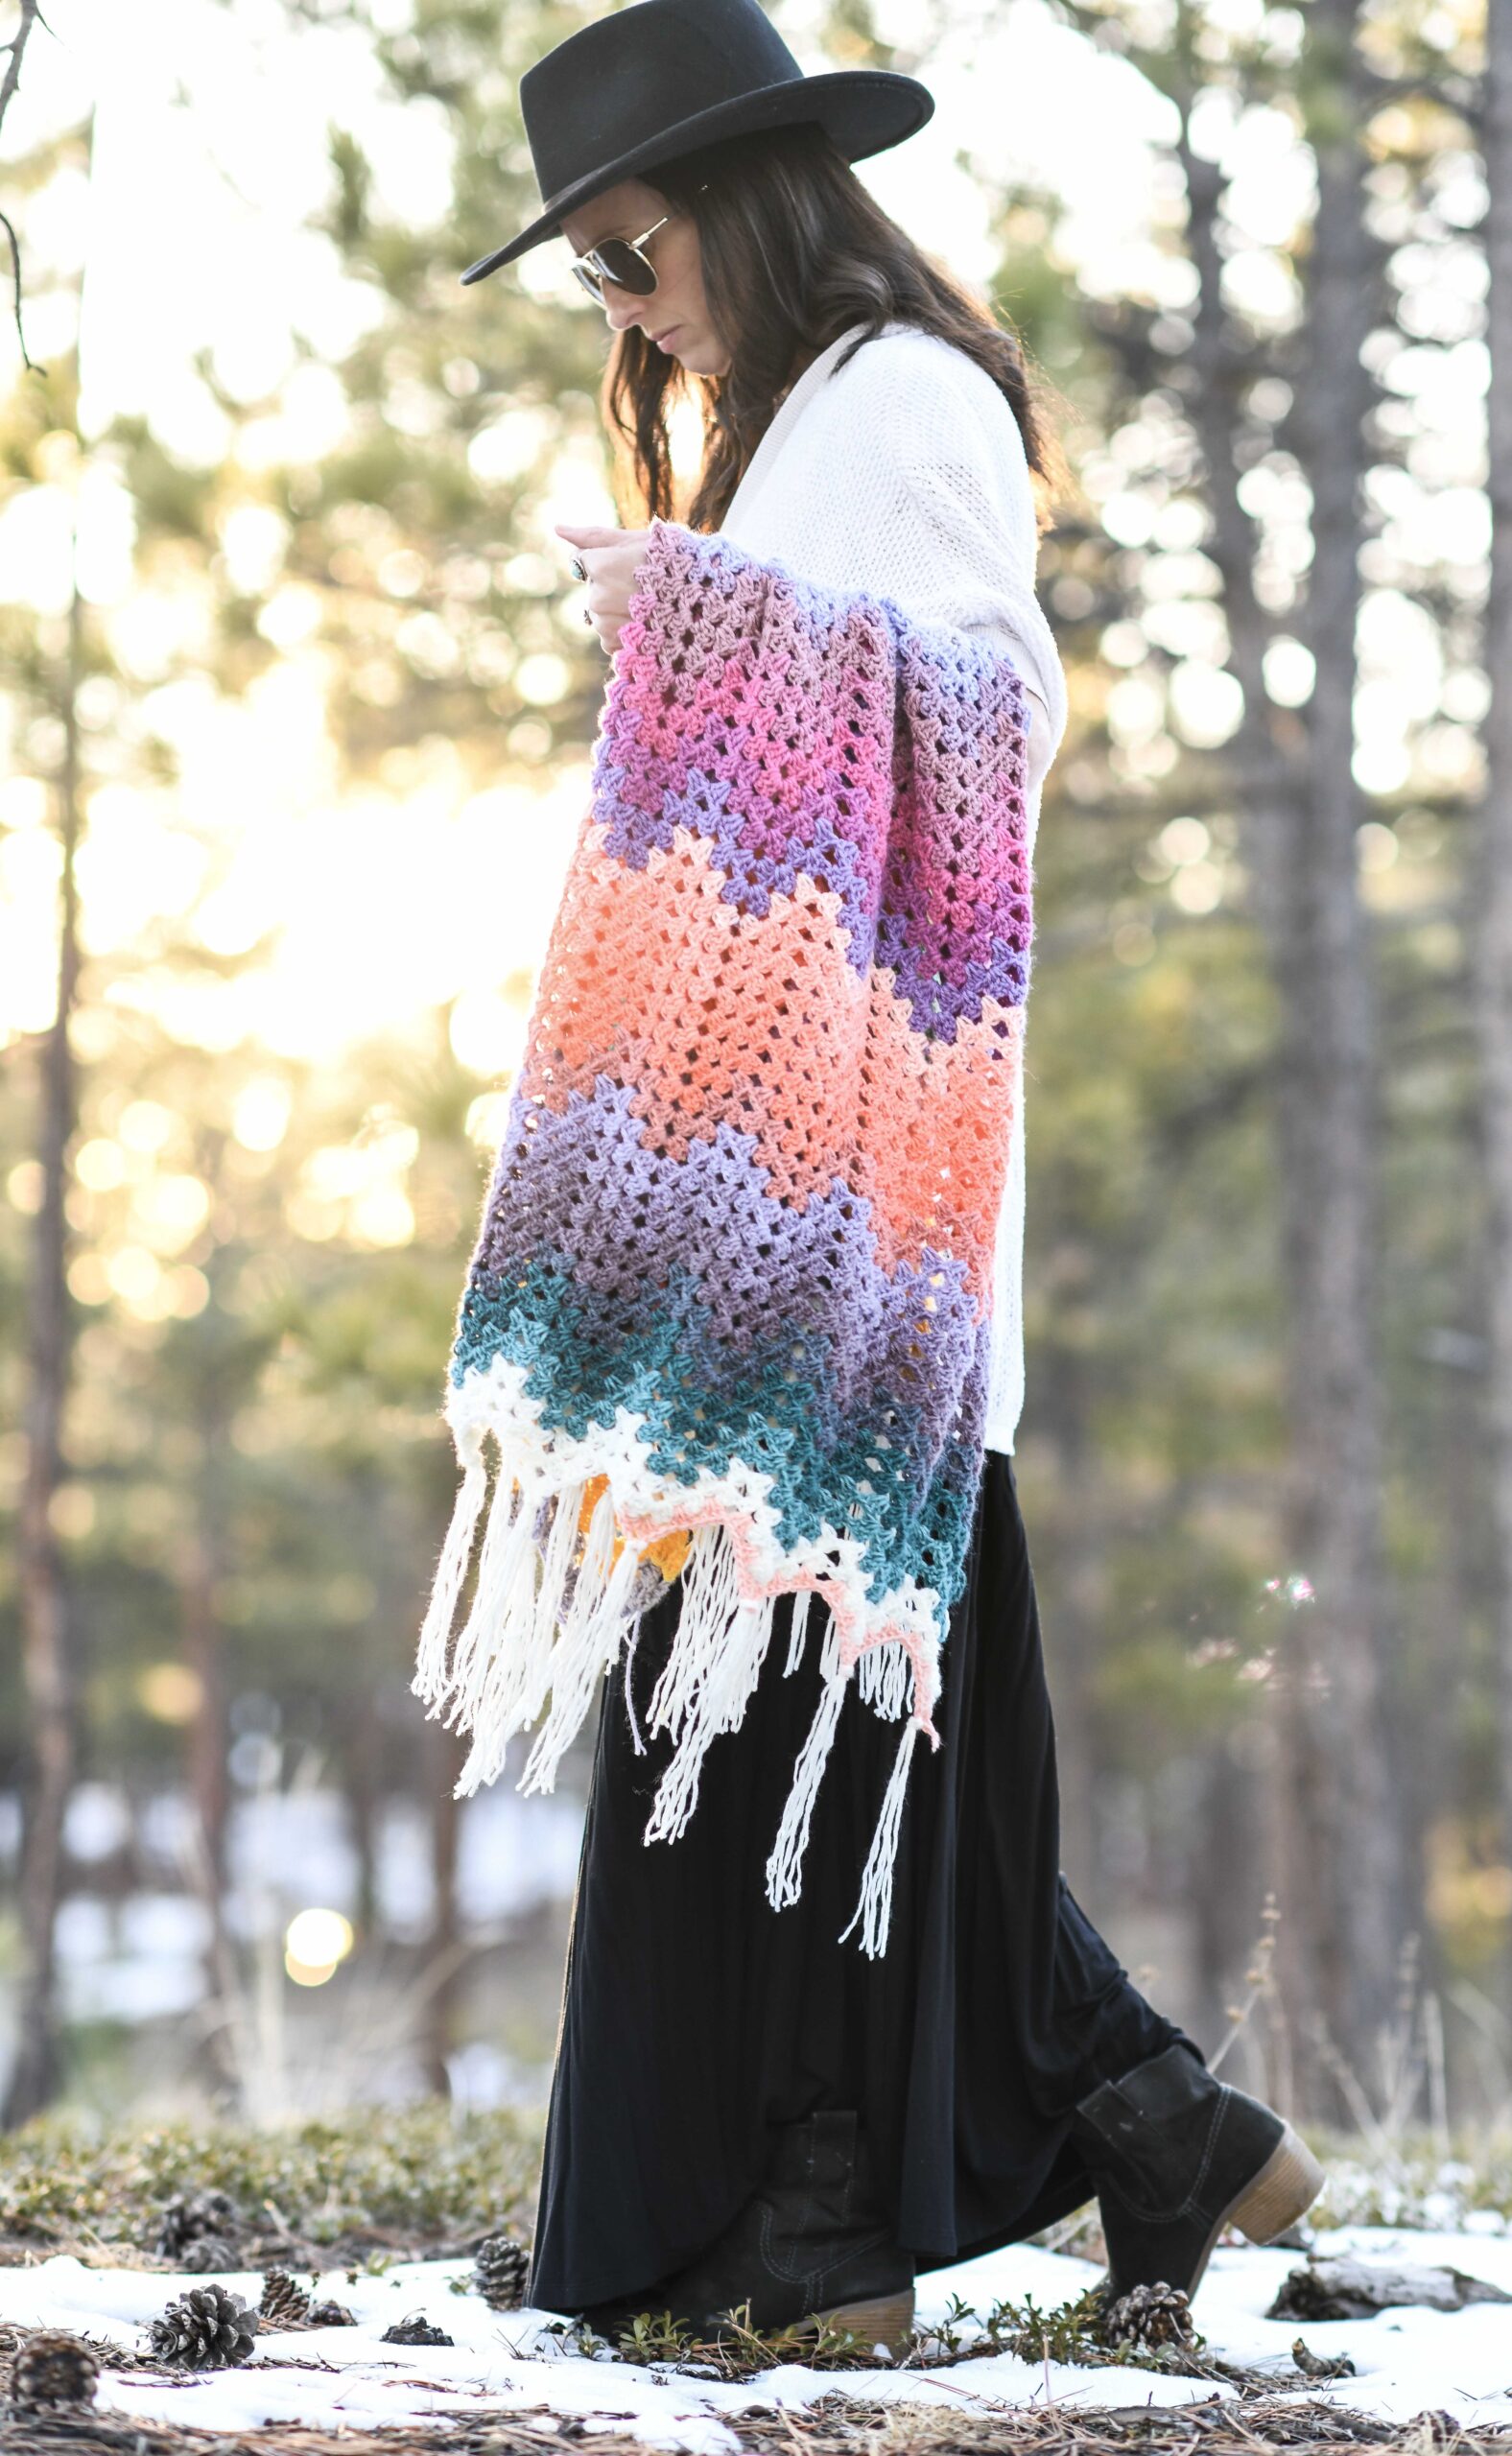
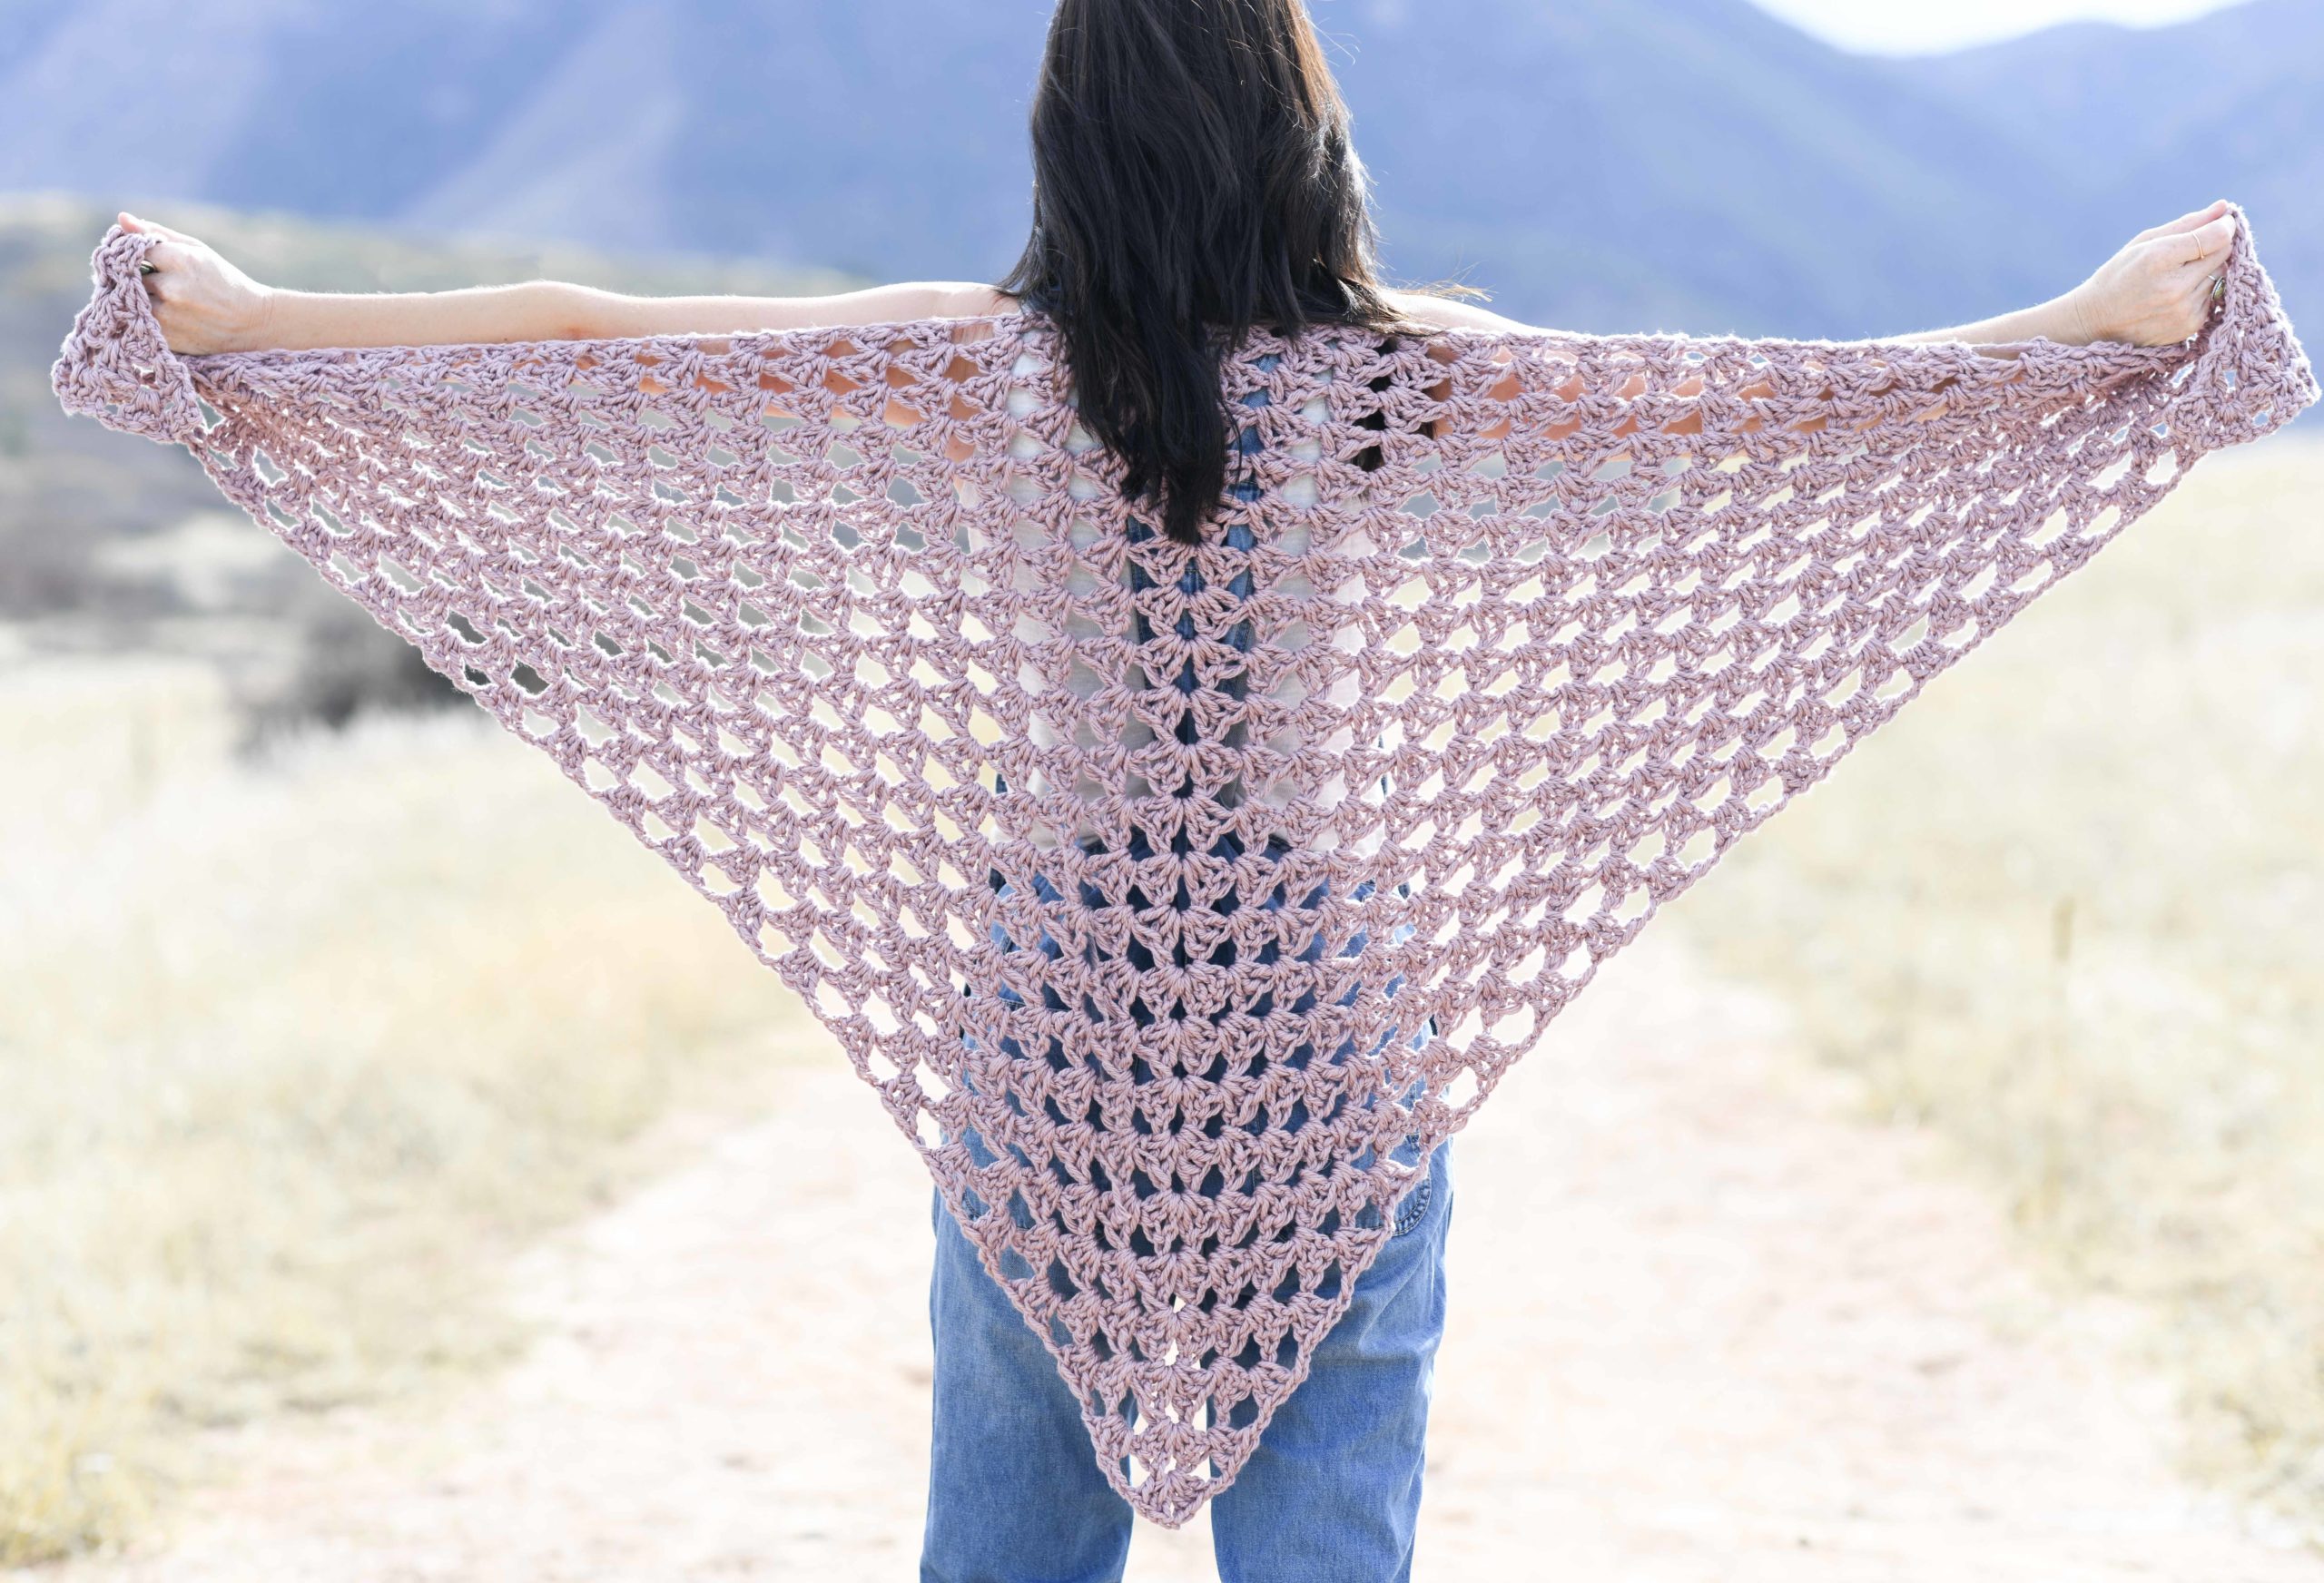
The other aspects that I love about this sweater is that the stitch works up really quickly. I also absolutely love the drape of this Lion Brand Heartland yarn and was reminded of that when I made the Smoky Mountains Triangle Wrap. This is a terrific yarn at a great value – I only used 4 skeins for this sweater! While it’s more than you’d use for a hat, that’s crazy for a sweater!
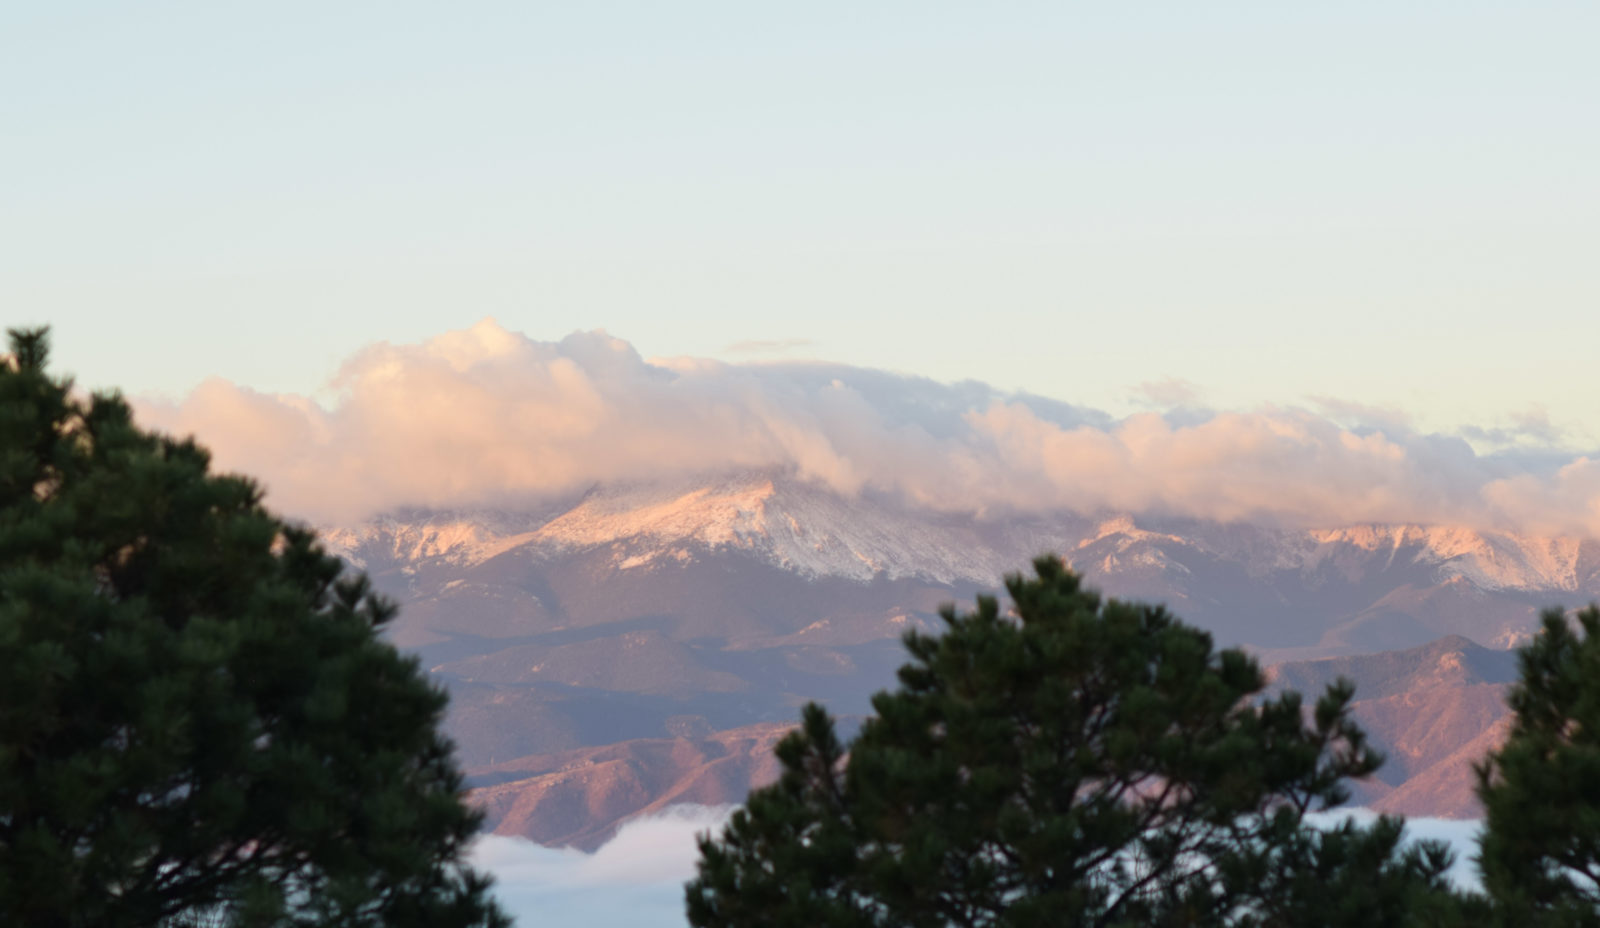
Above: What a beautiful site out my window this morning. Snow on the peak; it’s definitely sweater weather!
First, let’s go step by step into how you can crochet a sweater, and then I will dive into some details about the sweater that I made. I often prefer describing patterns or projects in “people terms” rather than the specific knit & crochet terms, so I’ll start with that and then get into the pattern details. I even practiced making a little intro video about it too. 😉
How To Crochet An Easy Pullover Sweater
PLEASE SCROLL DOWN FOR THE SPECIFIC PATTERN BELOW! THIS STEP BY STEP IS JUST AN OVERVIEW ON HOW YOU CAN CROCHET A SWEATER – The full pattern for the pictured sweater can be found at the bottom of the blog post. Thanks friends!
Step 1 You’re going to make two panels – a front and back. Begin one panel of your sweater by making a chain about as long as you want your sweater to be wide (to be even more precise, work up a swatch of whatever stitch you’d like to use. Count how many stitches are in an inch and multiply that by how many inches you want your piece to measure width wise – chain that number of stitches)
Step 2 Crochet using your preferred stitch until your piece is as long as you’d like it to be. This length will be from your neck to your waist or below! It’s up to you! Now, repeat steps 1 & 2 to make a second panel. These panels will be the front and back of your pullover.
I used the small mesh stitch from this video tutorial that I put together here:
Step 3 Create sleeves – Make a chain approximately (15-16″ Small, 17-18″ Medium, 19-20″ Large, 21″-22″XL) that will be used to create your sleeve. Proceed to crochet each row, making another rectangle while working until the sleeve is the length that you want. You will also be adding a cuff, so don’t make it too long. The sleeve is essentially a rectangle that starts wide and becomes narrower toward the cuff. To make it narrow, go down crochet hook sizes. Crochet the 1st third with your original hook, the 2nd third with a size smaller than that hook, and the last third with a size smaller than the last hook. Depending how much you want it to narrow, you can go to even smaller hook sizes. Make two of these sleeve “rectangles”.
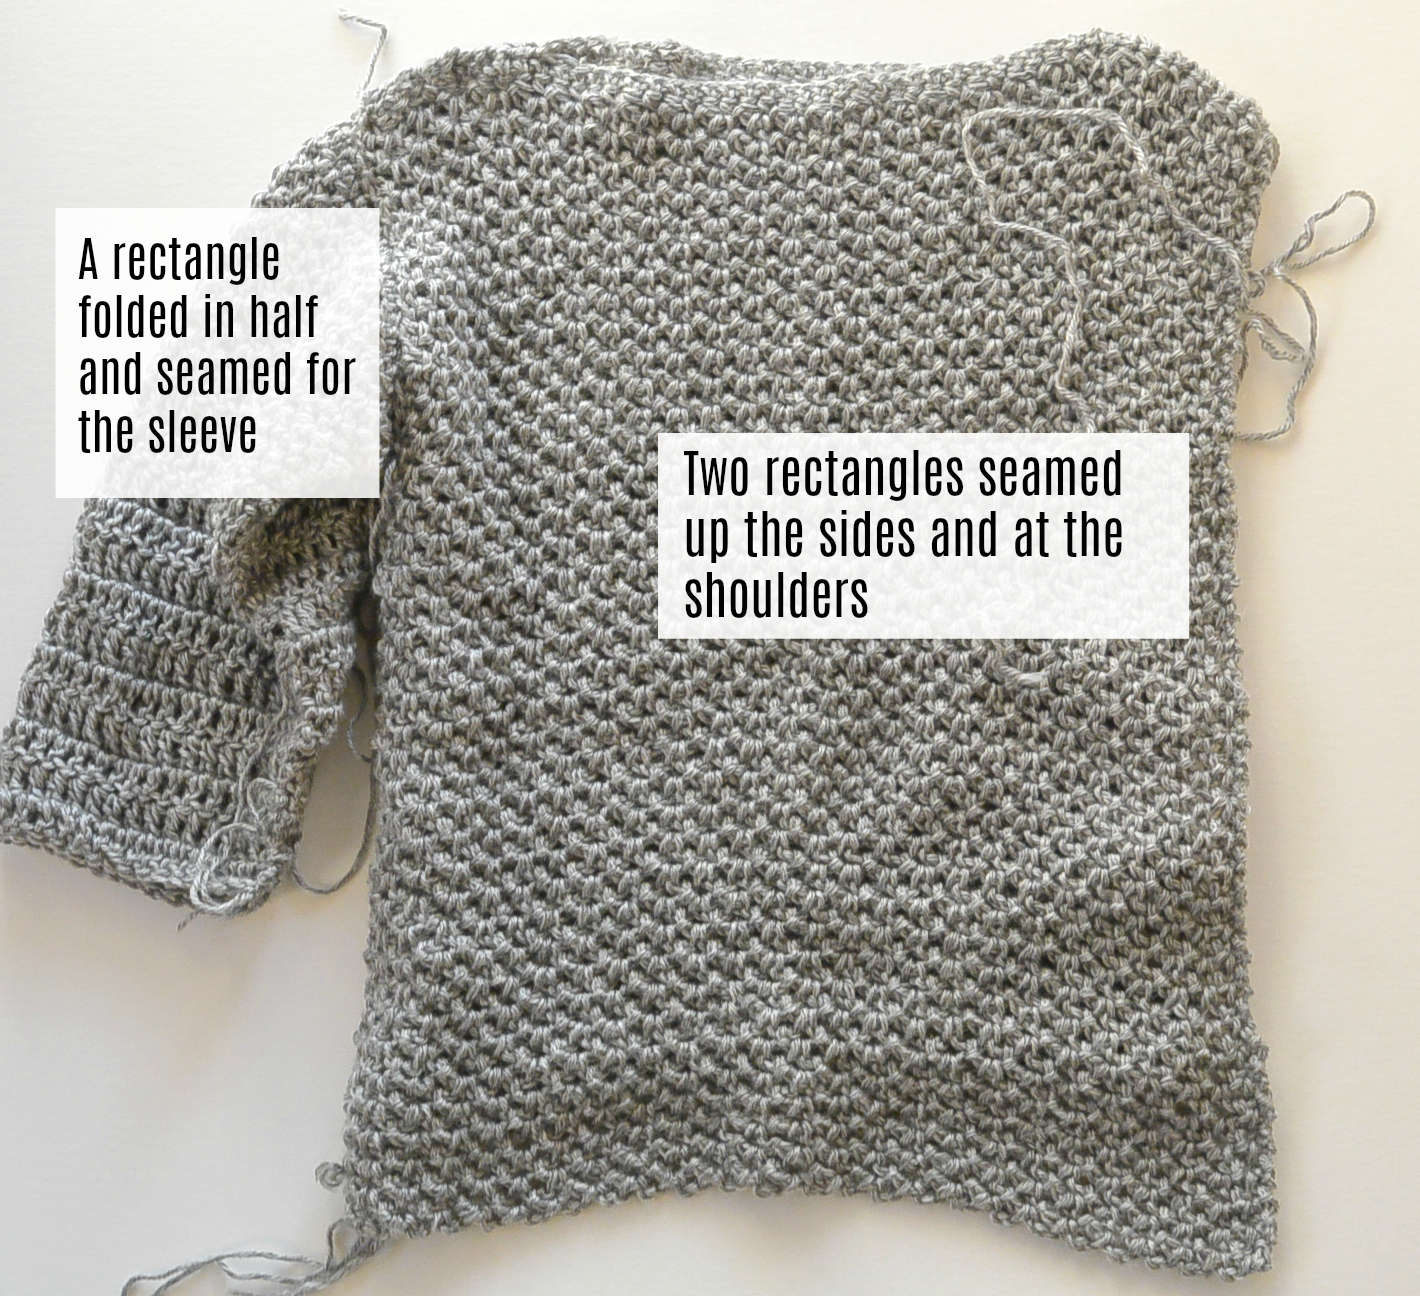
Step 4 Fold each sleeve rectangle in half lengthwise and seam with a whip stitch. It’s like you’re creating a tube from a rectangle.
Step 5 Place your two panels from step one and two together and seam up each side and at the shoulder, leaving a space for your head and holes on the upper sides to attach your sleeves. Attach your sleeves with a whip stitch as well!
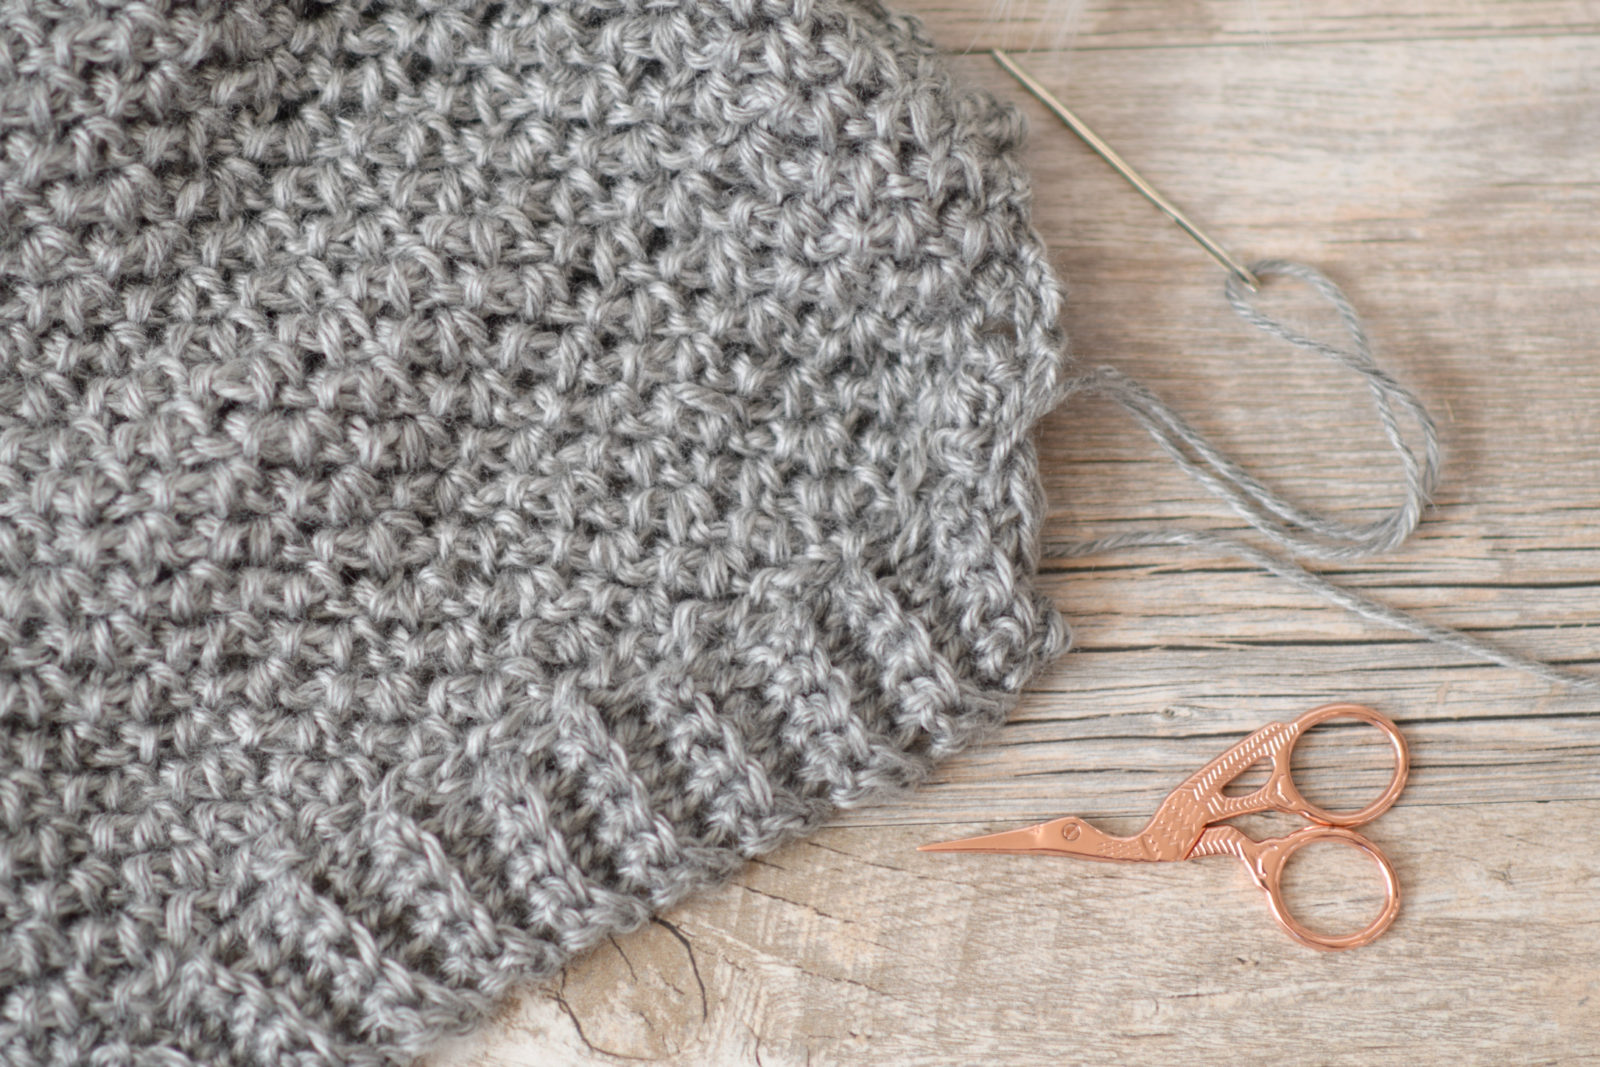
Step 6 Create cuffs by making a short chain and single crochet through the back loop of each stitch across the row. This will give you a nice, ribbed cuff! Make cuffs as long as you need to then attach with a whip stitch to the bottom of your sweater as well as the sleeve cuffs.
DONE AND DONE!
So you want to make the same sweater that I made here you say? Why sure!
Easy Knit-Like Crocheted Sweater
UPDATE: Please note that there has been some feedback that the sleeves for the large sizes may need adjusted to be smaller in some cases. The size small works out well. I’m leaving the pattern for the larger sizes here for you as a base point but you may need to make some adjustments.
You will need:
US Size L 8.0 mm crochet hook, K 6.5 mm crochet hook, H 5.0 mm crochet hook
4, 4, 5, 6 skeins Lion Brand Heartland Worsted Weight Yarn (142 g / skein) in Mount Rainier (Small 450g, M 552 g, L 667 g, XL 789g),
Scissors
Measuring Tape
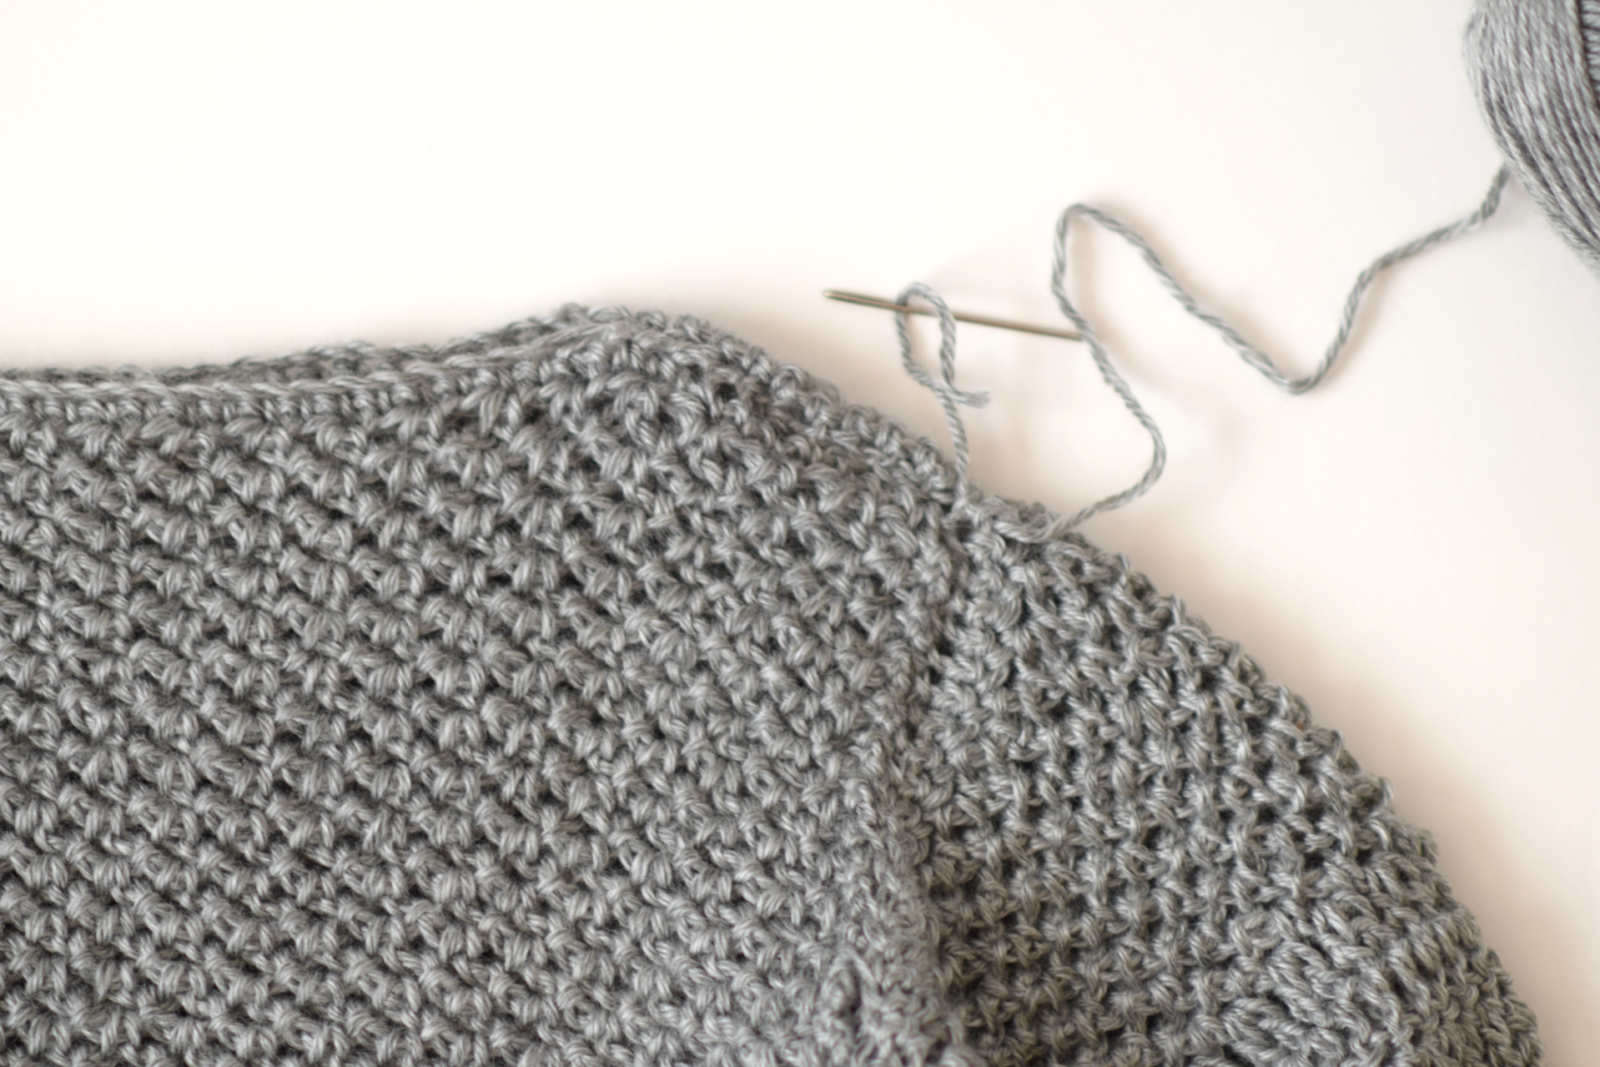
Tapestry needle to seam and weave in ends
Skills & Abbreviations:
sc – single crochet
sc blo – single crochet through back loop only
dc – double crochet
ch – chain
sp – space
st – stitch
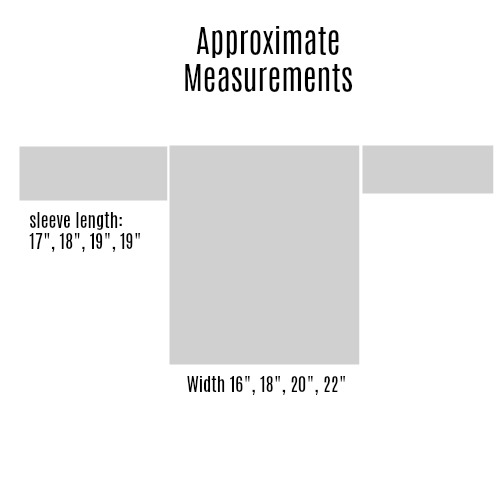
Finished Bust Circumference Measurements:
XS / Small 32″ around
Medium 36″ around
Large 40″ around
XL 44″ around
Length Measurements:
XS / Small 23″
M 25″
L 26″
XL 27″
If you want to make your sweater longer, simply make each panel for main body panel longer than indicated. You may also make the cuff wider by starting with a longer chain. Keep yarn needs in mind.
Above: Use these measurements as a guide and check your sweater as you go to ensure it’s correct
Gauge:
Just over 3 chain stitches per inch in “Easy Mesh Stitch” pattern found in the Main Body Panels section. (You may do a test swatch by chaining an even number of stitches and following the pattern.)
Be sure to measure as you go to ensure that you are making your panels the indicated width. Adjust by using a different hook or starting with a longer or shorter chain (keeping an odd stitch count)
Notes:
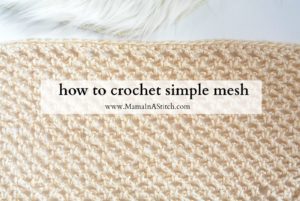
As stated in the gauge section above, an easy mesh stitch is used throughout the pattern. You can find a full tutorial and video on my blog here for this stitch. You might want to practice on a small swatch before beginning the entire sweater. Please refer to the “Small Mesh” in the tutorial.
Pattern
Main Body Panels:
These panels are made with the easy mesh stitch that I did a full video tutorial about HERE
Use your size L hook
Easy Mesh Stitch
Chain 55, 61, 69, 75
Row 1 Sc in 2nd ch from hook and in each stitch across row. (54, 60, 68, 74 stitches)
Row 2 Ch 2, turn, sk sc st below, sl st into next stitch; *Ch 2, sk st, sl st into next stitch; repeat from * across the row. (54, 60, 68, 74 chain stitches – count doesn’t include sl stitches)
Row 3 Ch 2, turn, sl st into ch 2 sp below, *ch 2, sl st into next ch 2 sp; repeat from * across the row. (54, 60, 68, 74 ch stitches)
Repeat row 3 until your piece is as long as you’d like or for about (21.5″, 23.5″, 24.5″, 25.5″) tie off and weave in ends (At this point you may want to hold up your panel and see if it’s as long as you’d like. You will still be adding a cuff to the bottom. Crochet more rows if you want to make it longer while keeping yarn needs in mind)
Next:
Repeat above pattern to make a second panel
Sleeves:
UPDATE: Please note that there has been some feedback that the sleeves for the large sizes may need adjusted to be smaller in some cases. I’m leaving the pattern here for you as a base point as it has worked for some, but you may need to make some adjustments
IMPORTANT!!! (The widest section of the sleeve at the upper section where you begin with your chain should measure approximately 15″, 17″, 19″, 21″ Adjust your hook size or tension accordingly and even adjust the number of chain stitches if necessary)
Upper Section
With your size L crochet hook
Chain 49, 55, 61, 67
Row 1 Sc in 2nd ch from hook and in each stitch across row. (48, 54, 60, 66 chain stitches)
Row 2 Ch 2, turn, sk sc st below, sl st into next stitch. *Ch 2, sk st, sl st into next stitch; repeat from * across the row. (48, 54, 60, 66 ch stitches)
Row 3 Ch 2, turn, sl st into ch 2 sp below, *ch 2, sl st into next ch 2 sp; repeat from * across the row. (48, 54, 60, 66 ch stitches)
Repeat row 3 for approximately 5″
Mid Section
With your size K crochet hook
Row 1 Ch 3 (counts as 1st st of row), turn, 1 dc in 1st ch2 sp below, *2 dc in next ch 2 sp. Repeat from * across the row. (48 )
Row 2 Ch 3 (counts as stitch), turn, dc in 2nd st of foundation row and each stitch across the row including the turning ch3. (48)
Repeat row 2 for approximately (5″, 6″, 7″, 7″)
Lower Section
Next, begin using your size H crochet hook and repeat row 2 from Mid Section portion (working double crochet stitches across the row) for another 6″
Tie off and weave in ends. You will fold and seam your sleeves in the assembly section below.
Repeat sleeve pattern to make second sleeve (Note: If you would like the sleeve opening at the bottom to be smaller, simply use a smaller hook for the lower section than indicated, or make some simple crocheting two stitches together)
Cuffs:
With your size L crochet hook
Ch 6
Row 1 Sc 2nd ch from hook and in each stitch across the row (5)
Row 2 Ch 1, turn, sc blo in each st across the row (5)
Repeat row 2 until cuff is as long as the width of your panel. Make one cuff for each panel. Proceed using the same pattern to make 2 shorter cuffs, one for the end of each sleeve, crocheting for as long as the sleeve ending is wide. Tie off and weave in ends.
Seam & Assemble
With a length of yarn and your tapestry needle, seam up each sleeve lengthwise with a simple whip stitch. Place sweater panels on top of each other with the beginning chain stitch end at top where neckline will be. Whip stitch seam up each side leaving openings for the sleeves and an opening at the bottom if you prefer for the hips. Seam at the shoulders leaving an opening for the head (pictured the opening is approximately 11″). Tie off and weave in ends. Lastly, whip stitch seam each cuff to the appropriate panel or sleeve. That’s it!
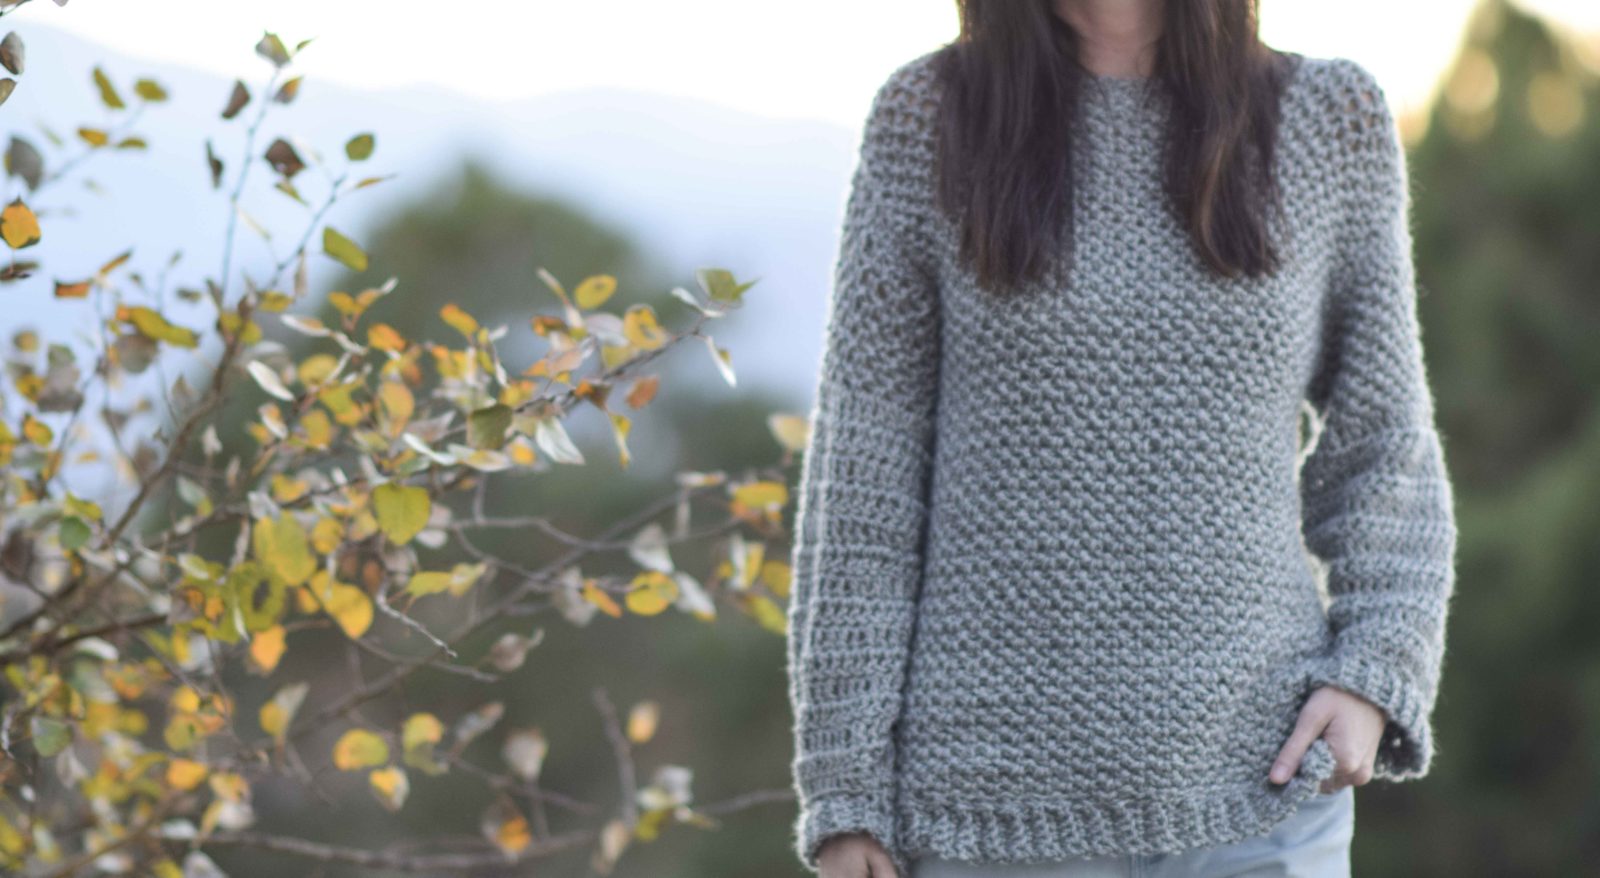
Above: Enjoy some sweater weather! By the way, I’m wearing the size “Small” and I’m close to 5’6″ and always wear size XS or S
I sure hope that this may give you the confidence to try a crocheting a sweater sometime! I’d love to hear your thoughts on sweater making in the comments below! Keep your eyes out for a knit pullover on the blog in the coming days. 🙂
XO
Jessica
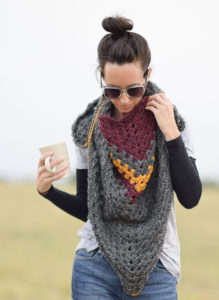
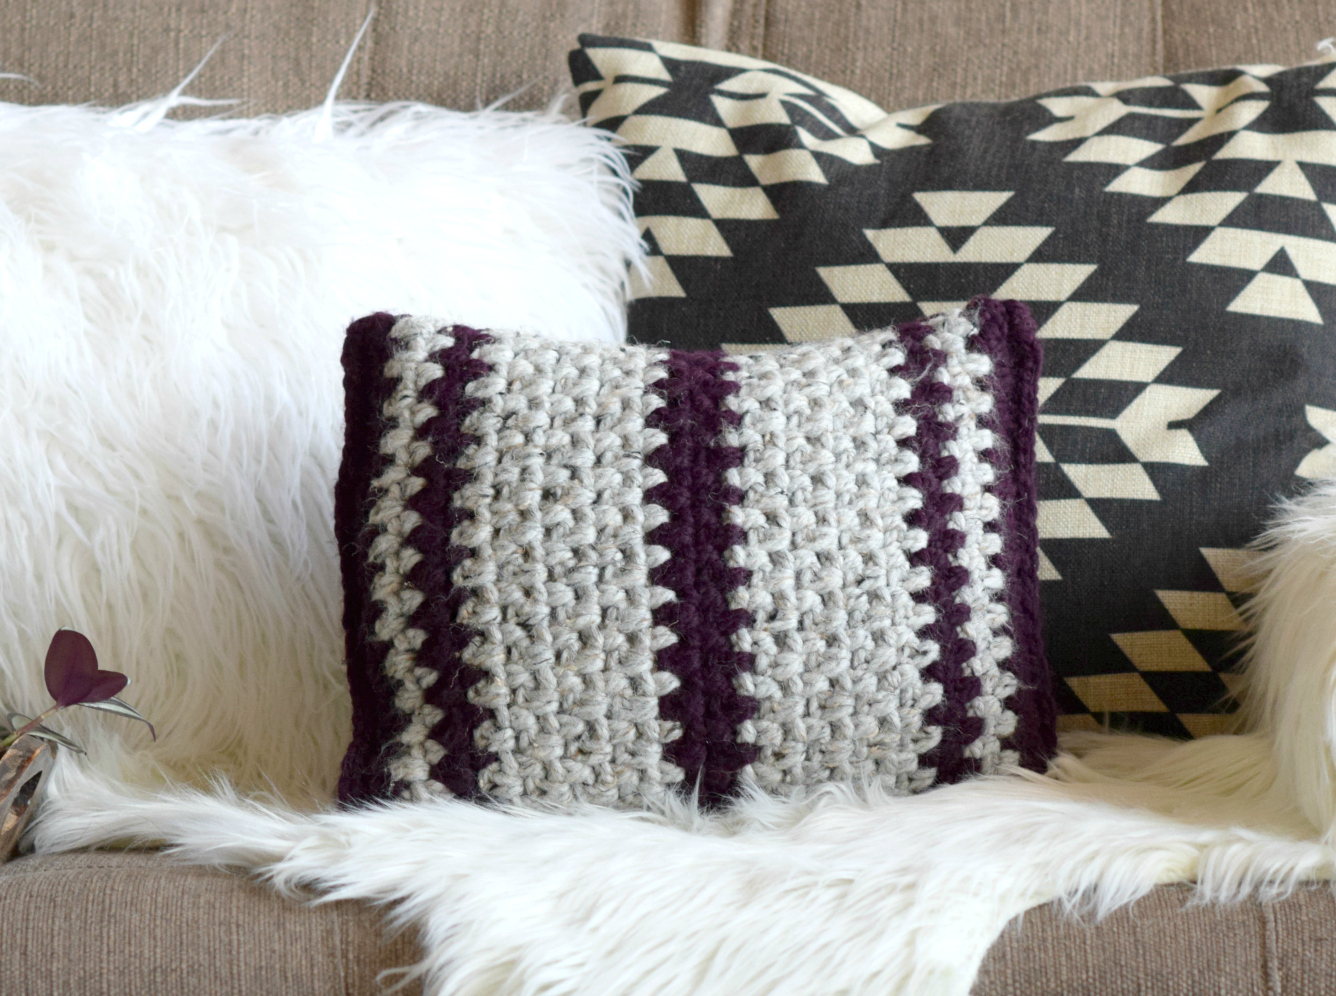
Oh and if you liked this, you might also like:
![]()


I love it, Jessica! You always amaze me!
I adore this sweater ❤.. if I wanted to make a thin ribbing along the neckline would I do it the same as the bottom and cuff? I just wanted the neckline to look a little more finished.. thank you for being so awesome!
Hi Klara! You could definitely try it out. It might take a little trial and error to get it just right, but it’s worth a try! Thanks for reaching out and for your comment on YouTube also! (And for your sweet words!)
Aww thanks for stopping in again girl! You’re so kind and I love your recent kimono!
Would it be easy to adapt this to a knitted sweater?
If you are a confident knitter, sure!
Did you block it? It’s super cute.
Thanks!
I actually didn’t block it at all. 🙂
Hi Jessica ,
Love this sweater ! Lucky for me I just happen to have some Lion Brand Heartland yarn in my stash just waiting for a lovely pattern to work up in . This will be my next project . I really appreciate how easy all your patterns are . Thank you for making a little video tutorial on how to do the mesh stitch this really helps . Looking forward to your next knit sweater pattern also . Thanks again for sharing all your lovely patterns with us .
Hi Marika!
How convenient! It’s always nice to already have the yarn in our stash. You’re welcome too – it’s fun to share these patterns and I’m so glad you like them!
Love this and can’t wait to make this one! Thank you 🙂
Would it make sense to just crochet the ribbing of the cuffs right unto the garment, rather then create it separately and sew on? Enjoying all your patterns. What beautiful scene to have right out your window!
Katy
Hi Diane! Let me know if you have any questions and you’re welcome!
Hi Katy! You sure can. But you’d have to use a different stitch because of the direction you’re crocheting on the panels and the sleeves.
So glad you’re enjoying the patterns. It was a gorgeous view for sure! And it wasn’t overly cold so that was a plus. 🙂
Hi, I am so teady to start this beautiful sweater! My first one I was wondering: what size hook do you start the front and back panels with?
* I meant ready of course!
Hi Jessica,
Would it be safe to say that I would chain 89 for the body if I am trying to make this pattern a 2X-3X?
The largest hook, L. 🙂
You are a ROCKSTAR and mindreader!! I’ve wanted a pullover pattern like this for a long time…but actually a hooded one…and now feel confident enough doing just that, possibly…what do you think?! LOVING all of your recent additions to your awesome pattern collection…completely matches my style. Working on the Driftwood Poncho now 😉 Luckily I started that before your kimono or topper came out cuz I’d never be able to decide and want to be able to get it done before it gets warm, Lol !! THANK YOU!!!
Hi Jamie! I’m totally laughing out loud right now because I so understand how you feel! I have so many things I’d like to make and soooo little time it seems. That’s so cool that you’re working on the Driftwood! Hope you love how it turns out. 🙂 And I think you can totally add a hood to this. The neckline is just like the Driftwood so if you are able to do it on that one, you’re good to go with this. Thanks for your sweet note girl!
Hi Jesicca, beauty of this pattern is in it’s simplisity. I like it, moreover you explain it nicely.
I keep showing Your work to people I know and everyone just loves it! You are so inspiring Jessica 🙂
I simply love your usage crocheting to create the look of knit! I’m a crocheter. Can’t knit. You make it possible for my items to have the appearance of a knitted item. You have a great sense of style and what’s on trend in the fashion world. Thanks oh so much for sharing your creativity.
Aww thanks Angel! I’m so glad you think so. It’s great to meet you and I really appreciate your kind words.
Can you tell me how to make this sweater in a 3x size. Cause I love this sweater. Ty
Hi, just wanted to say I love how easy your patterns are. I recently made a pair of prairie wind fingerless gloves and I’m so happy with how they came out. For this sweater, do you think I could use the Landscapes from Lion Brand? Would I probably have to use more skeins with this? I love their colours. Thanks. 🙂
Hi Vanessa! So glad you like this pattern and that you’re happy with the prairie wind fingerless gloves! I think it would look amazing in Landscapes! Definitely look at how many yards/grams are in each skein compared to the Heartland I’m using here. I’m pretty sure the Landscapes skeins are smaller. The colors are awesome for sure! Thanks for writing to me girl!
If I follow the pattern of math, this is what I get.
55+6=61+8=69+6=75+8=83+6=89+8=97+6=103
s m l xl 2x 3x 4x 5x
I have a few questions I am seriously a beginner at this but I love to challenge myself and this is a BIG challenge but one I know I can do . So here we go :
1. When I make the holes for the arms should I count one side of the stitches in the hole and times that by two so when I fold the sleeve over and connect it will match the amount of stitches? ( I hope that made sense)
2. For the cuffs and the bottom of sweater do I attach the chain to the bottom of the sweater and start stitches or do I do all three spectate then attach with the whip stitch? ( I hope that also made sense)
What a love.y pattern! Thank you for sharing! Do you think it would work with a chunky yarn?
Sure it would! Your sizing would come out a bit different though without adjustments. 🙂
I want to try making this and I made sound stupid, but in the instructions for the rectangles for the body it reads: (Row 2 Ch 2, turn, sk sc st below, ….. and on). Does the sk stand for skip?
Yep! The sk means skip.
Bought some beautiful alpaca yarn to knit a pullover with……I failed in a spectacular way. Frogged it and wondered what does Jessica have to offer in crocheted sweaters? This beauty is currently under construction
I decided 2018 is going to be the year I learn how to crochet clothing. I’ve only made blankets and amigurumi for the past like… 10 years. It’s been fun! But I want to learn something new. I’m so excited I found this post. I’ll be making all of these eventually, fingers crossed.
I love this easy pattern and have finished the two panels and am on the first sleeve. I am making the XL, as I am large and wanted it roomy. However, the sleeve I am working on seems HUGE. Should I have made it smaller than the XL size? I mean I could fit 2 if mot 3 of my arms into this sleeve that I am crocheting. I don’t know whether it is supposed to be real big or if I should scrap it and start over. Please help!
Hmmm…I’m not sure what’s going on with the sleeve Patty. If you’re finding it to be too large, you can certainly make the pattern for one of the smaller sleeves (though I know it’s a pain to frog what you’ve already done!)
I don’t think there is enough decrease in the sleeves. They are too wide at the wrist. I was afraid of that. This is the issue I have with every pattern with rectangle sleeves. I wonder if there is another method. Also, I’m Not sure why the ribbing can’t be done right on the edge. I haven’t gotten to that yet. Seems you can pick up stitches and single crochet a row, then front and back post dc.
So sorry about that you find them too large. There certainly are other methods, but my goal with this was to keep it as beginner friendly as possible. I will see what I need to do to correct the sleeves! Thanks for letting us know!
ok on sleeve mix section..it says 48. That js just small size correct?
Mid section. Sorry.
Let me tell you what the problem is with this sweater since I put a lot of time into making it. Many people who need a large, will not necessarily have larger wrists than you do. So this is the problem. I have made many sweaters with rectangular sleeves because there aren’t many patterns out there for easy to lake sweaters. It always becomes a challenge when trying to do a drop shoulder sweater with sleeves that done look strange. Your sleeves in the photo upon closer inspection are also awkward looking but it’s hidden in the positioning for the photo. I would suggest others think carefully before investing the time in this. It’s like a recipe. Time and cost in ingredients only to realize you wasted both.
Hi TD,
I am going to review the pattern and do apologize. This is my first time to calculate sleeves for a large and xl. The sleeves for myself work great so I may just remove the size L and XL from the pattern if I can’t work it out. Because of the many requests I receive for large sizes I did try to make this for all, however if the measurements for the sleeves are off I don’t want to throw people off. I will remove the larger sizes as I know the small worked out great for me. So sorry and thank you! I will review how the sleeves went wrong so I can get it right the next time.
Update. Mine are coming out fine now. I just did some decreases along the way and it tapered down perfectly. It’s a great pattern! Don’t get discouraged.
Hi Patty! Can you remind me what size you’re making? I want to ensure I make notes through the pattern if folks are having trouble with the sleeves in the larger sizes.
I did xl for the panels. But I did the L size for sleeves. After the upper section I started decreasing on mid section once every 10 stitches every couple rows. Then just a couple every few rows. I ended with 37 stitches or about 12 inches. Once again it’s an awesome pattern!
Patty
Great to know. Thanks so much Patty!
I just wanted to leave an update here as I’ve noted in the pattern above (in red) about potential adjustments that may need to be made to the sleeves. In this case folks will have the choice as to whether they want to attempt the larger sizes before putting time and effort into the pattern. I have had good feedback as well about the pattern so I’ve decided not to remove the larger sizes at this time. I truly appreciate constructive feedback and thank you for reaching out for others that want to make this. I also want to note that comments or replies to other readers which become nasty won’t be put on my blog as it isn’t in line with my philosophy.
I’m not sure if I’m doing the panel correctly. I’m using the L hook and the stitch gauge is 3 chains @1 inch but the width is greater than the 18” it shows on the diagram. (I’m making a medium). I’m nervous to change hooks as the stitch gauge won’t work anymore. Any suggestions? Btw: I have never had a problem with your patterns before. They work up so well and I get so many compliments on your designs. Love them!
Hi Lise! I really should have done a 4″X4″ gauge and am doing that for all future patterns. The most important things for this pattern is that your fabric is not super tight. So looser stitches the better. If you are a little over the 18″, I wouldn’t worry about it as I think it’s better to be a bit bigger than too small. However if it’s seeming way to wide, you might want to start with a slightly shorter chain or adjust your hook (as long as the fabric won’t be too tight). Just some thoughts for you and I hope you can get it to work out!
I never thought I could make a sweater, shaping is so complicated!! But I just finished this sweater Jessica and it is great! I love it! Thank you and God bless you for empowering me to do something I was pretty convinced I couldn’t do!
Hi Jessica,
I’d like to do a spring version of this sweater. Can you recommend a light weight yarn in cotton or a cotton blend? Thanks!
Also let me say the sleeves came out great. I followed original pattern, yes they are a bit bit but the sweater is big and cozy and skinny sleeves would look wierd. Your pattern is wonderful. Thank you
This is great news Frances. Thank you so much for letting me know!
Lion Brand has a cotton that is called 24/7 that has a bit of a sheen to it. There is also “I Love This Cotton” from Hobby Lobby that would work as well. Some of the local yarn stores have lovely cotton blends too. Hope you can find a good one Cheryl!
Love this sweater! Made it in denim blue. Wear it ALL THE TIME! THANKS SO MUCH!
How are the sleeves put in?
Do you whip stitch the seams with wrongor right sides together?
Yes.
You whip stitch them to the sweater.
Hi, I’ve made the body panels and am totally in love with this. Its also my first jersey 🙂
My question is, can you tell me how to decrease with the sleeves? the top fits my arm perfectly, but the wrist is huge. I’ve gone down the 3 hook sizes, but it make the stitch just look very tight. So i was thinking that decreasing would look a lot better than my stitches looking like I’ve pulled them super tight. Like from just above the elbow. I just cant figure out how you decrease with the mesh stitch. I hope this makes sense 🙂
Hey Natalie! Toward the lower sleeves I used double crochet stitches which are easy to decrease. Is that what you’re doing, or did you work mesh all the way down the sleeve? The easiest way to do it would be to change to double crochet stitches or half double crochet stitches and decrease down the sleeve with these stitches. Let me know!
Hi Beautifull sweater,ihave a huge stack off worsted weight yarn And was wonderring iff i couleur take worsted weight yarn for this sweater thanks in advance
Hi Jessica
I’ve stumbled across your page and can’t freakin’ wait to get started on this beauty of a sweater! I’ve made tons of granny squares/blankets and a few hats but want something I can wear properly with pride and say I made that!
Only problem is, I’m completely overwhelmed by the crochet talk as I’ve learnt through youtube videos and so am a bit of a stranger to the pattern talk.
I am a UK 8 so would probably need the same size you are wearing/made. I’ve got a sweater that fits me fine in the body, arm so wondering whether I can base the measurements on that? I wondered if I could pick your brain about the sizing I would need/inches etc…
Biggest of thanks x
What ply of wool did you use?
It’s worsted weight #4
II would like to make this sweater into a cardigan. I pretty much know that the back is ok. My isSue is not knowing how to crochet 2 front panels, tec. please…..HELP!
This was one of my first crochet projects. It came out great! It was also a very quick project. I wore it yesterday and was asked by someone if she could commission me to make one. I am not interested in art for money, but I have to say that I was very flattered. I am now inspired to try another of your patterns. Thanks so much for making crochet seem easy!
So awesome Cheryl!
This is my first and seems simple as a beginner. I bought DK but your pattern doesn’t show how many yards to use. I will make a gauge or two. How much yarn needed for xl to 1x. Thanks can’t wait to start. Will use the tips to narrow the sleeves
Oh my God, I envy your scenic surroundings! So very breathtaking. As is all your handiwork.
If you ever decide to do a basic pull over tee shirt that would be awesome. I can’t find one pattern anywhere for a simple tee shirt that doesn’t have some weird stitch or gaps in it.
If you know basic knit stitches, I have this one https://www.mamainastitch.com/easy-knit-boxy-t-shirt-jeans-pattern/
Thanks Donna! It is really pretty around here for sure. 🙂
I’m currently working on this and am very confused as to how you went from 60 stitches in the mesh stitch portion of the sleeve to 48 once you switch to double crochet. I went across doing 2dc in each chain space and got 58 stitches, not 48!
(I’ve also been doing the pattern for the large and my panels aren’t as wide as the pattern says should be [which I didn’t bother to check until after I’d finished them, naturally), but I’m chalking that up to personal error, i.e. me pulling too tightly on the yarn as I did the stitches).
Hi Jessica, I am getting ready to do this sweater and making gauge samples first because I am using a different yarn. I’m just back into crochet after many years. Was happy to find such stylish designs- and free!
I usually knit sweaters with lots of shaping but wanted something easy and cute to start crochet. This is it.
One thing about the 3 stitch mesh. I will be using J hook with my yarn and tried making beginning chain and Sc row with an L. My mesh lies flat and won’t need blocking.
Thanks for this excellent site!
Happy New Year!
MINNIE
Happy New Year Minnie!!
Thank you this is the 4th project I’ve made from one of your patterns, you make my work so easy to follow.
Getting ready to start this pattern in a size “small”. When whipstitching the panels together, how many whip stitches from the beginning of the neckline to the top of the sleeve opening? Also, how large of an opening do you leave for the sleeves to be whip stitched on?.. Can’t wait to see how it turns out.. it’s my first attempt at a sweater..
Thank you so much for this pattern! I just discovered Red Heart Hygge yarn and I knew I wanted to make my first sweater with it! Thank you for this pattern! I look forward to using it.
Hi Jessica. How do I do the swatch? What do you mean by 3 chain stitches to an inch? I’m confused. Please help.
Alicia
I did it! I’m a beginner and I was able to make a sweater!! Thank you so much for this easy to make beautiful sweater!