Winters Chunky Easy Knit Pullover Pattern
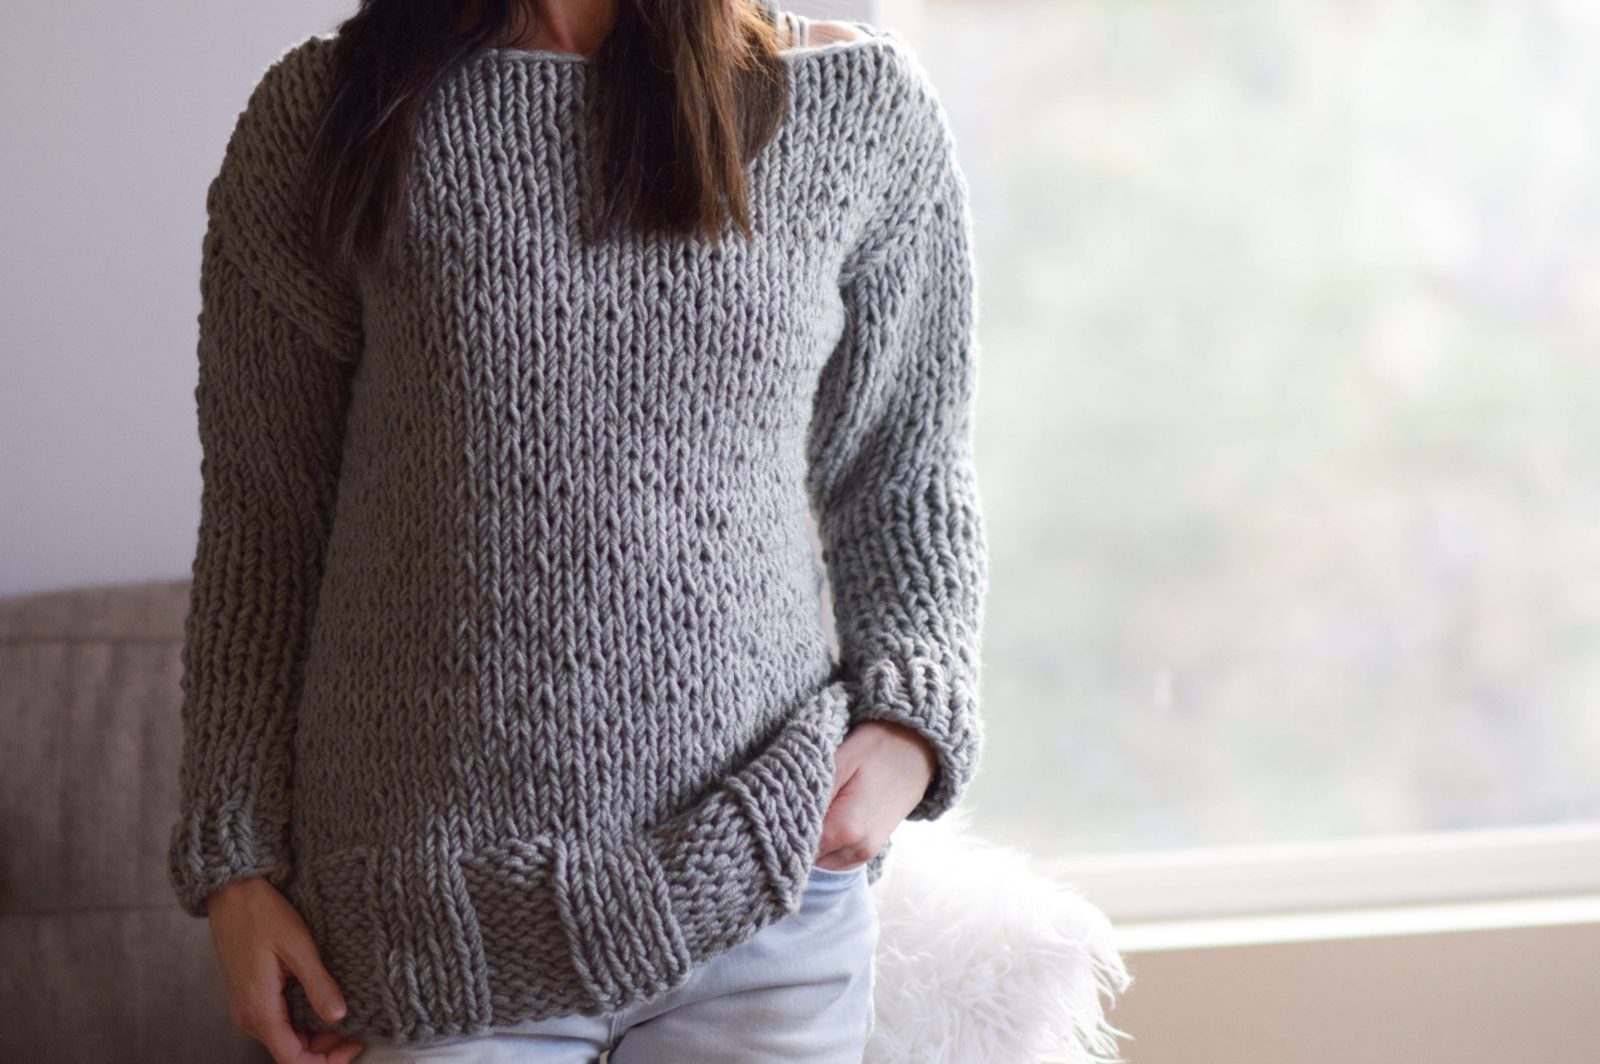
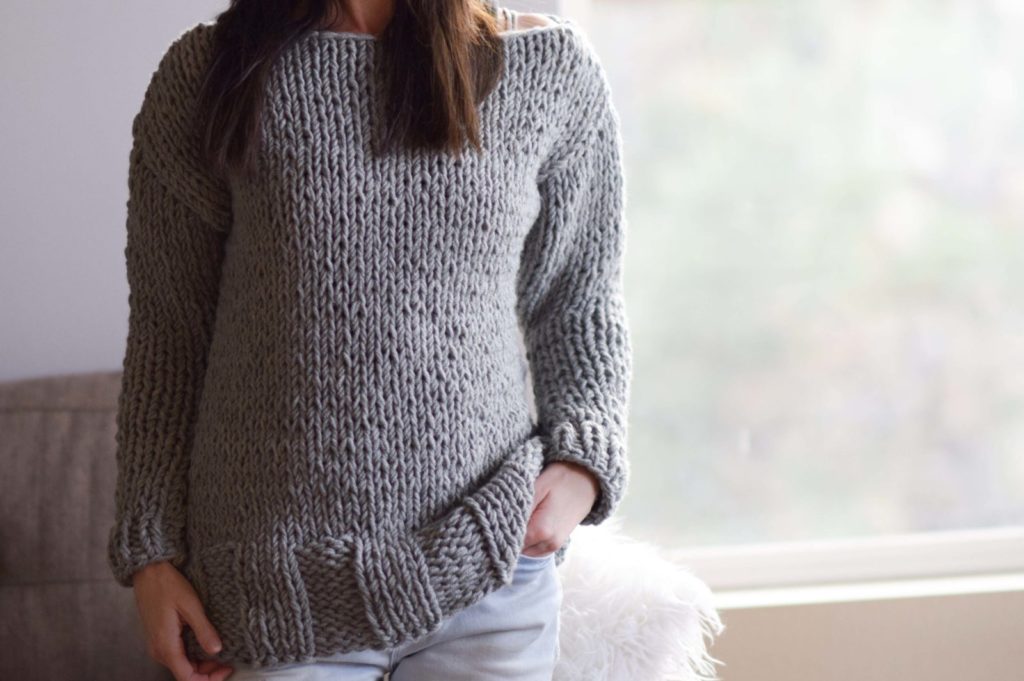
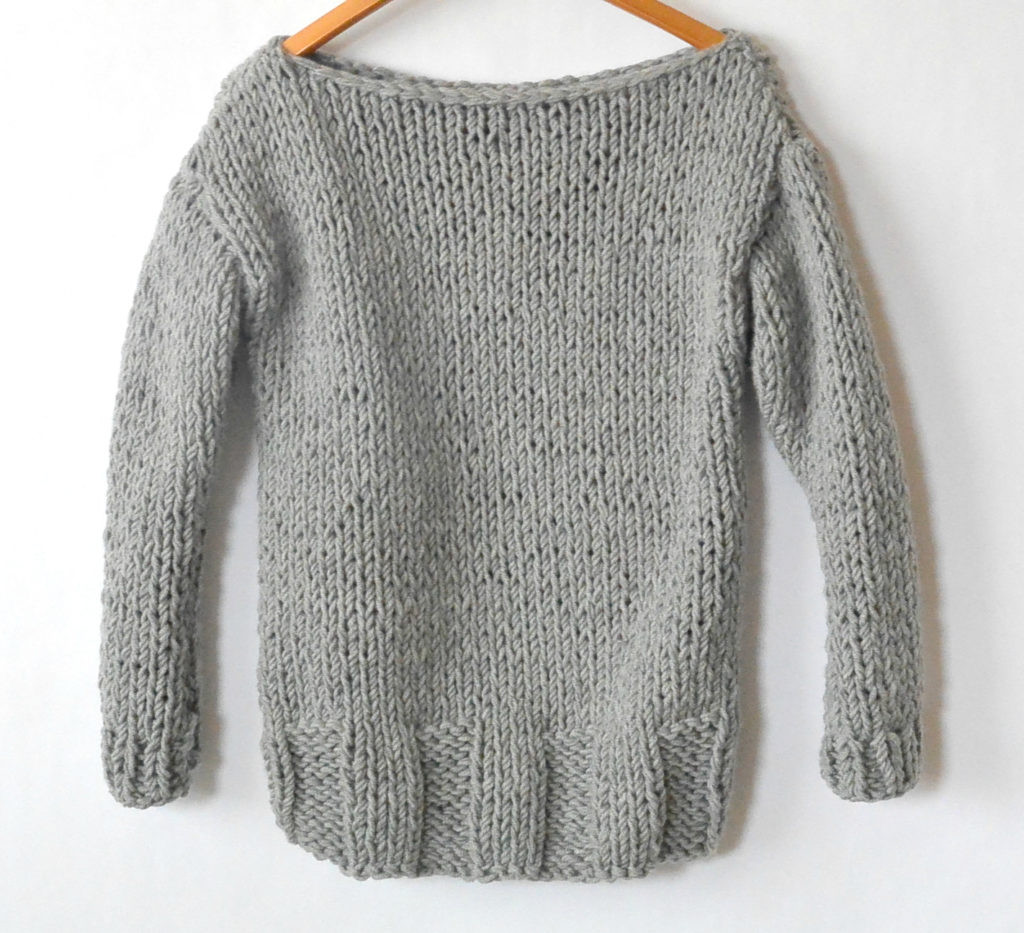
How To Knit A Super Chunky Pullover
The ultimate knitting accomplishment. KNITTING. A. SWEATER. (cue dramatic music)
The truth is that most sweater patterns and projects seem intimidating if you’ve never done one. In fact, when I googled how to knit a sweater recently, there were very few options that were doable beginner patterns. I found either a much too broad “how to” or patterns that had far too much stitch counting or intermediate stitches for my liking. So I made this super chunky pullover with the beginner in mind. This sweater uses the most basic knit and purl stitches to create the classic stockinette and wide ribbing at the cuffs. If you’re up for trying out a quick, chunky beginner sweater, this could be a goody. 🙂 Read on to see how simple it is to knit and put together. ( Find the free pattern below or you can find the kit for sale at Lion Brand Yarn here or the ad-free printable version in my Etsy Shop here.) 🙂
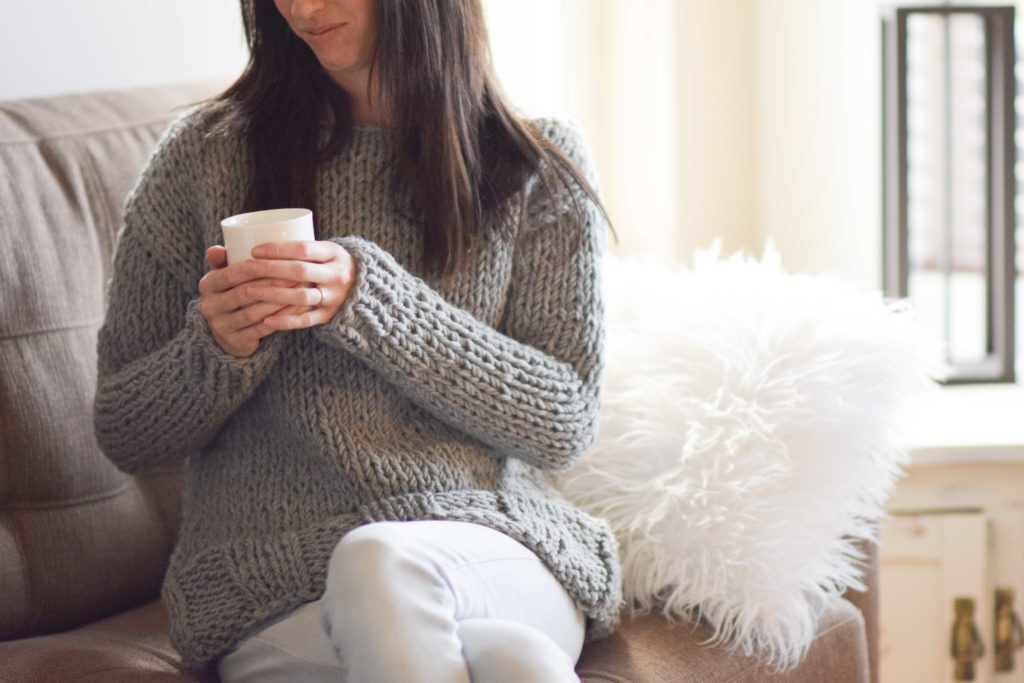
Oh, and this is a toasty, heavy sweater you guys! It is made while holding two strands of chunky Lion Brand Woolspun yarn (a fave of mine) together throughout the pattern and using big needles. I’m really pleased with the stitch definition it created and it has a similar look to my Easy Knit Blanket Sweater. The other good part about this is that it works up quickly with the large needles. Personally, I love the look and feel but it’s not to be worn on your next warm weather beach vacation, okay?! 😉
You’ll see more detail about this in the pattern below, but the piece is knit flat and is essentially made up of several rectangles that you’ll seam together. The arms do have a few decreases, but if you know the knit stitch, decreasing is a breeze. You’ve never decreased? Well, rather than putting your needle under one stitch as if you’re going to knit, you put your needle under two stitches, then knit as usual. So easy, right? Honestly, the biggest challenge with this sweater (and many sweaters and projects in my opinion) is the seaming. Seaming can be easy as a simple whip stitch, but it doesn’t mean it will look amazing. I walk you through the seaming options that worked for me so I hope that you find that helpful. Also, note that the seaming does add some bulk but is necessary to keep the pattern as beginner friendly as possible.
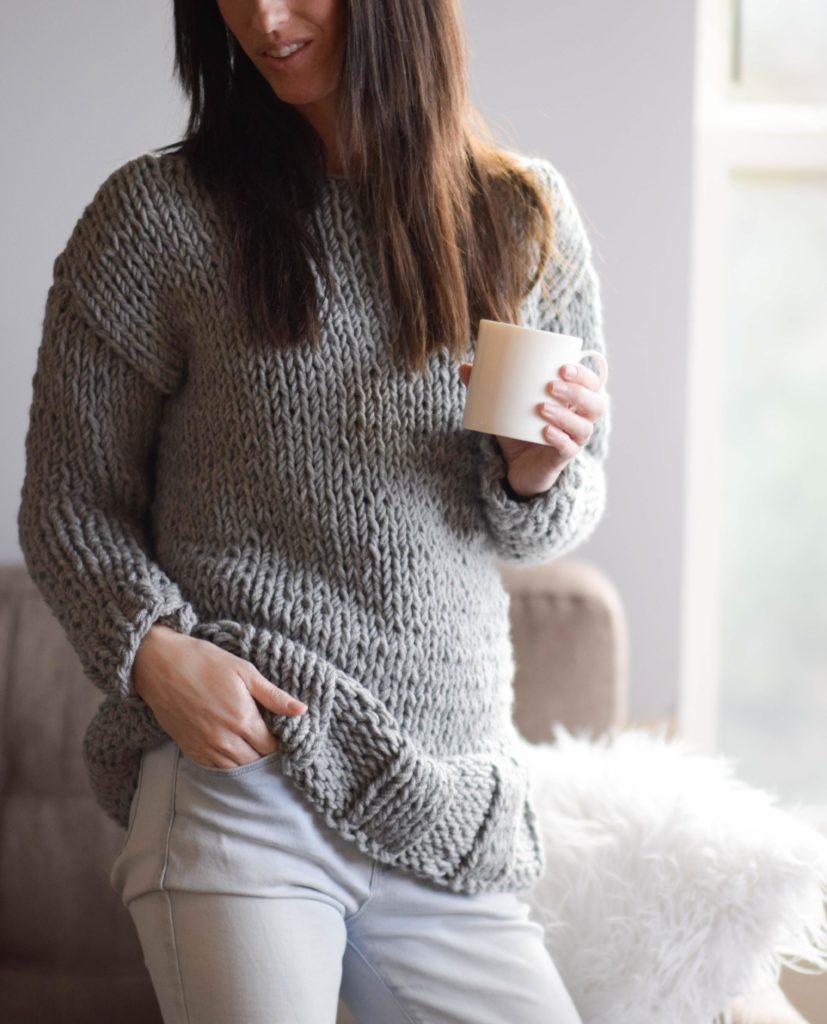
Ready to start knitting? Here we go….
(Remember you can see the free pattern below or purchase the full, ad-free, printable pattern which includes all tutorial photos from my Etsy shop here)
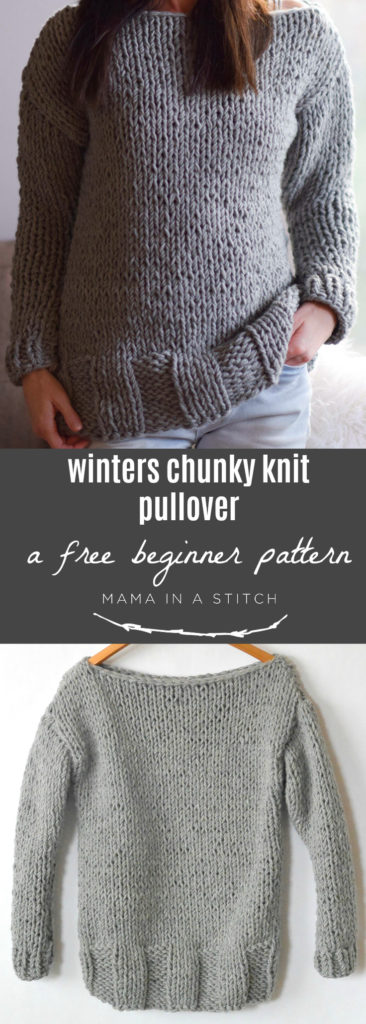
Winters Chunky
easy Knit Pullover Pattern
Cold winter days beg for big, cozy knits like this chunky, warm pullover. This easy project was created with the beginner in mind as there is minimal shaping and only basic knit stitches. A perfect first time knit sweater or easy project for relaxed knitting time by the fire.
You will need:
US Size 19, 15.0 mm, 29” circular knitting needles
8, 10, 10, 12 skeins of Lion Brand Woolspun Chunky #5 Yarn in Oxford Grey (100 g/skein) (Pattern uses approx. 737 g, 848 g, 975 g, 1121 g) Note: number of skeins needed takes into account that pattern requires holding two strands of yarn together, using two skeins at a time. Find the kit from Lion Brand here
Scissors
Tapestry Needle to weave in ends and seam
Sizes:
XS/S, M, L, XL
Follow the key throughout the pattern for your size (XS/S, M, L, XL) & specific size instructions within pattern
Finished Sweater Measurements:
Bust Circumference: (37”, 42”, 46”, 50”)
Length: (23.5”, 24.5”, 25.5”, 26.5”)
Skill Level:
Easy +
Approximate Gauge:
Just over 1 ¾ stitches per inch and 2 ½ rows per inch
Gauge is important in this pattern for sizing to turn out correctly. Also, measure as you go to ensure your widths and lengths are turning out correctly before you finish the entire pullover. See panel measurements in “Main Body” section below. Adjust accordingly.
Skills & Abbreviations:
k – knit
p – purl
k2tog – knit two stitches together (decrease)
Notes:
Entire pullover is knit flat while holding two strands of yarn together. You will knit two rectangular panels for the front and back along with two separate sleeves. All panels and sleeves are then seamed and sewn together to create the sweater! If you know how to knit and purl, you will find the stitch work to be rather easy. There is minimal decreasing on the sleeves which is done by simply knitting two stitches together at indicated points. The fit of the sleeves is slightly snug. If you’re experienced, you may knit sleeves in the round with appropriate needles to avoid the bulk from a seam. In addition, you may make sleeves wider by adding stitches while keeping an even stitch count. Block as needed.
Winters Chunky Knit Pullover Pattern
*Knit with two strands of yarn held together for the entire pattern
Front Panel
Cast On (36, 40, 44, 48) stitches
XS/S & L Sizes
Row 1 *K4, p4; repeat from * across to last 4 stitches, knit last four stitches (XS/S 36 stitches, L 44 stitches)
Row 2 *P4, k4; repeat from * across to last 4 stitches, purl last four stitches. (XS/S 36 stitches, L 44 stitches)
Repeat rows 1 & 2, 5 more times for a total of 12 rows of rib stitch.
M & XL Sizes
Row 1 *K4, p4; repeat from * across (M 40 stitches, XL 48 stitches)
Repeat row 1 for 11 more rows for a total of 12 rows of rib stitch.
Main Body:
All sizes
Row 1 Knit each stitch across row (36, 40, 44, 48)
Row 2 Purl each stitch across row (36, 40, 44, 48)
Repeat row 1 & 2, working in stockinette stitch until entire piece measures approximately (23.5”, 24.5”, 25.5”, 26.5”) ending on the right side (knit side). Knit cast off, weave in ends. (Note: you can make the sweater as long as you’d like, but keep yarn needs in mind)
Approximate panel measurements before seaming are:
XS/S 19.5”X23.5”, M 22”X 24.5”, L 24”X25.5”, XL 26”X26.5”
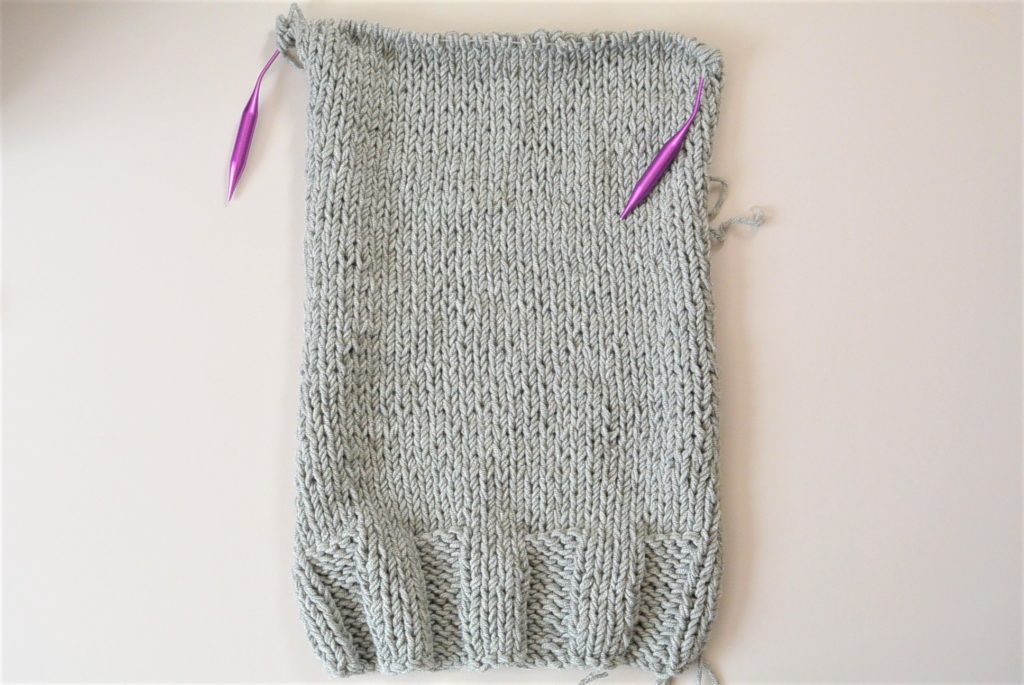
Above: One XS/S panel almost completed
Back Panel
Bottom Ribbing
CO (36, 40, 44, 48) stitches
XS/S & L Sizes
Row 1 *P4, k4; repeat from * across to last 4 stitches, purl last 4 stitches (XS/S 36 stitches, L 44 stitches)
Row 2 *K4, p4; repeat from * across to last 4 stitches, knit last 4 stitches (XS/S 36 stitches, L 44 stitches)
Repeat rows 1 & 2, 5 more times for a total of 12 rows of rib stitch.
M & XL Sizes
Row 1 *K4, p4; repeat from * across (M 40 stitches, XL 48 stitches)
Repeat row 1 for 11 more rows for a total of 12 rows of rib stitch.
Main Body:
All sizes
Row 1 Knit each stitch across row (36, 40, 44, 48)
Row 2 Purl each stitch across row (36, 40, 44, 48)
Repeat row 1 & 2, working in stockinette stitch until entire piece measures approximately (23.5”, 24.5”, 25.5”, 26.5”) ending on the right side (knit side). Knit cast off, weave in ends.
Sleeves
CO (28, 32, 34, 36) stitches
Row 1 K across row (28, 32, 34, 36)
Row 2 P across row (28, 32, 34, 36)
Row 3 K across row (28, 32, 34, 36)
Row 4 P across row (28, 32, 34, 36)
Row 5 k2tog, knit across row to last two stitches, k2tog (26, 30, 32, 34)
Row 6 P across row (26, 30, 32, 34)
Row 7 K across row (26, 30, 32, 34)
Row 8 P across row (26, 30, 32, 34)
Row 9 K2tog, k across to last two stitches, k2tog (24, 28, 30, 32)
Repeat rows 6 – 9 until there are (18, 22, 24, 28) stitches left
Next, work in stockinette stitch, alternating one row of knit stitches with one row of purl stitches until piece is approximately (15”, 15”, 16”, 16”) long
Next you will continue and make the sleeve cuff in a rib stitch pattern
Ribbed Cuff
Row 1 *K1, p1 across row (18, 22, 24, 28)
Repeat row 1 until ribbed cuff is approximately 2” long and entire piece measures (17”, 17” 18”, 18”)
Bind off, weave in ends
Repeat the sleeve pattern again to make the second sleeve
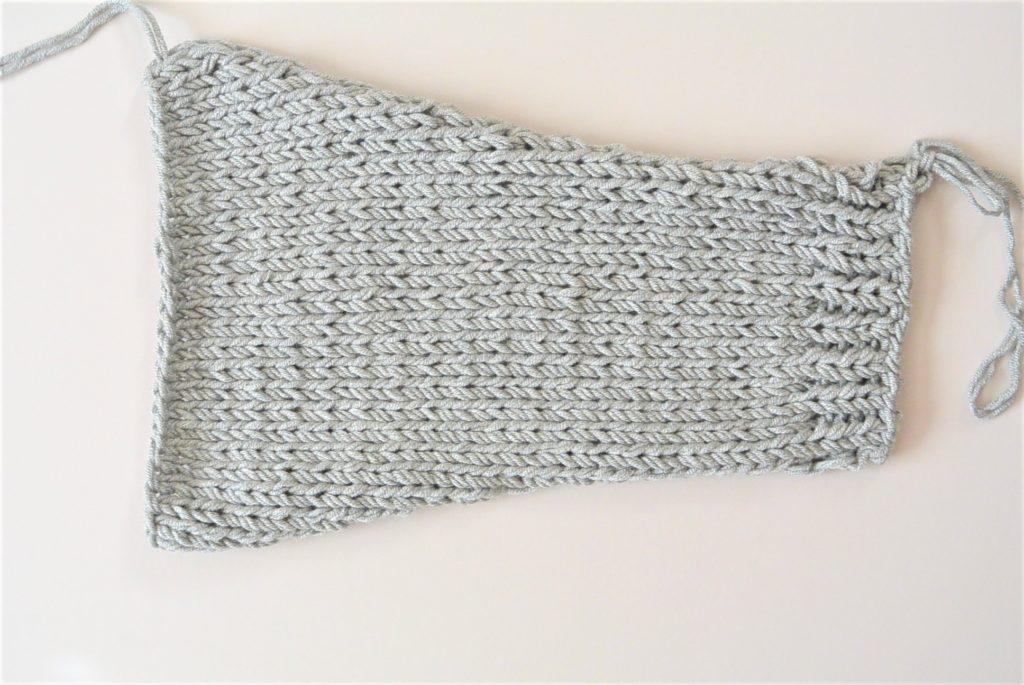
Above: One sleeve completed before folding and seaming
Seaming: (please also see seaming details section below for further assistance)
Shoulders:
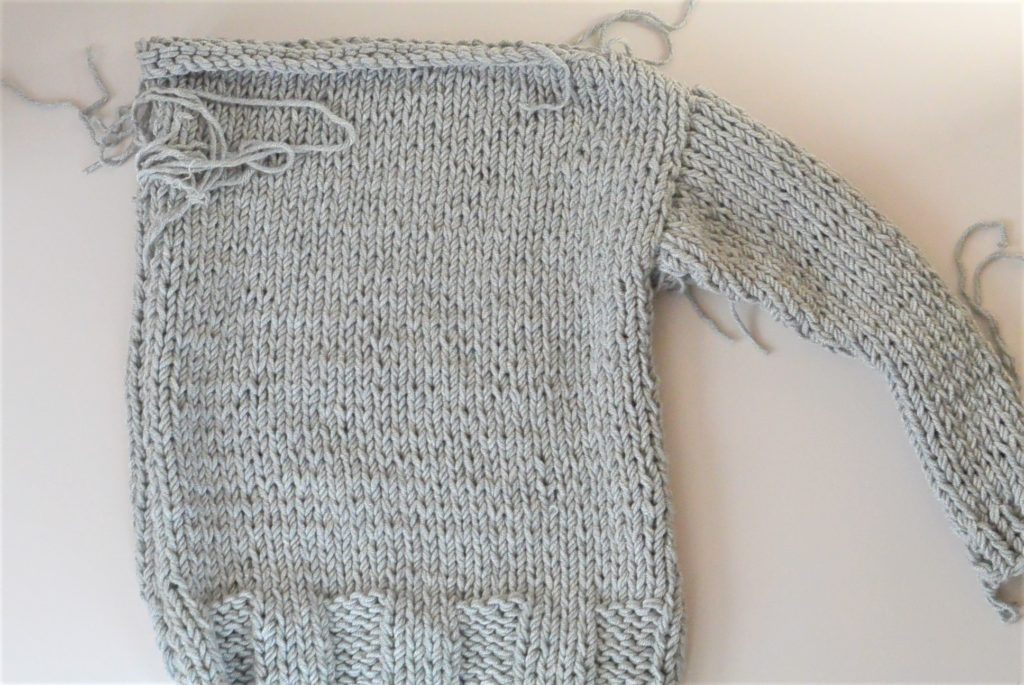
First, with your tapestry needle and length of yarn, sew the top of the front and back panels together at the shoulders with right sides out. Work from the outside of the panels, inward for approximately (3.5”, 4.5” 5.5”, 6.5”)
Sleeves:
Fold in half lengthwise and seam cuff with whip stitch or preferred seaming method and proceed to use the mattress stitch to seam the stockinette portion of the sleeve until there is approximately 5” left. Finish with a whip stitch for the last 5”. This will prevent extra bulk created from the seam under the arm area once the pullover is assembled. (You may use the mattress stitch up the entire arm, but it creates bulk under the arm of the sweater)
Attach Sleeves to Body:
Place center of top of sleeve to top center or pullover shoulder area. Secure before sewing if necessary. Sew sleeve to pullover with preferred seam (see details on seam options below)
Seam Up Main Body:
Whip stitch seam or use preferred method to sew the ribbed portion and proceed with mattress stitch up the stockinette portion of the body until you reach the sleeve. Tie off and weave in ends. Seam up each side.
Finally, ensure you have tied off and weaved in all loose ends.
Specific Seam Details:
Mattress Stitch:
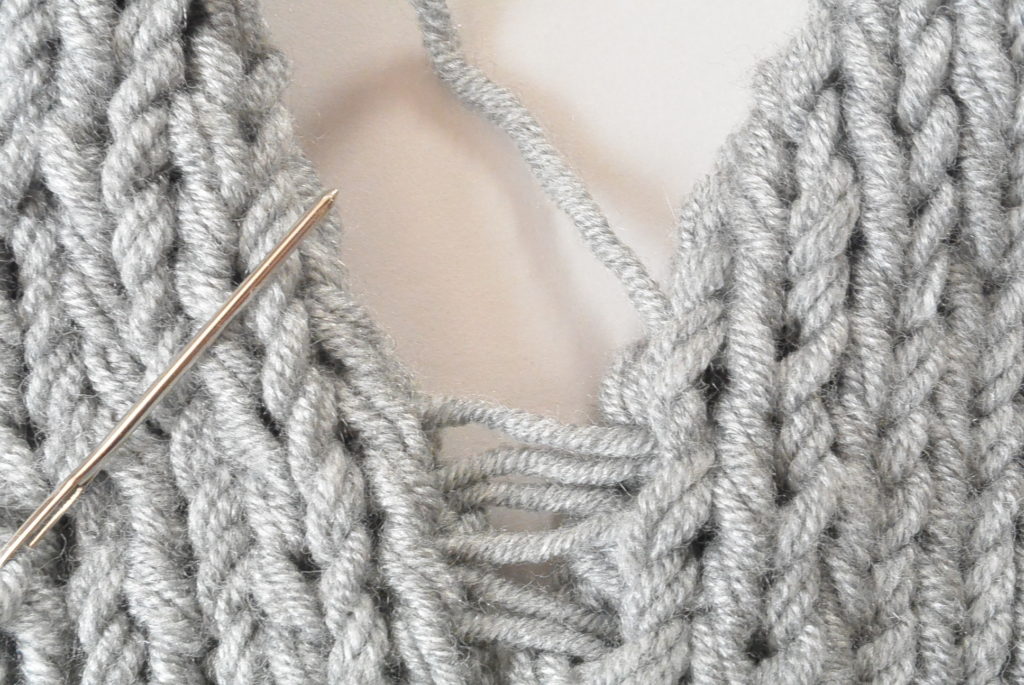
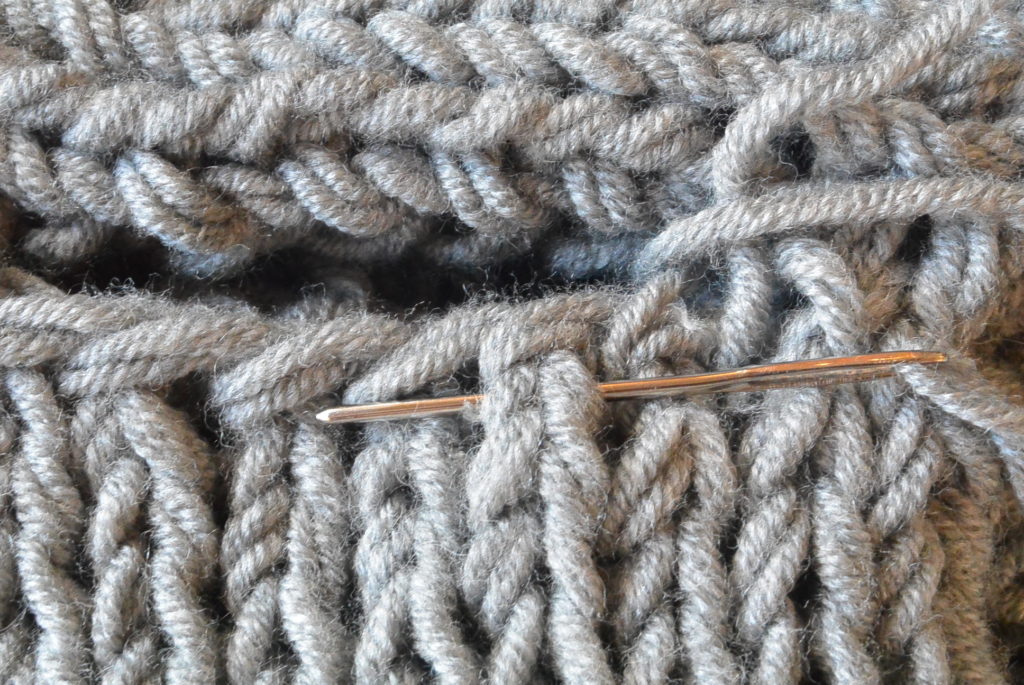
You can find many tutorials online by doing a search for simple “how to do the mattress stitch”. You will line up your two panels and work back and forth through two rows, pulling your needle and yarn through the “bars” of the stitches. Do not pull too tightly. Pictured below is a mattress seam in progress. When the yarn is tightened, it will create an invisible seam.
Sleeves:
There are a few ways that you may choose to attach the sleeves. The simplest seam is a whip stitch, but this will be quite visible. There are ways to make it virtually invisible if you search online for how to attach selvege edge to cast off edge. I do find these create bulk with our chunky yarn. I preferred to work under the “v” of the stitch on the sleeve (pictured) then whip stitch around the opposite stitch on the main body panel.
Above: Working under the “v”, then a simple whip stitch on the opposite side. Continue around.
Shoulders:
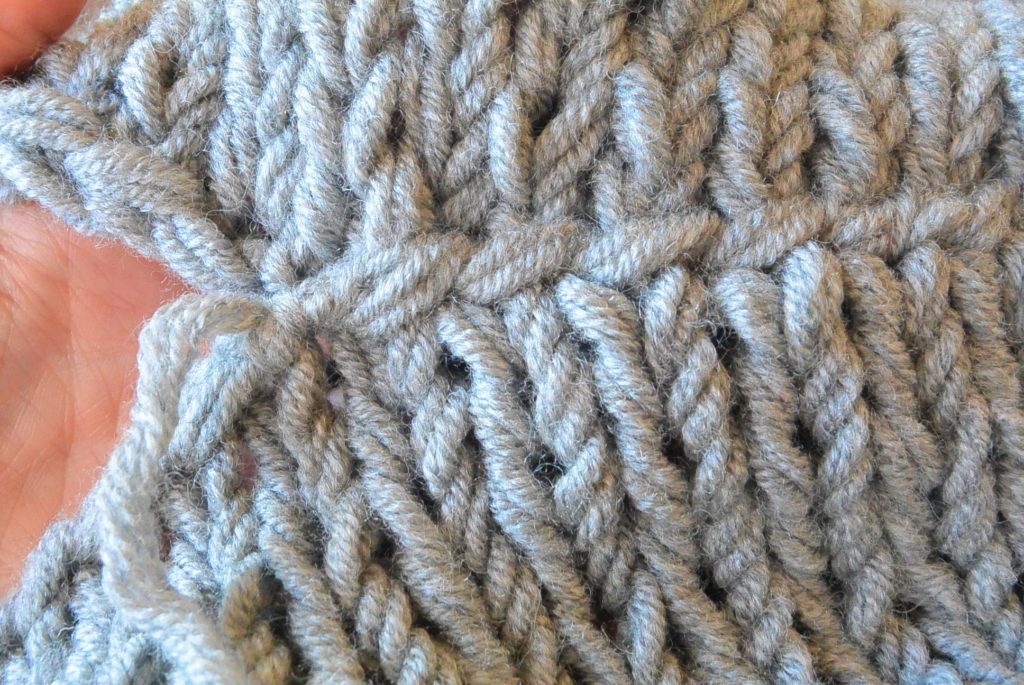
Here, you may whip stitch to keep it simple and not create bulk, or do a stitch similar to the stitch used on the sleeve above where you will work under the “v” on one panel and then whip stitch around a stitch on the other panel.
Above: Yarn worked through the “v” then whip stitched around opposite side
Above: Close up of the shoulder seam
I hope you enjoyed making this easy knit pullover! You will never be cold again. 😉
What do you think of this sweater? I’d love to hear in the comments below. Easy enough?
XO,
Jessica
If you crochet, you might want to check out this super easy tutorial and pattern for a crocheted knit-like sweater pullover here!
If you liked this pattern, you might also like:
Thank you so much to Lion Brand Yarn for sponsoring this post. All opinions are 100% my own.


Jessica
I like the pattern, but I live in San Diego and wouldn’t use something as bulky. Can you make this sweater using only 1 strand of yarn to make it less heavy?
Thank you,
JoAnn
Hi JoAnn!
I think that would be beautiful! You may need to play around with the gauge a bit. Make sure your gauge (adjust your tension or needle size to accommodate any necessary adjustments) is similar to mine and you’re good to go.
I LOVE this design! Any plans to release a version for knitting in the round? I hate seaming.
Thanks so much! So glad you like it. I don’t have a plan to make it in the round but if you’re experienced it would be pretty easy to figure it out from this pattern.
Is this pattern unisex? I would like to possibly make for Boyfriend but I am worried about it not fitting. He is a rather chubby man (wears usually an XL in most shirts/sweaters) and I’m especially worried about the sleeves being too tight…
Hi Desiree,
It’s written for women’s sizing, so it would definitely be too tight for your boyfriend unfortunately!
Do you think its possible to make this with a cowl like neck by picking up stitches once its all seamed together? Or would you do it some other way?
I think that would work Nicole!
Hi, this looks a lovely jumper and would be great for chilly winters in the UK. I am a total beginner only having knitted very simple scarves etc. When you say circular needles, can you use straight ones in the sizes you have given? I don’t have any circular needles.
Many thanks
Helen
Hi Helen!
The only issue with straight ones is that it might not be possible to hold all of the stitches on one needle. If you are making a small size, it may, but I’m not certain!
Years ago I knitted a sweater, this looks like a similar pattern. Thank you for sharing it. I might work on another soon .
You’re welcome!
I just wanted to say thank you for making this pattern so easy.
This looks beautiful, I can’t wait to start it! As for seaming, would slip stitch crocheting the seams work as well, vs. mattress stitch?
Hi Bailey,
The seaming is the most difficult part of this sweater as it can become very bulky. I’m going to say you’ve gotta use the mattress stitch. 😉
Complete knitting newbie here..what do you mean by front/back panel vs main body? What is the difference?
Would lion brand hometown work also for the yarn used I guess as long as it’s the same weight or wool-ease. I want to try to make this but can’t find the yarn specified
Hi Melinda! Yes, you can use any comparable chunky yarn and I think the chunky Hometown would be a good option.
Hi Jessica (& Melinda)! If Hometown or Wool-Ease is used, would you still need to use 2 skeins at once?
No! Haha…definitely just one strand if it’s Wool Ease Thick & Quick or Hometown USA. 🙂
Hi Jessica! This looks great – exactly what I am looking for as we head into winter down here in Australia. I have US19 circular 24″ needles (not 29″ as specified). I will be knitting the size XS/S. Do you think the sweater will fit on the 24″? Thank you!! Jennifer
Hi! I ended up buying the longer circular needles as specified and made the sweater using Lana Grossa 100% Colmo, a virgin wool, alpaca & mohair blend. It turned out great, and as promised was very simple! I just needed to adjust the number of stitches in the body by 4 based on the swatch guage, but given the detailed instructions, felt confident the whole way. Thanks again!!
Can anyone tell me what size the needles would be in canada, thanks
So wondering if I could use a super bulky yarn (I’m thinking “Heal the Wool”). Would I need half the yardage of the Woolspun (which seems to be discontinued anyway)? I don’t want to go by weight as they may differ because of fiber content.
Hello, I’m a very new knitter and have just completed my first beginner’s jumper, which was all knit. I’d love to try your pattern next, but wonder if you could advise on the wool, please? I’ve been given six balls of Beregere Arlequin (https://www.bergeredefrance.co.uk/arlequin-1.html) and I’m guessing that wouldn’t be enough? Would you be able to advise how many I would need in total, please? I measure 37″ bust, so I’m not sure if I’d need to make the S/XS or the M. Thanks very much for any advice. Jo
Hello, I’m very new to knitting and have just completed my first jumper, which was a beginners pattern and all knit. I’d love to make your jumper next! I’ve been given six balls of Beregere Arlequin wool (https://www.bergeredefrance.co.uk/arlequin-1.html) and I’m guessing this won’t be enough? Could you advise how many extra balls I’d need to buy please? Also, I measure 37″ bust, so I’m not sure whether I’d need to make an XS/S or a M. Any advice would be gratefully received. Thank you, Jo
I just made this! Just started knitting last winter, this is my first large project. Although the Woolspun yarn has been discontinued, you can still buy it online. I used a charcoal gray and made it in large since I wanted something loose. It knit up quick & easy as advertised. One note: I made the arms a bit larger since it says the arms tend to be snug & I don’t like snugness, plus I have broad shoulders and large upper arms. But I really could have gone with the original pattern, it looks like, and it would’ve been loose enough. I may do it again in another color, so fun seeing something wearable come together so quick (and I don’t need more hats & scarves!)
Hi,
I’m curious what size the sweater pictured is knit in?
Thanks!
Help! I finally found a sweater pattern that I want to use and the yarn is discontinued! I made a sweater with my own choice of yarn and it just didn’t work with that pattern. I really want to follow this one but am scared to pick my own yarn again. I looked up alternative yarns, but none seemed as awesome. Do you have any recommendations? I can’t find another S on S #5 bulky. Thanks!