Willow Wrap Over Shrug
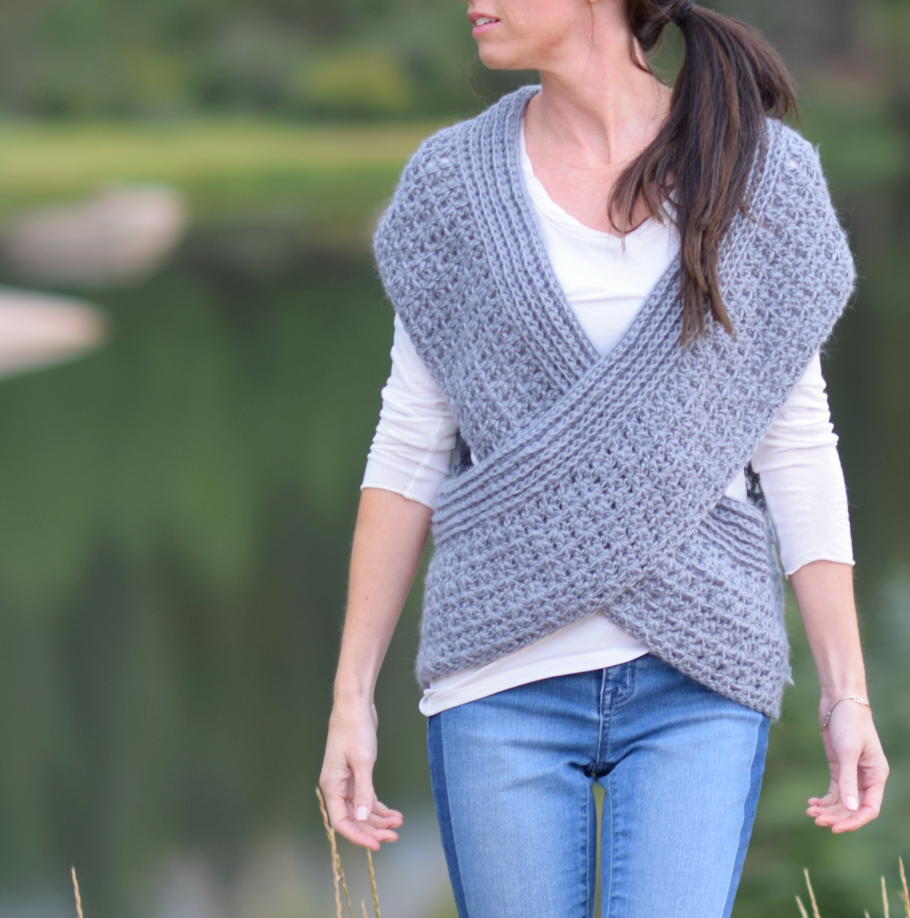
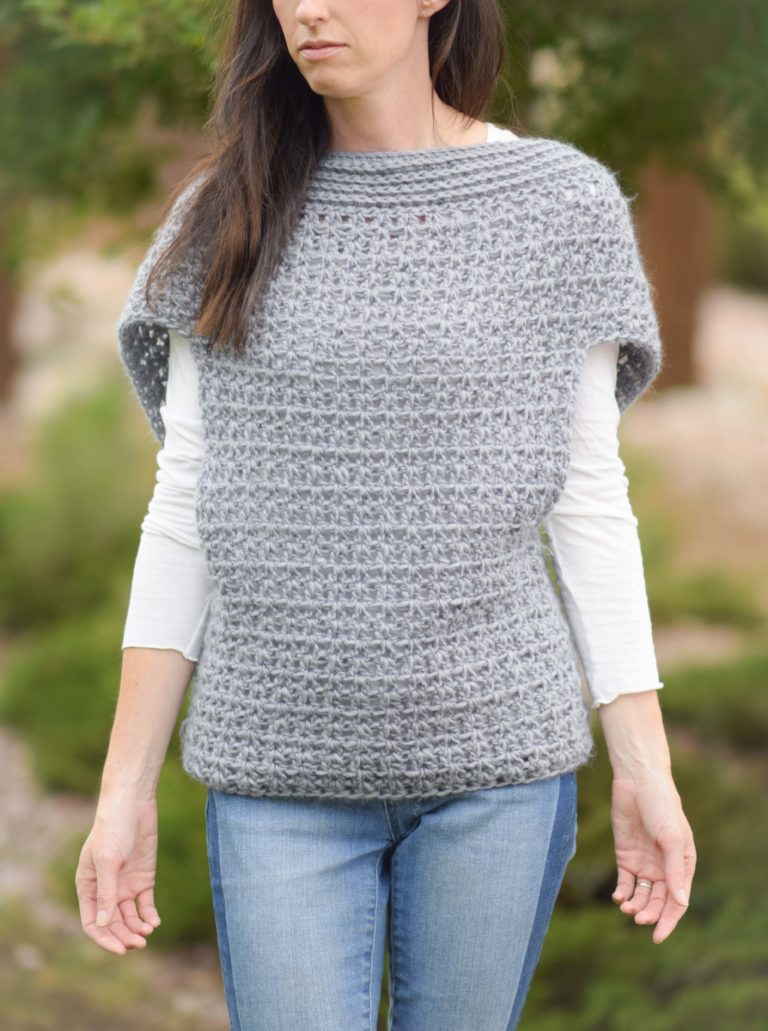
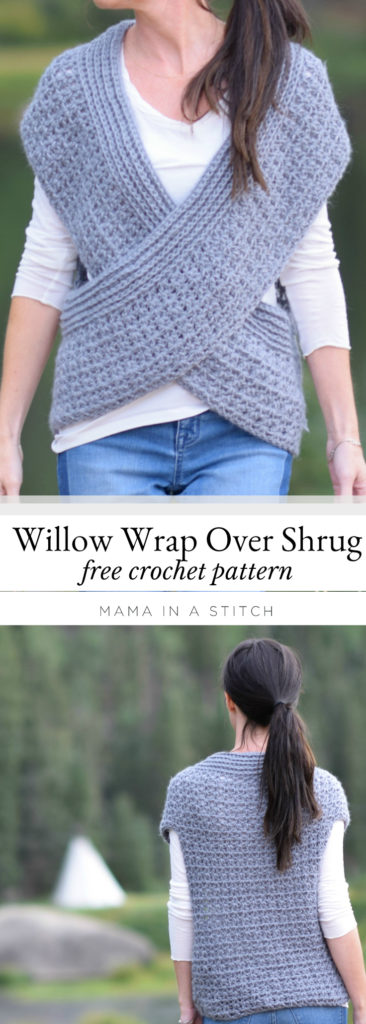
Hi friends! I had so much fun creating this crocheted wrap over shrug. And while it was fun to make, it’s been even more fun to wear mostly because it’s comfortable and also completely reversible. The Lion Brand New Basic yarn that I used has a gorgeous handspun look and the beautiful grey tone goes with any outfit. The stitching appears knit around the neckline and the fabric is warm but not overly so.
Do you like to wear shrugs or vests? When I was teaching, I loved wearing them because they offered a bit of warmth on cool fall mornings, but they didn’t make me overly hot by afternoon when things were heating up. This wrap over shrug is a vest with a bit of a twist. 😉 You can find the full free pattern below (scroll down), the printable version on Etsy, or you may choose to purchase the Lion Brand kit HERE which includes the yarn and pattern as it’s part of their 12 weeks of Christmas series! I’m so honored and thrilled to have been able to come up with this design for their series. They will be sharing 12 different projects from some of my fave bloggers each week until Christmas!
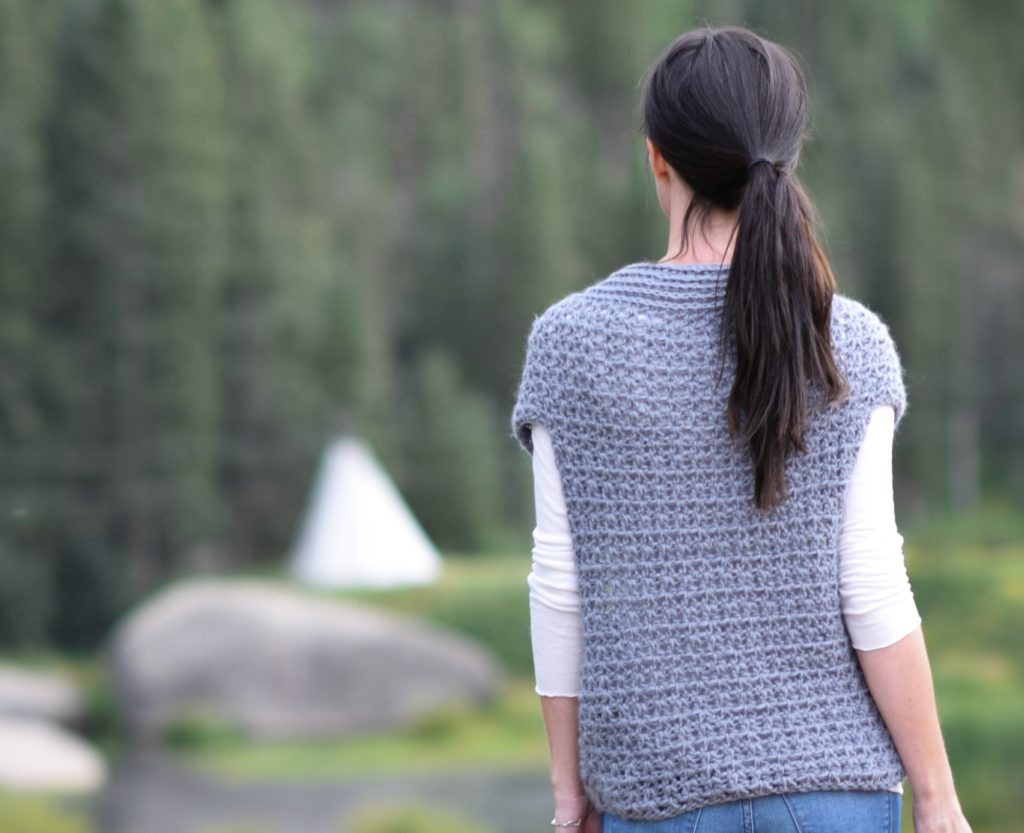
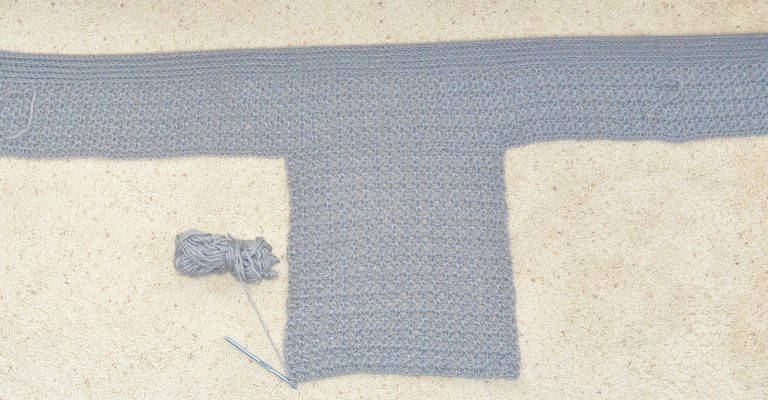
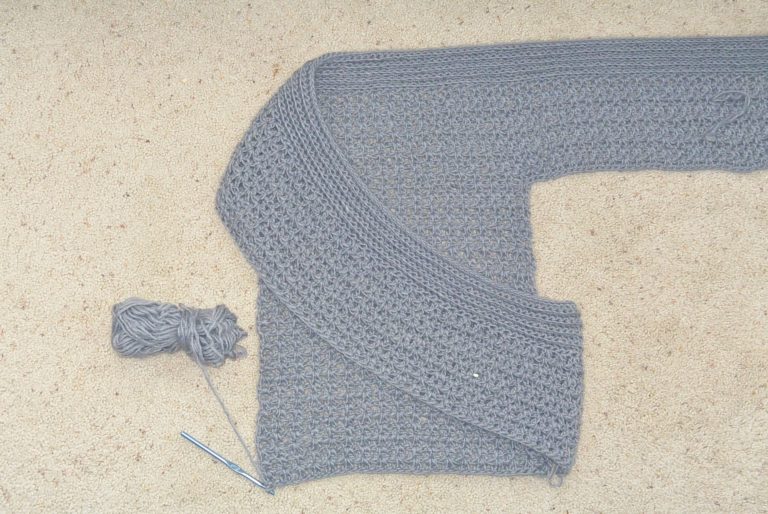
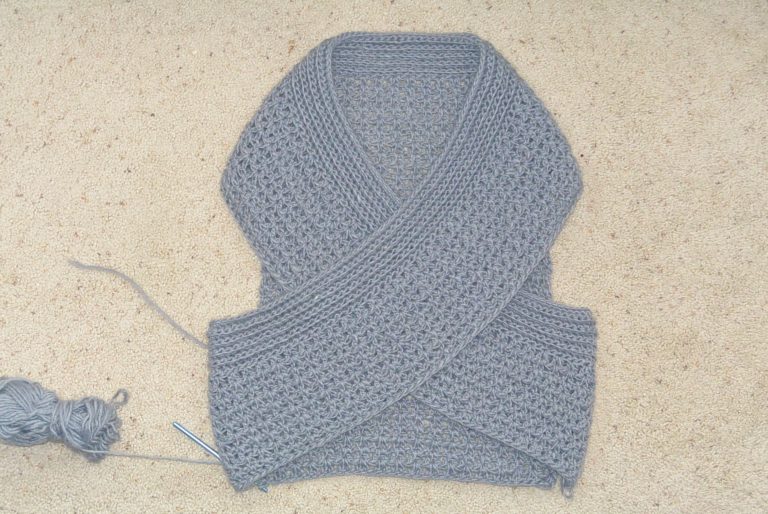
The stitches used in this pattern are easy peasy as usual with my patterns and if you scroll down, you’ll see how simple this piece is to assemble. You basically crochet the shape of a “T” following the stitch pattern and then fold to seam.
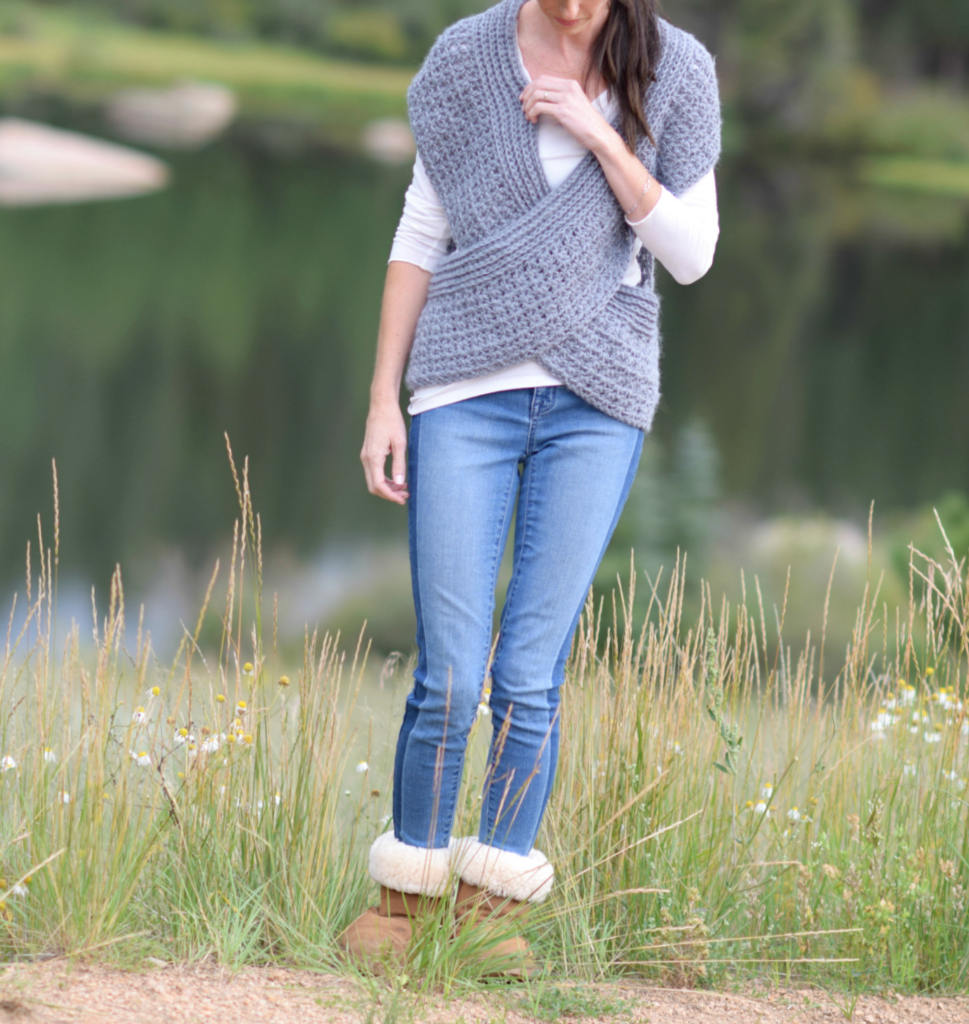
How ’bout we turn it around…..now it’s a boatneck
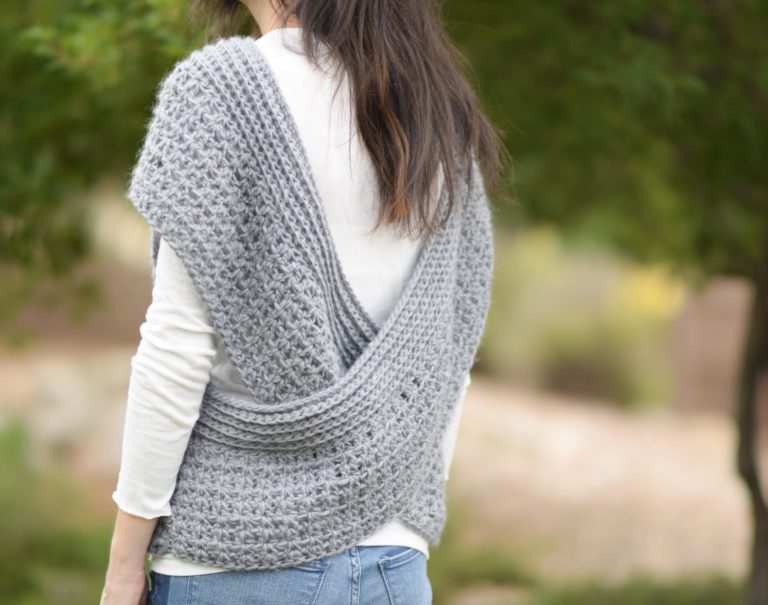
And here it is with the wrap over in the back…
This shrug also uses less yarn than some of the other shrugs and vests that I’ve seen which is always a plus.
Shall we get started?
Willow Wrap Over Shrug
This unique wrap over shrug is both flattering and ultra-comfortable. It’s perfect to throw on with just about any top for an extra layer warmth and a bit of style. Wear it two ways, either with the wrap in front or in back. A versatile piece for cool days and evenings.
You will need:
3 skeins (XS/S) or 4 skeins (M/L) of Lion Brand New Basic 175 in Grey (100 g / skein)
Size XS/S uses approximately 271 g
Size M/L uses approximately 339 g
Size K 6.5 mm crochet hook
Scissors
Tapestry Needle to weave in ends and seam
Sizes:
2 sizes available
XS/S & M/L
Size Key
Please use the following key throughout the pattern for your size. Portions of the pattern are the same for both sizes, however, where there are parenthesis, stitch counts and instructions will first be listed for the XS/S and then the M/L size as follows:
(XS/S, M/L)
Approximate Top Measurements
XS/S
36” around bust
22” from back neckline to bottom of top
M/L
40” around bust
25” inches from back neckline to bottom of top
Skill Level:
Easy +
Gauge:
Just over 2 ½ stitches per inch and 1 ¾ rows of v-stitch per inch approximately
*Gauge is important for this pattern. Sizing may turn out incorrectly if crocheted with a different gauge. If you do make it and it turns out too small, see ideas to correct it below in the Q & A section. It may also help to measure after you’ve crocheted several rows of the v stitch pattern.
Skills & Abbreviations:
ch – chain
dc – double crochet
sk – skip
sc – single crochet
(the pattern will also instruct you to single crochet through the back loop only)
Notes:
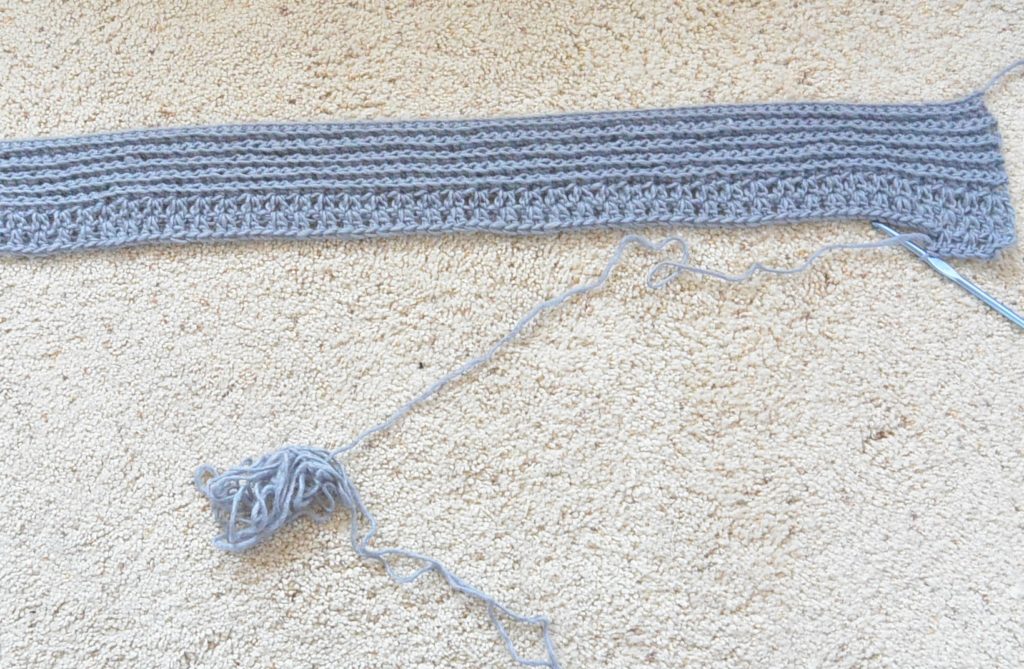
Most of this piece is crocheted with the v-stitch. The knit-look edging is created by single crocheting through the back loops only for a set amount of rows. The piece is crocheted as a basic T shape that will be wrapped and seamed to finish. (see photos below) You will begin by crocheting the long end and work downward.
For additional help with the v-stitch, you can visit my blog Mama In A Stitch for a step by step picture tutorial here:
https://www.mamainastitch.com/how-to-crochet-v-stitch-tutorial/
Willow Wrap Over Shrug Pattern
Neck and Cross Front Portion
Ch 165 (Both sizes)
Row 1 Sc across row (164 stitches), ch 1, turn
Row 2 Sc through the back loop only in each stitch across the row, ch 1, turn. (164 stitches)
Repeat row 2 until you have a total of 9 rows of single crochet stitches worked through the back loop. Do not chain 1 at end of 9th row. Next, you will work the v-stitch crochet pattern.
Row 10 Ch 3, 2 dc in 5th st from hook (this is also the second stitch in of row below), *sk 1 st, 2 dc in next st. Repeat from * across row to last st, 1 dc in last st.
Row 11 Ch 3, make 2 dc stitches in the space below the 5th st from hook (this is also the space between the first V shape formed by 2 dc stitches) Make 2dc in the middle of each dc group across the row. At the end of the row make 1 dc in the last stitch, which is the turning chain from the previous row. Ch 3, turn.
Repeat row 11 for (7 rows, 9 rows). Your piece should measure approximately 63” long and (7.5” wide, 8.6” wide) at this point.
Mid Back To Bottom Portion
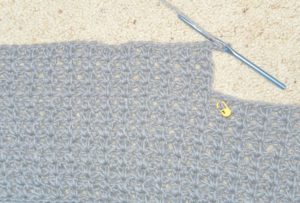
Place stitch markers (64 stitches, 59 stitches) inward on bottom portion of work on each side. This will leave (36 stitches, 46 stitches) in the center of your piece.
Attach yarn at first stitch marker on the left.
Row 1 Ch3 (counts as first stitch), work dc in st below to create first V stitch, sk st, 2dc in next st across to stitch marker (36 stitches, 46 stitches), ch 3, turn.
Row 2 Make dc in group of 2 dc below, make 2 dc in each dc group across the row, ch 3, turn. (36, 46 stitches)
Repeat row 2 for (23 rows, 27 rows), do not ch 3 at end of final row. There will be a total of (25 rows, 29 rows) in this Midback to Bottom Portion of the pattern. (This portion only, from where you started with the stitch markers, should measure approximately 14.5”, 16 ¾” from top to bottom. Consider adding rows if yours turned out too short. THIS MEASUREMENT DOESN’T INCLUDE THE NECK CROSS FRONT PORTION)
Tie off and weave in ends.
Seam:
Place entire piece on a flat surface in front of you. Take each side of the Neck Cross Front Portion and cross to attach to opposite, bottom side of Mid Back To Bottom Portion. (See photos) Seam with a simple whip stitch seam. Tie off and weave in ends.
Assembly Photo Tutorial:
Below: Crochet a T shape. Simply cross the top portions over and seam to each edge.
That’s all there is to this fun little wrap over shrug!
Do you have questions? I’ve tried to think of some and have given some answers below. 🙂
Q & A
I’m having trouble with the stitch pattern, is there a tutorial?
Find a picture tutorial on my blog here:
https://www.mamainastitch.com/how-to-crochet-v-stitch-tutorial/
What if my piece turned out smaller than I want?
It’s important to check your gauge before beginning, however if your piece has turned out small there are a few things you can do. Before seaming, you can add rows to different areas to make this the size that you need. To add some length to the back, you can add rows to the Mid Back to Bottom Portion. If it is fitting too tightly around the front, you may attach yarn to the short ends of the Neck & Cross Front Portion and simply add equal length to each end with single crochet stitches or a preferred stitch.
I hope you enjoyed this somewhat “unique” shrug wrap over pattern! I’d love to hear what you think of it and please let me know if you make one!
XO
Jessica
If you liked this, you might also like:
Thank you so much to Lion Brand Yarn for sponsoring this post. All opinions are 100% my own.


Another great pattern for the cold weather coming!!! thank you!!!
Jessica,
This is soooo cute and unique! I absolutely love it.
Thanks for sharing such lovely projects!
Blessings,
Janelle
Hey Janelle! You’re welcome….and thank you for your kind words as always! Have a great weekend!
I love the creativity in your posts! I noticed you said you were a teacher, I’m wondering what you taught? Keep up the great work!
Hi Stephanie! I taught Special Education and loved every minute!
So happy you’re enjoying my stuff here on the blog.
Hey. I am such a dummy when it comes to Crochet. Is a Knit pattern for this wonderful crochet shrug pattern.
Please keep these amazingly beautiful patterns coming.
Hi Mell! Unfortunately I’ve only done this one in a crochet version. I’m so happy you like it though! Thanks for the kind words about my patterns.
That is absolutely adorable, I wish I could make it for plus size
Aww Tammie thanks. I’m hoping to find the time to offer more sizes in the future. It all is just so time consuming to come up with sizing, yarn amounts and stitch counts. I know the frustration of wanting to make something that’s not in your size. Often patterns turn out too large for me.
Oooooh! What a beautiful pattern! And I actually think I may be able to do this!
I think I may start with a kit and make it as a Christmas gift for my grandauhhger…
However….
I too wood be interested in a plus size pattern.
Thank you!
Thanks for the feedback Kelly!
I hope that you enjoy it – it’s pretty unique. Let me know if you come up with any questions!
Another great pattern:) Making it now.
Thank you
Awesome Sara!
Hope you like it!
I ink this could be fabulbous knit project. Do you have any plans to design it as a knit pattern?
Do you also the “willow wrap over shrug” pattern instructions in knit? I don’t know how to crochet? Any hits on how to convert to a knit pattern?
Love it but stuck…
*SWOON*!!! Saw this today, 1/2 hour later yarn ordered in Plum…….Whisper was a close second! This pattern is so different and quirky which draws me like a magnet, thanks for another jewel Jessica
Aww, thanks Pam! So happy that you like it!! I’d love to see it in Plum – what a great choice! And you’re welcome of course!
Hey Miss Thang!
I was just on Katharine Heigls’ blog thoseheavenlydays.com and she me ntioned YOU as a favorite designer!!! Provided a link to you and everything She was talking about her cold weather projects she was working on and mentioned you at the end of her post, pretty awesome!
Pam
Aww, hi Pam! That’s so neat that you saw that!!! I was so thrilled to see that as well – haha!! What an honor. I will actually be sharing a little interview that I did with her soon (yeah, so cool!) here on the blog. She was so gracious to answer some questions. 🙂 Have a lovely day and thanks for taking the time to write me here. 🙂
I’m sure I’m just missing it but what size. Roche hook for the adorable unique shrug?
I love the look of this shrug. Any idea on dimensions to make this plus size?
OMG this looks amazingly easy. I cannot wait to get started. Thank you so much for all these beautiful patterns.
You’re welcome Carolyn!
I do want to start something new. The seems like it is something I would like to do. Pamela
So glad you like it Pamela!
Getting started on this FINALLY! Had to complete all the Christmas gifts before I’d let myself start it…….torture!
I’m attempting to make this however I’m at least a 2x. What’s the best way to make it bigger to fit?
I absolutely love this pattern, but I cannot crochet (I think I might have to learn that next). Many of the comments that I have read are asking for this pattern in a knit version. Do you think you may have the knot version in the near future? I hope so.