The Dreamer Crocheted Triangle Wrap Pattern
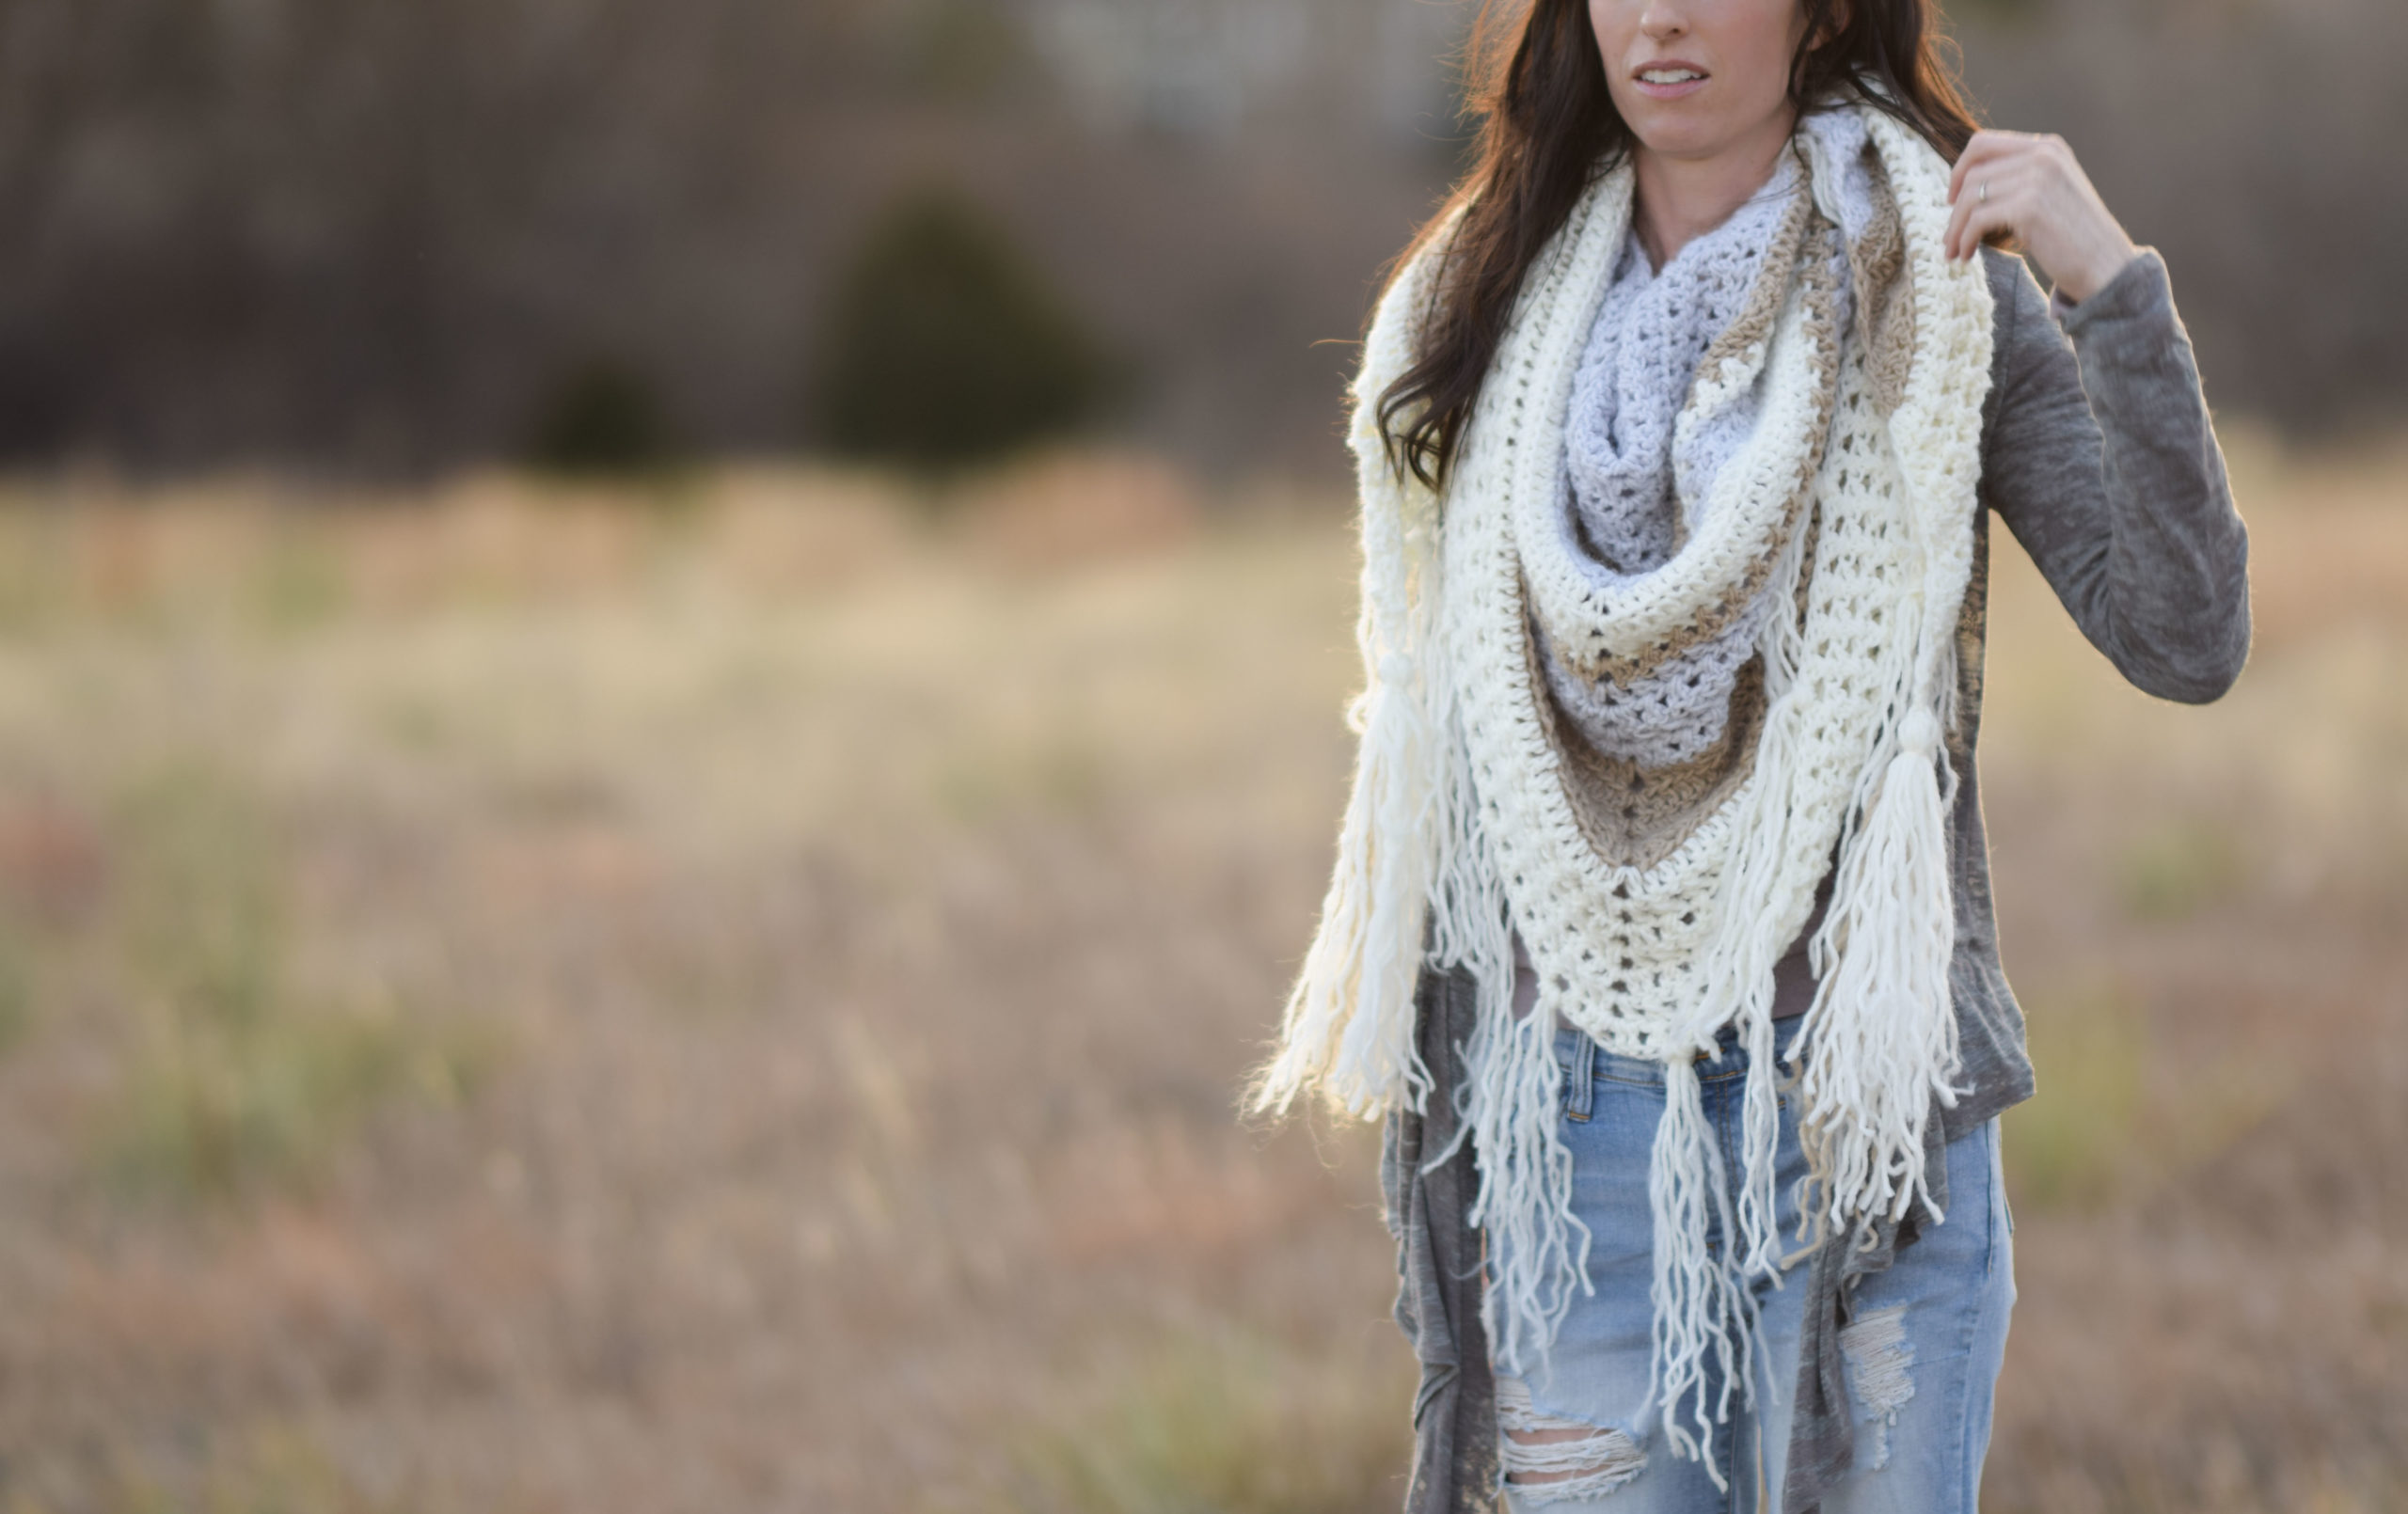
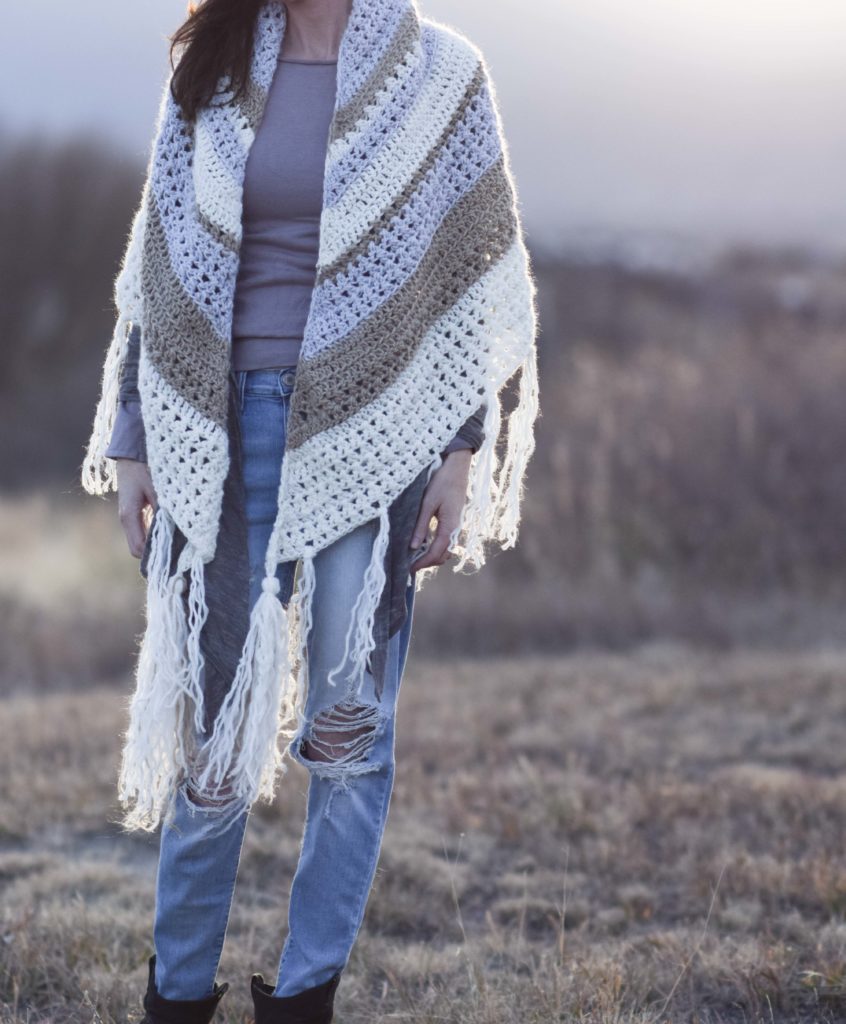
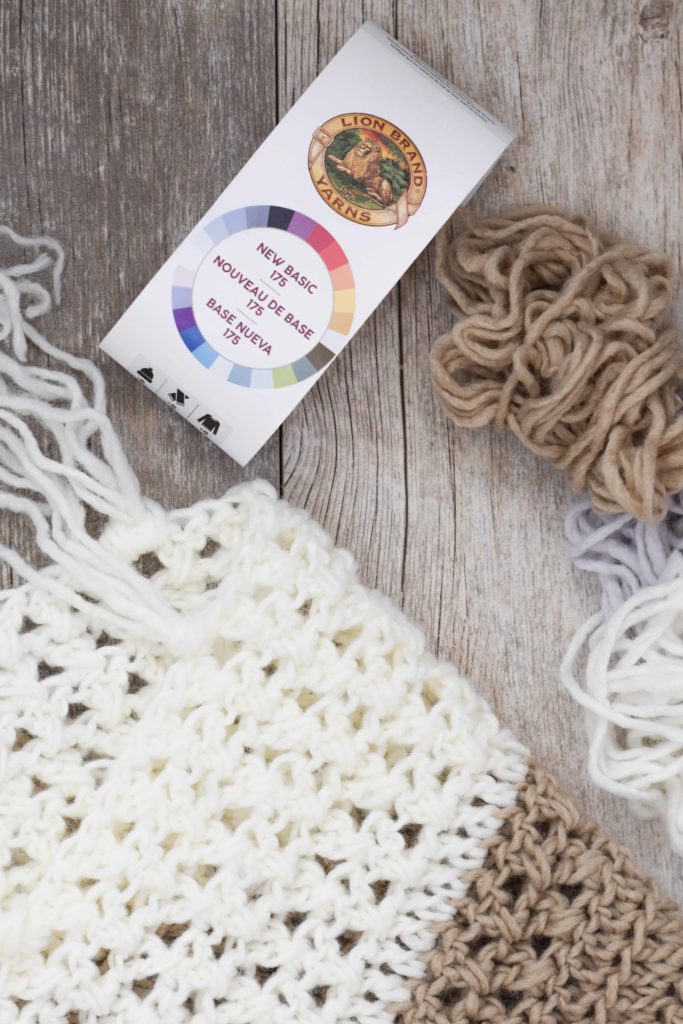
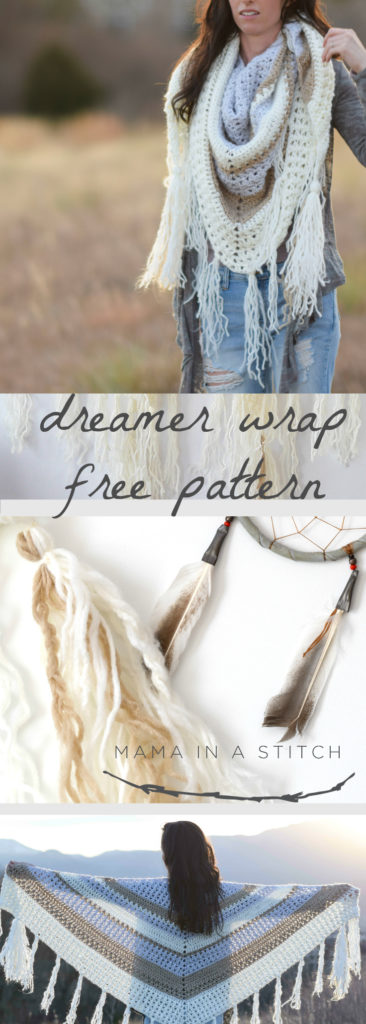
After making the Smoky Mountains Triangle Wrap and a Easiest Knit Triangle Wrap, I thought it would be fun to make a new wrap with a bit more detail and a dreamy, boho feel. The stitches are fairly simple just as I like and there’s very little counting involved with this project. The other part that I enjoy about this crocheted triangle wrap pattern is that it includes some of my favorite yarn colors all wrapped up into one pretty piece. YAY! It uses the amazing Lion Brand New Basic yarn which I fell in love with while making the Cascading Kimono Cardigan. The blend of neutrals will go with just about any outfit and the optional flowy fringe and tassels give it that kind of bohemian vibe, don’t you think? I’ve even braided some of the fringe which you can see in the photos below. So feel free to scroll down below to see the pattern for free as well as the picture tutorial or you may choose to purchase the kit from Lion Brand HERE (20% off for a limited time) or the printable PDF pattern from my Etsy shop HERE.
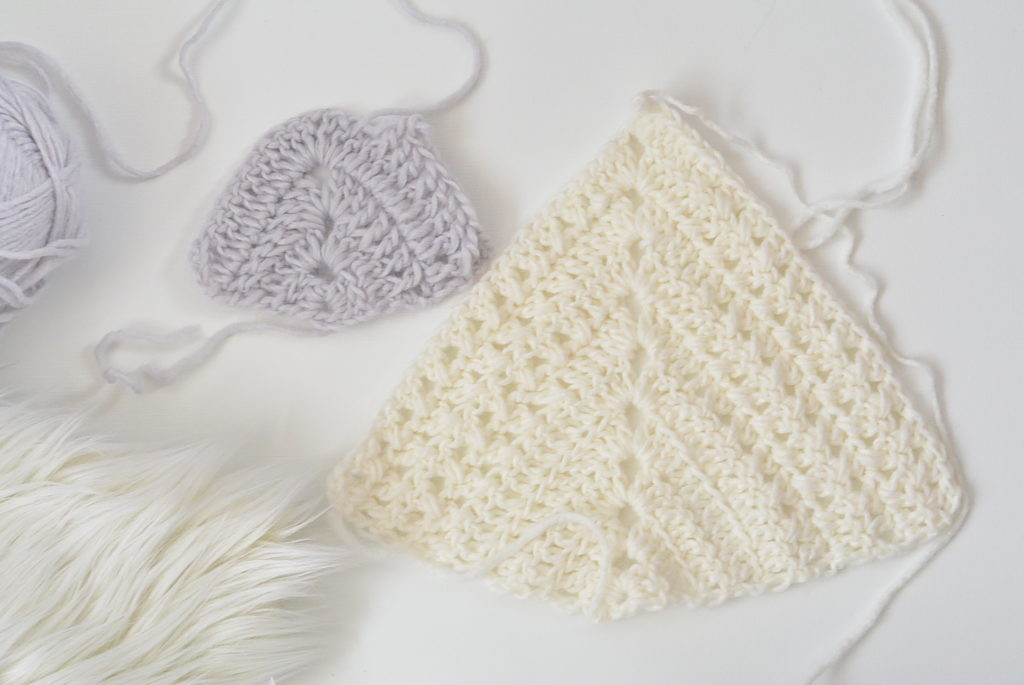
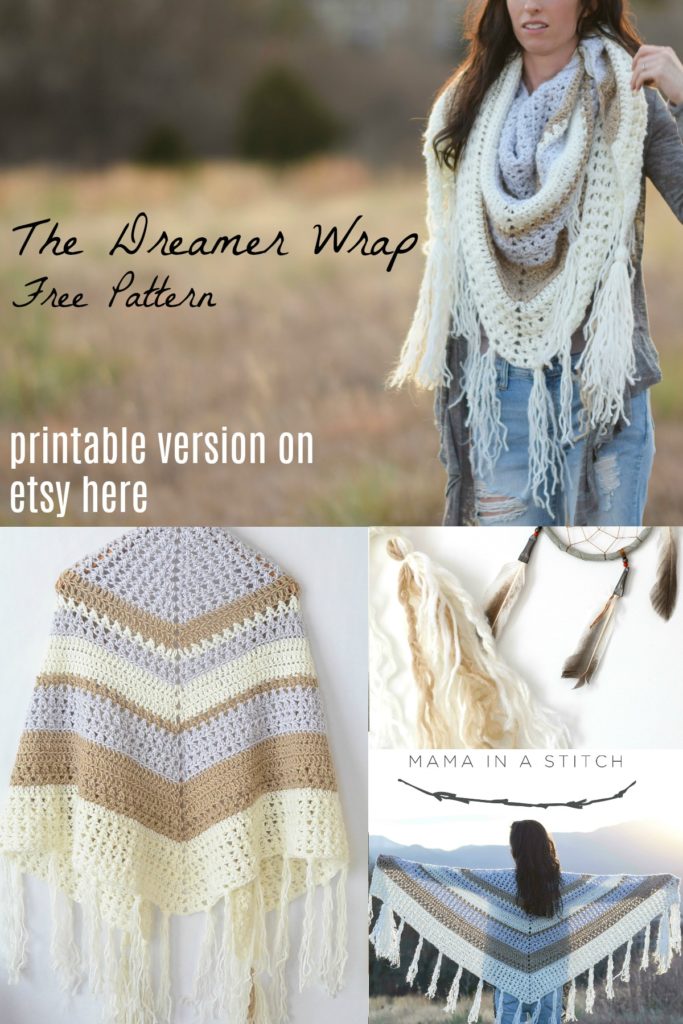
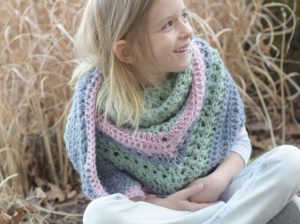
This crocheted triangle wrap pattern took a bit more planning than the others as I tried to figure how to make the triangle a nice, wide size (You can see a few of my late night triangle making attempts below lol). It is similar to the Smoky Mountain Wrap in that it starts at the center point and works out from there. You can see exactly how to get started in the picture tutorial at the very bottom of this blog post. I’m so thrilled with how this wrap finally turned out that I’ve made a second one for my daughter which you can see here, the Lil’ Sweet Dreamer. While it’s made with just a few rows that are repeated in varying areas throughout, the look of the stitch work and colors look a bit non-symmetrical and unplanned giving it that artsy look. AND once you get a few rows in, you simply work repeats as indicated, making the varied color changes throughout. Pretty fun and easy! And while I love the fringe, it’s completely optional if you’re more of a no fringe sort of gal or guy. 😉
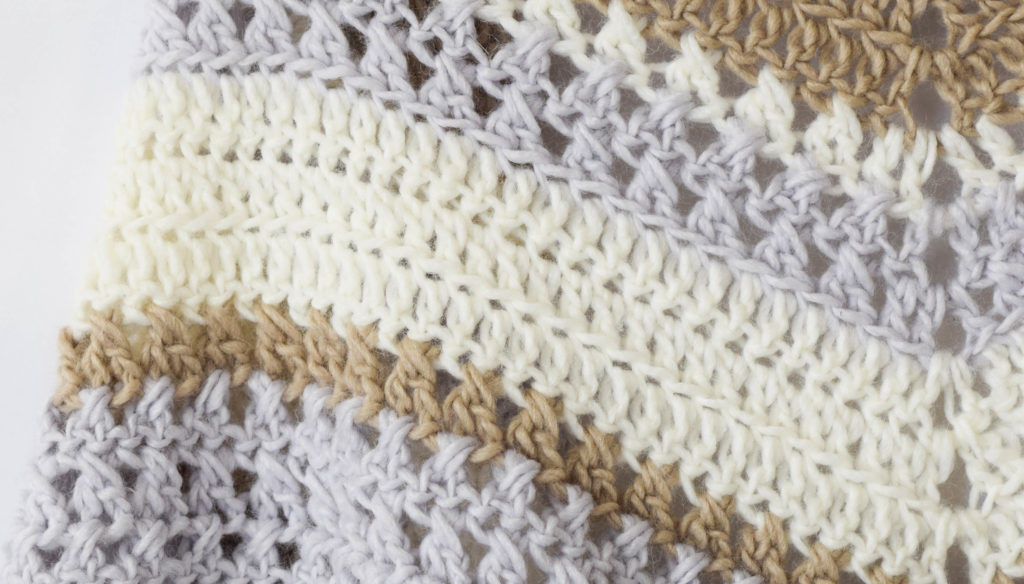
As many of you know, I’m all about easy patterns and while this one is fairly simple it’s not a great one for brand new baby beginners. However, I do walk you through each row that is repeated with a picture tutorial so it’s doable if you’ve made a handful or two of good crochet projects in the past. It’s a good idea to count your stitches at least every few rows to ensure you’re getting it right. You can do this! You’ll noticed that I’ve used crossed double crochet stitches which I think look quite neat. You may remember the tutorial from the blog for the crossed half double crochet, but this is the first time I’ve used the crossed dc stitches. If you’re not familiar with it, you may want to test it out on a few rows. Once you get going it’s a super easy way to create a pretty piece without having to do much counting. You’ll also find that there are rows where you will double crochet through the front loop only. This makes a really beautiful and simple texture.
On our recent trip to Taos, New Mexico I was really inspired by the super laid back, artsy vibe down there. They call New Mexico the “Land of Enchantment” with it’s scenic beauty and rich history. There’s a neat feel there with the blend of cultures and a wonderful independent art scene as well. This Dreamer Wrap really fits in with the cool vibe that I noticed in the town of Taos. I’ve thought that if I ever lived somewhere besides Colorado I think I could really appreciate living in Santa Fe or that area for this reason. Have you been to this part of the Southwest?
So shall we get started? You will find the pattern below, but also be sure to check out the picture tutorial as well! Also you can choose to purchase the ad-free printable pattern on Etsy as well. It includes the full picture tutorial too!
The Dreamer Wrap Crochet Pattern
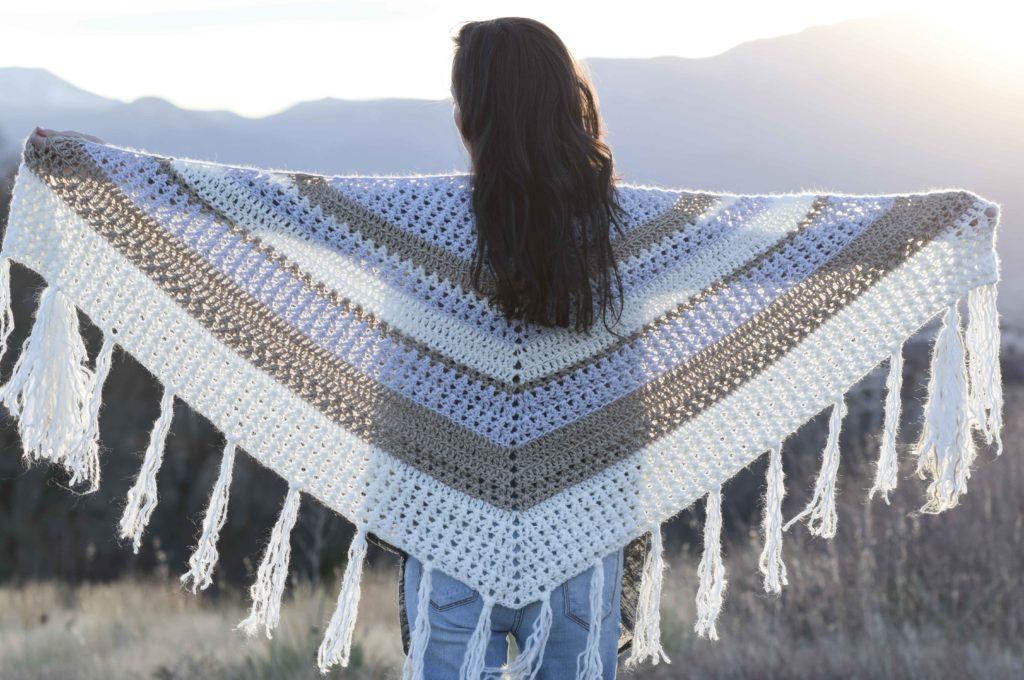
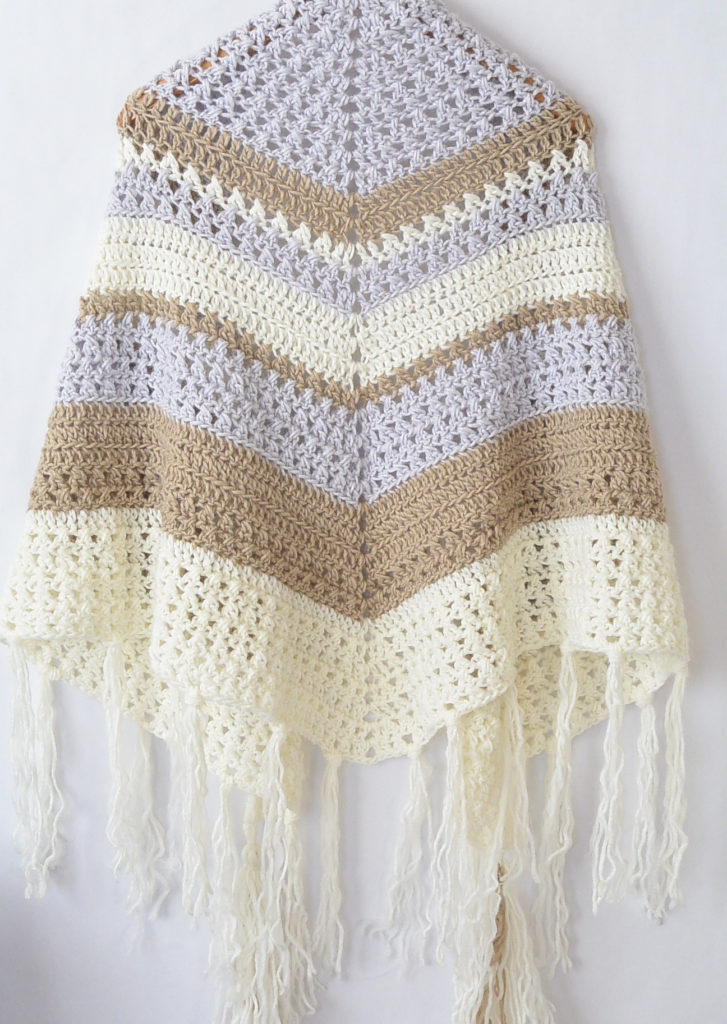
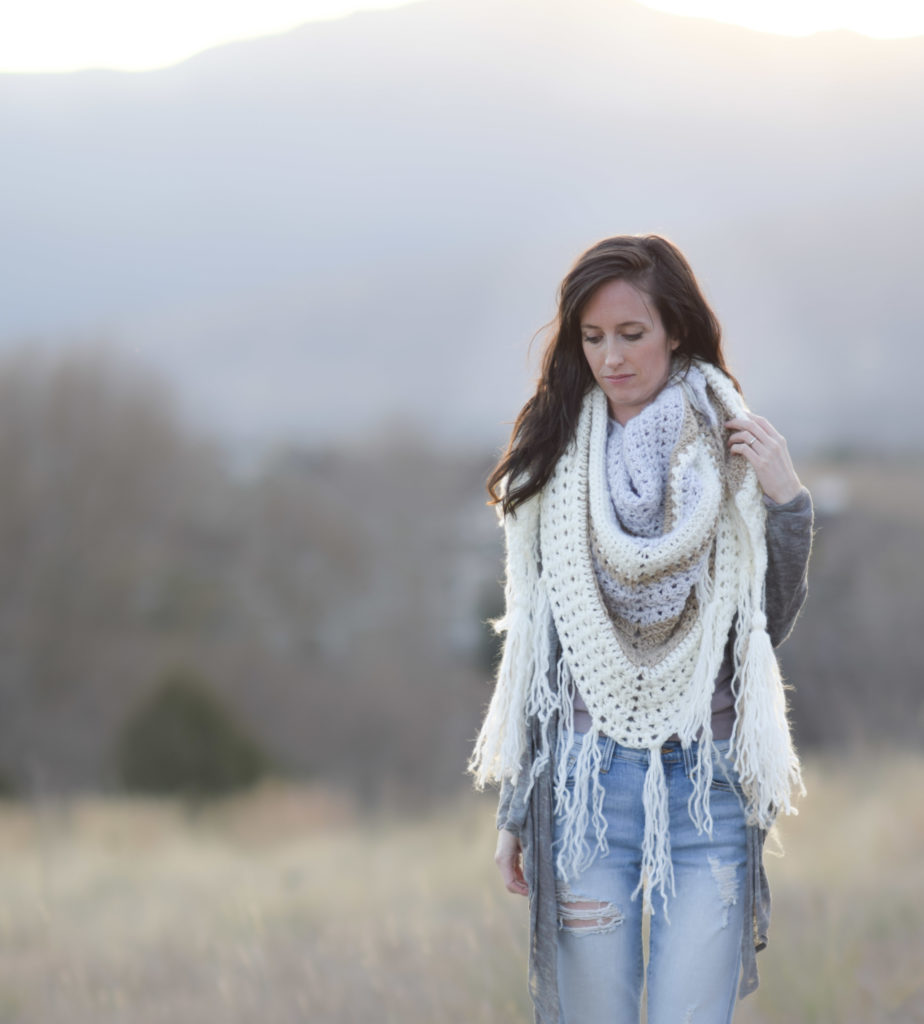
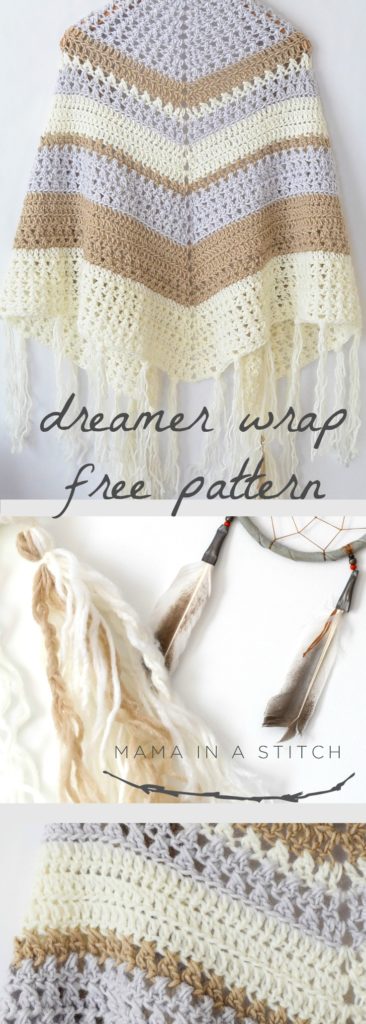
A luxurious triangle wrap featuring a blend of light neutral tones and beautiful stitch work. The contrast of the delicately open stitches with the tighter fabric creates an eye catching pattern that’s also incredibly comfortable. Perfectly sized to wrap around shoulders and to wear as a classic shawl or as a triangle scarf worn in front. Optional fringe and tassels add a dreamy, boho touch to finish off this cozy wrap.
And don’t forget to check out the step by step picture tutorial below!!
You will need:
US Size K 6.5 mm crochet hook
1 Skein Lion Brand New Basic Yarn in Whisper (100 g/skein)
1 Skein Lion Brand New Basic Yarn in Café Au Lait (100 g/skein)
2 Skeins Lion Brand New Basic Yarn in Cream (100 g/skein) (Pattern uses approximately 400 g of yarn)
Scissors
Tapestry needle to weave in ends
Size:
Approximately 69” wide X 28.5”
Notes:
You should know how to make basic color changes for this pattern. The ch 3 at the beginning of the row counts as a dc stitch throughout the pattern. Much of the pattern is a repeat of row 2, 3 or 4. Repeat as indicated noting the change in stitch count for each row. Last stitch of the row is worked into the turn chain of the previous row. Color changes are indicated throughout the pattern but this is a general guide; feel free to make this your own by using the colors in a different way!
Skill Level:
Easy +
Gauge:
Not important for this pattern, however it’s close to 10 dc stitches in 4”
Skills & Abbreviations:
dc flo – dc through front loop only
sl st – slip stitch
ch – chain
sk st – skip stitch
dc – double crochet
ch sp – chain space
ch2 corner sp – this is the chain 2 space which is the middle corner of the triangle
Stitch Pattern:
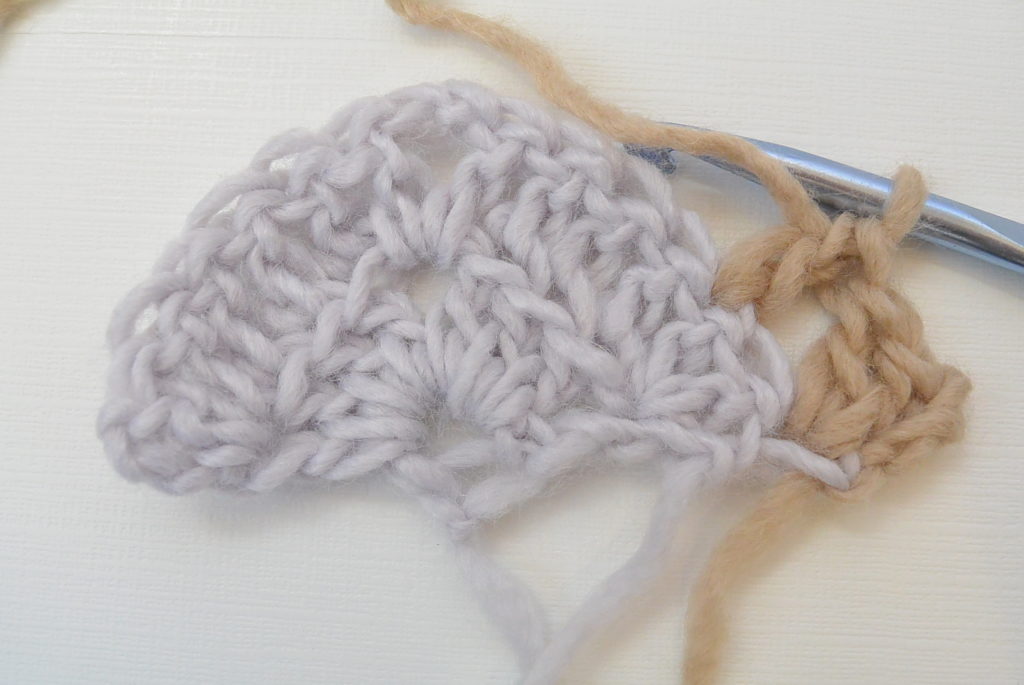
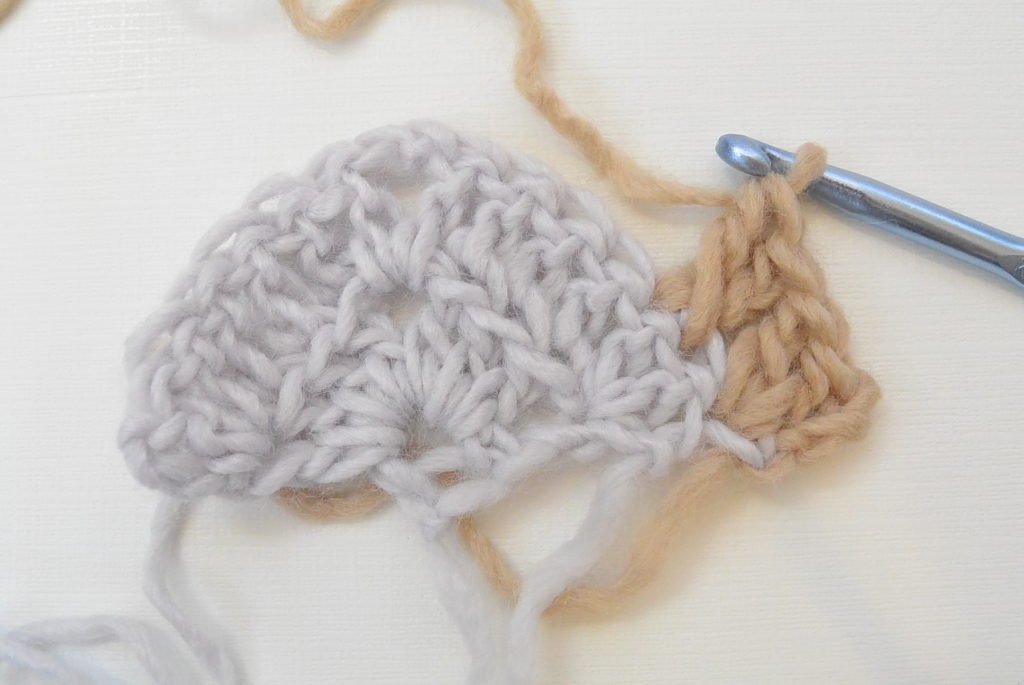
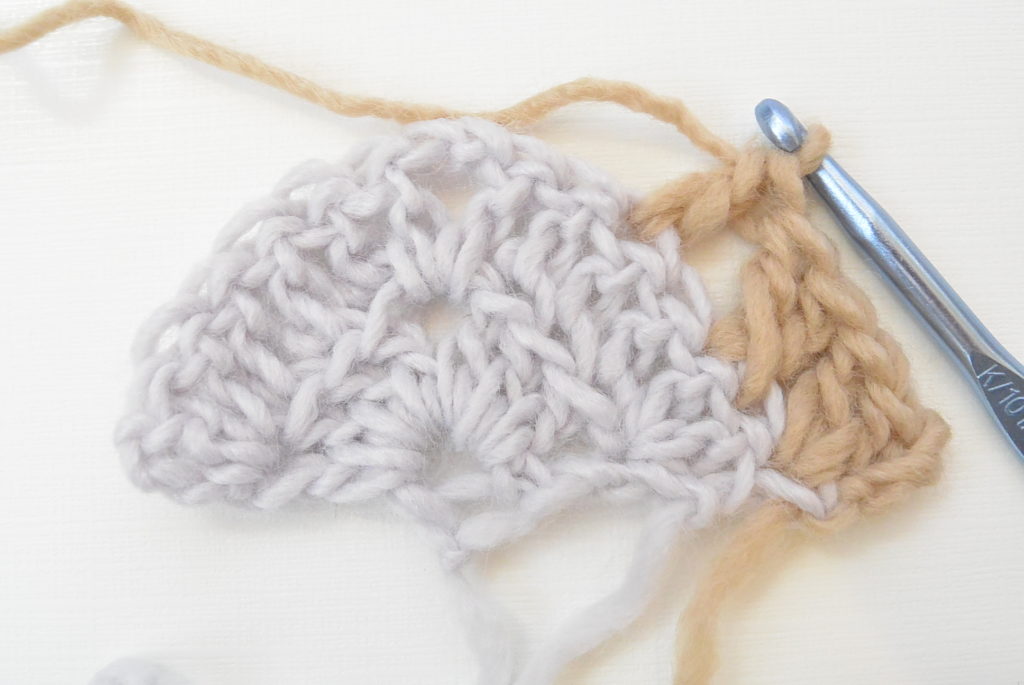
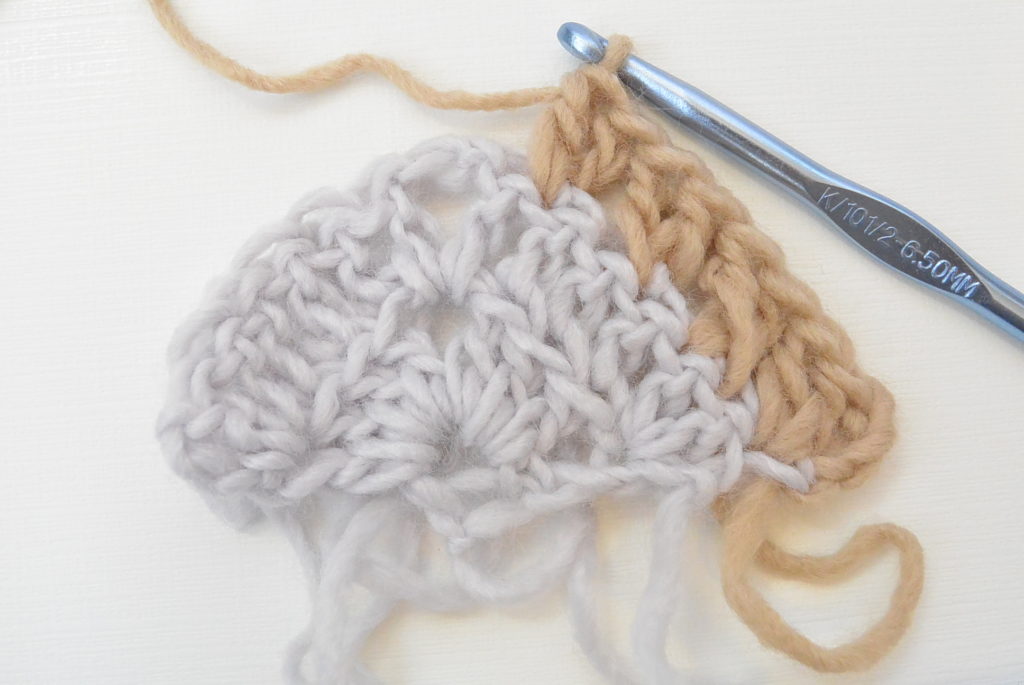
crossed dc (crossed double crochet) – *skip stitch, work dc in next st, work dc in skipped stitch. Repeat from * across.
Note: In much of this pattern, you will be working the crossed double crochet stitch across the row. See picture tutorial below for additional assistance.
Pattern
Using the color Whisper
Ch 5, sl st to join in order to form a ring
Row 1 Ch 3, 3dc in ring, ch2, 4dc (8dc)
Row 2 Ch 3, turn, 2 dc in 1st st, 1 dc flo in each st across until ch2 corner space; work (1dc, ch2, 1dc) in ch2 corner sp, 1 dc flo in each st to final st of row, 3 dc in final st. (14 dc)
Row 3 Ch 3, turn, 2 dc in 1st st, work crossed dc to ch2 corner space; work (1dc, ch2, 1 dc) in ch2 corner sp, work crossed dc to final st of row, 3 dc in final st of row. (20 dc)
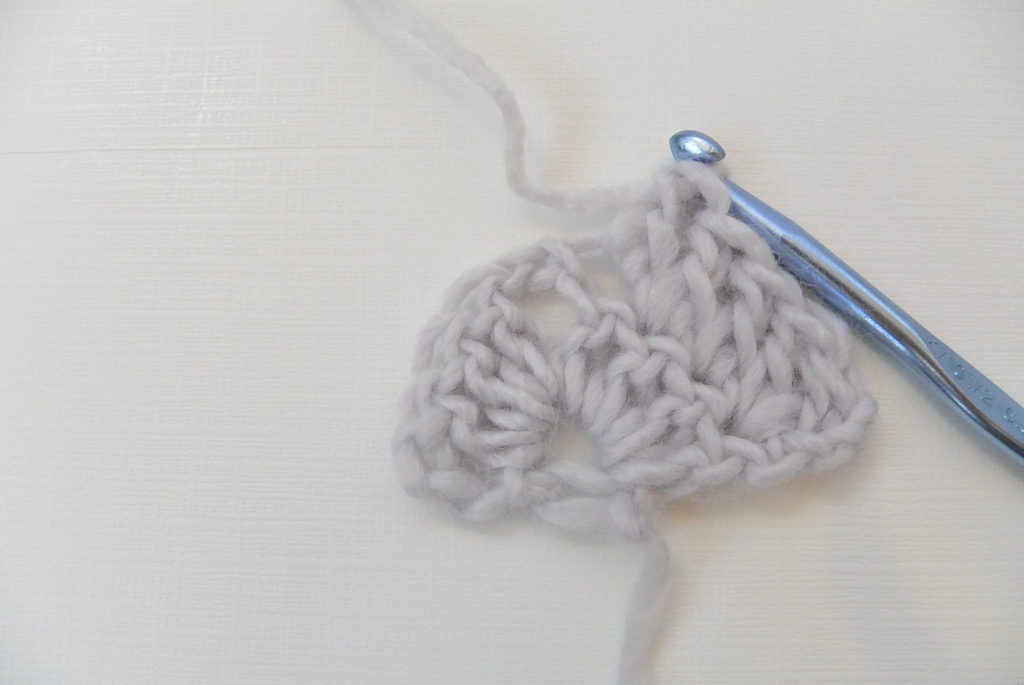
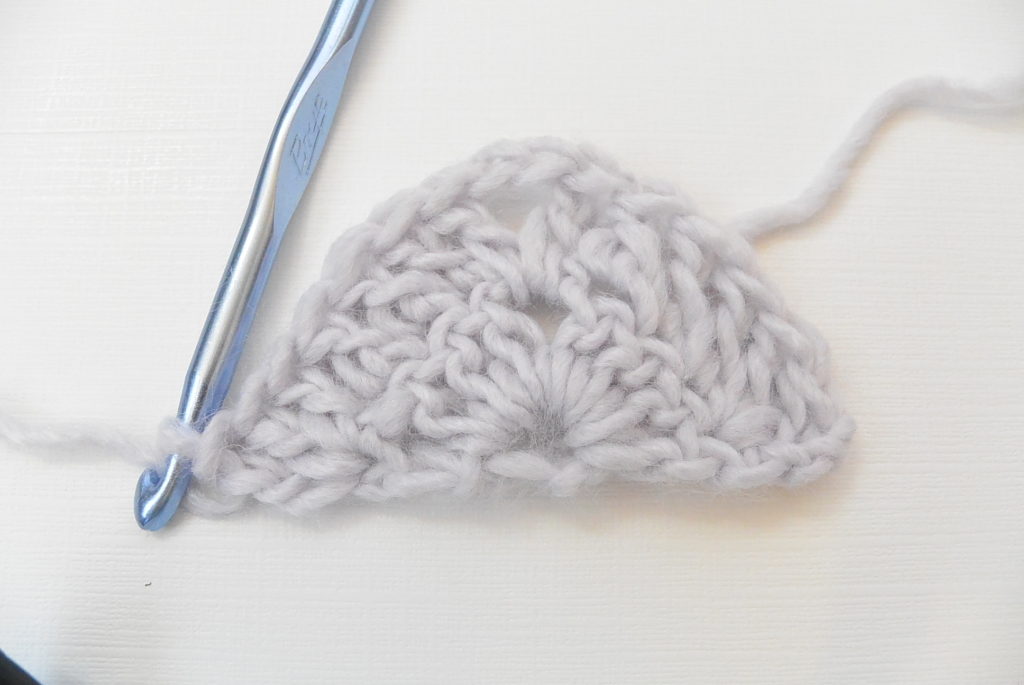
Row 4 Ch 3, turn, 2 dc in 1st st, work crossed dc across row to 2nd st before ch2 corner space, work 1 dc in final stitch before ch2 corner space; work (1dc, ch2, 1dc) in ch2 corner sp, 1 dc in next st, work crossed dc to final st of row, 3 dc in final st. (26 dc) (see photo tutorial below for assistance)
Rows 5 – 10 Repeat rows 3 & 4, 3 times (32, 38, 44, 50, 56, 62 dc)
Row 11 Repeat row 3 (68 dc)
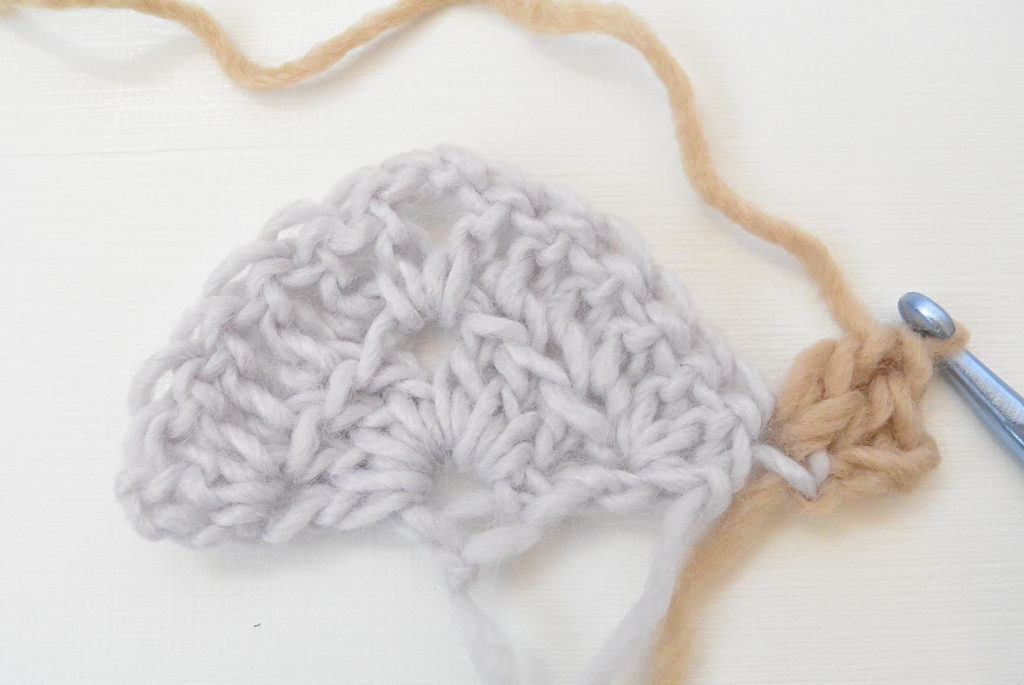
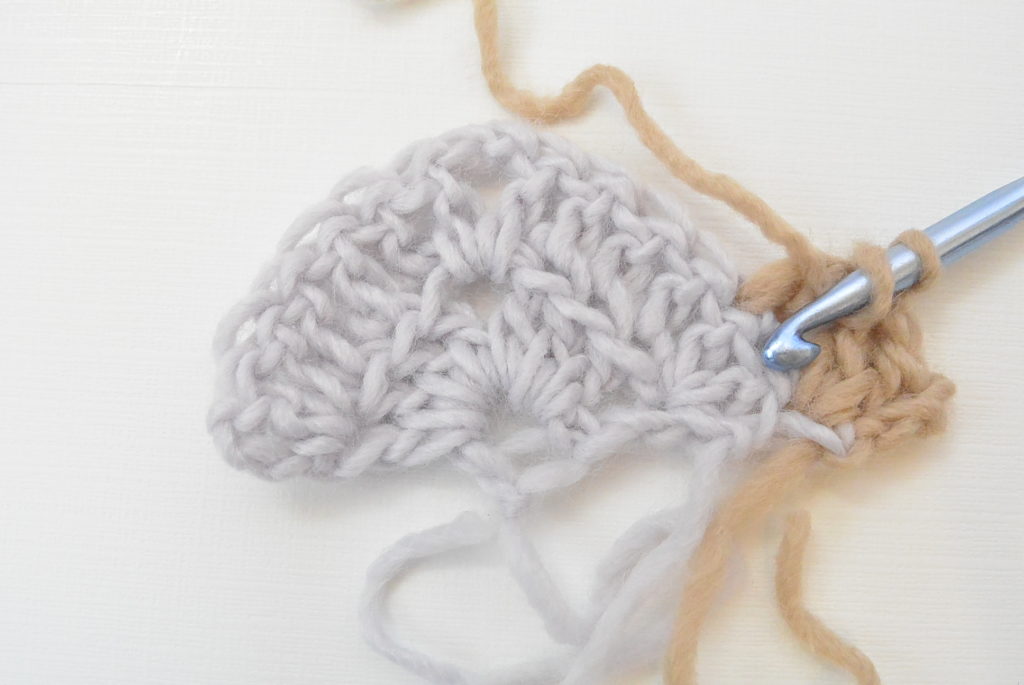
Change to Café Au Lait
Rows 12 – 13 Repeat row 2 (74, 80 dc)
Change to Cream
Row 14 Repeat row 4 (86 dc)
Change to Whisper
Row 15 Repeat row 3 (92 dc)
Row 16 Repeat for 4 (98 dc)
Change to Cream
Row 17 – 19 Repeat row 2 (104, 110, 116 dc)
Change to Café Au Lait
Row 20 Repeat row 4 (122 dc)
Change to Whisper
Rows 21 – 22 Repeat rows 3 & 4 (128, 134 dc)
Row 23 Repeat row 3 (140 dc)
Change to Café Au Lait
Rows 24 – 26 Repeat row 2 (146, 152, 158 dc)
Row 27 Repeat row 3 (164 dc)
Row 28 Repeat row 4 (170 dc)
Change to Cream
Row 29 Repeat row 2 (176 dc)
Row 30 – until end Repeat row 4 followed by row 3 until desired length or until piece is approximately 69” wide (182 dc at row 30)
Tie off and weave in ends. Block as desired.
Adding Optional Fringe:
For each set of fringe, cut 2 – 3 lengths of yarn approximately 18” inches long. Holding lengths of yarn together, fold them in half and place the fold through a stitch along the edge of the wrap. Draw ends through the fold and pull tightly to secure. There are a lot of great tutorials online to show how to make a tassel or fringe from yarn by doing a simple search. Place fringe evenly along edge of wrap.
Optional corner end tassels:
For each tassel, cut several lengths of yarn approximately 22” long. Fold in half and tie with another length of yarn at center. Next, wrap another length of yarn around the upper section and tie tightly with a knot to secure. Weave in ends to your tassel.
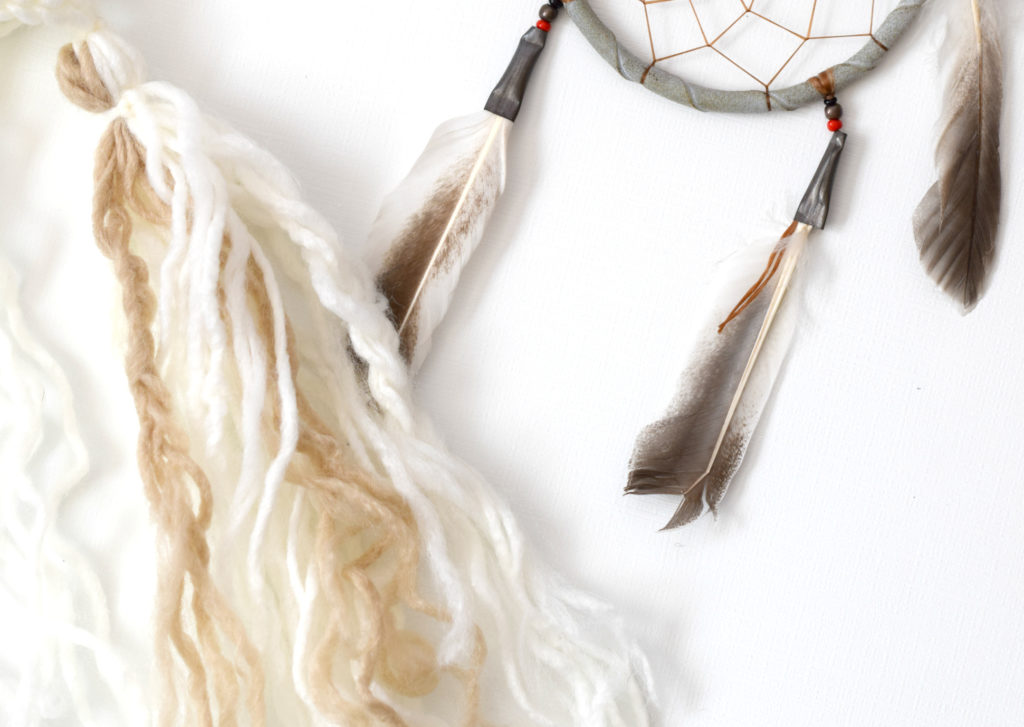
Trim tassels and fringe. You can also achieve a beautiful look by “fluffing” your fringe. Take one end of a piece of yarn from your fringe and pull the yarn apart. Do this with as many or as few pieces as you’d like. You can even add more boho flair by braiding a few strands in your tassels or fringe.
Would you like to see it done through pictures? If you can get these few rows down that you see pictured below, you can do the entire wrap.
Dreamer Wrap Picture Tutorial
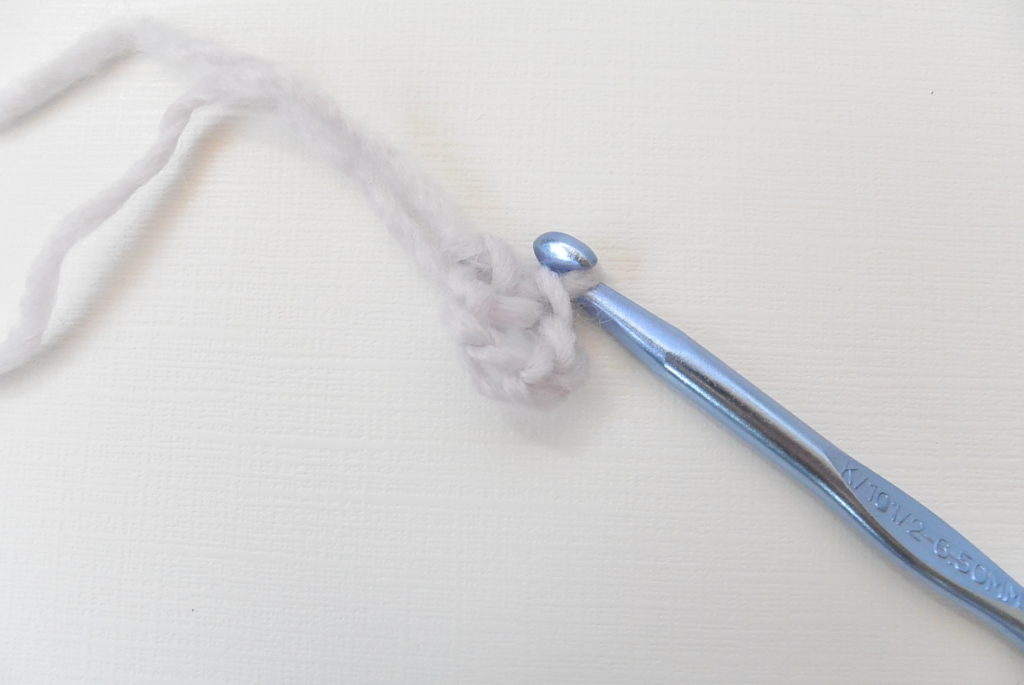
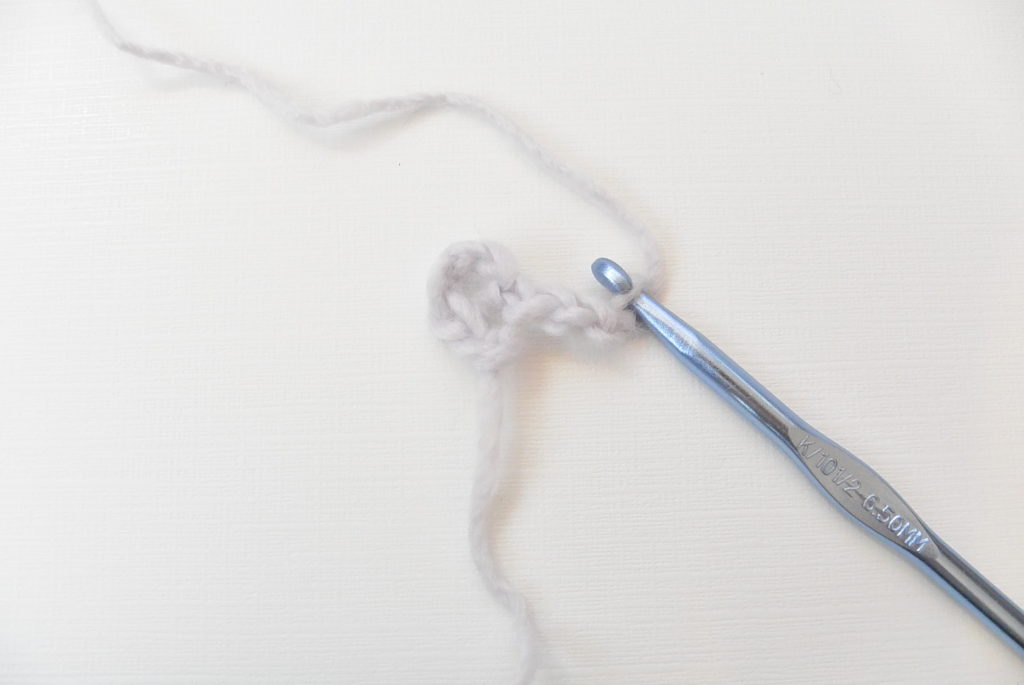
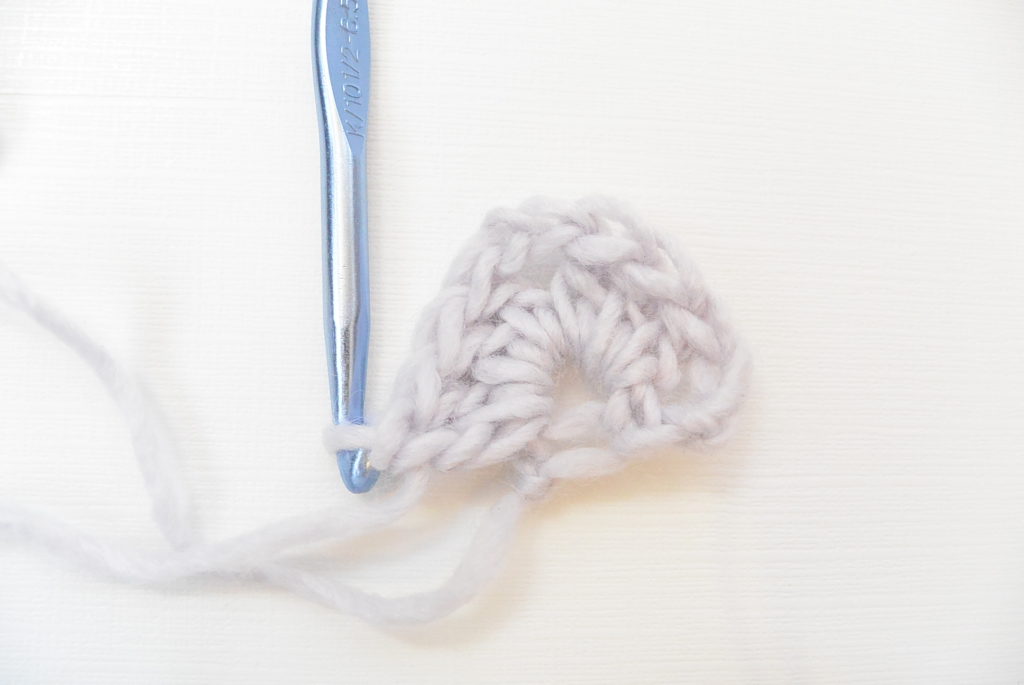
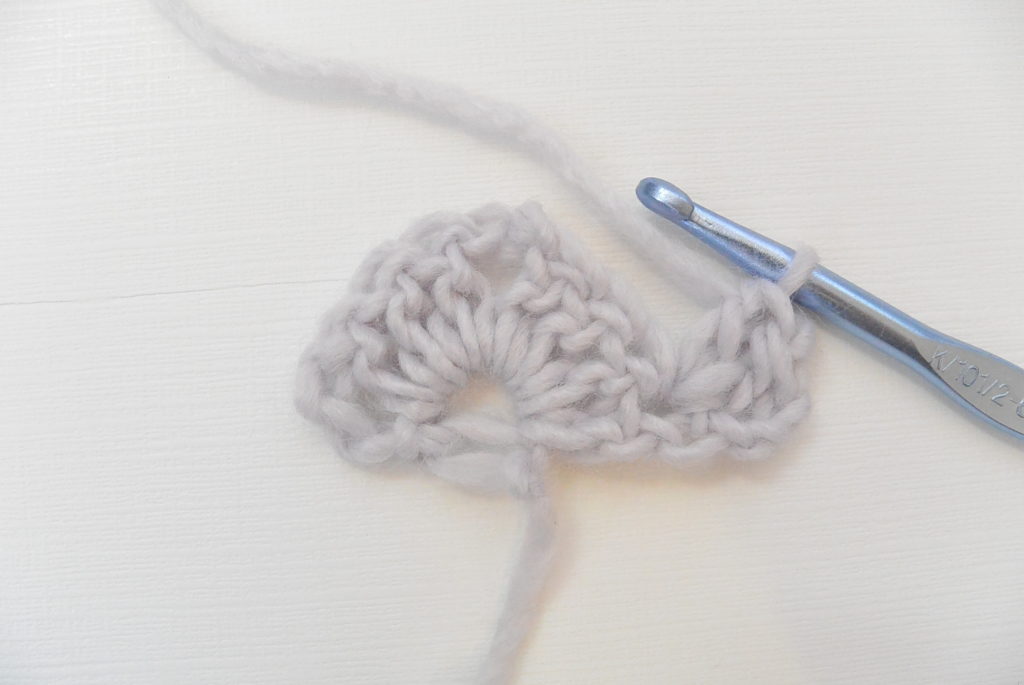
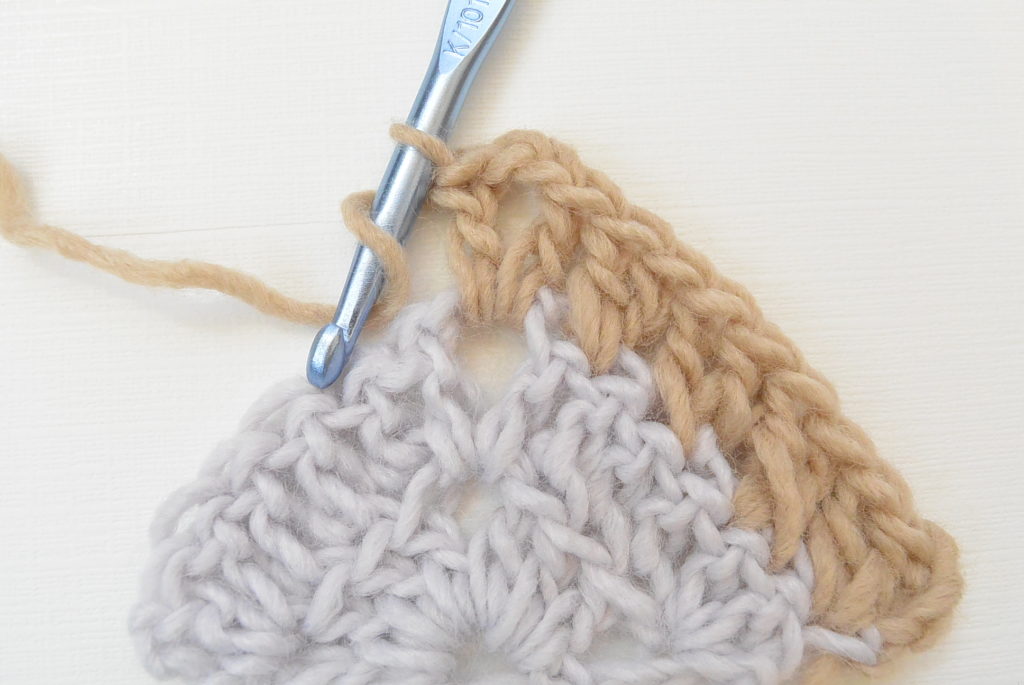
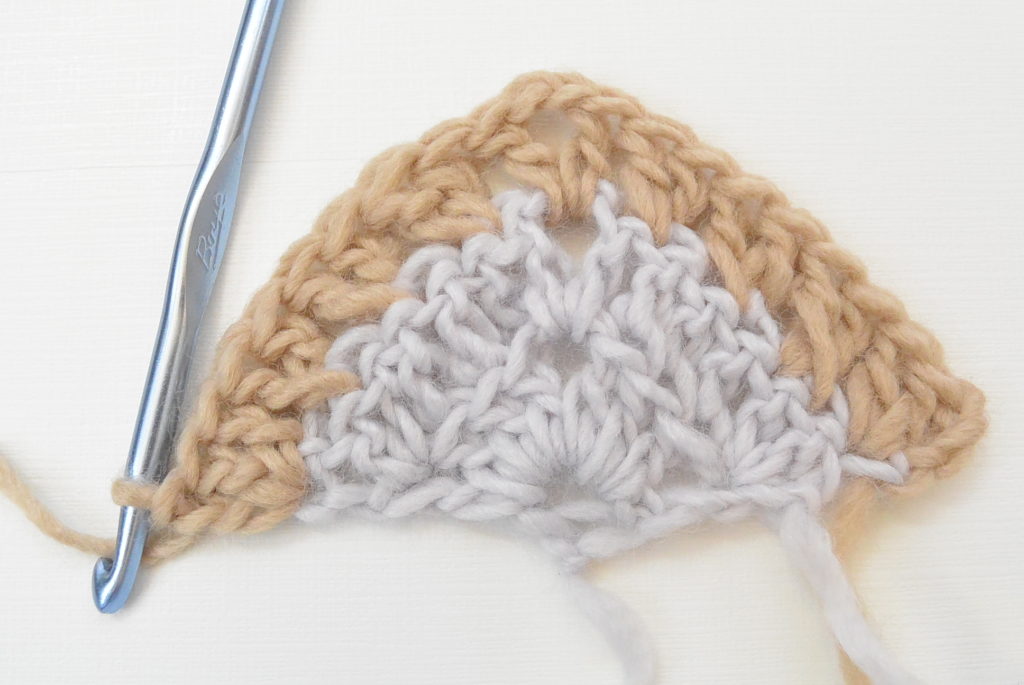
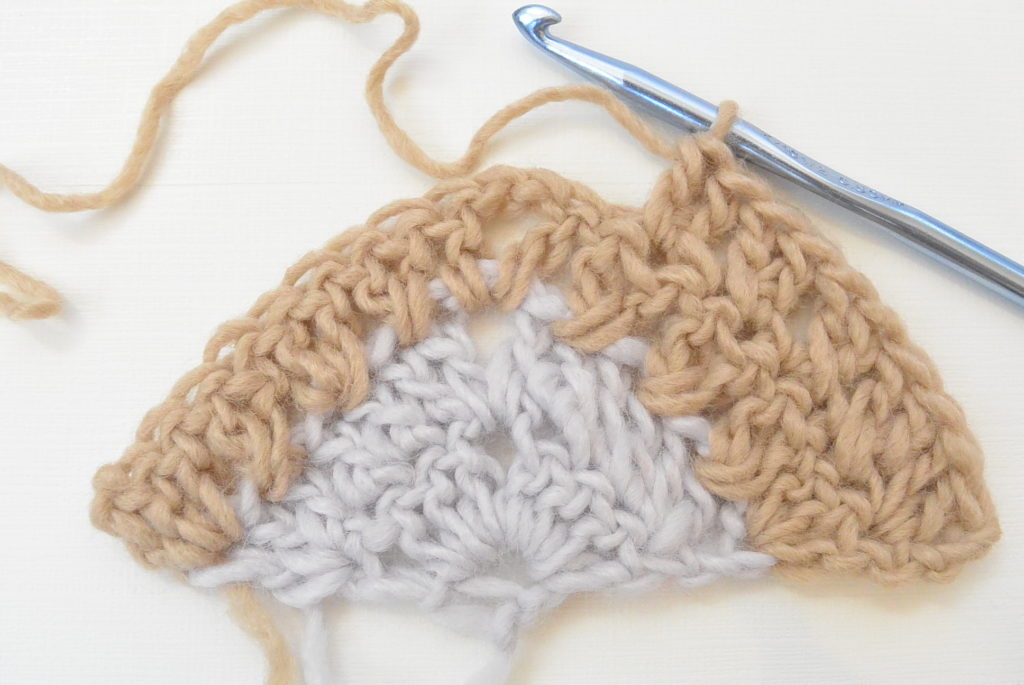
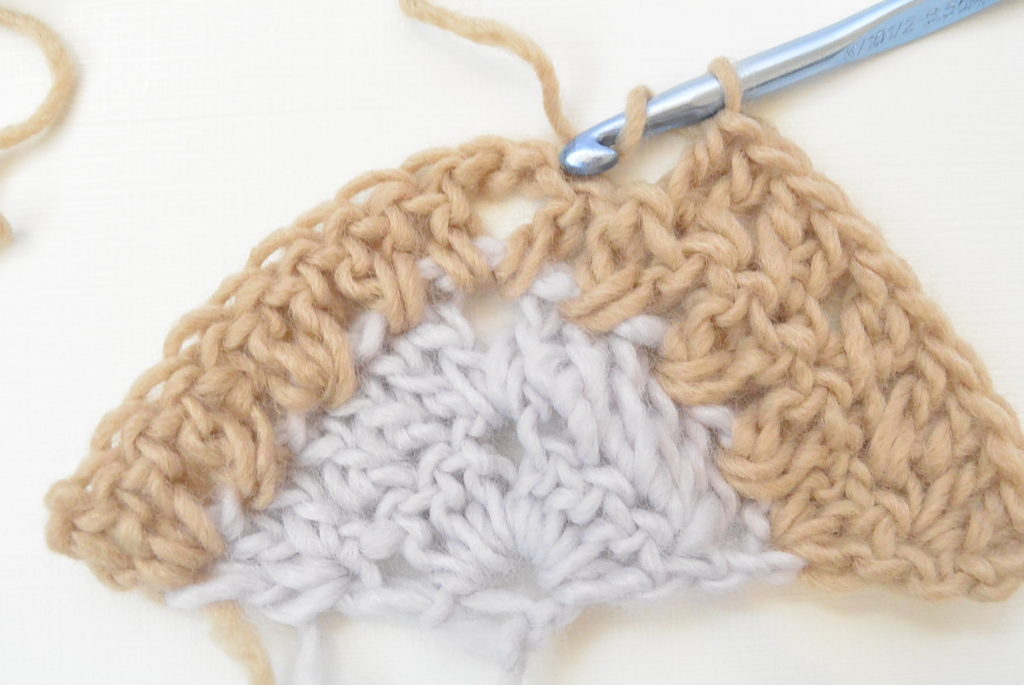
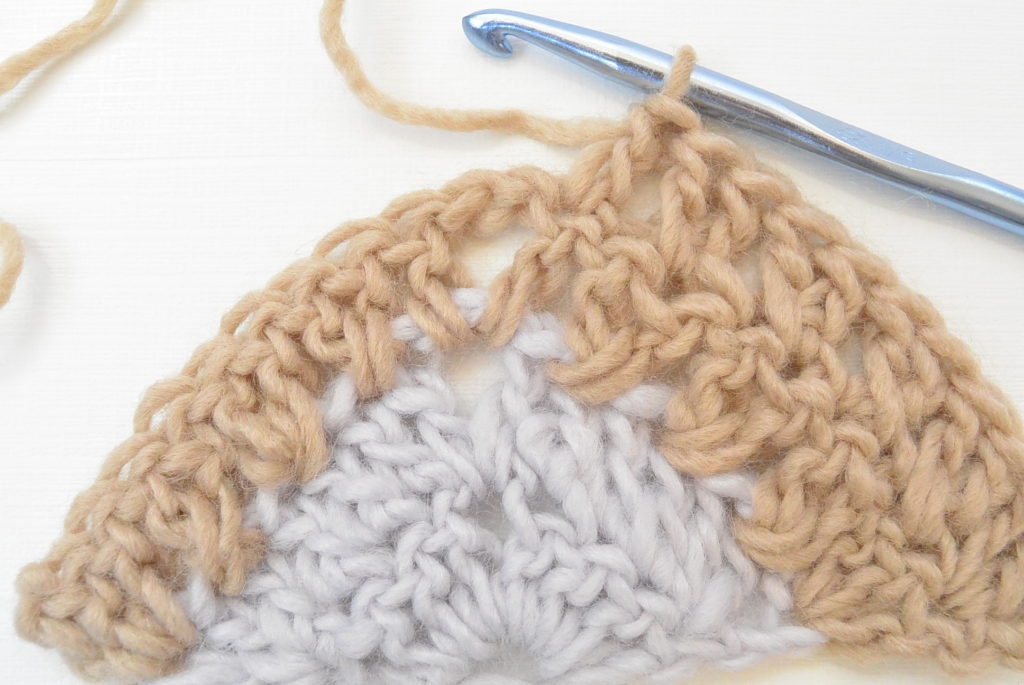
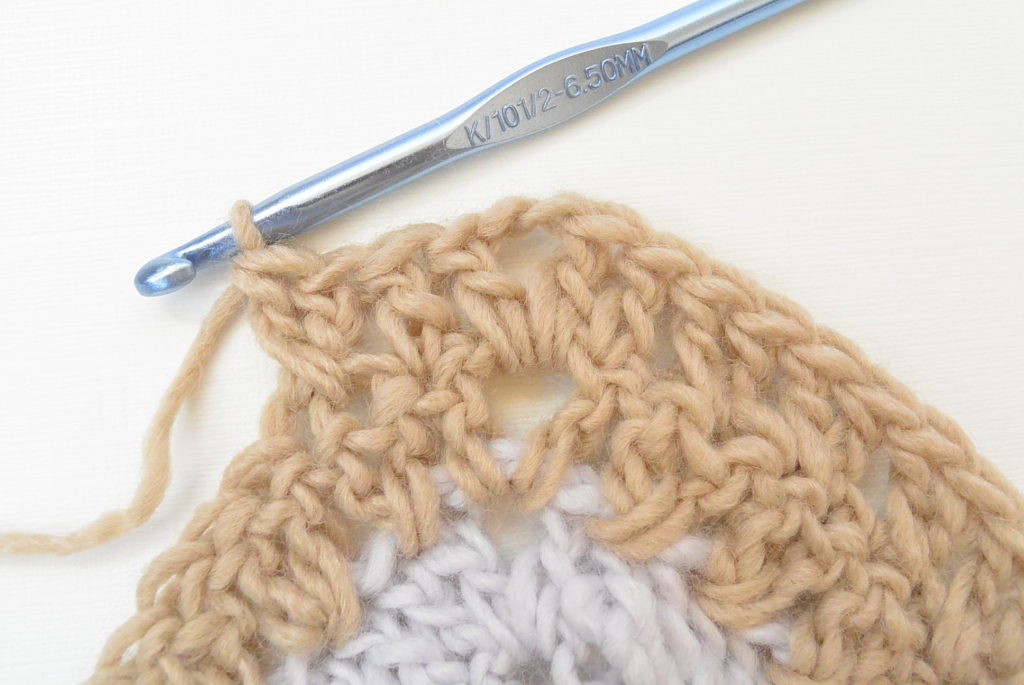
Have you made a triangle shawl before of any sort? If this one seems a little intimidating, you might want to check out the Smoky Mountains Triangle Wrap which is even easier and I do a video tutorial in that blog post.
Hope you enjoyed this and happy dreaming and crocheting my friends!
XO
Jessica
And thank you so much to Lion Brand Yarn for sponsoring this post!
You can also check out the one I made for my daughter here, the Lil’ Dreamer Wrap:
If you liked this, you might also like the Cascading Kimono Cardi HERE

This is so beautiful….I have been waiting all morning for this! I can’t wait to make one for myself and also the Lil’ Dreamer Scarf for my granddaughter, Bella. She earned it after all the “help” she gives me with my yarn lol. Thank you, Jessica, for all of the beautiful work you do
Hi Johanna! I’m so glad that you want to make one (and one for your little granddaughter, Bella). You’re so welcome for the patterns lady! It’s a ton of fun.
This is adorable! I don’t know how to crochet (yet!) but I might convert this to a knit. Love the boho vibe!
I’d love to see it in a knit version. 😉 Thanks for the kind words Tamara!
Absolutely love it. As a fairly novice crocheter but advanced knitter, I would love a knit version of this . If there isn’t one in the works, will just have to force myself to learn a few more crochet skills!
Hi Donna – I don’t have a knit version at this time. So glad you like it though and maybe you can brush up on crochet. 😉
Oh, Jessica, this is amazing! You always outdo yourself. I hope to try this pattern soon!
Nell
Thanks so much Nell!! Means a lot to me! I’m thrilled to see you using my pattern!
OMG it just clicked you’re from Colorado, too! Winter is finally showing up….
You do such amazing work, I am beyond astonished. Just a woman who can do ANYTHING!!!
Beautiful pattern, and I can’t wait to try!! Welcome back!!
Hi Jennifer! Haha! Winter is certainly showing up but where’s the snow?! Thanks for all your sweet words!!
Pretty !!
Can you make a knitting version one 🙂
I’ll keep it in mind! Thanks!
I love this! I am almost done with mine, using blue, rosy pink and cream. The stitch pattern is so beautiful and relaxing to work. I am a little sad I’m close to being done. I think I’ll have to make another one!
Quick question: are you planning on putting this in Ravelry? I looked for it but didn’t see it on there.
I need to put it on Ravelry! Maybe I’ll go do that right now. 😉
So glad that you enjoyed it!
I see it now! Thanks 🙂
This is so beautiful. So much fun to make. Thank you so much for sharing!!
So glad you think so!
Jessica I have a weight # 3 yarn which I really like. Would I be able to use it in place of this yarn without changing the pattern? If not I will get the yarn. Thank you. I love all your patterns. Wish I had found you yeats ago;
Hi Betty!
Thanks so much for the kind words – this yarn is a thick worsted weight 4 in my opinion, so it will be a bit different to use the 3. You can certainly try it and see how you like it, but I’d suggest trying it with a 4. Thanks Betty!
Is it possible to make this wider and longer?
Yes, just continue the same stitch pattern for as long as you’d like!
Hello,
Will it be possible to use this pattern but with lion brand ease wool thick and quick?
Hello,
Will it be possible to use this pattern but with lion brand ease wool thick and quick?
Thanks in advance
Yes but it will be larger and of course look a bit different as well as be heavier.
I think it definitely has a Northern New Mexico vibe. Beautiful.