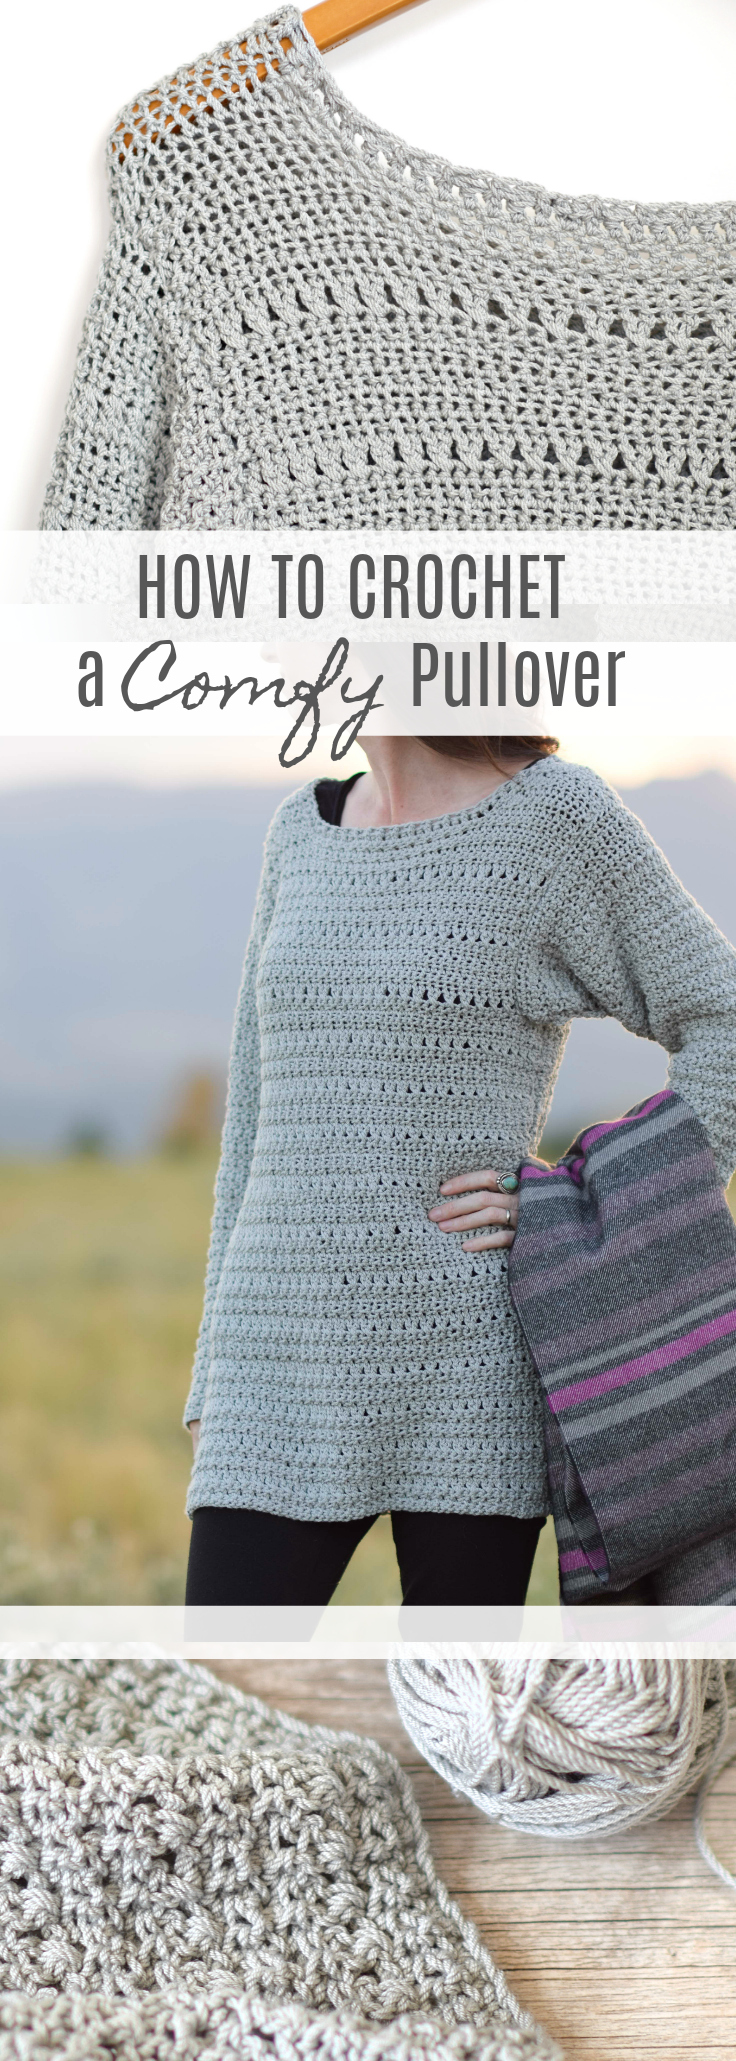
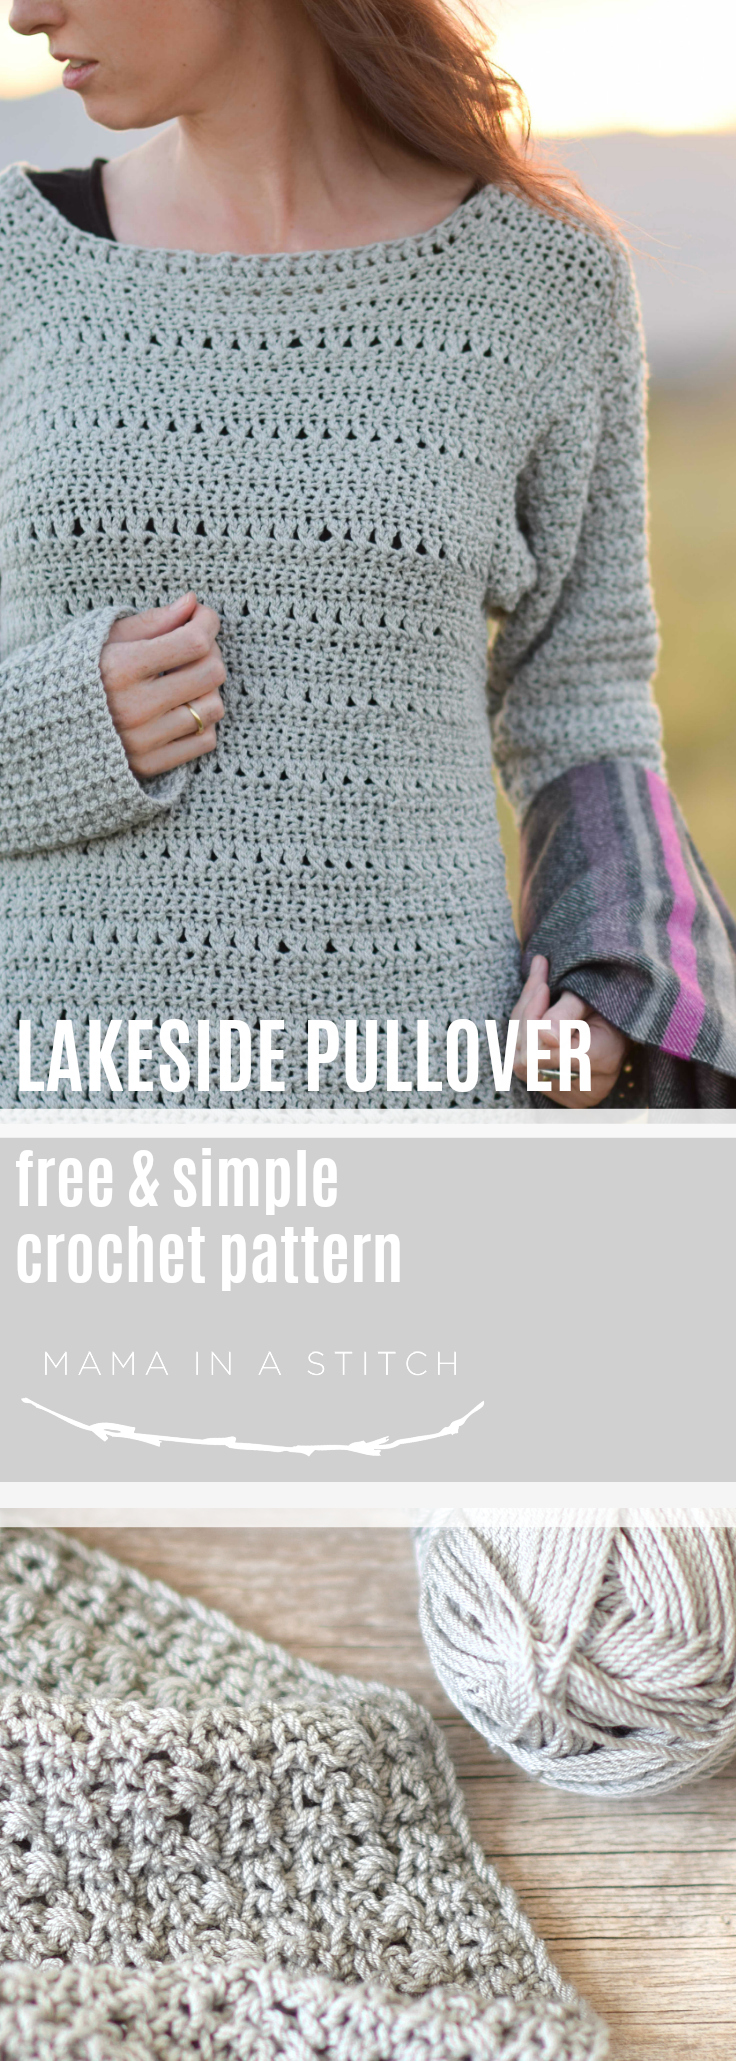
The Lakeside Easy Crocheted Pullover Pattern
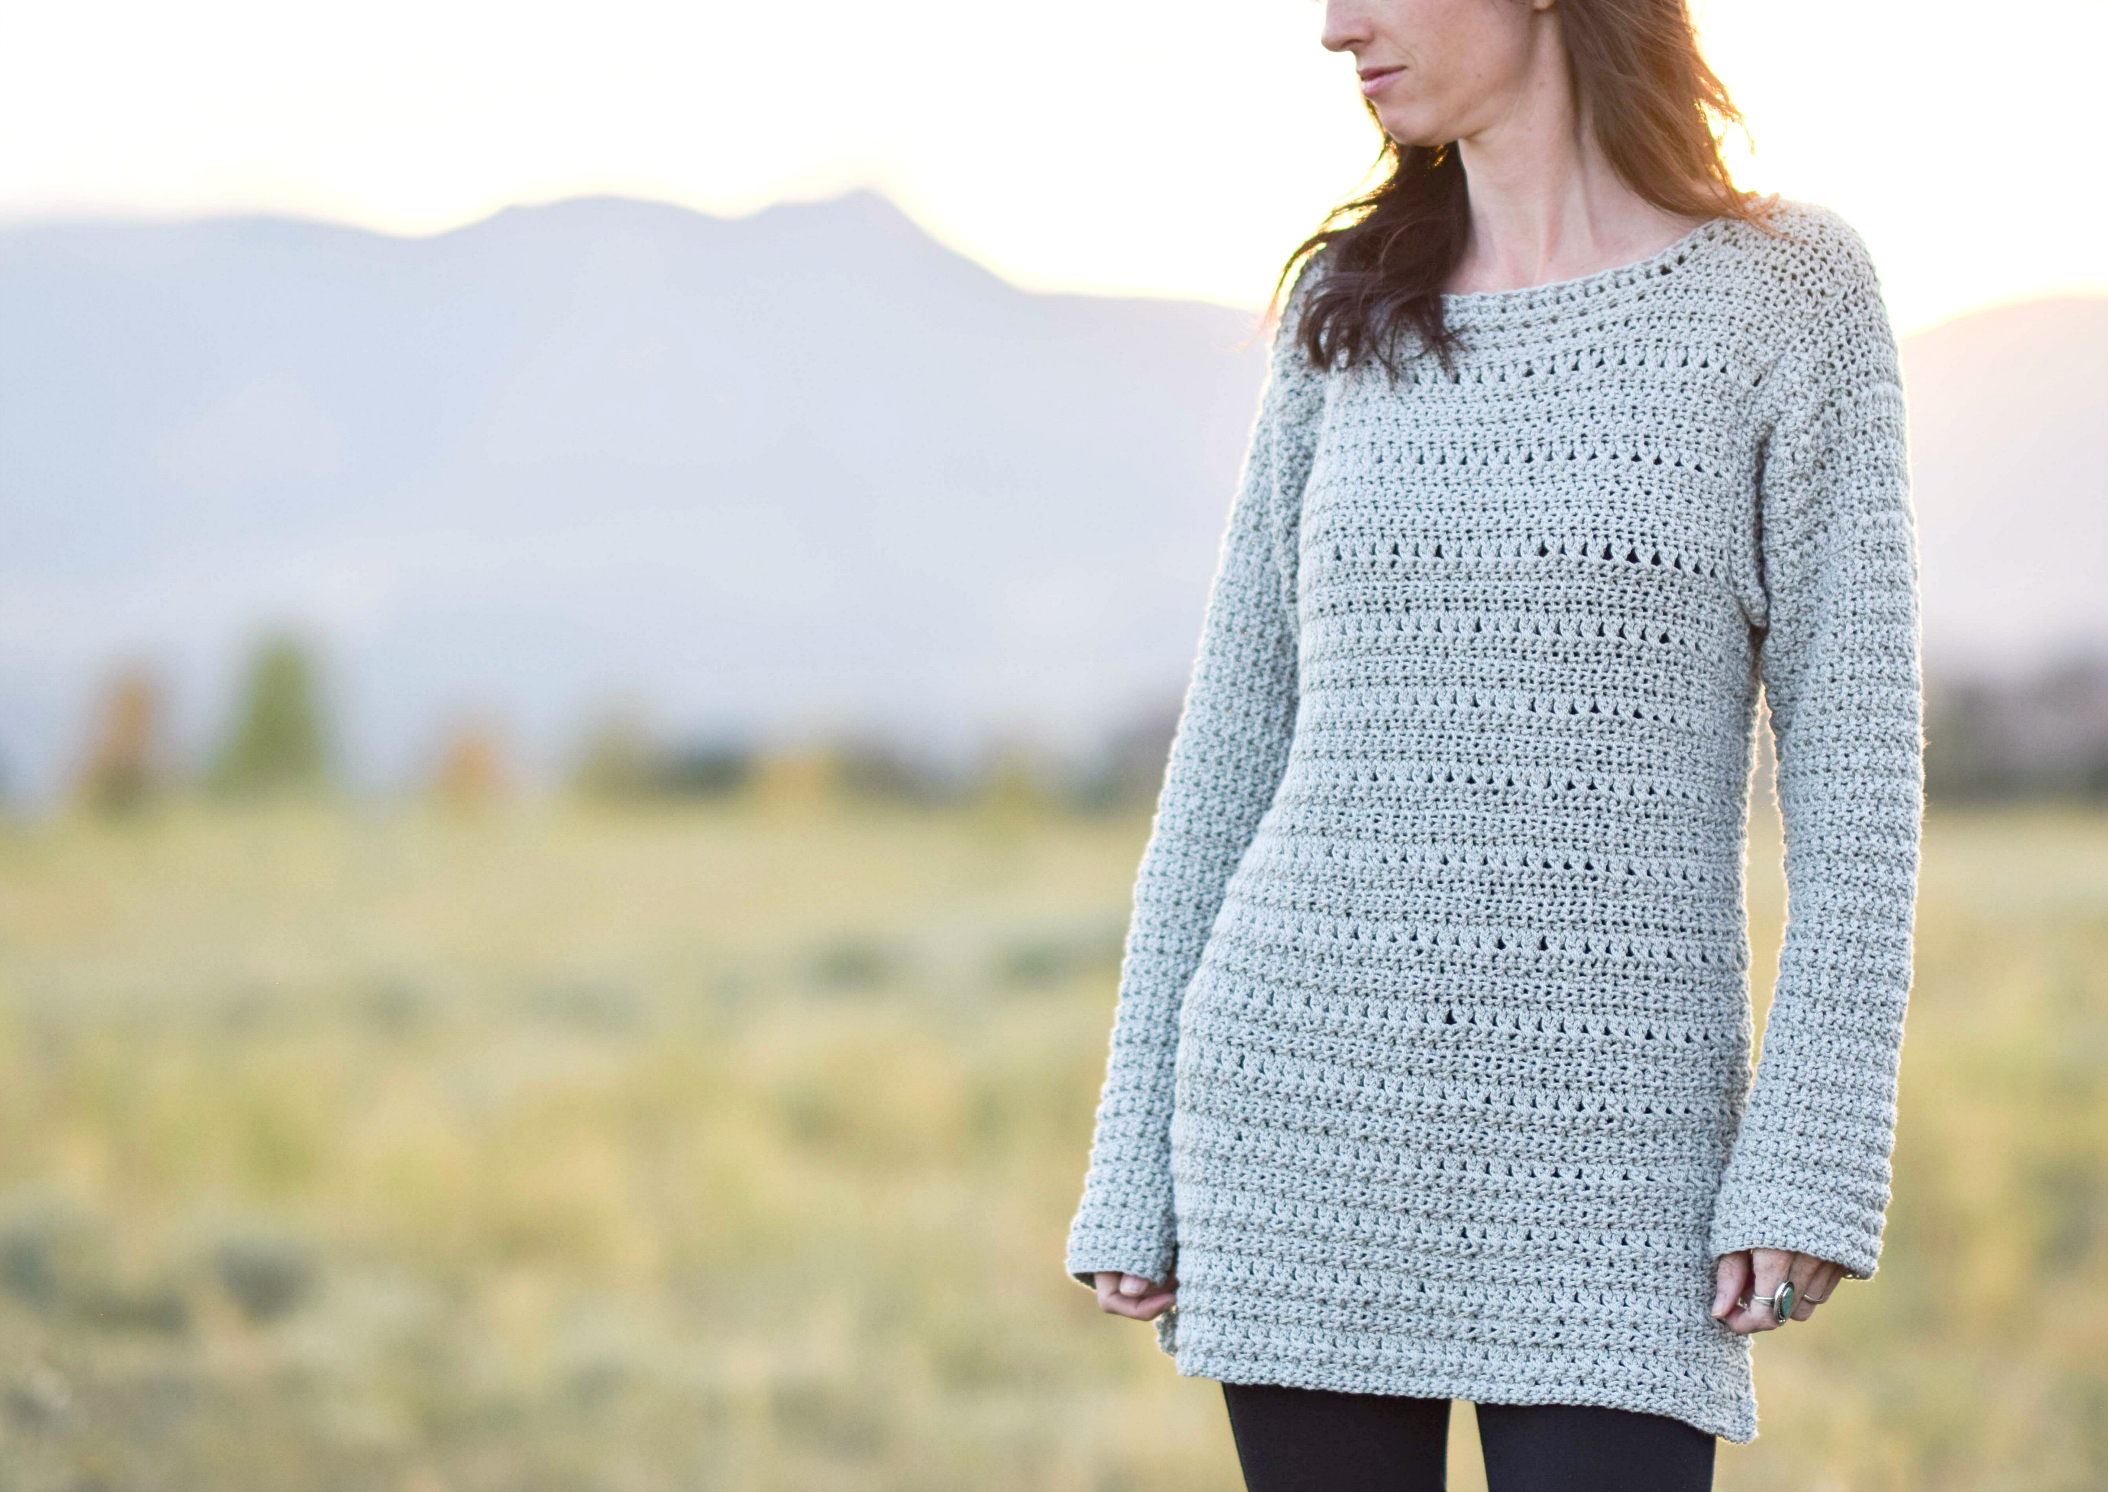
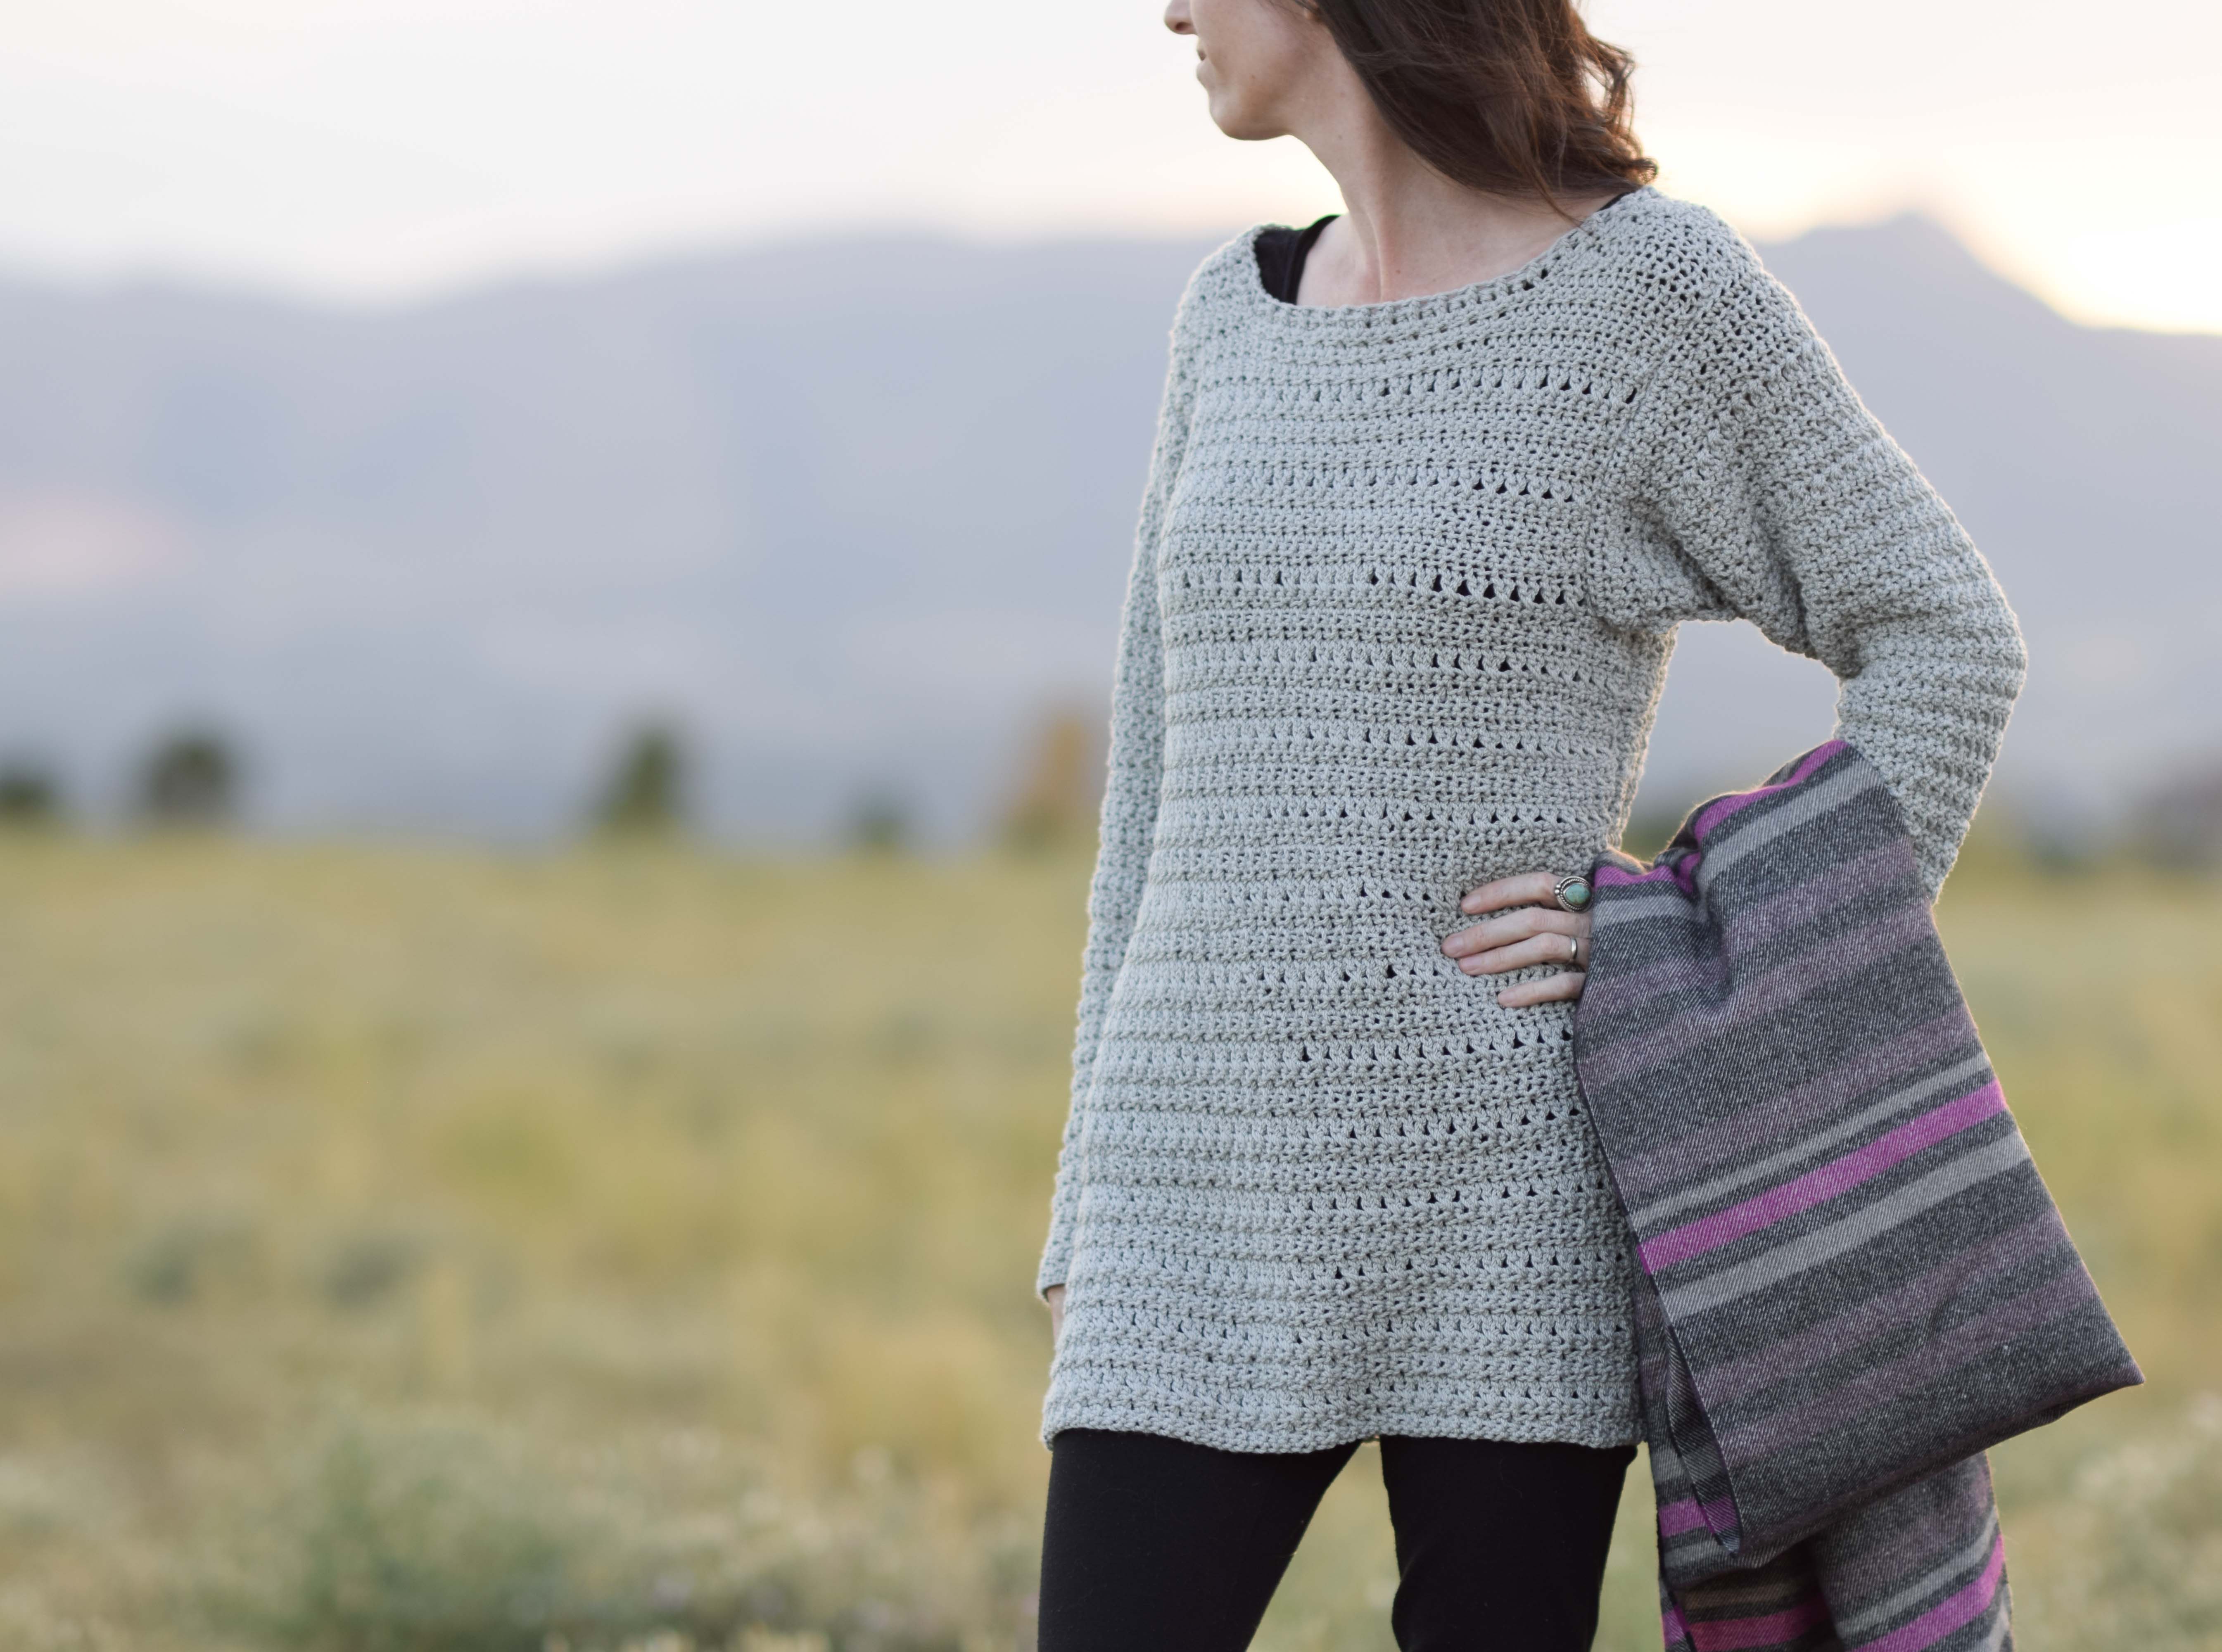
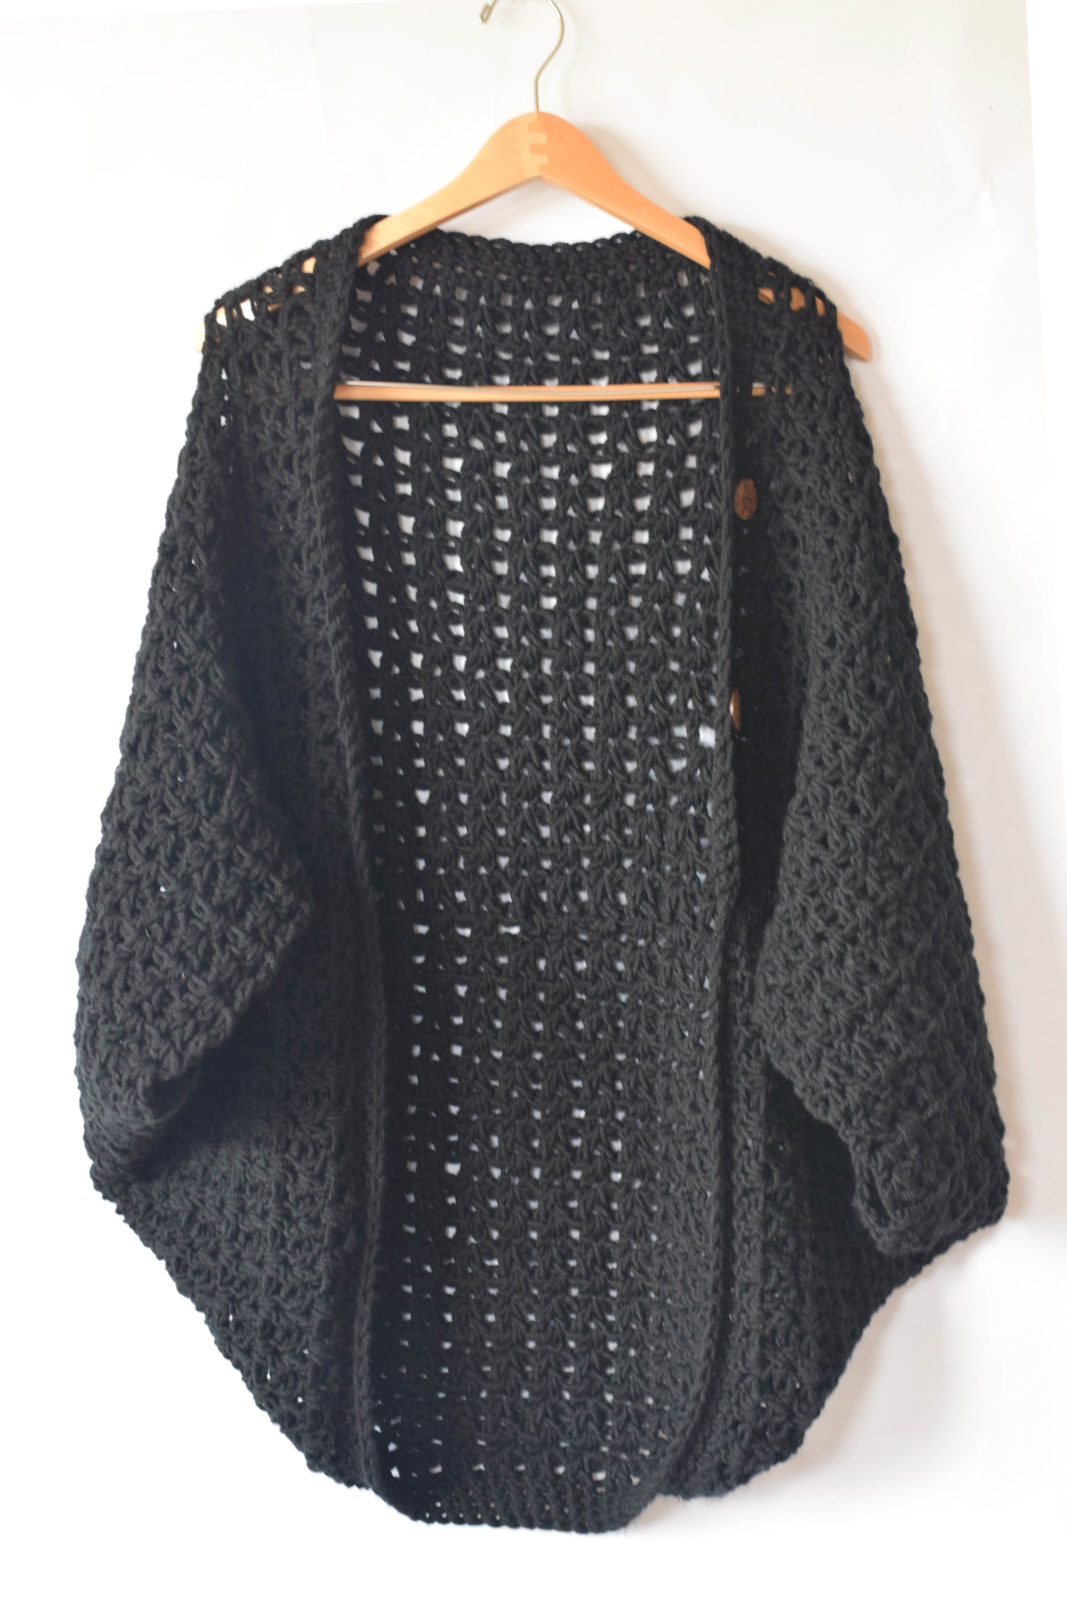
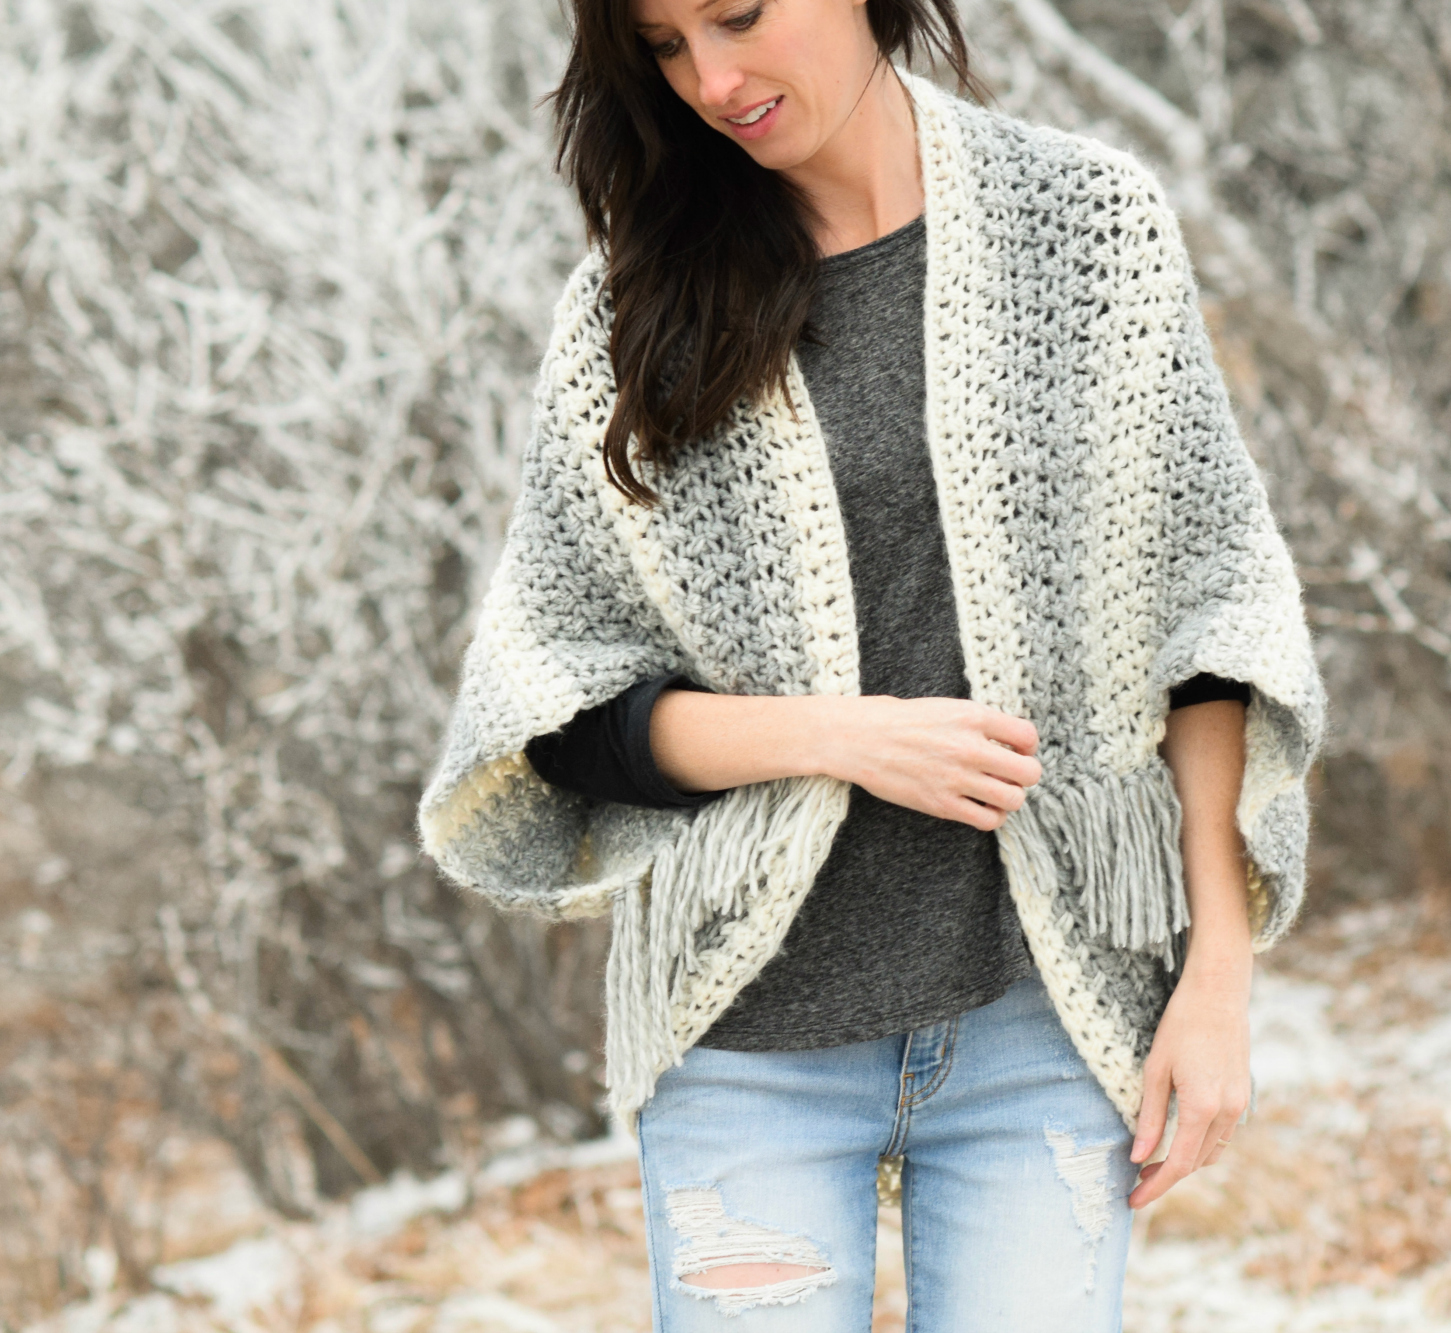
Introducing the Lakeside Crocheted Pullover. 🙂 I’m loving this sweater for lazy days at home, visits to the lake and just to throw over my leggings! This is the first time I’ve written a crochet pattern for a lightly shaped sweater using worsted weight yarn. You might remember a tutorial on how to make a knit-like pullover (here), but there was only slight shaping in the sleeves. Anyway, I love making crocheted and knit tops but have largely stayed away from shaping. Why? Because it means I have to do more counting and more paying attention. Mama likes to relax with my hobby rather than count all day – hehe. However, to get the look that I wanted for this top there was no doubt shaping was going to happen. And guess what – it’s actually enjoyable! (Not ready to try shaping quite yet? Check out this easy chunky blanket sweater and this black one too!)
If you’re going to make a shaped sweater, it really doesn’t get any easier than this! I’ve included the pattern, a diagram and photos as well as helpful links to stitch tutorials throughout this post. Read on. 🙂 And as usual, the ad-free printable PDF can be found in my Etsy shop HERE, you can see the free pattern below, or you may choose to purchase the kit from Lion Brand Yarn HERE. Love the color options!
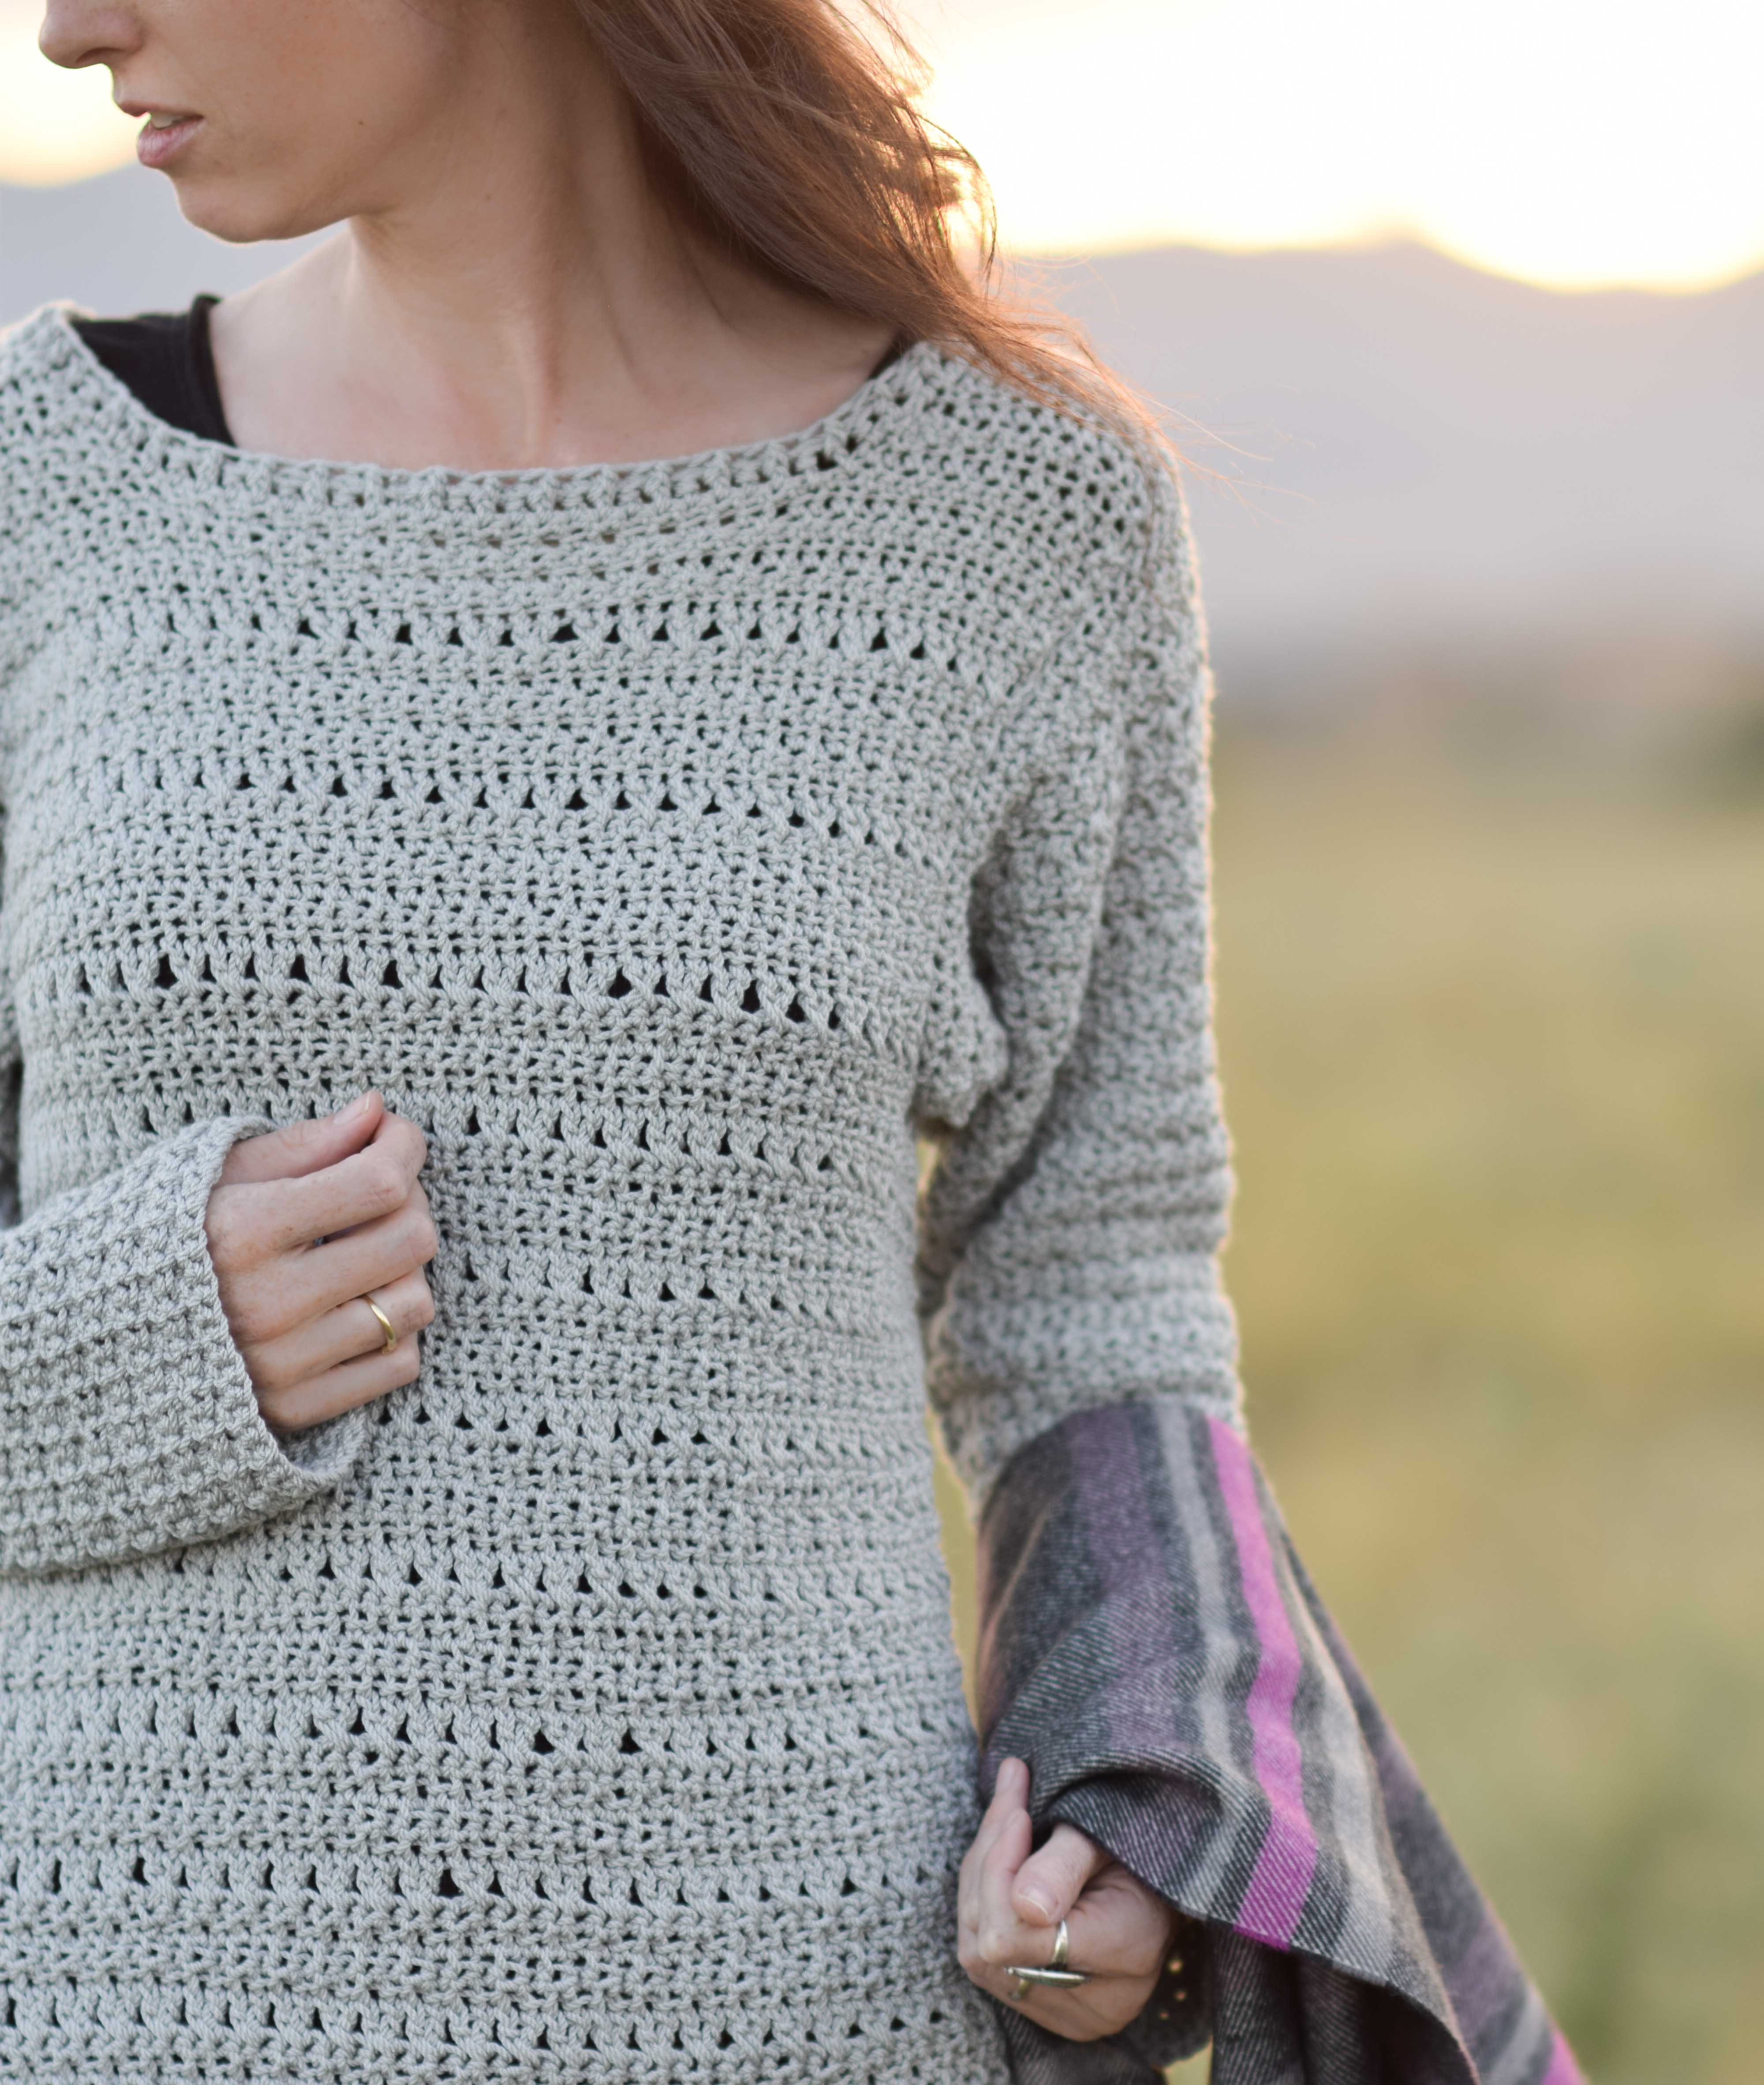
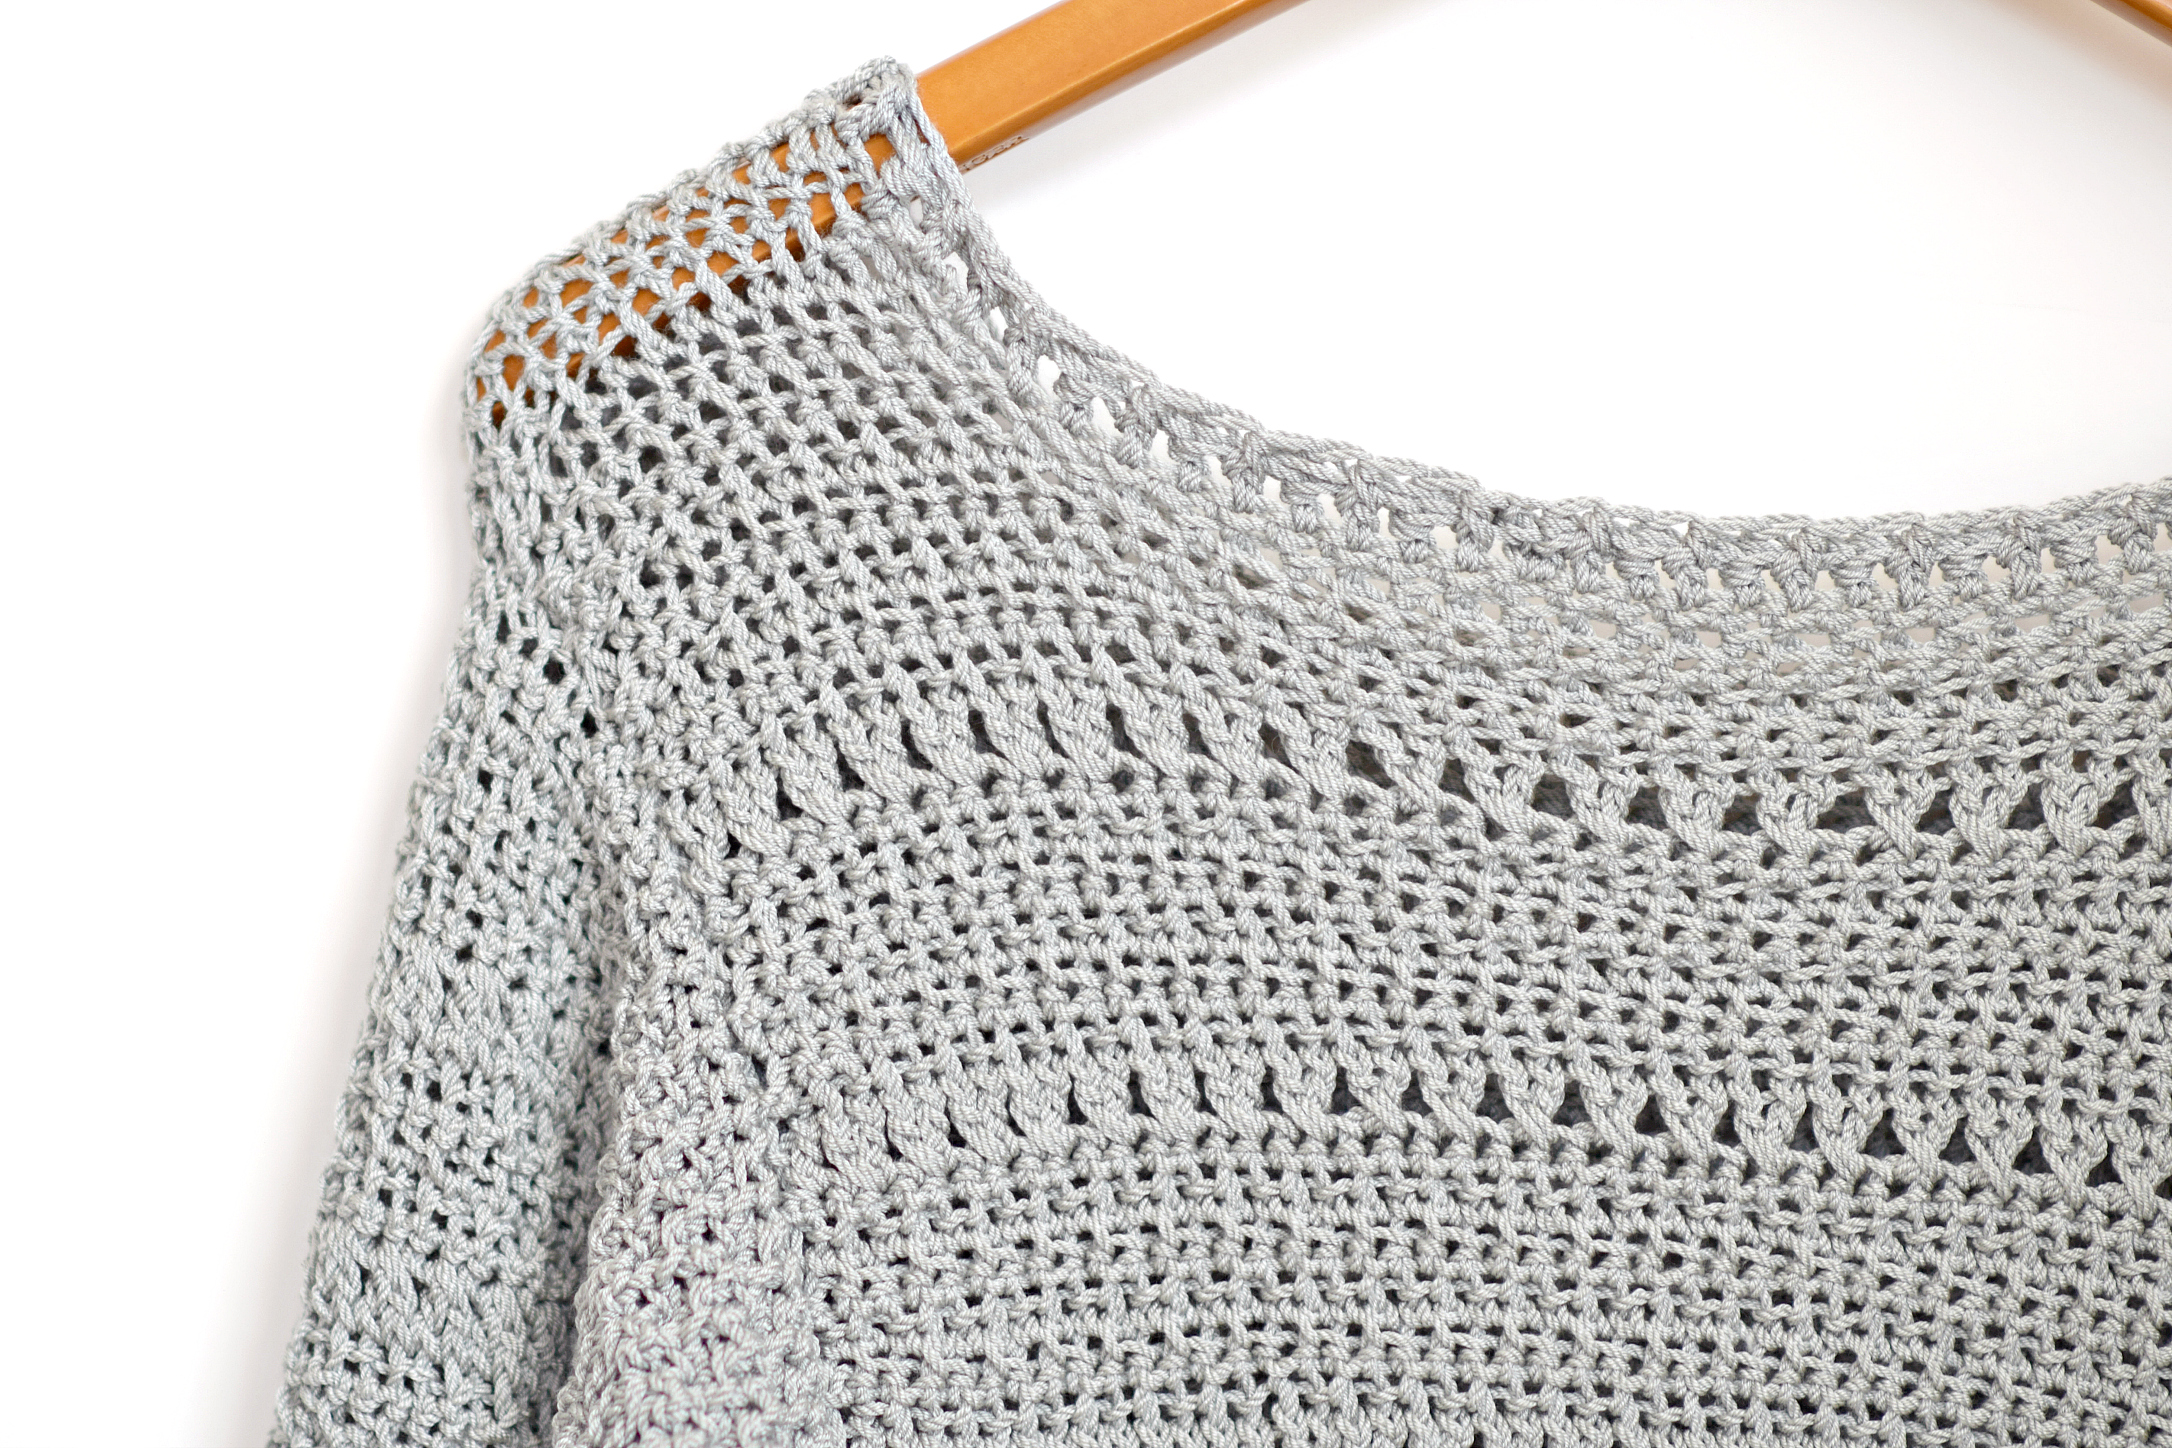
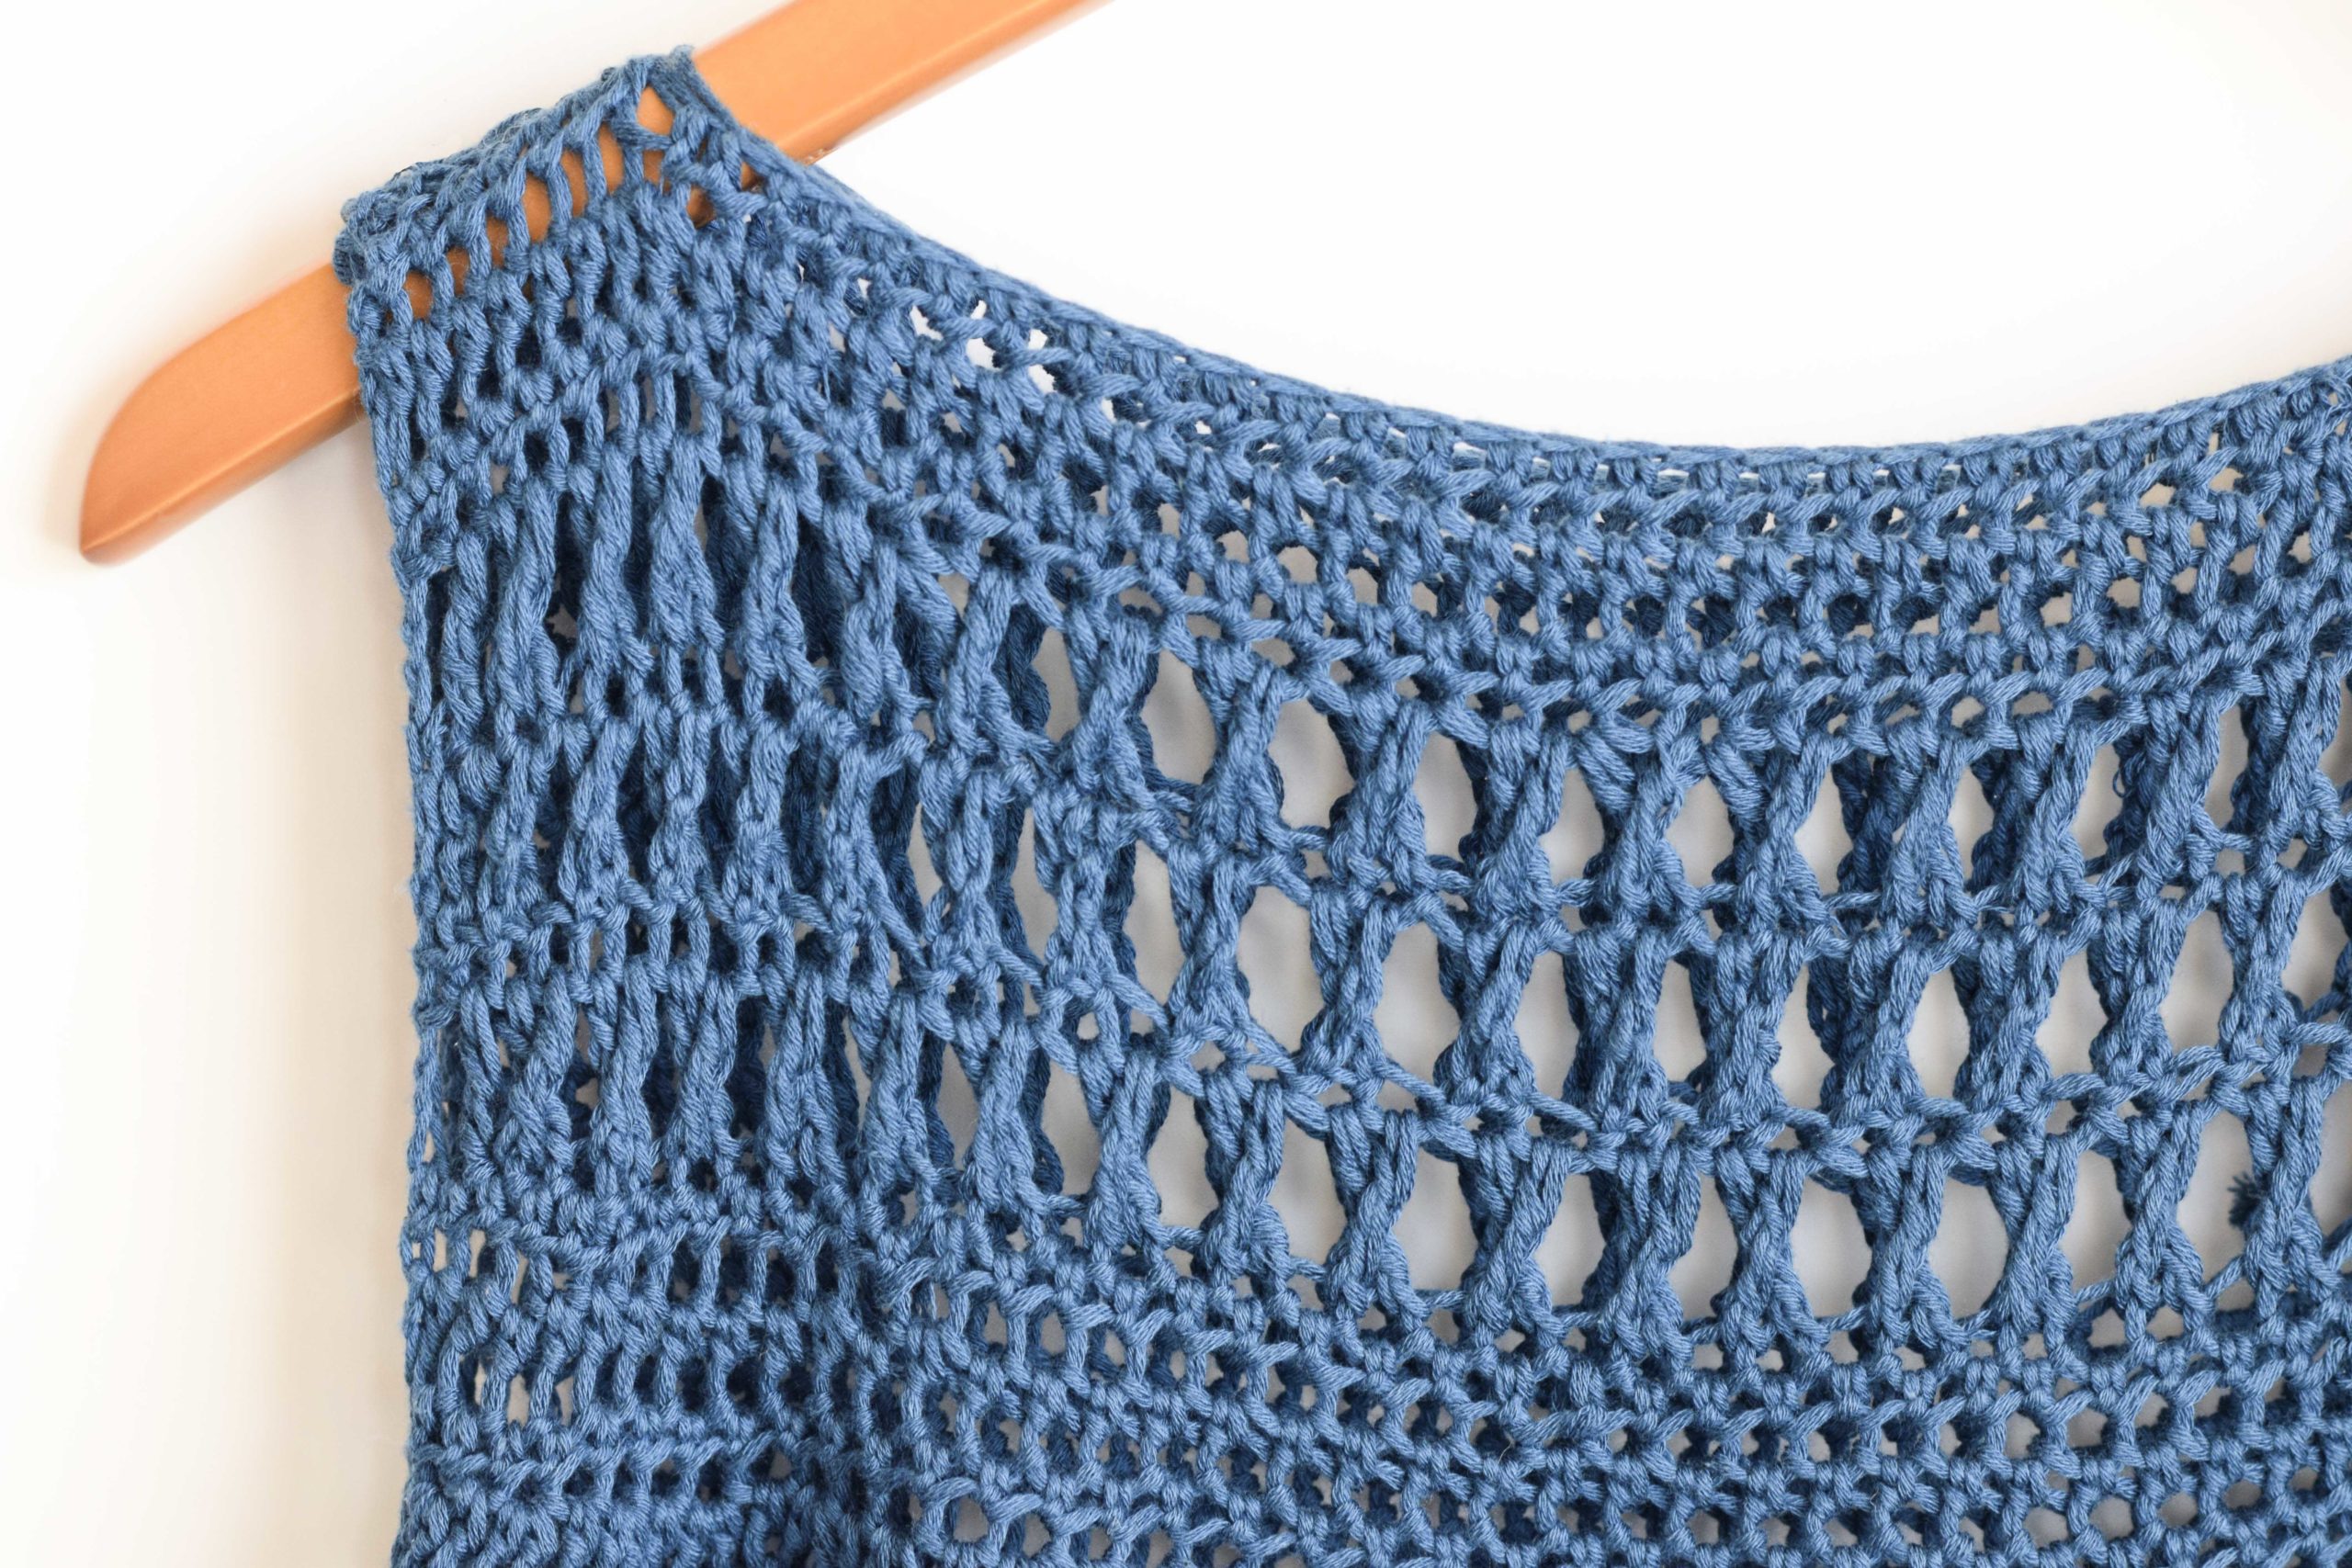
Above: I love how the crossed double crochet rows create the look of pretty eyelets without the burden of counting. Yay!
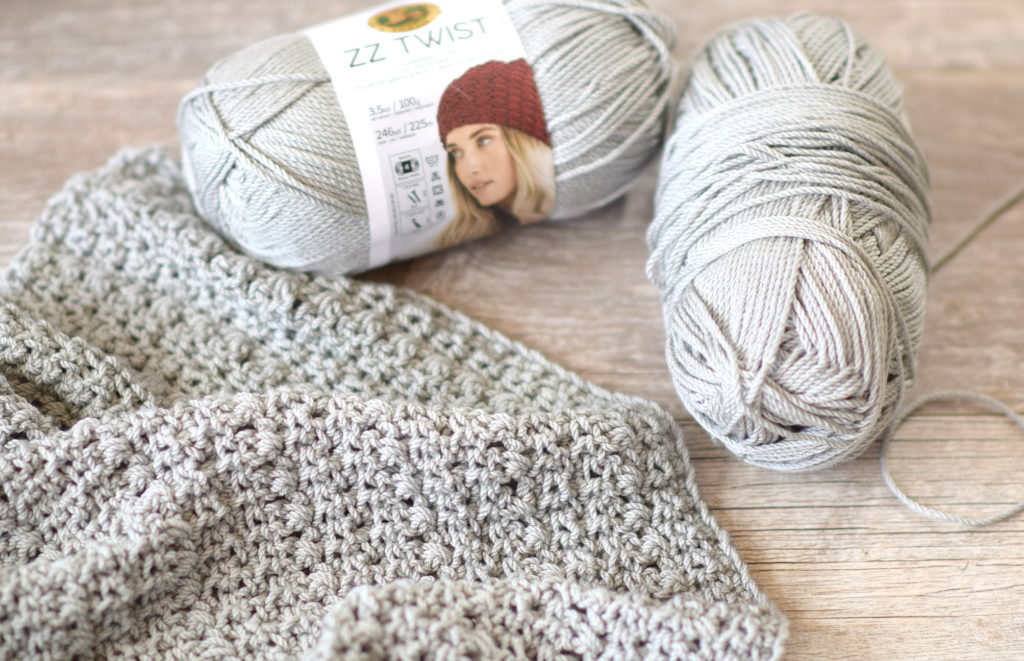
Below: The ZZ Twist yarn is super silky. You can see all of the colors available here
Because this sweater is made with worsted weight yarn, it’s warm but not overly hot. The drape is really nice as the nature of the yarn is silky and it has lovely stitch definition while remaining “relaxed”. The fabric is bouncy and stretchy. 🙂 While I’d say this is an easy pullover, it’s definitely not for a brand new crocheter. It takes time to make and could get a bit overwhelming for a newbie. I tried my best to make the pattern user friendly and simple as possible. It’s a forgiving pattern in my opinion as adjustments can be made by someone with experience if needed for your specific shape. Small mistakes likely will go unnoticed and it’s written in a minimalist fashion to keep things simple. Feel free to make this your own by making a smaller neckline or adjusting the sleeves, or even by adding cuffs!
How Do I Crochet This Sweater? (in people words)
scroll down for the pattern
I’m going to give you a quick summary in people words rather than strict crochet pattern terms on how to make this sweater. Then scroll down to see the specific pattern below!
Here’s what you will do to make this simple sweater. You’re going to start with a chain and will crochet from the bottom up. Using alternate single crochet and crossed double crochet stitches, you’ll make the textured fabric. This is the first time alternate single crochet has been used in one of my projects and I’m in love! It’s so easy and makes a great alternative to the look of regular single crochet. (You can see a tutorial from New Stitch A Day here) Crossed double crochet is simple too as it entails skipping a stitch, making a double crochet, then going back to the skipped stitch to make another double crochet (see a crossed double crochet tutorial here). You’ll be making a basic rectangle at this point using these two stitch patterns. Yay!
Next, you will shape the arm openings. “Shaping”, in this case, means that you will be making a few slip stitches inward on either side. That’s it! Then continue the stitch pattern until you get to the neck. At that point, you will work some simple decreases to shape a lovely neckline. You will crochet two panels just like this as one is for the front and one is for the back.
Lastly, you’ll crochet the sleeves. You’ll make a chain that will be the long edge of the sleeve and work the pattern. Decreases happen at certain rows as you follow the pattern. And finally, seam the panels and sleeves – voila!
OH! And one very important part of sweater making is to ensure that you are crocheting with the correct gauge!!! Your sweater can turn out drastically smaller or larger than intended if you crochet tighter or looser than what’s indicated as the gauge for the pattern. Please note that I like to crochet loosely, so if you are a tight crocheter this is especially important to check before you begin. You can always go up or down a hook size to get your gauge just right.
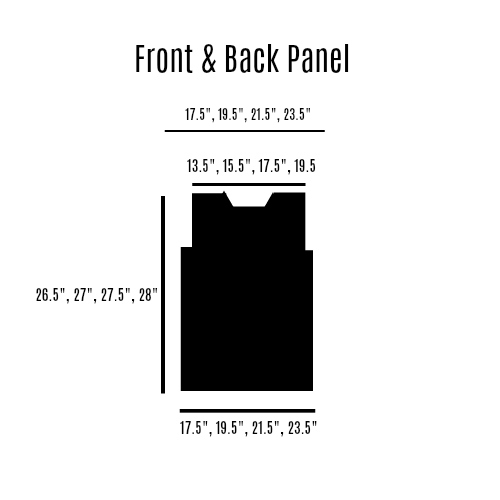
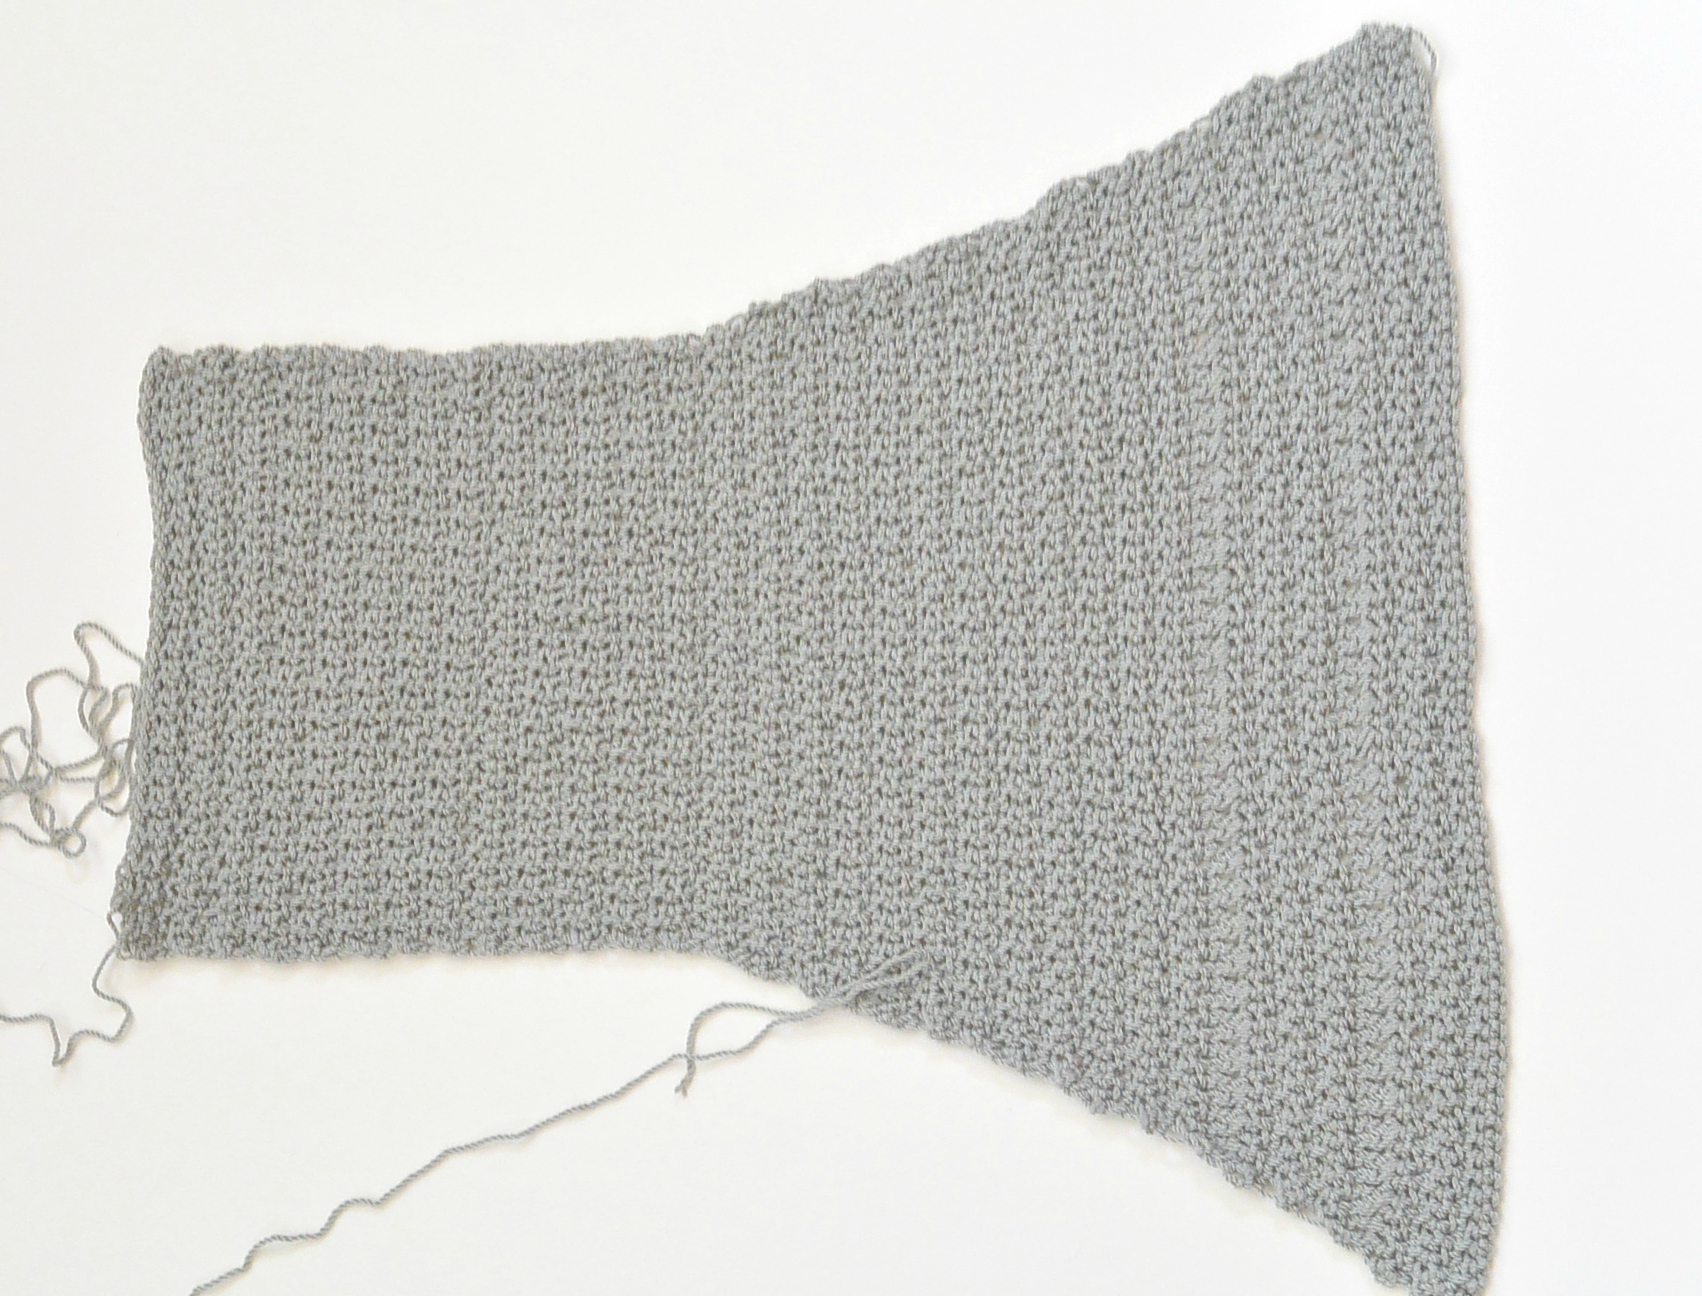
Below: You will crochet two panels in this simple shape.
Below: Crocheted sleeve that will be folded and seamed
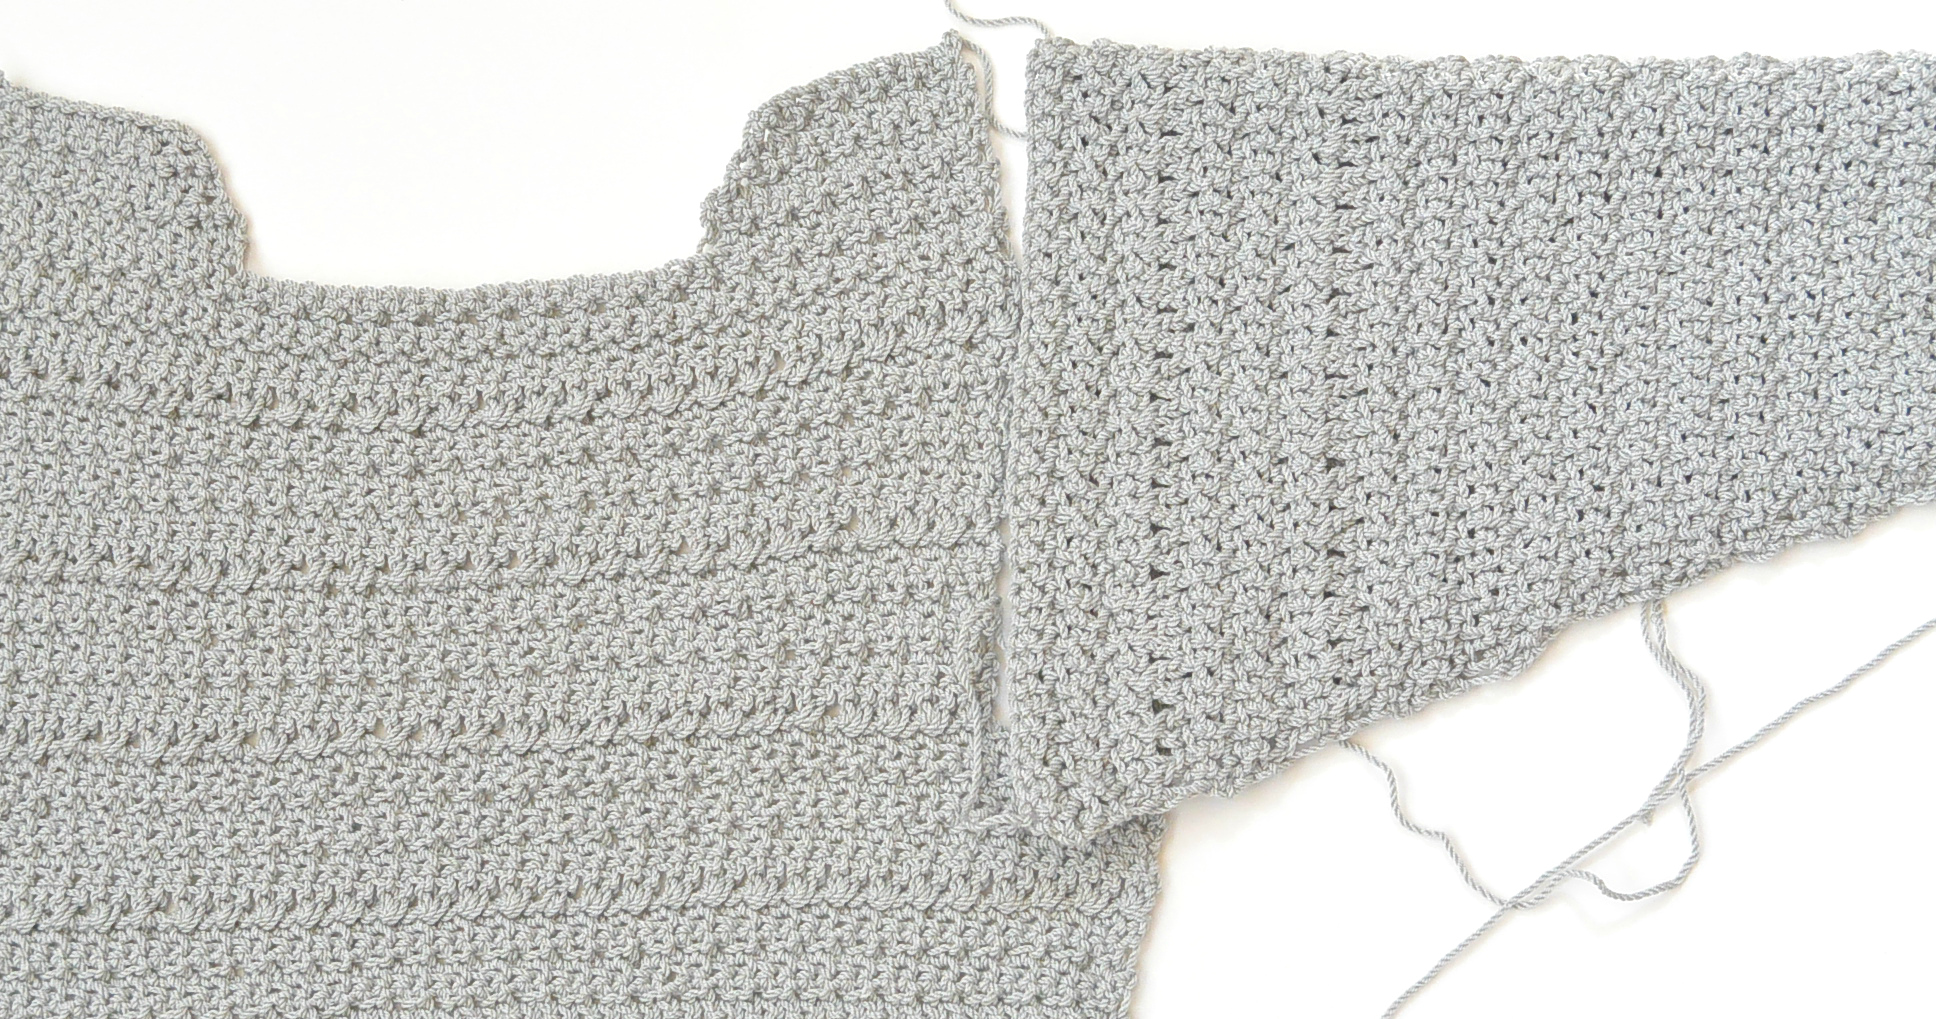
Below: The panel is shown with the sleeve as if to be seamed.
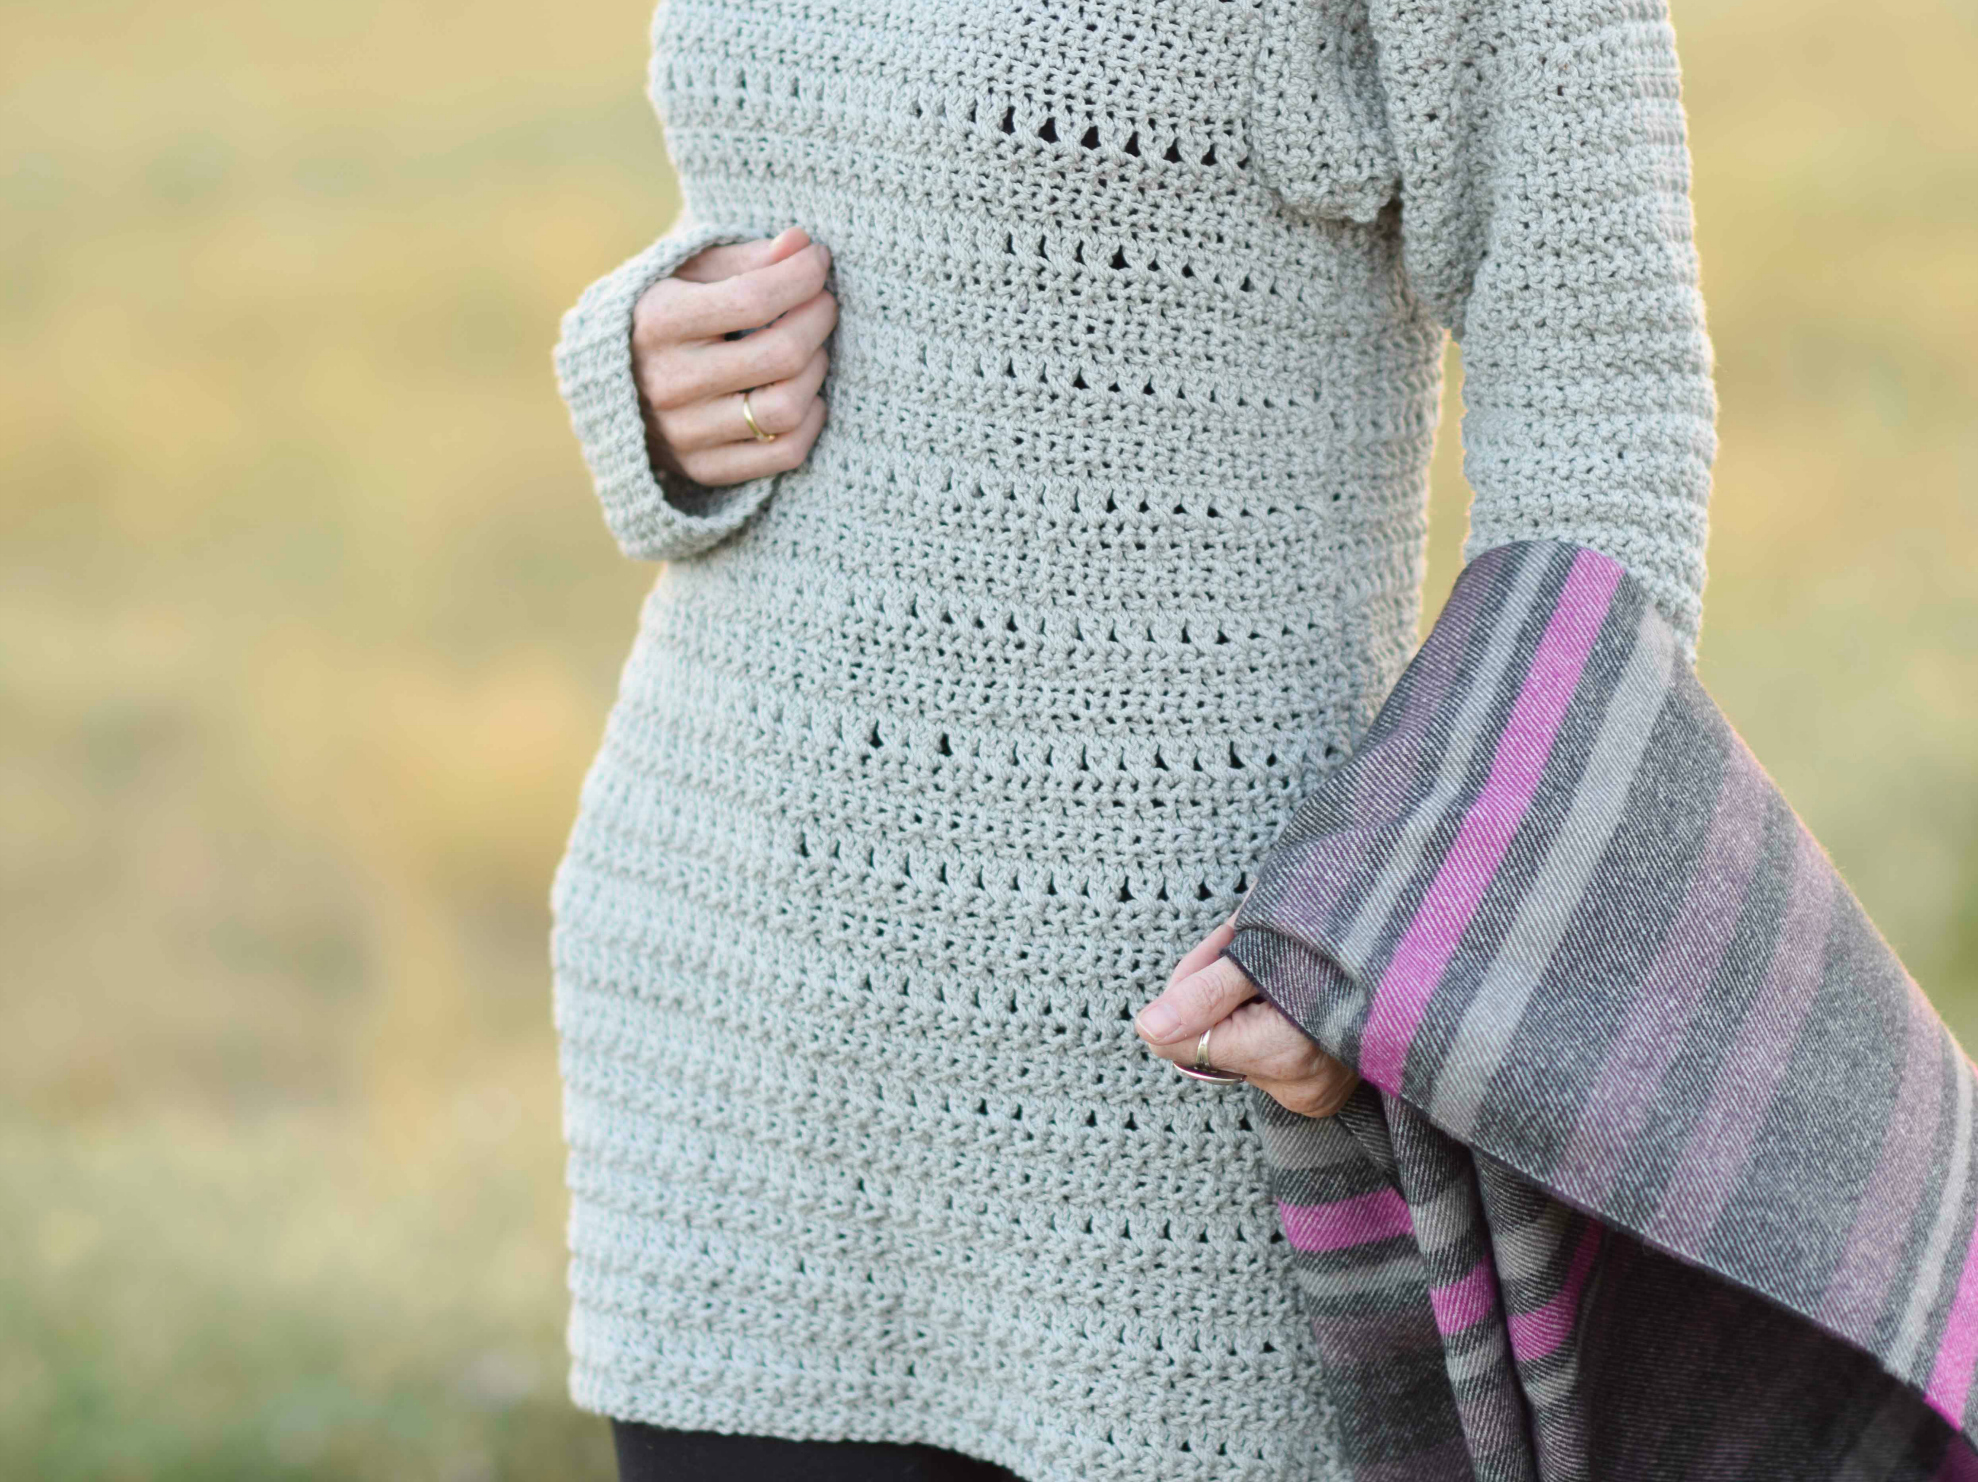
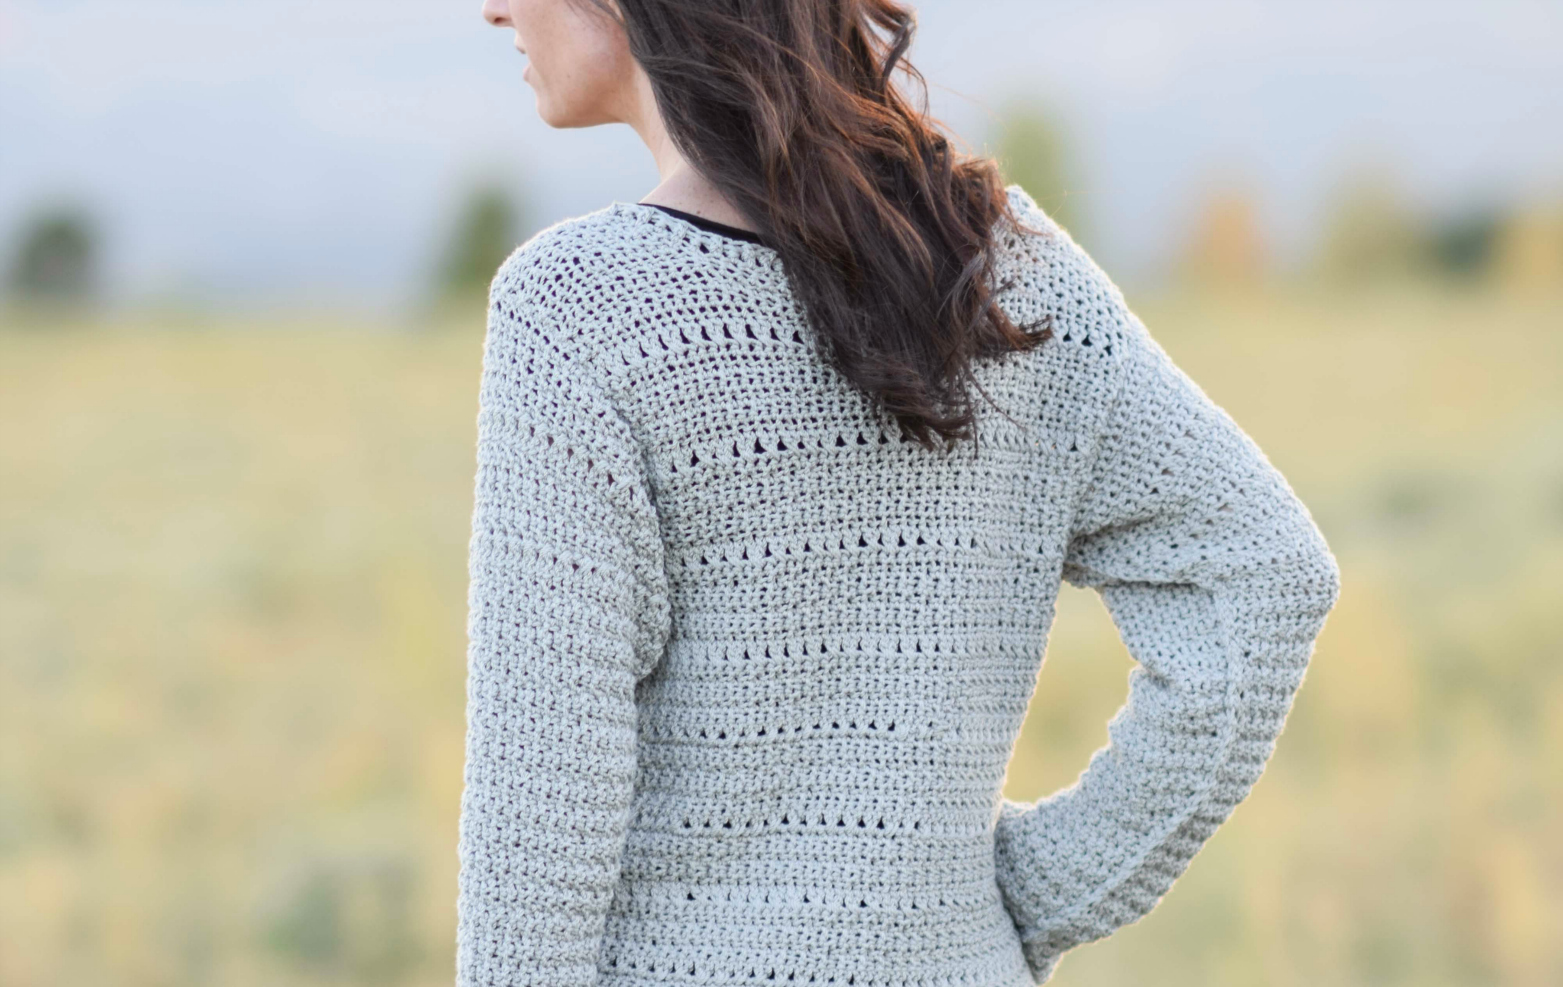
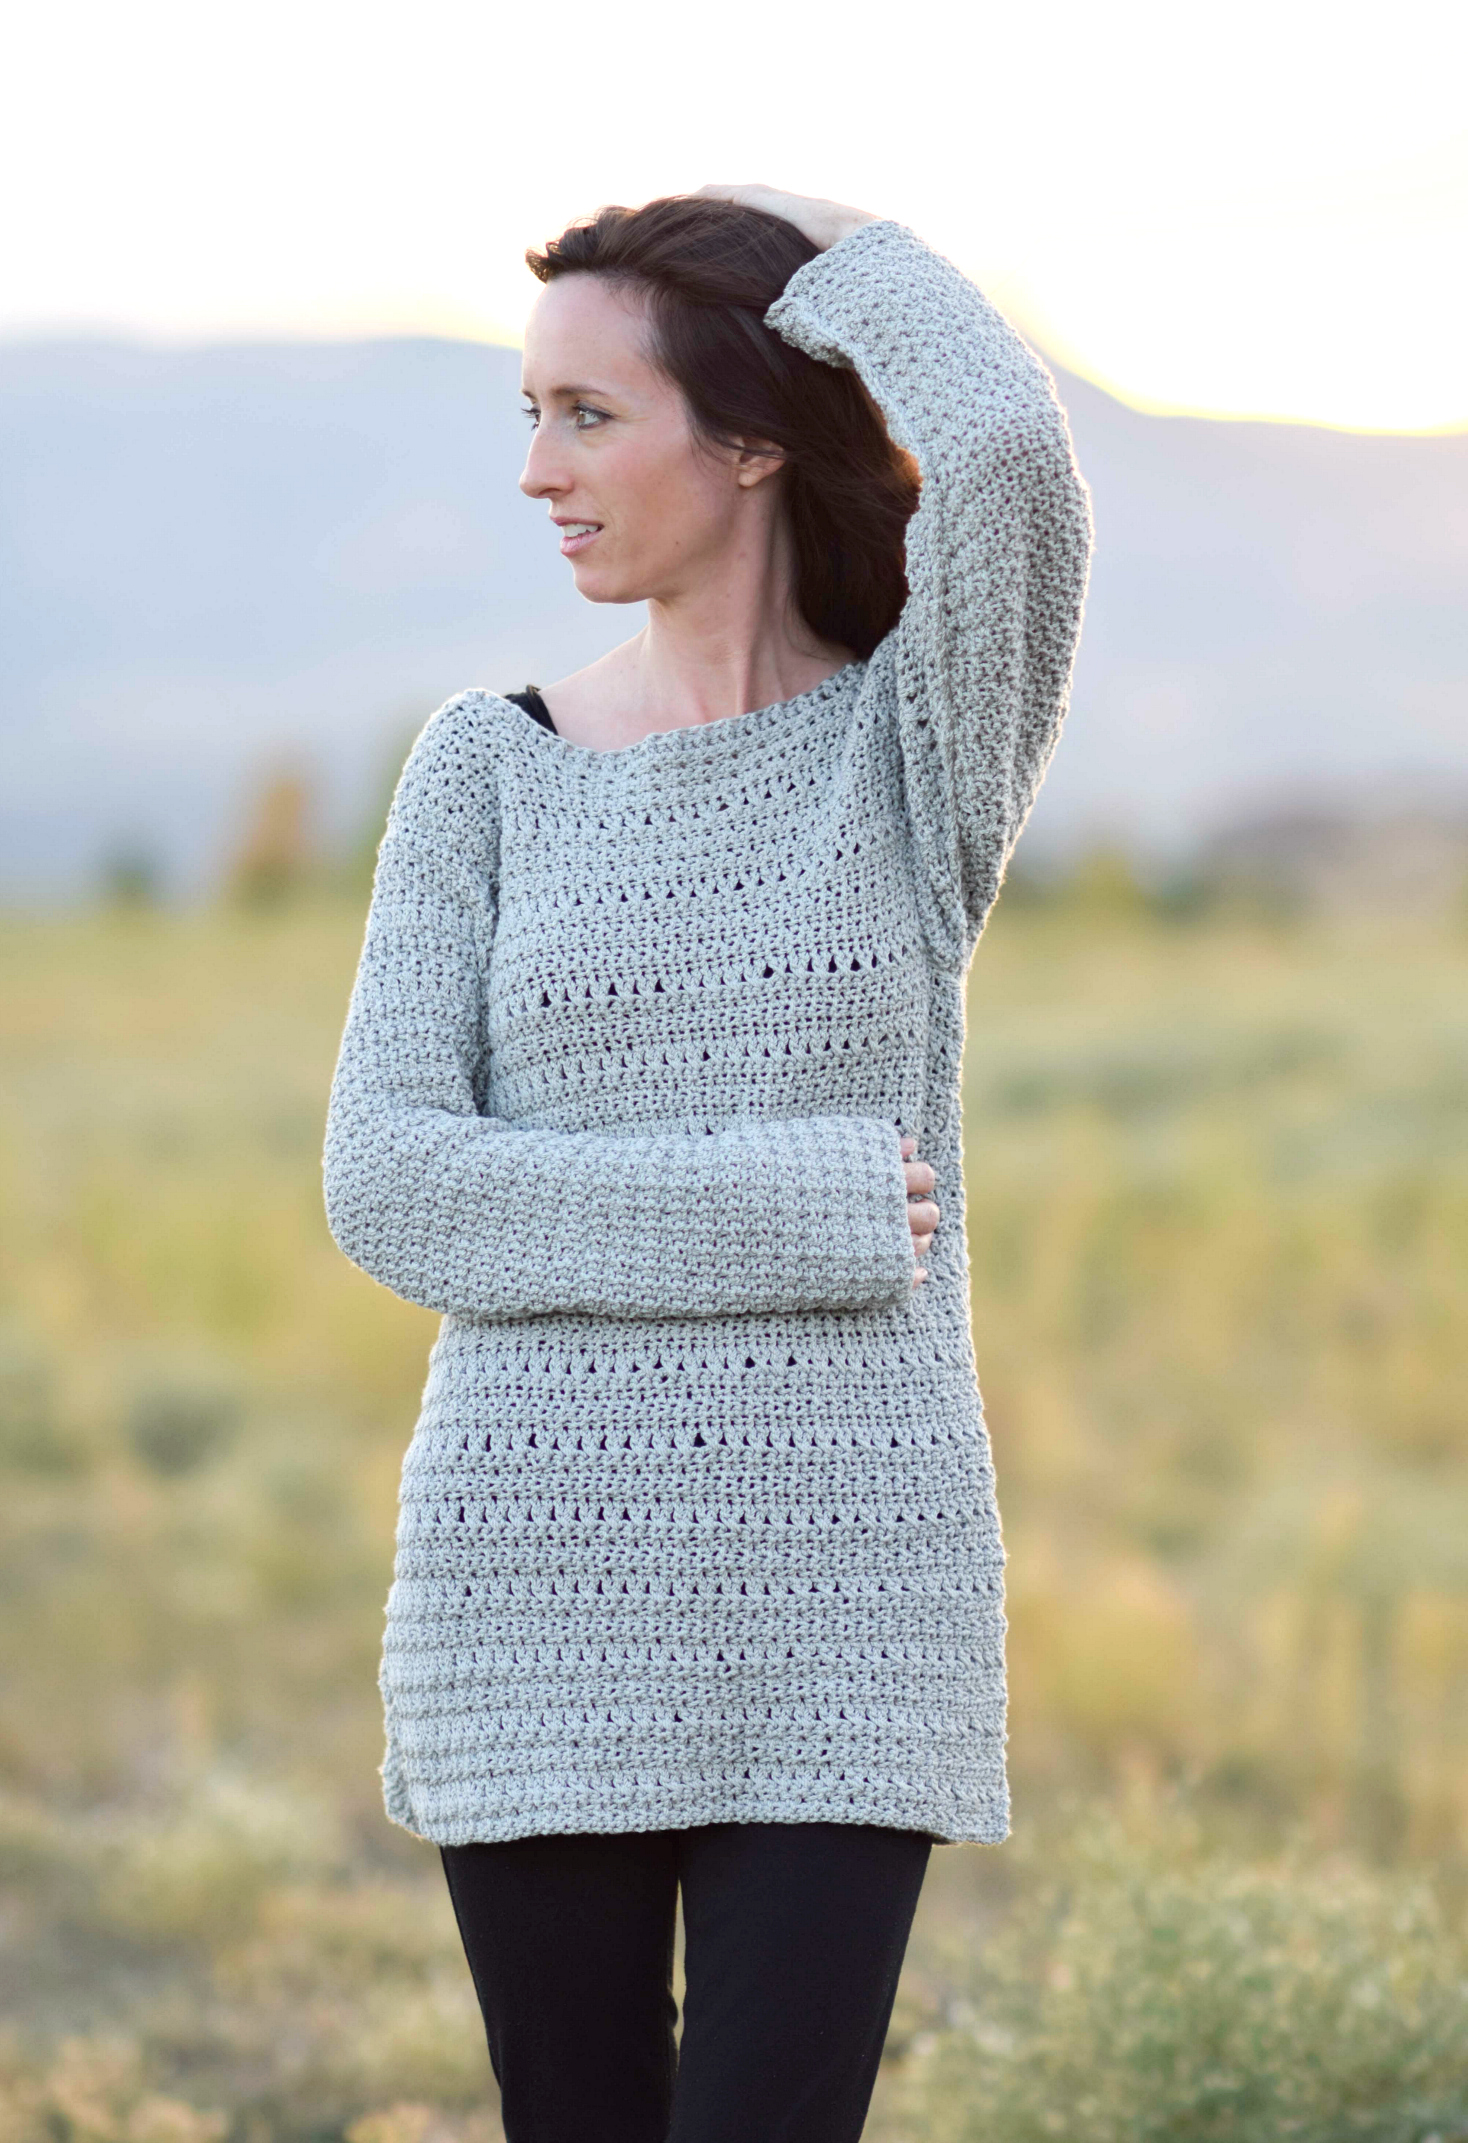
Below: I made and am wearing the size small. I’m 5’6″ and 105lbs for reference.
What Yarn Did You Use?
This sweater was crocheted with Lion Brand Yarn ZZ Twist worsted weight yarn (here). This was the first time that I used this yarn and I can’t say enough good things. It didn’t split, it wasn’t fuzzy, it has amazing drape and just a bit of sheen. It’s also silky smooth which was necessary for a top that’s going to be worn so close the the skin.
Alright, are you ready for the pattern details? Here goes!
Remember you can choose to purchase the advertisement free, printable version from my Etsy shop here or see the free pattern below. 🙂
The Lakeside Easy Crocheted Pullover Sweater Pattern
Pattern Description:
This beautiful sweater features a lightly textured fabric with incredible drape. Simple shaping creates a flattering piece, yet it’s easy enough to crochet even if this is your first sweater project. The silky texture of the yarn feels great against the skin making this a lovely top to enjoy at the lake, the coffee shop, home or office.
Skill Level:
Intermediate
Materials:
US Size J 6.0 mm Crochet Hook
(6, 7, 7, 8) skeins Lion Brand Yarn ZZ Twist in Silver 100 g/skein (Pattern uses approximately 530, 602, 686, 782 grams) Kit Available from Lion Brand Yarn HERE
Scissors
Tapestry Needle to weave in ends
Gauge:
Just under 16 stitches & 12 rows of alternate single crochet in 4” X 4” **Gauge must be used to ensure that the sizing will turn out correctly. Adjust hook size as needed to obtain correct gauge. 🙂
Dimensions (approximate):
Small, Medium, Large, X-Large
Bust: S 35” M 39” L 43” XL 47”
Width: S 17.5” M 19.5” L 21.5” XL 23.5”
Length: S 26.5” M 27” L 27.5” XL 28”
Follow the key for preferred size throughout the pattern (S, M, L, XL)
Abbreviations & Skills:
ch – chain
st – stitch
sc – single crochet
sc flo – single crochet through the front loop only
sc blo – single crochet through the back loop only
dc – double crochet
sk st – skip stitch
FPhdc – front post half double crochet
BPhdc – back post half double crochet
dc2tog – double crochet two stitches together (decrease)
Special Stitch Patterns:
Alternate Single Crochet (alt sc) – *single crochet through the back loop (sc blo) in the first stitch, single crochet through the front loop (sc flo) in the next stitch; repeat from * across. See this tutorial here for more help
Crossed Double Crochet – *sk st, work dc, go back to skipped stitch, work dc in skipped stitch; repeat from * across. (see a tutorial from New Stitch A Day for the crossed double crochet stitch here)
Notes: This sweater is made in 4 pieces and seamed to finish. Two front panels are crocheted from the bottom up with simple shaping at the arms and neck. Two sleeves are then crocheted flat starting at the widest end and then decreasing to the other end of the sleeve. Panels and sleeves are then seamed together to finish! See the diagram and pictures for additional help.
Pattern Instructions
Front & Back Panel
Ch (70, 78, 86, 94)
Row 1 Sc in each st across the row (69, 77, 85, 93)
Row 2 Ch 1, turn, alt sc across the row ending with sc blo (69, 77, 85, 93)
Row 3 Repeat row 2 (69, 77, 85, 93)
Row 4 Ch 3 (counts as dc), turn, dc in 2nd st of row, *sk st, dc in next st, dc in skipped st. Repeat from * across the row (69, 77, 85, 93) (note: you are working crossed double crochet in this row)
Row 5 – 7 Repeat row 2 (69, 77, 85, 93) (sc into ch 3 of previous row on the final stitch of row 5)
Row 8 Repeat row 4 (69, 77, 85, 93)
Repeat rows 5 – 8 until piece measures approximately (18”, 18.5”, 19”, 19.5”) long
Next, you will shape the armholes and continue working the same repeating stitch pattern from rows 5 – 8.
Shape Armholes
Row 1 Ch1, turn, sl st in first 8 stitches, work stitch pattern (starting from where you left off in the repeat of rows 5-8) across to last 8 stitches; leave last 8 sts unworked. (53, 61, 69, 77)
Next, continue stitch pattern repeat from rows 5-8 for approximately 6”. (53, 61, 69, 77 stitches in each row)
You will then move onto the neckline shaping.
Neckline Shaping
Row 1 Ch 1, turn, work alt sc across in the first 15 stitches; leave remaining stitches unworked for neck (15)
Row 2 Ch 1, turn, work alt sc across the row (15)
Row 3 Ch 1, turn, work alt sc to last 4 sts; sc2tog twice (13)
Row 4 Ch 1, turn, work alt sc across the row (13)
Row 5 Ch 1, turn, work alt sc across the row to the last 4 sts; sc2tog twice (11)
Row 6 Ch 1, turn, work alt sc across the row (11)
Tie off, weave in ends.
Turn your panel, attach yarn to upper opposite side of panel. Repeat above pattern for Neckline Shaping to create neckline for opposite side.
Repeat entire panel pattern to make a second panel. (You make one panel for the front and one for the back)
Sleeve
Ch ( S/M 74, L/XL 80)
Row 1 Sc in each st across the row (73, 79)
Row 2 Ch 1, turn, alt sc across the row (73, 79)
Row 3 Ch 1, turn, sc2tog, alt sc across the row to last 2 sts; sc2tog (71, 77)
Row 4 Ch 1, turn, alt sc across the row (71, 77)
Row 5 Ch 1, turn, alt sc across the row (71, 77)
Row 6 Ch 3 (counts as dc), turn, (dc2tog) over next two sts (2nd and 3rd st of row), work crossed dc across the row to last two sts, dc2tog over last 2 sts.
Row 7-12 Repeat rows 1-6, 1 more time
Next, you will work only the alt sc stitch pattern, making decreases when indicated, for the remainder of the sleeve.
Alternate Single Crochet (alt sc) Portion of Sleeve
Row 1 Ch 1, turn, work alt sc across the row
Row 2 Ch 1, turn, work alt sc across the row
Row 3 Ch 1, sc2tog, work alt sc across to last two sts, sc2tog
Repeat rows 1 – 3 until the sleeve measures (10”, 10”, 11”, 11.5”) wide
Next, work alt sc across each row until the length of the sleeve is approximately 19.5” long
Tie off and weave in ends.
Repeat sleeve pattern to make second sleeve.
Assembly:
Place panels together; sew up side seams, leaving 4 – 5 inches open at the bottom, and then sew shoulder seams. Next, fold sleeves appropriately and seam. Finally, sew sleeves into arm openings with a whip stitch seam or preferred method. (See photos)
Final Neck Detail:
Attach yarn to neckline
Round 1 Ch 2, hdc evenly around neck opening
Round 2 Ch 2, FPhdc in first st, BPhdc in next st, repeat from * in each hdc around, slip stitch to attach at end of round. Tie off and weave in ends. (Note: You may make the neck cuff as many or few rows as you’d like to make neck opening wider or smaller.)
That’s all there is to it!
Now wear it, gift it or show it off to your friends. Lol!
What do you think? Please let me know if you have any questions about this pullover! I hope you enjoy making it as much as I did. 🙂
XO
Jessica
Thank you to Lion Brand Yarn for sponsoring this post! All opinions are 100% my own.
I love this! Probably will not attempt til after the holidays, as I crochet so slowly that there’s no way I could finish before then….with all other projects now in the plans.
I do have a question about the neckline. I personally would prefer a slightly higher neckline and am curious If in order to accomplish that, would I not have to do some decreases to properly shape that higher neckline?
I’ve read over entire pattern and it seems absolutely doable – even for me! But I would like to make that slight change if possible.
Jessica, I want to thank you so much for all that you share so freely with all of us! You have been so incredibly generous in sharing your beautiful work with us – and making it possible or us to accomplish so much more than we even thought we could! THANK YOU SO MUCH! It is so appreciated!
Are you on Ravelry? I need to be able to find this pattern later, it’s the perfect sweater for me!
It is beautiful I really need to learn how to crochet
Aah I love this. Will be making this one for sure. I am in South Africa so I work more with this weight of yarn. Chunky is a bit too hot for our climate!
This is my style for sure. Thanks for another super pattern.
I love this pullover. Not too close fitting but very wearable under a jacket when it gets cold. I can imagine this under a jacket with a seprate cowl to keep warm.
This zz yarn must be a dream to crochet. I wish I could buy it here.
I love your pattern! I’ve shared it on my own blog because I know I can’t wait to try it and I’m sure some of my readers would love to try it as well! Great work! 🙂
This is such a cute sweater and I’ve always had great results with Lion Brand yarns. I hope you come up with some cute stuff for summer. Thank you for rekindling my love of crochet.
Thanks for this pattern, I am very tempted to try it. However, because I’m quite short myself, I’d like to make it shorter. Are there any rows I can skip to make it, let’s say, 5 or 6 inches shorter, please? Thanks so much again.
I love this pattern, Jessica! I have made several of your beautiful creations, but I have to say this one is my favorite. Instructions are easy to follow and spot on. I am between beginner and intermediate and found it very easy to follow. I used the identical yarn (same color, too!) My only caution to those trying it is it comes out very long, and the neck was way too wide for me. I added about 4 more finishing rows to the neck. I also cut off about 6 inches from the bottom and made a small hem. It washes beautifully, and I haven’t noticed any pilling or felting. This yarn does have a tendency to keep stretching longer and longer. The good news I can toss it in a hot dryer and it does not shrink. Thank you Jessica!
So happy to hear this Laura!!! Yay!! And thanks for the tip about using the hot dryer.
I would like to ask you to clarify your gauge instructions. You write “just under 16 stitches.” Doesn’t this mean 15? If you mean 15 stitches, can’t you just say chain 15 stitches and worked for 12 rows?
I REALLY love this sweater (more like a sweater dress!!)! Can you make more patterns like this?!
It’s still stretching. Now it’s to my knees. Lol! I want to make it again, but not sure what yarn to use.
I did a regular sc for the first and last stitch of each row, and that made the edges nice and smooth and easy to sew. I also ended up making the smallest size, as the pattern is super stretchy.