Sweater Coat Cardigan Crochet Pattern & More
Scroll down for the free Sweater-Coat Crochet Pattern, or you can find the printable, ad-free pattern version available in my Etsy shop HERE. You can also find the kit from Lion Brand Yarn HERE (currently 20% off!)
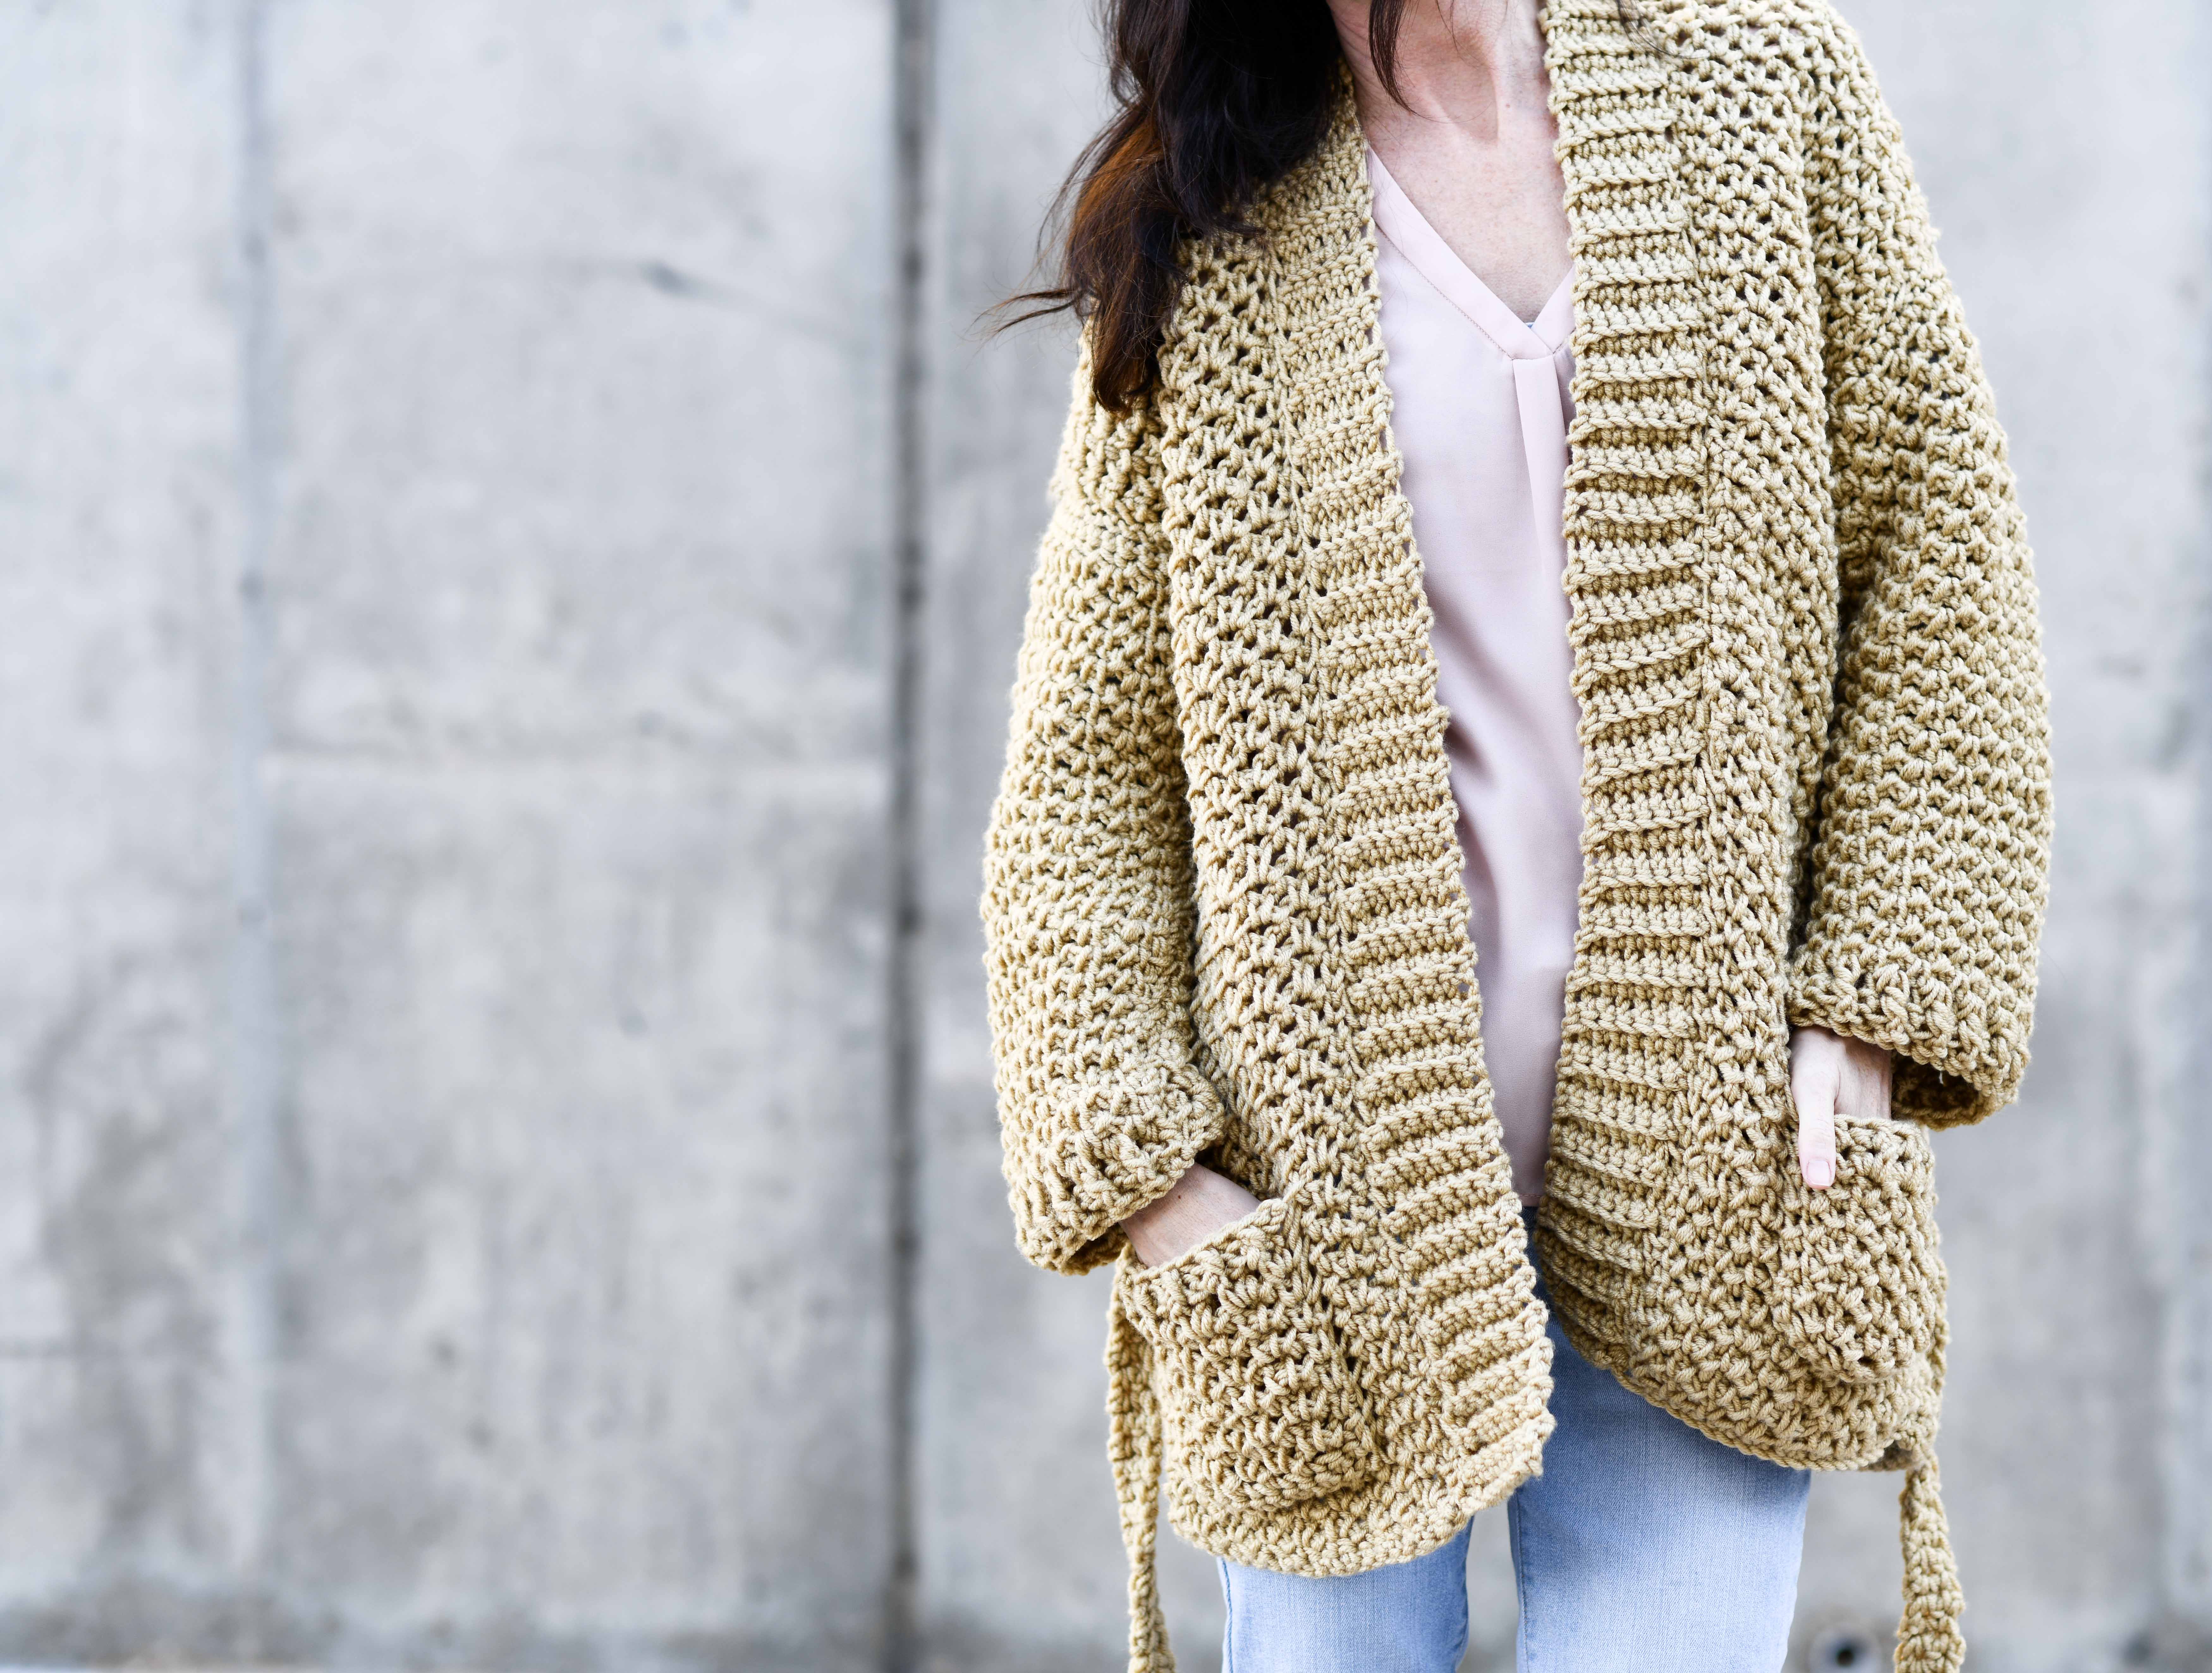
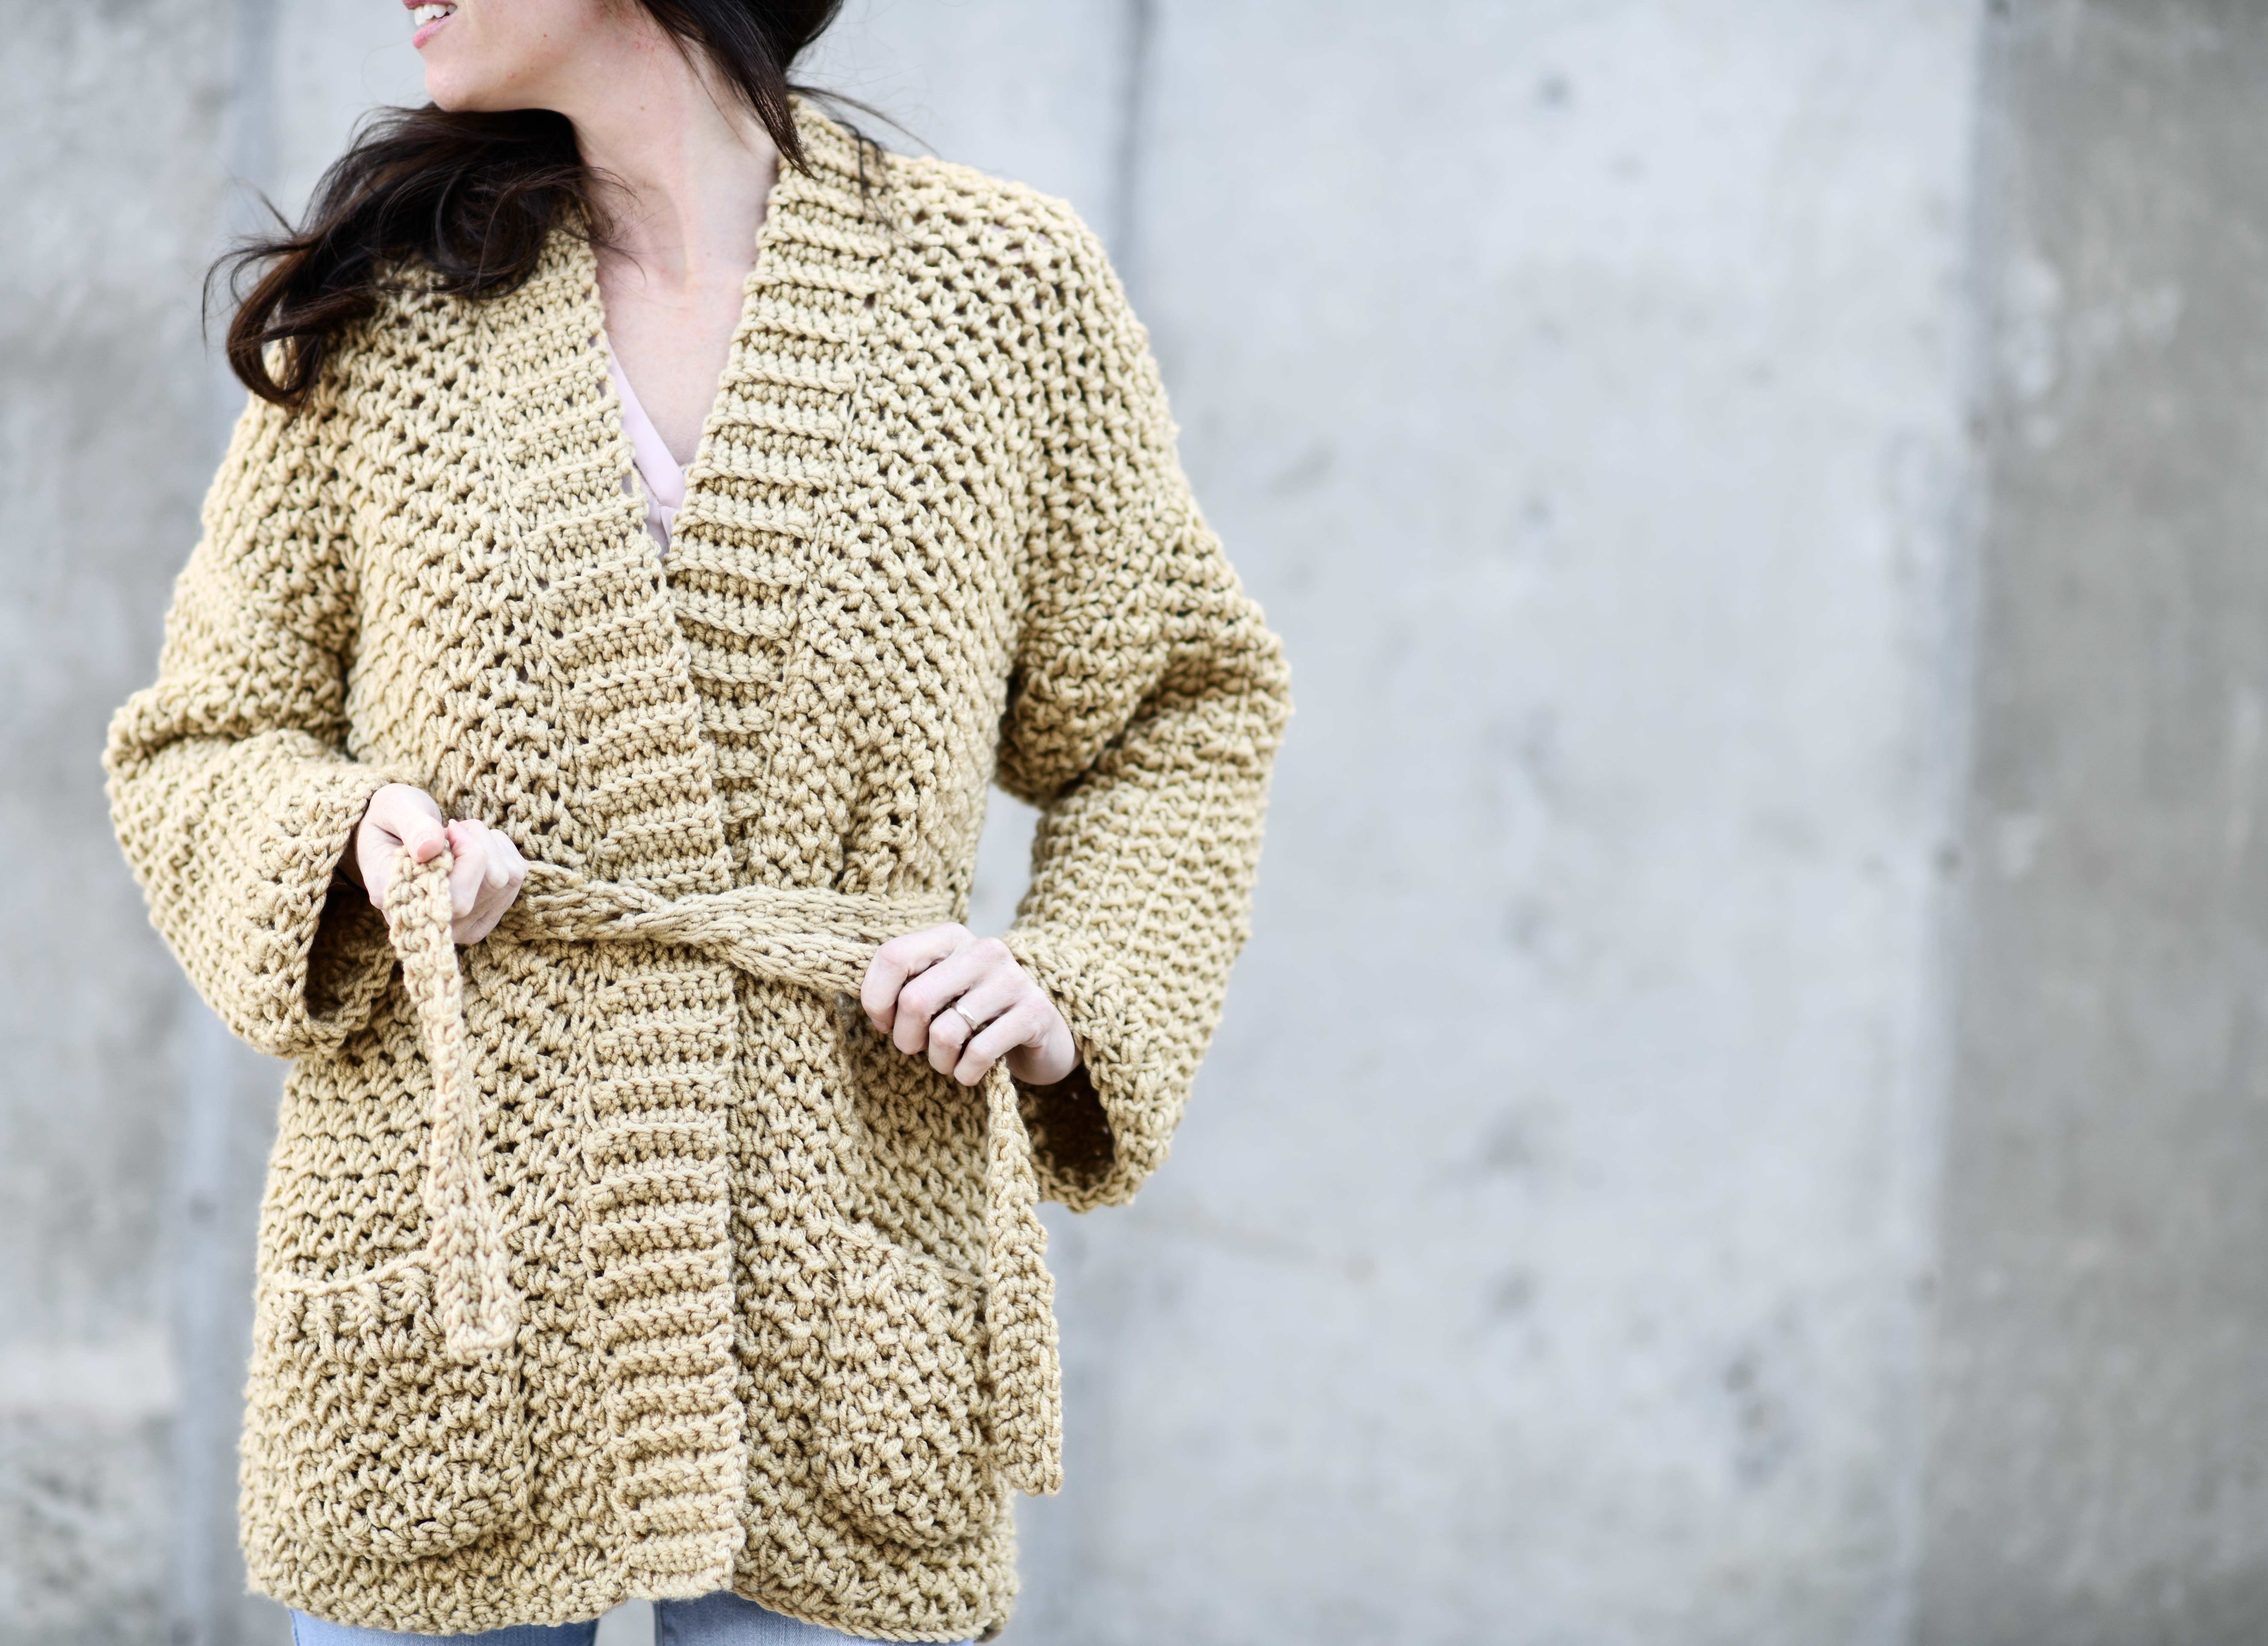
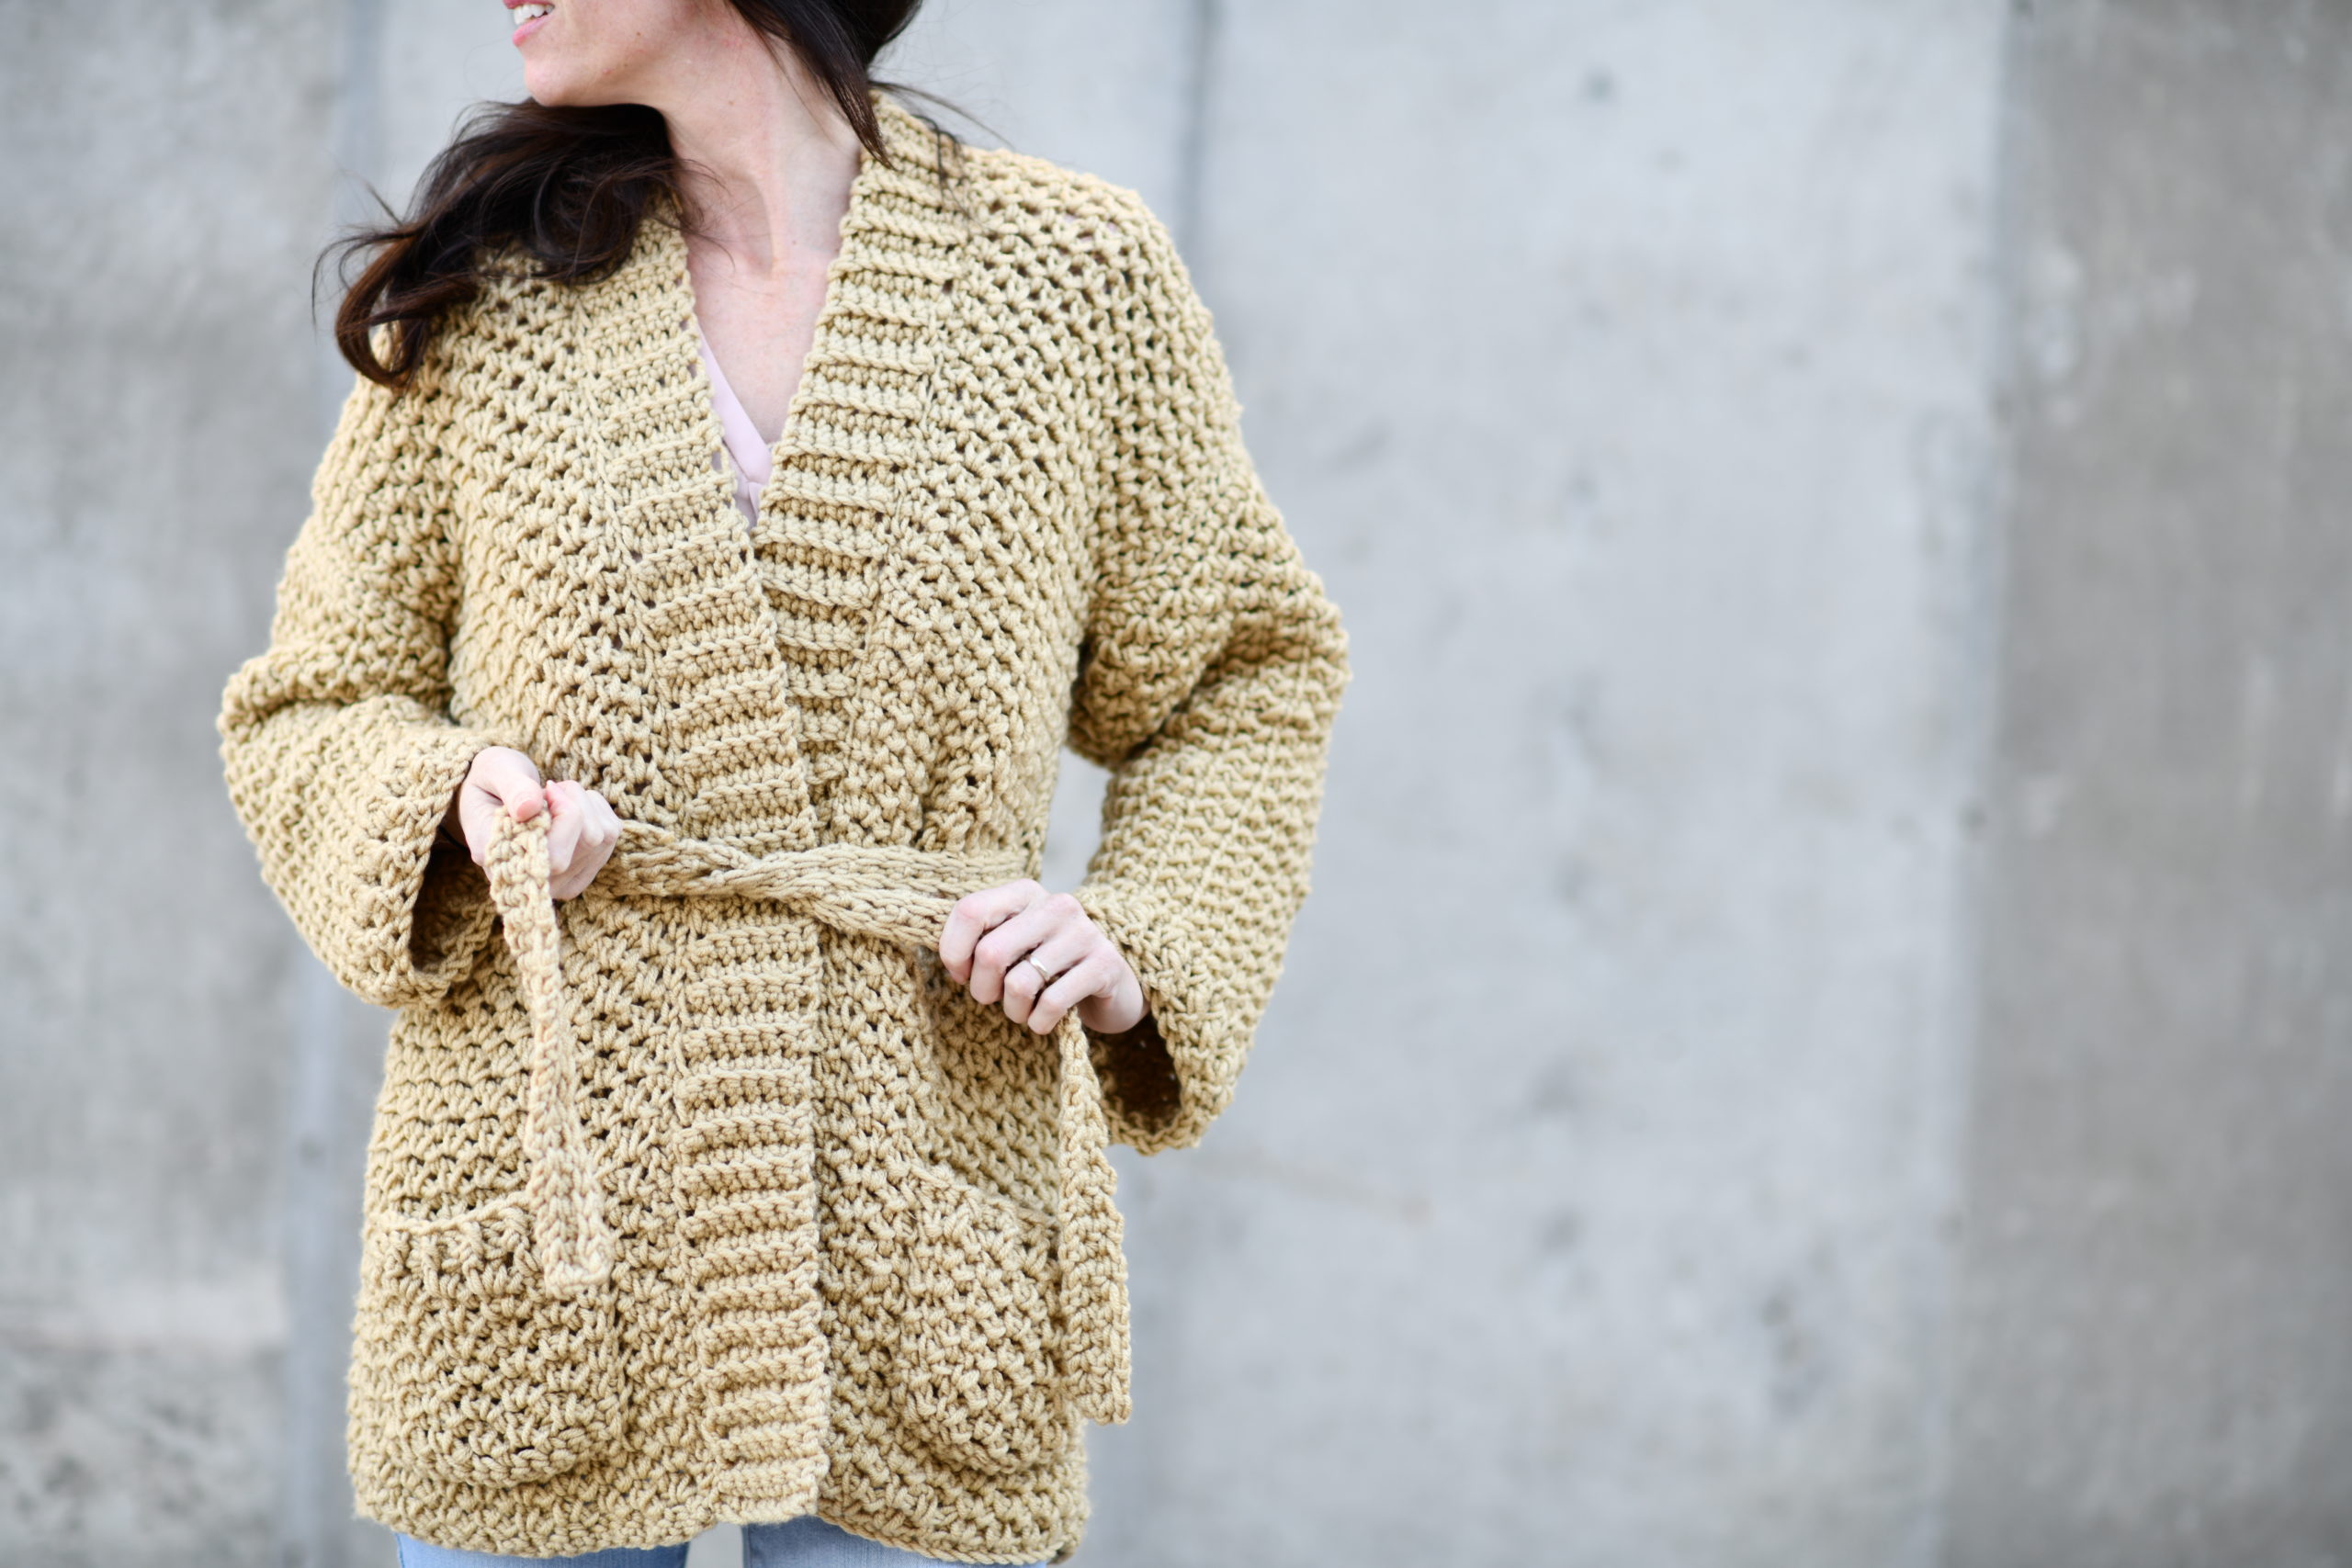
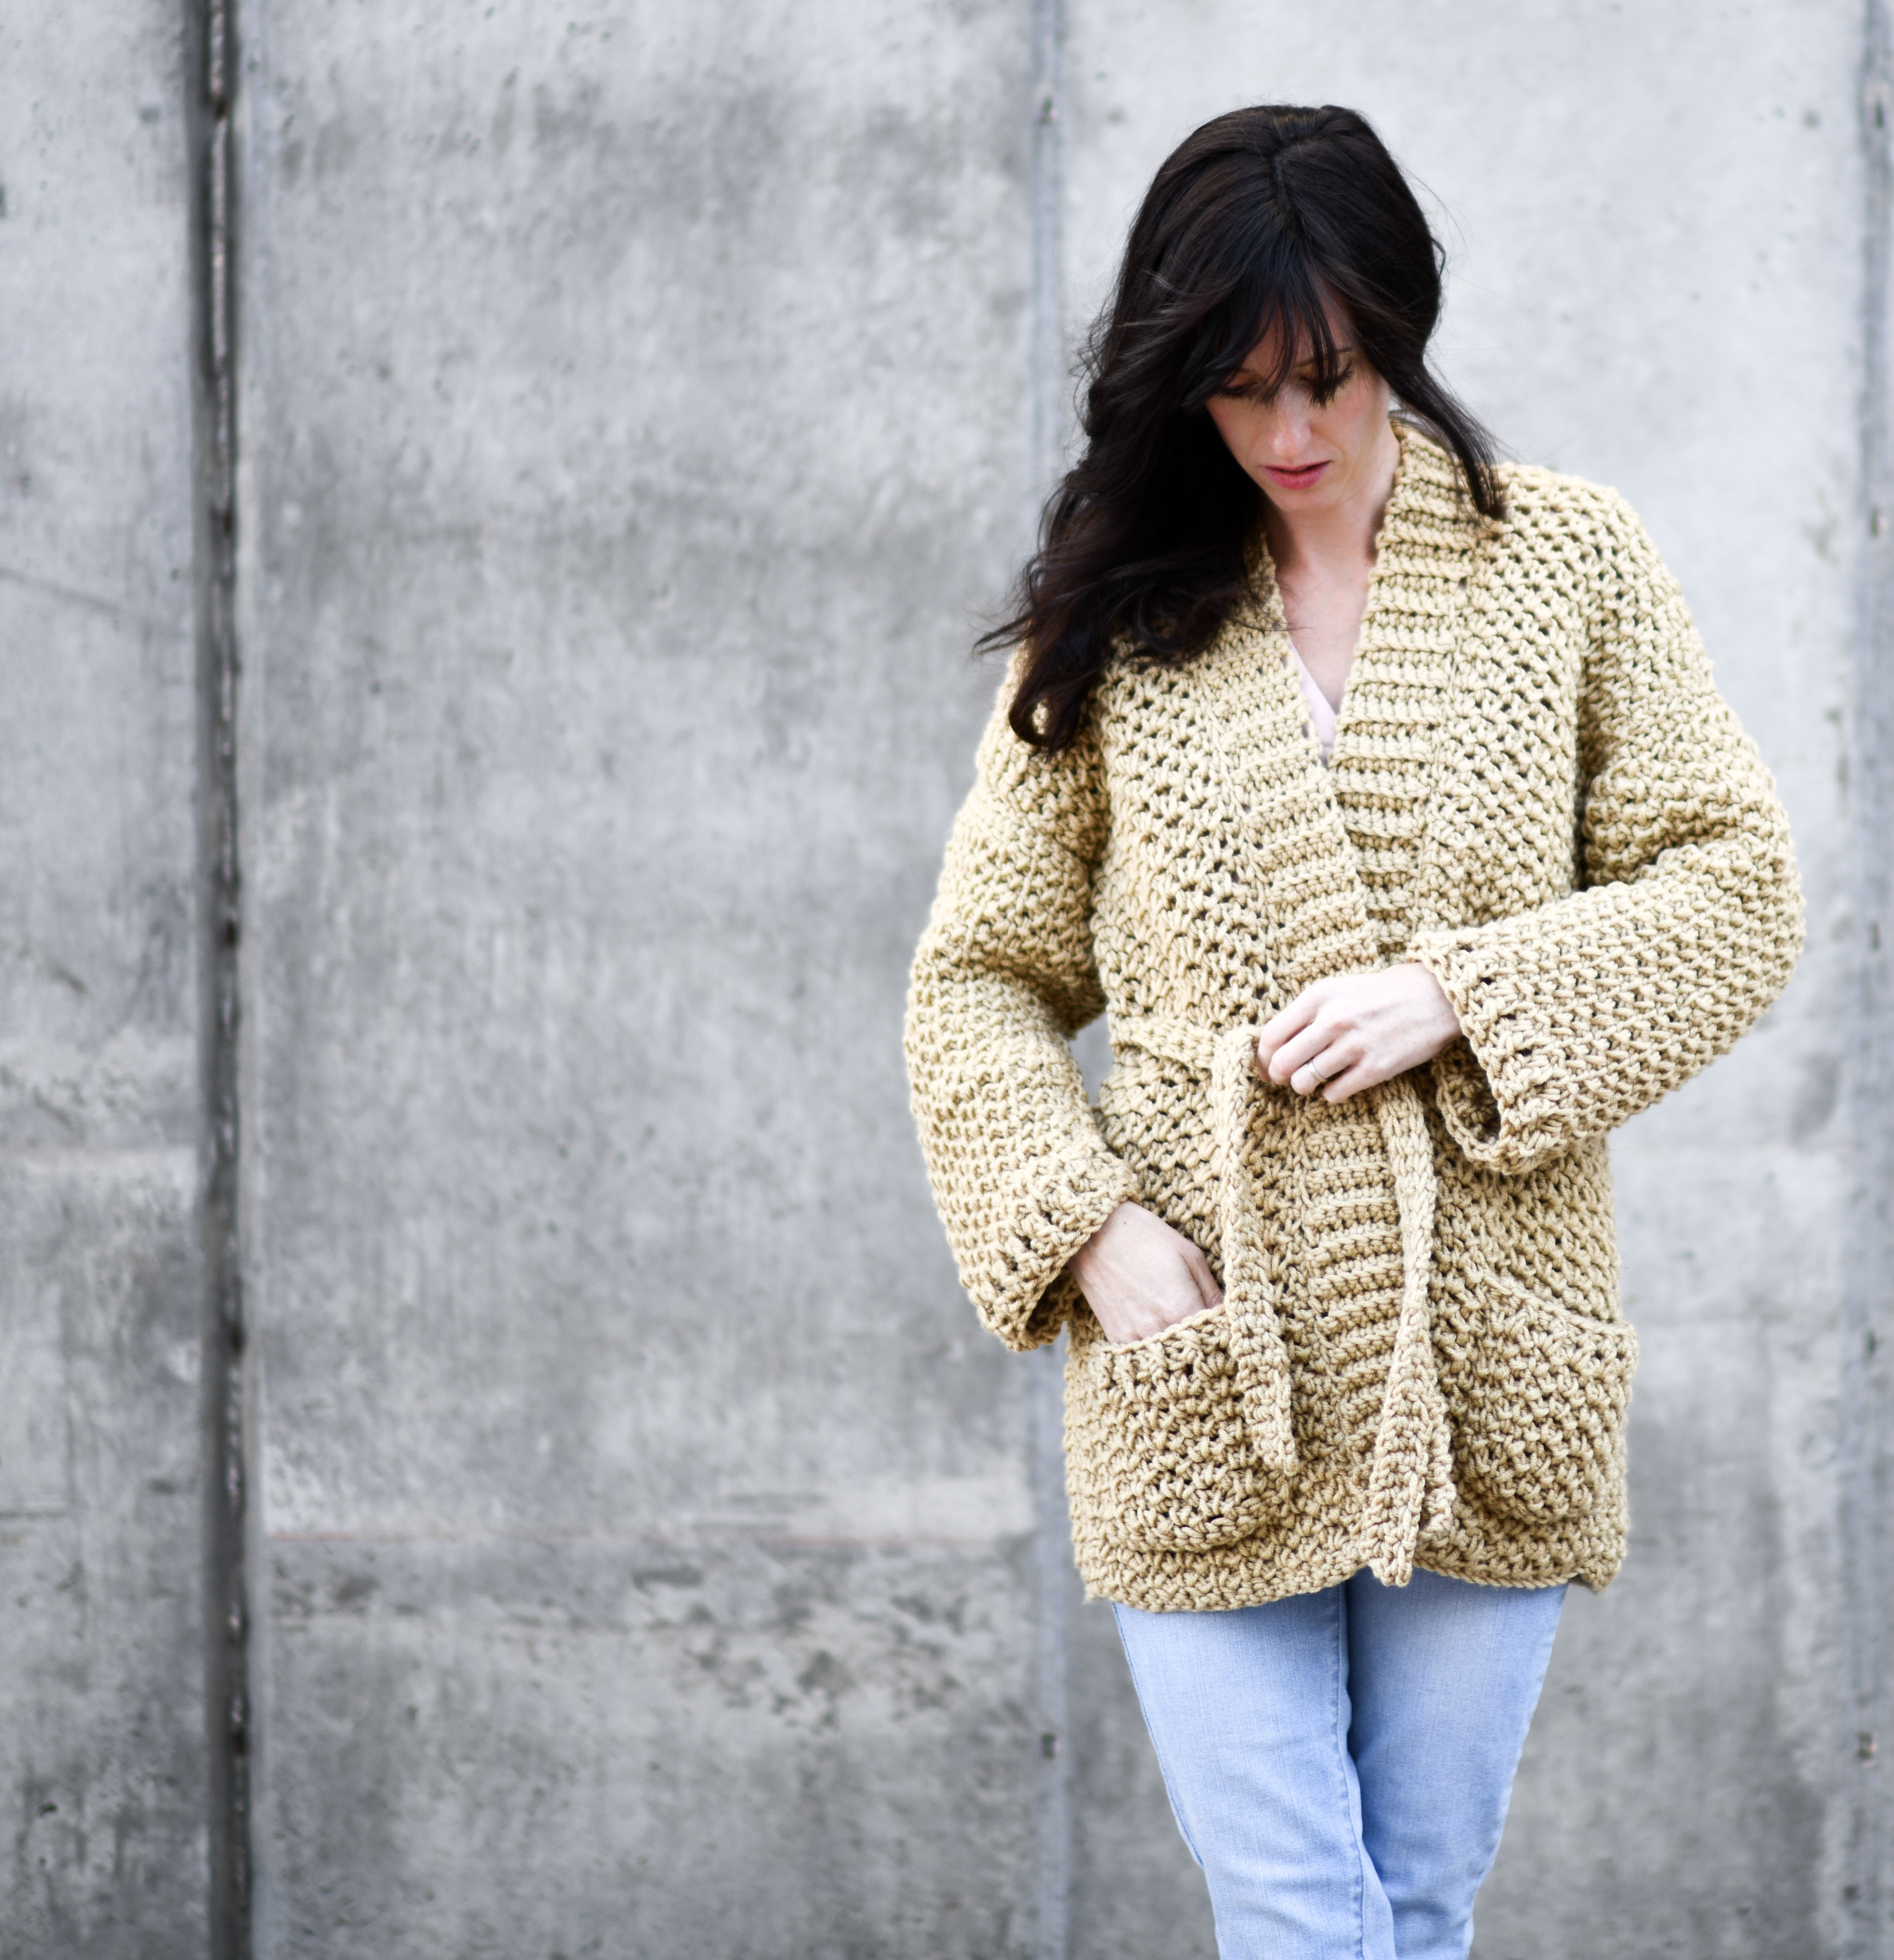
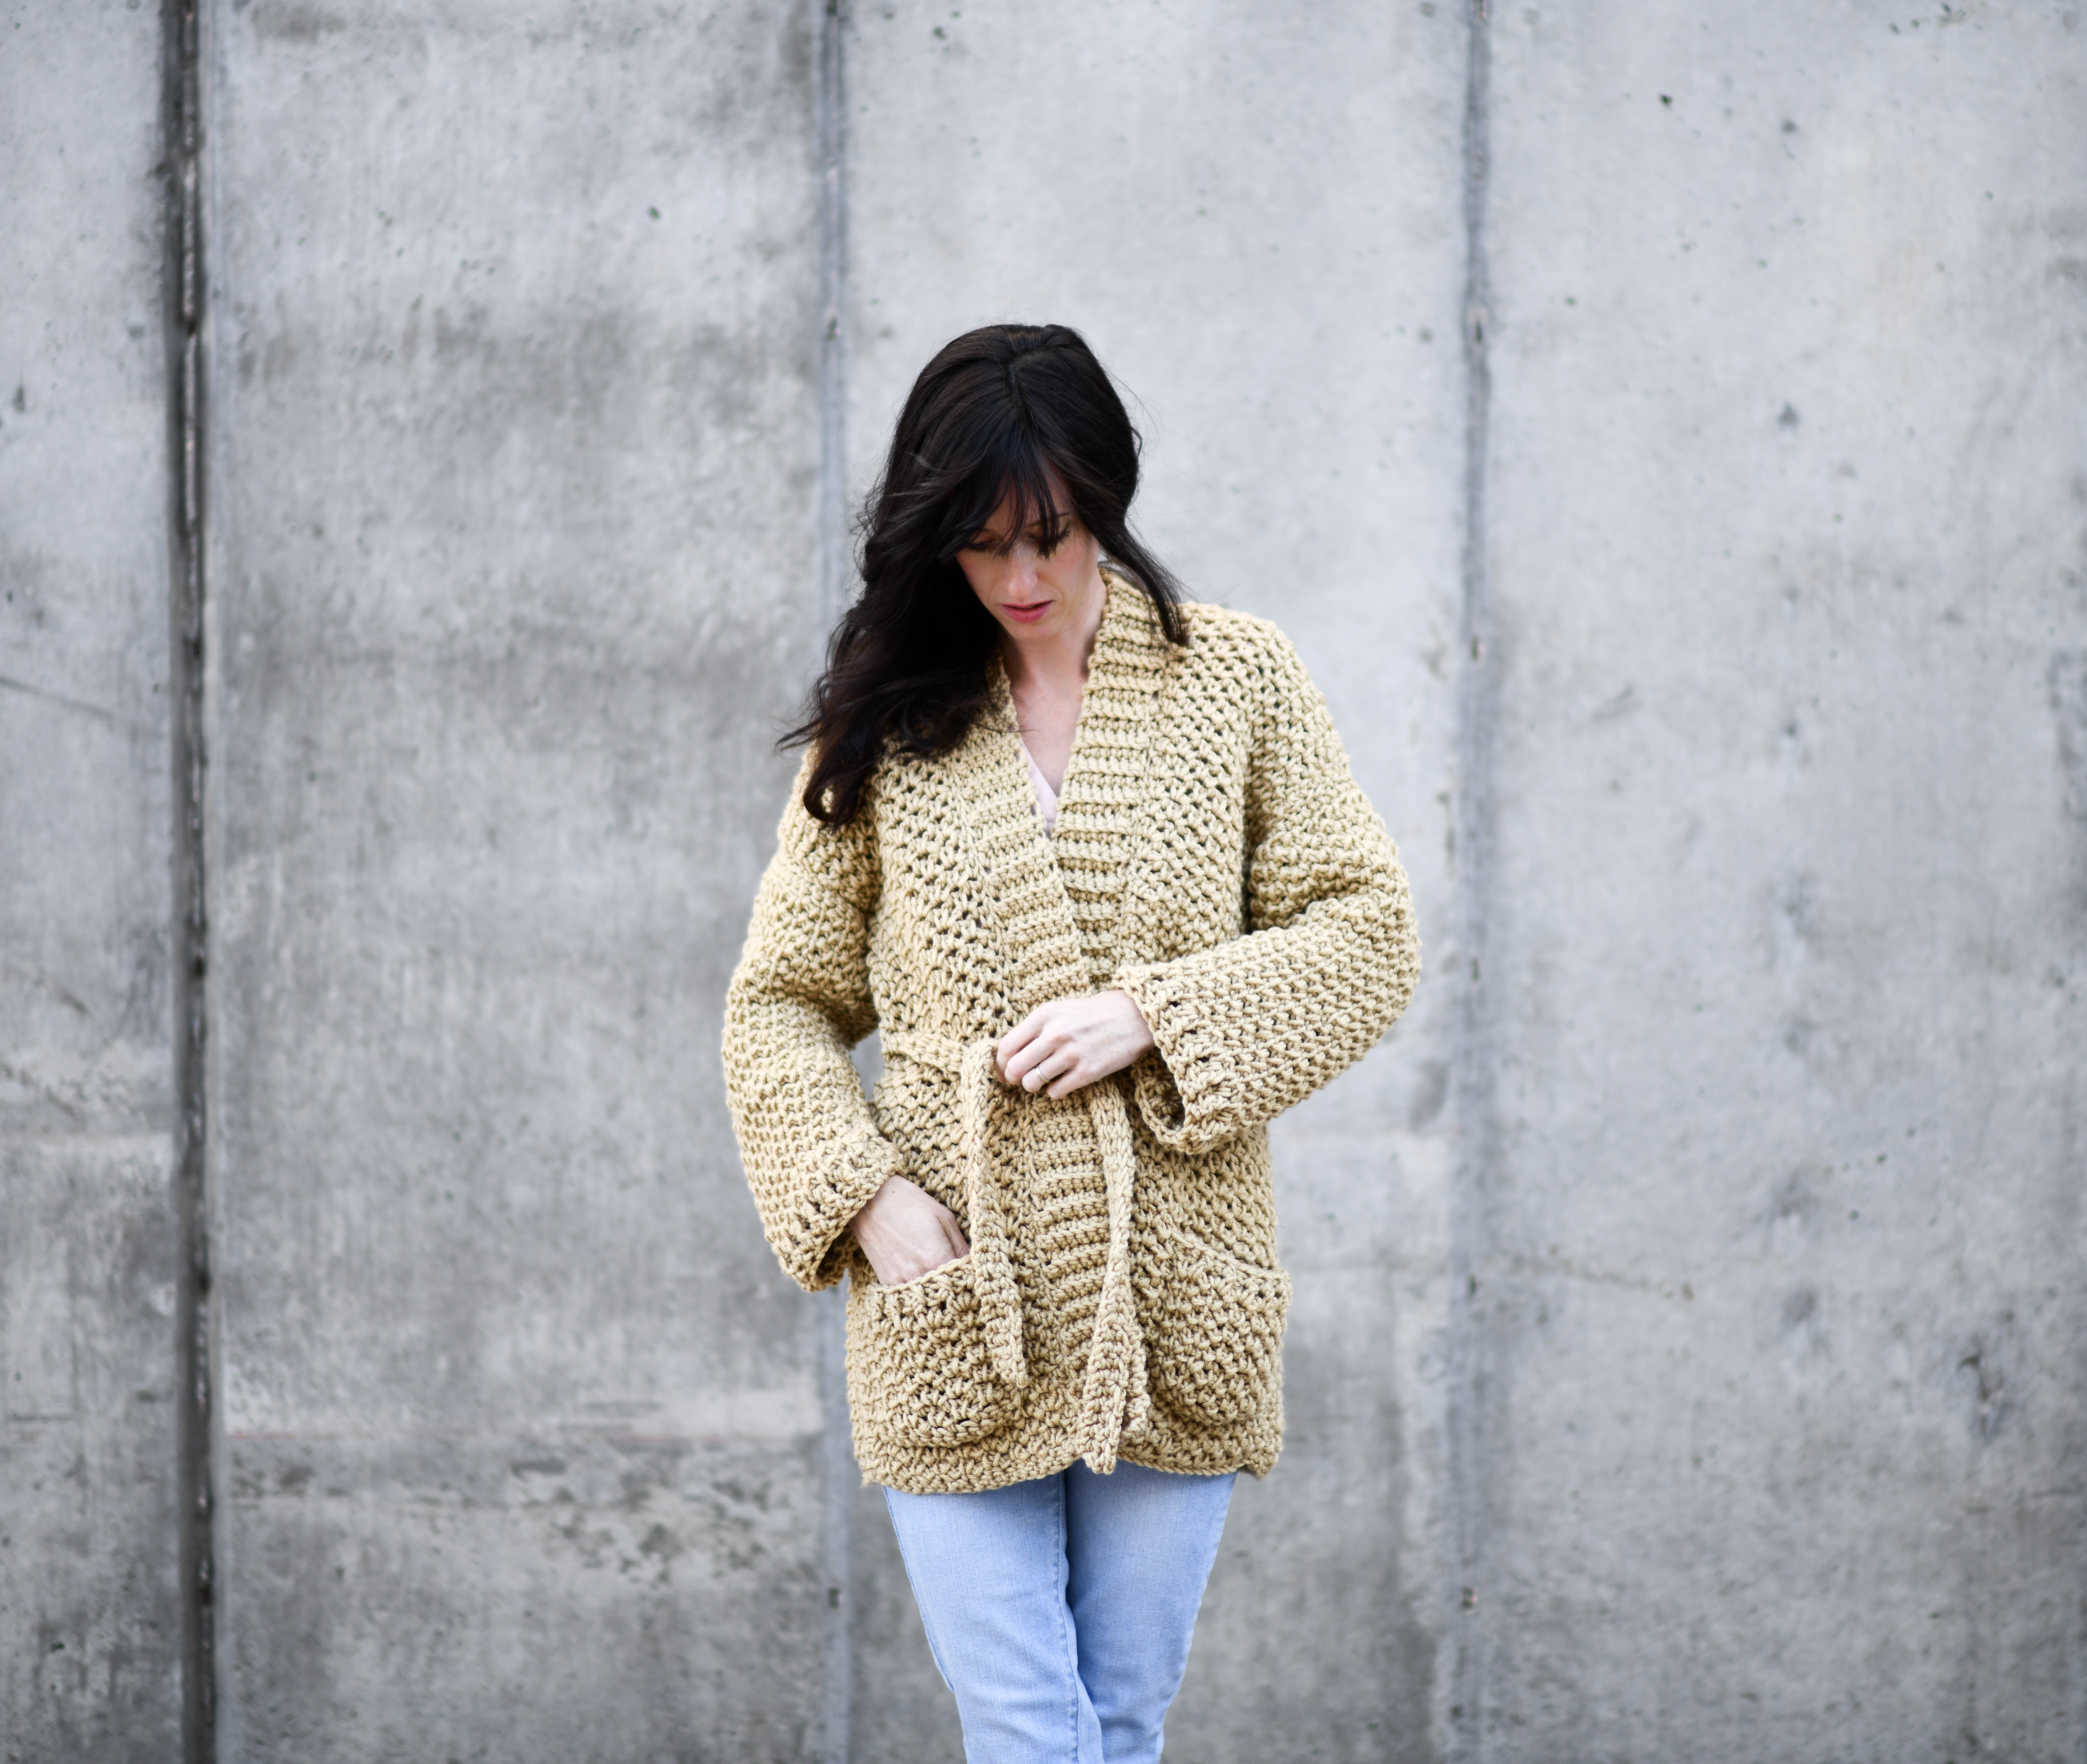
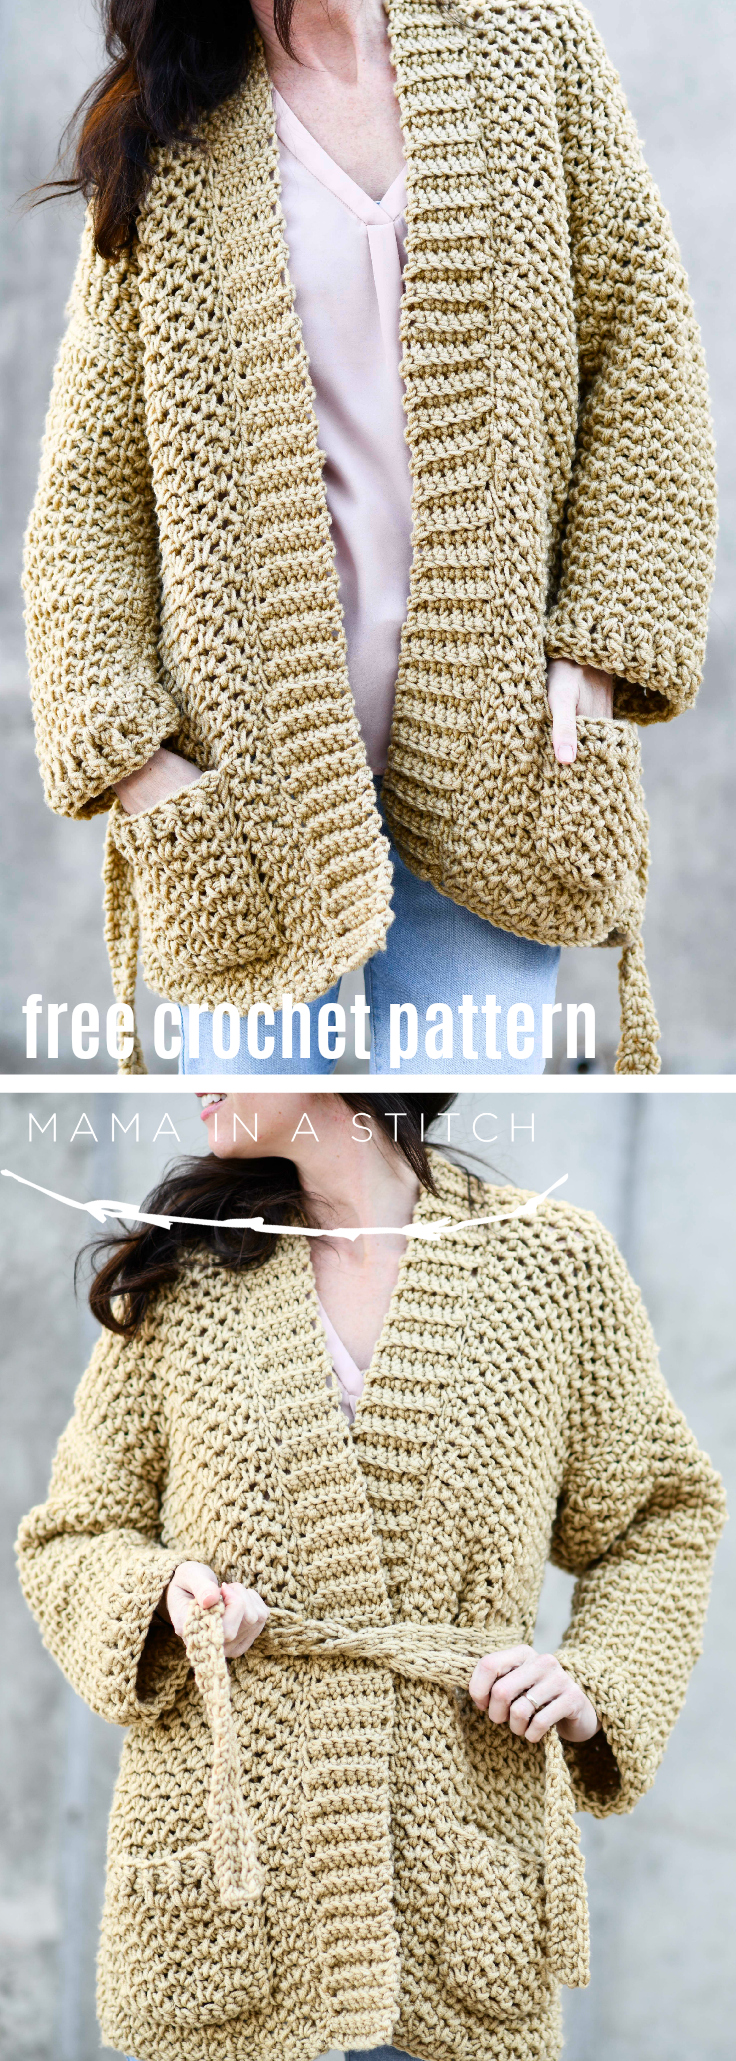
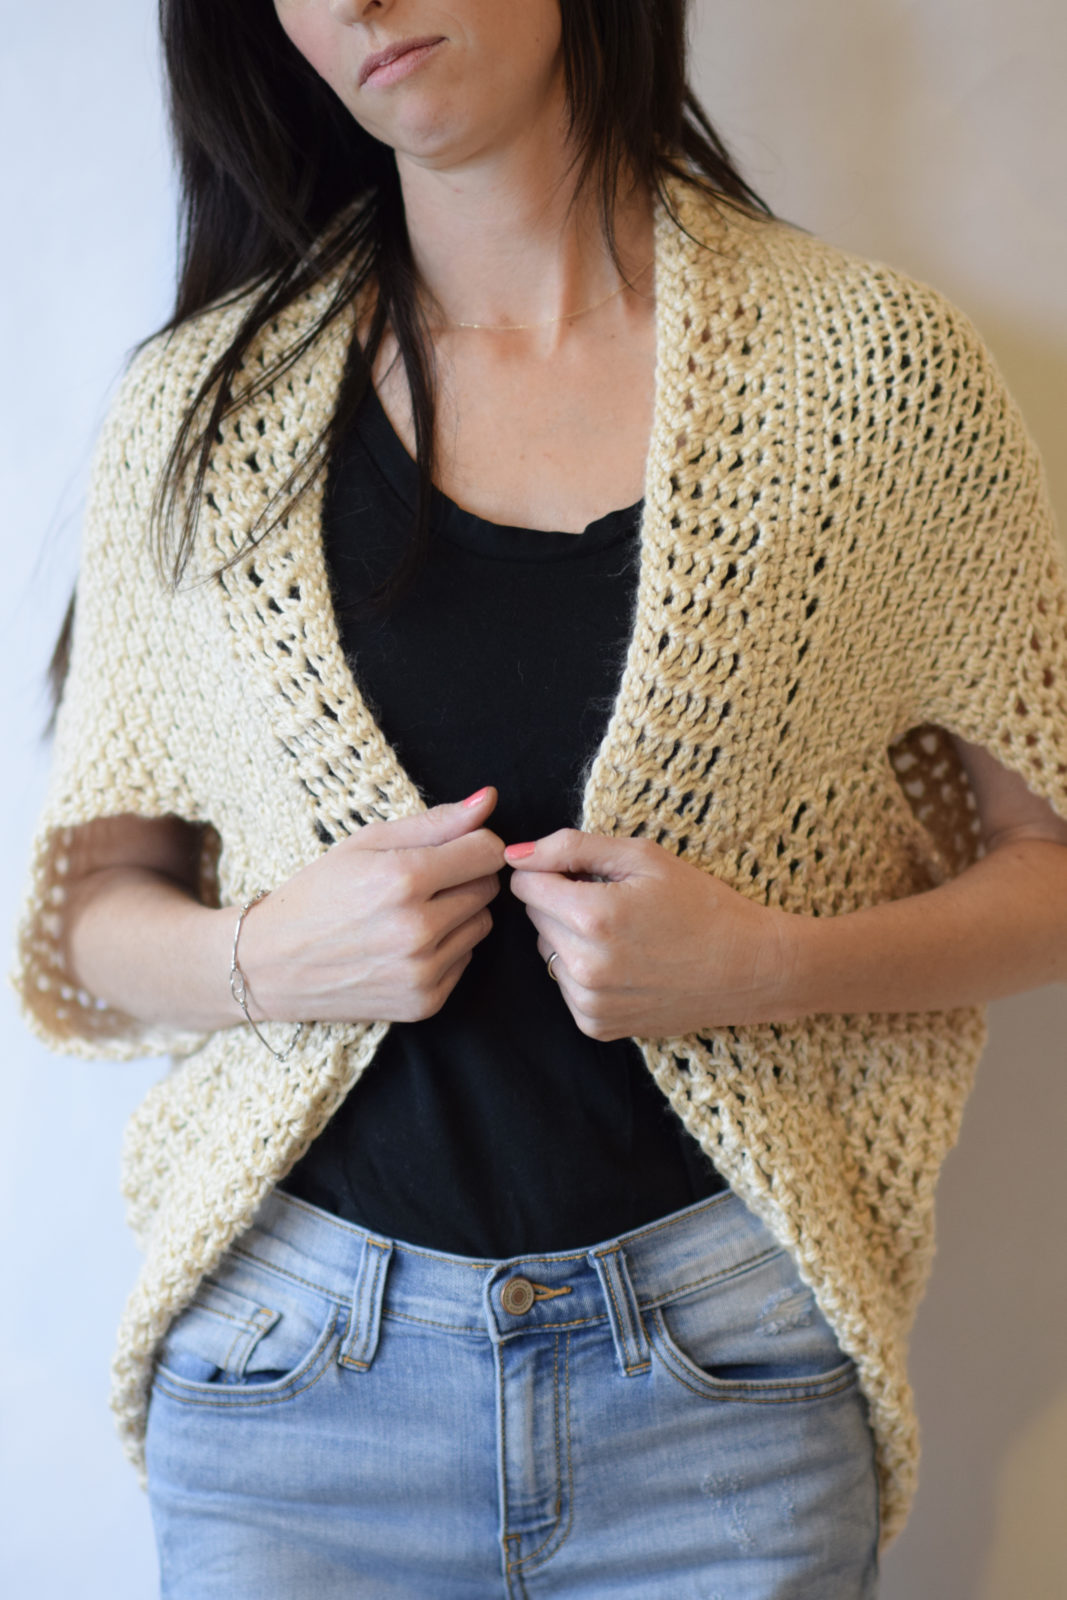
Is it a coat, a sweater or a cardigan?! I’ve been so excited to show you a few projects that I’ve been working on for the last several months, including this Sweater Coat. It’s part of my “Colorful Life Collection” that I’ve put together using chunky, Color Made Easy from Lion Brand Yarn. You can now find the Color Made Easy Yarn at select Michaels Stores, Michaels.com and LionBrand.com. I’ll introduce you to my collection in a bit, but first want to touch on this fun, chunky crochet cardigan pattern. You’ll also find the full, free pattern for the Sweater-Coat at the bottom of this blog post!
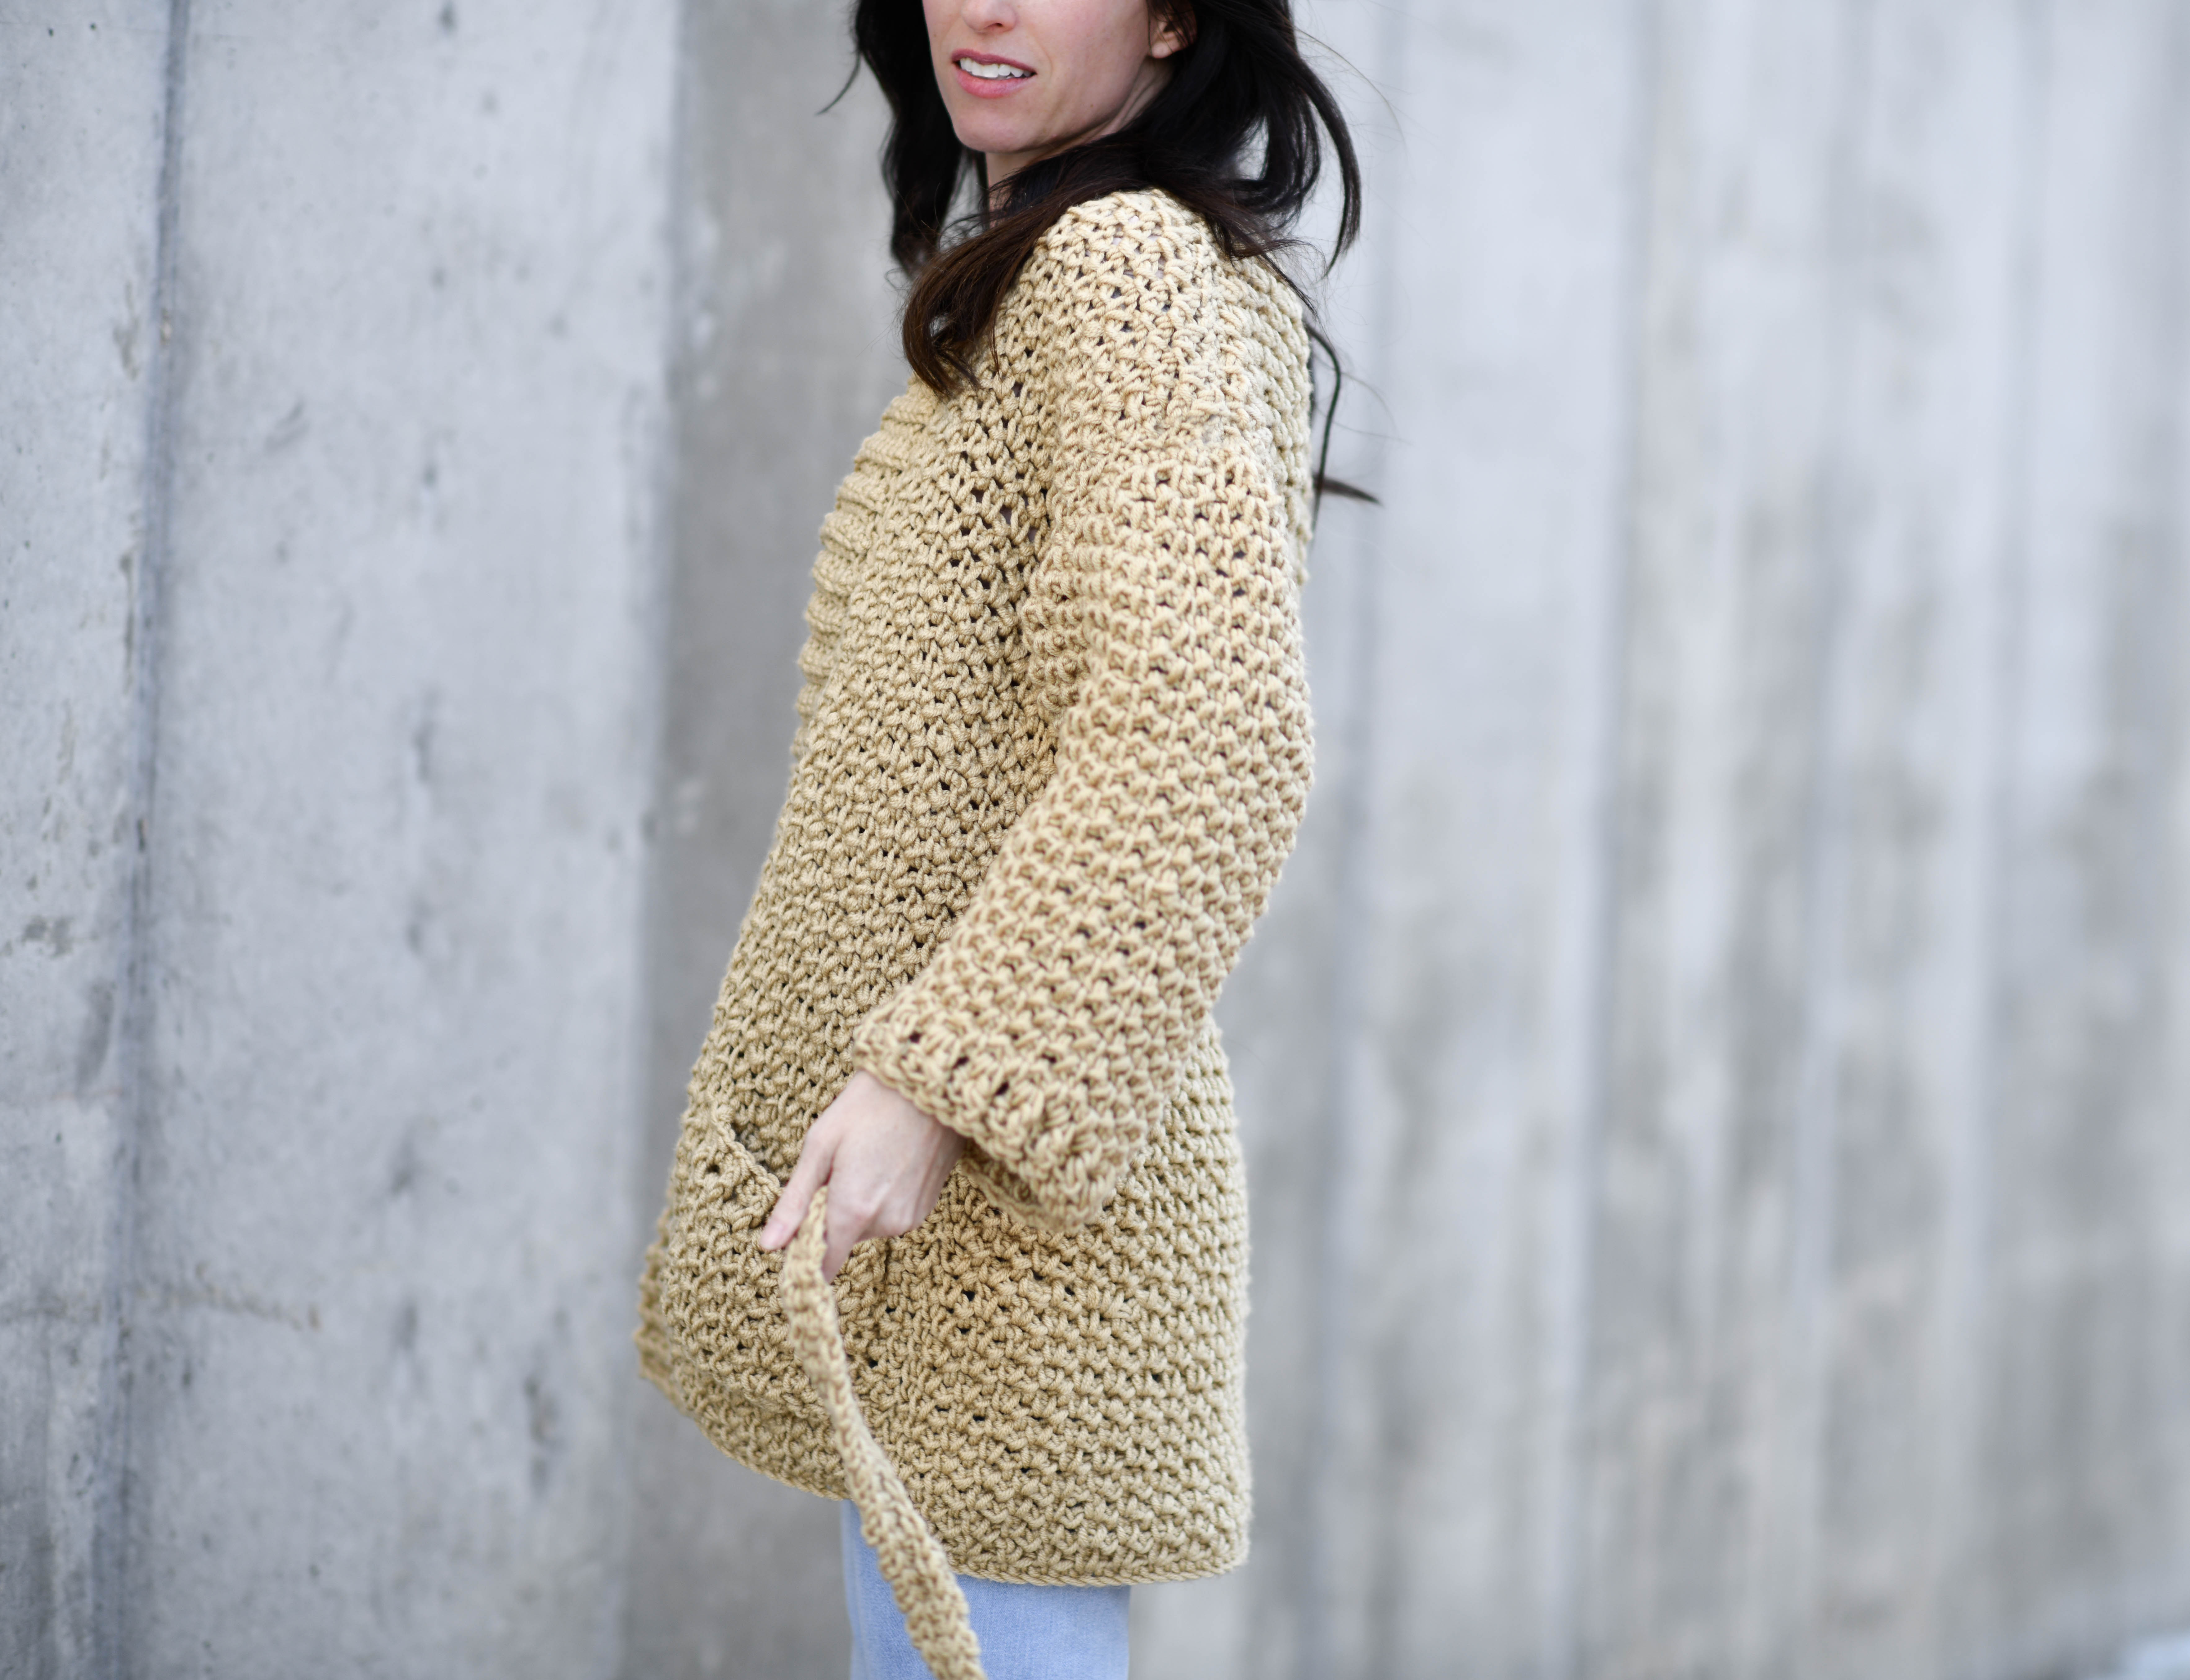
Who else loves using the big yarns? (Raises hand) If you follow my blog, you know I’m sort of obsessed with using super bulky yarns and chunky yarns. Not only do I love the look when they are knit or crocheted, but they also work up quickly. This Sweater-Coat is no exception as you can crochet it relatively quickly compared to many other sweaters made with worsted weight yarn. It also happens to be a simple pattern, made with basic shapes and very minimal shaping. I like the belt tie which is flattering to any body type and the cozy pockets. Below you’ll find instructions and also a link to my tutorial on how to crochet this cool looking stitch pattern.
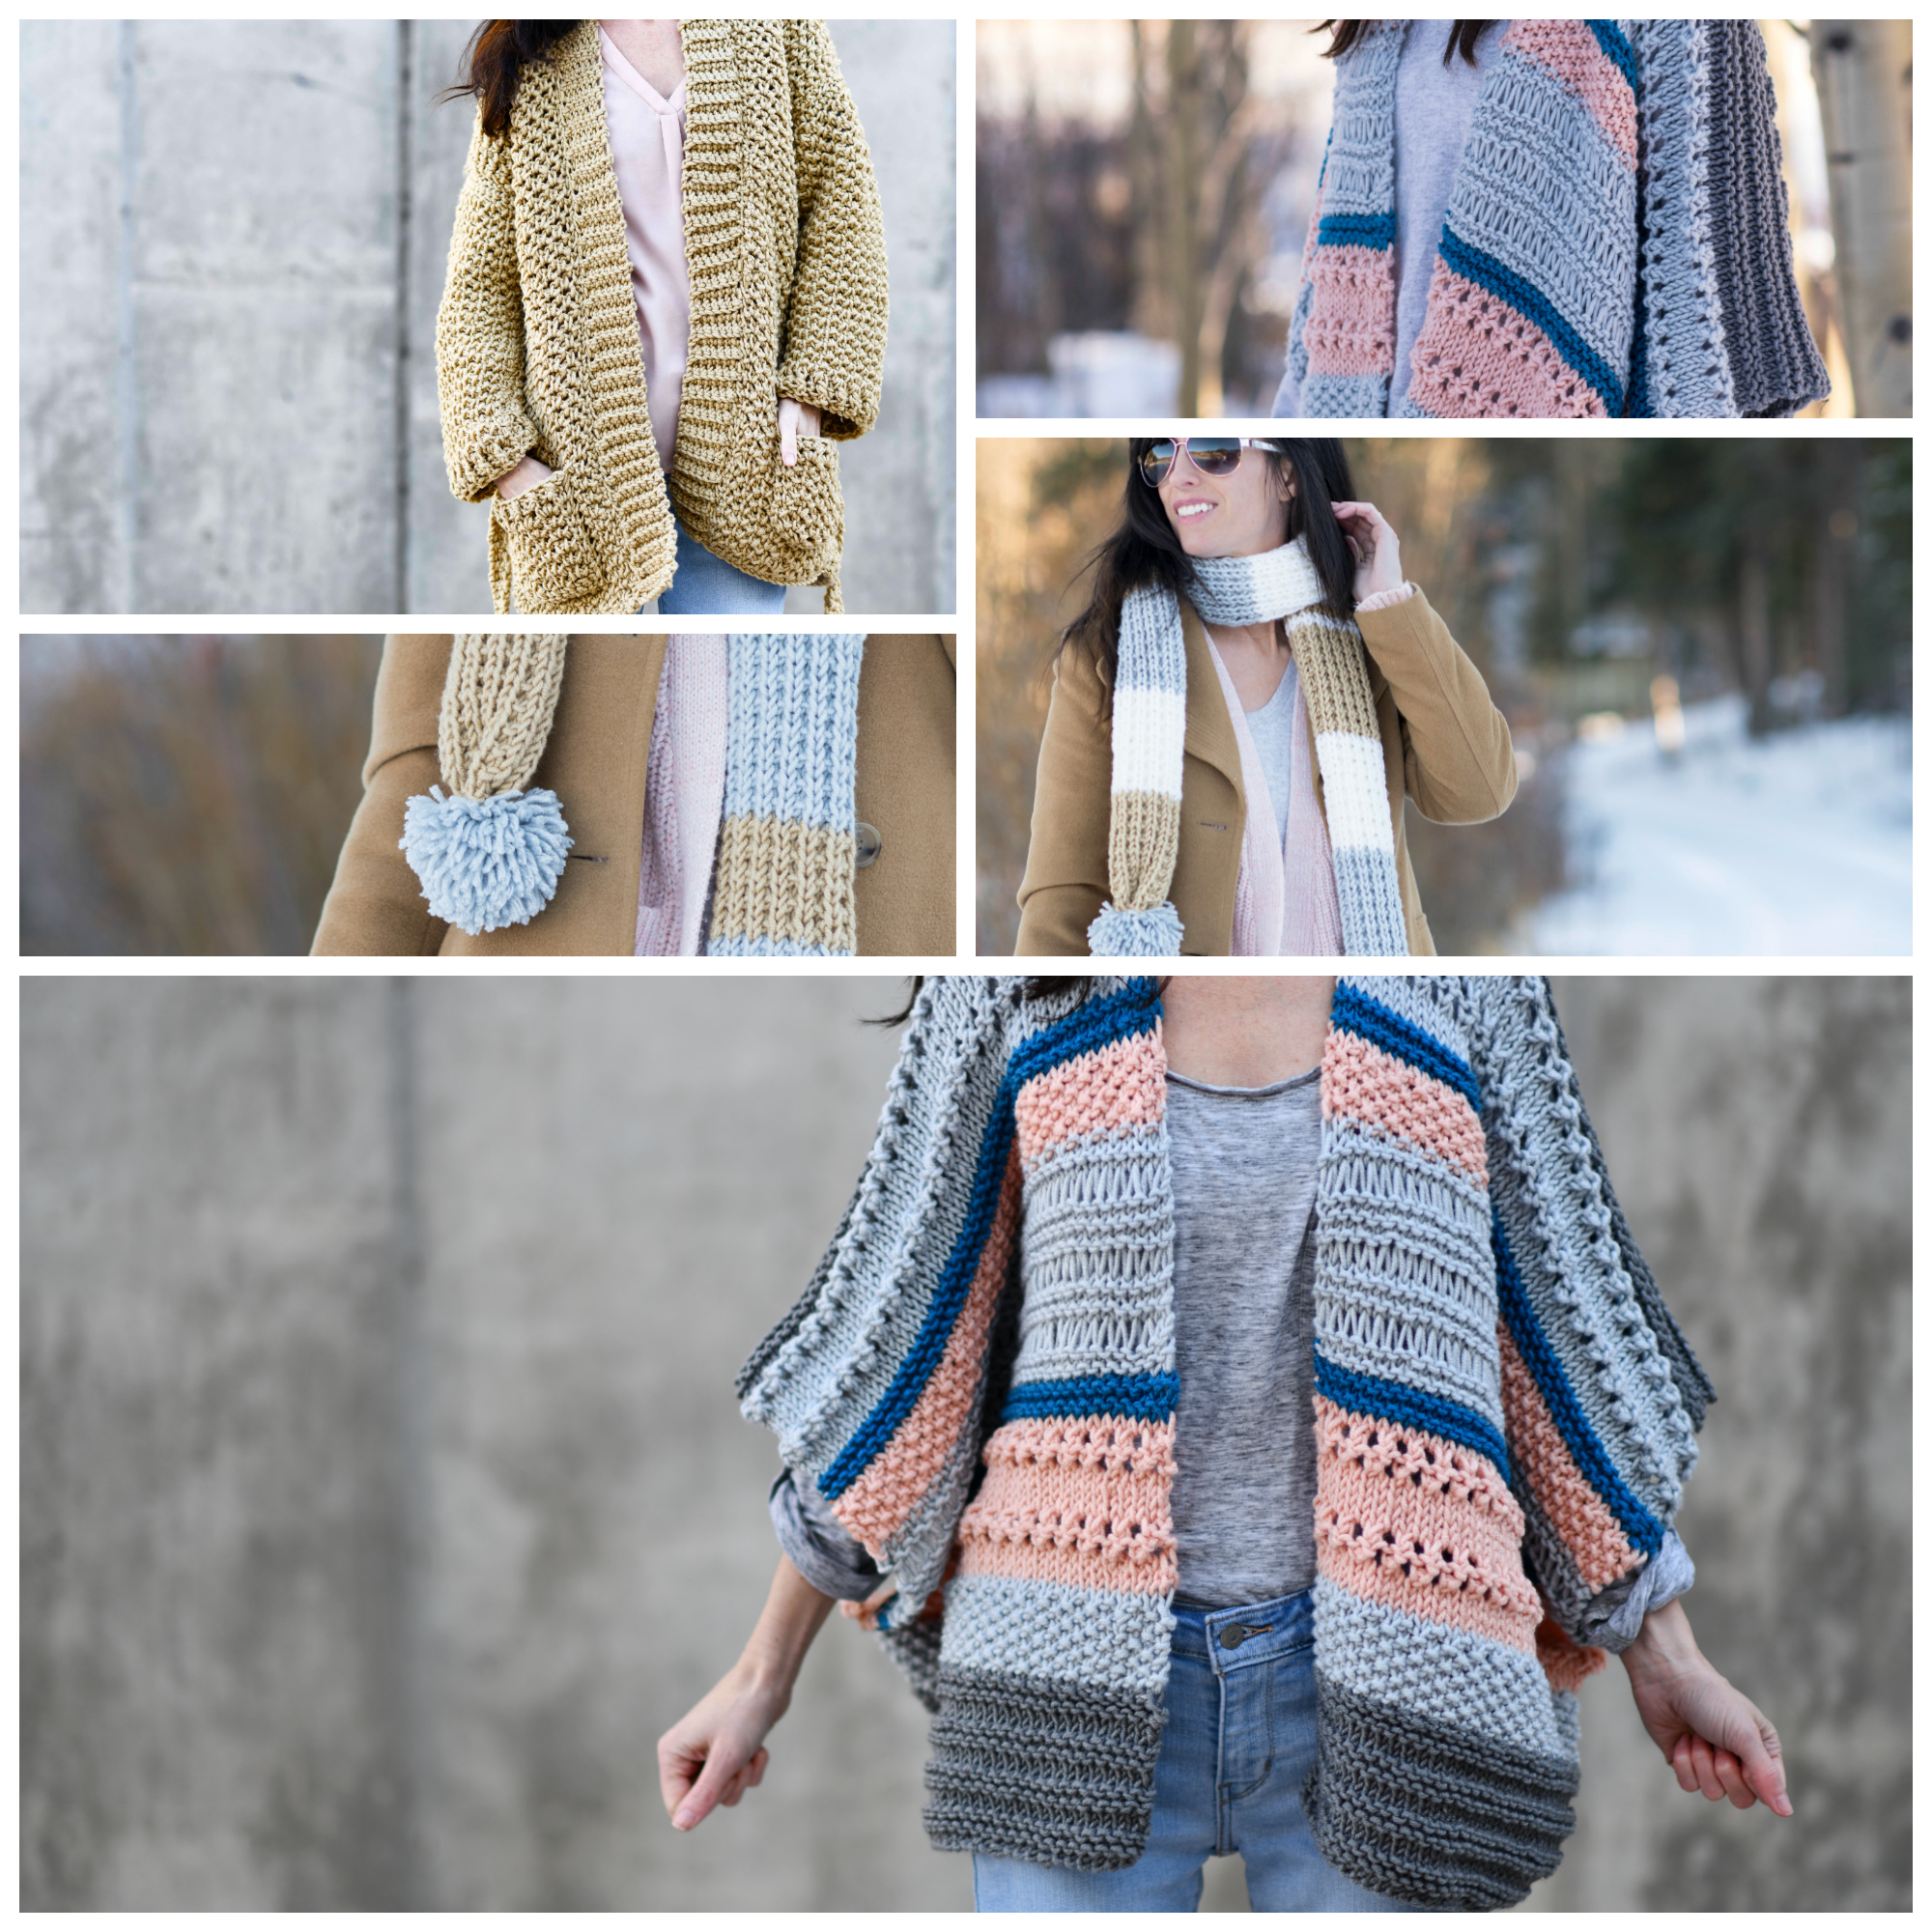
Above: The new, Colorful Life Collection. And look, there’s color on my blog! (Quick little happy dance) To me, living a colorful life means living life to the fullest! Read a new book, travel somewhere, make a new friend, learn a new craft, knit a new stitch, learn to crochet, laugh, love, and be grateful! Let’s live a colorful life this year, shall we?
If you want to see more patterns and kits using this yarn, definitely check out all of the kits available from Lion Brand (HERE) by Two of Wands, Sewrella and Make & Do Crew.
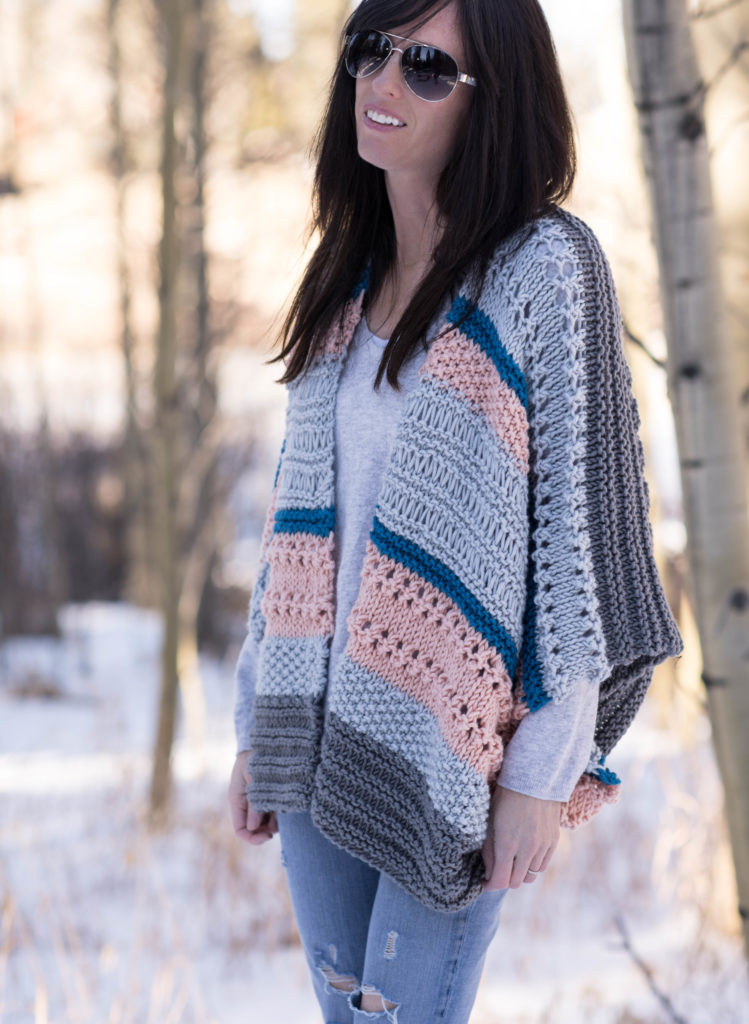
Above: This is the Monaco Kimono (kit available HERE for 20% off) and I will be sharing the pattern for FREE in the next couple of weeks here on the blog!
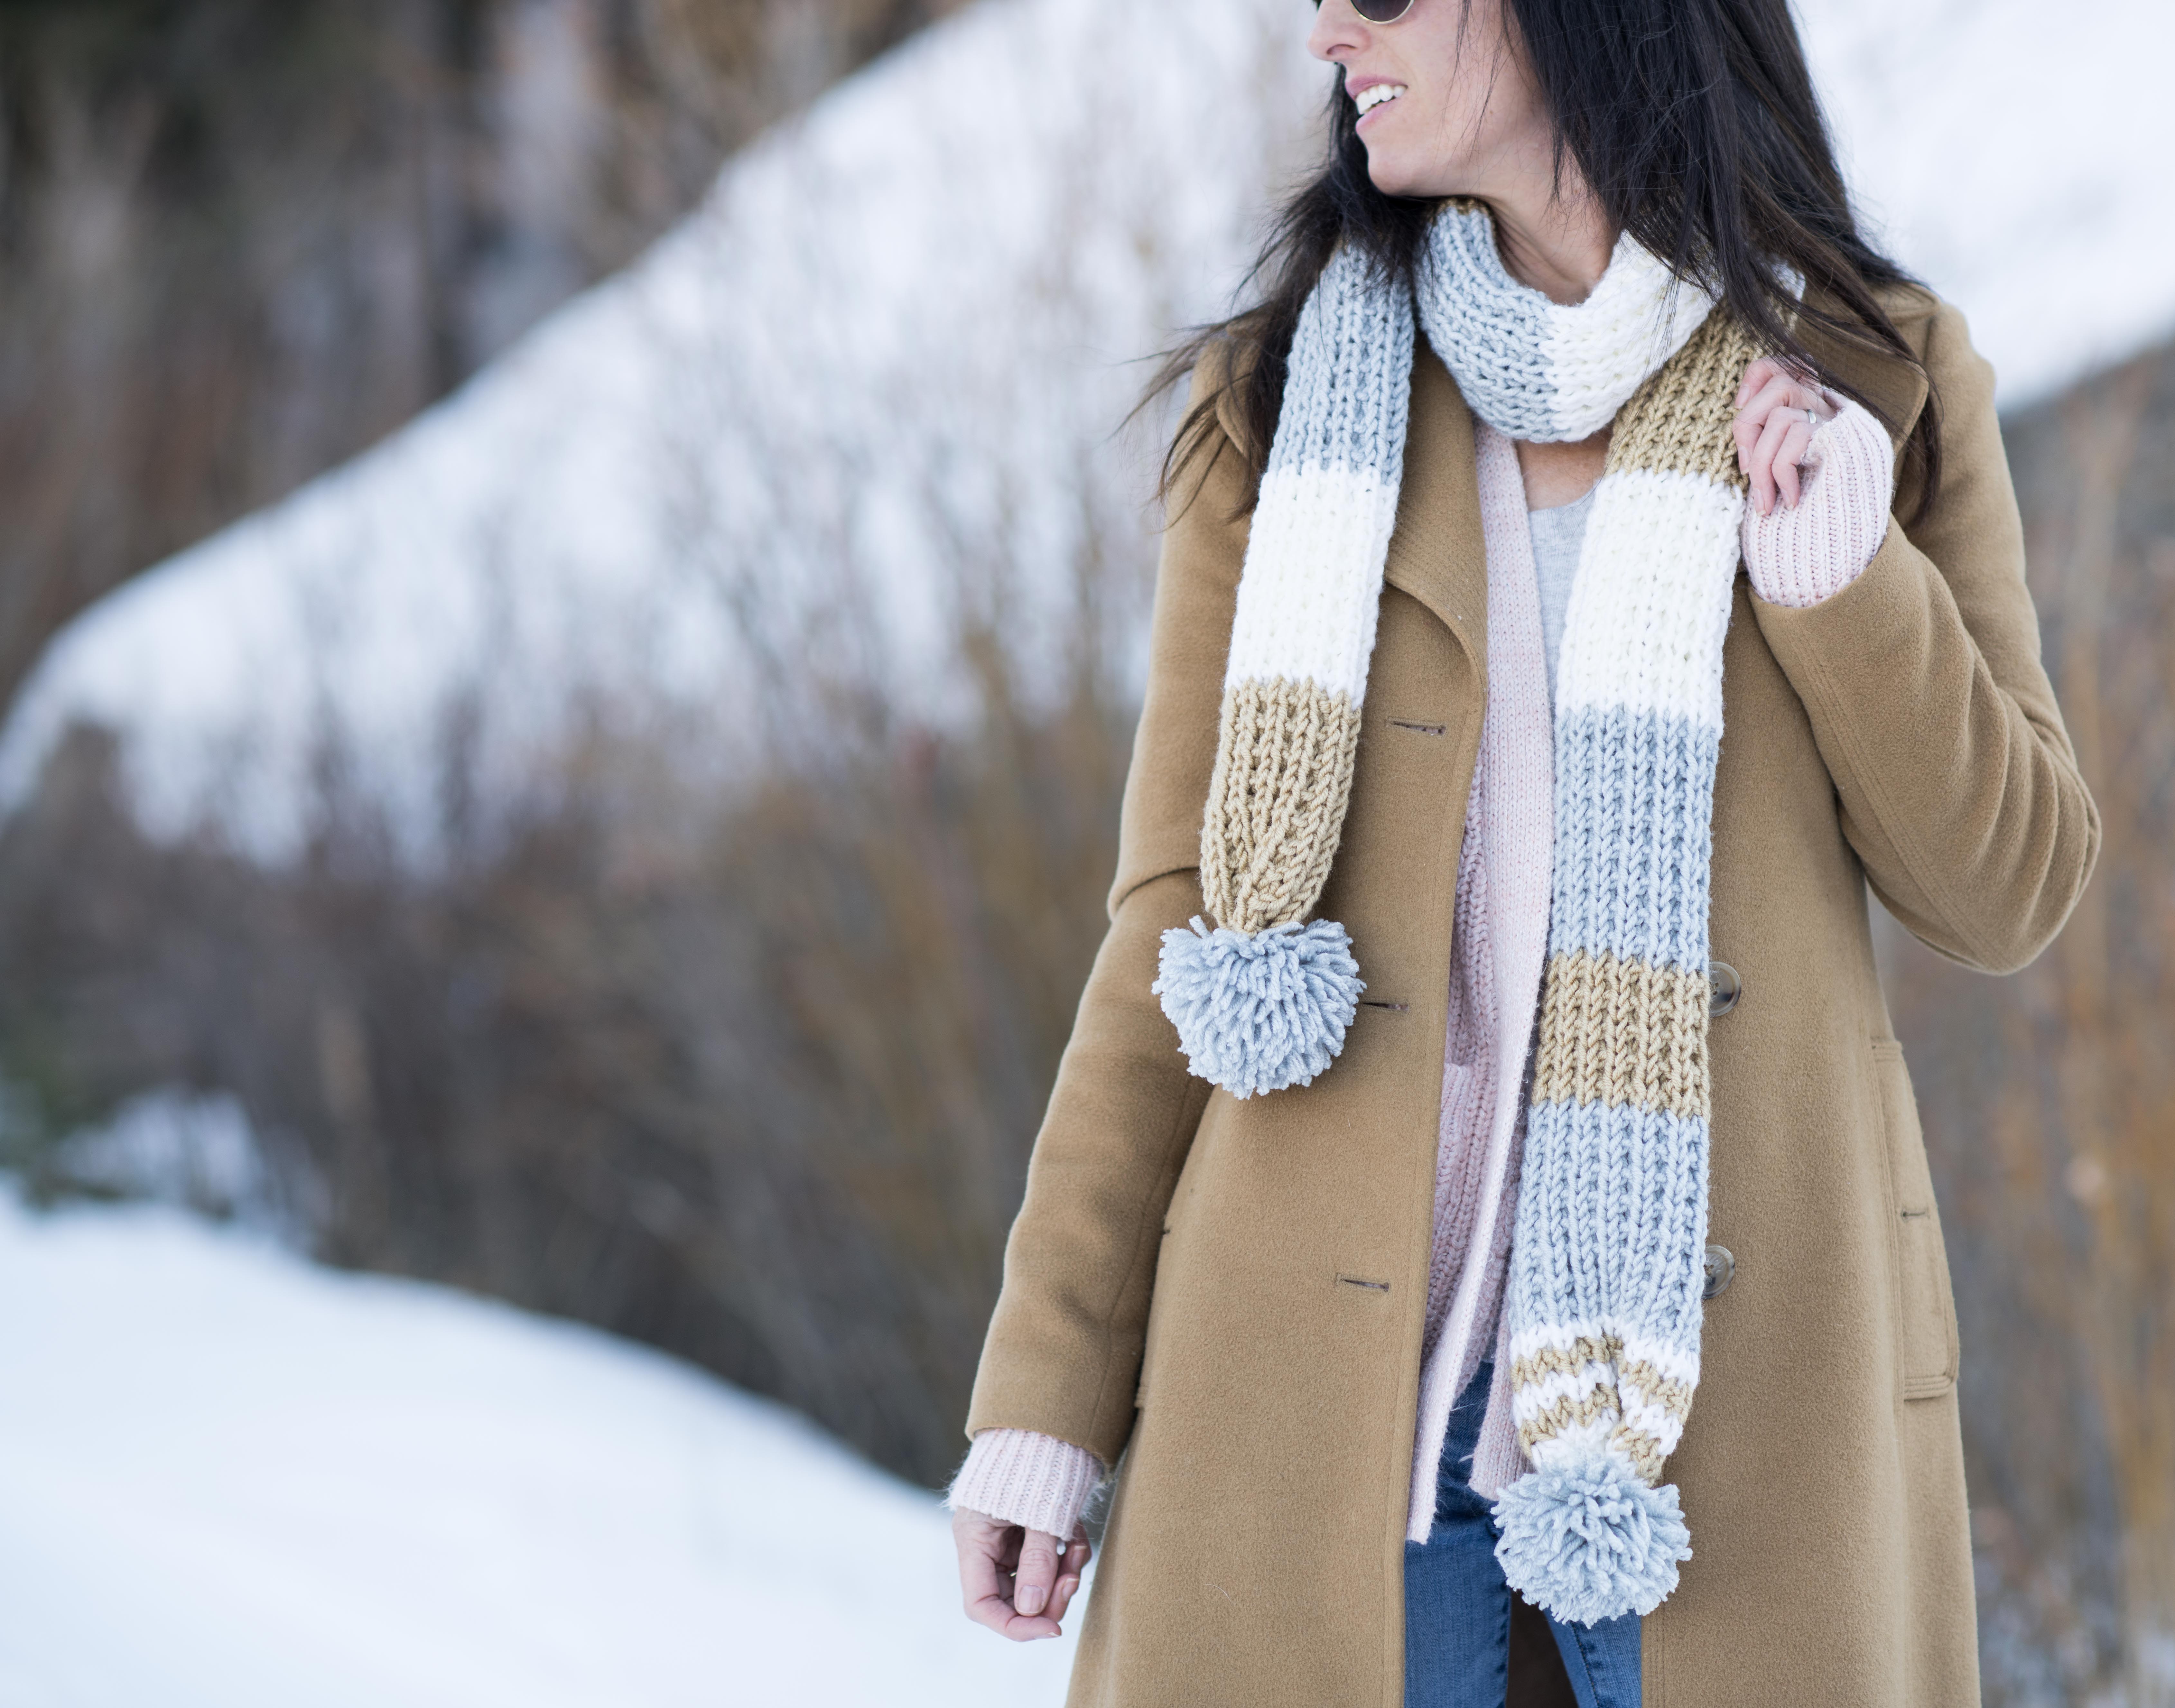
Above: This is the Fairbanks Pommed Scarf! It’s available now as a knit kit from Lion Brand Yarn (currently 20% off) and I’ll be sharing this one on the blog for free as well in the next couple of weeks.
Do you have a favorite chunky yarn? My fave used to be Woolspun, which was discontinued, so I was excited to learn that Lion Brand was coming out with this comparable yarn. I’d say it’s even better than the Woolspun in the sense that it’s 100% acrylic so there are no worries about wool allergies. It’s very soft, has a nice drape, and the stitch definition is awesome.
Okay, shall we get to this pattern?!

Crocheted Sweater-Coat Pattern
See free pattern below, or you may choose to purchase the ad-free printable version from my Etsy shop HERE
Pattern Description: Is it a sweater, a cardigan or a coat? How about all three! This sweater-coat can double as a light jacket or chunky cardigan. The simple stitch pattern is easy to memorize and it’s a breeze to crochet as there’s only light shaping on the sleeves. The sweater features practical pockets and an optional belt-tie to keep you cozy. Add the beauty of a textured crochet stitch and you’ve got a piece that won’t go unnoticed.
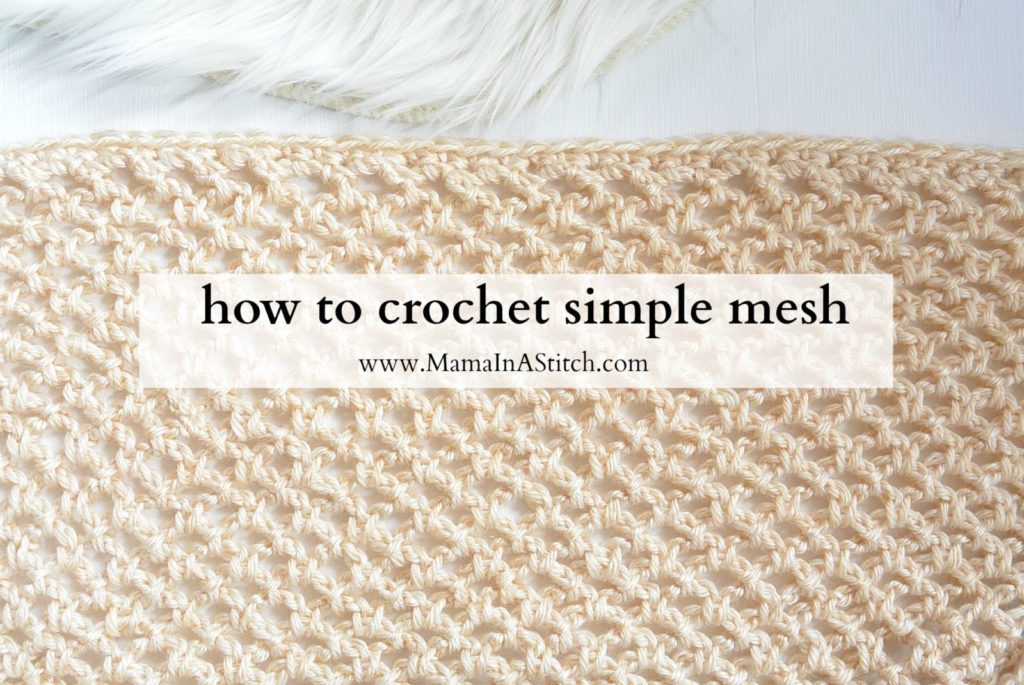
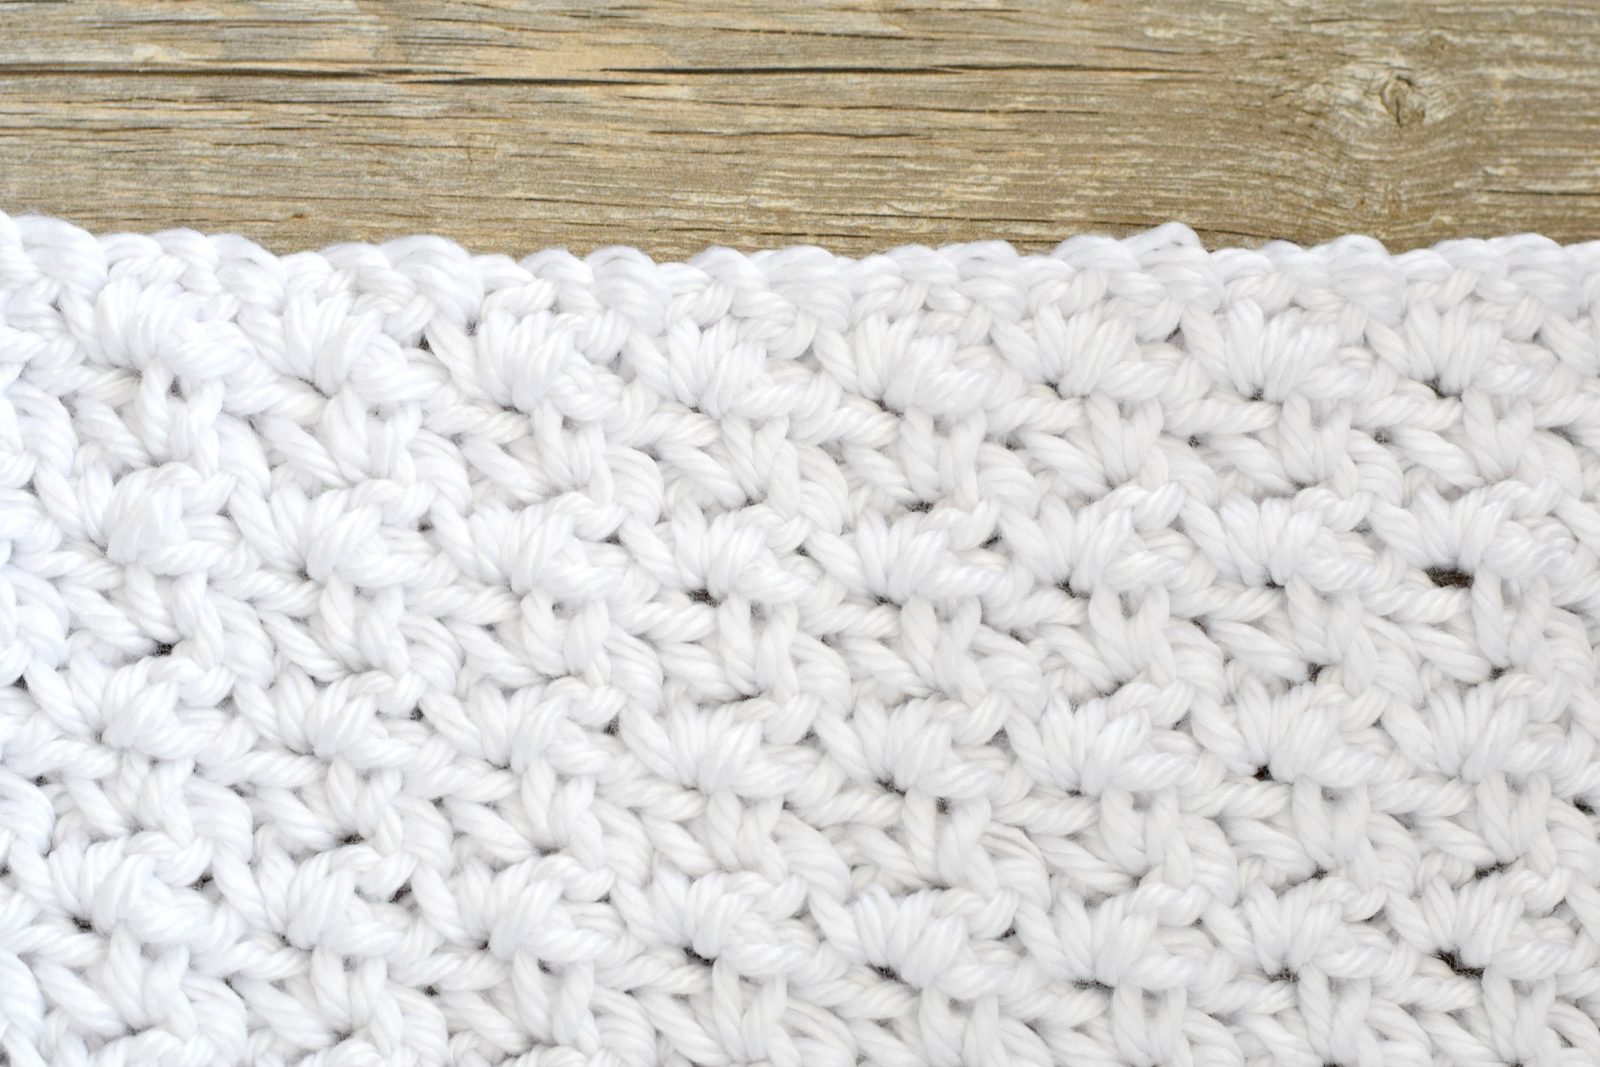
This pattern is made with a simple mesh stitch! You can see a full tutorial on the blog HERE
Skill Level: Easy +
Materials:
Size L Hook 8.0 mm
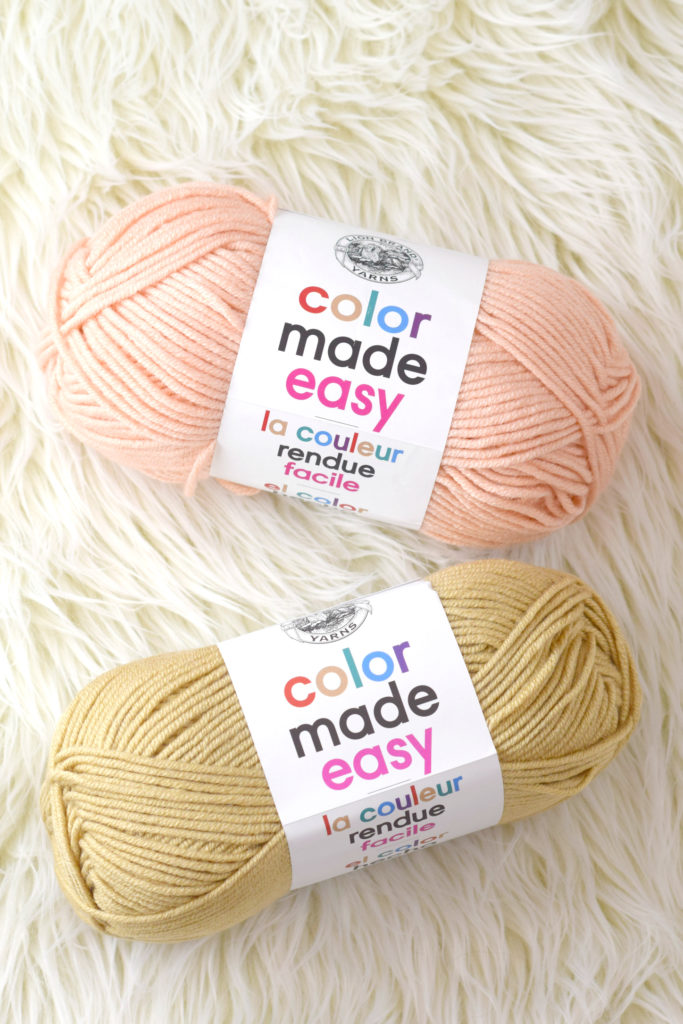
(5, 6, 7, 7) skeins Lion Brand Yarn Color Made Easy in Wheat (200 g / skein) (Kit available from Lion Brand Yarn HERE)
Pattern uses approximately (935 g, 1076 g, 1225 g, 1334 g) total
Tapestry Needle
Scissors
Dimensions (approximate):
Small, Medium, Large, XL
Please follow the key throughout the pattern according to the size you are crocheting:
(S, M, L, XL)
Bust Circumference:
S – 37”
M – 41”
L – 45”
XL – 49”
Length:
S – 26”
M – 27”
L – 28”
XL – 28”
Cross Back:
S – 15”
M – 16”
L – 17”
XL – 18”
Abbreviations & Skills:
ch – chain
sc – single crochet
st – stitch
sk – skip
sl st – slip stitch
ch2sp – chain two space
sc blo – single crochet through the back loop only
fp hdc – front post half double crochet
bp hdc – back post half double crochet
Gauge:
Approximately 11 ch stitches & 12 rows in 4” x 4” of mesh stitch which is the stitch pattern worked throughout the project. You can find the pattern and a tutorial of the mesh stitch on the Mama In A Stitch blog here: https://www.mamainastitch.com/how-to-crochet-an-easy-mesh-stitch/
Notes:
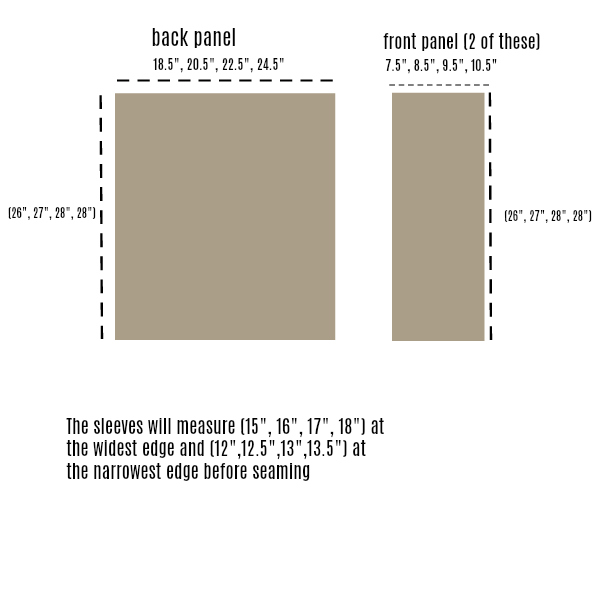
This sweater-coat is made in several pieces. There is one rectangular back panel, two rectangular front panels and two lightly shaped sleeves. Each piece is worked separately and then seamed to finish. The collar, pockets and belt are then each crocheted separately and sewn onto the sweater.
Pattern Instructions
Back Panel
Ch (51, 55, 61, 67)
Row 1 Sc in 2nd ch from hook and in each ch st across the row (50, 54, 60, 66)
Row 2 Turn, ch 2, sk 1st st, sl st into next st, *ch 2, sk st, sl st into next st; repeat from * across the row (50, 54, 60, 66 ch stitches)
Row 3 Turn, *ch2, sl st into next ch2sp; repeat from * across the row (50, 54, 60, 66 ch stitches)
Repeat row 3 until piece measures approximately (26”, 27”, 28”, 28”) long. Tie off and weave in ends.
Front Panel Pattern (make 2)
Ch (21, 23, 27, 29)
Row 1 Sc in 2nd ch from hook and in each ch st across the row (20, 22, 26, 28)
Row 2 Turn, ch 2, sk 1st st, sl st into next st, *ch2, sk st, sl st into next st; repeat from * across the row (20, 22, 26, 28 ch stitches)
Row 3 Turn, *ch2, sl st into next ch2sp; repeat from * across the row (20, 22, 26, 28 ch stitches)
Repeat row 3 until piece measures (26”, 27”, 28”, 28”) long. Tie off and weave in ends.
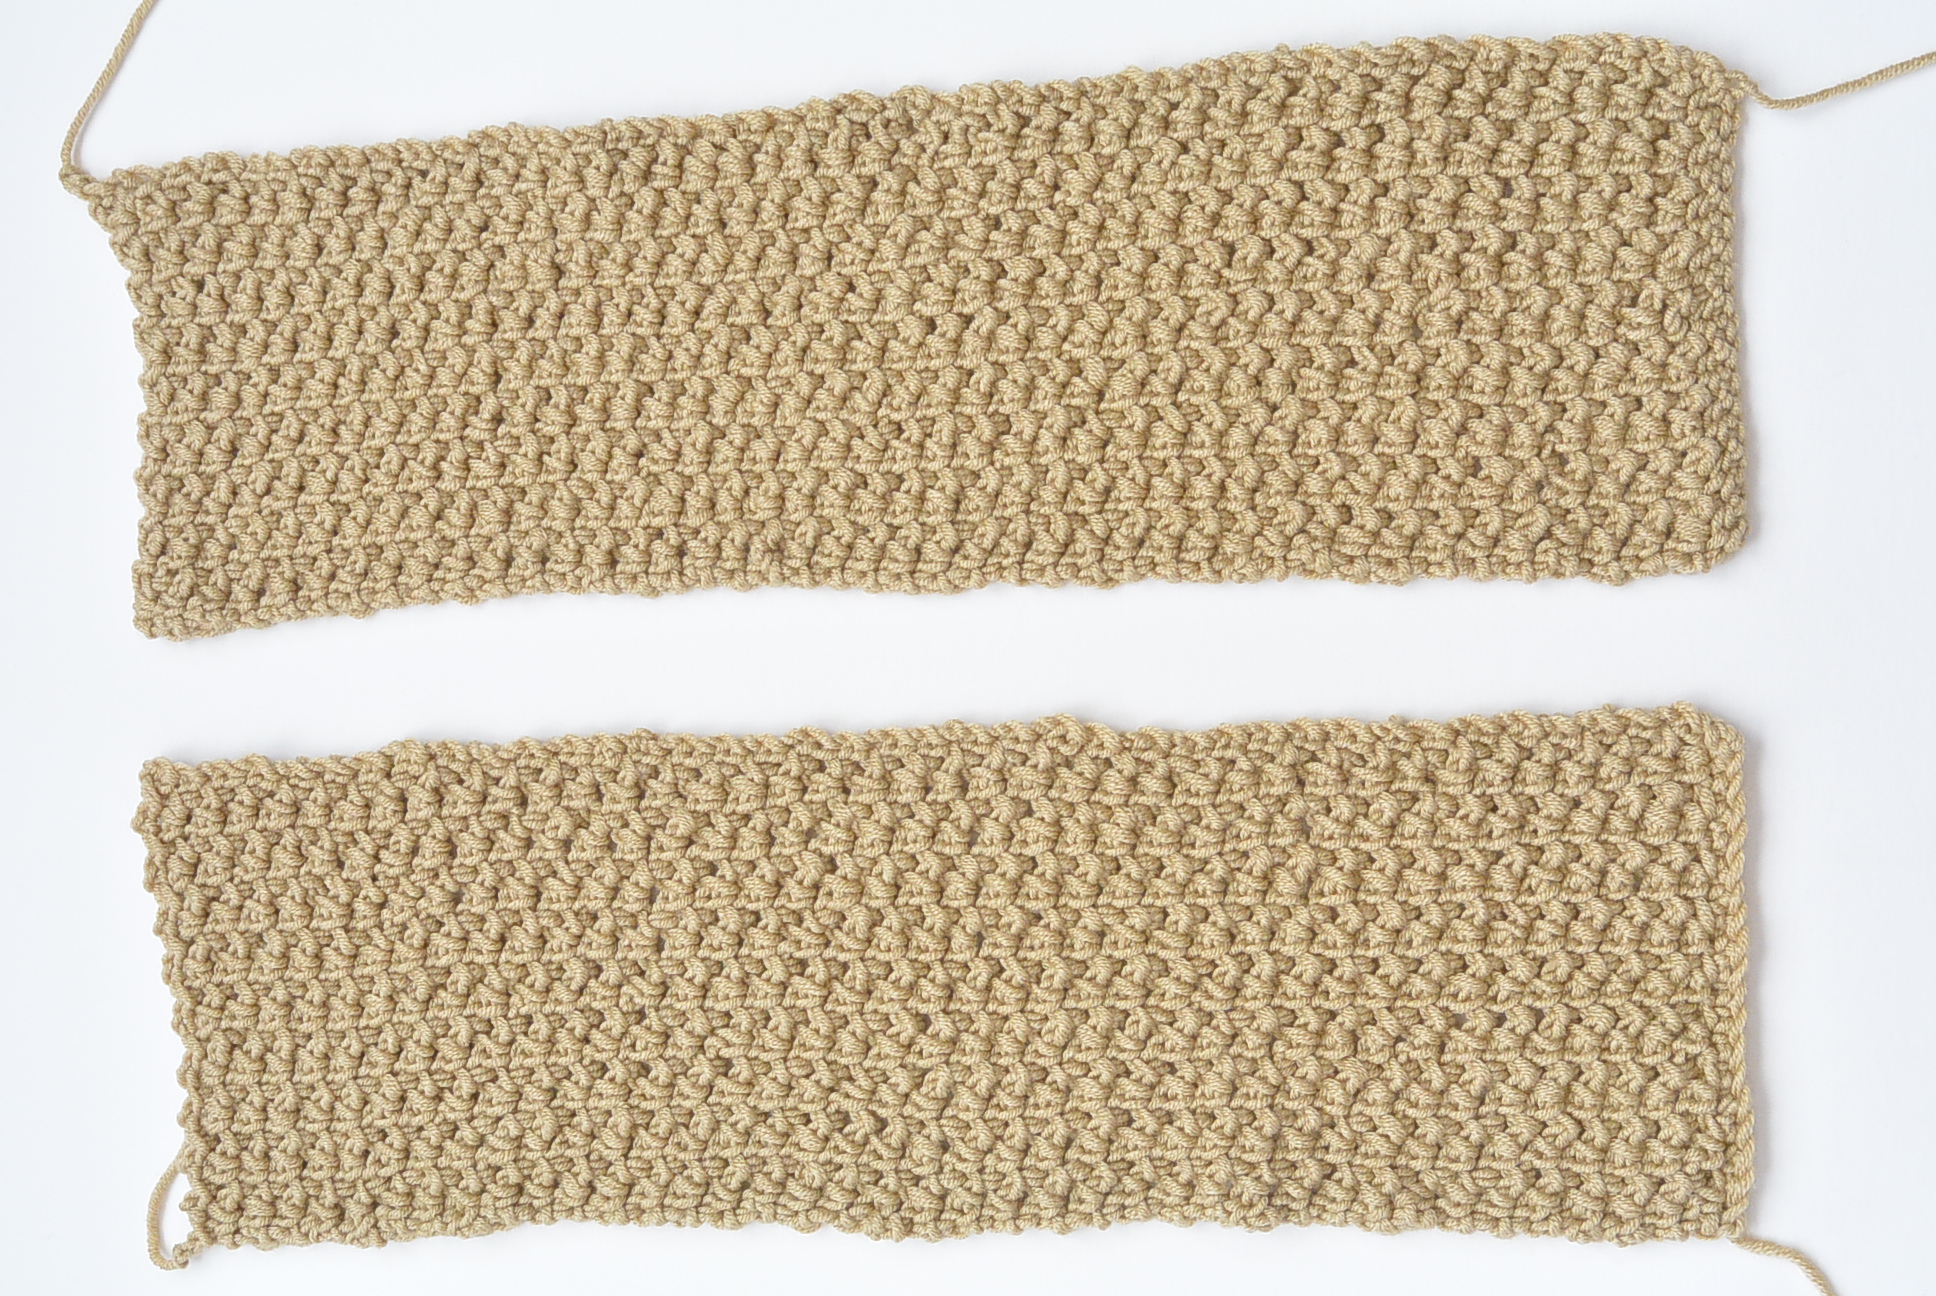
Repeat this pattern one more time to make a second front panel.
Below: Two panels complete
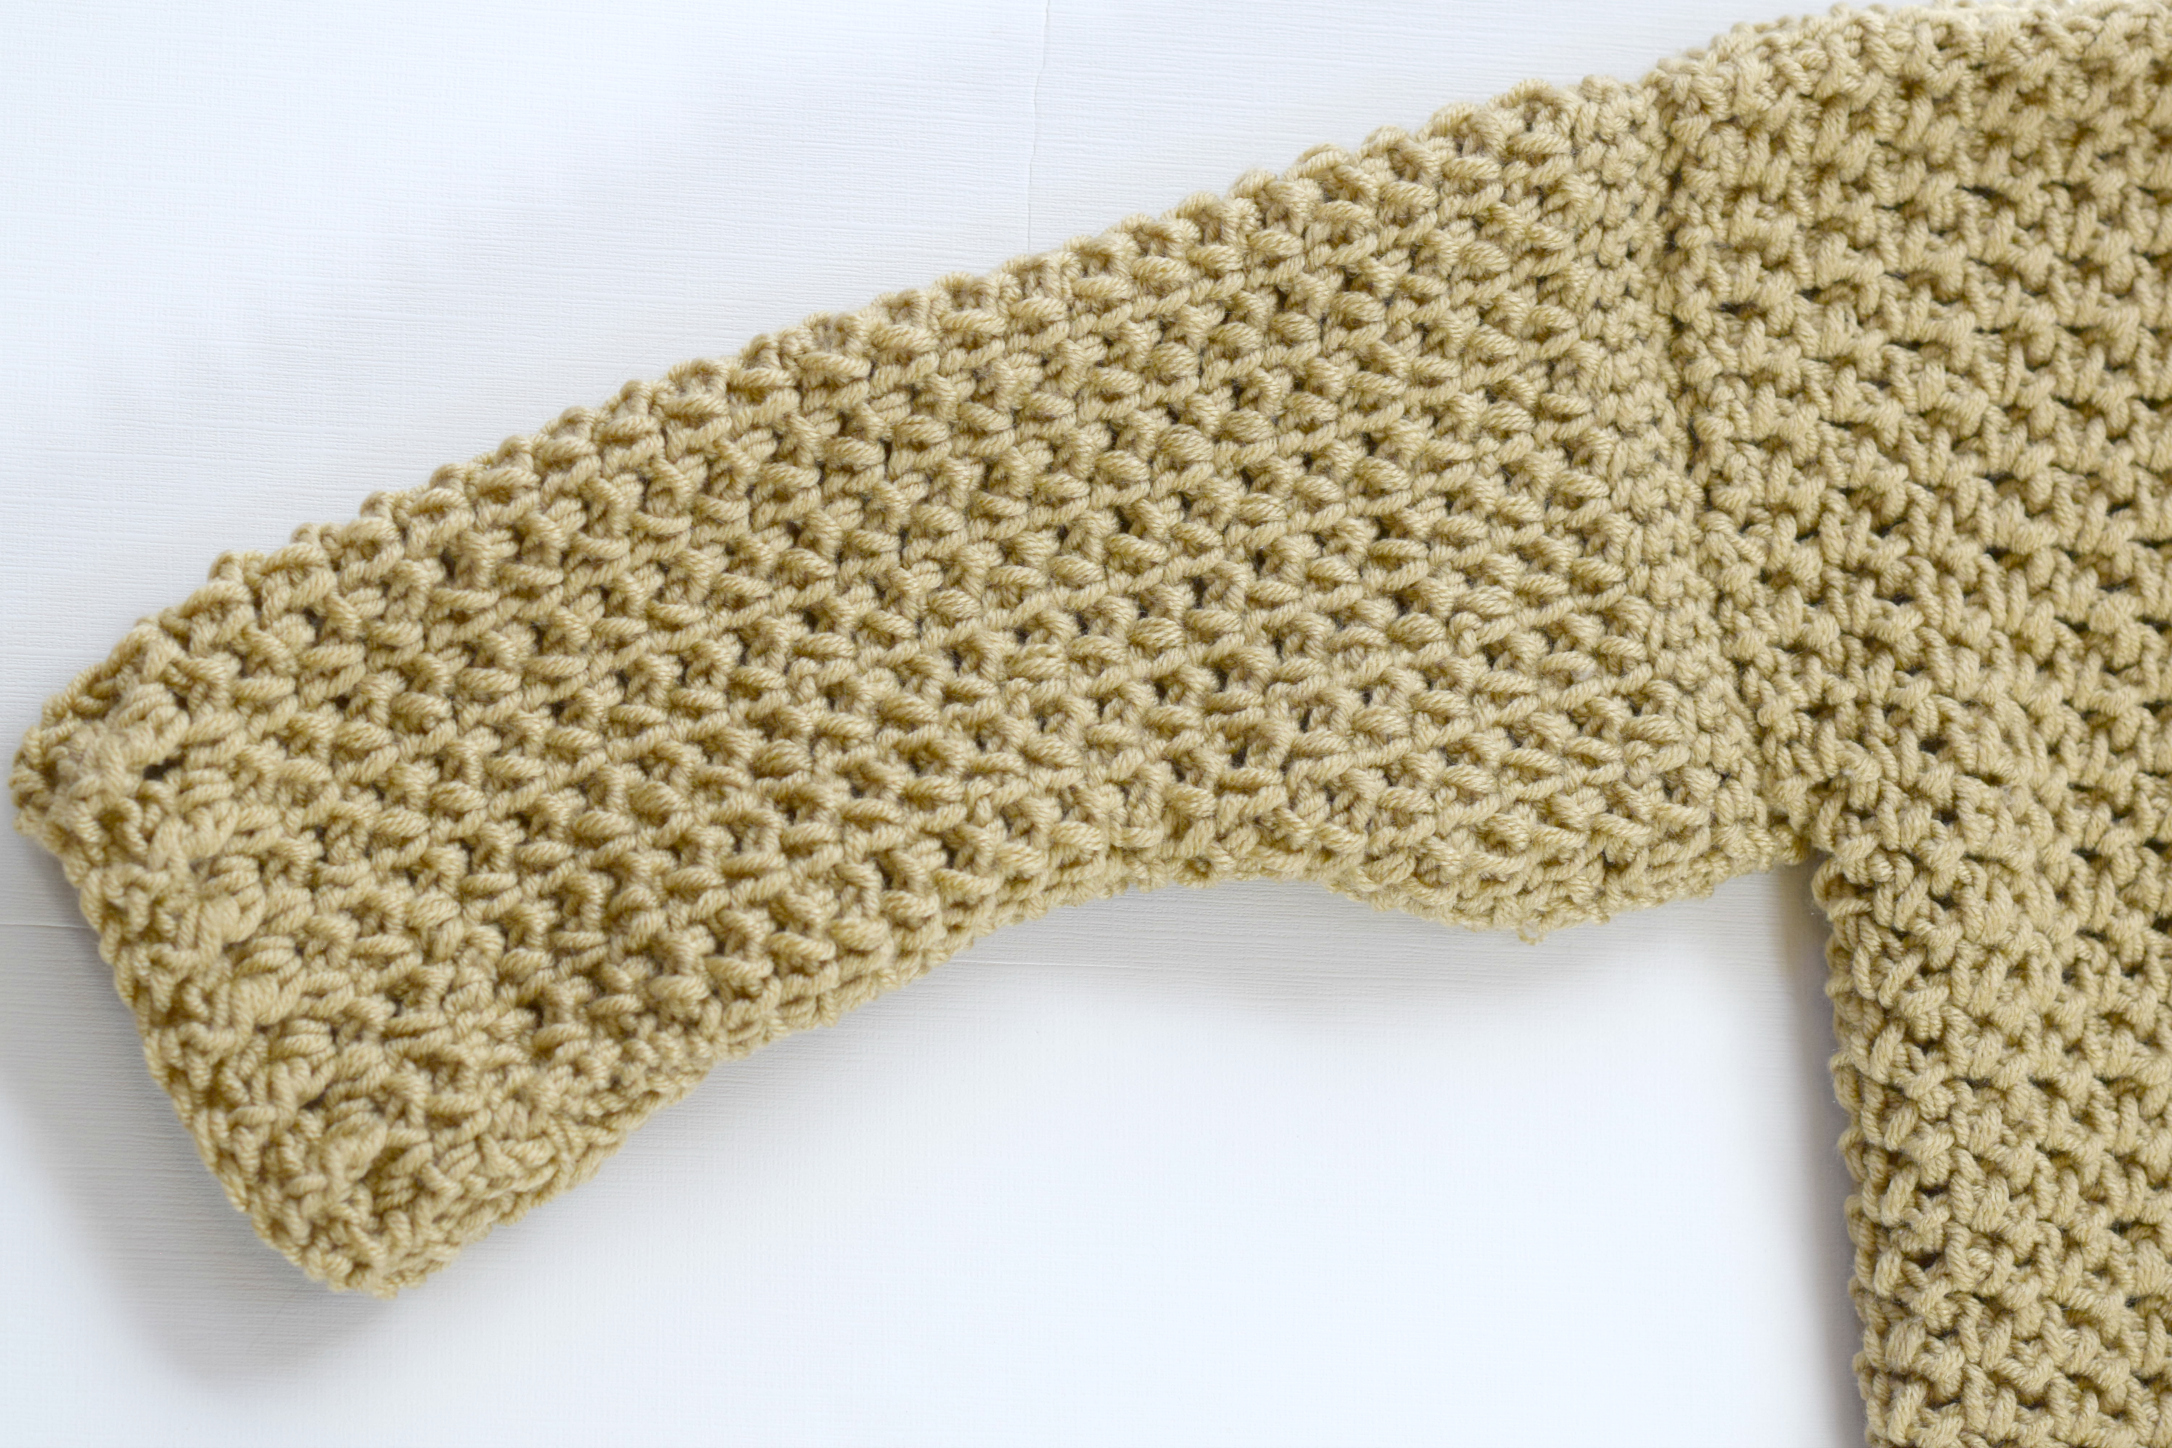
Sleeve Pattern (make 2)
The beginning chain is the widest end of the sleeve and you will crochet to the narrowest end which is also the cuff
Ch (41, 45, 47, 49)
Row 1 Sc in 2nd ch from hook and in each ch st across the row (40, 44, 46, 48)
Row 2 Turn, ch 2, sk 1st st, sl st into next st, *ch2, sk st, sl st into next st; repeat from * across the row (40, 44, 46, 48 ch stitches)
Row 3 Turn, *ch2, sl st into next ch2sp; repeat from * across the row (40, 44, 46, 48 ch stitches)
Decrease
Row 4 Turn, ch 1 (doesn’t count as st), sc in 1st ch2sp, ch 1, sl st into next ch 2 sp, *ch 2, sl st into next ch 2 sp; repeat from * to last ch2sp, ch 1, sc in last ch2sp of row. (this row will decrease stitch count by 2 stitches – do not count sl stitches or turn ch 1 in stitch count)
Row 5 Turn, ch2, sk sc stitch of previous row, sl st into ch2sp, * ch 2, sl st into next ch2sp; repeat from * across the row. (this row will decrease stitch count 2 stitches – count only ch stitches and not sl stitches if counting)
Row 6 Turn, *ch2, sl st into next ch2sp; repeat from * across the row.
Repeat rows 4 – 6 until piece is approximately (12”, 12.5”, 13”, 13.5”) wide, ending with a row 6 pattern repeat
Next, repeat stitch pattern from row 6 until the sleeve is (16.5”,17.5”,18.5”,18.5”) long
Next you will create the ribbed cuff portion of the sleeve
Sleeve Cuff
Row 1 Ch 2, make 2 hdc in each ch2sp across the row
Row 2 Turn, fp hdc in 1st st of row, *bp hdc in next stitch of row, fp hdc in next st; repeat from * across the row, tie off and weave in ends.
Fold sleeve in half and seam with a simple whip stitch seam.
Repeat Sleeve Pattern one more time to make a second sleeve.
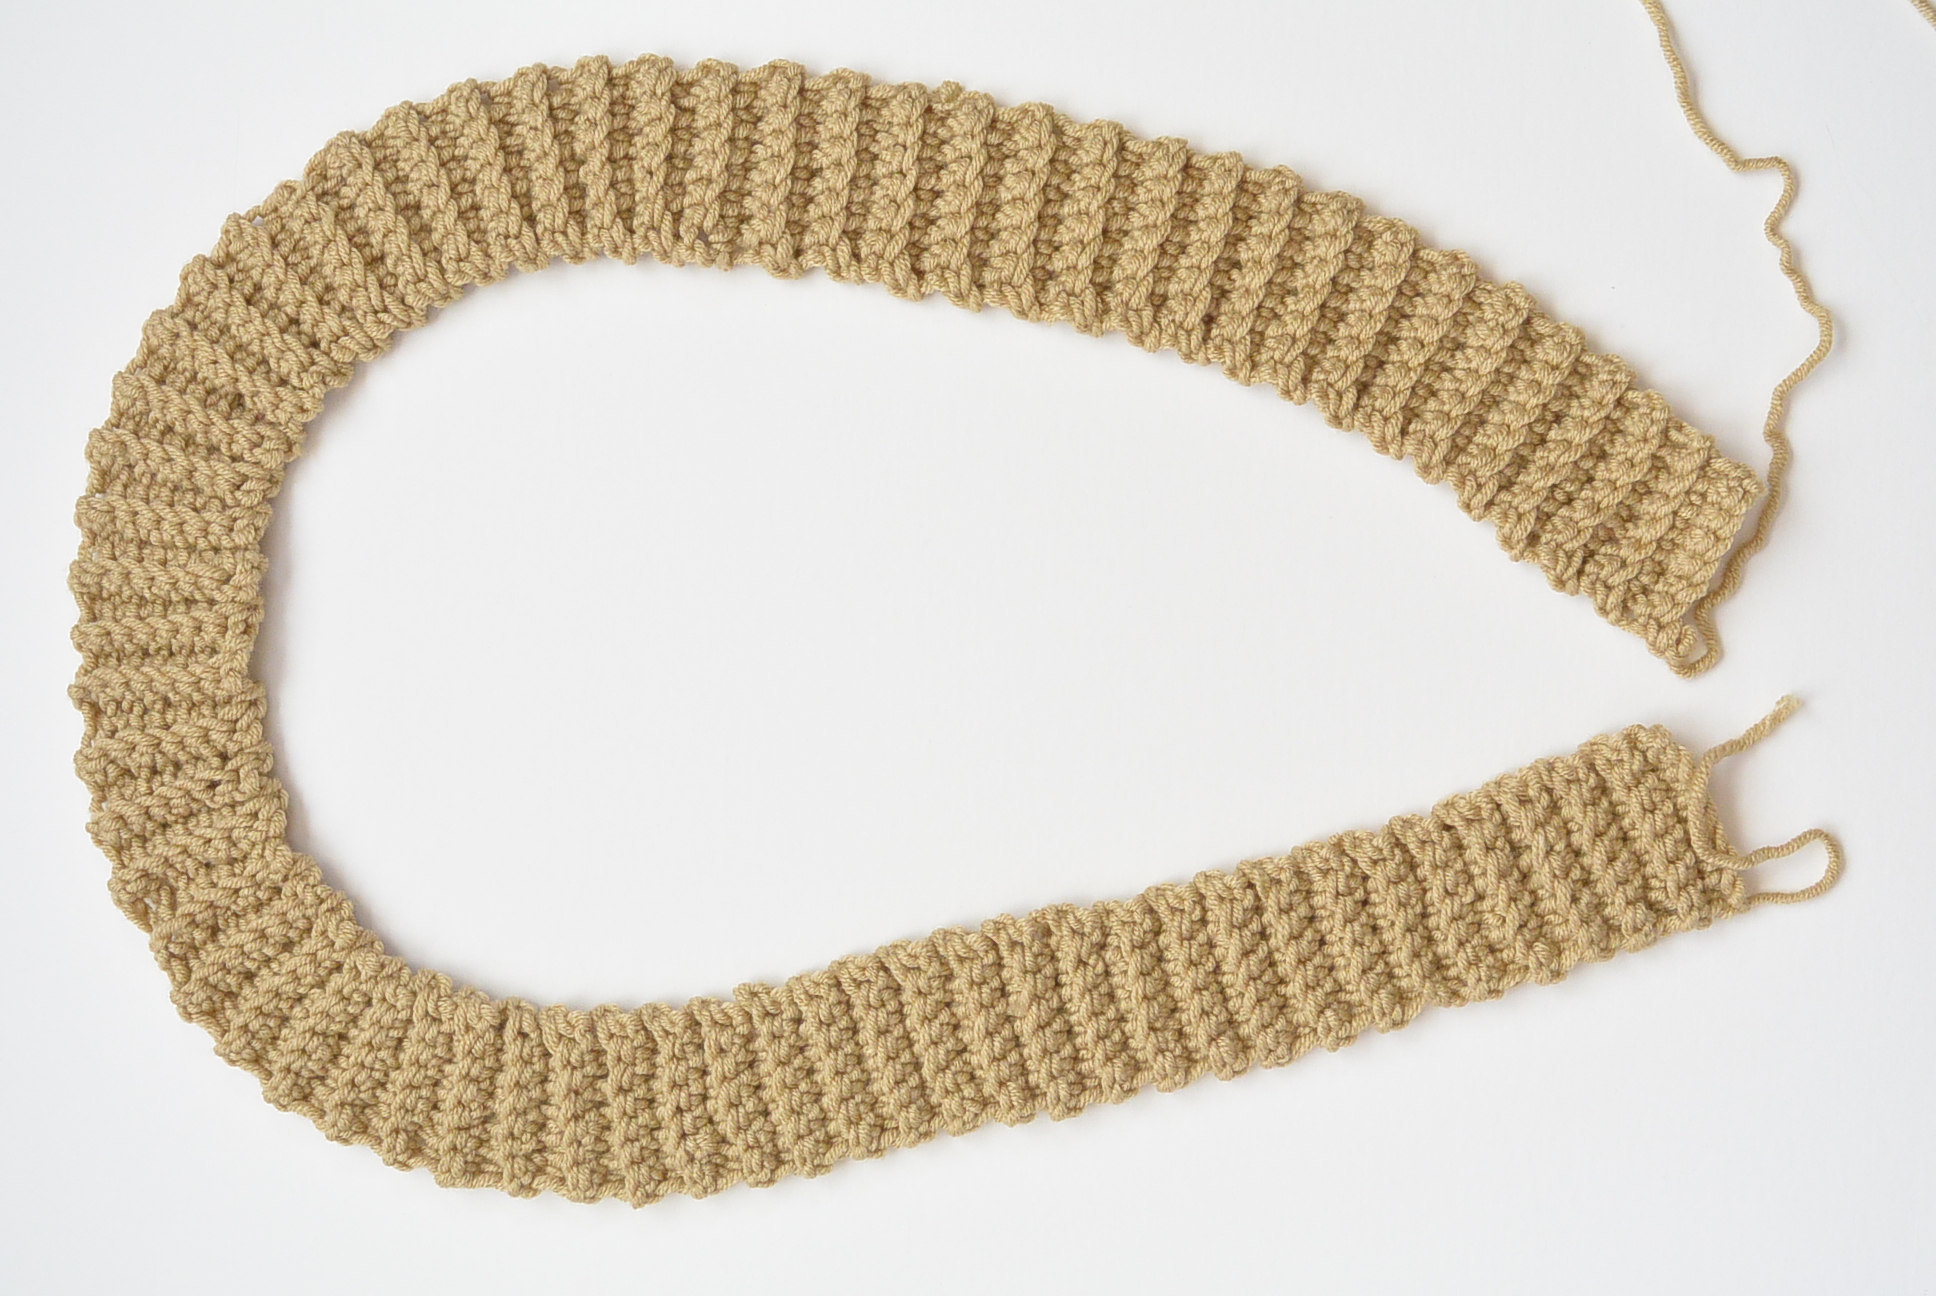
Collar Pattern
All sizes, ch 8
Row 1 Sc in each st across the row (7)
Row 2 Turn, ch 1, sc blo in each st across the row (7)
Repeat row 2 until collar measures (56”, 58”, 62”, 66”)
Tie off and weave in ends
Below: Crochet the collar separately, then whip stitch to the cardigan.
Pocket Pattern
All sizes, ch 16
Row 1 Sc in each st across the row (15)
Row 2 Turn, ch 2, sk 1st st, sl st into next st, *ch2, sk st, sl st into next st; repeat from * across the row. (15)
Row 3 Turn,*ch2, sl st into next ch2sp; repeat from * across the row. (15)
Repeat row 3 until your pocket is approximately 4.5” tall.
Next, you will continue working the upper ribbing of the pocket
Upper Ribbing of Pocket
Row 1 Ch 2, make 2 hdc in each ch2sp across the row
Row 2 Turn, ch 2, fp hdc in 1st st of row, *bp hdc in next st, fp hdc in next stitch; repeat from * across the row.
Tie off and weave in ends.
Repeat Pocket Pattern one more time to make a second pocket.
Belt Pattern (Optional)
All sizes, ch 3
Row 1 Sc in each st across the row (2)
Row 2 Turn, ch 1, sc in each st across the row (2)
Repeat row 2 until piece measures approximately (55”, 58”, 61”, 64”) or desired length
Finish by working slip stitches around belt. Tie off and weave in ends.
Assembly
Place front panels on top of back panel, one on each side. Using your tapestry needle and a length of yarn, sew front panels to back panel with a simple whip stitch seam working up each side and along the shoulders. Leave arm openings for the sleeves.
Sew sleeves to arm openings with preferred seaming method.
Attach collar to front of sweater by sewing with a simple whip stitch seam. The collar is placed on the inner edge of each front panels and sewn evenly in place. See photos of sweater for visual assistance on where to place collar.
Sew pockets onto front panels with a simple whip stitch seam.
Block to shape and size as desired.
Weave belt into stitches on each side of the sweater-coat. There’s no need to crochet belt loops.
*Note: sleeve measurement above doesn’t include additional length with ribbed cuff
Enjoy your new Sweater-Coat!
Have you worked with chunky weight #5 yarns? I can’t wait to use it more often!
XO,
Jessica
If you liked this, you might also like:
Easy Knit Blanket Sweater
![]()
Light Frost Blanket Sweater (Crochet)
![]()
Thank you to Lion Brand Yarn for sponsoring this post. All opinions are 100% my own.
Would love to see more knitting patterns.
What would I need to do to get a 3x size. I just love this sweater. I love you hard work. Thanks
Thanks for the feedback, Debby! The next two patterns that I share will be knit (the kimono and scarf). 🙂
Thank you, my Mom bought a cardigan in Madeira on a family trip years ago, but it has fallen apart due to age and use – and this beautiful pattern will be a perfect replacement. Have never worked with this a chunky weight like this, but hey, I am going to try. THANKS again
So darn cute! Might be what I make – waiting on my yarn for the pink cardi you just put out.
I love crochet and knit so am excited to see this cardi in crochet.
I love this cardigan, Jessica! I would also be interested in a larger size!
Thank you for doing a crochet pattern. Too many only do knitting. 🙂
This cardigan is beautiful, Need to go shopping for that yarn, have none in my stash!
thank you
I would love to make this in 3x and 4x. Would you have the pattern for those sizes?
I would love a comparable cardigan sweater coat in a knitting pattern! This is gorgeous and I love cardigans!
I love this pattern. It reminds me of one I made in the 70’s and wore it out long ago. I need a larger size also. It is a matter of having broad shoulders and back. I think I will try making the back 2 or 3 inches wider, since there isn’t a lot of shaping. I have been getting your patterns for quite a while now and I enjoy them a lot, although I don’t love the bulky yarns as much as you do. I am bulky enough as it is :). This is perfect for the Pacific Northwest. I plan to make the pink one you published recently also. Thank you so much for doing the hard part for us to enjoy.
I am interested in a larger size 3xl.
I would love something similar to this in a knitting pattern! Gorgeous!
Sorry, I thought my previous comment was lost, oops!
I love this pattern! But I also love super bulky (#6) yarns. Is there an easy way to convert it for that type of yarn? Thanks!
it would be nice if we could make it in larger sizes llike 3x. i love all you do . can not wait for that next sweater to come out.
Did you use the chain 3, slip stitch (with necessary blocking), OR chain 2 slip stitch for the example I am looking at in this email?
It’s the chain 2. Thanks for asking!
I have a super bulky 6 cardigan pattern coming out soon!
I made a beautiful crochet sweater for my daughter years ago. It required 2 different size hooks. I remember one was a size N. Her husband put some clothes in the garage (including the sweater) and mice got into it. It reminds me of your sweater, but it had a rolled collar and button closure. There were also pockets. I am going to try and adapt your sweater although the pattern will not be the same.
Thank you for the pattern.
Ruth
I am crocheting the sleeves of this sweater coat cardigan now. You mention that the sleeves are slightly shaped. Do u have any pics of the sleeve before it’s assembled? The shape that is coming out is confusing me. Thank you!!
I would love this in a 3x too. In Florida we have no need for bulky weight yarn.