Monaco Kimono Knitting Pattern
Scroll down to see the free pattern or you may choose to purchase an ad-free, printable PDF pattern from my Etsy shop or the kit from Lion Brand Yarn here.
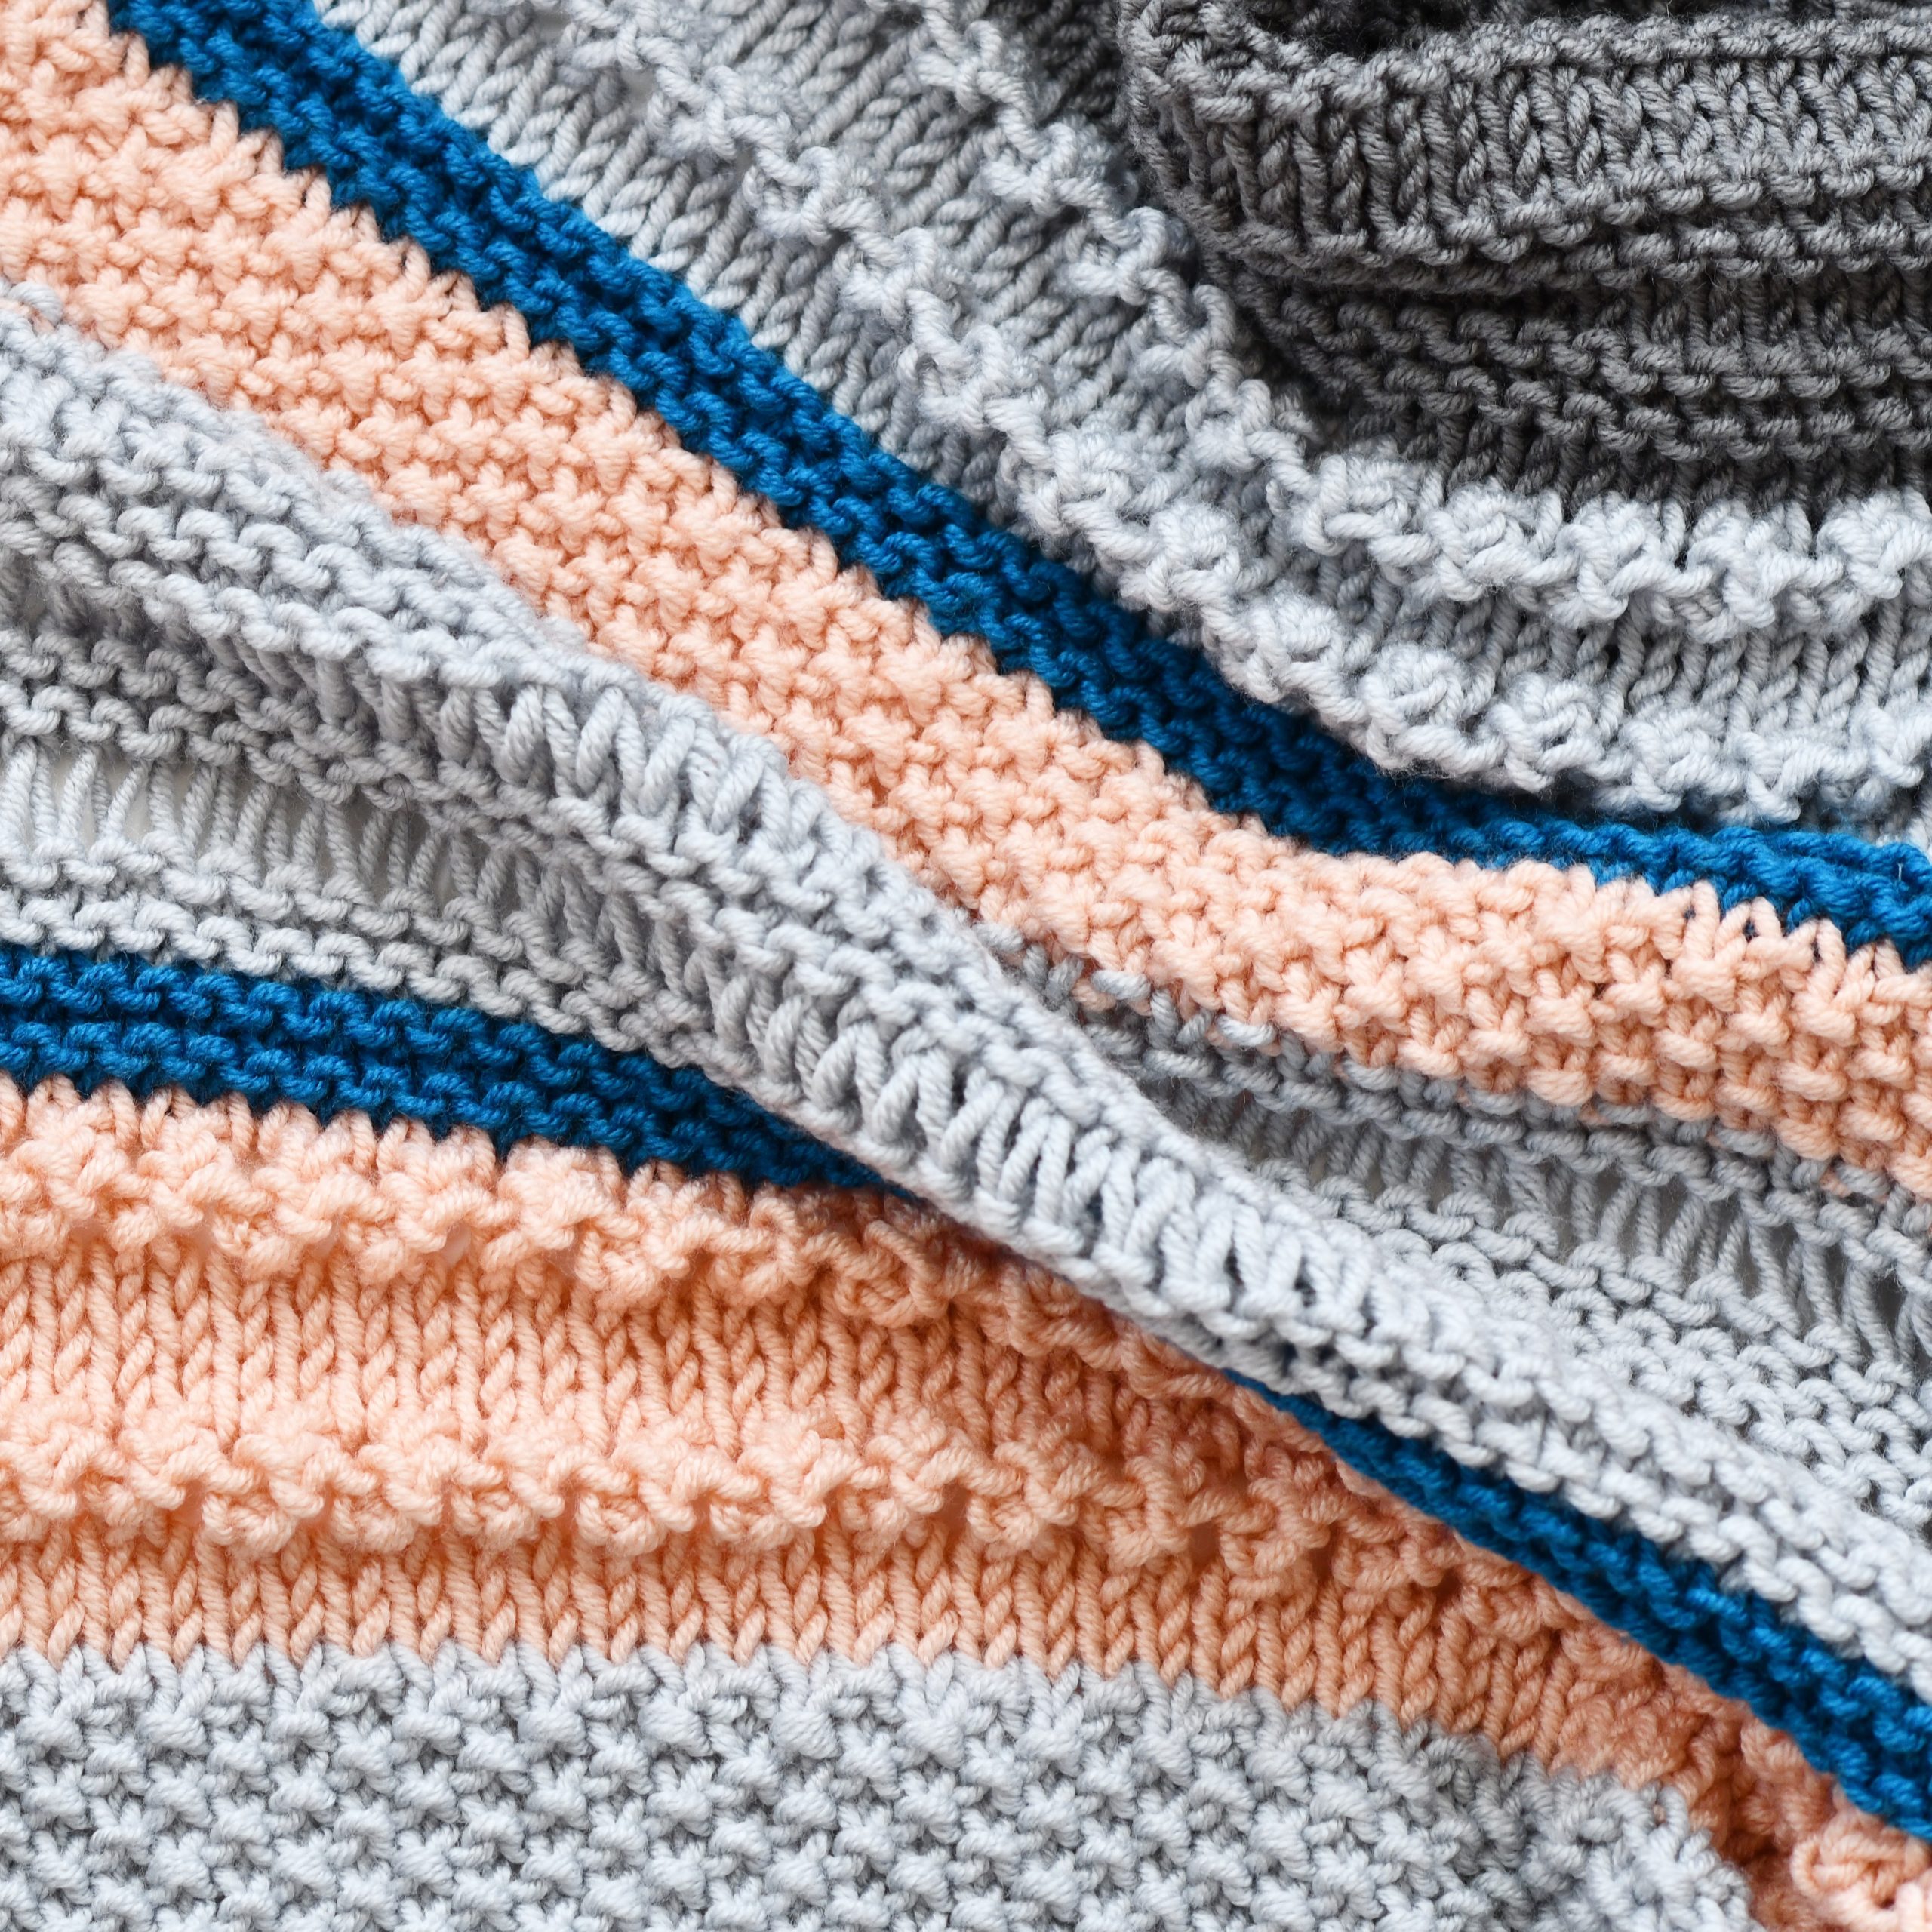
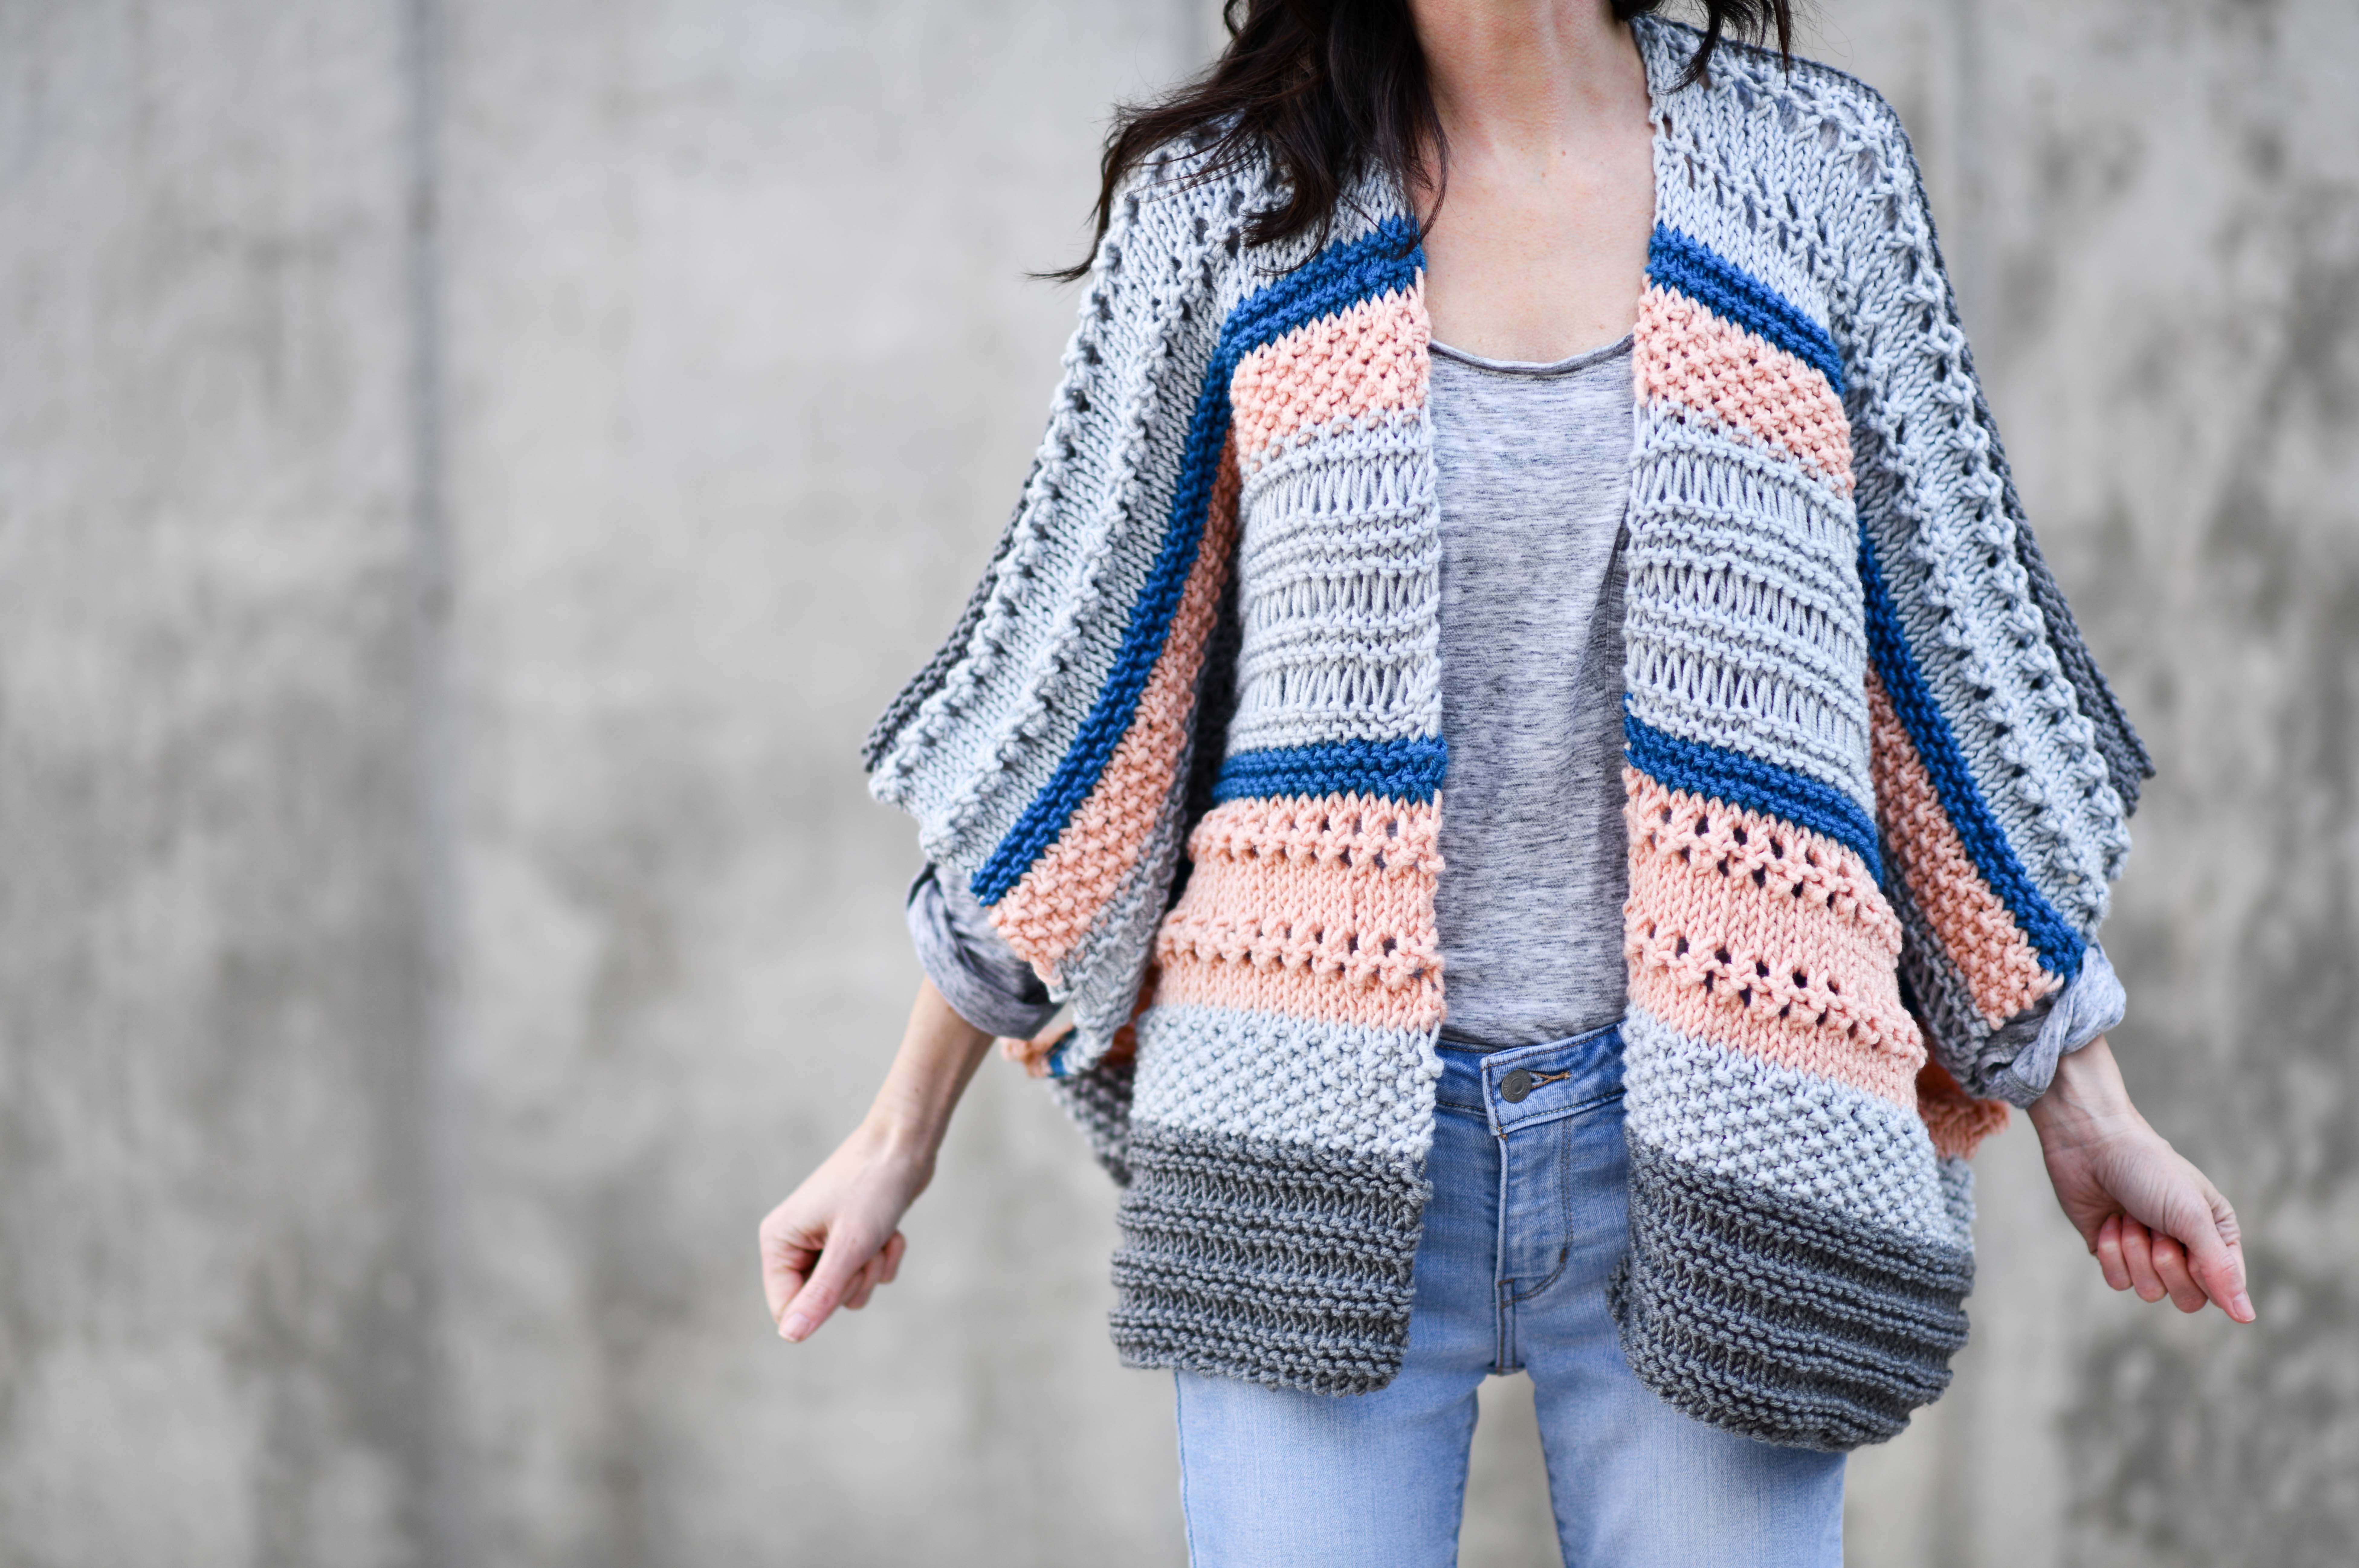
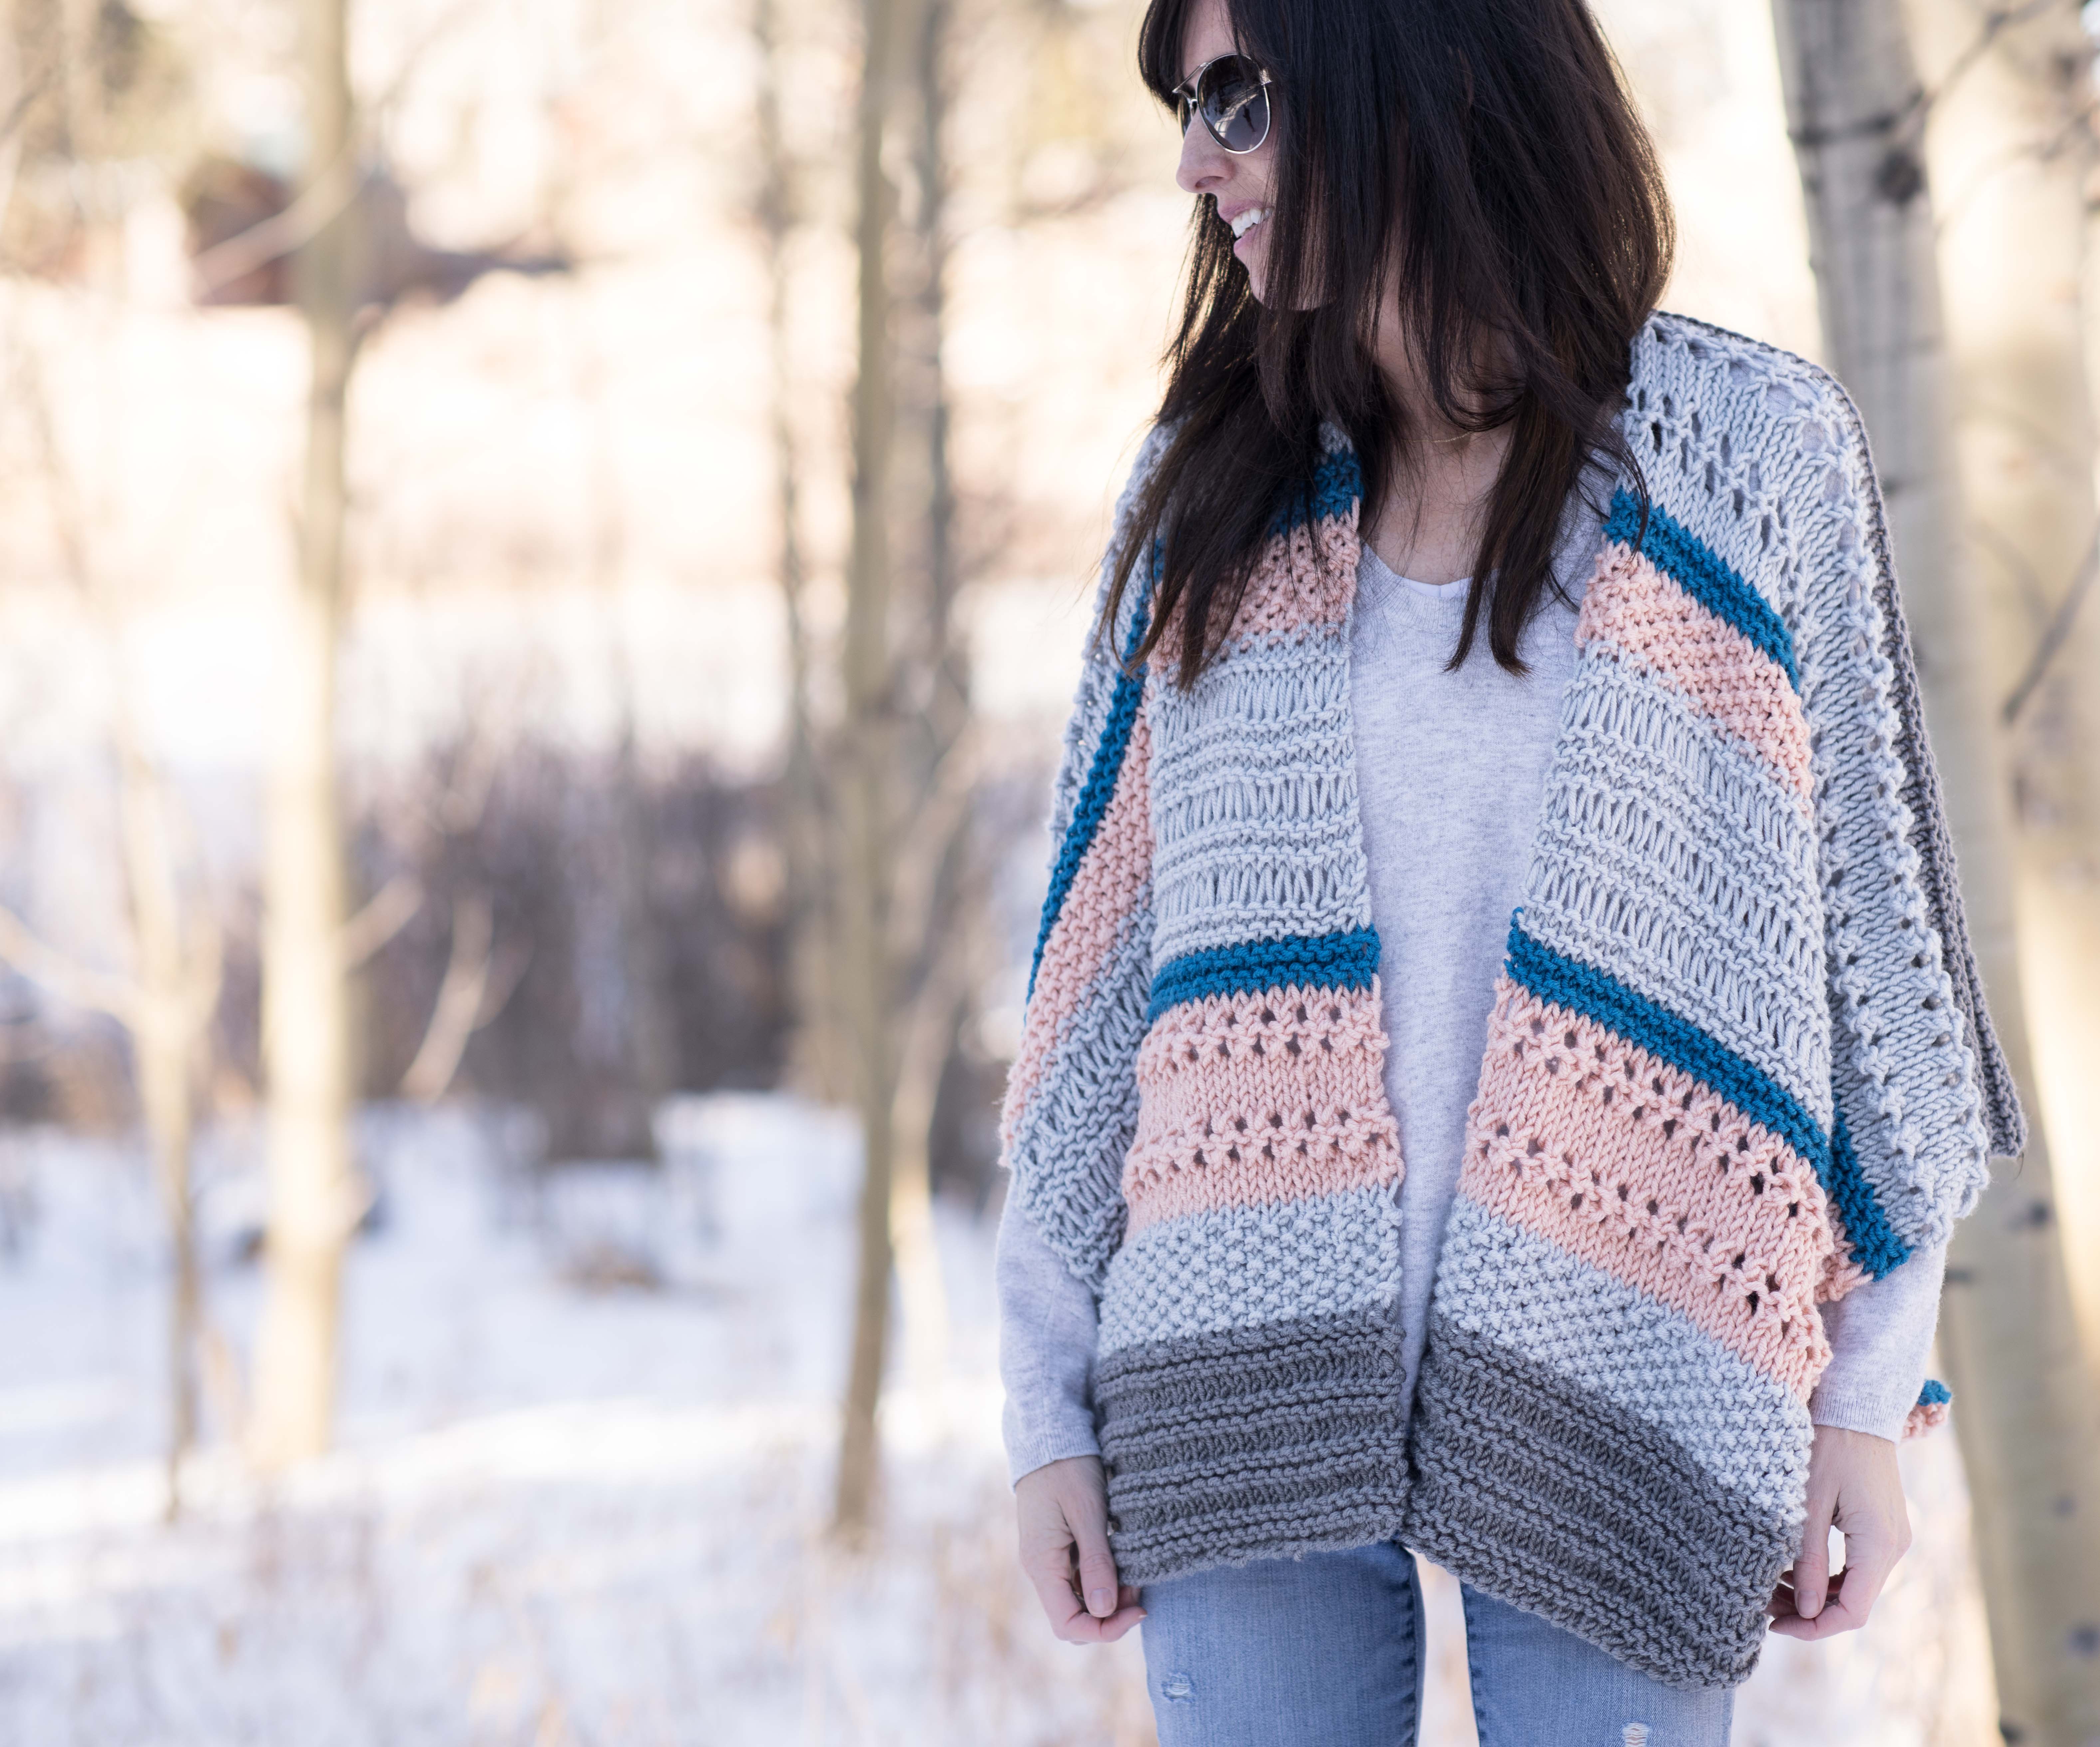
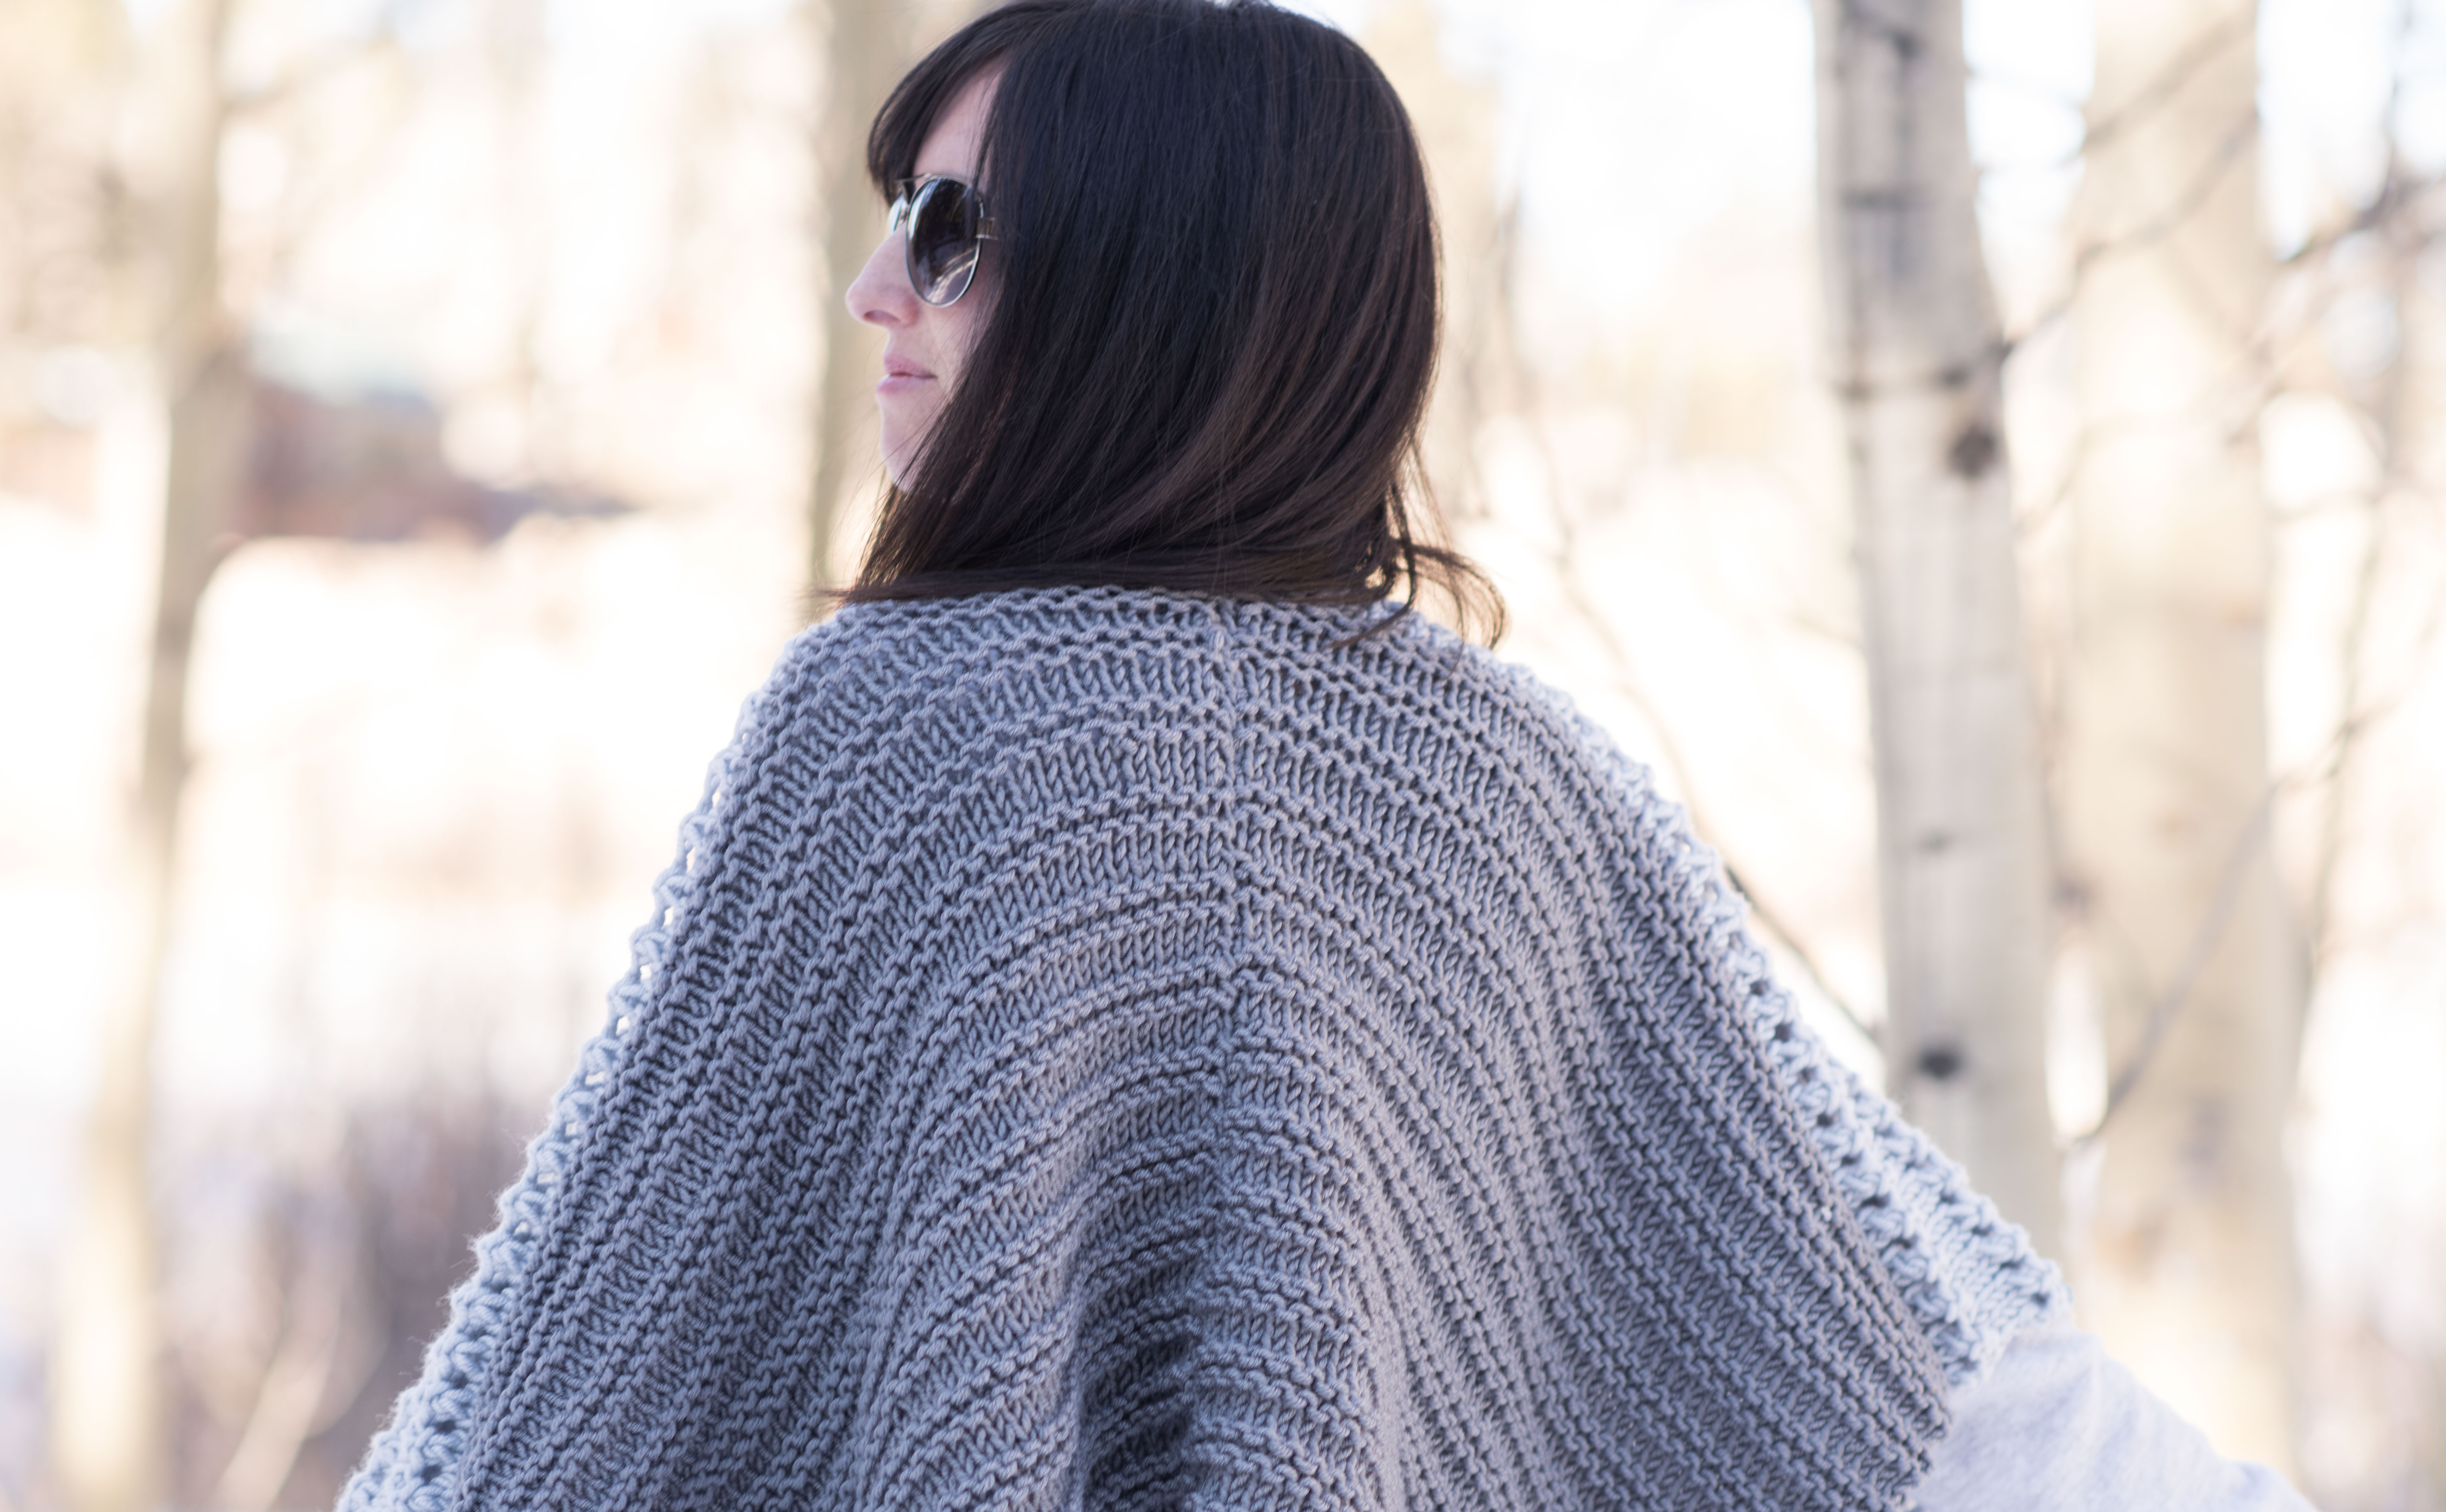
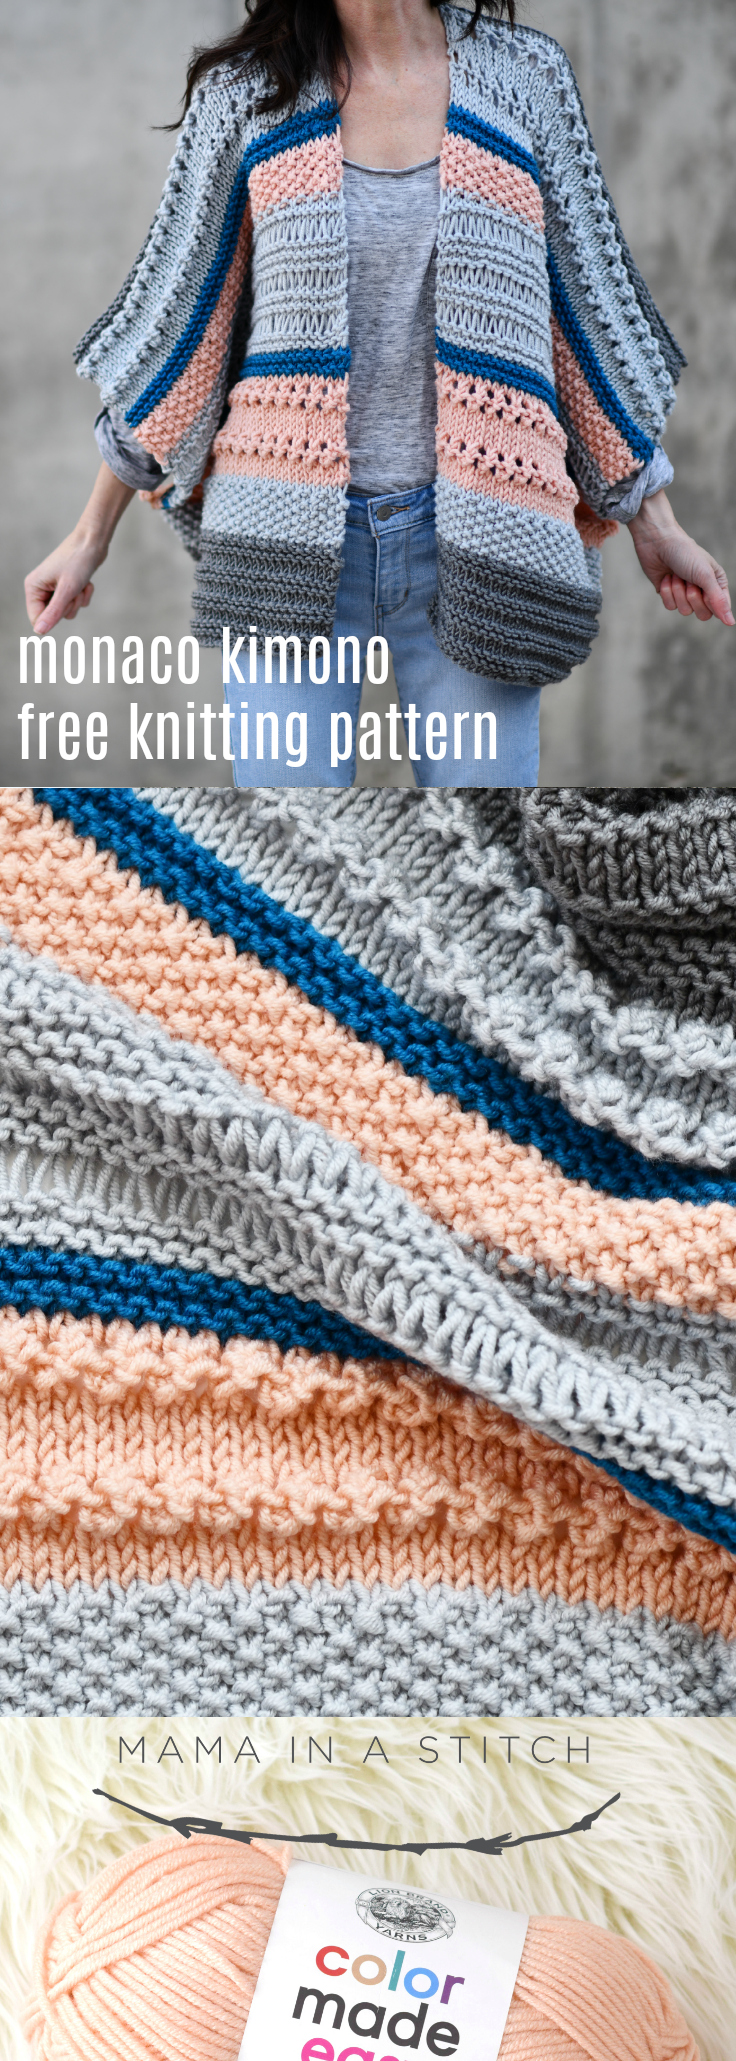
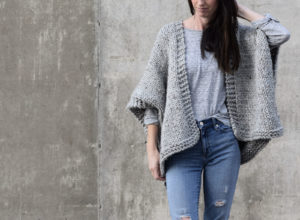
Today I get to share my second project made with the new Color Made Easy yarn from Lion Brand! This Monaco Kimono is super pretty and especially fun to knit because you get to play around with several different colors and stitch patterns. The variety of stitches creates a cool visual effect and makes for a nice mix of textures. And no worries, this kimono was made to be simple!
Before I get to the pattern, I’d like to talk about some of the stitches and how this kimono is constructed. 🙂
Do any of you remember the Telluride Knit Kimono (here)? It’s a nice, classic kimono that’s really great for beginners because it uses the most basic of stitches and an easy construction method. This Monaco Kimono uses the same construction method, but it requires a bit more skill because of the color changes and variety of stitches. You’re essentially knitting two rectangles and seaming them together to form the kimono. It’s pretty impossible to get bored with this pattern as you’ll be hopping from drop stitches, to bobbles to eyelets. These are all stitches that you can definitely do if you’re comfortable with knitting and purling. You will do some yarn overs and decreases (but that’s nothing to be afraid of). It’s always nice to have stash buster ideas in our back pocket, and this kimono pattern would be a perfect stash buster for your chunky yarns as well.

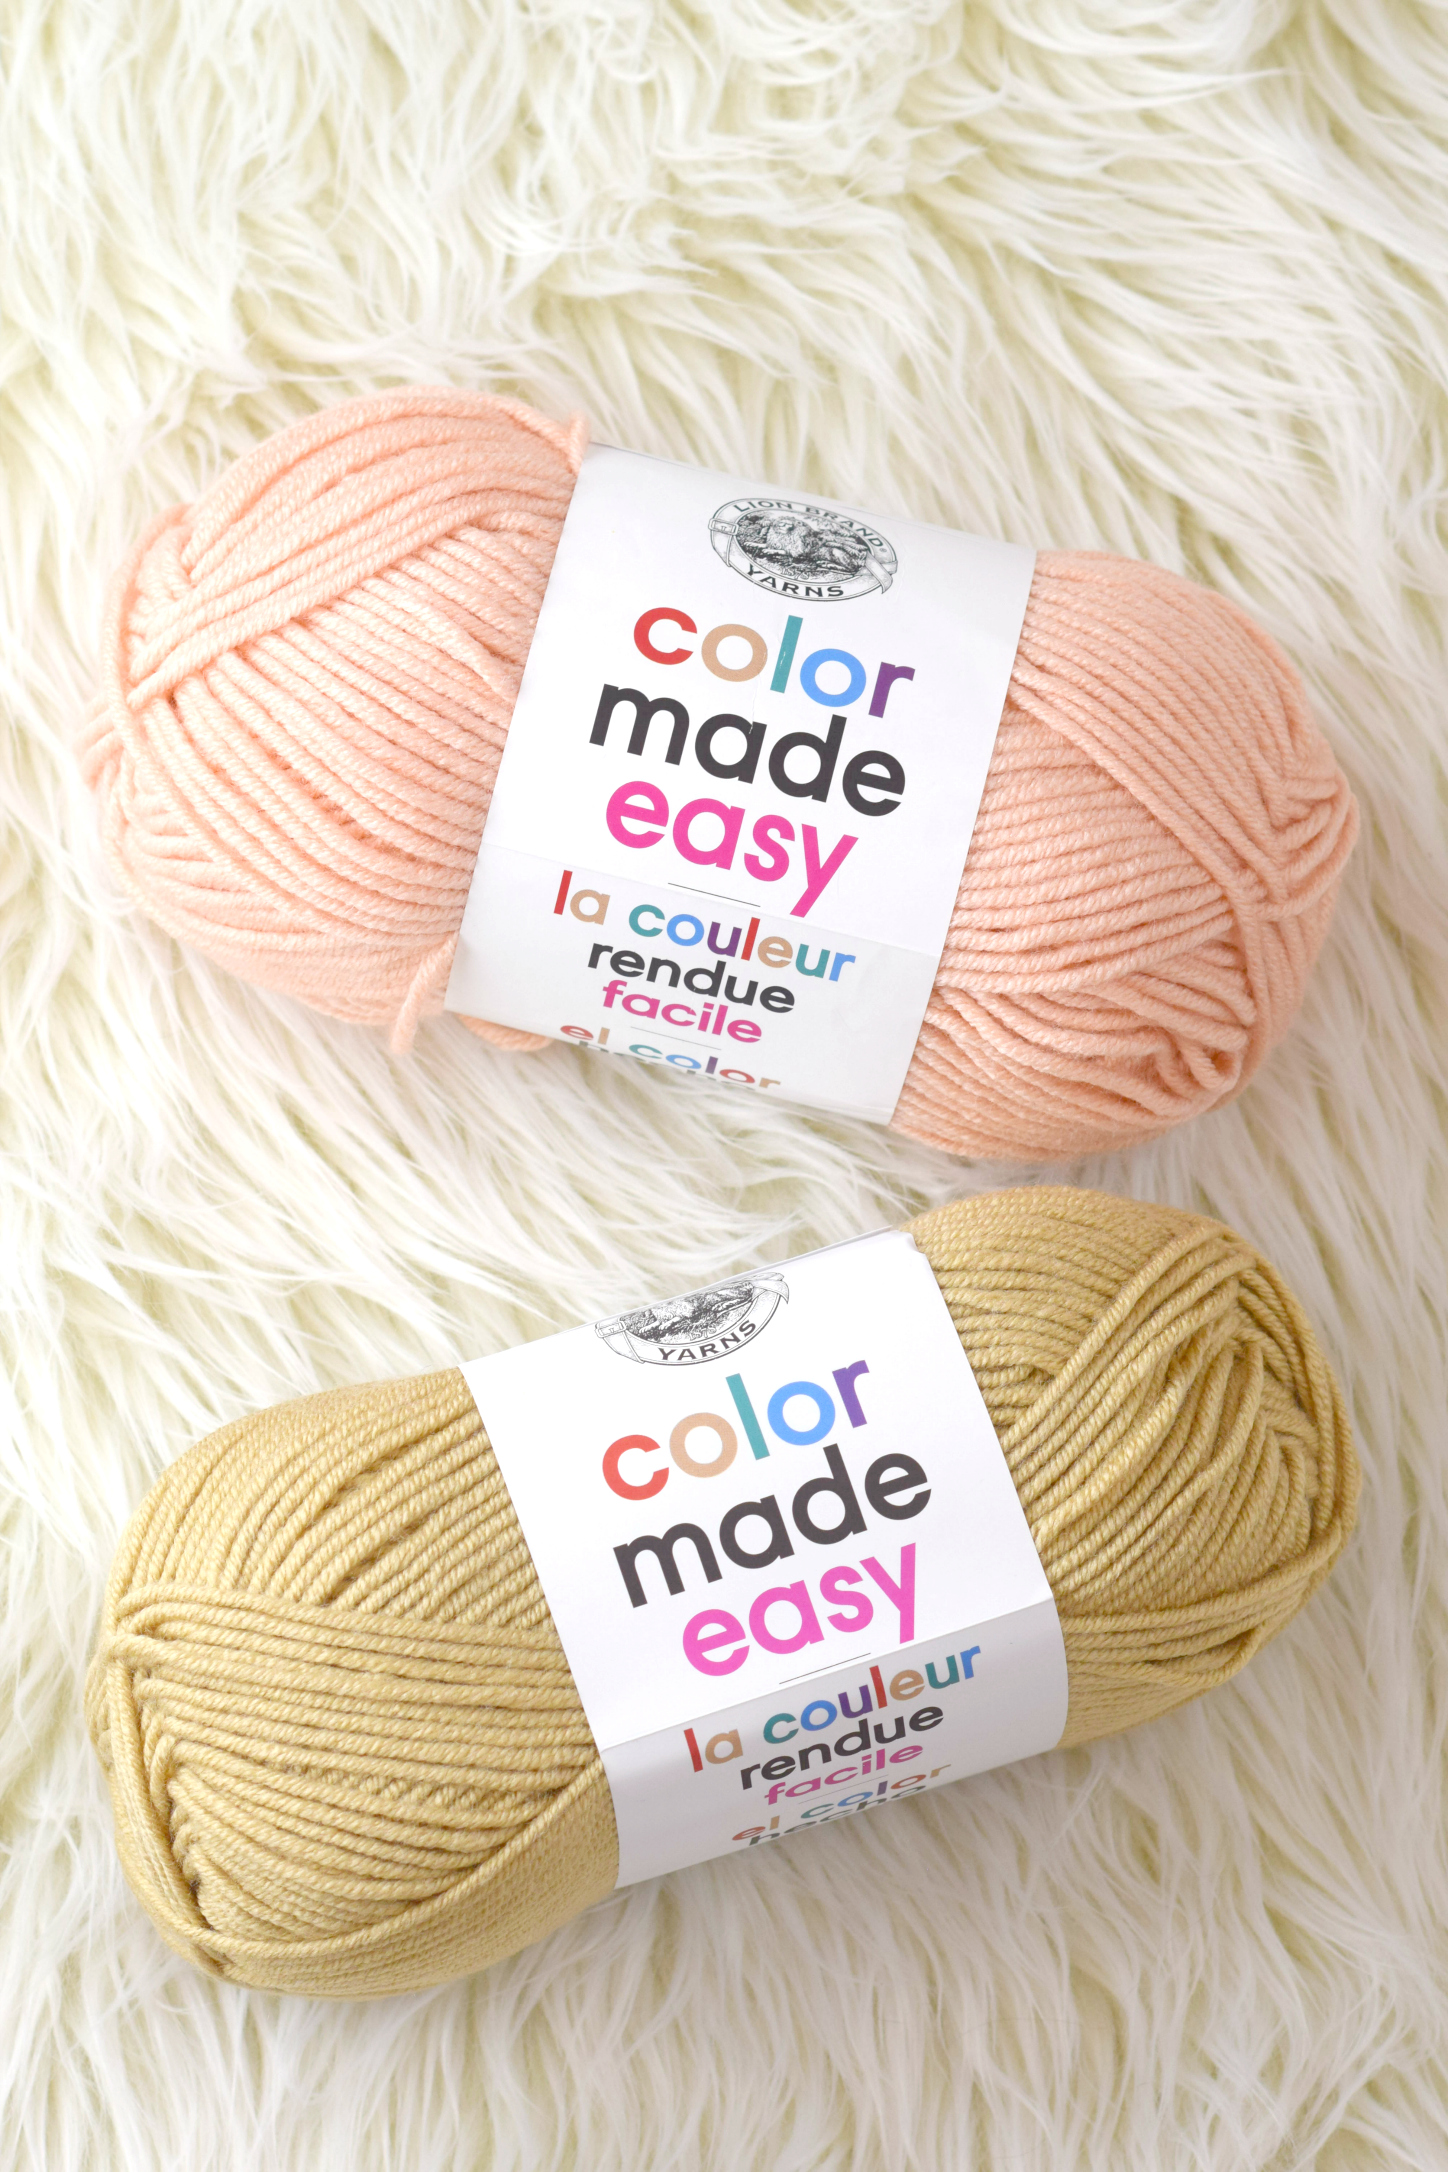
When designing this pattern, I hoped to stretch out of my comfort zone and use some new colors. I’m pleased with how they all came together! You should have seen me sitting on the floor while trying to decide on colors. It may have taken me longer to pick colors that it will take you to knit this kimono. 🙂 There are several great color options with the Color Made Easy yarns, including several pretty neutrals. You guys can find the yarn at select Michaels Stores and online at the Michaels website and also on Lion Brand’s site.
This kimono is squishy, unique and definitely fun to knit. I think it goes great with jeans, but it would be really cute with leggings as well. Any other ideas? Messy bun, kimono and leggings – that’s probably my fave idea of all.
One thing that I really love about this yarn is the stitch definition you get. It also works up beautifully as it doesn’t split and it feels great in your hands. Yay for having a new, chunky weight yarn available!
Oh! On Instagram, some of you mentioned that you think this stitch pattern would make for a nice blanket! If you’re experienced and want to make a blanket, you will just cast on a stitch count in a multiple of 2 stitches + 2, making it the width that you’d like. Then you can follow the stitch pattern for as long as you’d like, working the various sections until the blanket is the size you’re hoping for.
You’ll see the free pattern below, or you may choose to purchase the ad-free printable version from my Etsy Shop HERE
Monaco Kimono Knitting Pattern
Pattern Description: A gorgeous cardigan-kimono that can be worn over a variety of tops to add warmth and style to your winter wardrobe. The diversity of stitch patterns make it not only pretty to look at but also super fun to knit. With colors that are right on trend, this kimono goes perfectly with leggings or jeans to create a cute cold weather outfit.
Skill Level: Beginner +
Materials:
US Size 15 29” Circular Knitting Needles
3 Lion Brand Yarn Color Made Easy in Basalt 200 g / skein Monaco Kimono Kit available from Lion Brand HERE
1 Lion Brand Yarn Color Made Easy in Shade 200 g / skein
1 Lion Brand Yarn Color Made Easy in Kingfisher 200 g / skein
1 Lion Brand Yarn Color Made Easy in Millennial 200 g / skein
(Pattern uses approximately 708 g of yarn total)
Scissors
Tapestry needle
Dimensions (approximate)
One size fits most
Bust Circumference: Approximately 68”
Cross Back: Approximately 30”
Length: Approximately 22”
Abbreviations & Skills:
k -knit
p – purl
yo – yarn over
p2tog – purl two together (decrease)
st – stitch
CC – change color
RS – right side
WS – wrong side
Gauge:
Approximately 11 stitches and 18 rows in 4” x 4” of Garter Ridges (from pattern)
It’s important that your gauge matches the gauge indicated in the pattern for the size to turn out correctly. Adjust your tension or change needle size accordingly.
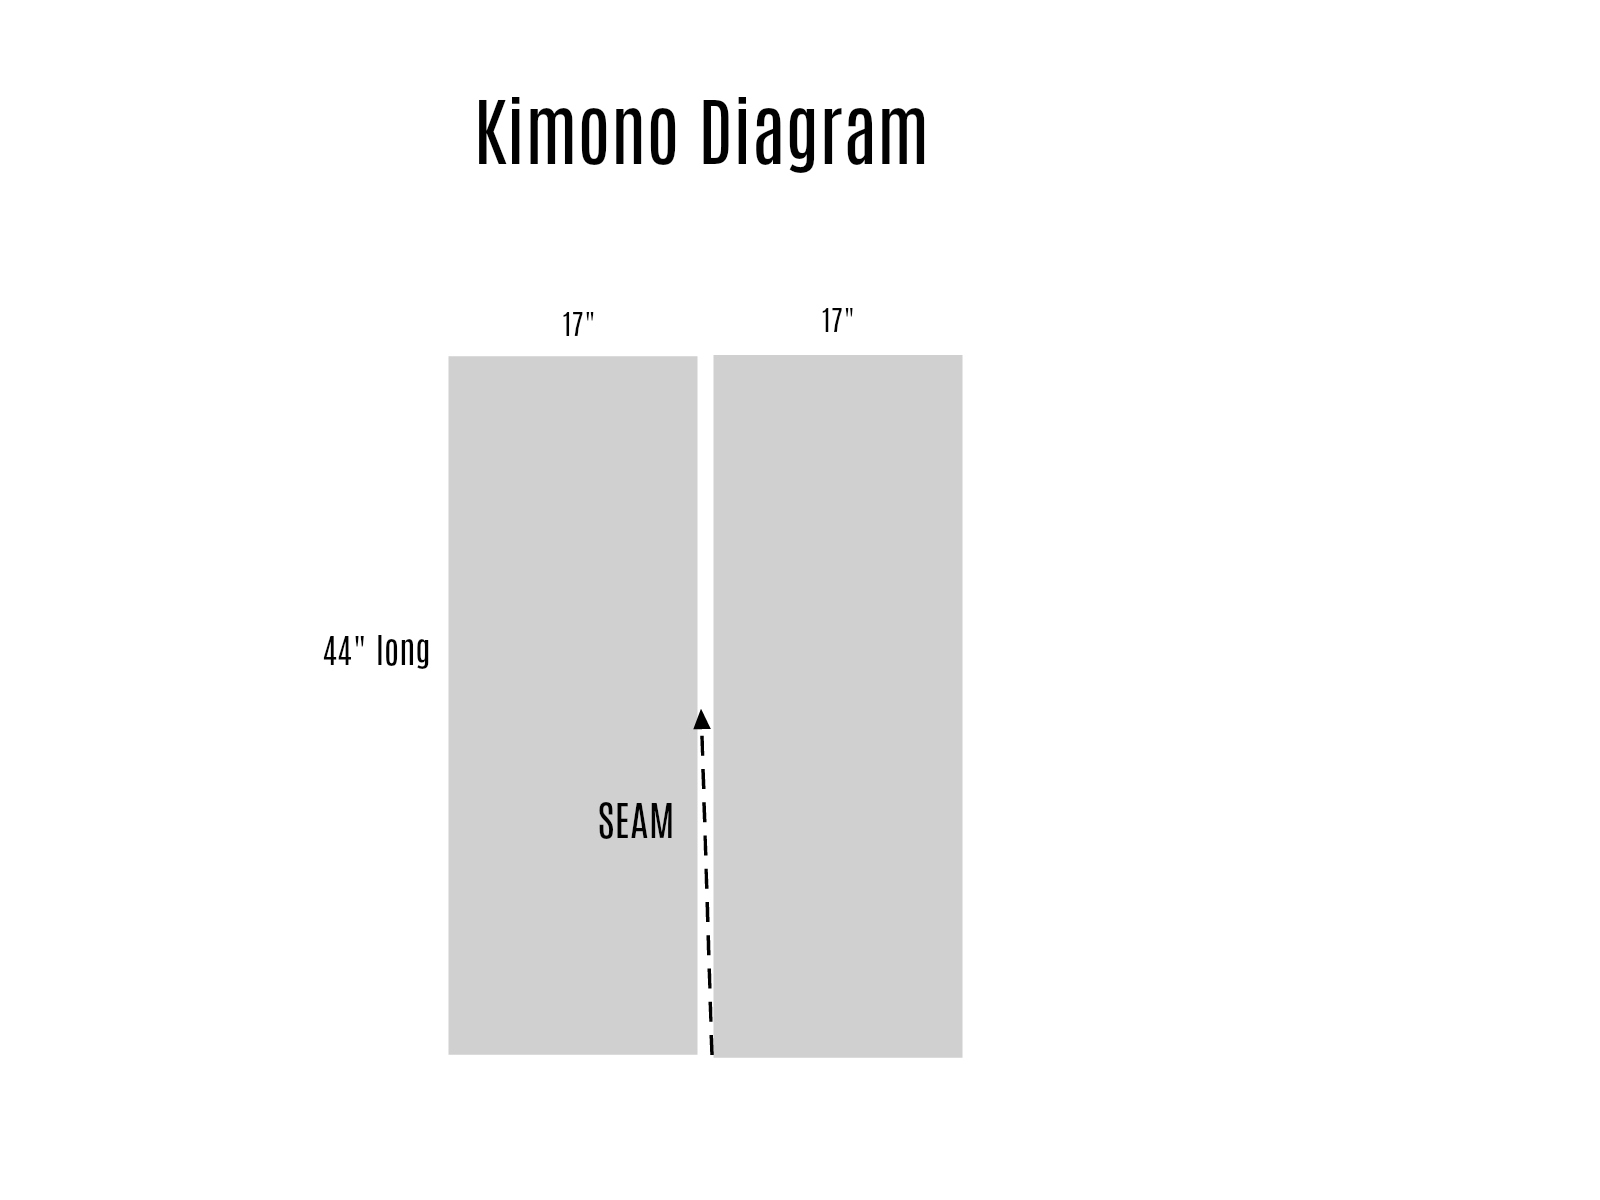
Notes: This kimono pattern is created by knitting two rectangular panels, from the bottom up. The pattern is broken into the various sections of stitch patterns. You should know basic knitting stitches and how to make color changes. To finish, the panels are seamed along the center back and sides. You may choose to make it longer by adding more rows to the end of each panel (keep yarn needs in mind).
Pattern Instructions
With Basalt, cast on 46 stitches
Garter Edge
Rows 1 – 4 Knit across each row (46)
Garter Ridges
Row 1 Knit across row (RS)
Row 2 Purl across row (WS)
Rows 3 – 6 Knit across each row
Next, repeat rows 1 – 6, 2 more times
CC to color Shade
Seed Stitch
Row 1 *K1, p1; repeat from * across row (46)
Row 2 *P1, k1; repeat from * across row
Rows 3 – 10 Repeat rows 1 & 2 (ending on WS row 10)
CC to color Millennial
Ridged Eyelet
Row 1 Knit across row (46)
Row 2 Purl across row
Row 3 Repeat row 1
Row 4 Repeat row 2
Row 5 P1, *yo, p2tog; rep from * to last st, purl.
Row 6 Knit across row
Row 7 P1, *p2tog, yo; rep from * to last st, purl.
Row 8 Purl
Repeat rows 1 – 8, 1 more time
CC to color Kingfisher
Garter
Rows 1 – 4 Knit across each row (you should end on WS row 4)
CC to color Shade
Drop Stitch
Rows 1 – 3 Knit across each row (46)
Row 4 K1, *yo, k1; repeat from * across row
Row 5 K1, drop yo off needle, knit next st; repeat from * across row
Repeat rows 1 – 5, 2 more times (ending on RS row)
Next, knit 2 rows
CC to color Millennial
Seed Stitch
Row 1 *K1, p1 across row (46)
Row 2 *P1, k1 across row
Rows 3 – 7 Repeat rows 1 & 2, in that order, ending with a row 1 repeat (WS row)
CC to Kingfisher
Garter
Rows 1 – 4 Knit across each row (end on WS row 4)
CC to color Shade
Ridged Eyelet
Repeat pattern from previous Ridged Eyelet Section
CC to Basalt
Garter Ridges
Repeat rows 1 – 6 from previous Garter Ridges section until piece measures approximately 44” long, or desired length (keep yarn needs in mind), ending on a row 6.
Cast off and weave in ends.
Repeat entire pattern one more time to make second panel.
Assembly
Place panels vertically on a large, flat surface parallel to one another with wrong sides facing up. With your tapestry needle and length of yarn, seam up the center from the bottom up. The seam will be on the side with the Basalt color and Garter Ridge stitch pattern. Seam until you are 2” from the center point. Tie off and weave in ends.
Next, fold panels downward so that the panels are folded in half. Seam up each side, leaving large openings for the arms. Tie off and weave in ends.
That’s all there is to it!
Next week I’ll be sharing my final pattern of the “Colorful Life Collection”, which is a playful knit scarf. 🙂 Hope you have a wonderful day and I’d love to hear your thoughts, as always!
XO
Jessica
![]()
Thank you to Lion Brand Yarn for sponsoring this post. All opinions are 100% my own.


Any chance this will be turned into a crochet pattern???
I suck at knitting….
would you have this in a crochet pattern
LOVE IT!
Oops sorry did not look close enough. Thank you, I think our weather Downunder ie 31c today must be getting to me. Will put aside untilweather cools down.
I’m definitely going to make this kimono. I’ve been waiting for the pattern since I saw the first pictures. I’ll make mine in a natural white wool mix yarn from my stash. I’m sure that it’ll be very beautiful with all those stitches. I like colors, too, but just now I need and want a white kimono. It’s difficult to find a decent high quality acrylic yarn here. It’s a pity because some people can’t wear wool.
I would also love to know if you will have this in crochet. It’s absolutely beautiful ❤️. But I can’t knit either. I would love to learn, but I have no knowledge. You make absolutely beautiful patterns all the time. Thank you for all you do for all of us.
Thanks Dawn! I don’t have a crochet version in the works, but always appreciate suggestions!
Same here! I’d love to learn to knit but just don’t have the time
Just saw this post today. It’s my birthday and Michael’s has this yarn on sale, so I went and picked it up! Can’t wait to make it. I picked turquoise and magenta to go with the two grays.
I’m definitely going to do this, one question, please can you help me with n kids size also… my daughter is 10 and would love to make the same one for myself and her.
In the Drop Stitch section I don’t see the first *. Is it at the first K1 or the Drop yo off the needle?
I don’t see it either. Would love a reply here!
Hey Jessica if I want to make this wider then 17 inches Per side what multiples do I cast on? Thanks love this pattern. It’s beautiful !!