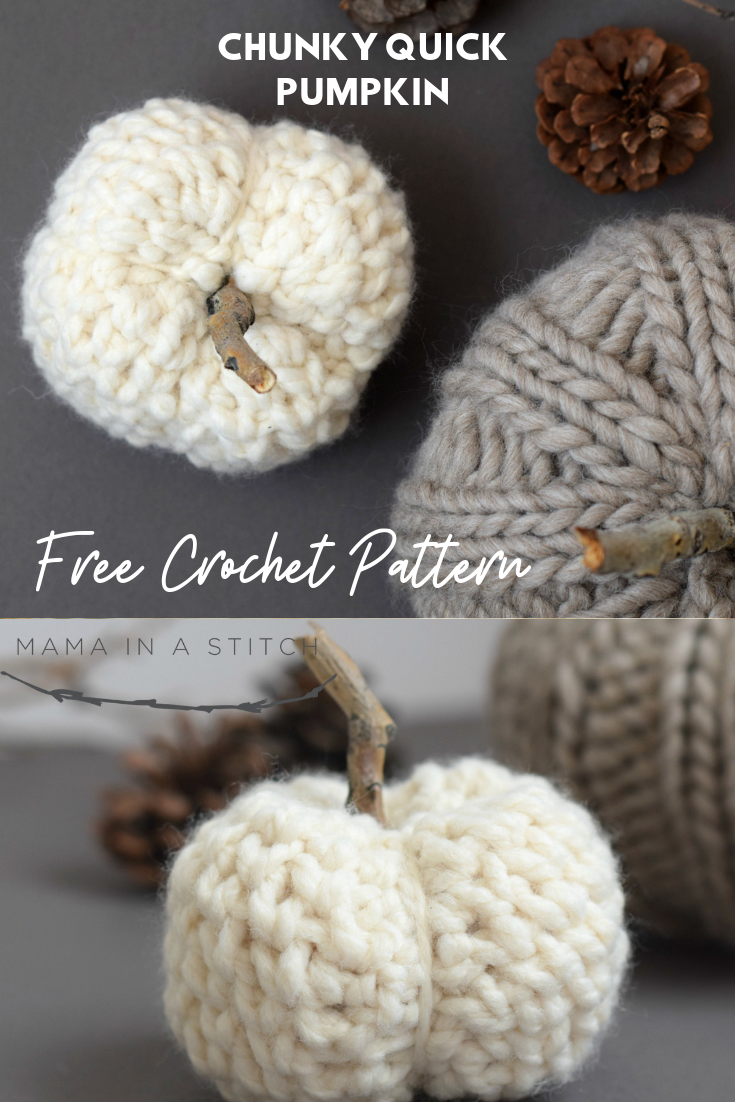
How To Crochet A Chunky Quick Pumpkin
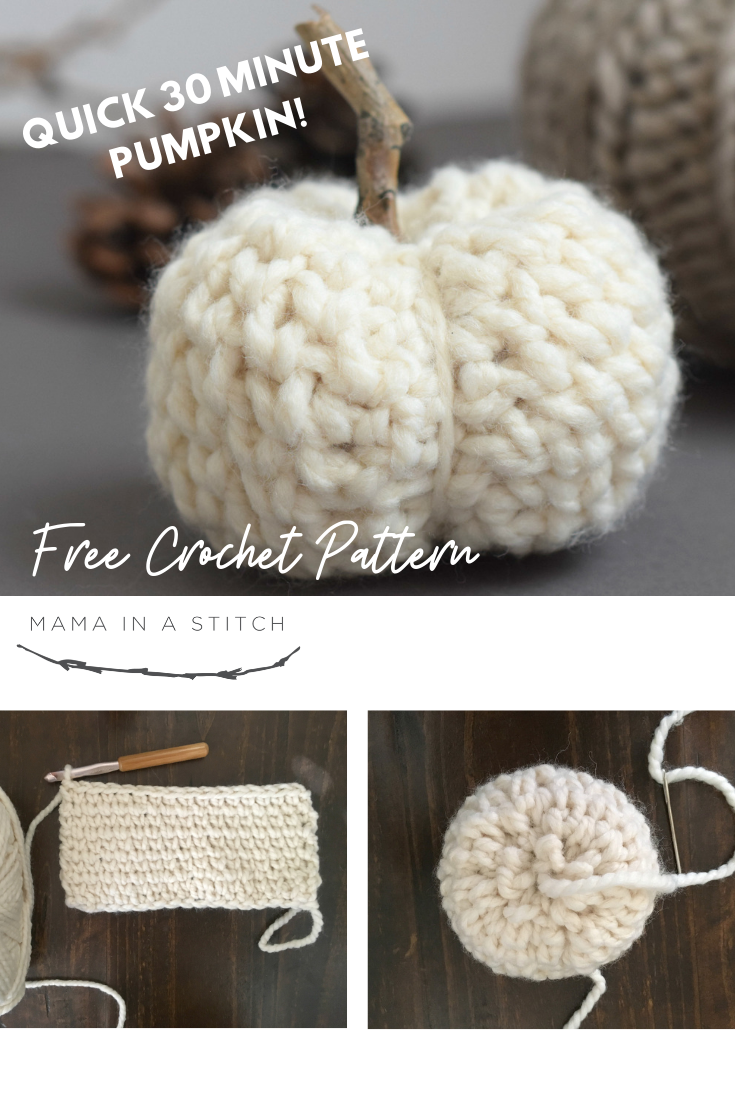
This weekend I jumped on the pumpkin train and whipped out this little guy. It was really fast and simple to make, so I’m happy to share it with you today! Pumpkins have been all over social media and even the stores already, but I haven’t seen any quick crocheted versions made with super bulky yarn (which is my fave). So I got to making this very simple, super chunky, fast to make (under 30 minutes – yes!) pumpkin. I wanted a pumpkin STAT! 🙂
Yesterday, I was visiting a department store and was ooohhing and ahhhhing over all of the pumpkins they had! Knit versions, fabric versions, plaids, ceramics and more. The color options and styles were endless and I was hooked on the idea of making some of my own. After getting started, I realized that most chunky crochet stitch patterns created a “holey” fabric that wouldn’t work for stuffing. That’s when I tried the trusty ole’ waistcoat stitch (here) which worked perfectly. It creates a tight, knit-like fabric that holds in the stuffing and also has a rustic, textured look. Yay!
There is no shaping in this pattern and for those of you who need it, there’s a full picture tutorial included at the end of the pattern as well. 🙂

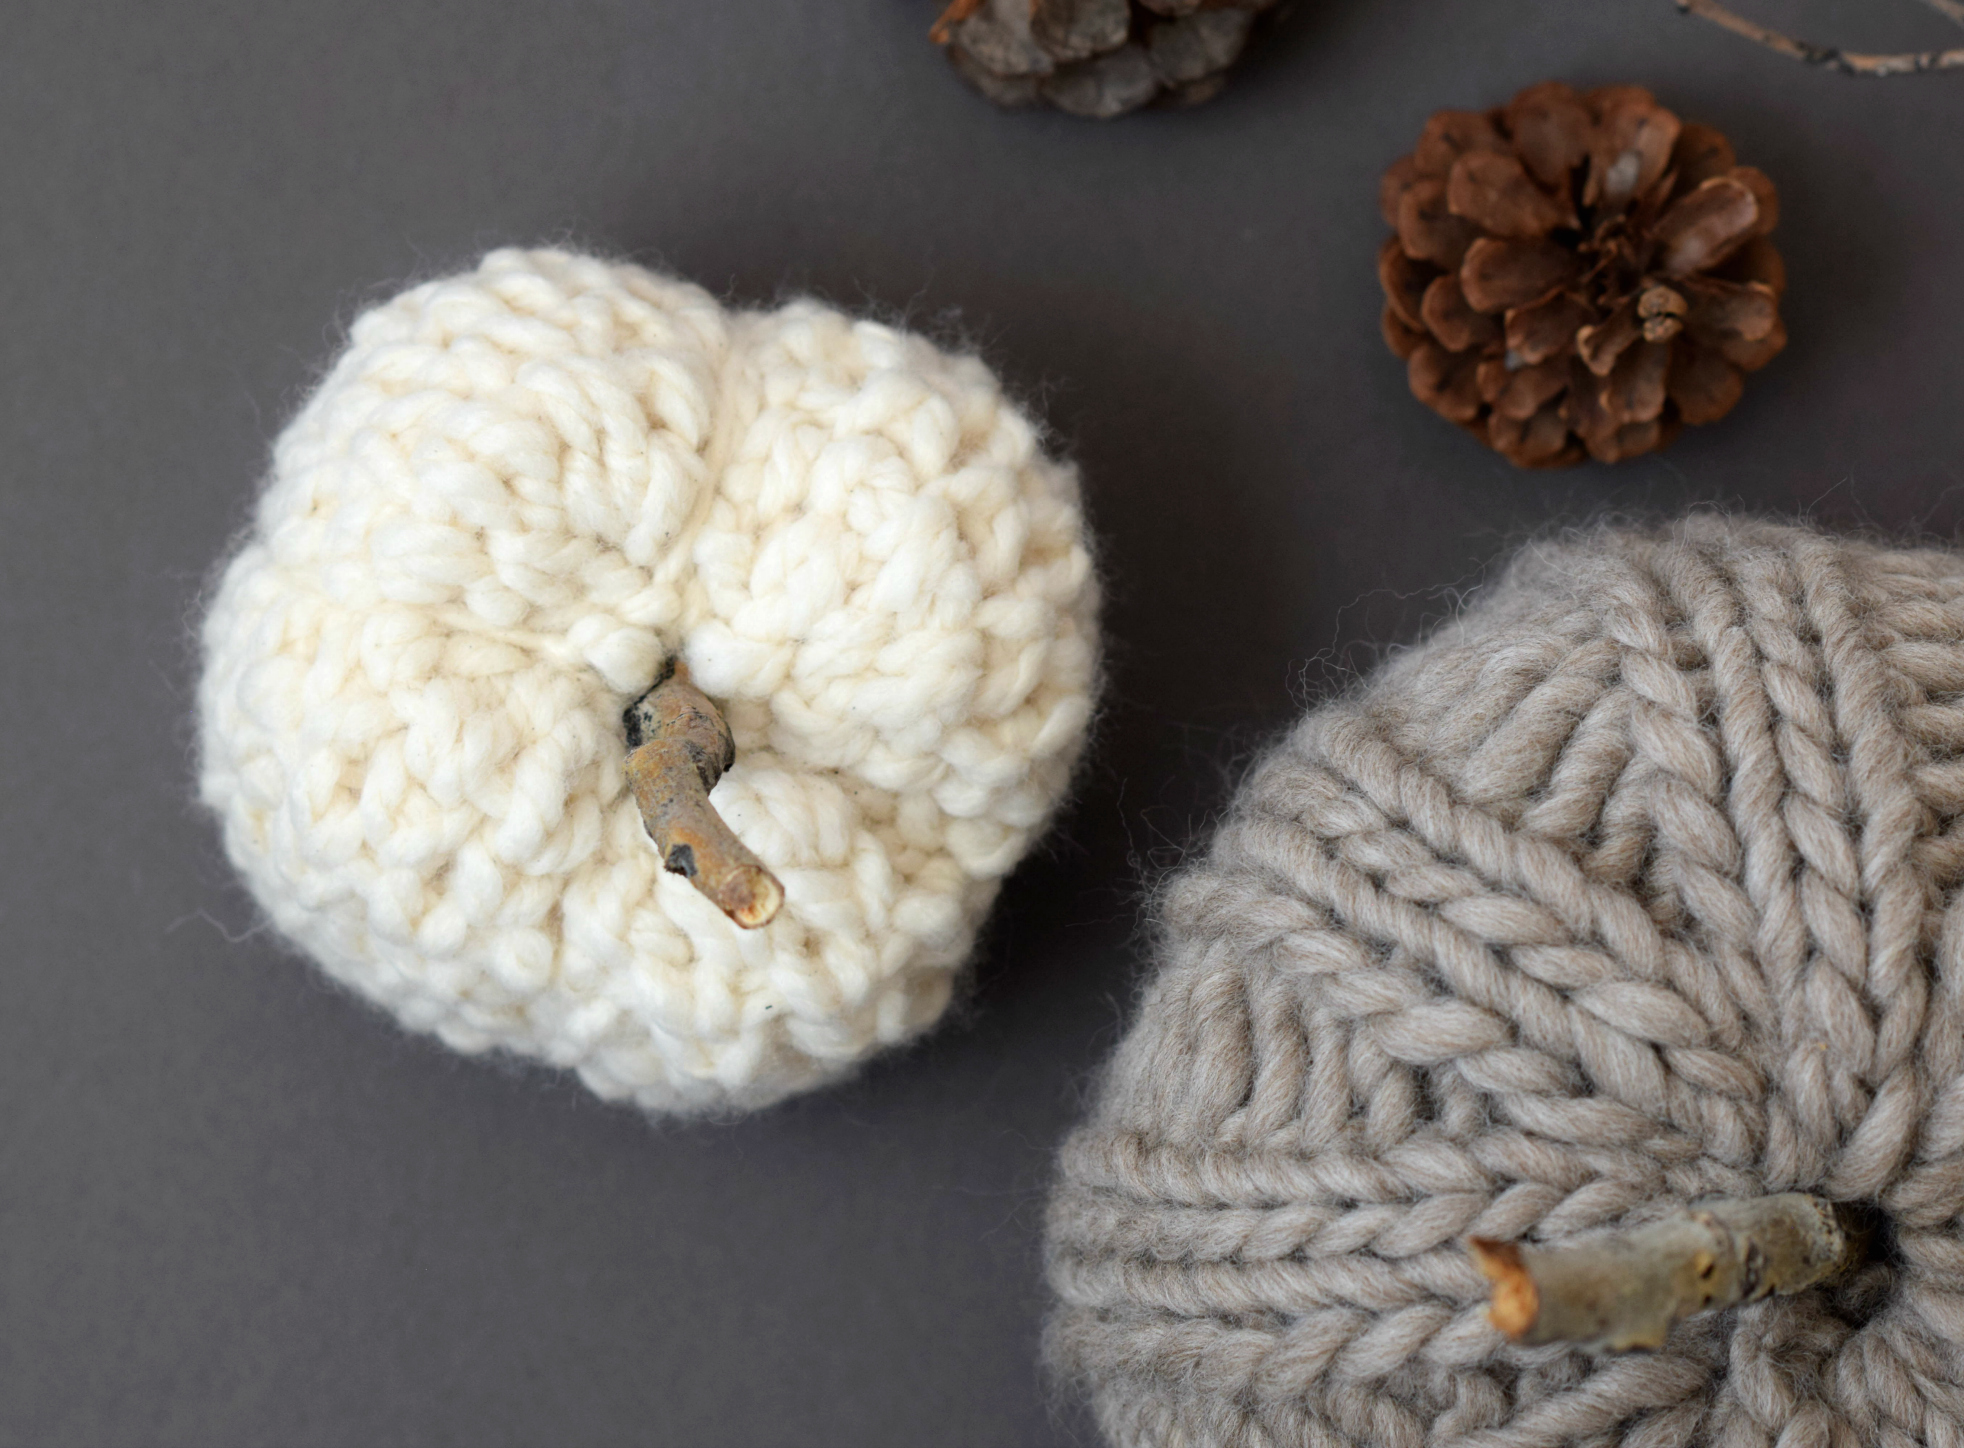
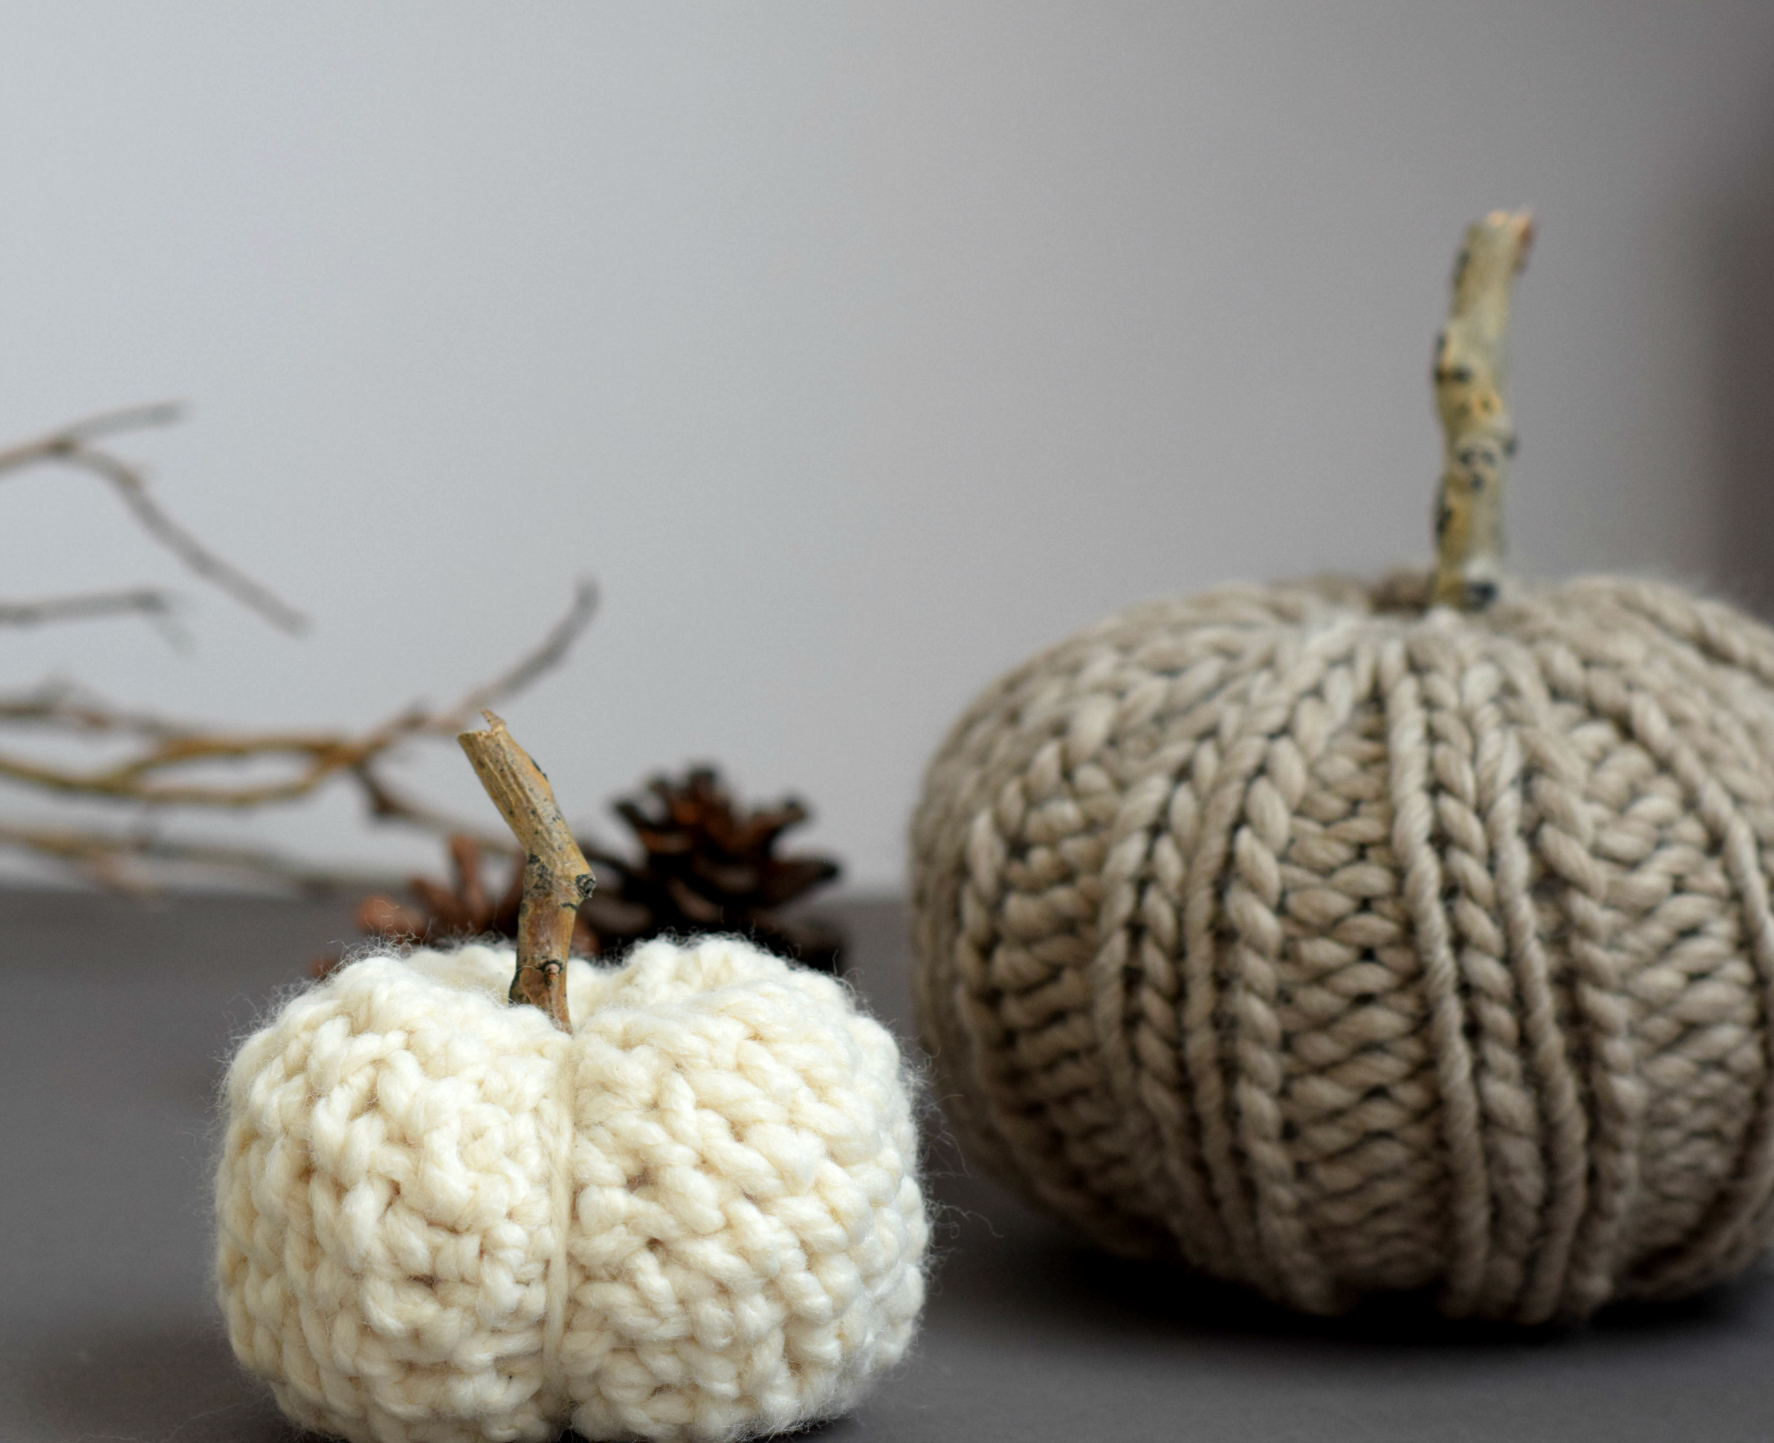
Above: You can see the crocheted pumpkin as well as a sneak peek of a knit pumpkin that I’ll also be sharing on the blog. Definitely plan on making more than one as they look best displayed in groups. 🙂
Let’s get started!
You can see the free pattern below, or you can purchase the ad-free printable version from my Etsy shop HERE.
Chunky Quick Crocheted Pumpkin – Free Pattern
Description:
This chunky pumpkin works up quickly with a large hook and super bulky yarn! It’s easy enough for beginners and has a rustic, store-bought look. The color possibilities are endless and you can be creative with the fun little stem. They work great as last minute fall gifts, or to use as décor in your own home.
Materials:
US Size M/N, 9 mm crochet hook (you may also choose to use a 10 mm)
1 skein Lion Brand Yarn Wool Ease Thick & Quick in Fisherman (HERE) (170 g/skein)
(Pattern uses less than a skein)
Scissors
Tapestry Needle
Skill Level: Beginner
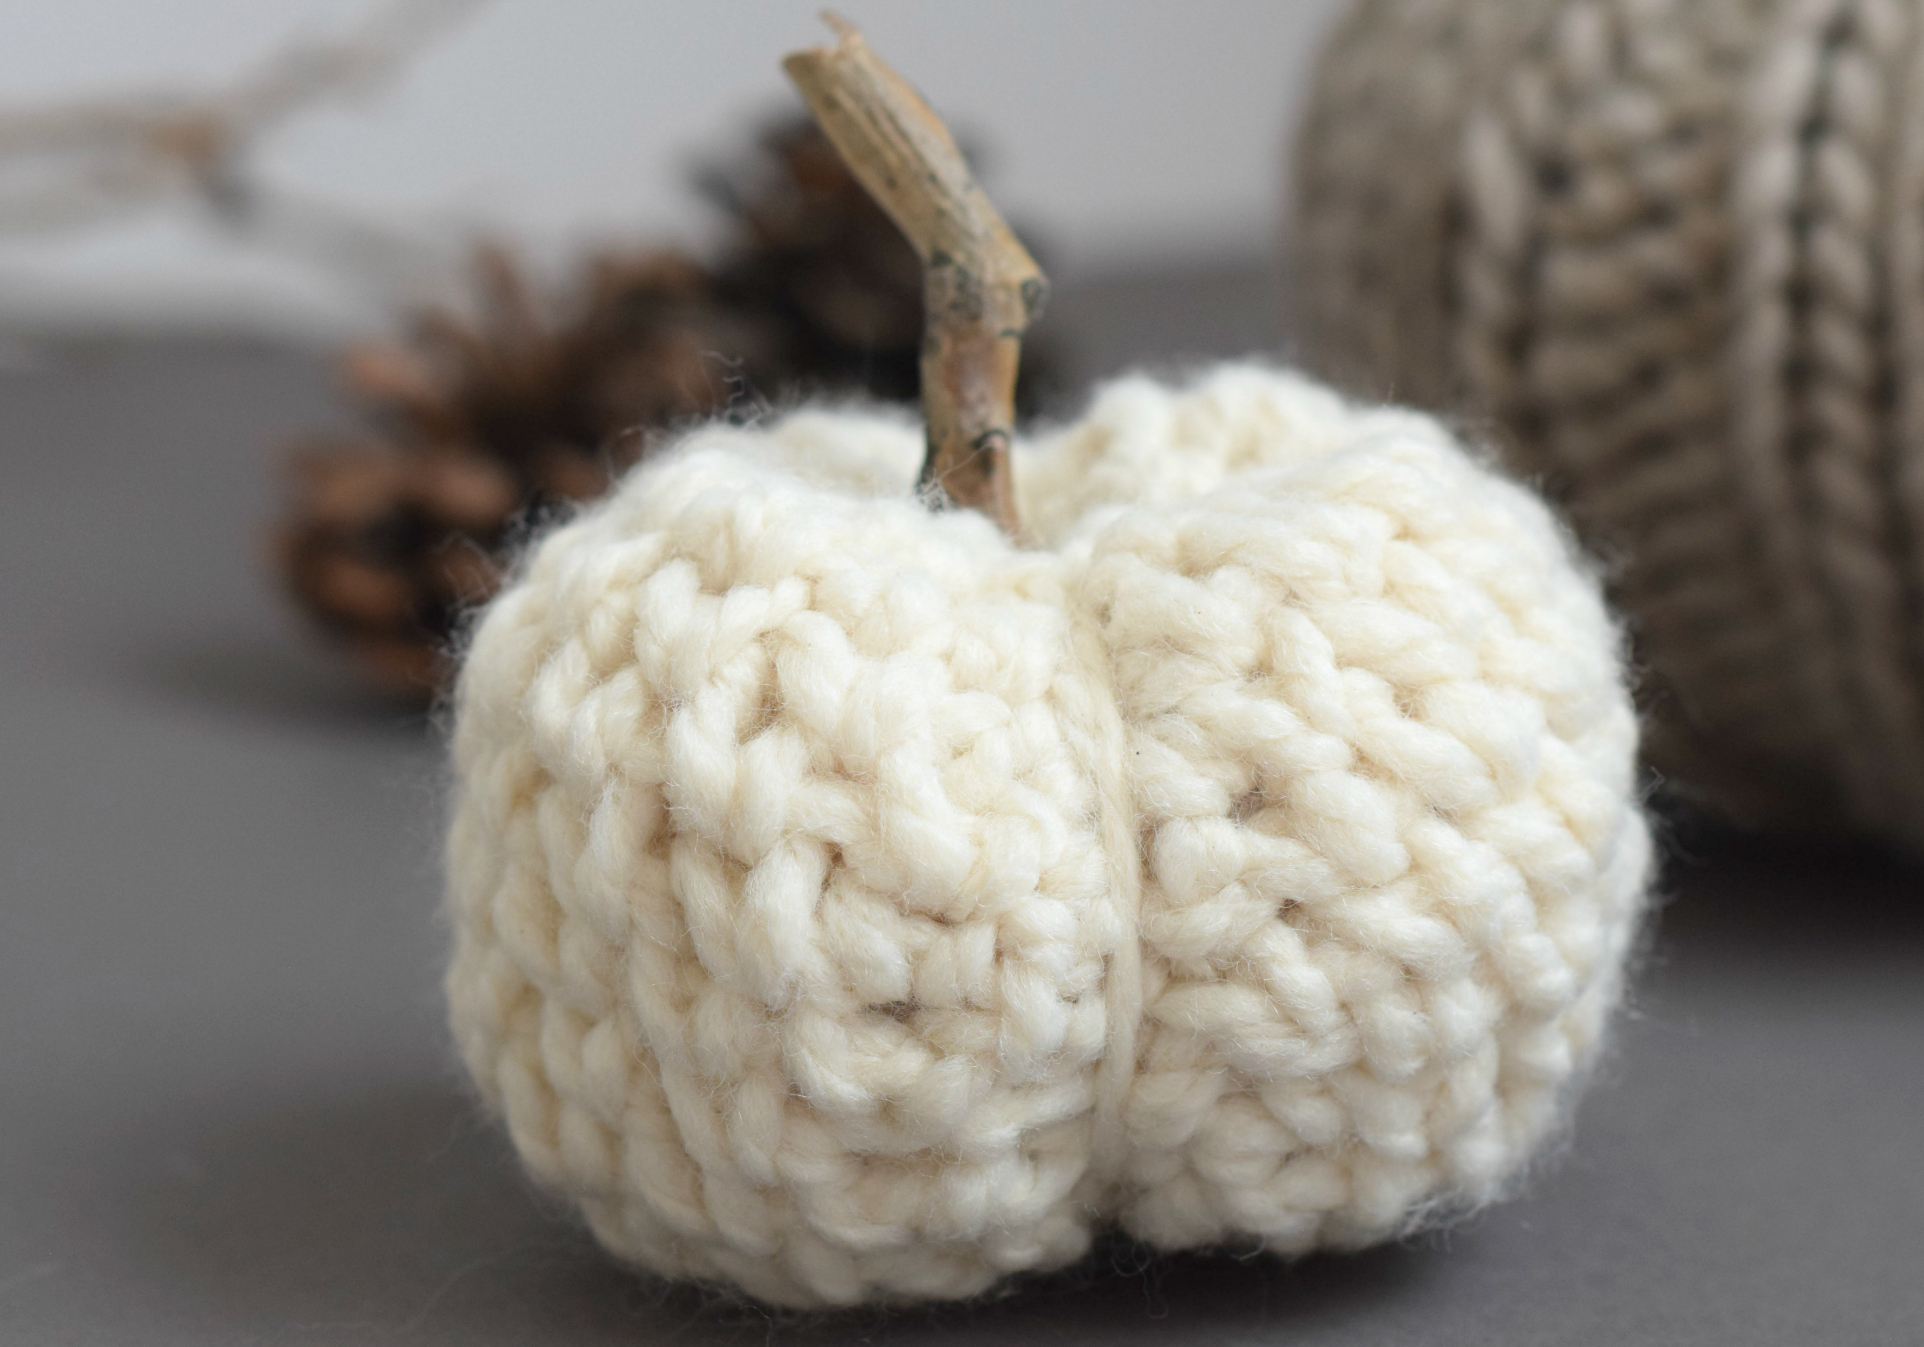
Size: Approximately 4.5” wide x 3” high
Gauge: Not important for this pattern
Notes:
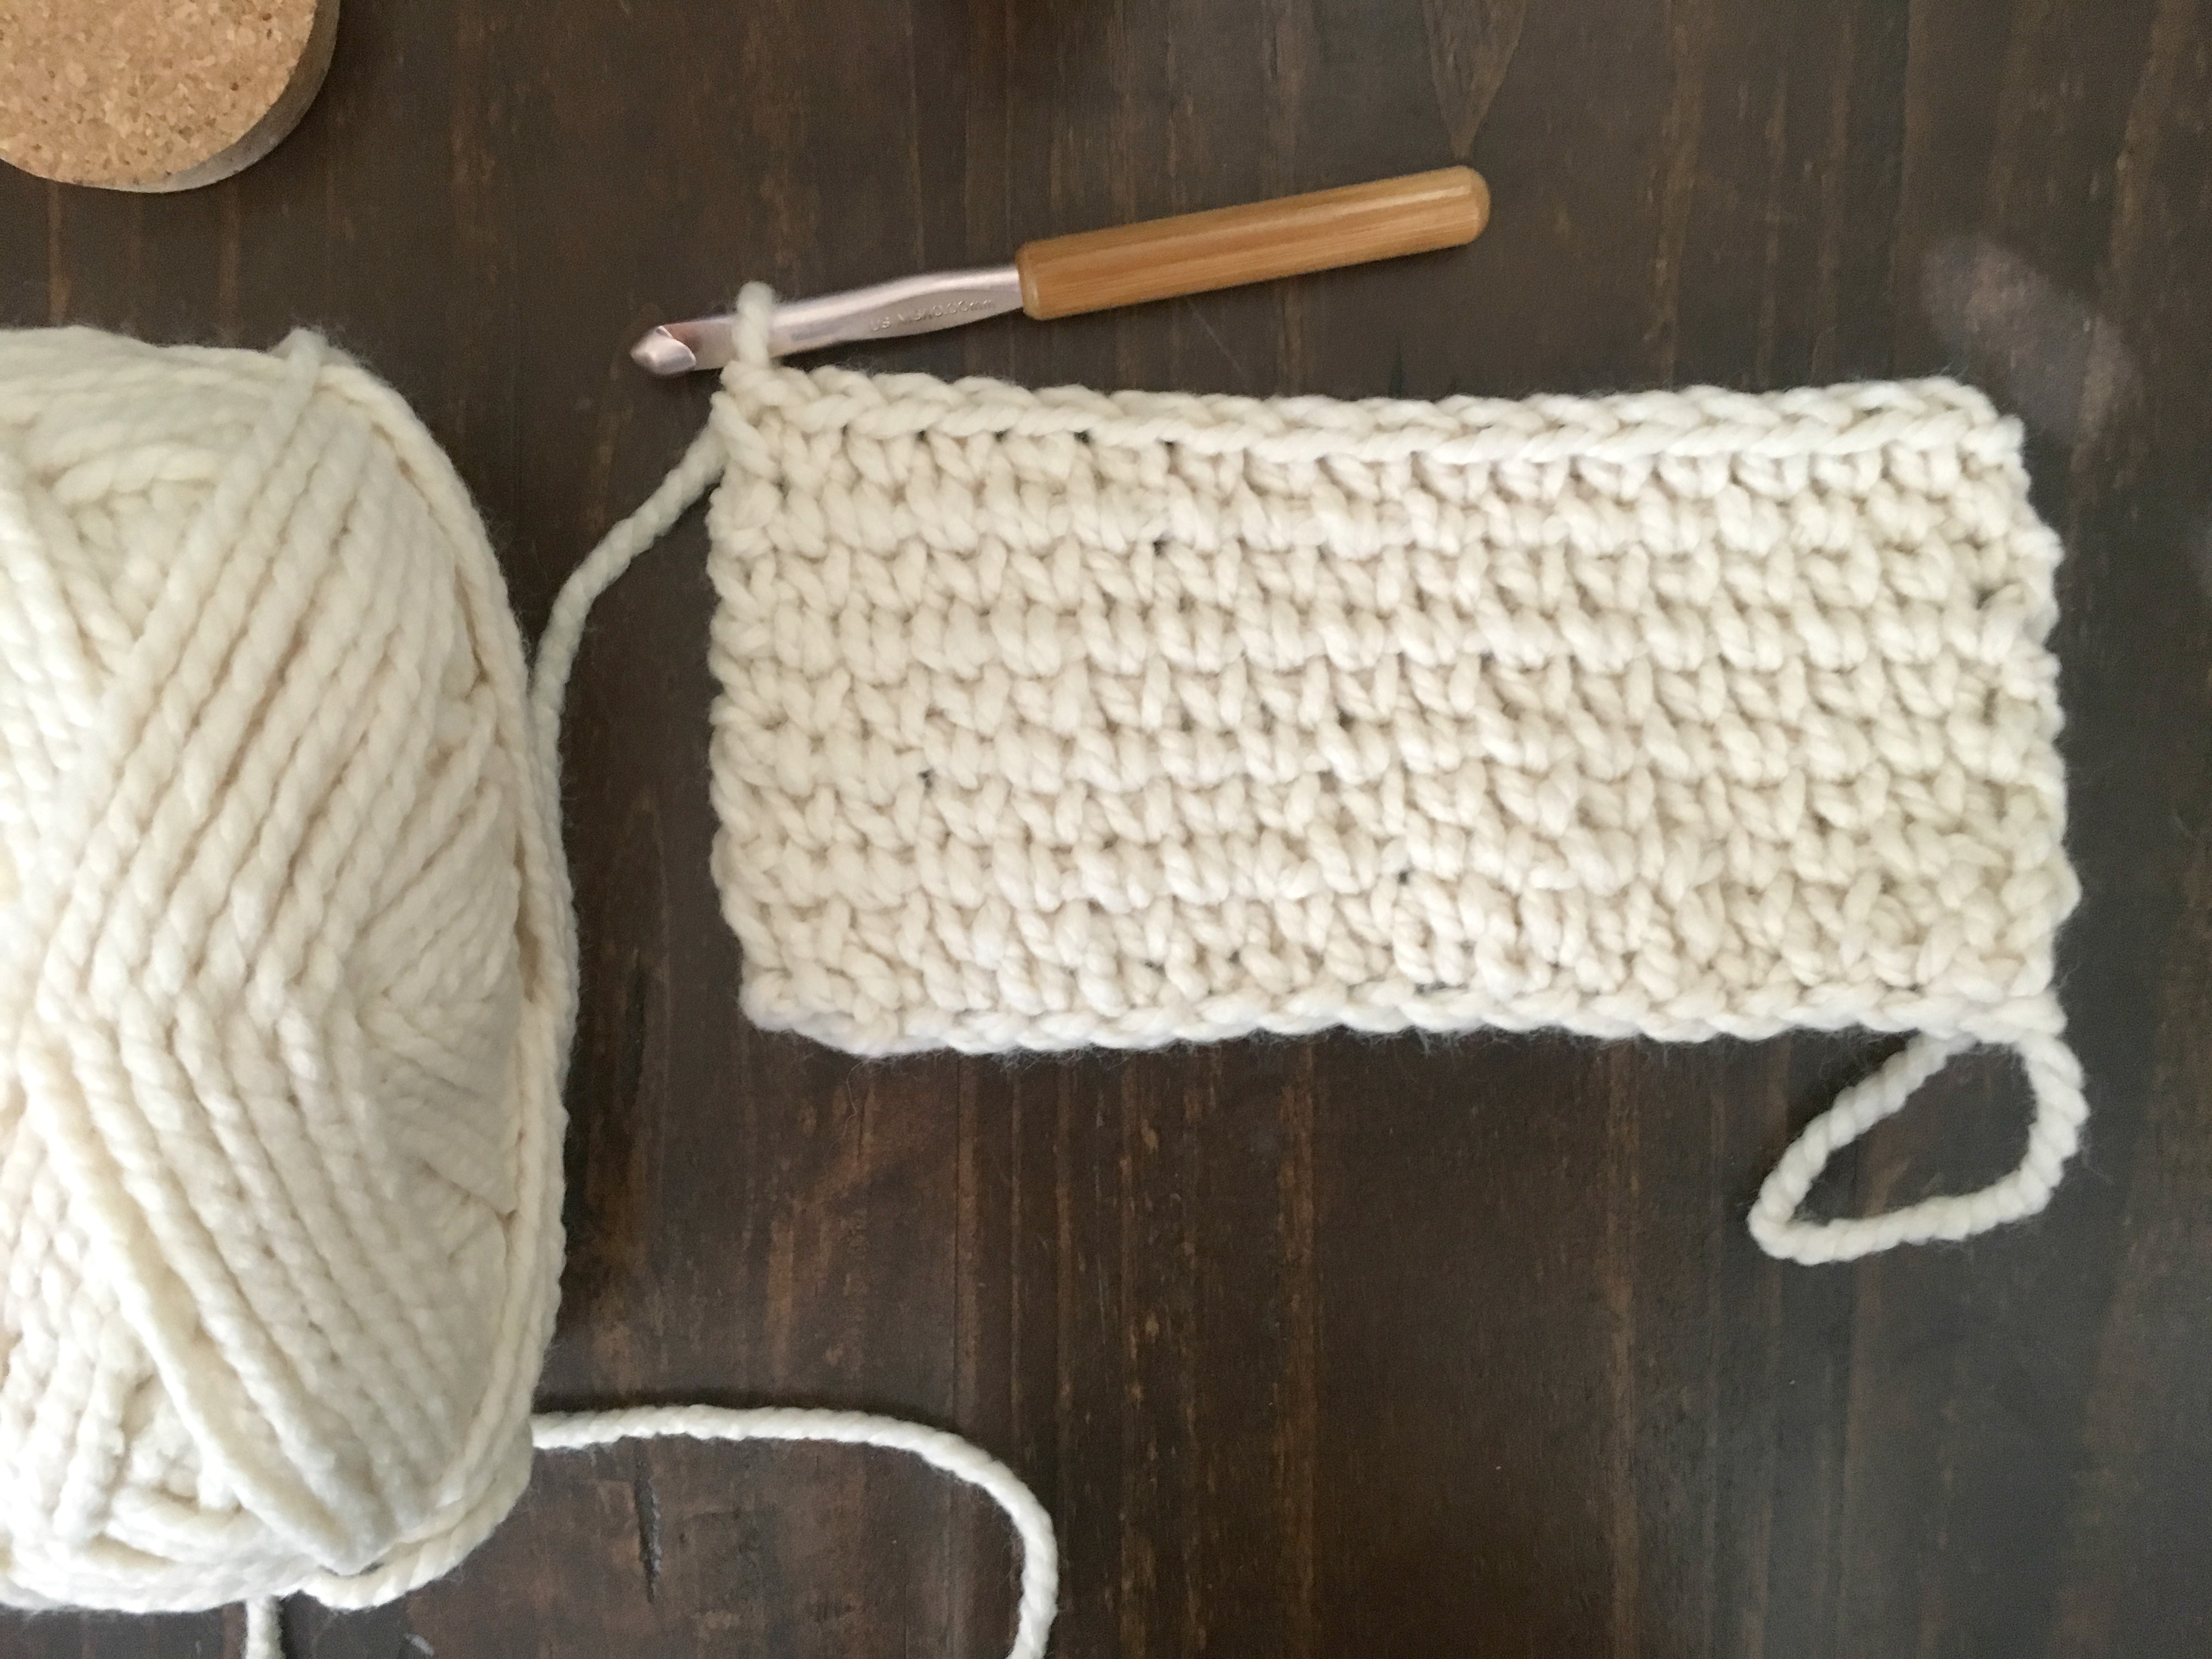
This pumpkin is crocheted flat, in rows. It’s then folded and seamed to make a cylinder shape and cinched together at the top and bottom. It’s crocheted with the center single crochet or waistcoat stitch. While this one is a pretty cream color, you can use any color that you like! Feel free to adjust the pattern to make the pumpkin just the size that you prefer. Crochet for more rows to make it taller or start with a longer chain to make it wider. See a tutorial and video to help you understand this stitch at: https://www.mamainastitch.com/crochet-knit-stitch/
Also, don’t forget to see the helpful pictures below!
Abbreviations (US) & Skills:
ch – chain stitch
sc – single crochet
csc – center single crochet
st – stitch
Chunky Quick Pumpkin Pattern
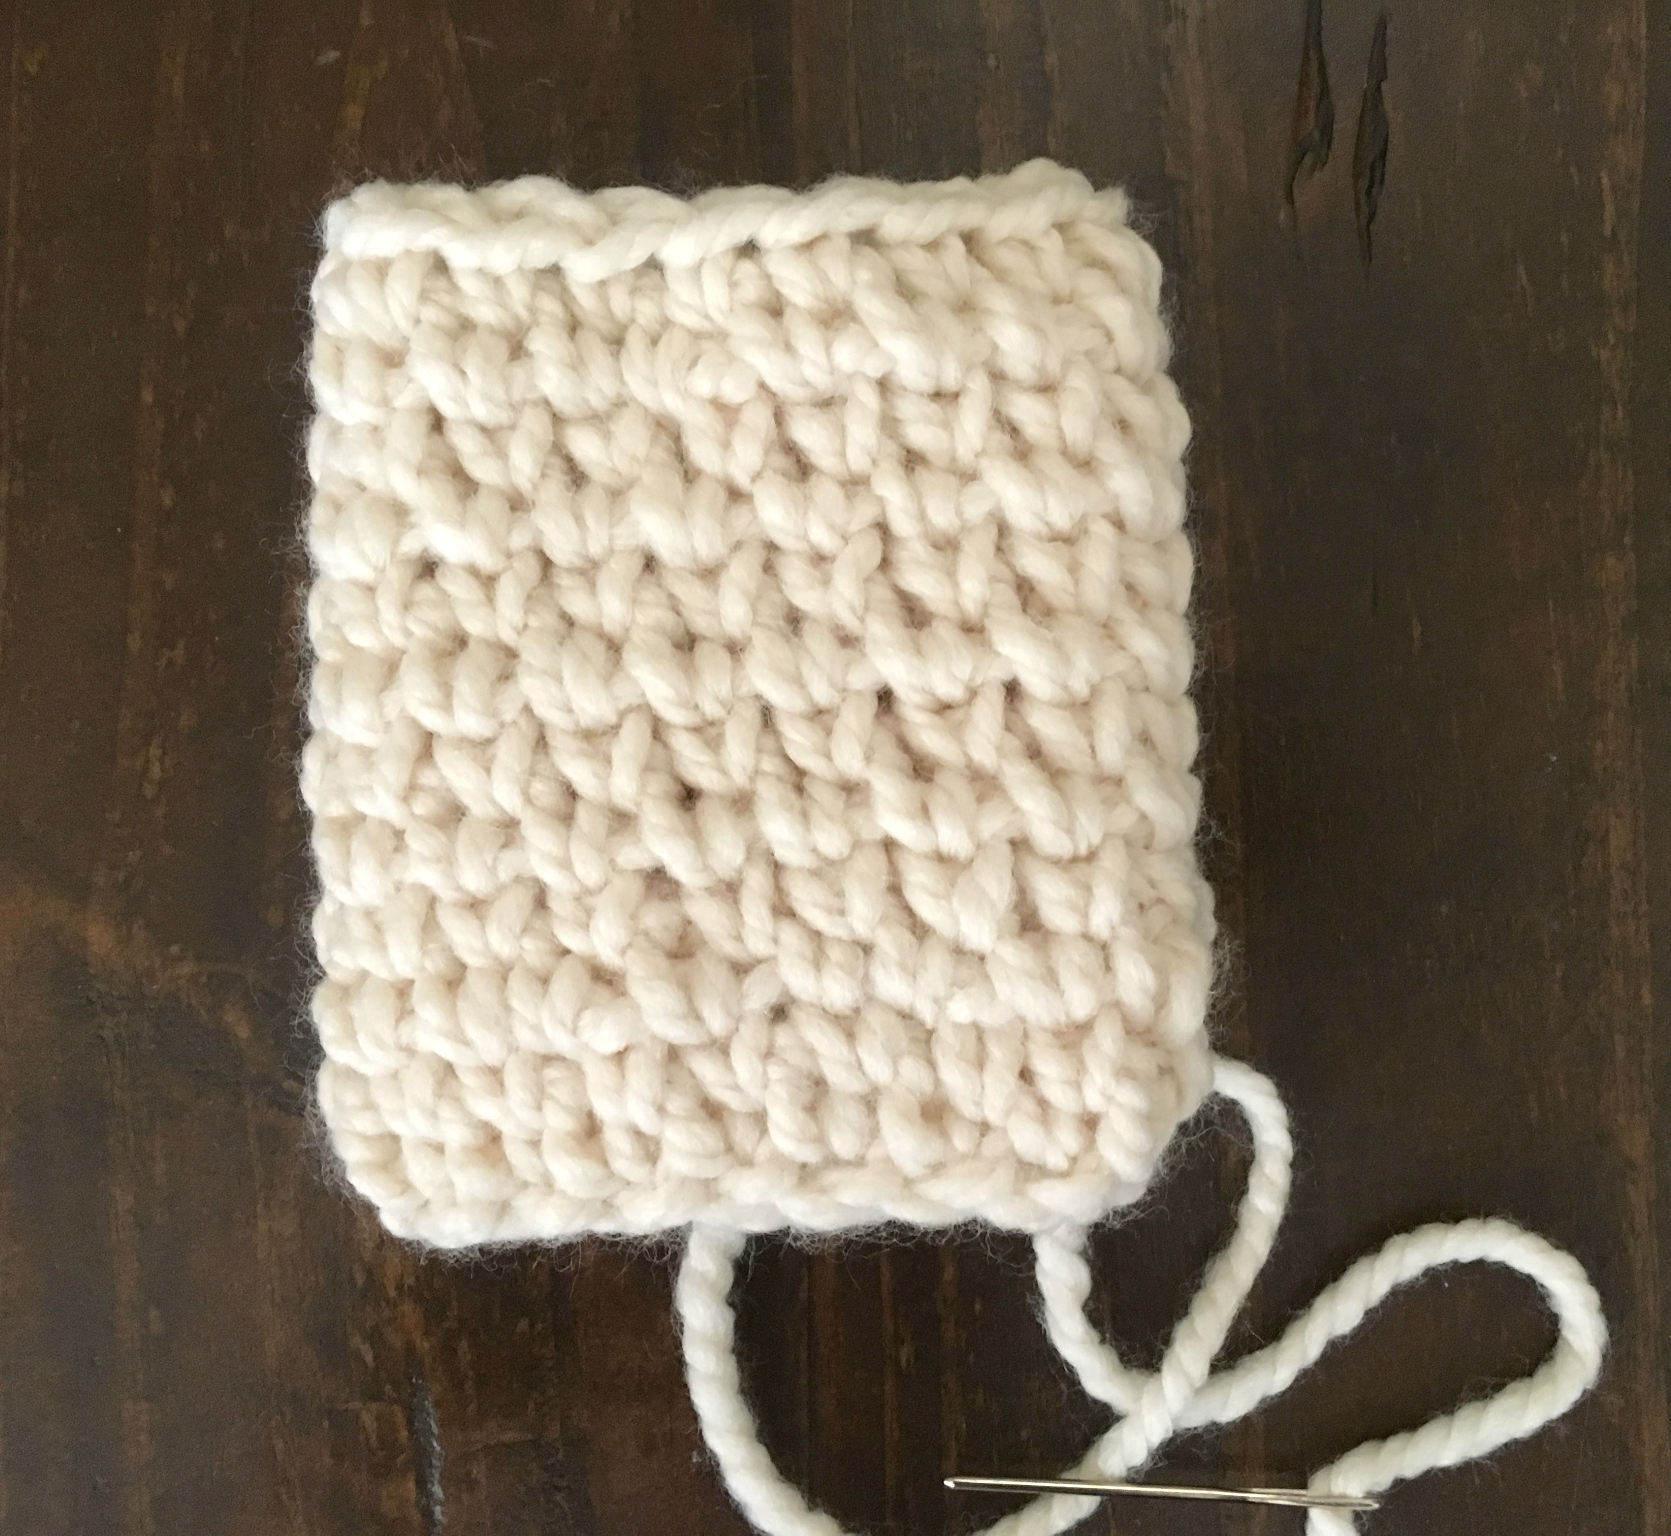
Ch 19
Row 1 Sc in each ch st across the row (18 sts)
Row 2 Ch 1, turn, csc in each st across the row (18 sts)
Rows 3 – 12 Repeat row 2
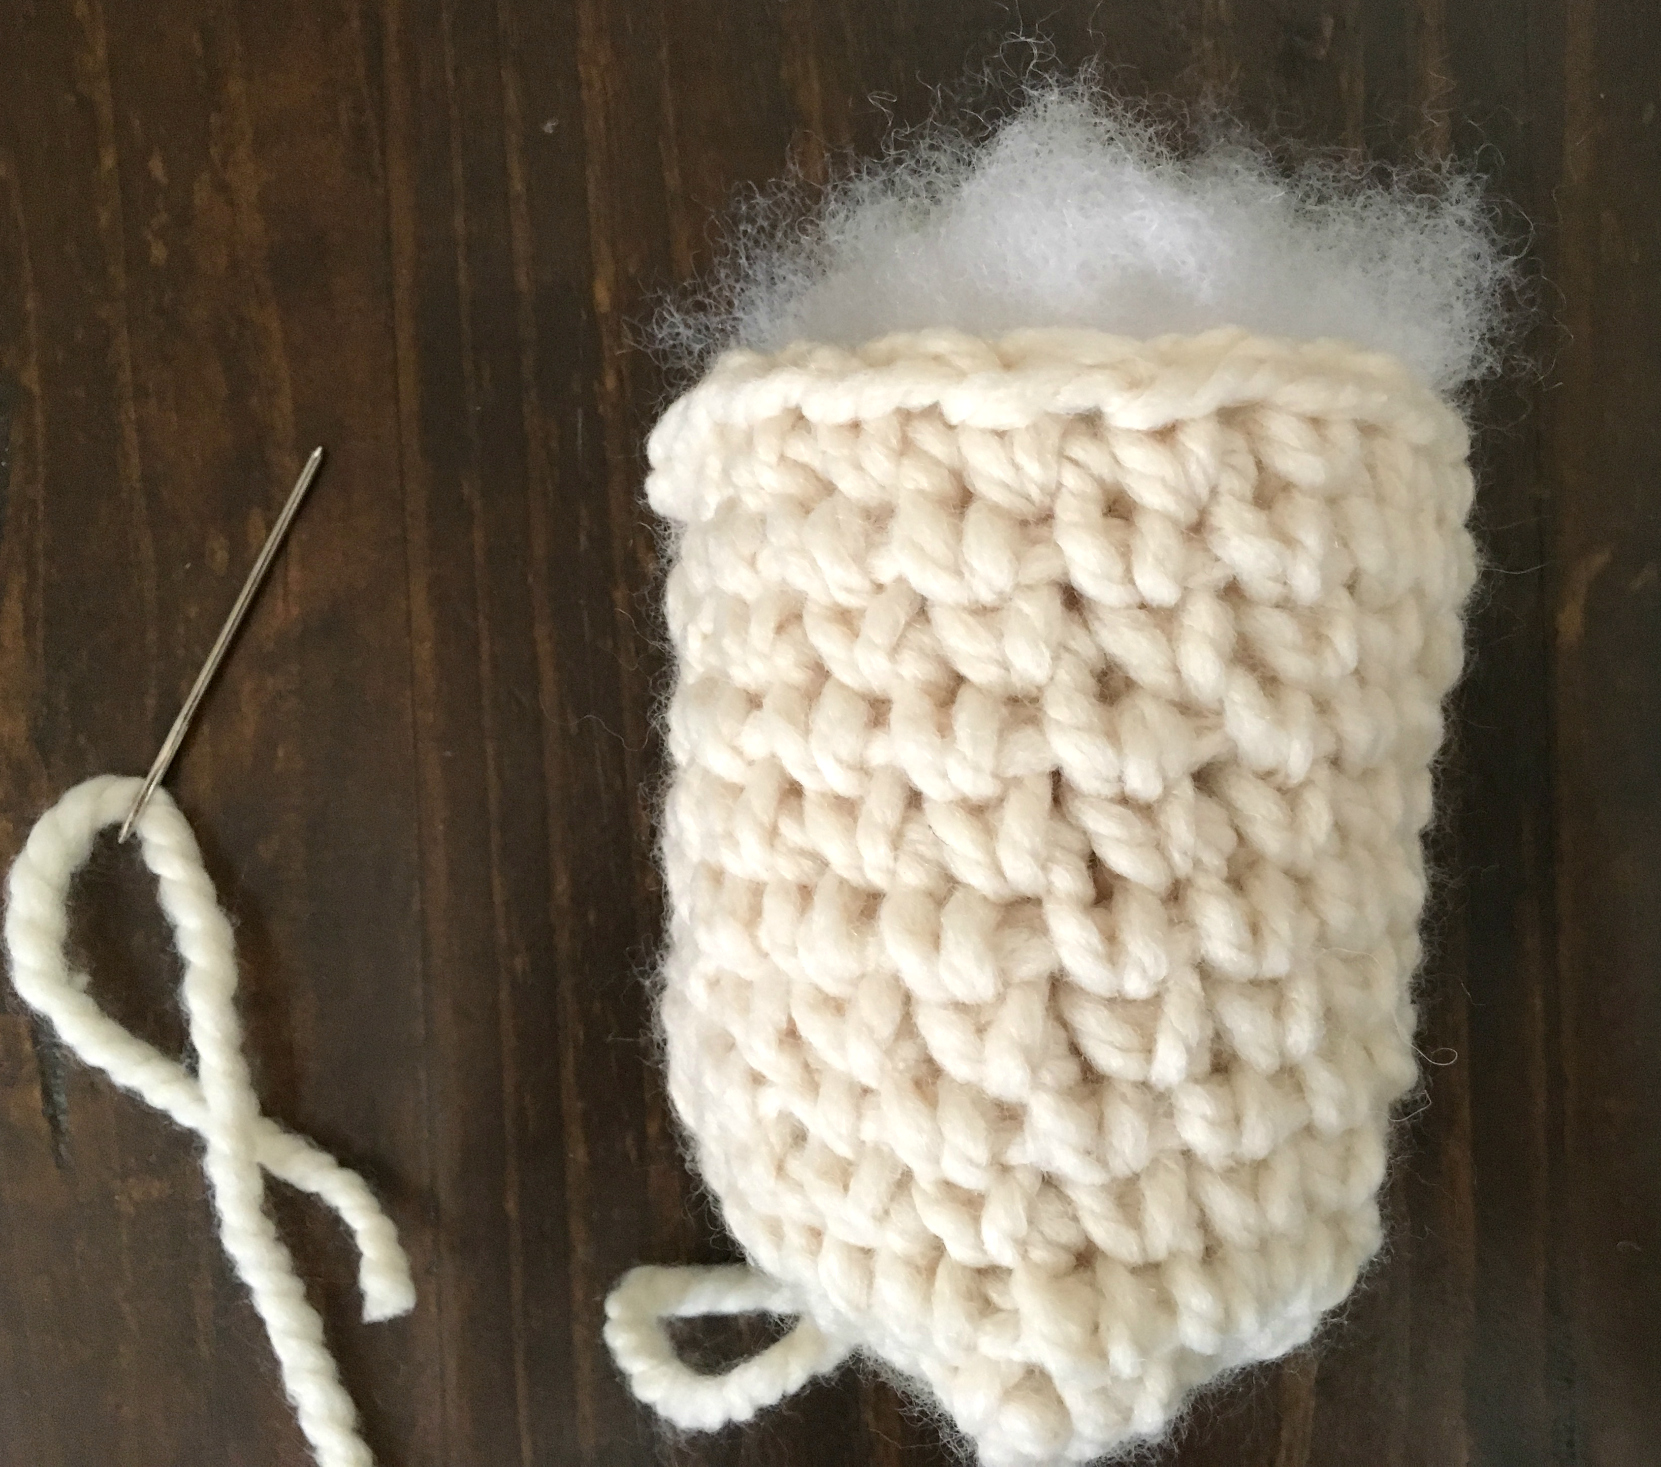
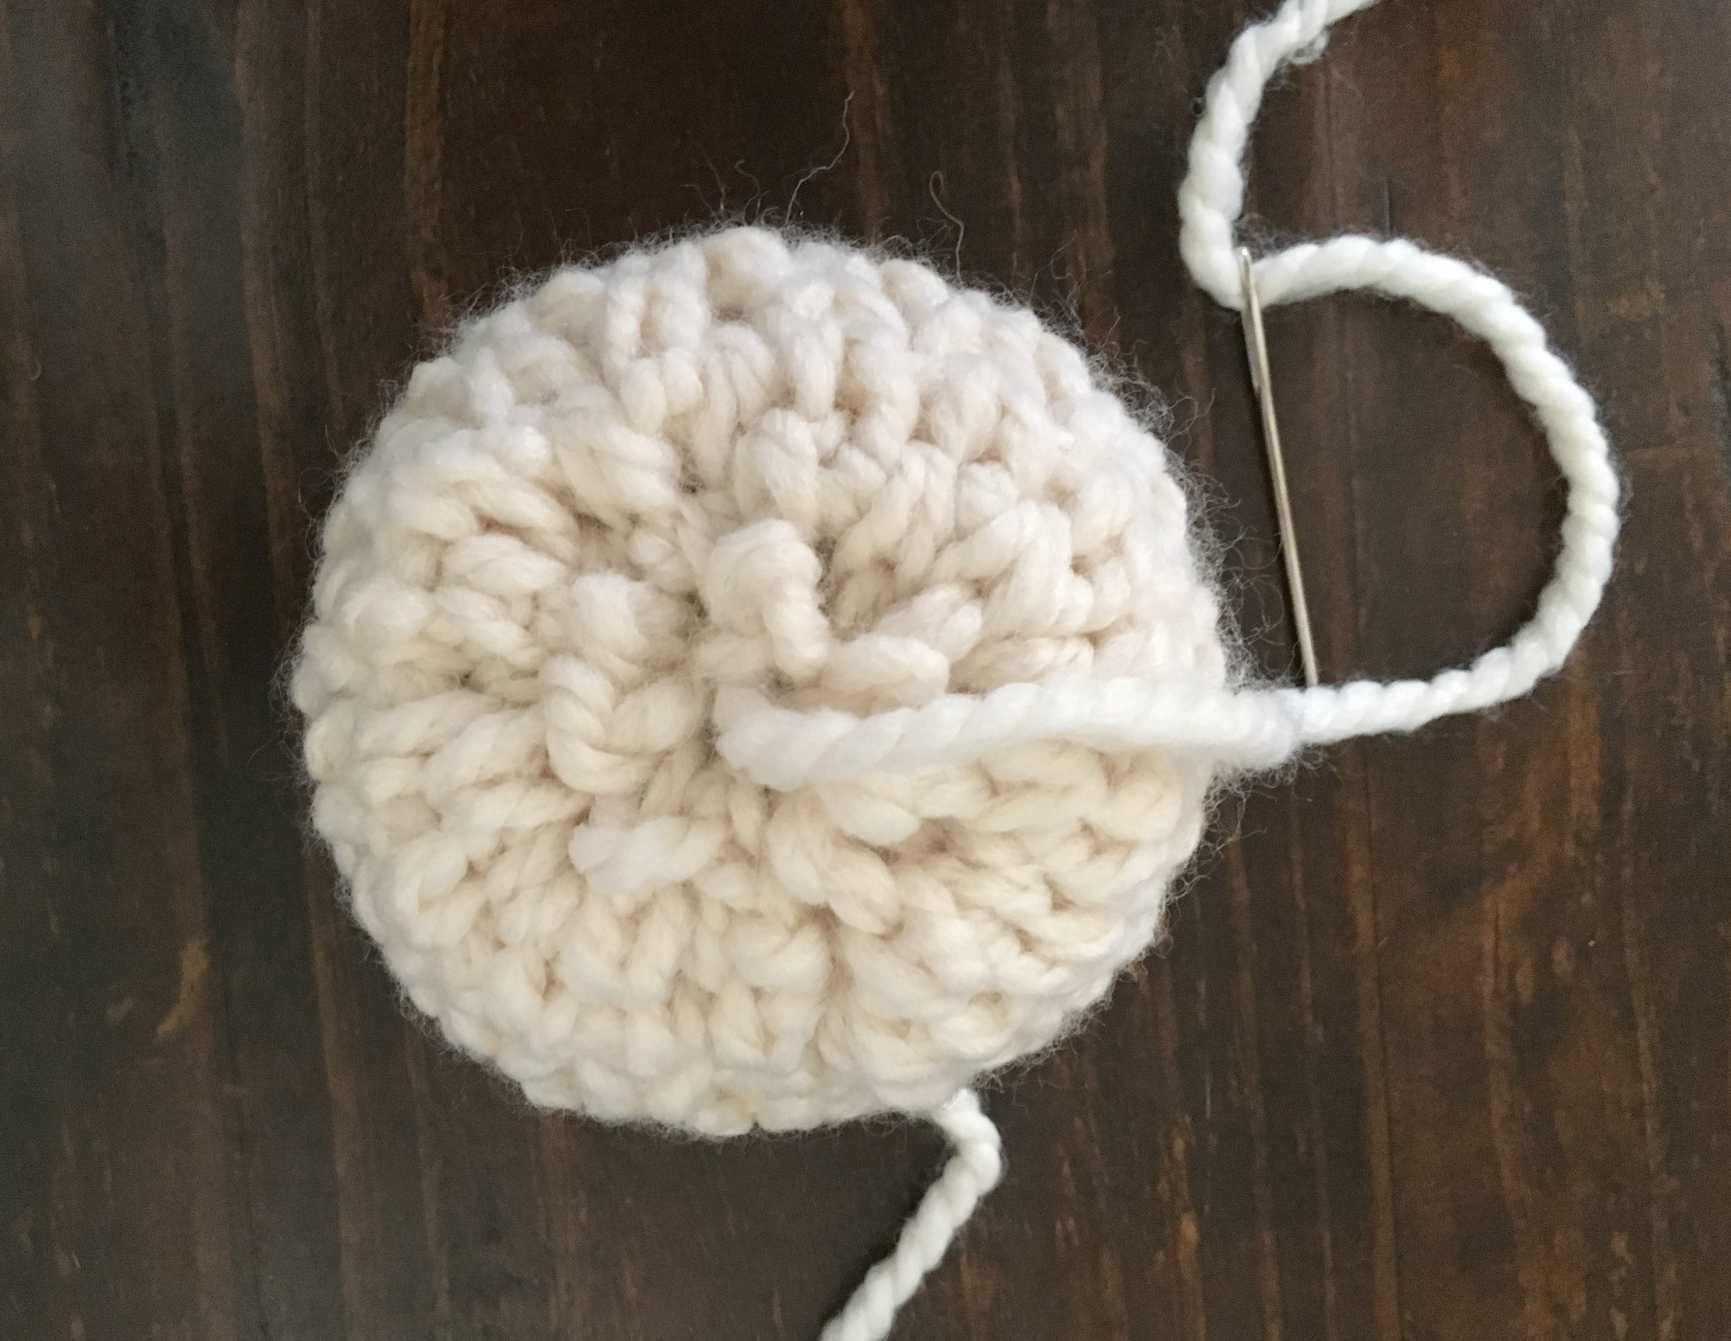
Tie off, leaving a length of yarn. Fold rectangle in half (see pictures) to seam up the side in order to make the shape of a tube. Next, with a length of yarn and your tapestry needle, work through each stitch at the bottom of the tube and tighten to close. Stuff the pumpkin with poly-fil or preferred stuffing. Next, pull the same needle and yarn up through the center to the top of the pumpkin. Whip stitch and cinch the top closed with this same length of yarn, creating some shaping for the pumpkin base and top. Tie off. Next, take the same yarn or a new length of yarn and tie it around the pumpkin, dividing it into quarters. Tie knot and weave in all ends.
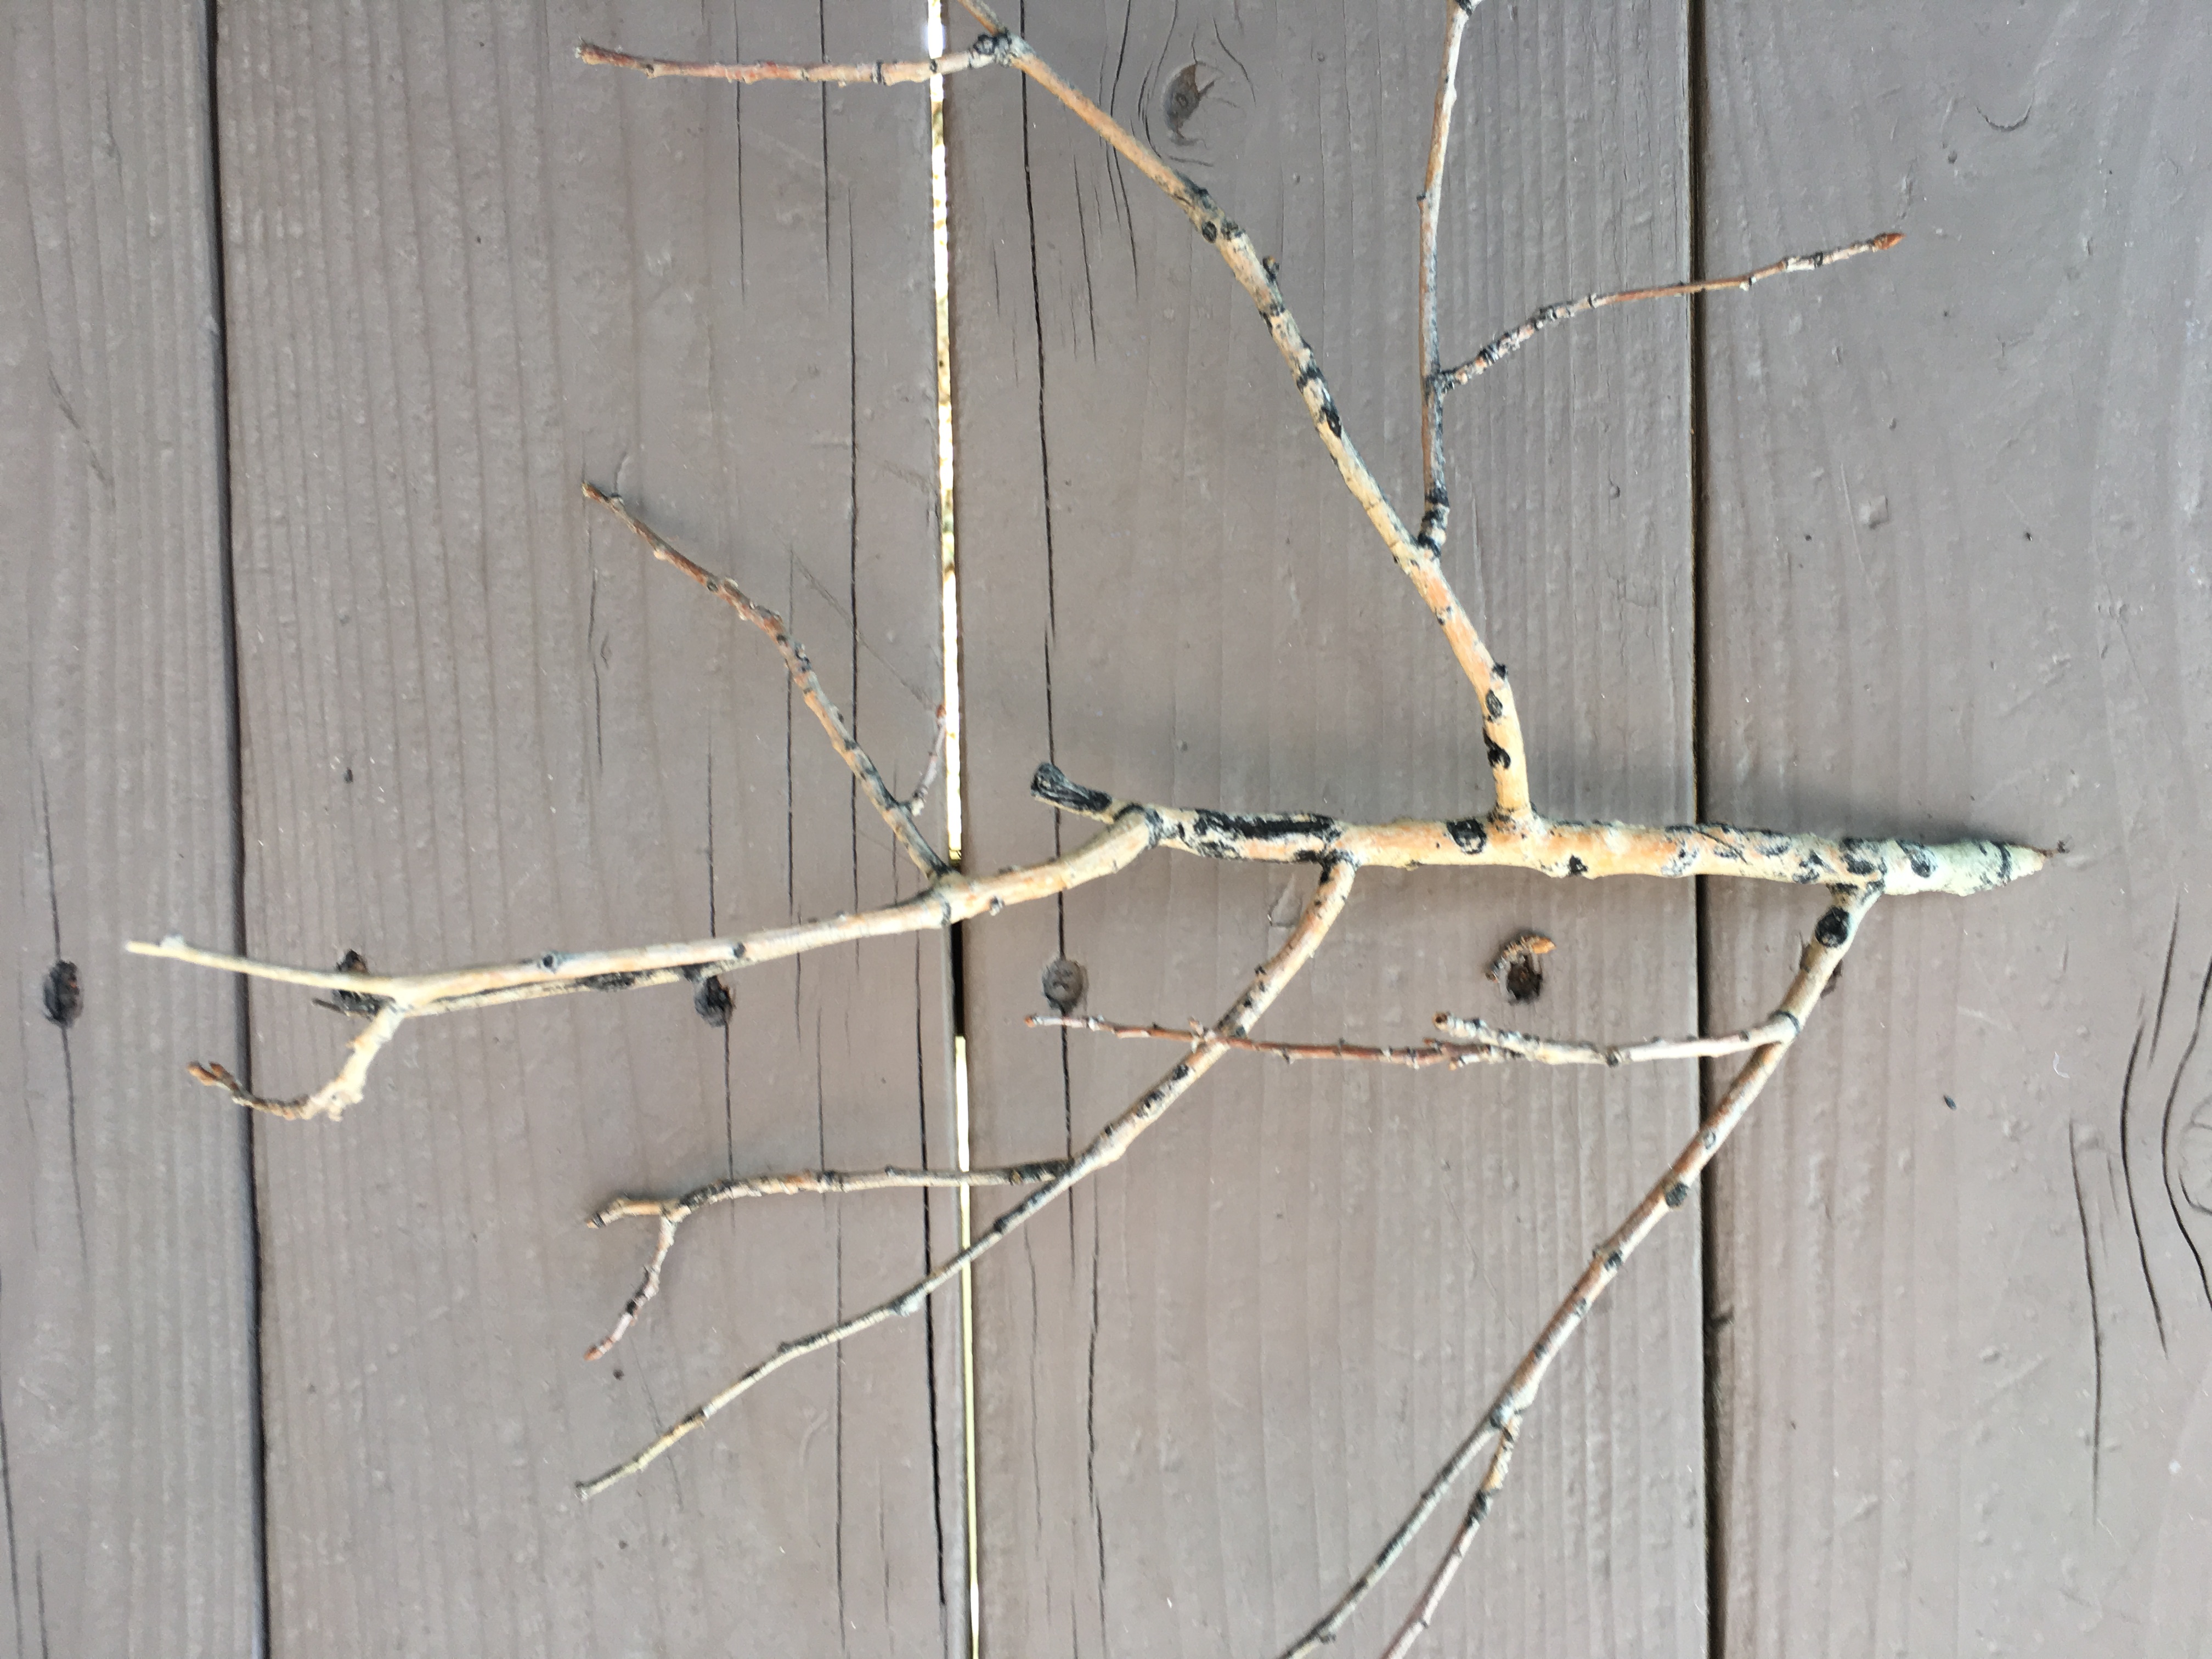
Be creative with the stem! Use part of branch, stick or crochet an i-cord to put in the top.
Below, you’ll find a picture tutorial. First, you’ll crochet in rows to make a rectangle. The rectangle is then folded and seamed. Next, you will cinch the bottom closed and stuff. Lastly, close up the top and add a stem to the center (you can push a stick into the center opening before cinching if that’s easier)
Below: I used a dead branch from an Aspen Tree in my backyard to make the stems.
Easy and quick, right? Enjoy!
XO,
Jessica
If you’d like to see more fall worthy patterns, you might also like:
Little Pumpkins Garland Free Crochet Pattern
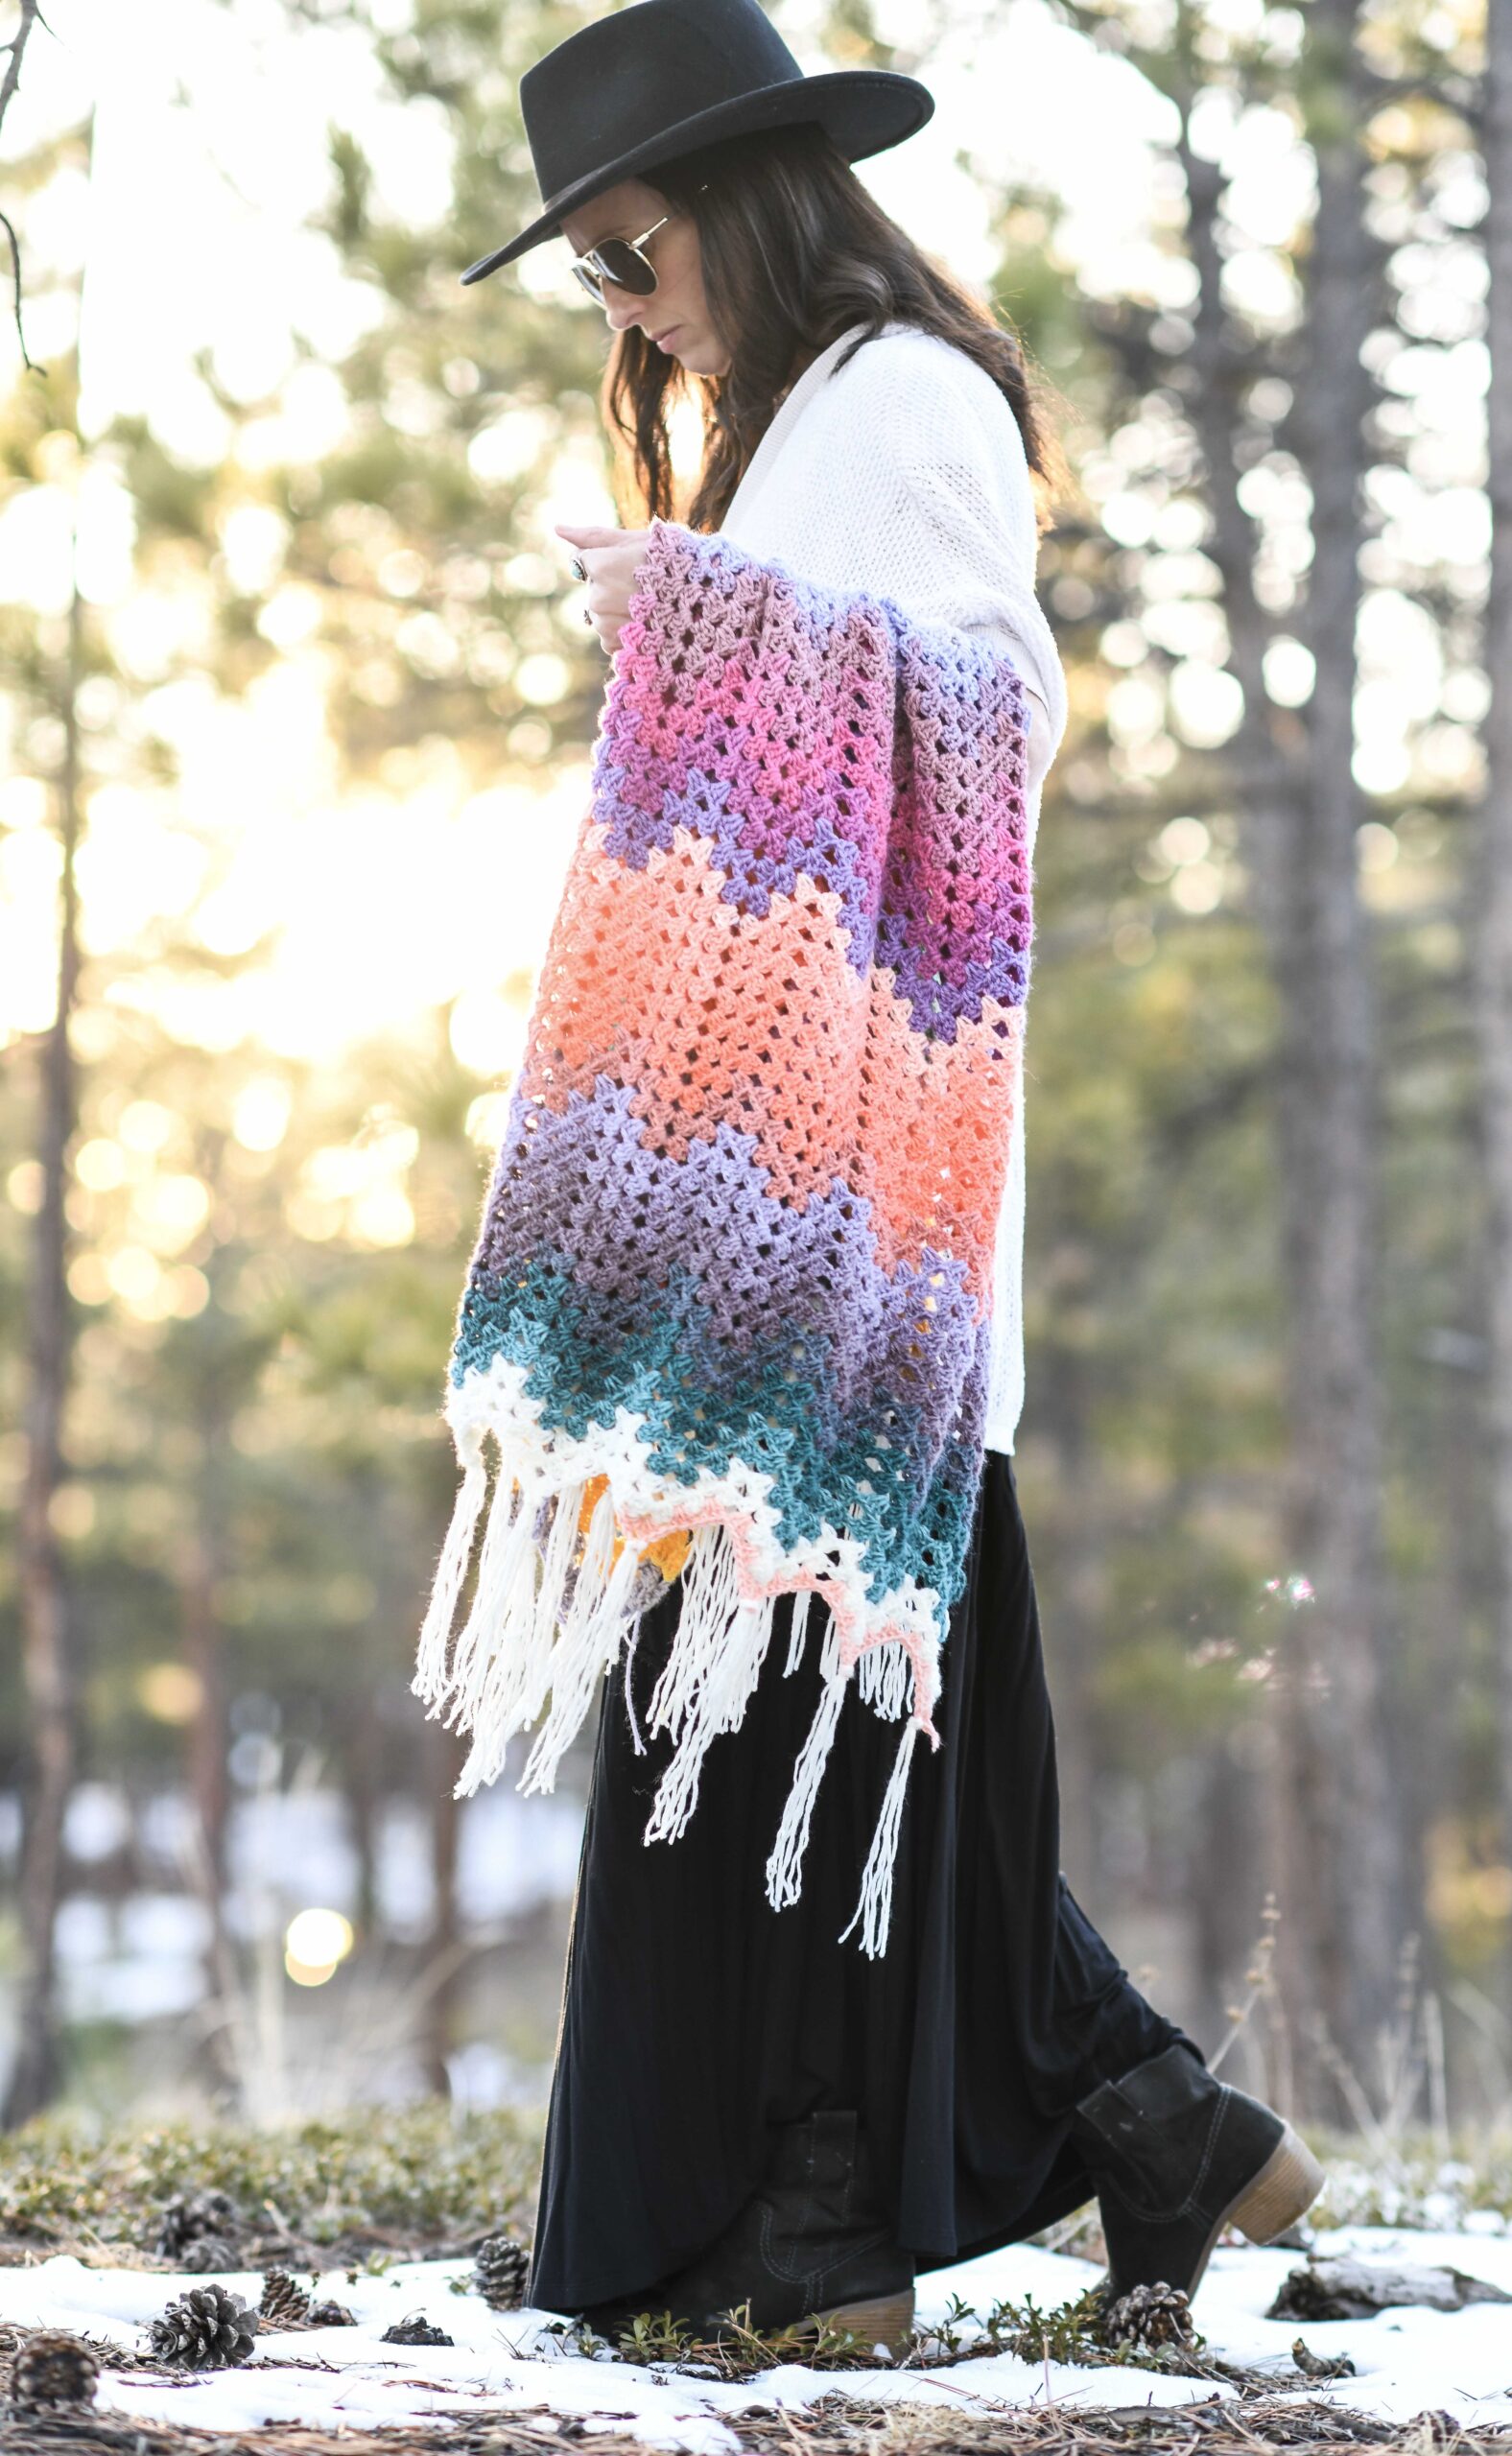
Light Alpaca Poncho Free Crochet Crochet Pattern
Mamas Maker Members get all of the patterns as ad-free, printable downloads! If you’re a member or would like to be one, check it out HERE.
Clever woman you are! Adorable and easy.
Just made one–love it! Thanks, Jessica
Oh yay!! So glad you like it!
So cute! Did you make the larger oatmeal colored pumpkin too?
Yes, that is the knit pumpkin I made. I’ll be sharing that pattern soon!
Thanks for the pattern just in time for the fall festival at church. I am going to use a cinnamon stick for my stems.
Ahh I love the idea of a cinnamon stick! Too cute and have a great time at the fall festival.
Cinnamon stick! That’s an awesome idea!
So cute!! You are just so creative. Gotta make some of these!
So cute! I made some last year. Always fun to make! I love your tutorial.
Where’s the knit pumpkin pattern
I’ll be sharing the pattern in the next week, but the knit version is the brown pumpkin you see in the photos.
Adorable pumpkin. I don’t crochet, but I do knit. How about a pattern for that cute knitted tan pumpkin in the photo?
I’ll be sharing that pattern in the next week! Yay!
Very cute Jessica and looks easy enough. I love these quick fun projects. Do you happen to have a youtube video to go along with this one yet?
LOVE them. I might try to crochet one, but looking forward to knit version. I will make it in orange. My gosh, this year is going fast if we’re talking Halloween. Thanks!
So cute! How did you attach the branch stem? I definitely want to make these!