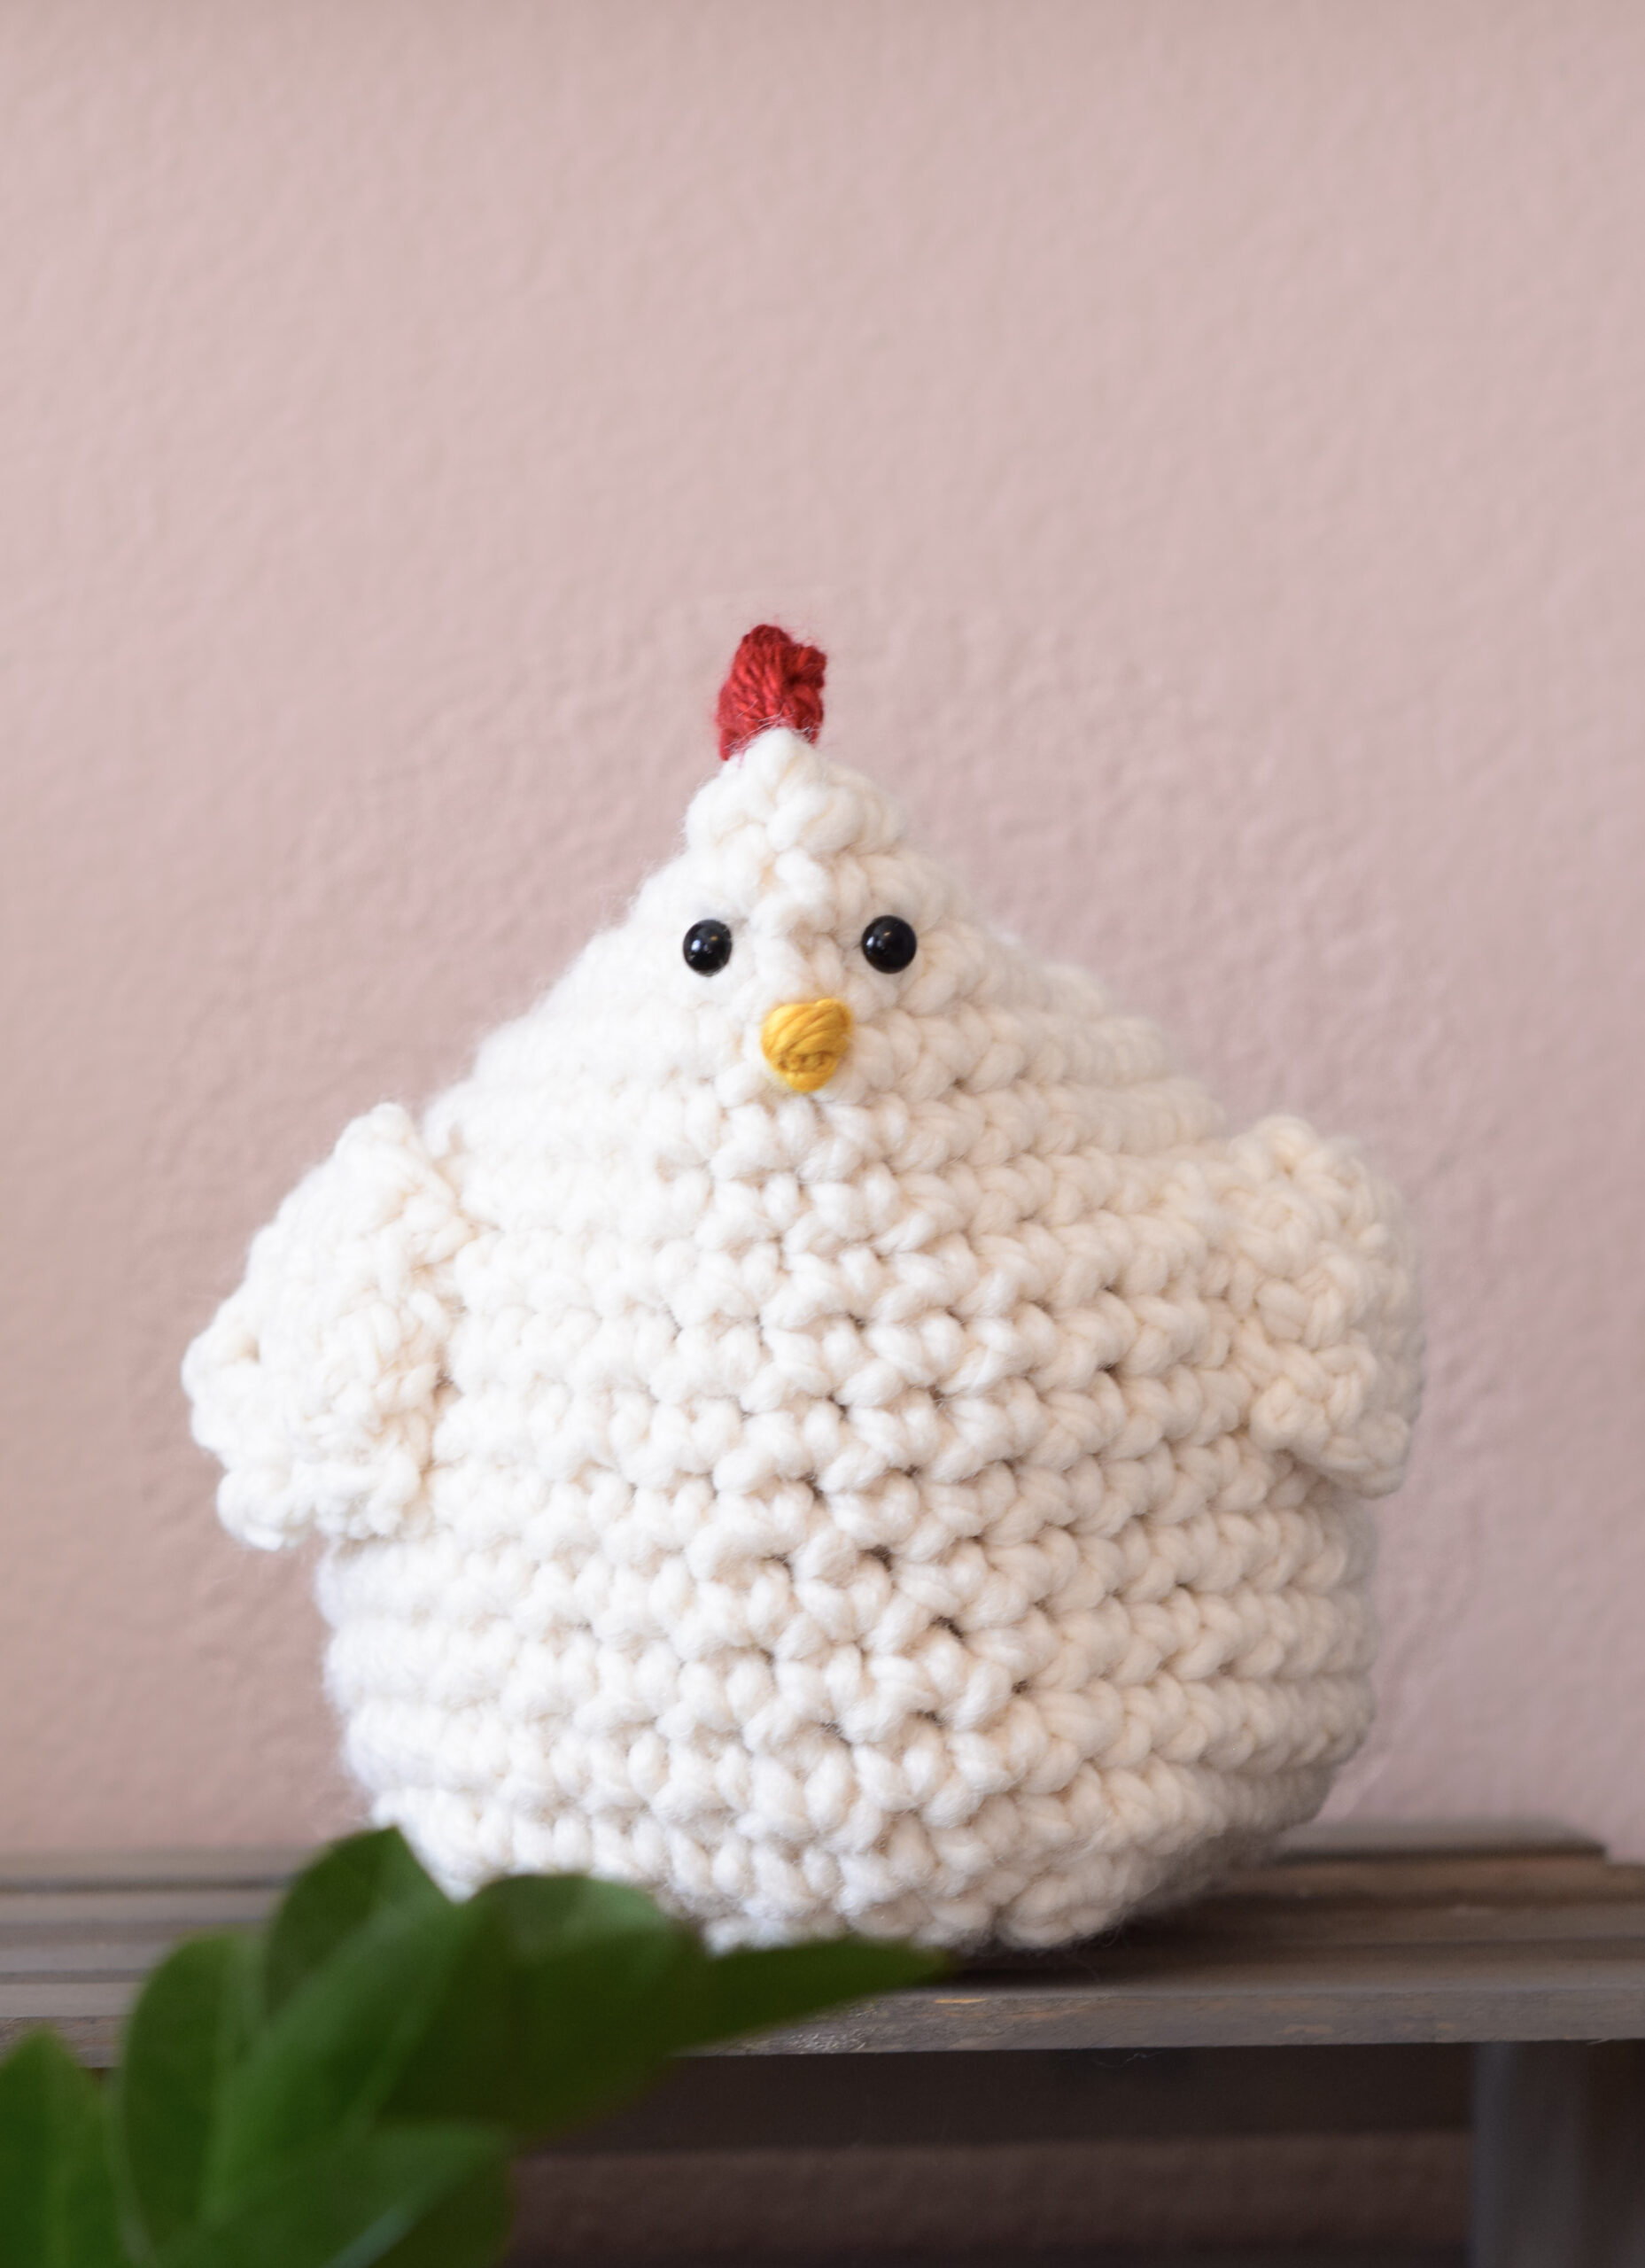
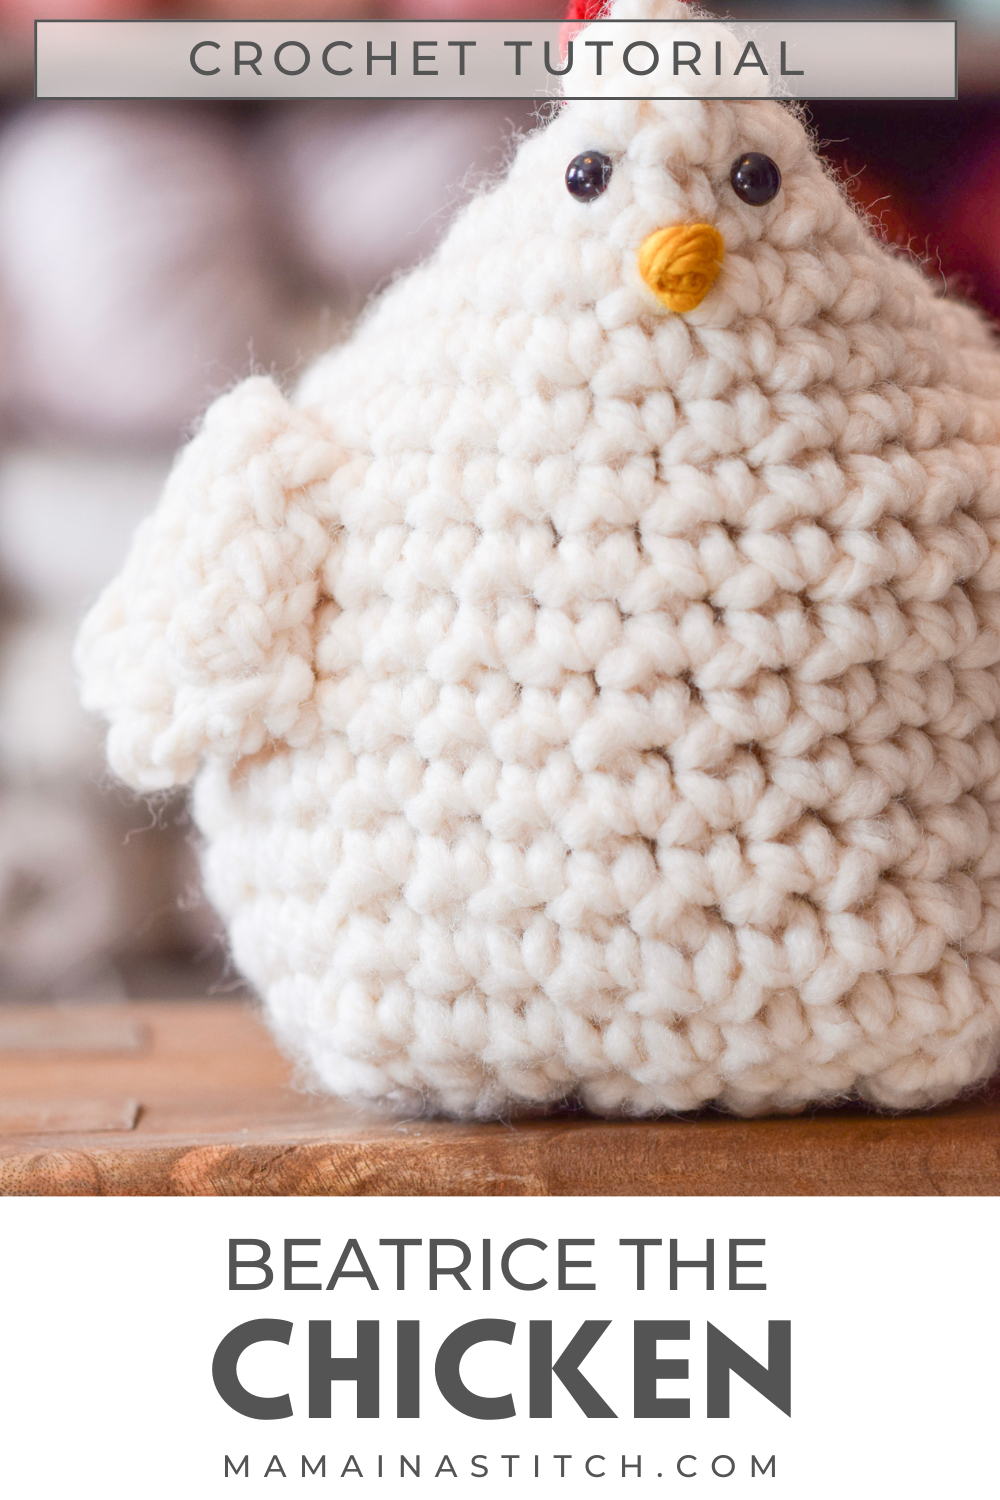
Beatrice Chicken Crochet Pattern
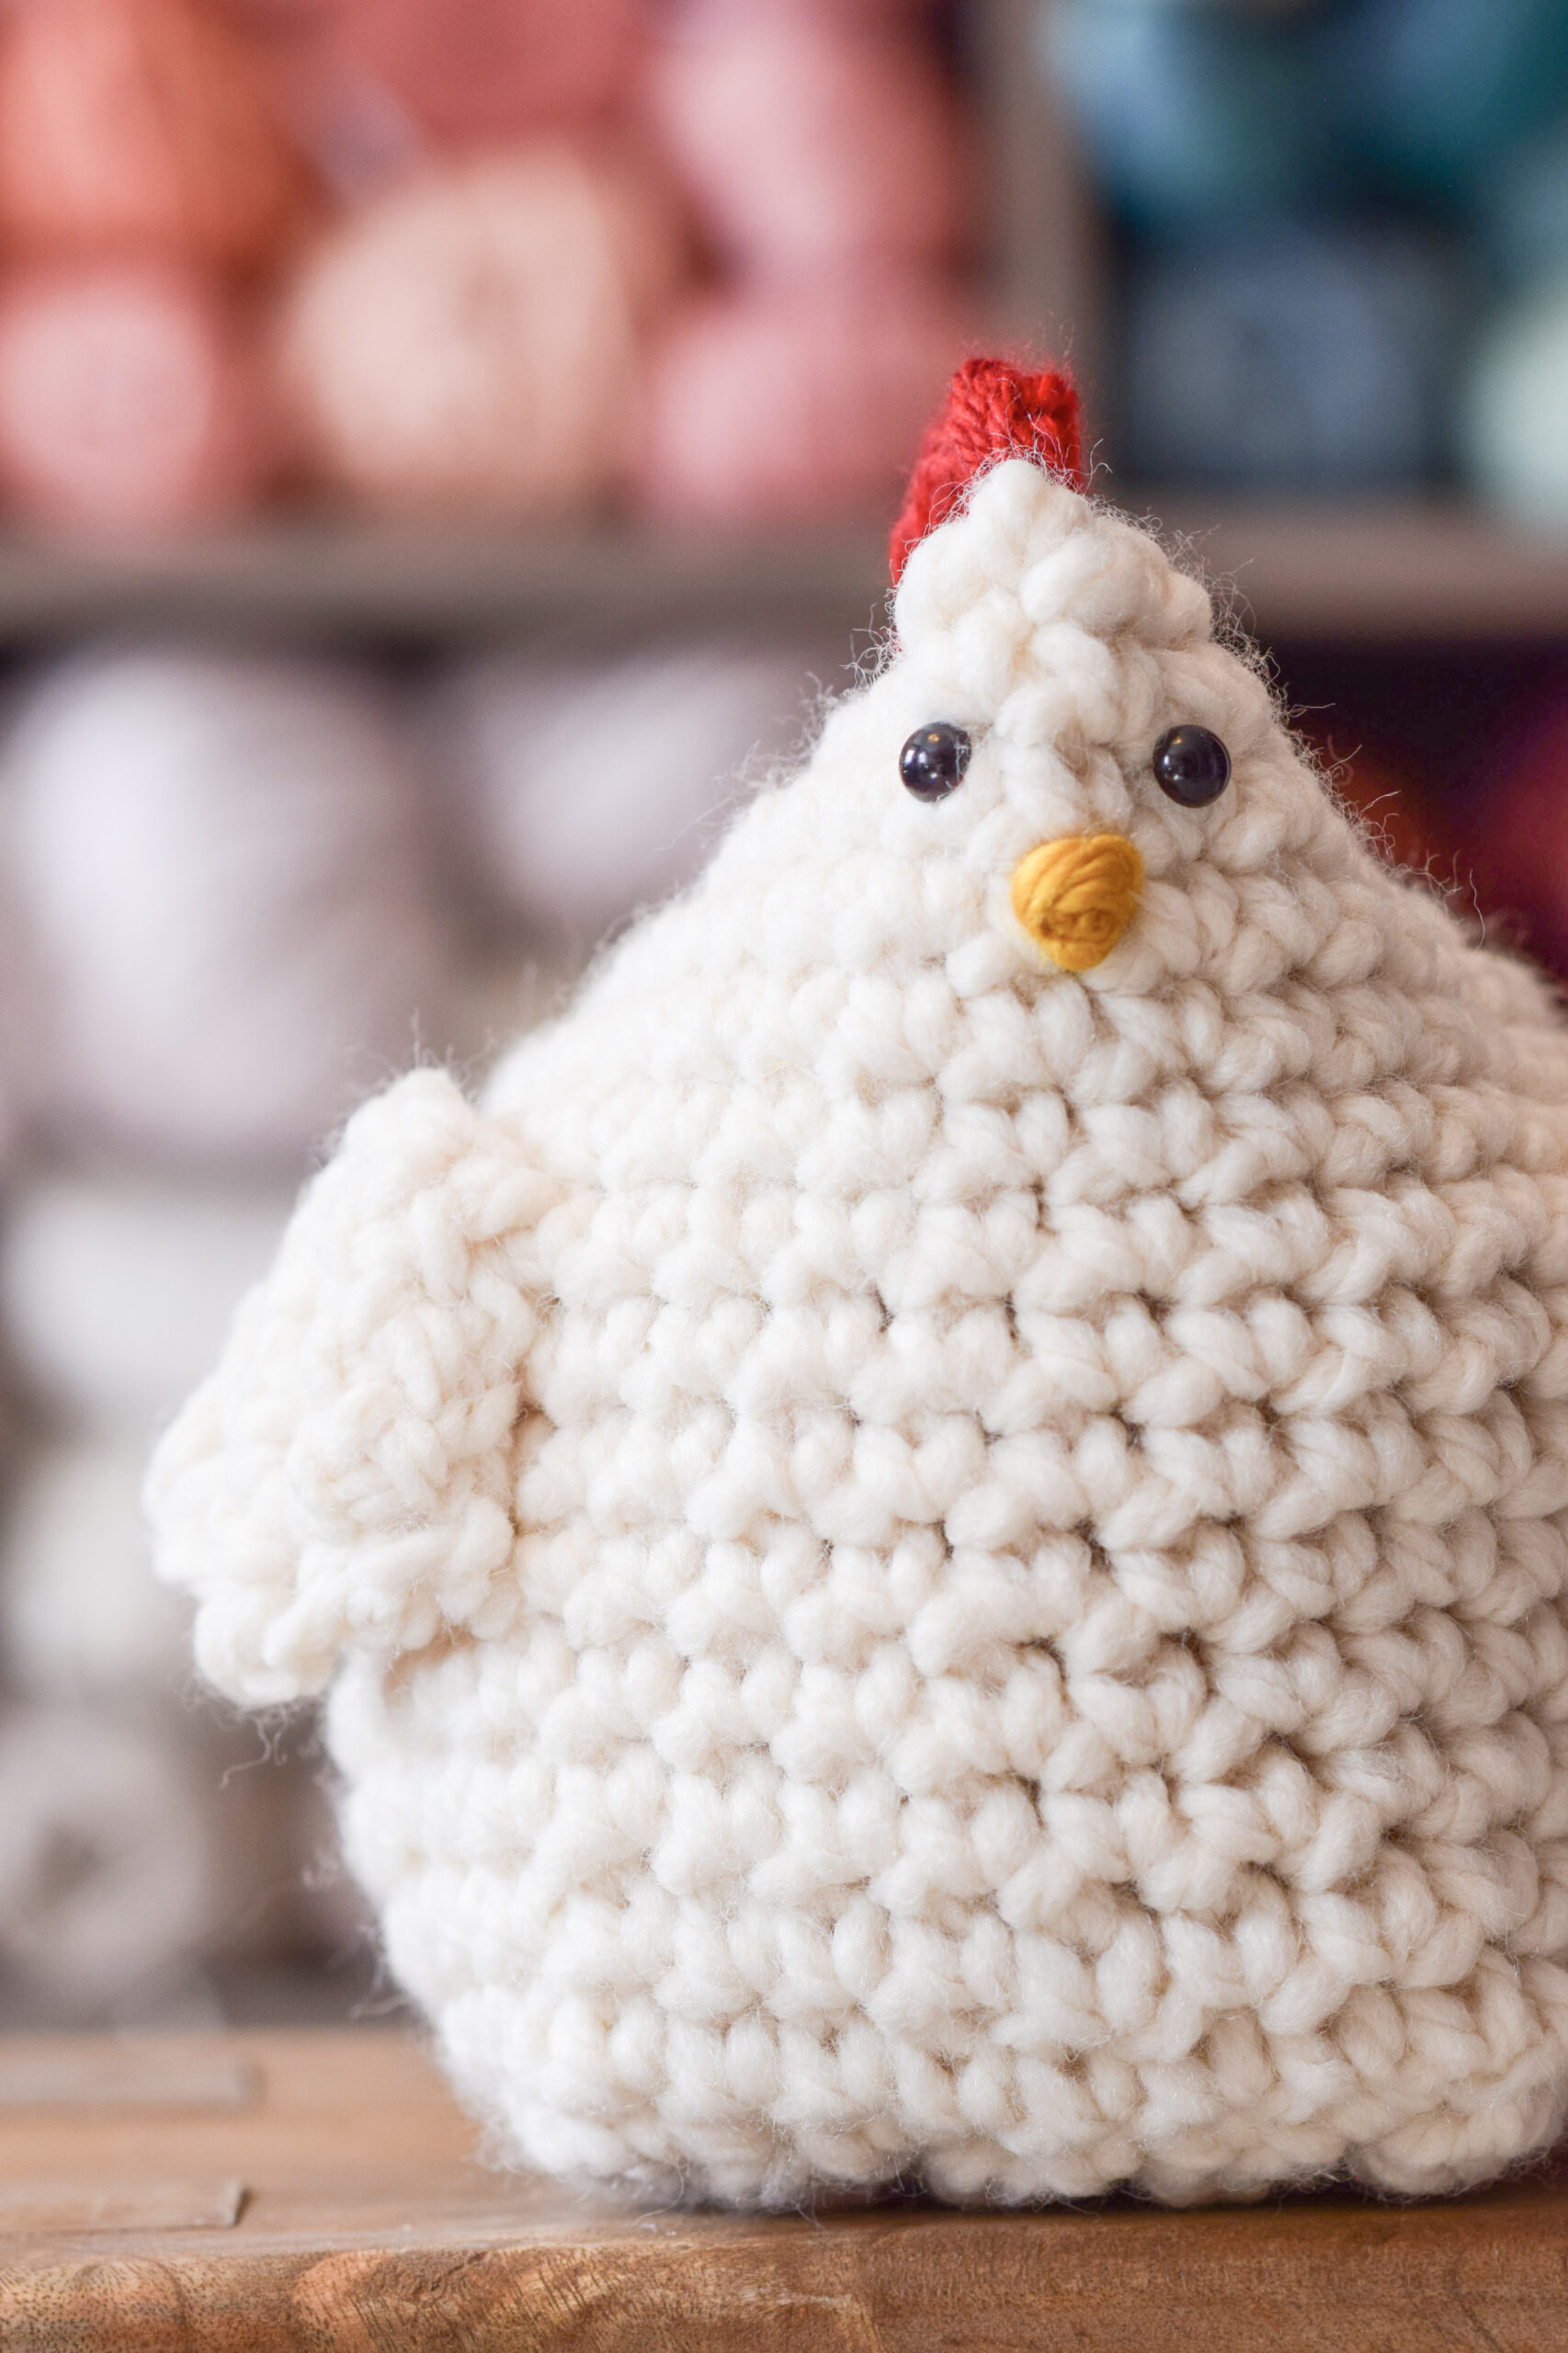
This chunky chicken crochet pattern was inspired by my knit Poppy The Chicken pattern! It’s beginner friendly, and fun to make with one skein of super bulky yarn.
See the full, free pattern below, or you may choose to purchase the ad-free printable version from my Etsy shop HERE.
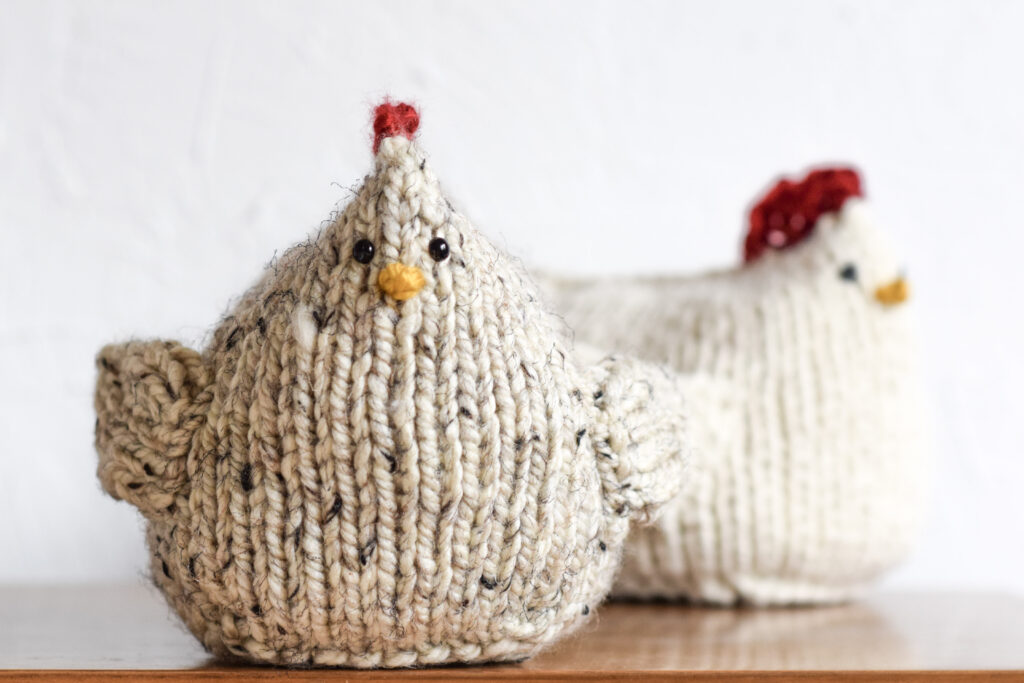
I love the cozy, wooly farm vibes that Poppy The Chicken has, and I’ve received several requests for a crocheted version. Beatrice is worked in the exact same way that Poppy is worked, starting with a square base and then stitching in the round. No shaping whatsoever unless you make the wings!
You’ll see a picture tutorial below with some progress shots, but it’s so fast to make this chunky little chicken. If you have one ball of super bulky yarn, you’re all set.
I was hoping that you could get two chickens out of one skein of Wool Ease Thick & Quick, but you’ll just get one. It’s still cool to be able to make such a cute project with just one skein of yarn!
Here’s Beatrice’s sister – the knit version, Poppy!
Scroll down to see the free pattern, or you may purchase the ad-free, printable version from Etsy HERE
Description:
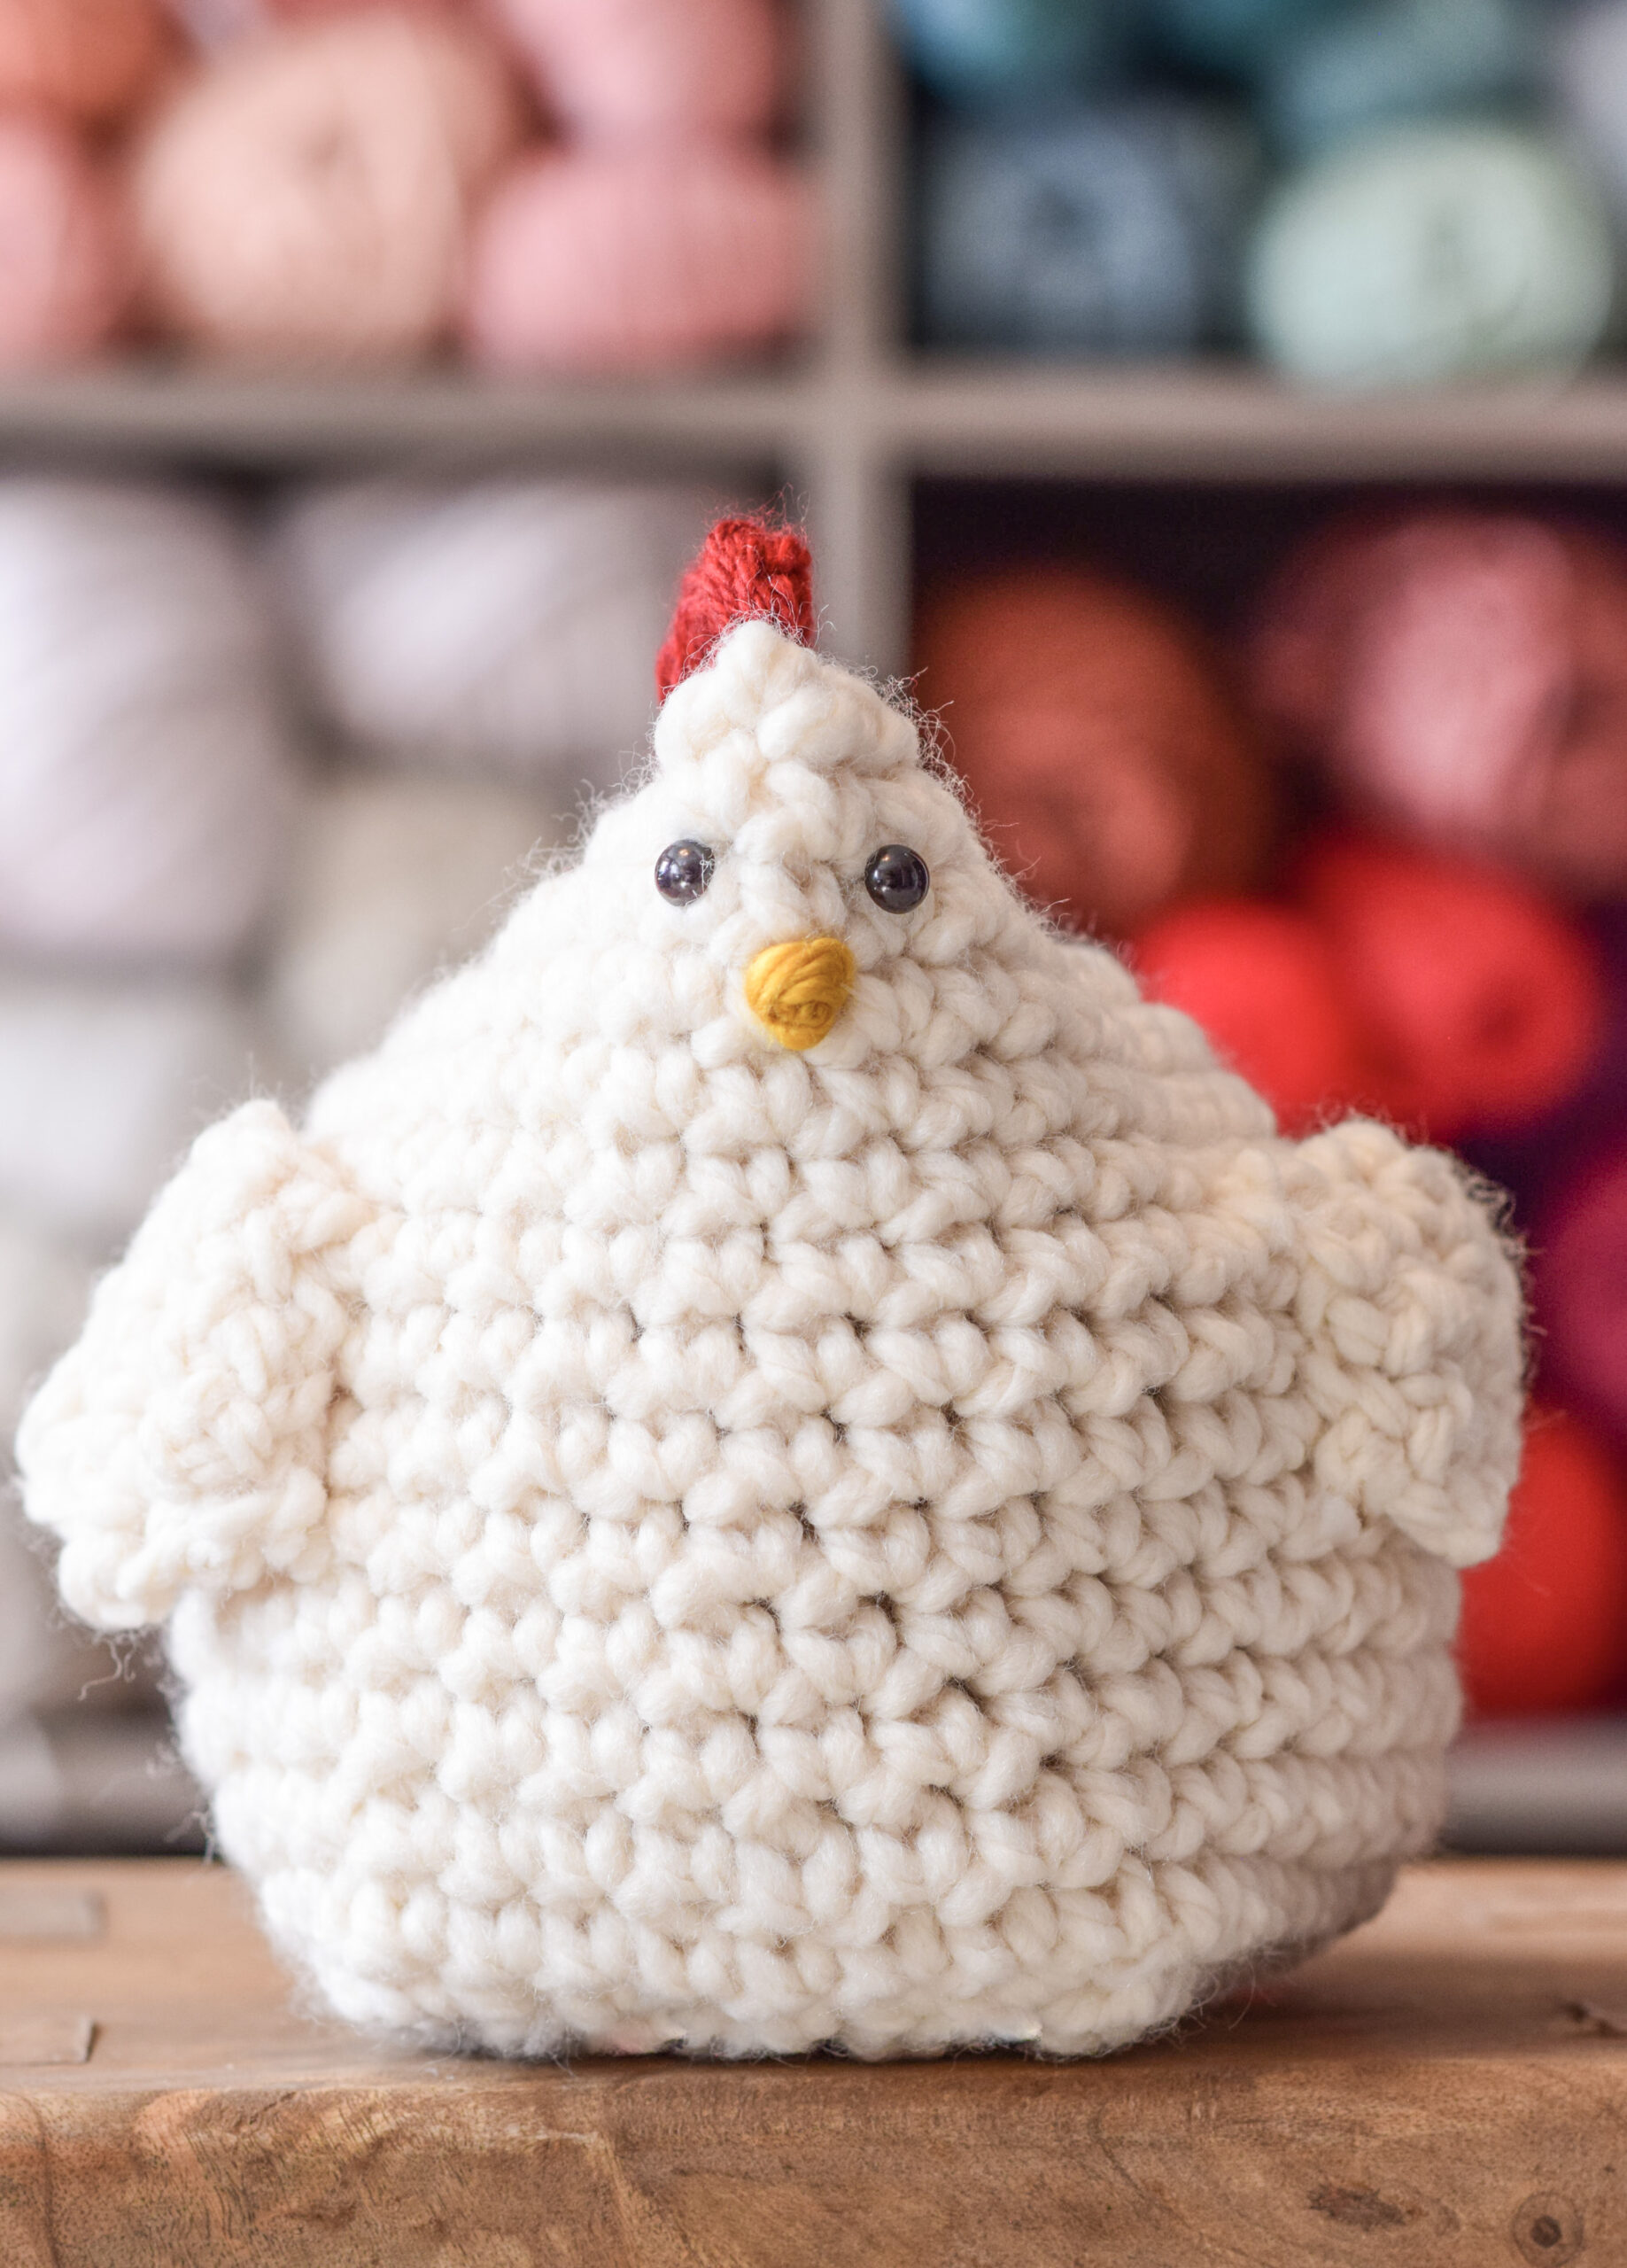
Adorable Beatrice the hen is ready to sit pretty in your house or be cuddled by your favorite little one! Inspired by Poppy the knit chicken, this pattern was created to make a similar crochet version. Add a touch of wooly, farm whimsy to any space and make her in any colors you like. This super easy pattern works up quickly and is simple enough for new crocheters. Pick your favorite yarn shade and go!
Materials:
1 skein Lion Brand Yarn Hometown USA super bulky #6 yarn in Tampa Spice (red)
1 skein Lion Brand Yarn Hometown USA super bulky #6 yarn in Madison Mustard (yellow)
US Size L 8.0mm crochet hook
Small black safety eyes or black yarn for eyes (if being used by children)
Fiber fill for stuffing (5-10 oz)
Scissors
Tapestry needle to seam and weave in ends
Measuring Tape
Finished Size (approximate):
6.5” wide x 8.5” long x 8” tall at crest
Gauge:
Not important for this pattern
Pattern Notes:
You will begin by crocheting a flat square base for your chicken with single crochet. Next, you’ll crochet evenly around the base in the round. You’ll simply crochet until the specified height. The stuffing, beak, eyes and wings are then added. The chicken is closed up on the top with a simple whip stitch seam. There is no shaping in the pattern except for the wings (which are optional!). While this chicken has safety eyes, you may also use black yarn to create eyes. If the chicken will be around little ones or small children, black yarn secured tightly should be used for safety reasons. See the photos at the end of the pattern for additional assistance.
Have fun!
Abbreviations (US) & Skills:
The chicken body section is crocheted in the round.
ch – chain
sc – single crochet
st – stitch
sts – stitches
sc2tog – decrease single crochet two stitches together
Beatrice The Chicken Crochet Pattern
Square Base of Chicken
Chain 10
Row 1 Sc in each st across the row (9 sts)
Rows 2 Ch 1, turn, sc across (9 sts)
Rows 3 – 9 Repeat row 2
Tie off and weave in ends. Next, work the Chicken Body Section.
Chicken Body Section
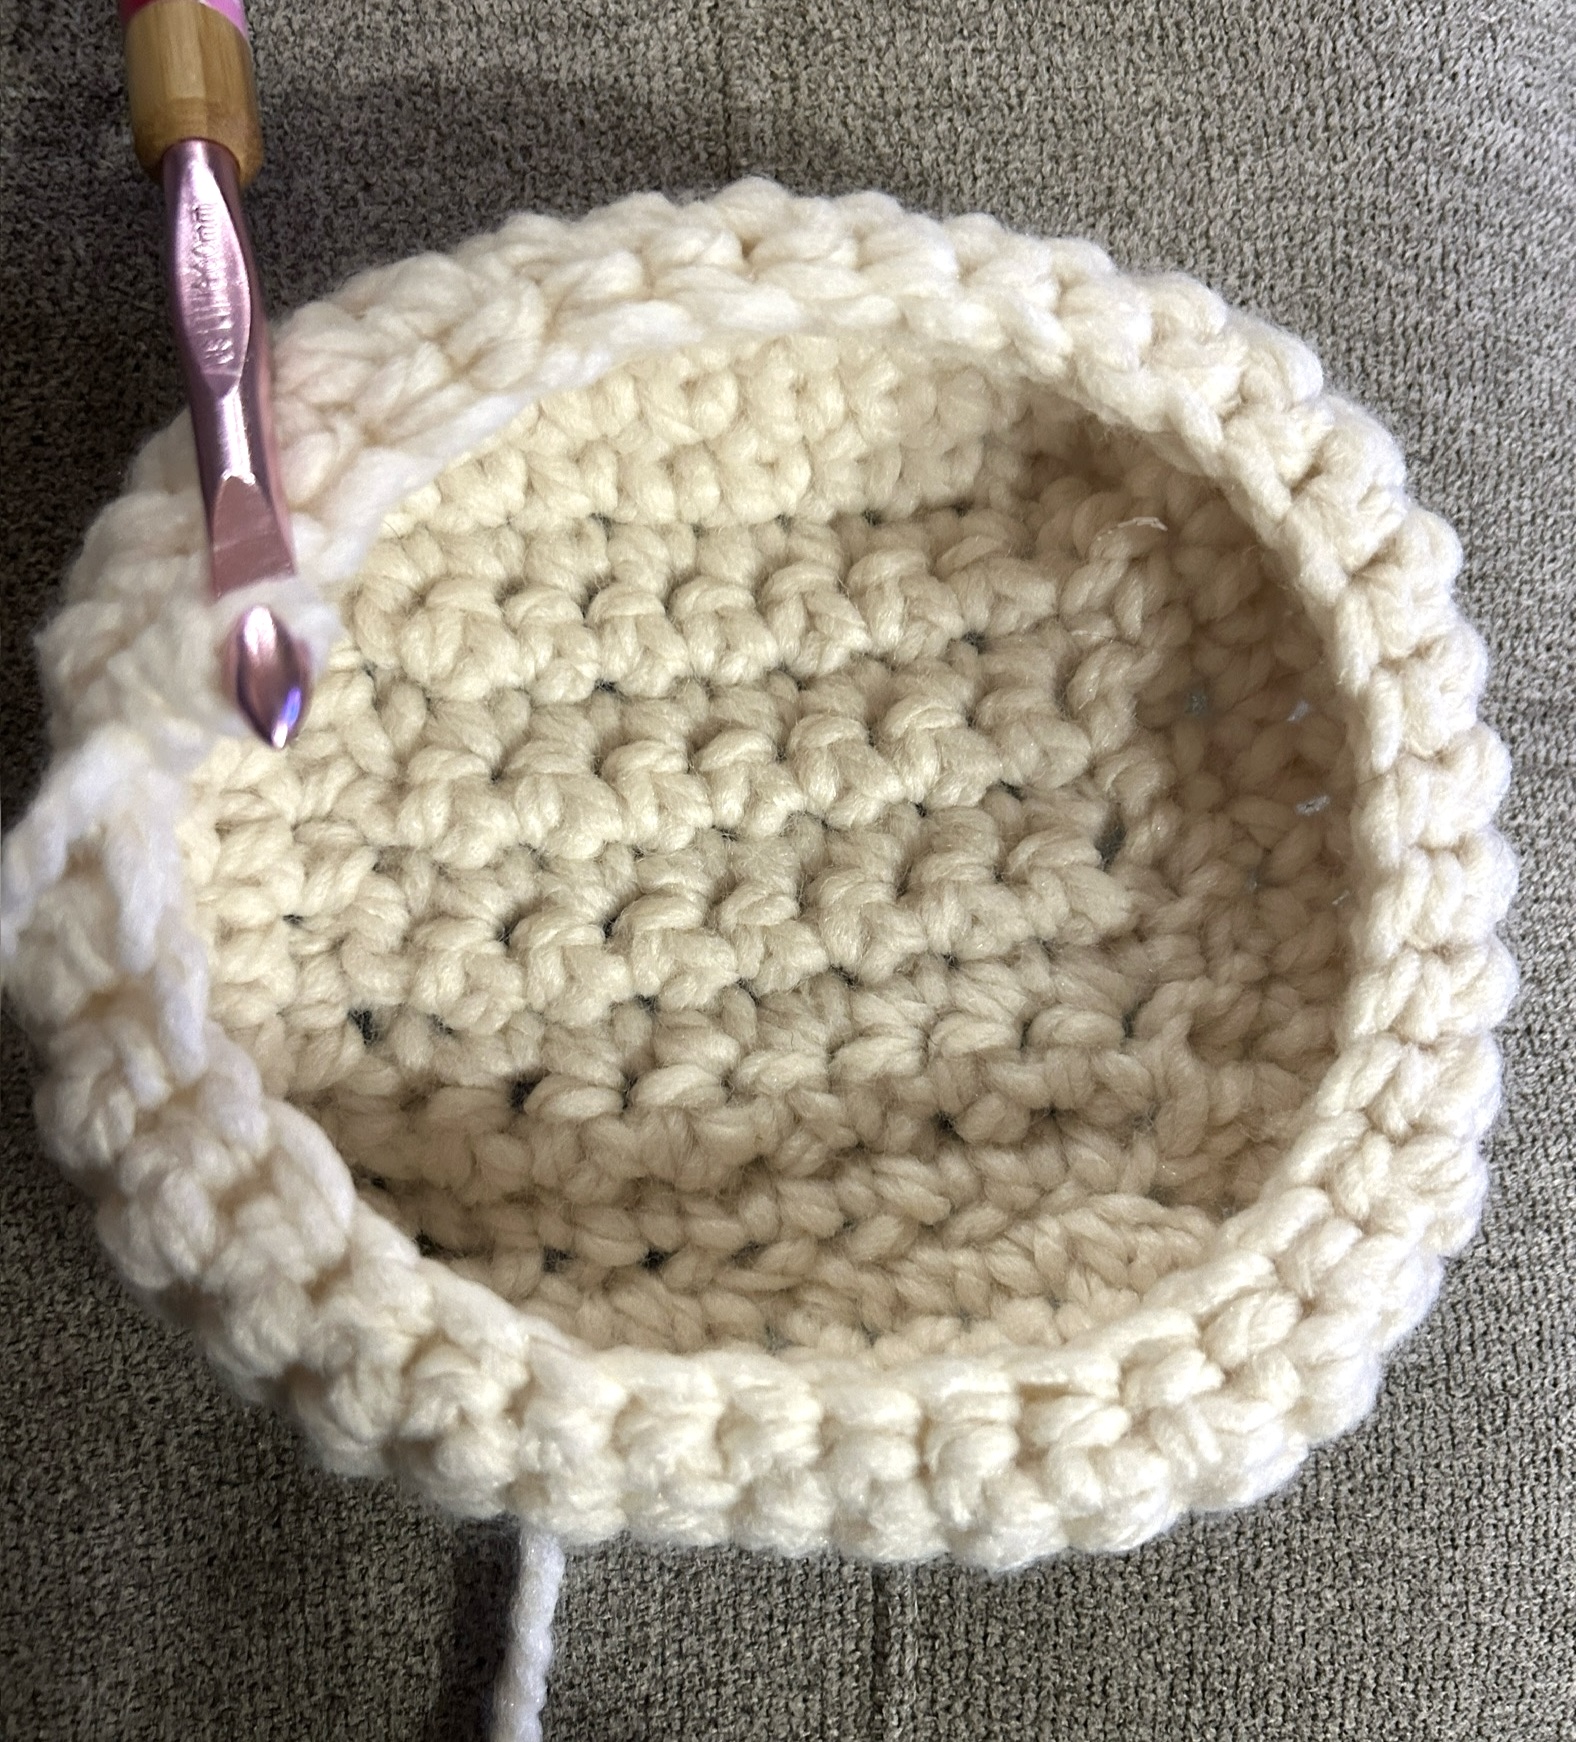
You’ll now begin to crochet around the base. Single crochet one stitch in each stitch around, making two stitches in the corners as needed for a total of 10 stitches on each side. This will equal a total of 40 stitches around.
Round 1 Sc each st around.
Repeat Round 1, crocheting until entire piece measures approximately 8.5” – 9” inches from top to bottom when laid flat.
Tie off and weave in ends.
You can use either side as the outside of the chicken’s body. Choose the texture you like best!
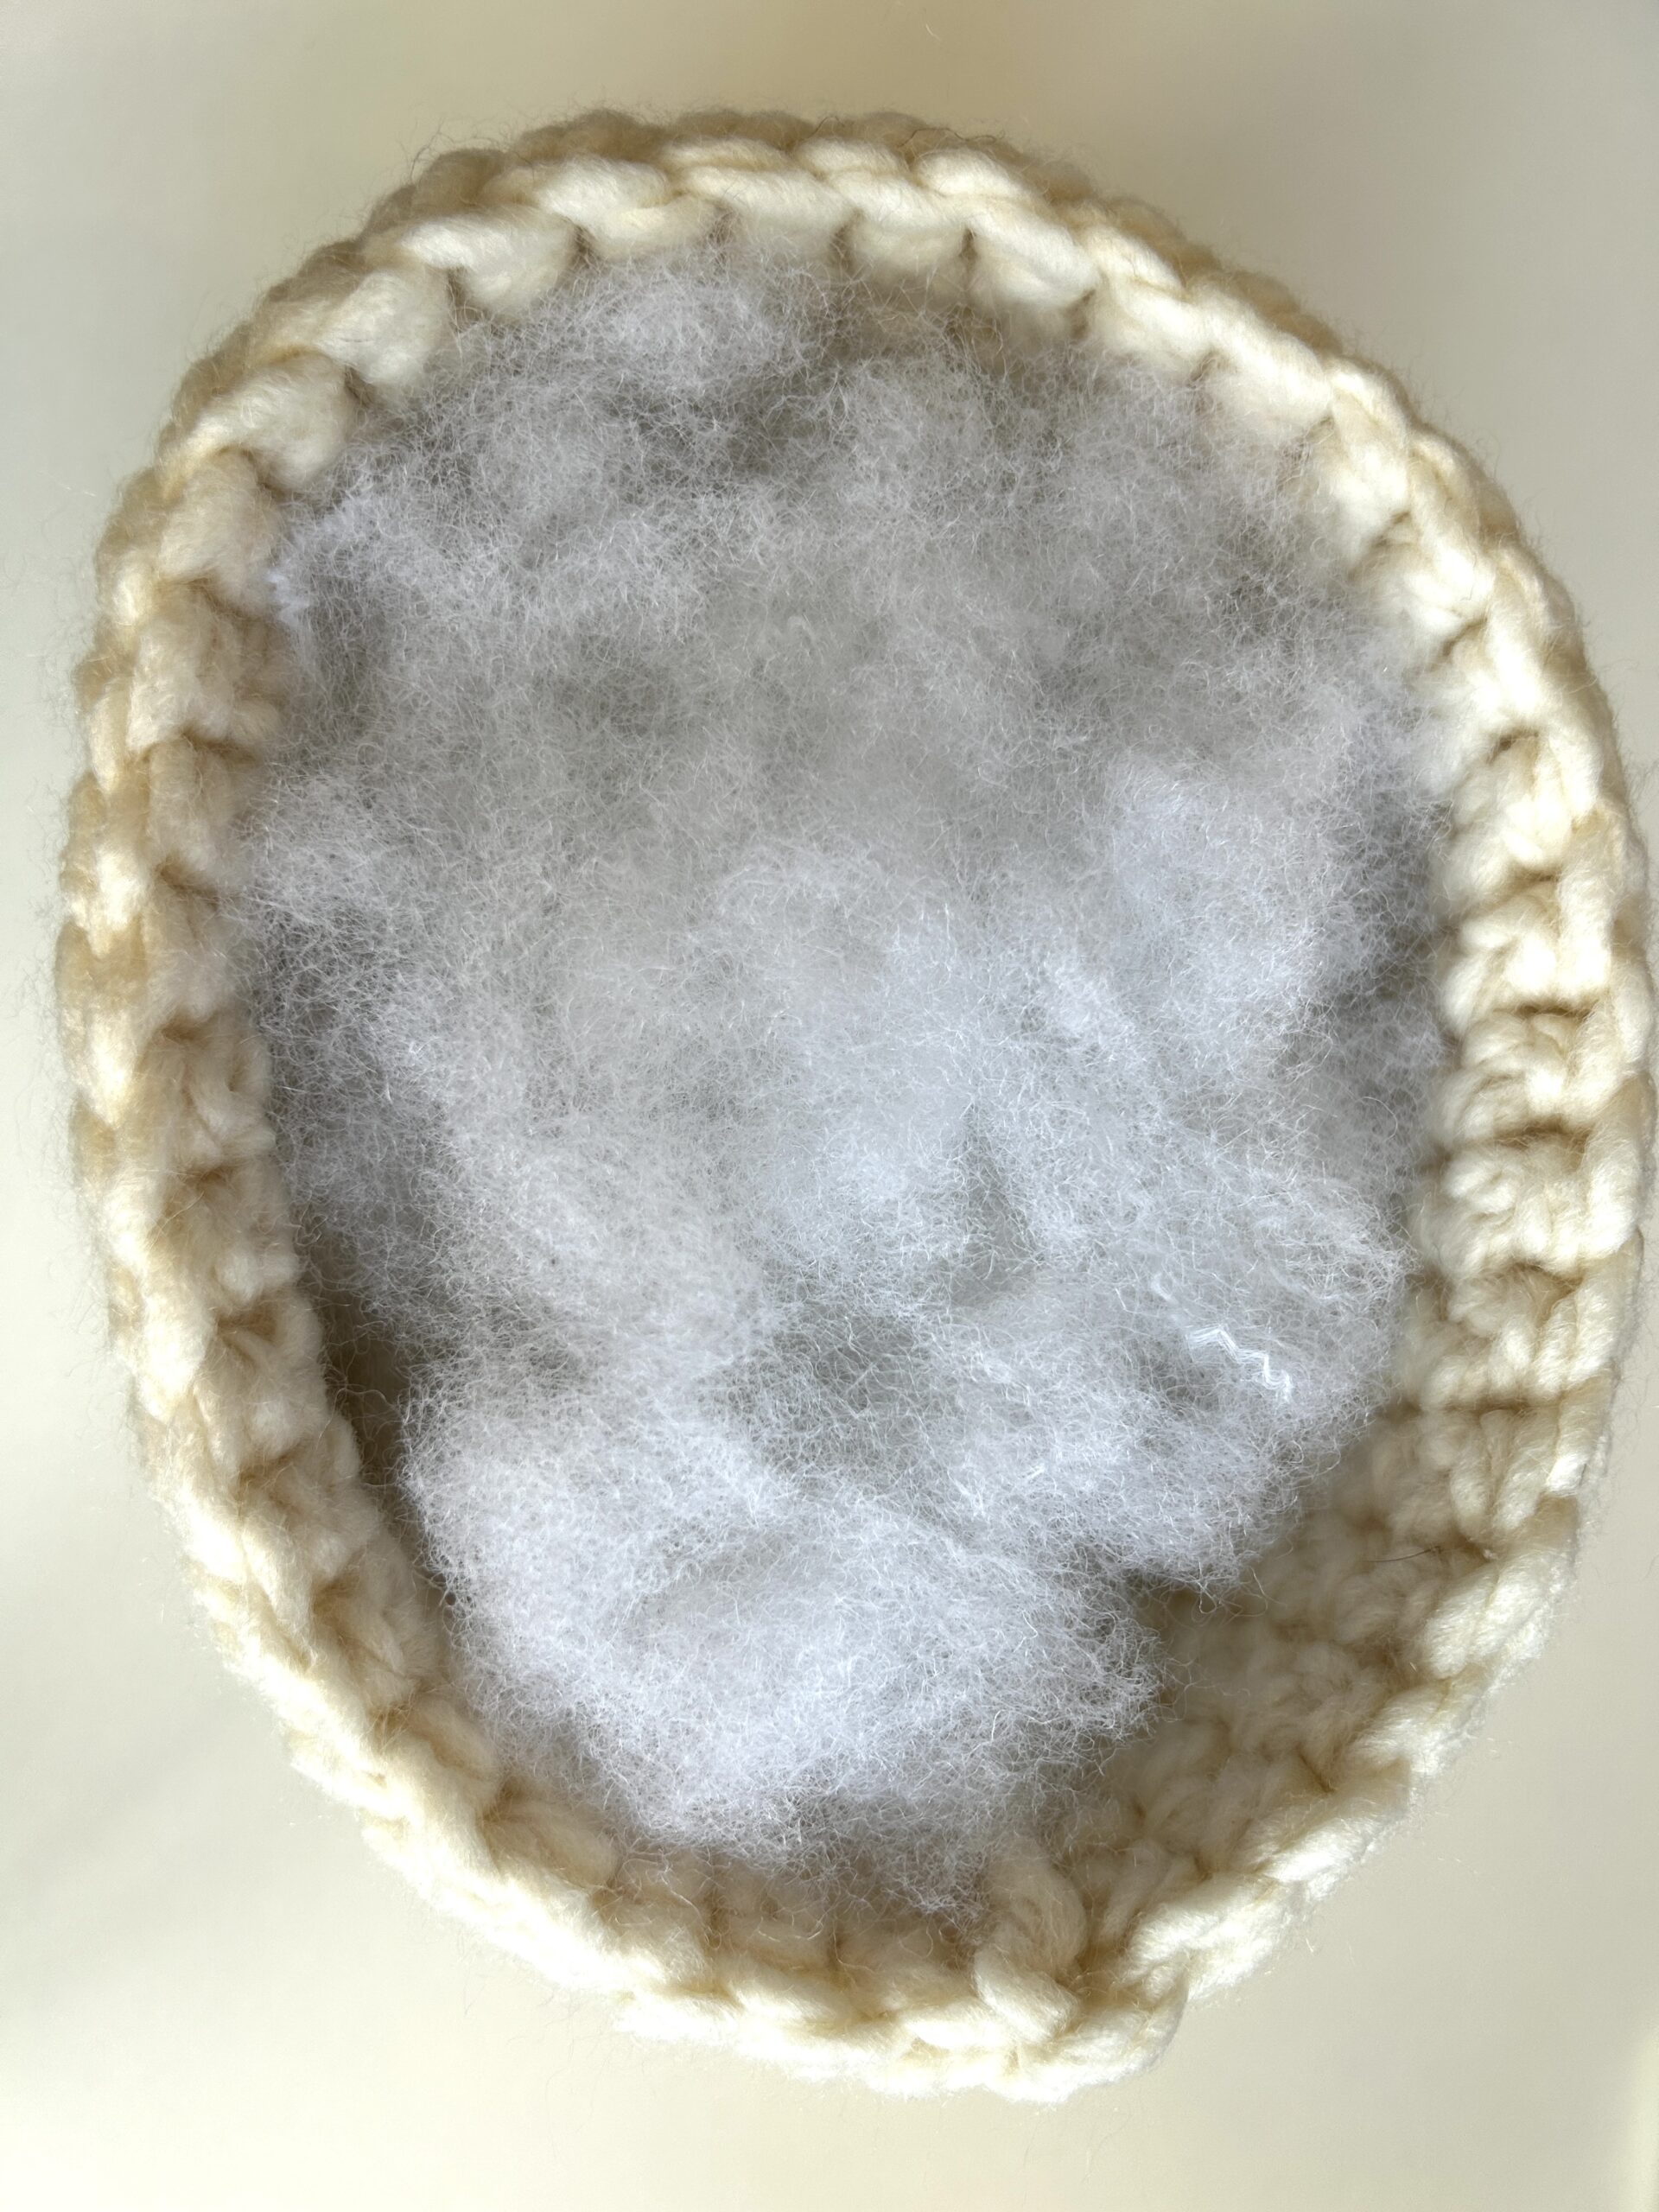
Stuff Your Chicken
Here’s the fun part!
Next, fill your chicken evenly with stuffing ensuring that the shaping looks good. Your fat chicken shouldn’t look lumpy!
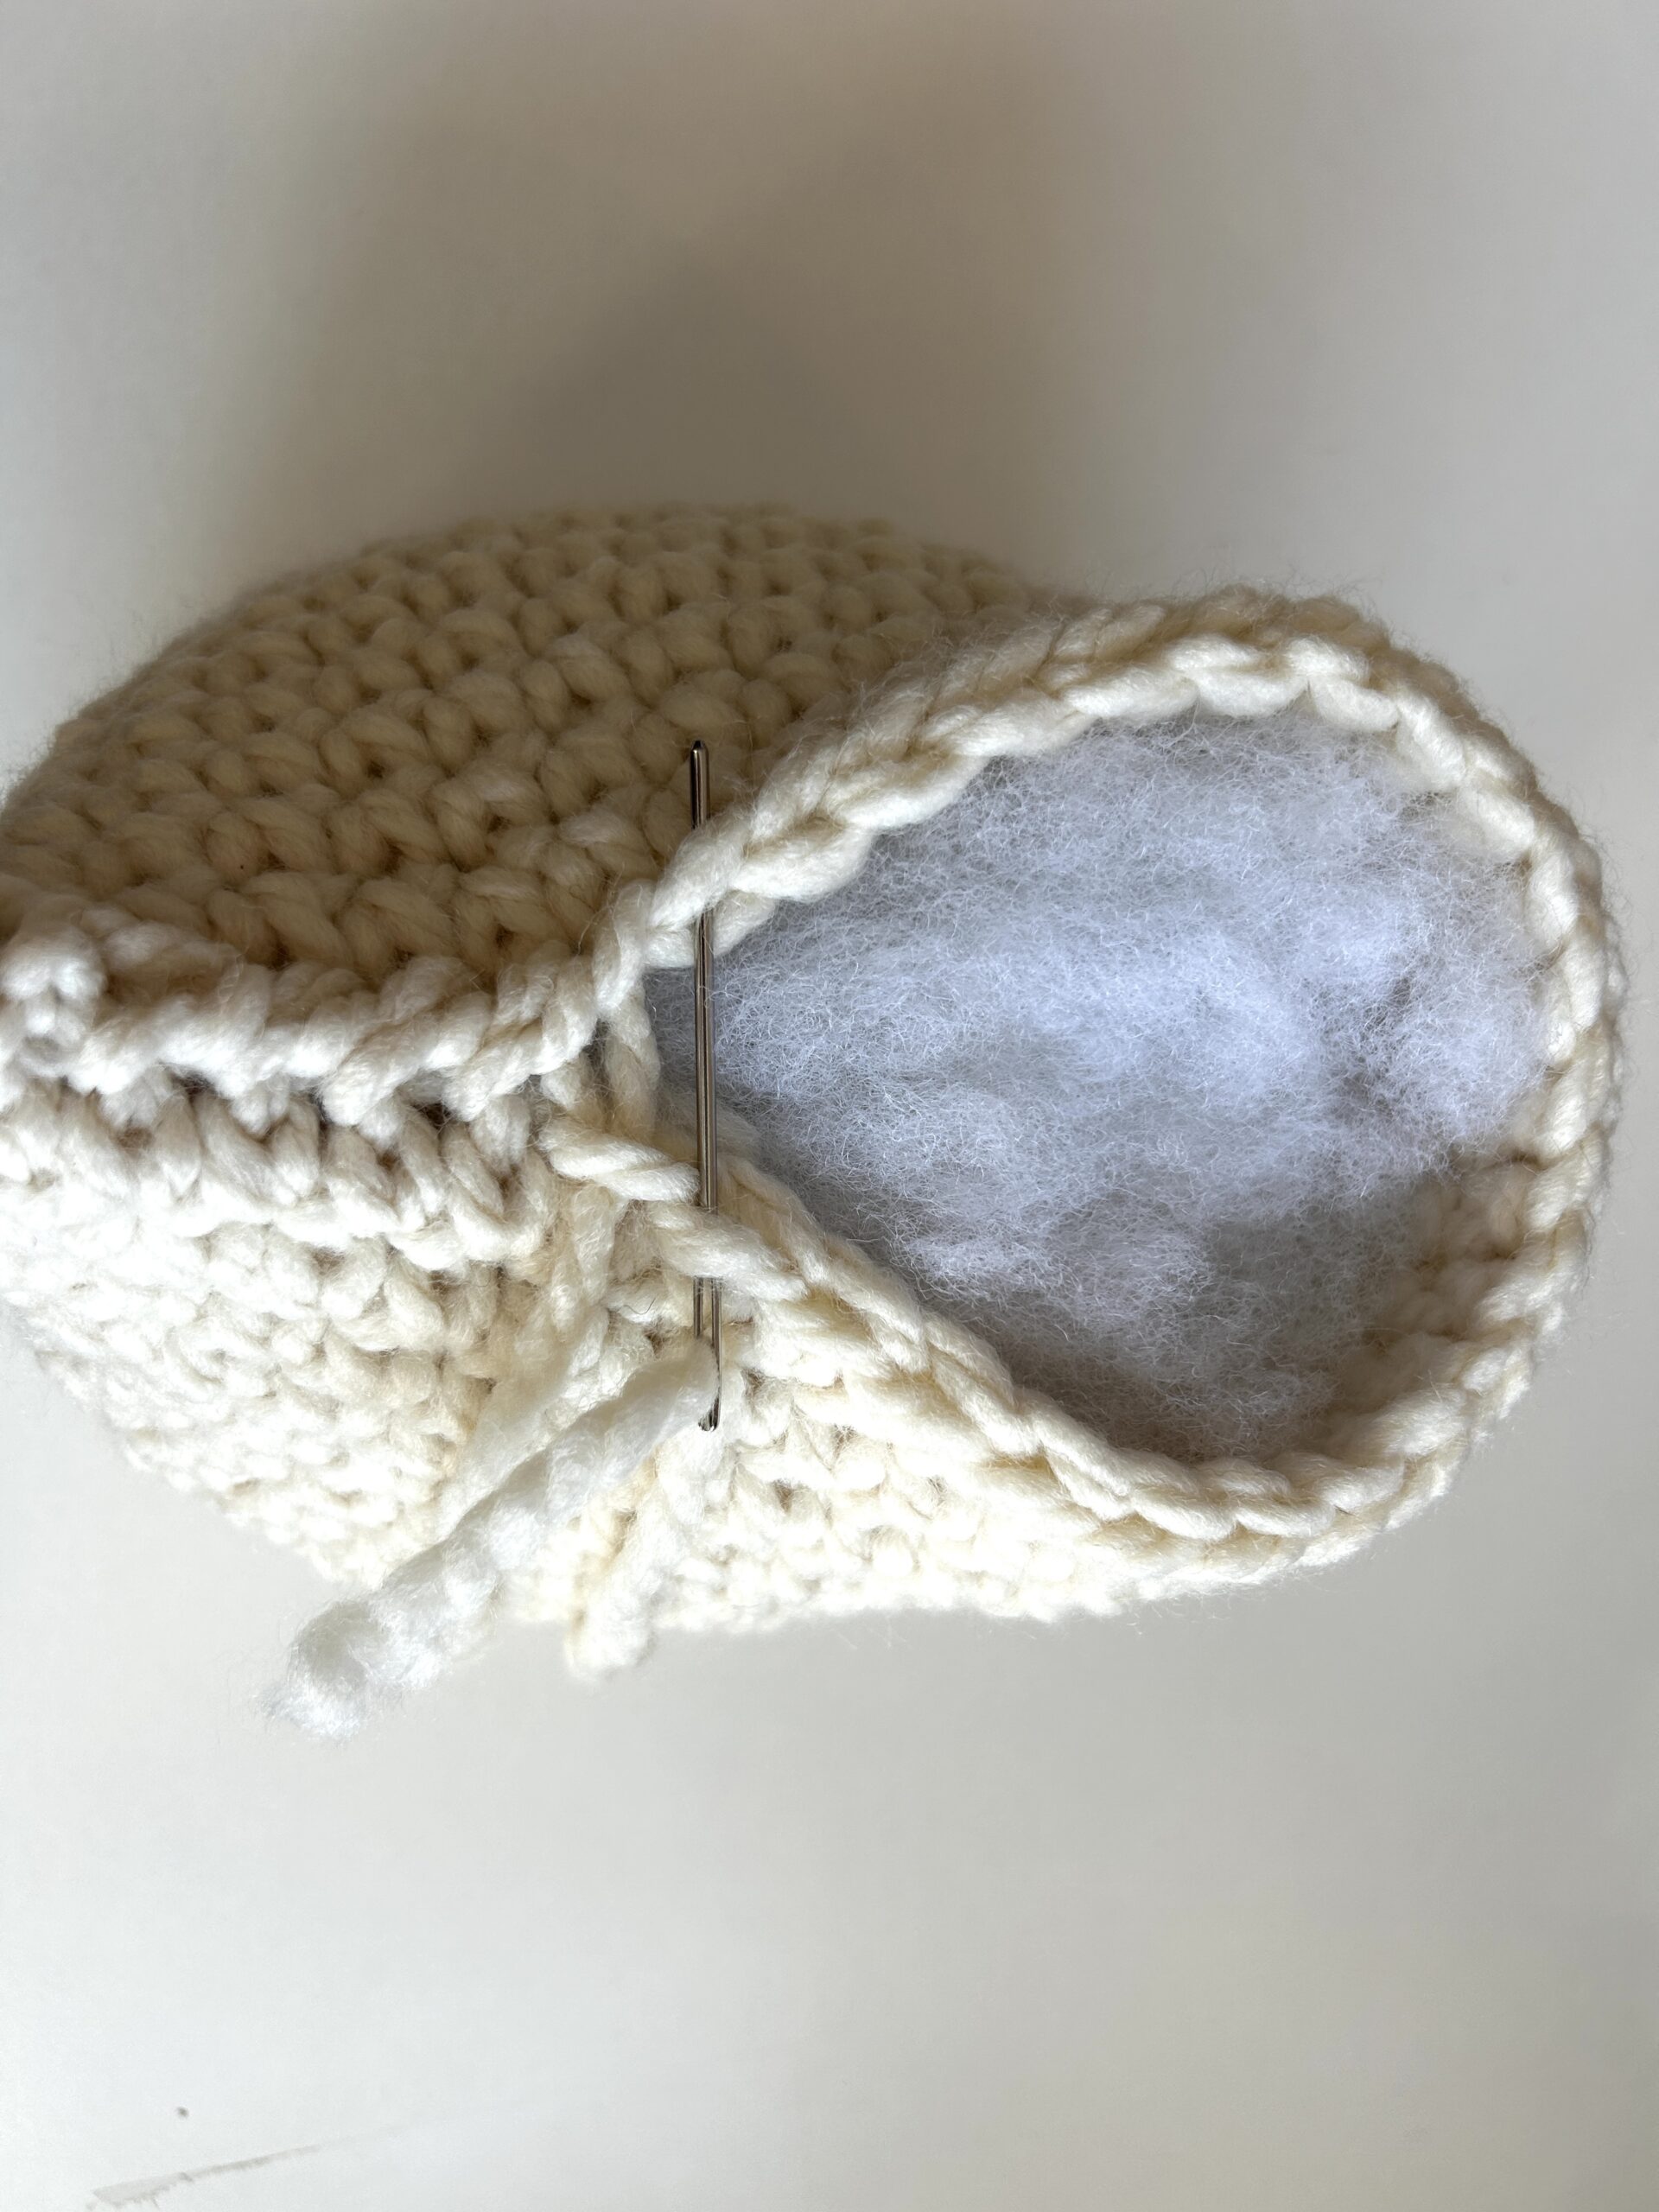
Seam
With a length of yarn and your tapestry needle, close the opening at the top of the chicken. Sew with whip stitch seam from back to front working through one “leg” of each stitch on either side.
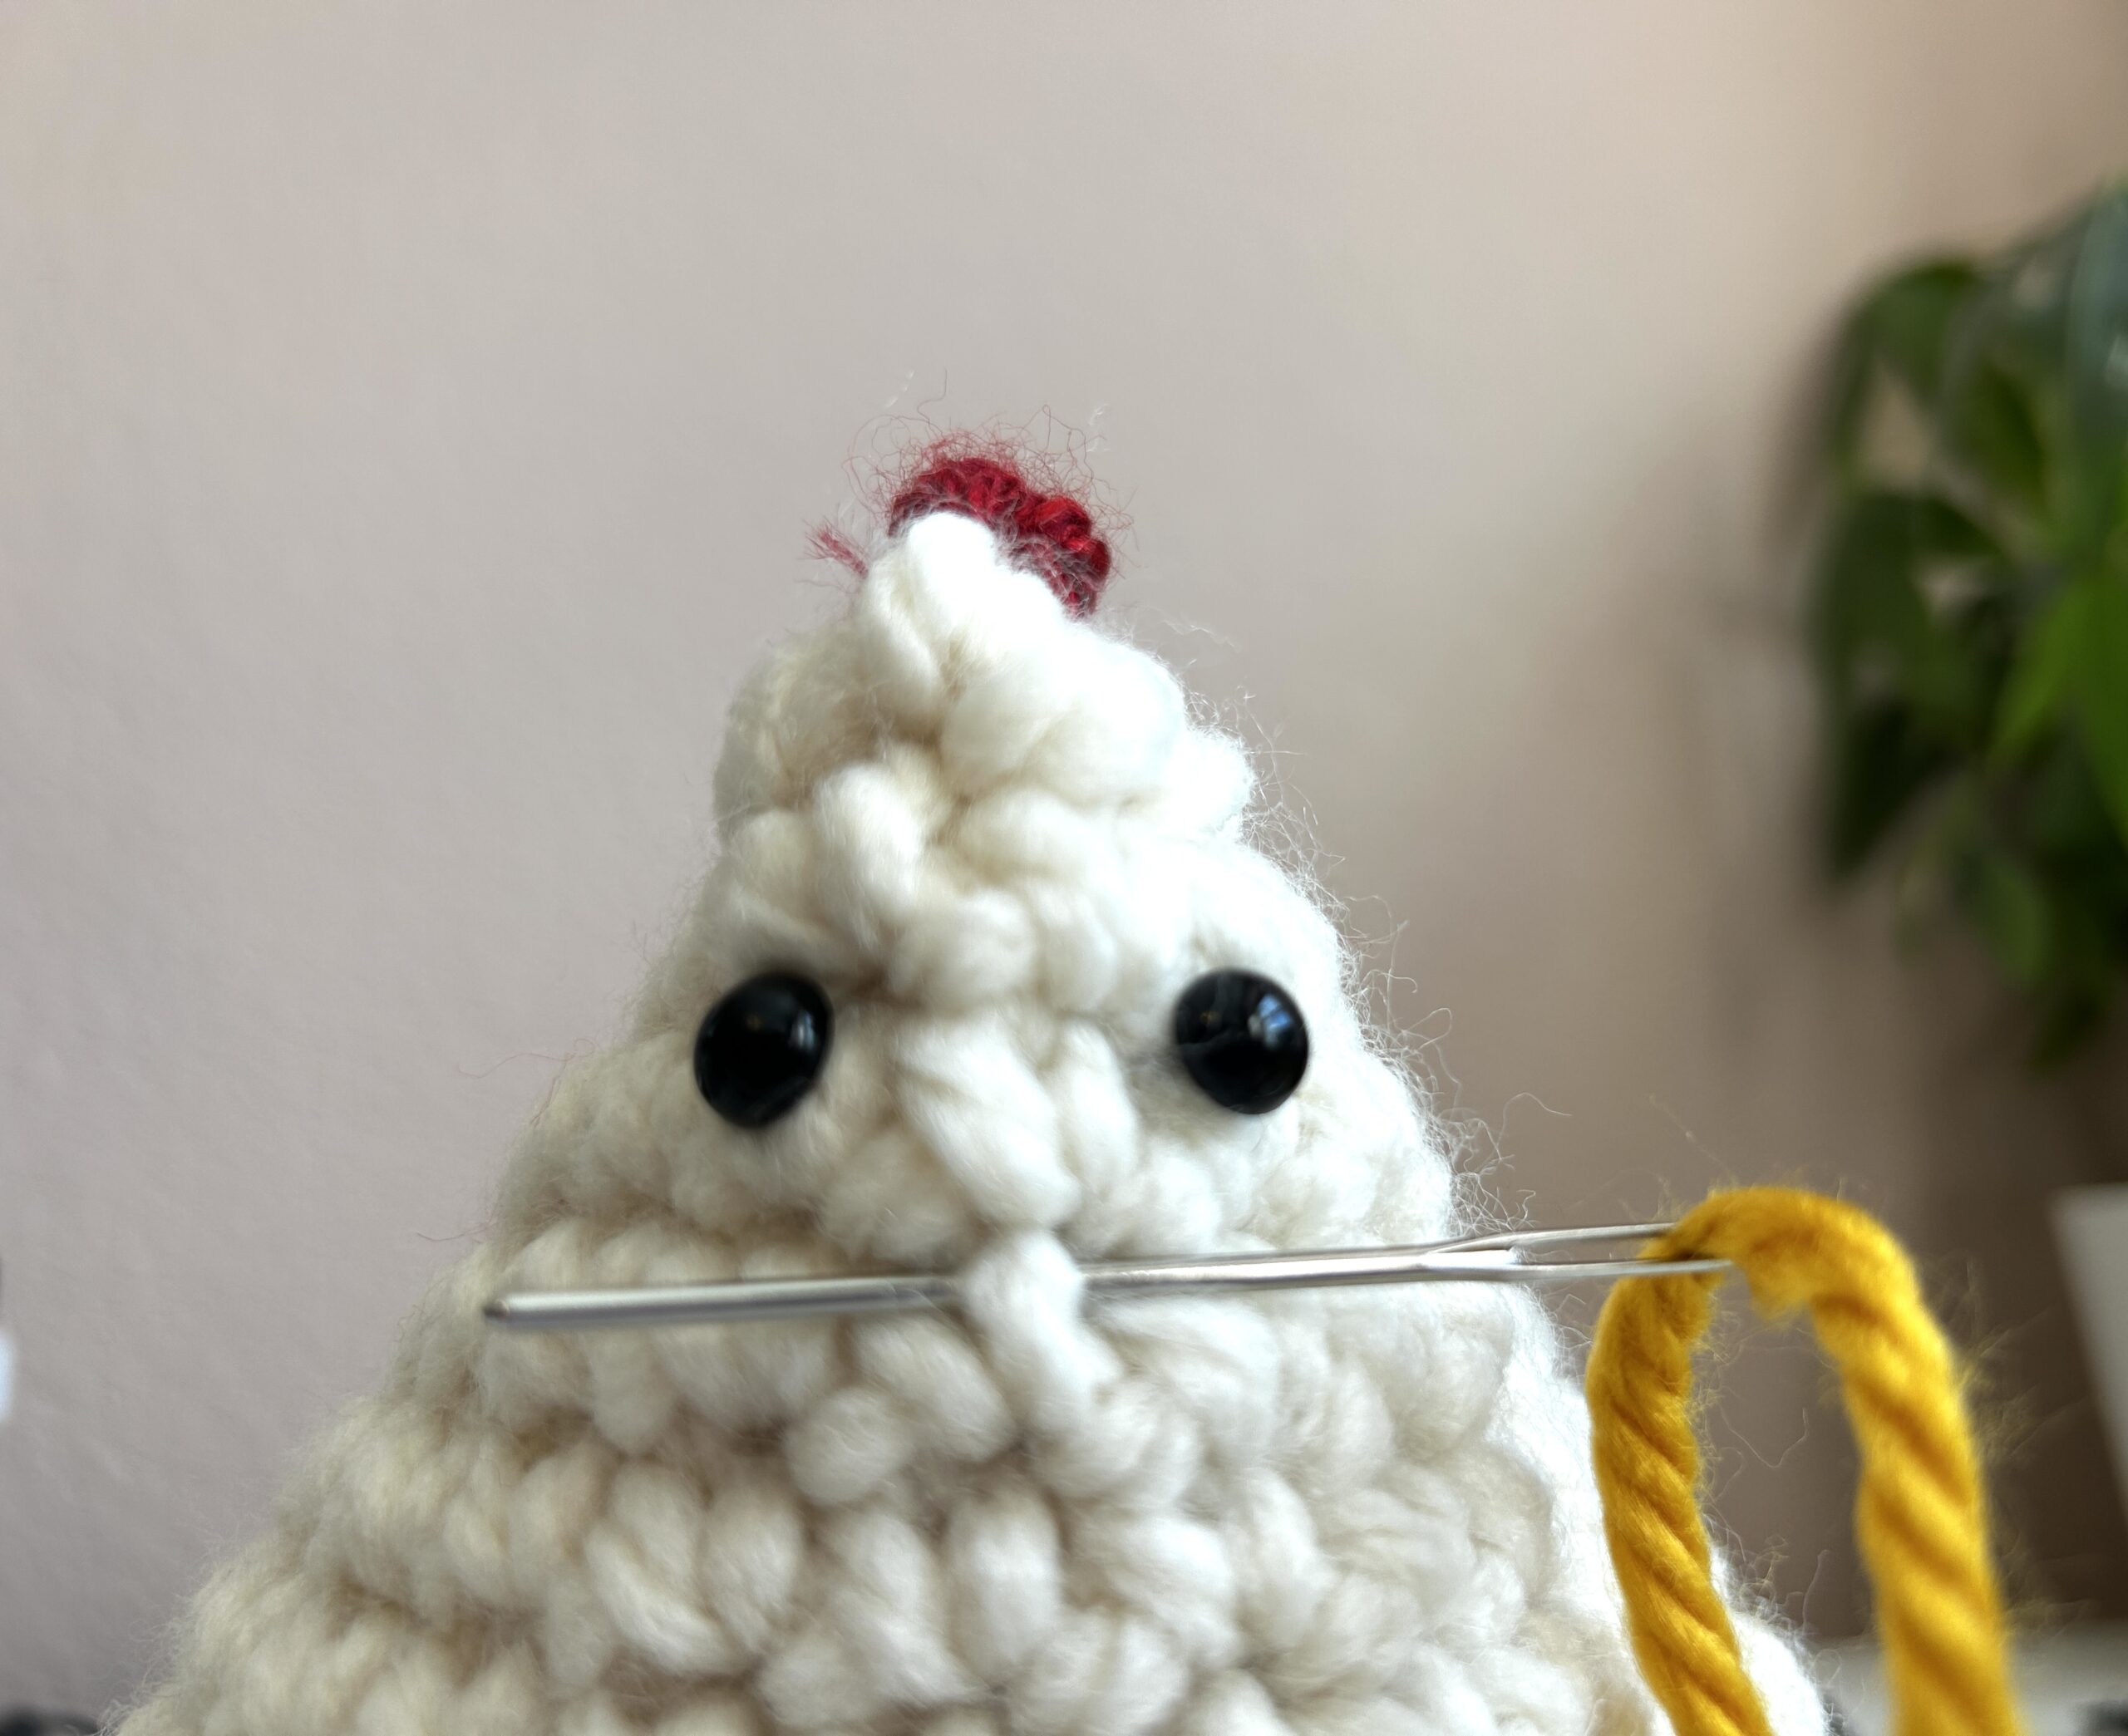
Seam until there is approximately 2 inches left where the head will go. Don’t finish seaming until you’ve added the beak and eyes.
Beak
Locate the center front of the chicken where the face will go when folded and seamed.
Count approximately 5 stitches down from the top. This is the stitch where you will create a knot for the beak.
With your tapestry needle and a length of yellow yarn, work yarn from front to back of stitch. Tie a knot. Next, work each end of yellow yarn back into the fabric. (see photo at end of pattern)
Eyes
Feel free to customize the eyes to your liking! You may choose any size, shape, or color. You may also use yarn rather than toy eyes. If your chicken is decorative, you have more flexibility with the eyes. If children will be playing with the chicken, black yarn should be used as the stitches are large and the safety eyes may come loose from the fabric.
Place eyes just above, and to the side of the beak.
You may add wings here (see Wing Section), or you may add them once the chicken is seamed to better see the final shaping.
Crest
With your red yarn, chain 5.
Row 1 Sc in first 3 sts, sl st in final st. (4 sts)
Tie off and weave in ends.
With a length of red yarn and your tapestry needle, whip stitch the crest to the top of the chicken’s head seaming it lengthwise. Pull ends of yarn into the chicken body to finish.
Wings (optional)
Ch 5
Rows 1-3 Sc in each st across the row. (4sts)
Row 4 Sc2tog across the row (2sts)
Row 5 Sc2tog across the row.
Tie off and weave in ends.
Picture Tutorial Beatrice Chicken Crochet Pattern
That’s all there is to her!
More Animal Knitting & Crochet Patterns:
Enjoy, my friends!
XO,
Jessica