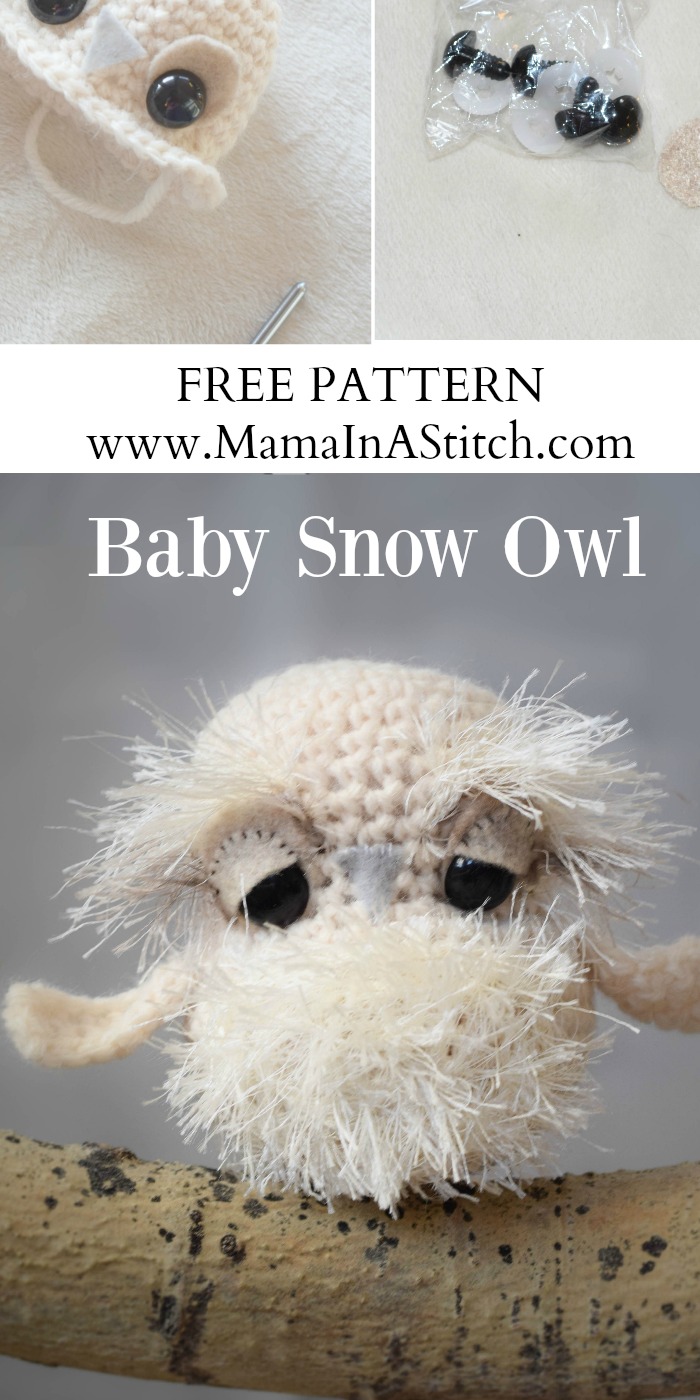
Baby Snow Owl Crochet Pattern
You might remember that when I made the woodland hedgehog , it was a debate as to whether I should use the same pattern to make an owl. My daughter is still loving the hedgehog! If the hedgehog was good enough for her, then I knew an owl might be acceptable too. 😉
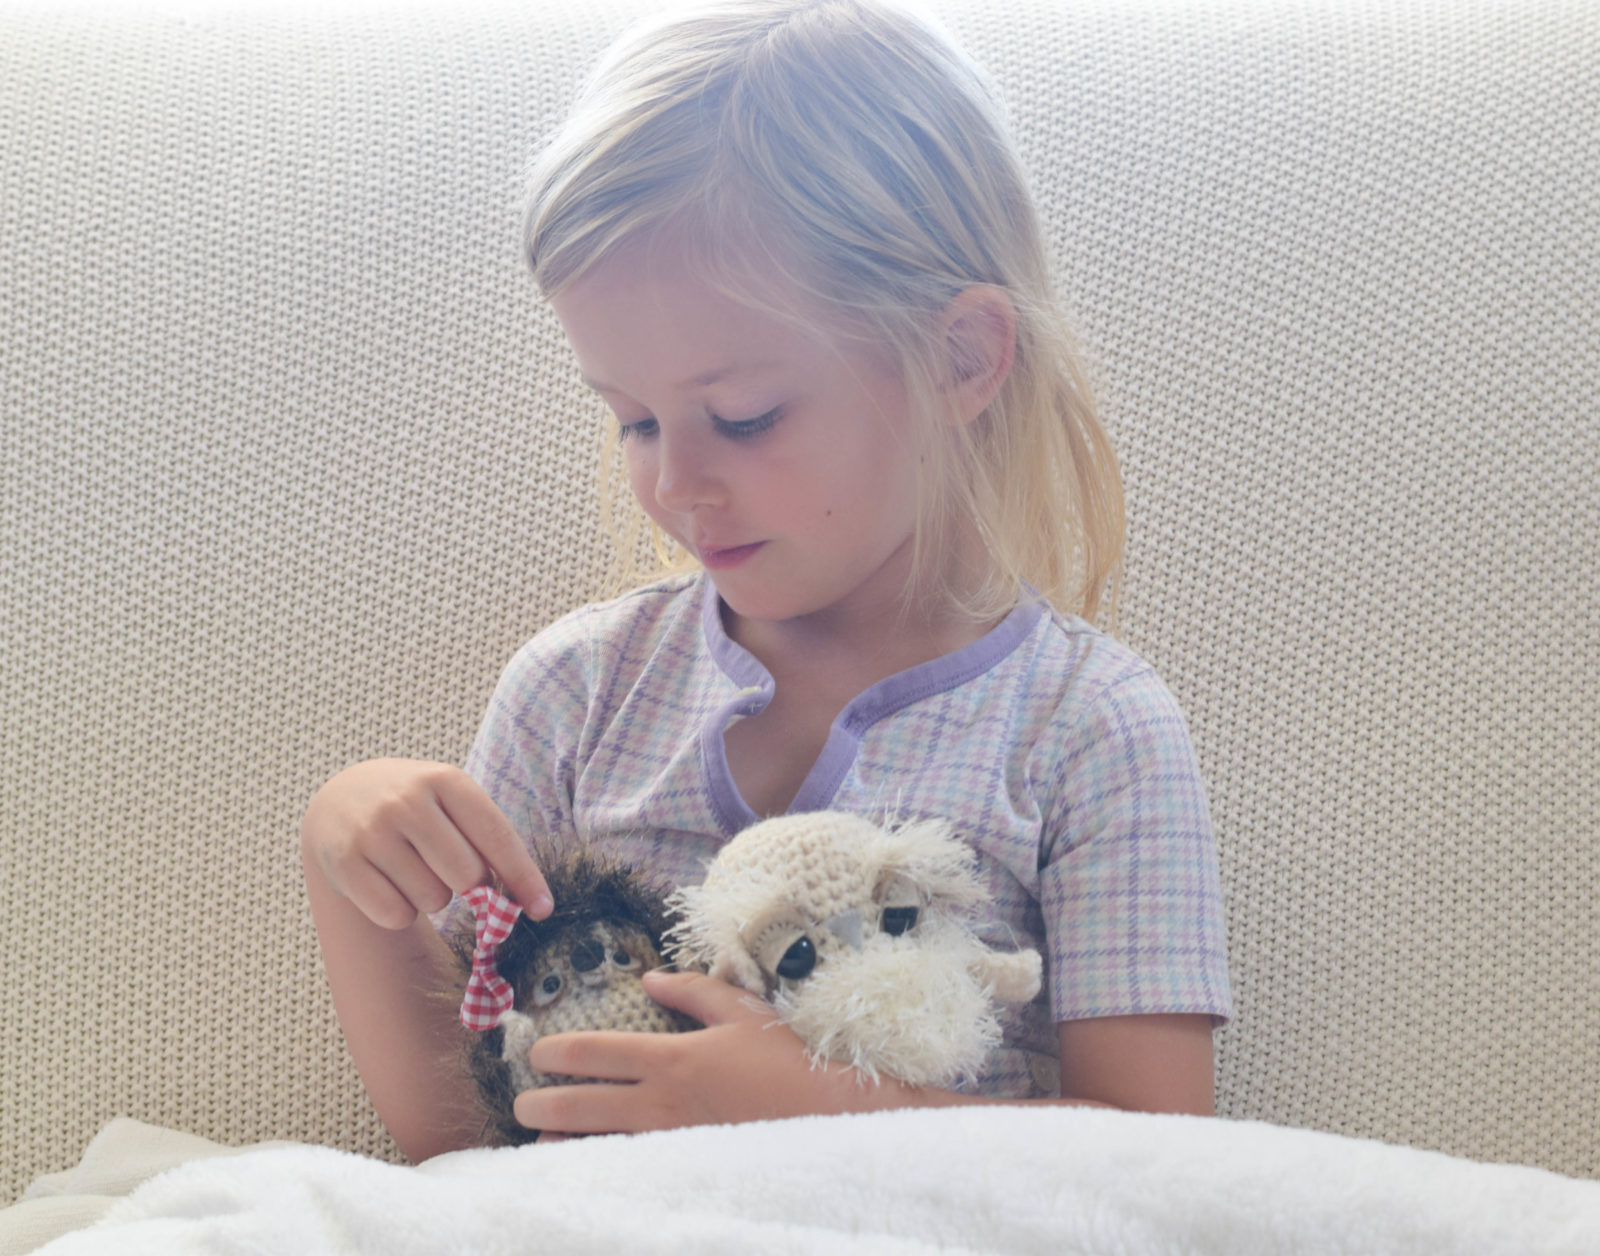
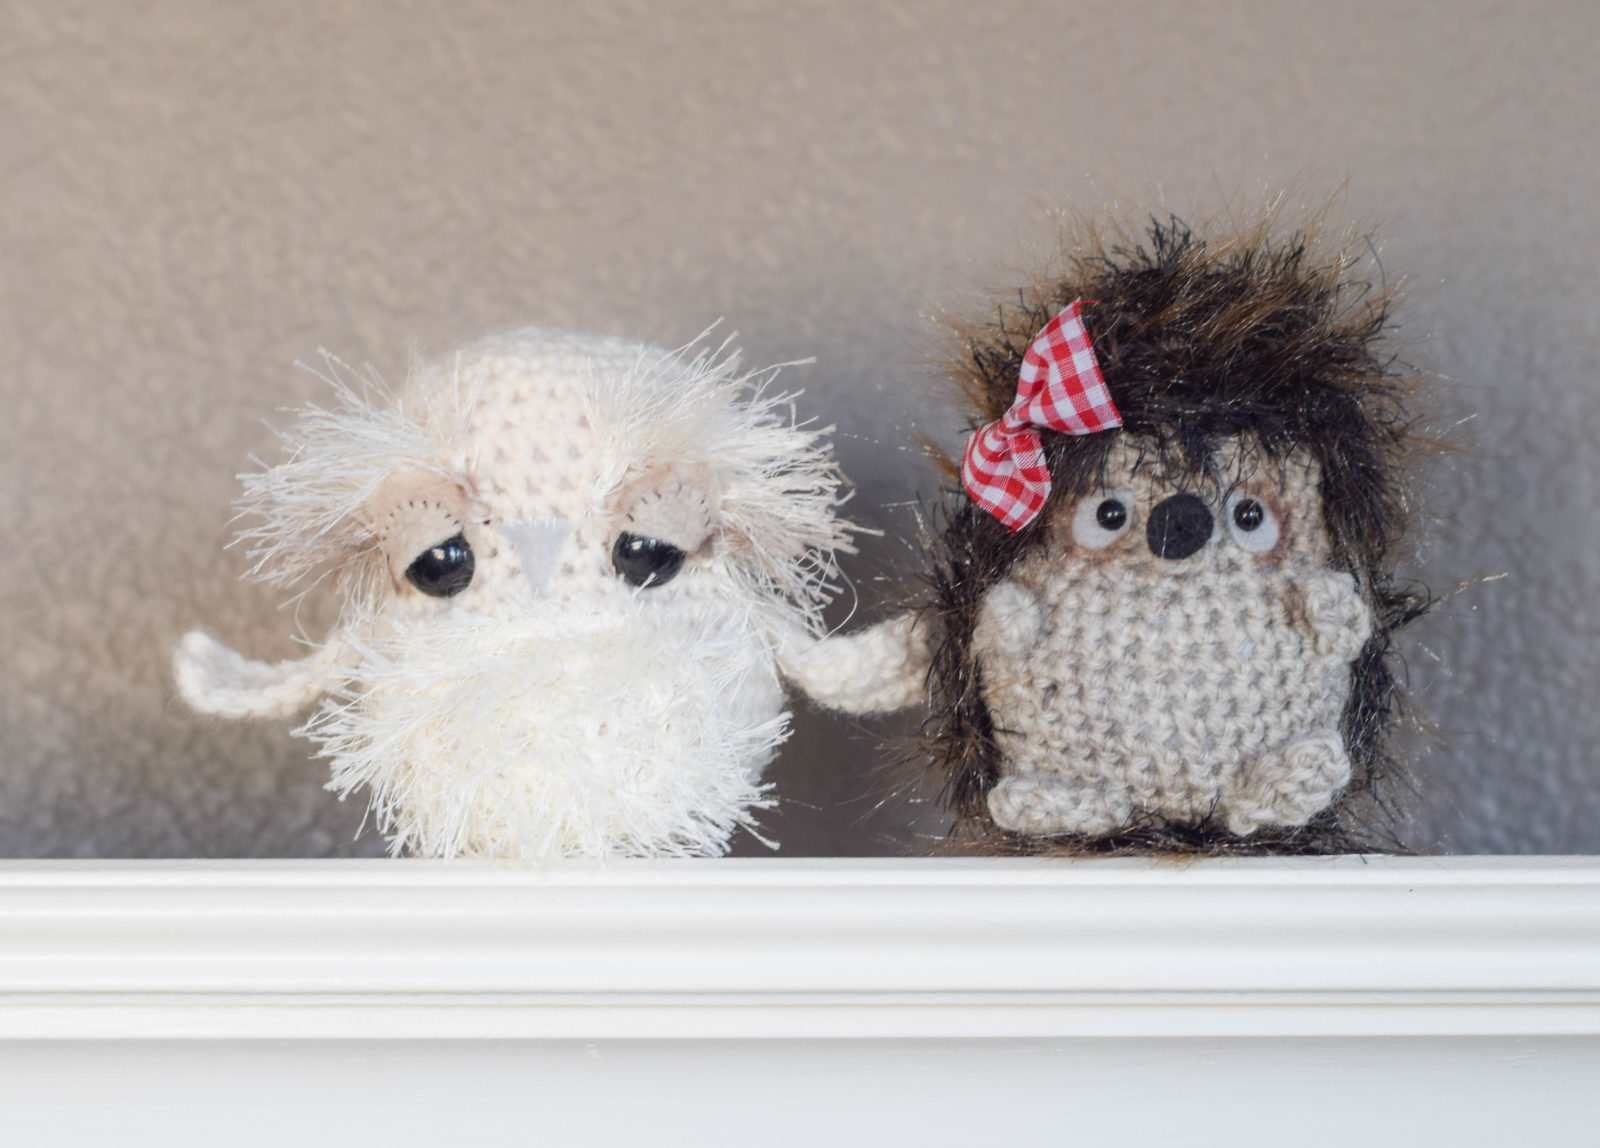
It’s such a simple pattern, so I decided to go ahead and whip up the owl using the same body as the hedgehog. Now the little hedgie “Mrs. Tiggy” has a friend.
Owls have been so popular for quite a while now, and for good reason. Some of my favorite stuffed animals that my daughter has are her owls. It doesn’t get a whole lot cuter than wide eyed, chunky bodied, fuzzy animals. 🙂
Just like with the hedgehog, I surface crocheted all of the fun fur so it’s very easy. Several of you mentioned having some difficulty in the past with seeing your stitches while working with fun fur. This won’t be an issue if you’ve had trouble as you will just surface crochet and you don’t even have to be precise. It’s very forgiving!
For the owl, you should know how to single crochet and be able to crochet in the round. There are also some basic increases and decreases in the pattern. You will mark your rounds, and will work in continuous rounds. If you’ve never surface single crocheted, it is simply crocheting along the surface of the fabric. This is what I did with the fun fur and it’s a really easy way to add details to your projects.
I’m listing what I used to make the owl below, but you can make this owl your own by changing up the colors. It’s also a great project to use up some scrap worsted weight yarn that you might have laying around.
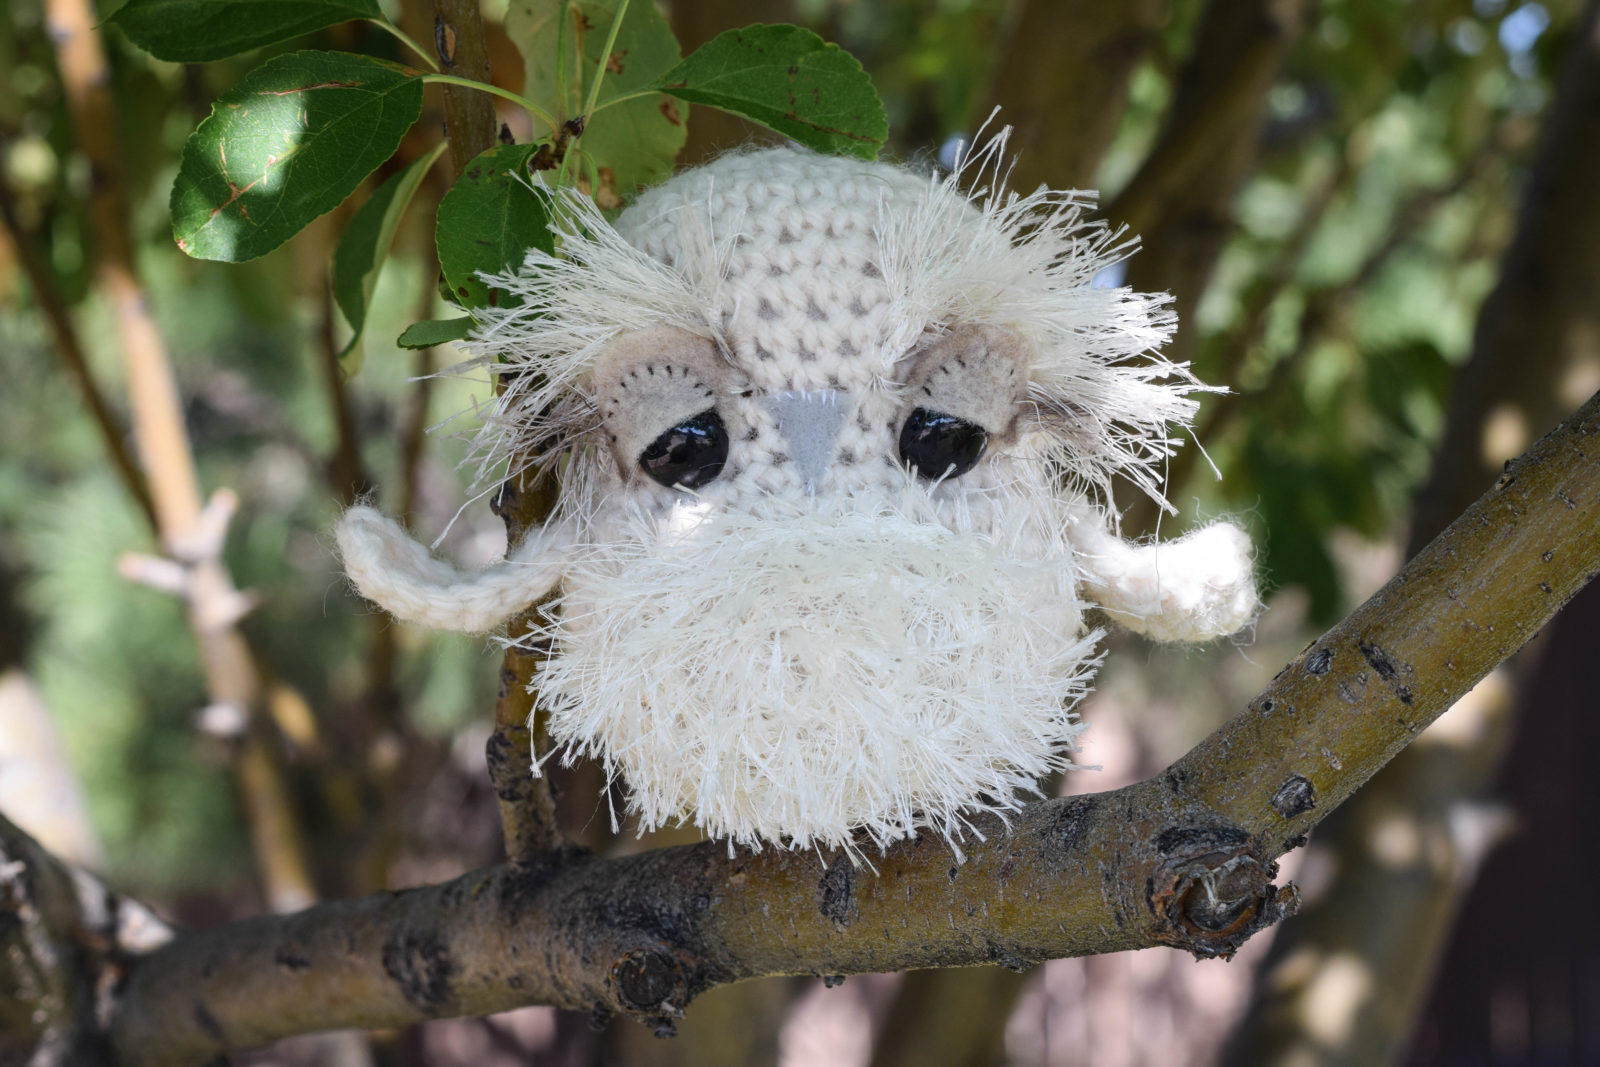
It doesn’t take much yarn at all as it only used about half a skein or less of the Lion Brand Wool Ease. I liked this yarn in particular for the owl because of the texture and the off white color. I didn’t want him to be too bright white and this was the perfect match.
Scroll down for the free pattern, or for a printable version, which is advertisement free, find the inexpensive PDF pattern here on Etsy
You will need:
US Size F Crochet Hook 3.75mm
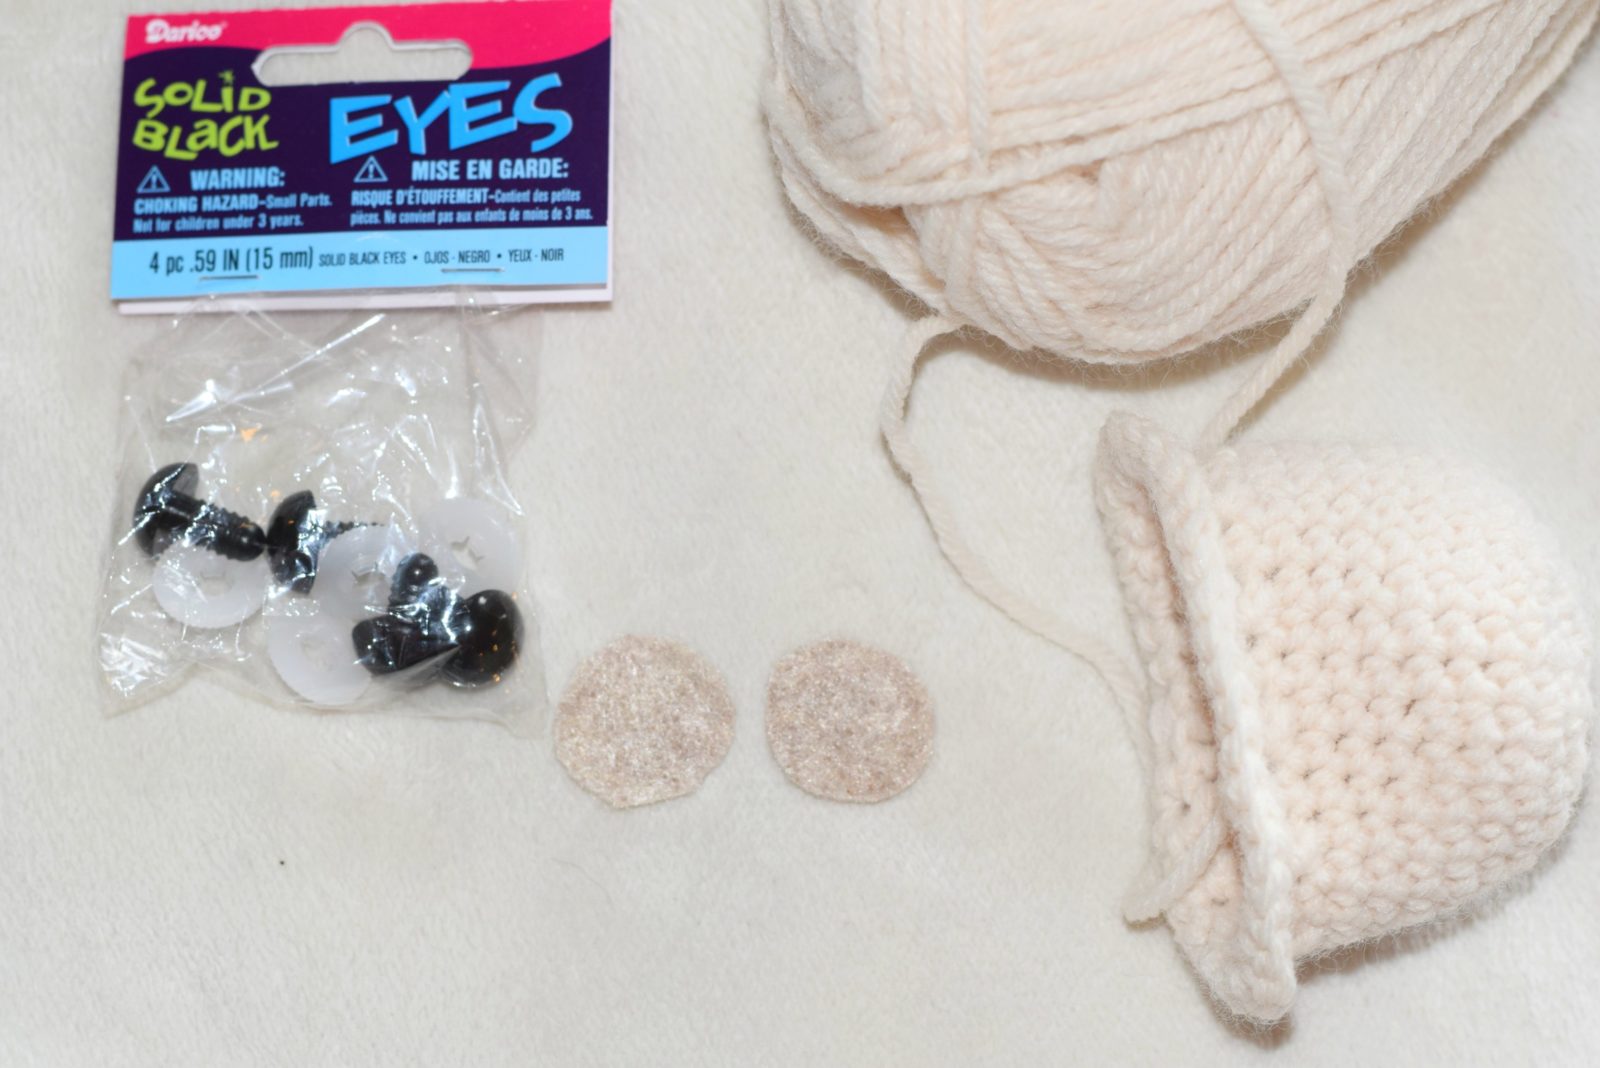
Light tan felt (or preferred color for the eyes – white would work also)
Light grey felt (or preferred color for the beak)
Less than 1 skein Lion Brand Wool Ease in Fisherman or comparable worsted weight yarn
Lion Brand Wool Ease Yarn
(Above is an affiliate link. I will make a small commission if you purchase through this link.)
Solid Black Safety Eyes 15mm or .59 inch
1 skein (less than 1 skien) Lion Brand Fun Fur in Ivory – Soft Off White
Sewing needle and small amount of off white thread and brown thread which I used on the eyelids (or any thread that you’d like)
Scissors
Tapestry needle to weave in ends
Brown eye shadow (optional)
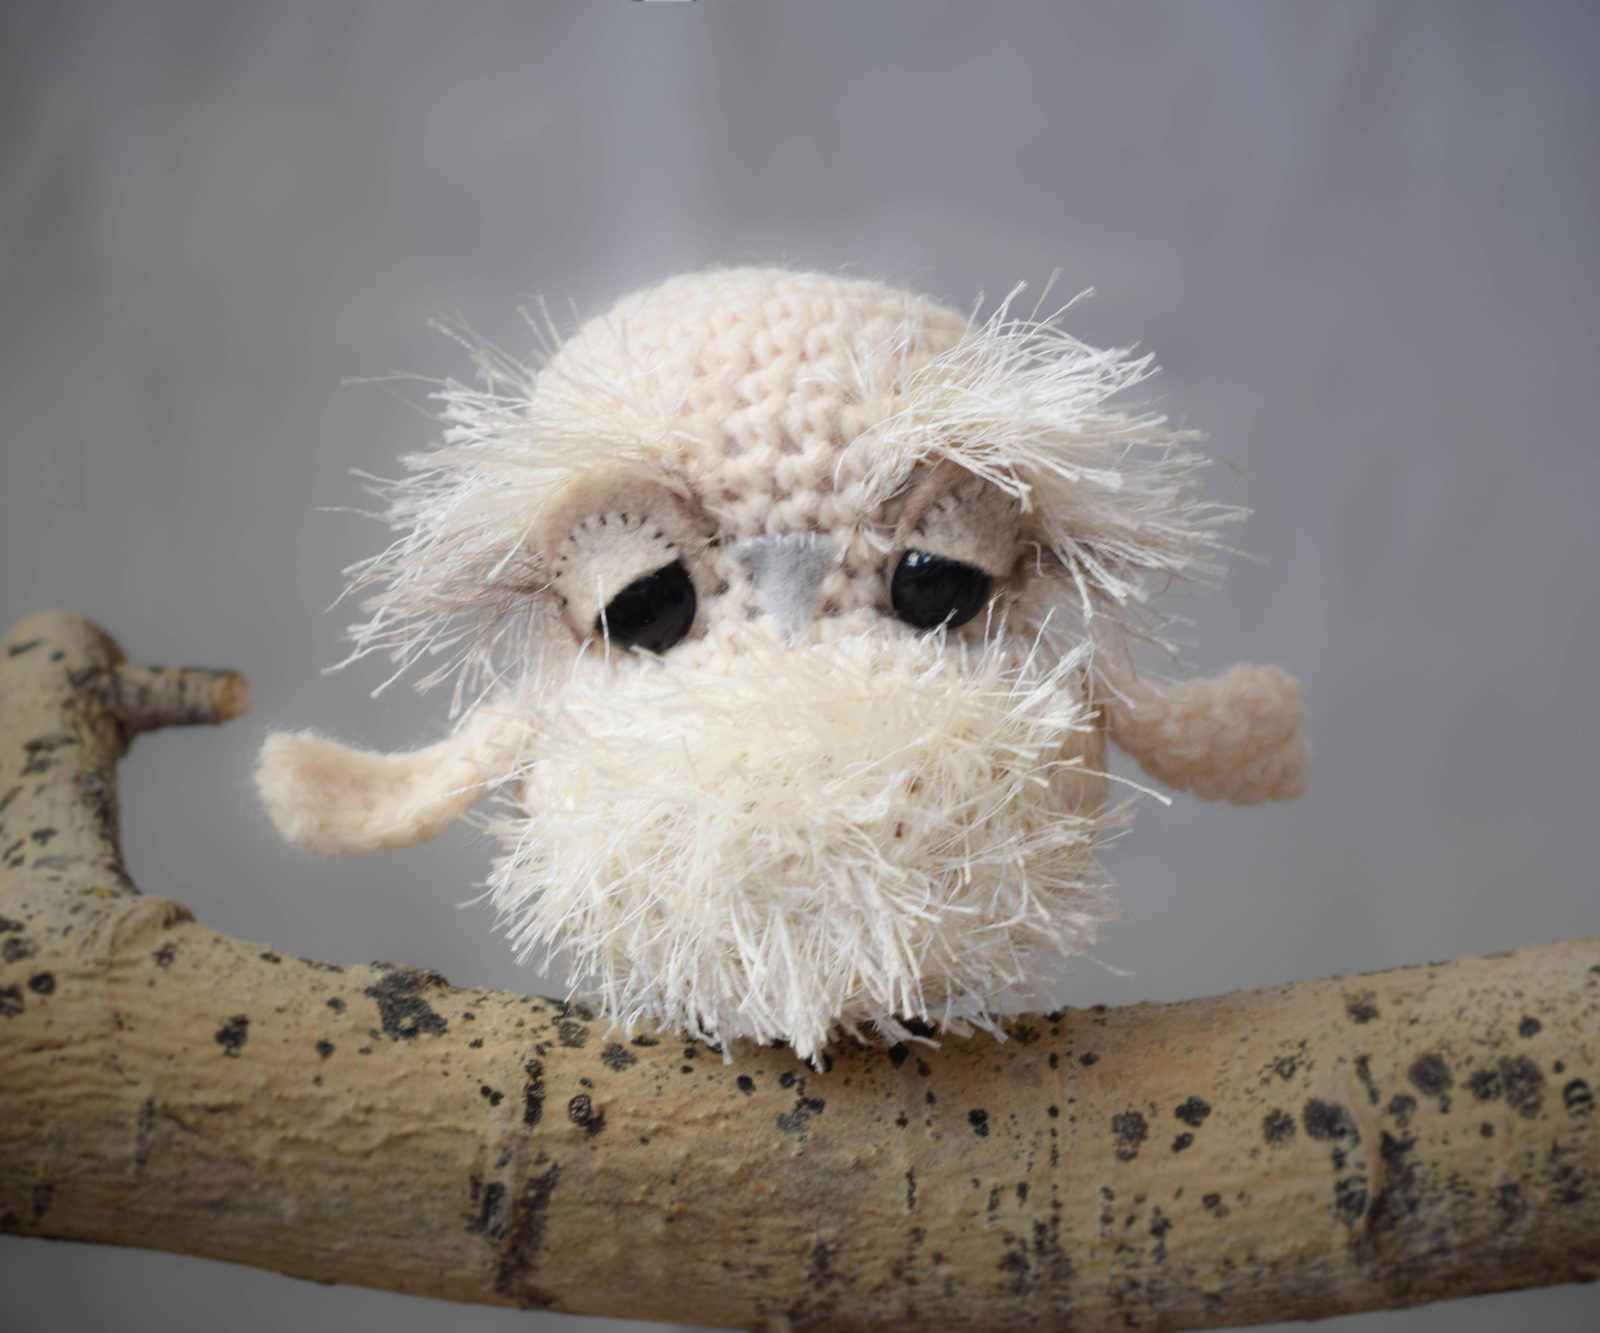
Snow Owl Crochet Pattern
The head and body portion are worked in one piece from the top – down.
Owl Body:
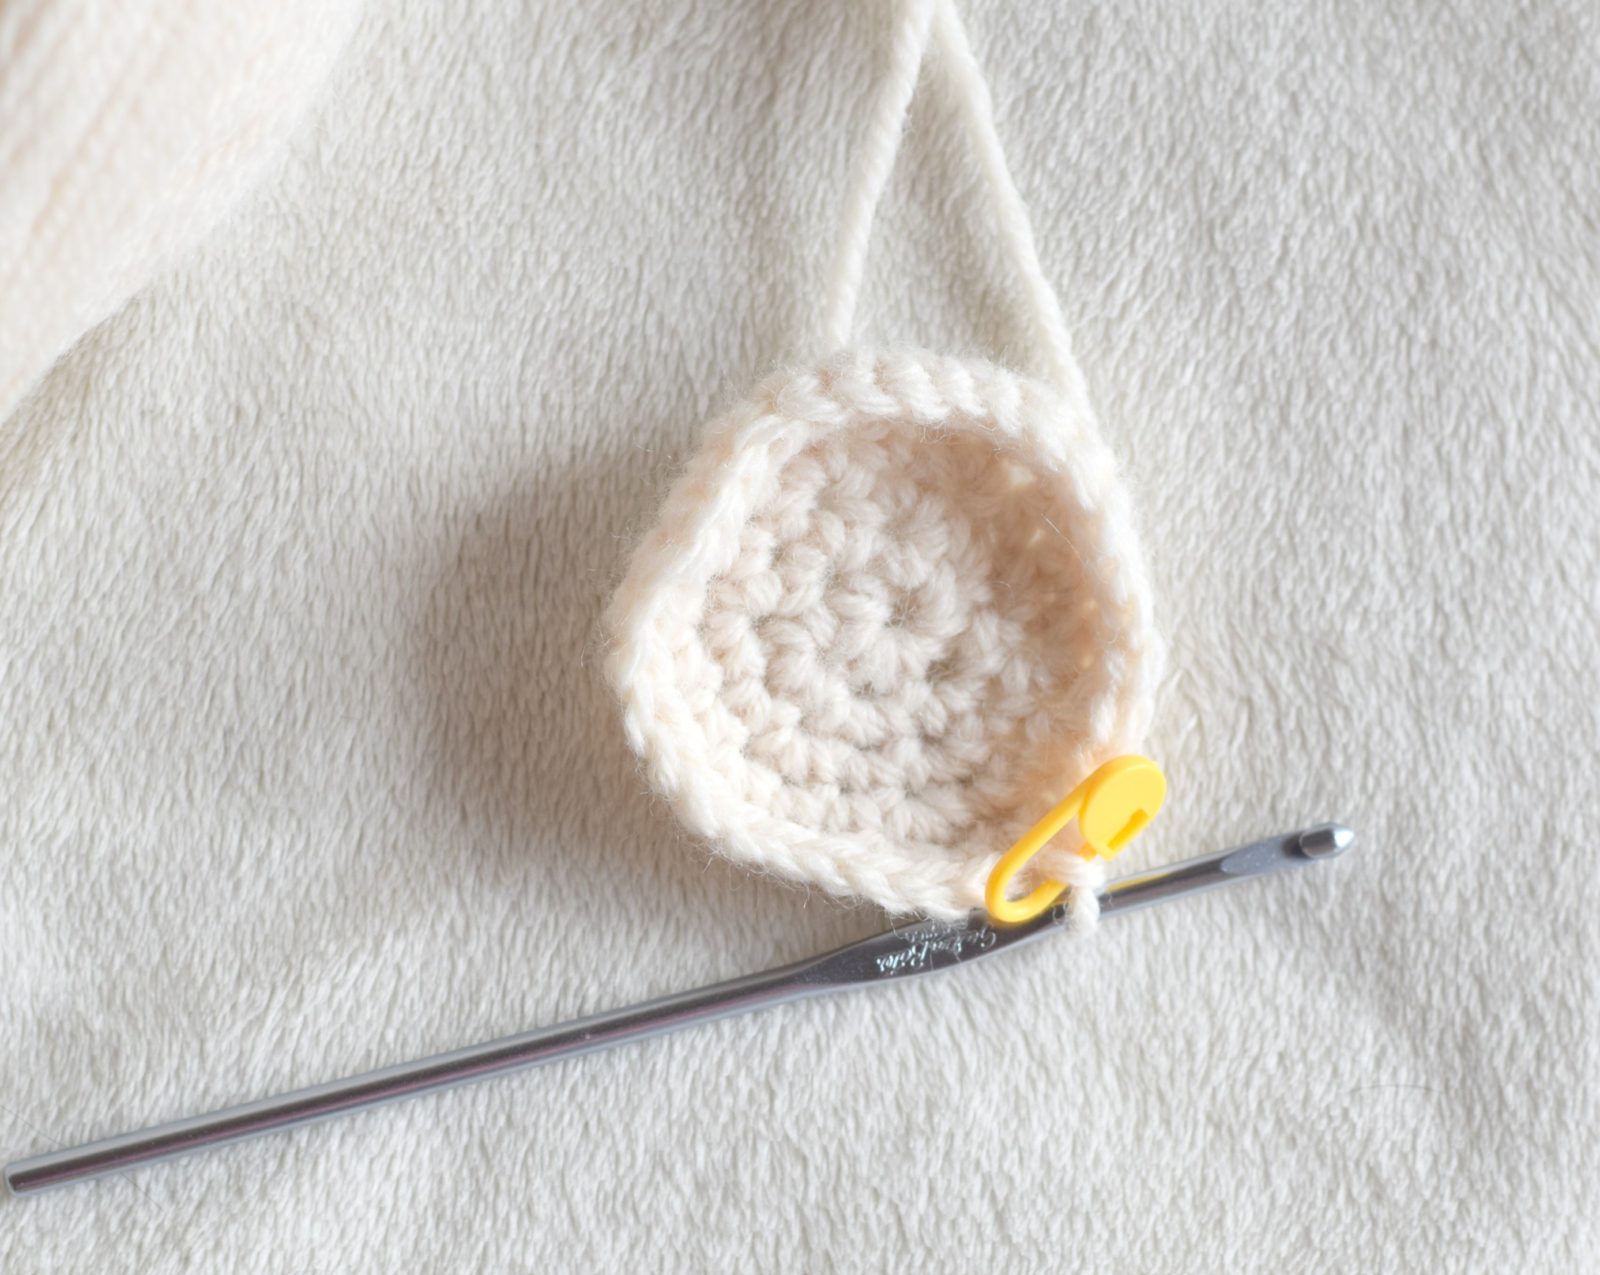
With your size F hook and worsted weight yarn, ch 2
Round 1: Make 6 sc in second chain from hook. Place a stitch marker at beginning of round, and move each round to keep track of your rounds.
Round 2: 2 sc in each stitch around (12 stitches)
Round 3: 2 sc in next stitch, sc in next stitch. (18 stitches)
Round 4: 2 sc in next stitch, sc in next two stitches (24 stitches)
Round 5: 2 sc in next stitch, sc in next three stitches (30 stitches)
Round 6-12 Sc in each stitch around.
Round 13 Sc 2 together, sc in next stitch. Repeat around. (20 stitches)
Round 14 2 sc in next stitch, sc in next stitch. Repeat around. (30 stitches)
Round 15 2 sc in next stitch, sc in next two stitches. Repeat around. (40 stitches)
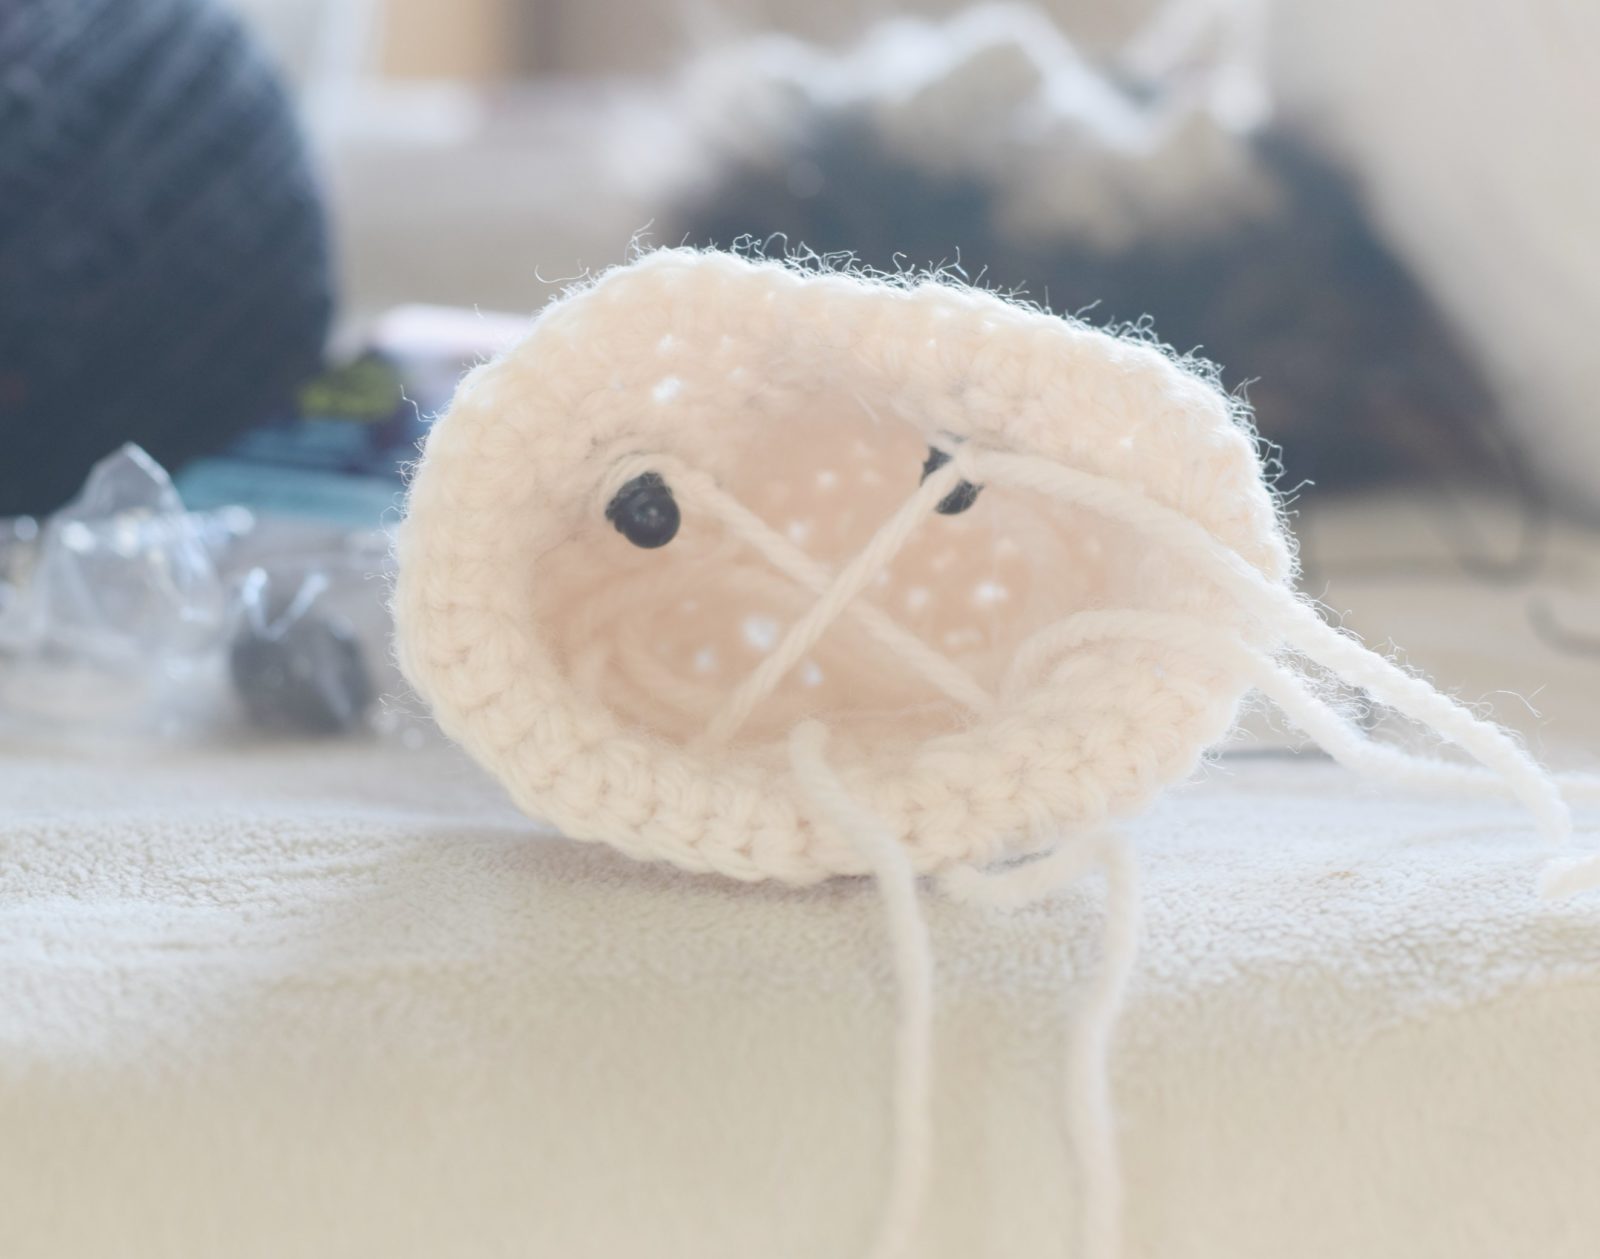
At any point now, you can attach the eyes and nose. (See instructions for each below) You can also begin to fill the head with the stuffing. The little owl will get prettier as you go!
Round 16-21 Sc in each stitch around.
Round 22 Sc 2 together, sc in next two. Repeat around (30 stitches)
Round 23 Sc 2 together, sc in next stitch. Repeat around (20 stitches)
Round 24 Sc in each stitch around – make sure she is stuffed as much as possible now!
Round 25 Sc 2 together around. Repeat around.(10 stitches)
Round 26 Sc 2 together around (5 stitches), Pull Tight, Tie Off, Weave in all ends
Wings Pattern:
Ch 8
Row 1 Sc across (7 stitches), ch 1, turn
Row 2 Sc across (7 stitches), ch 1, turn
Row 3 Sc 4, slip stitch in each of next three stitches
Finally, single crochet around entire piece
Tie off and weave in ends
Attach each wing to the sides of the body, just below the increase rows (or about halfway down the side of the body-see picture).
Attaching the eyes:
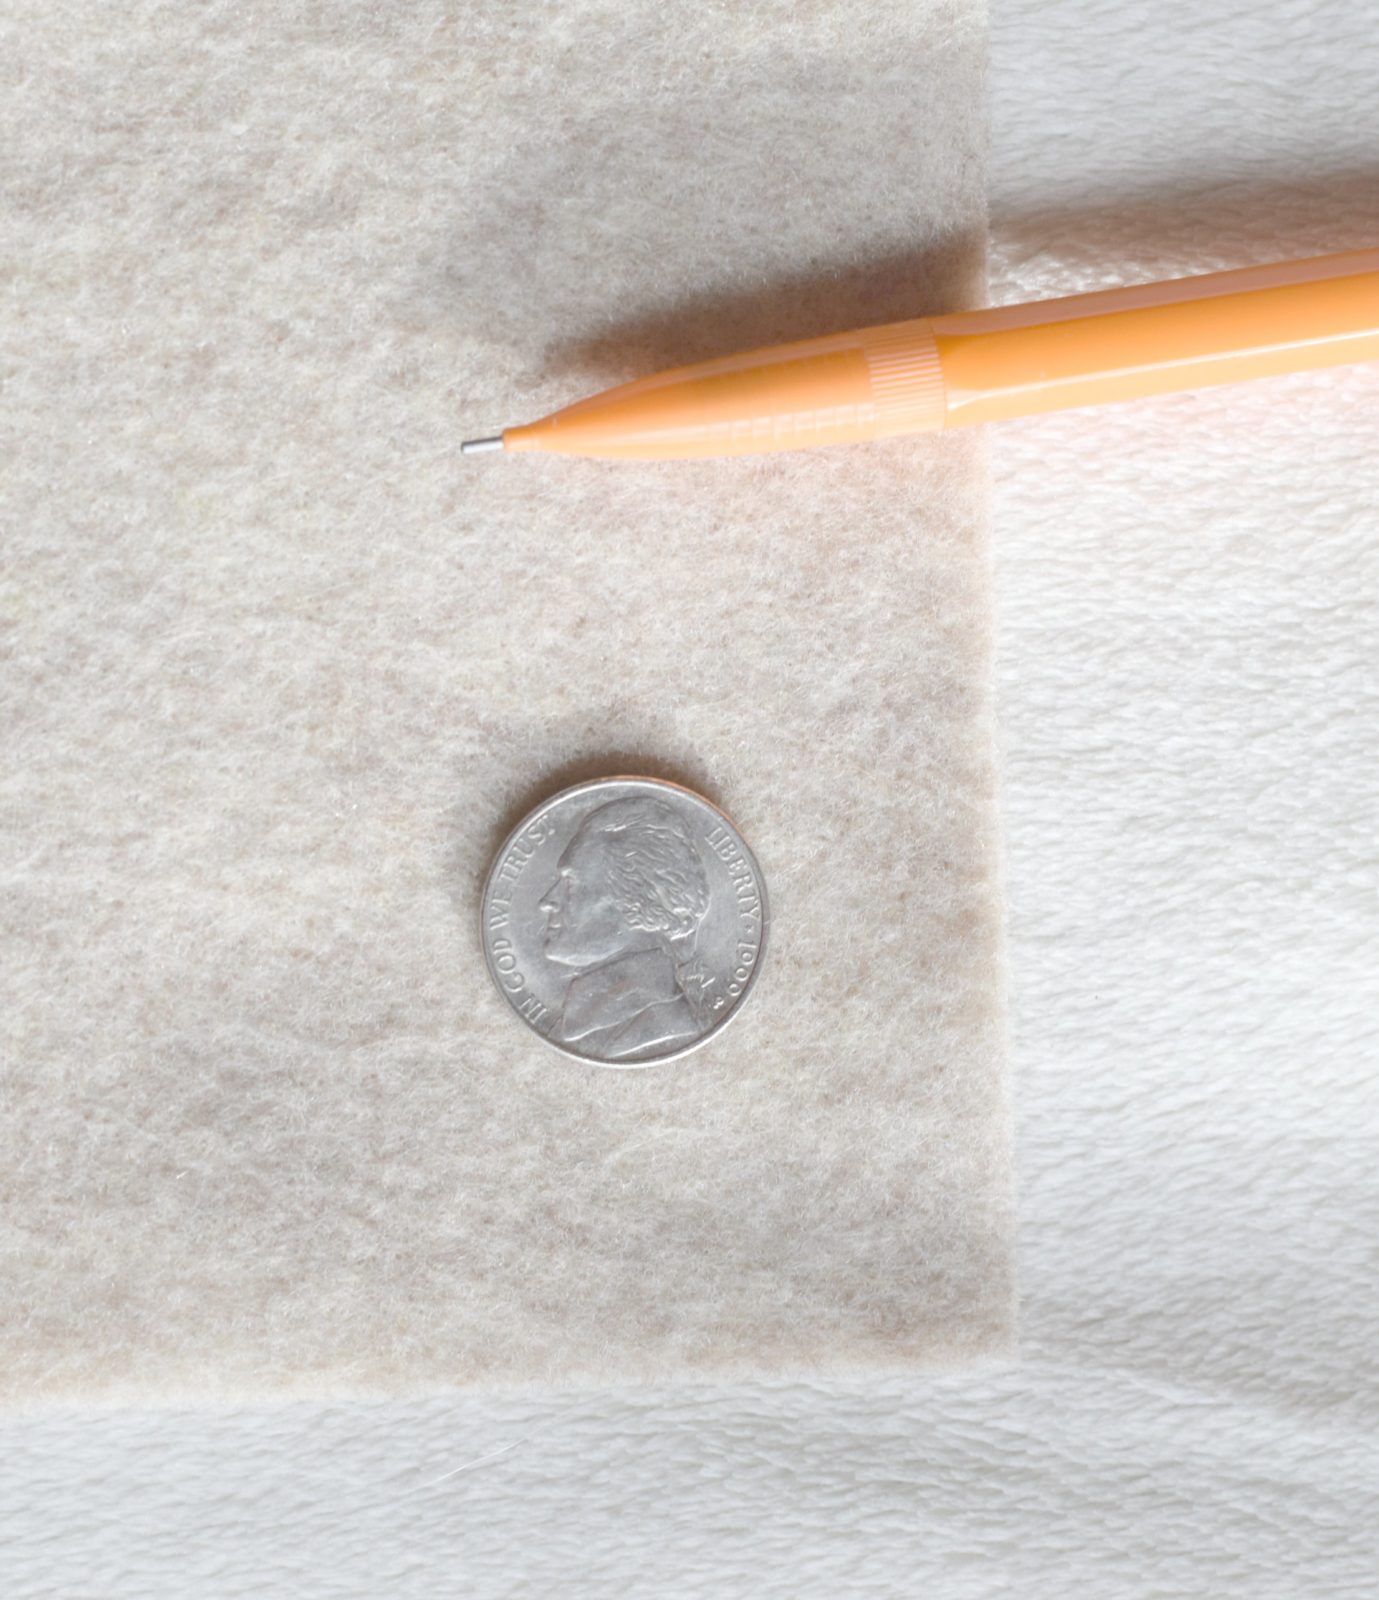
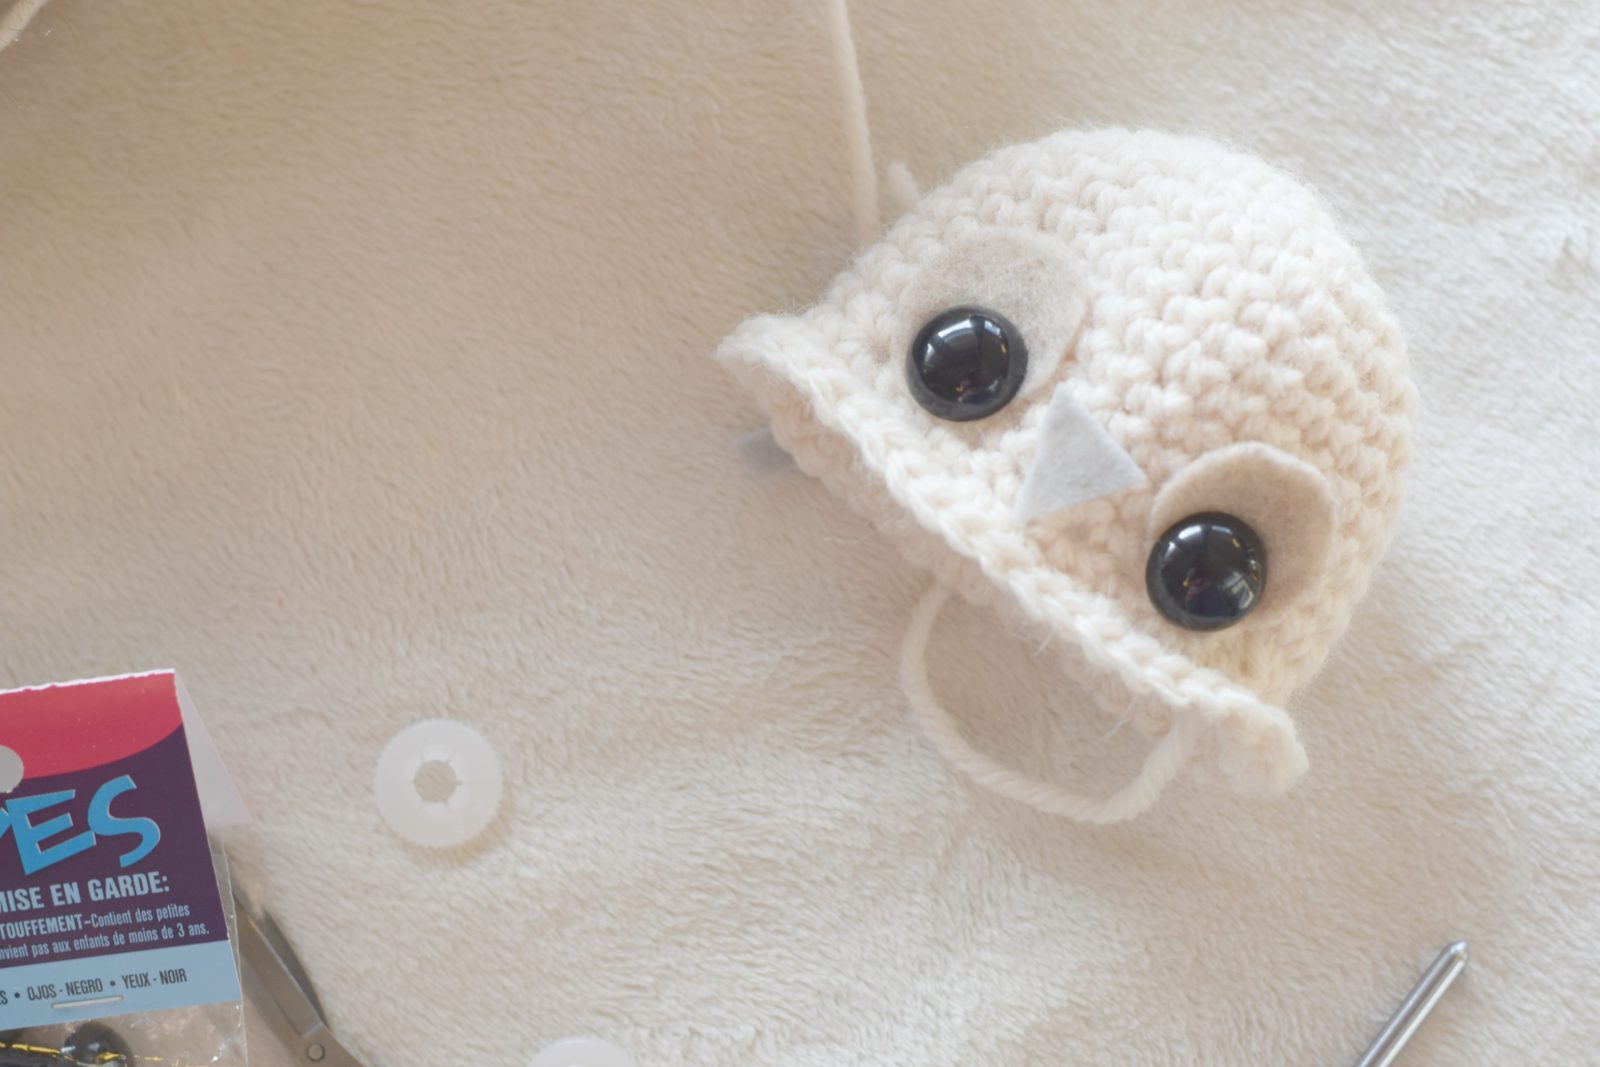
Cut out two pieces of felt about the size of a nickel (or a little over 3/4″inch diameter). Cut or poke a small hole 1/3 of the way up from the bottom. This hole is where you will insert the safety eye. Insert the safety eye through the hole in the felt and then insert the piece 2 rows above where the increasing begins (basically at the bottom of her head, each eye should be placed so that there are approximately 7 stitches in between the eyes). Secure with the fastener. I used the same method that for the eyes that I did with the hedgehog which I found from Stephanie at All About Ami HERE. This pulls the eyes inward a bit to make them more life like. This of course is optional, but I really like the effect that it gives the eyes.
Cut a third circle out that is the same size as the other felt circles, about the size of a nickel or 3/4″ inch in diameter. Cut this circle in half. Each of these halves will be eyelids. Place them over the upper portion of the black safety eyes. With your needle and thread ( I used brown thread), stitch around the eyelid with a whip stitch to attach.
Beak:
With your grey felt, or whatever color that you have chosen for the beak, cut out a small triangle. The base should be 1/2″ wide and the length from the base to the corner end of the beak should be 1/2″ long.
Attach the beak with your sewing needle and thread in between the two eyes. See the picture if you need a visual on where to place it. I used the white thread to attach the beak.
Feathers:
With your fun fur, surface single crochet the belly of the owl. You will attach your fur the outer edge of the owl’s “belly”. Don’t worry, this doesn’t have to be precise. It’s very forgiving! Single crochet along the surface in the shape of a large circle all around the belly.
Fill in the belly stitches in this manner as well. I worked in a spiral, starting from the outside, making a circle and then going in to fill in the feathers, working around until I got to the center. I used scissors and gave the feathers a “hair cut”. Trim them down, and especially trim them near the eyes so they don’t block the owl’s view. 🙂 Done!
Add some fur in the same manner, by surface single crocheting, just above his eyes. Start at the upper right side of the eye and surface single crochet around the the opposite lower, outside portion of the eye.
Turn and do one more row, working back to the upper inside portion of the eye. Tie off, and trim as wanted. I added a little bit of brown eye shadow just to the outer corners of the eyes and the outer “feathers”.
I hope that you’ve enjoyed the baby snow owl. I know that she was a lot of fun for me to make, and I love quick projects like this. They’re a hoot! (Okay-BAD JOKE!)
Feel free to share a picture if you make one with me on my Facebook page or Instagram and please let me know if you have any questions! Thanks friends!
And thank you to Lion Brand Yarn for sponsoring this post! All opinions are 100% my own.
XO
Jessica
Absolutely adorable!!! Love your woodland animal collection!
Thanks my friend Patty! Stay cool down there in the heat!
I am so happy to see this! Snowy owls are my LOVE! Have one as a tattoo. I have loved owls forever.
I made your hedgehog and was never so pleased with something I have made before.
Thank you for this wonderful adventure of making these!
I’m so happy to hear this Kelly! How cool that you’ve even got a little owl tattoo. I’m so pleased that you love how the hedgehog came out. It really made my morning! Thanks for taking the time to write. And you’re welcome of course!
These projects are the most adorable things!!! I can’t wait to make them for my daughter!! 😀
I hope your daughter loves them! Let me know if you have any questions as you make them. So happy you think they are cute!
So adorable! The eyes are perfect! I often feel like my crocheted animals need something “more” around the eye area . . . this owl though! So great!
The Yarn Fanatic Party is back after a long summer vacation. I’d love to “see” you there! https://www.thephilosopherswife.net/2016/09/yarn-fanatic-party-59.html
I’ll check it out. Thanks so much for stopping by and for the kind words about the eyes!
So adorable! Ben Wigler from Lion Brand gave me this link on my blog and I’m glad he did. I love owls and this one is the cutest. I’ll have to try this! Thanks!
Hi Rula! How nice of Ben to share!! I hope you enjoy it. Owls are just so cute aren’t they??
I LOVE this snow owl. Now I want the hedgehog pattern. My grand-daughter is in love with owls and I have to make this for her. Thanks so much for the pattern. I just subscribed to your newsletter also.
I’m having a terrible time trying to figure out “surface crocheting” with the fun fir. Do you have a quick tutorial to look at to get what you mean? Thank you very much.
So sorry! I don’t have a tutorial for that. You want to put your hook through the first “hole or stitch” then out another to grab the fur and pull through to crochet. So hard to explain in detail…..hope this might help a bit!
I’ve made quite a few of your hedgehogs,and can’t wait to make this fabulous owl,thank you so much
I would love a Youtube or video on this baby owl. I love it “good job.”
Dpopcorn