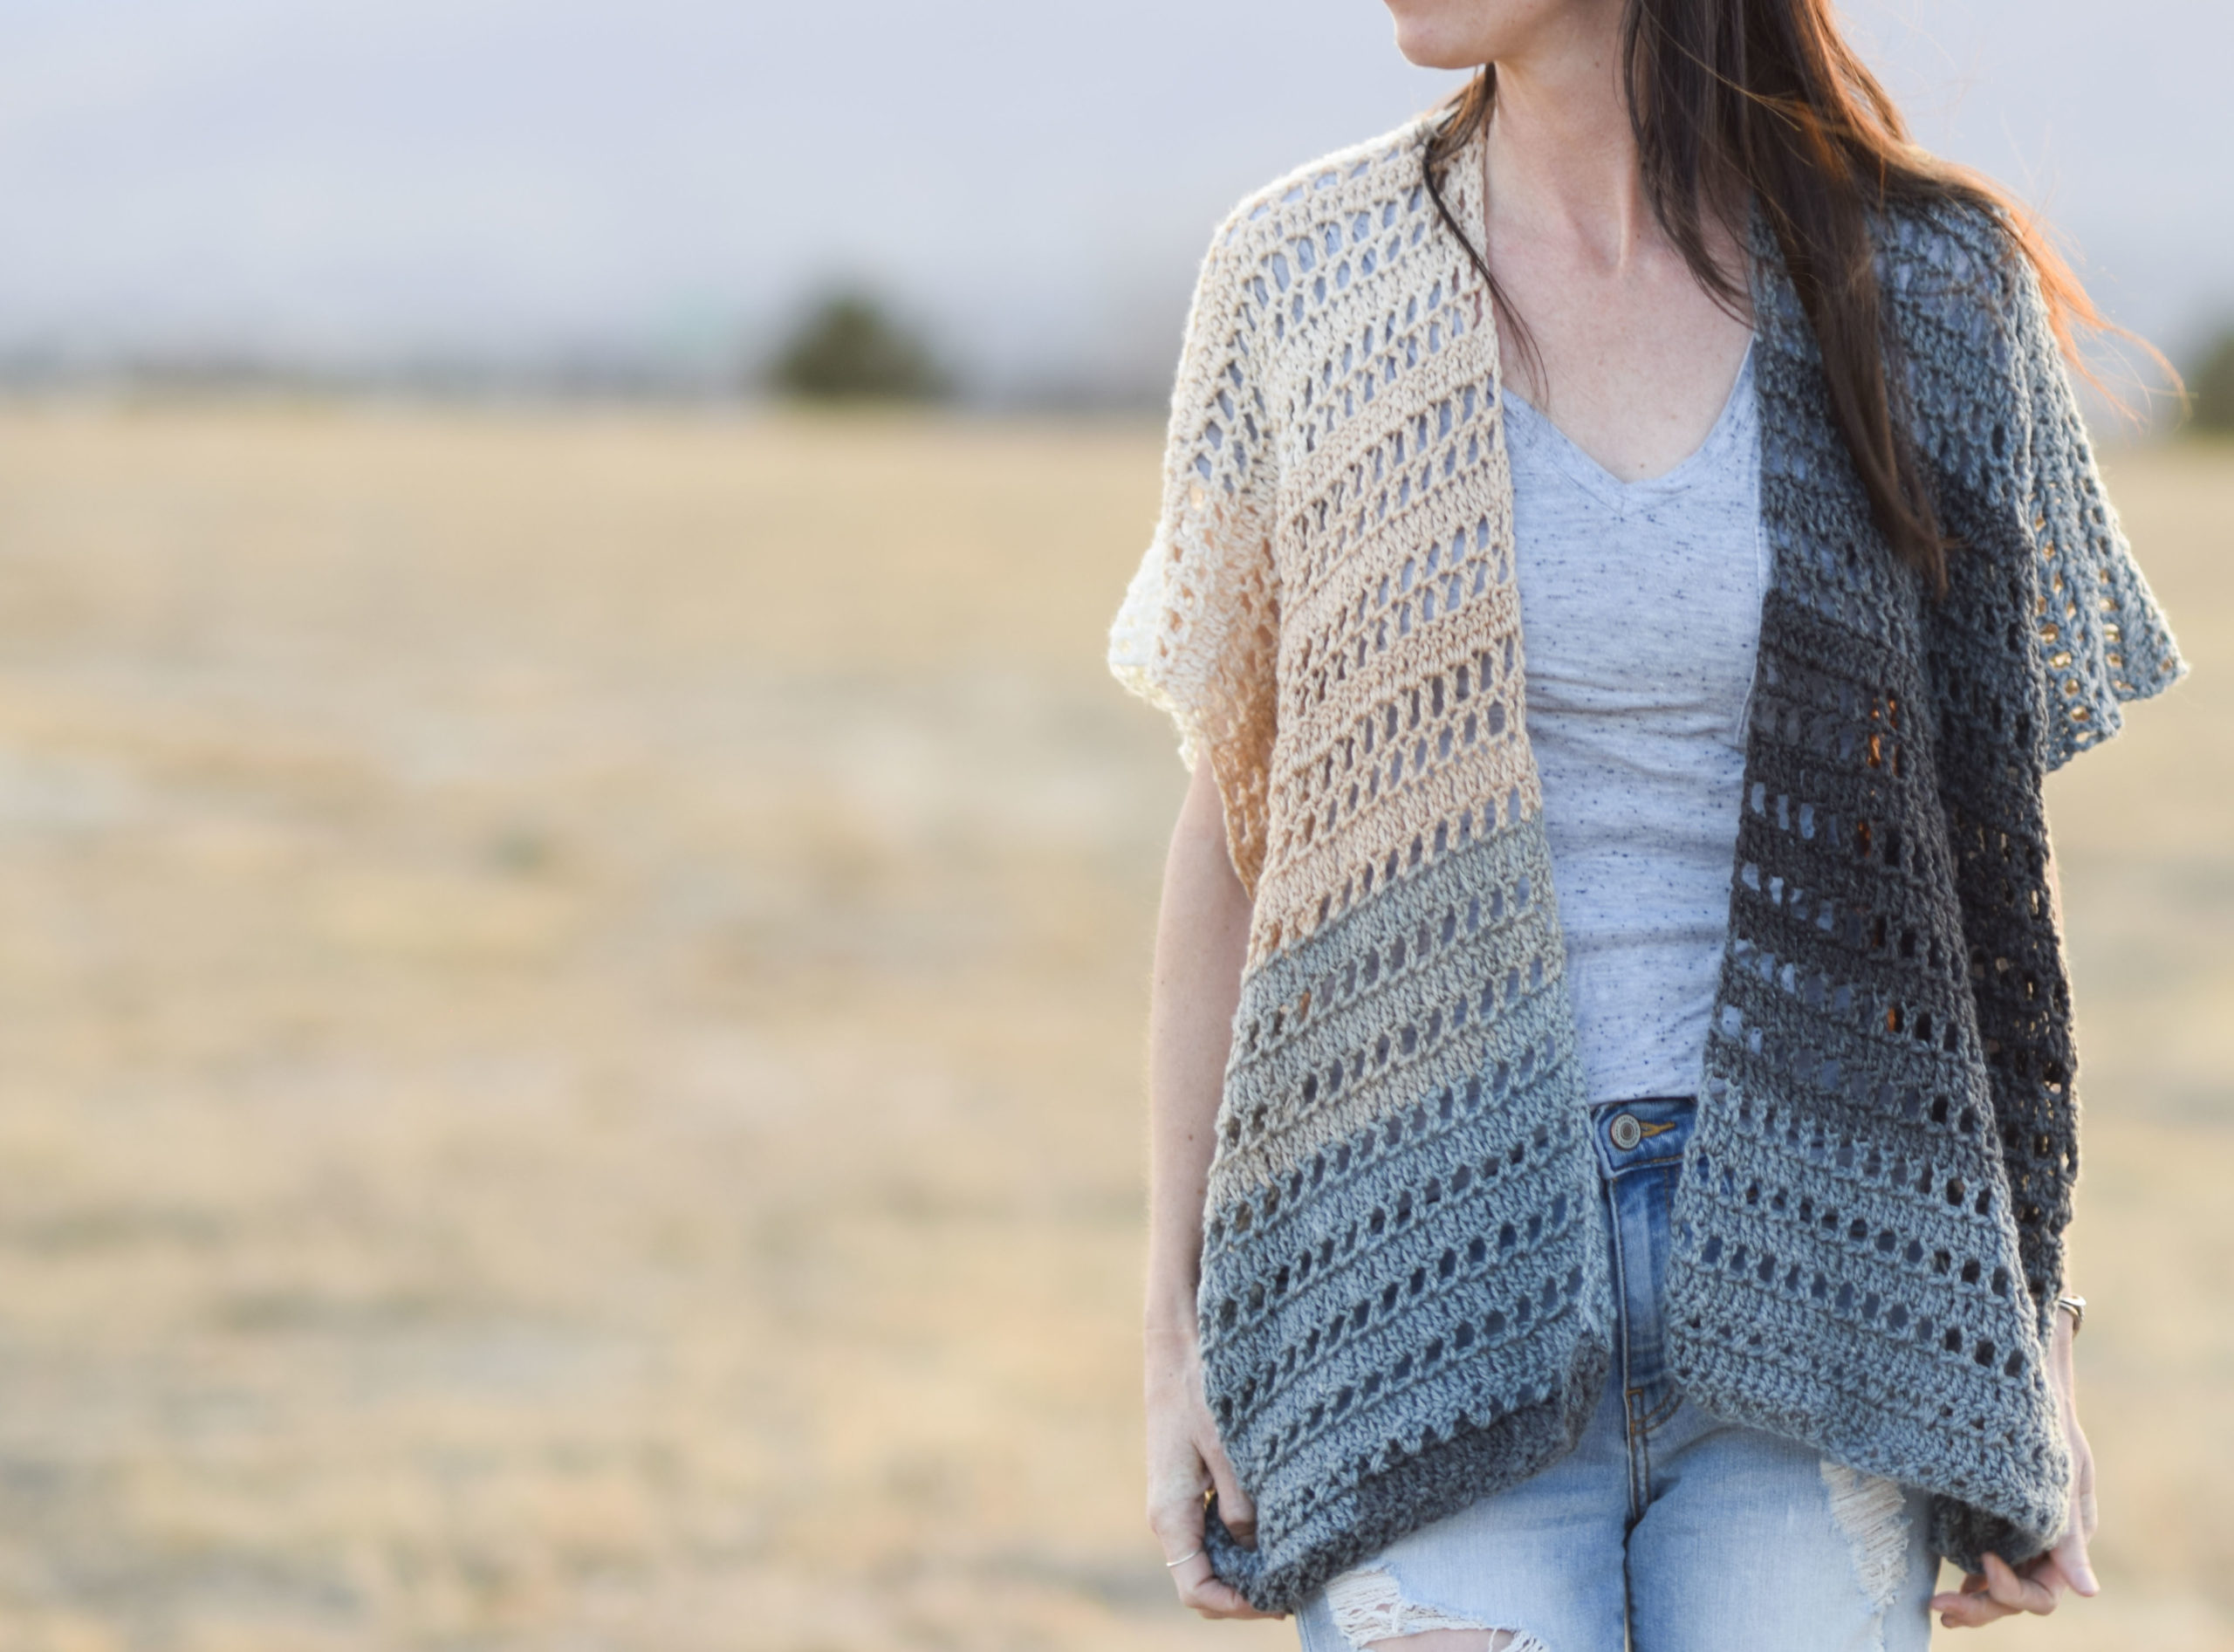
Easy Crochet Cowled Sweater Vest
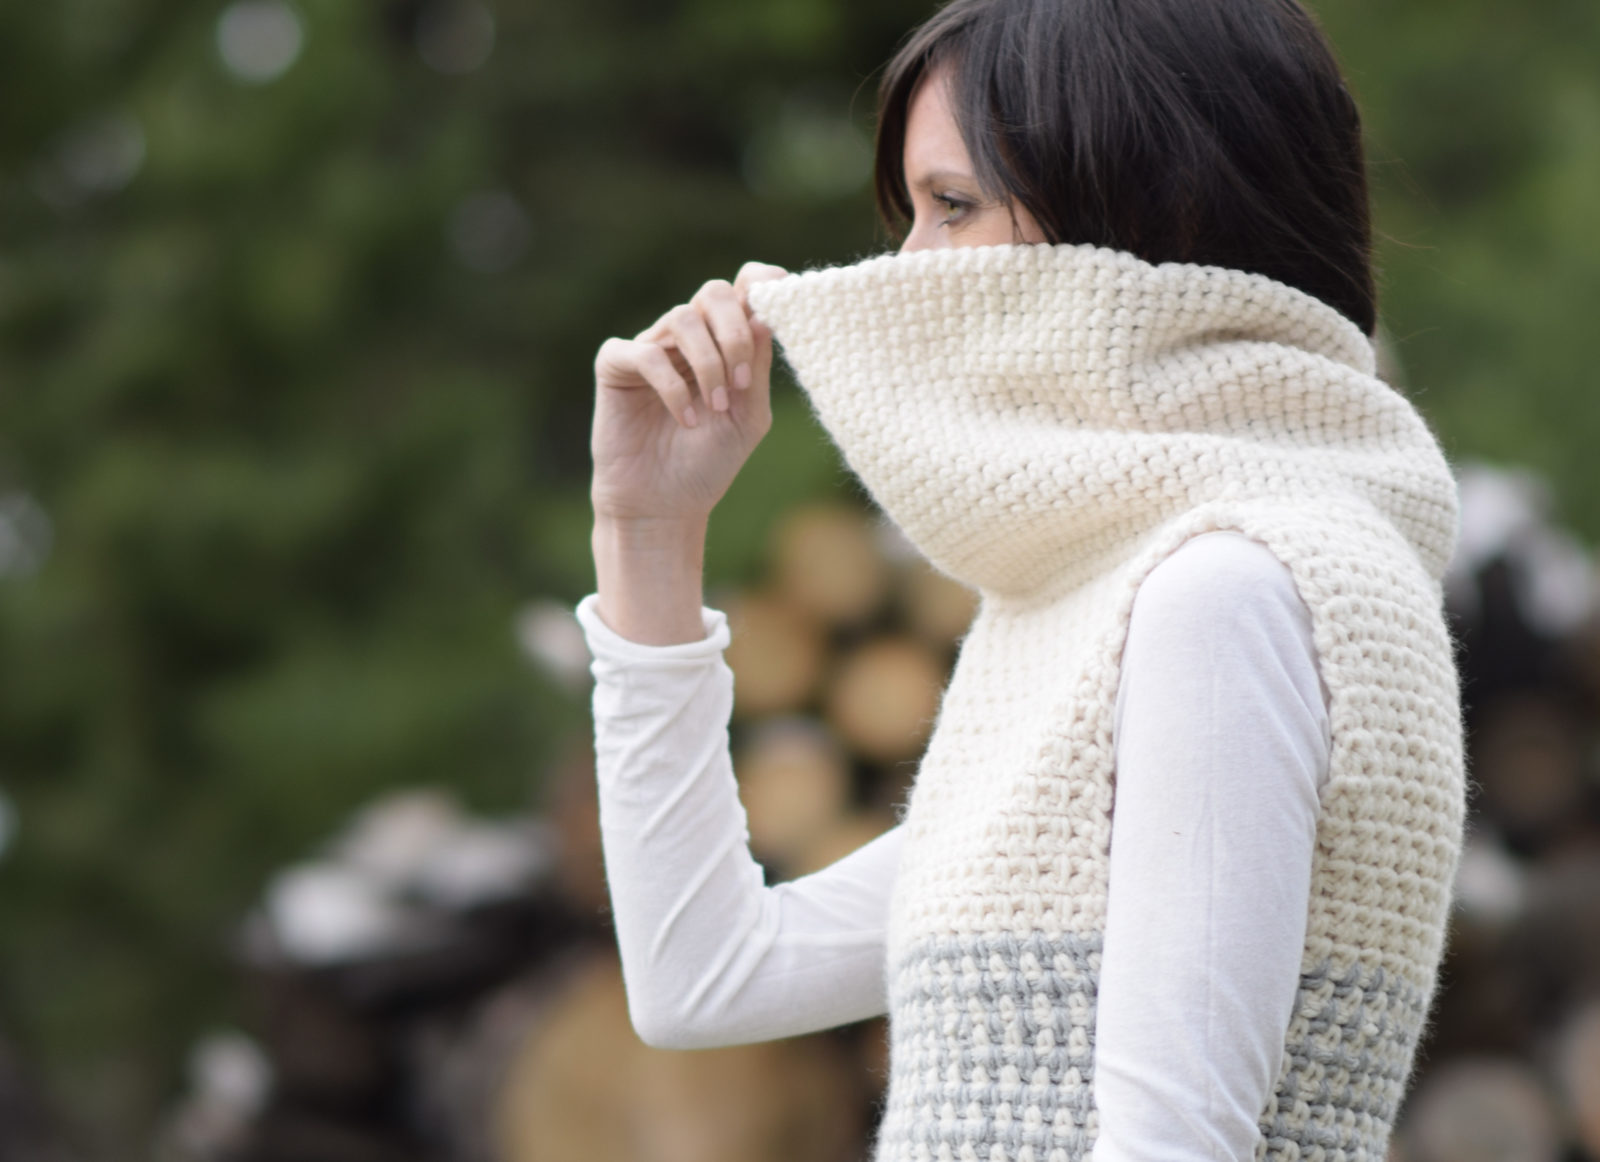
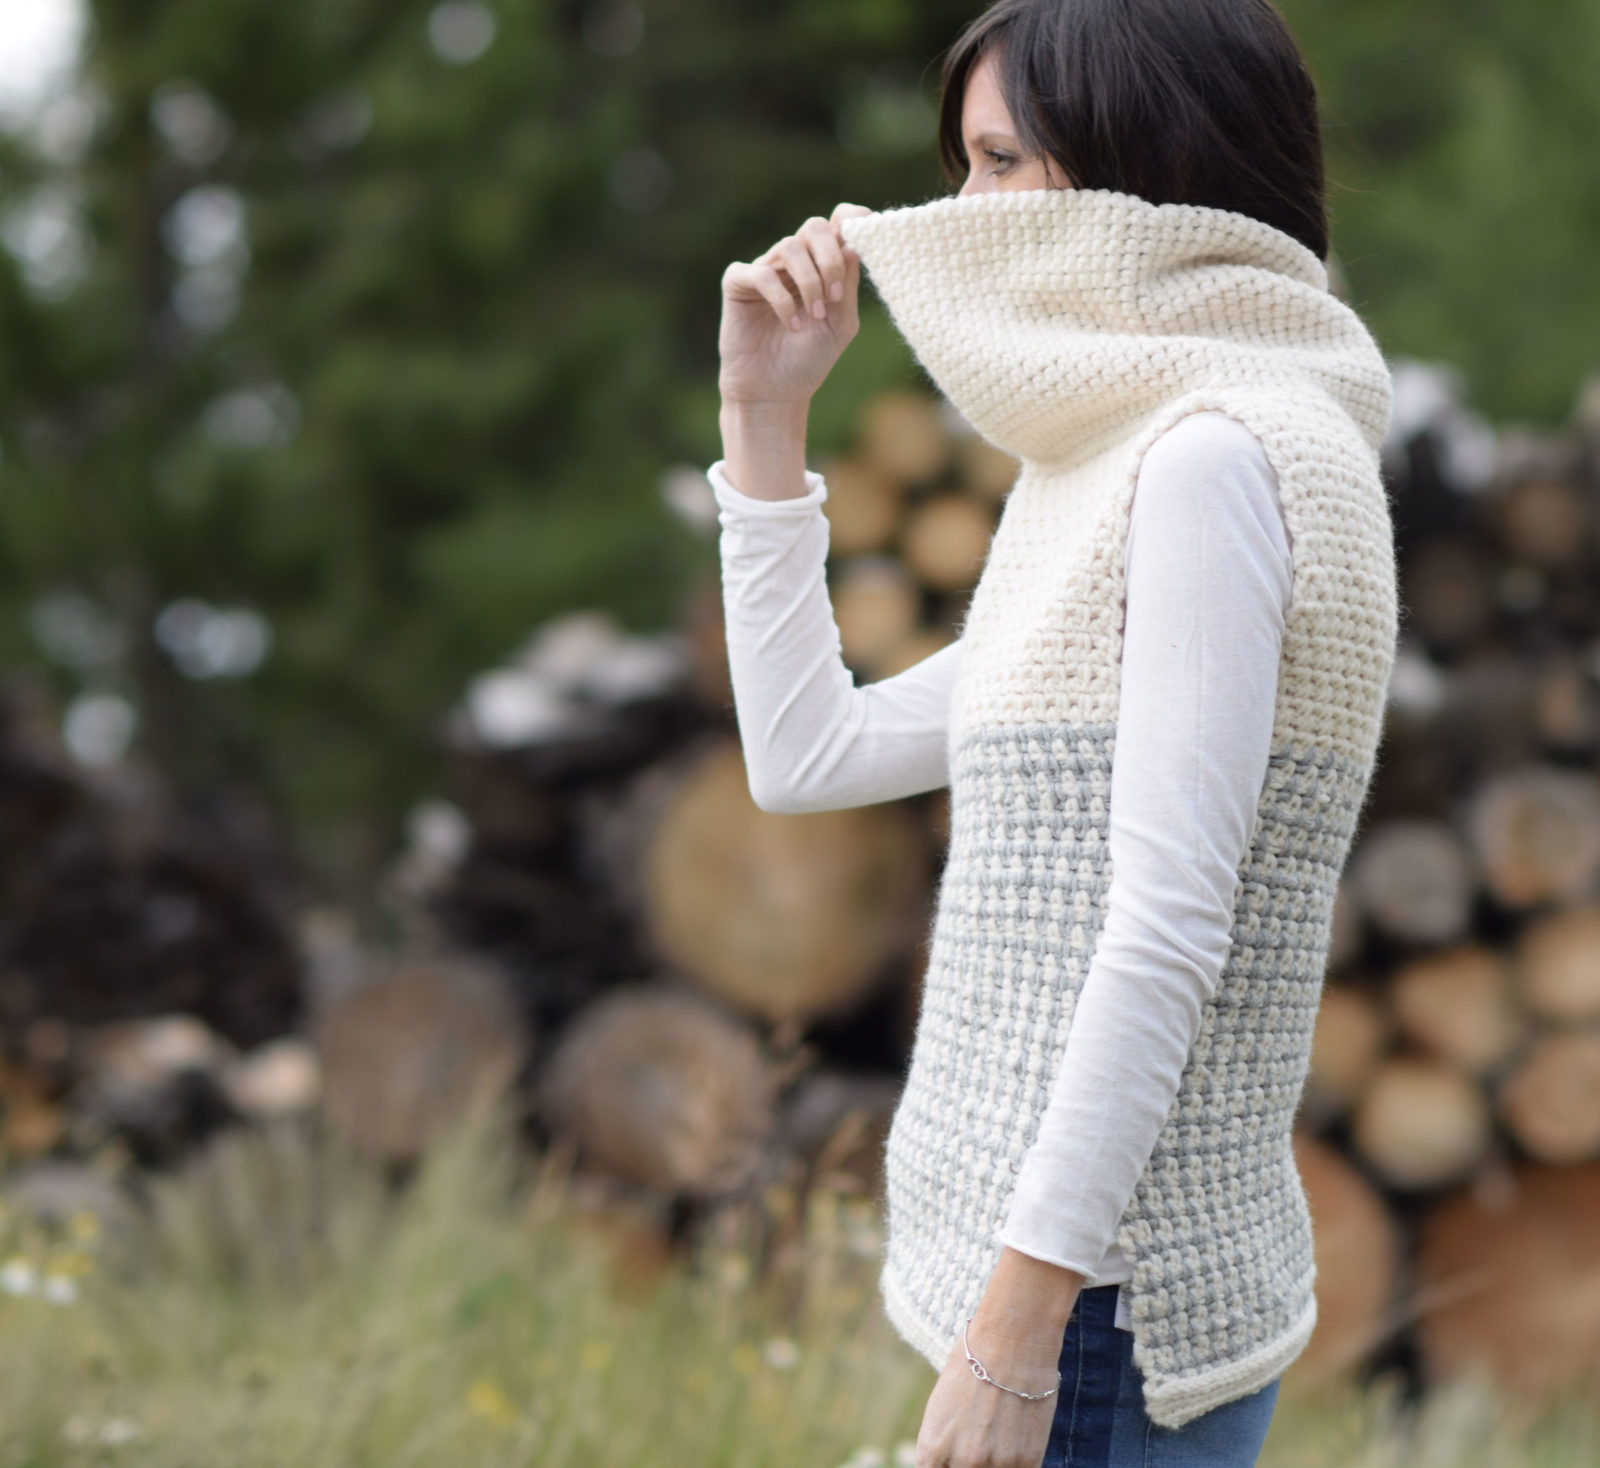
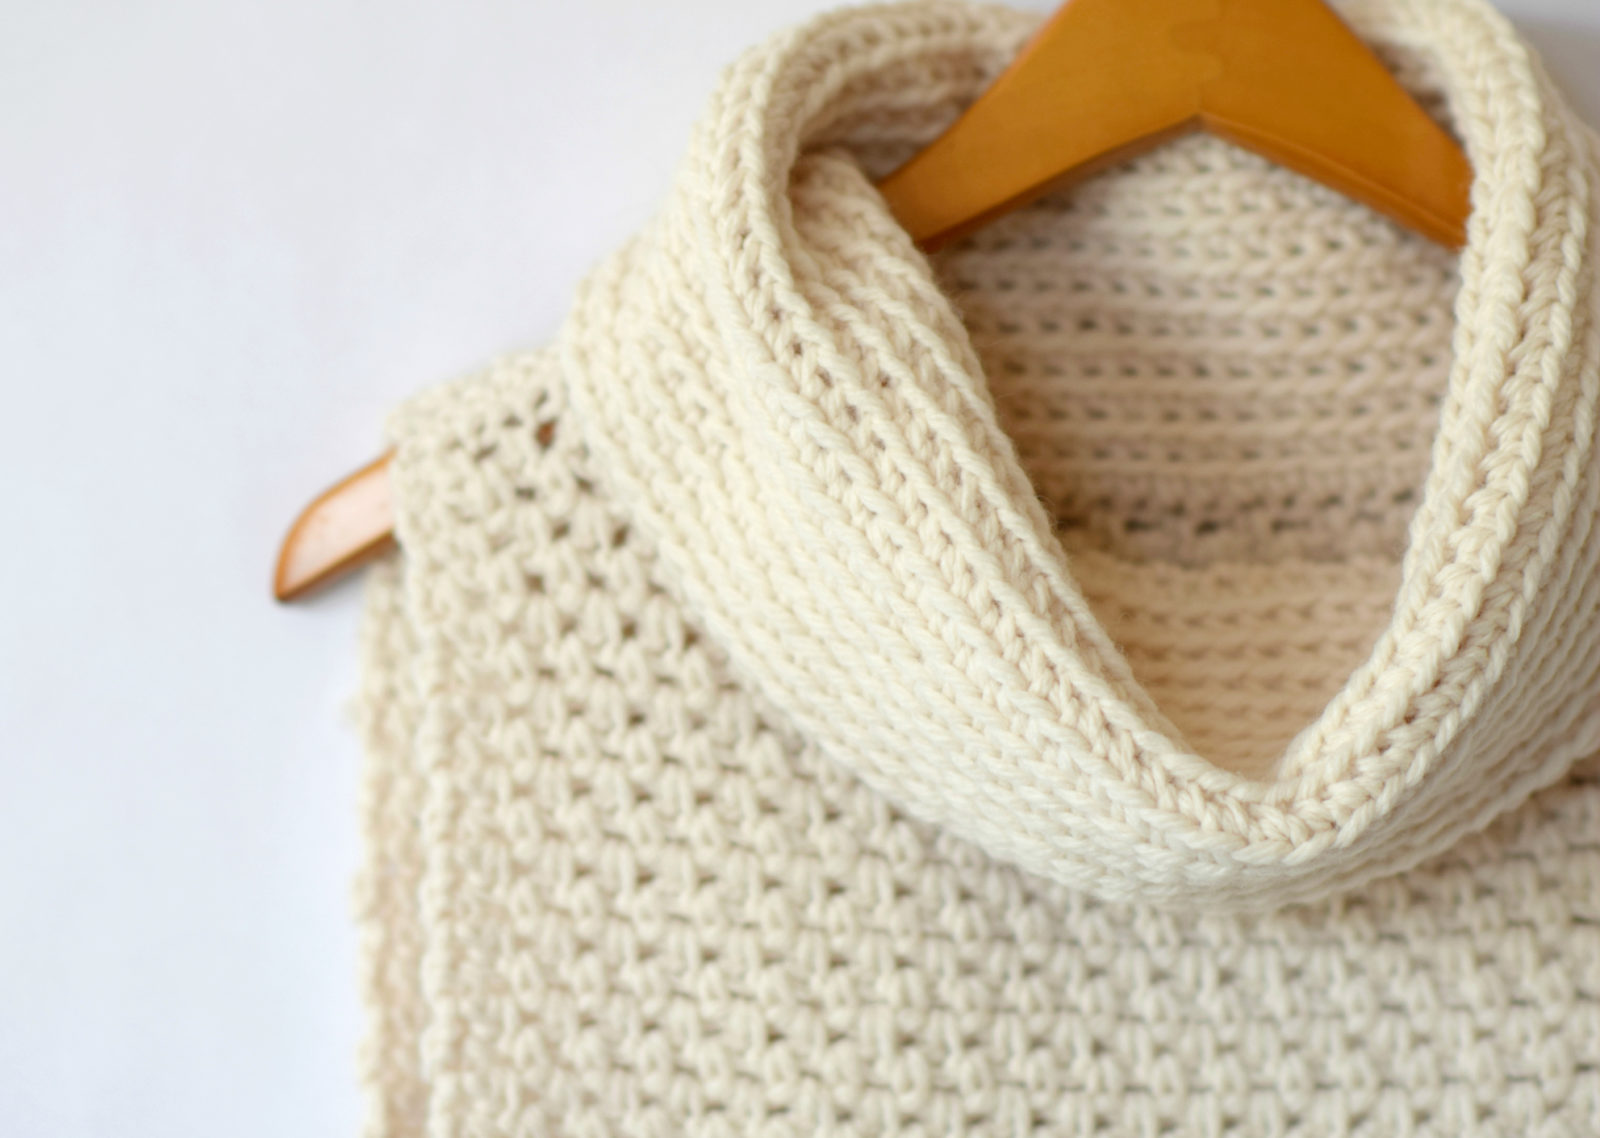
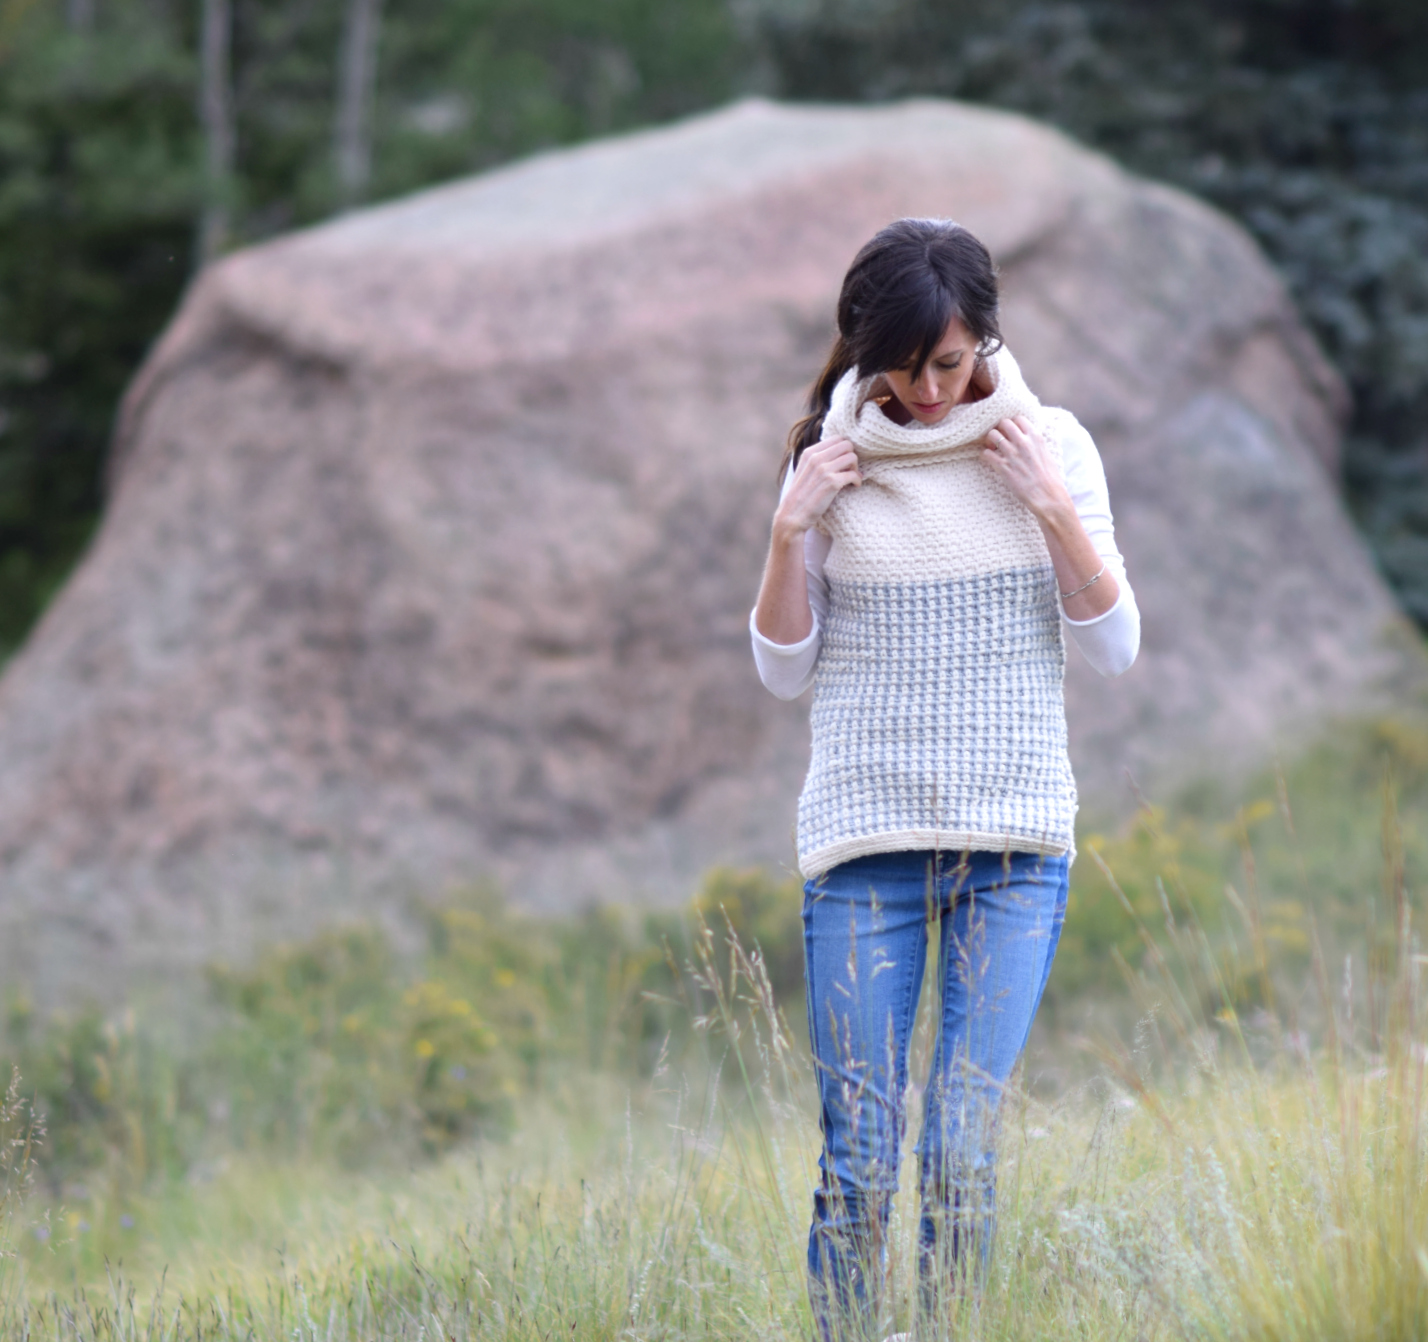
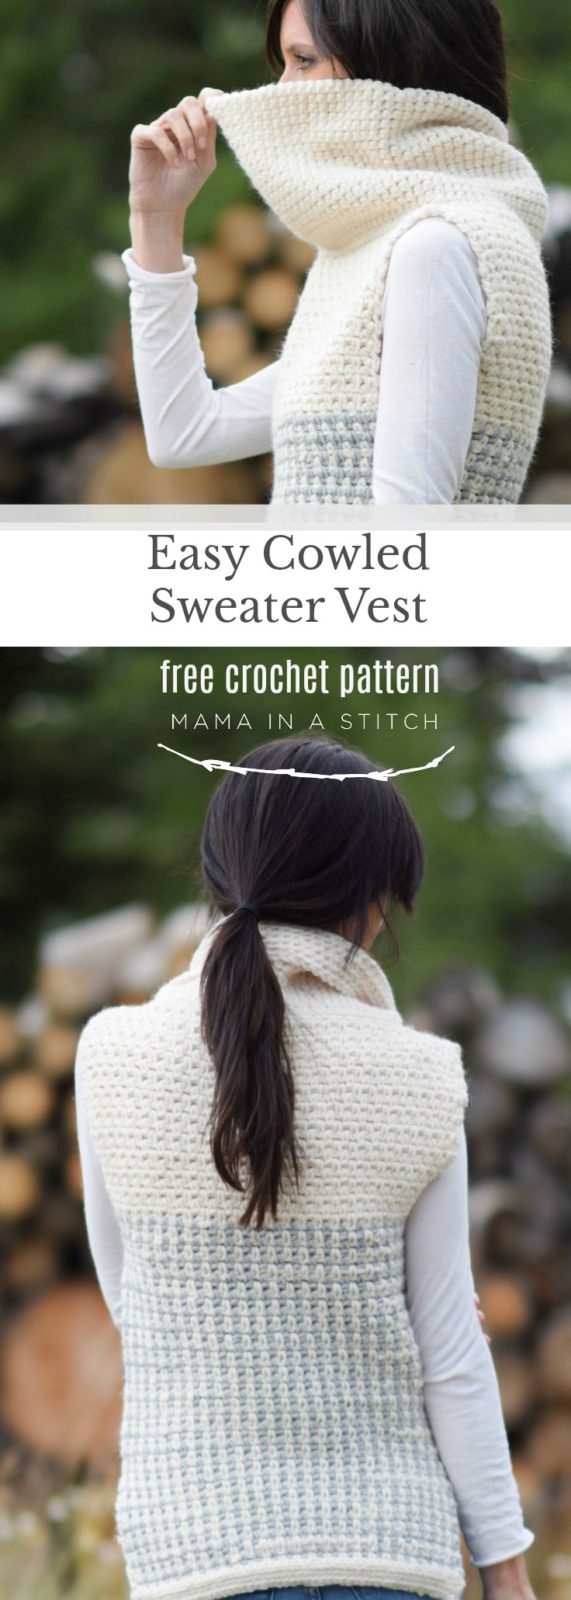
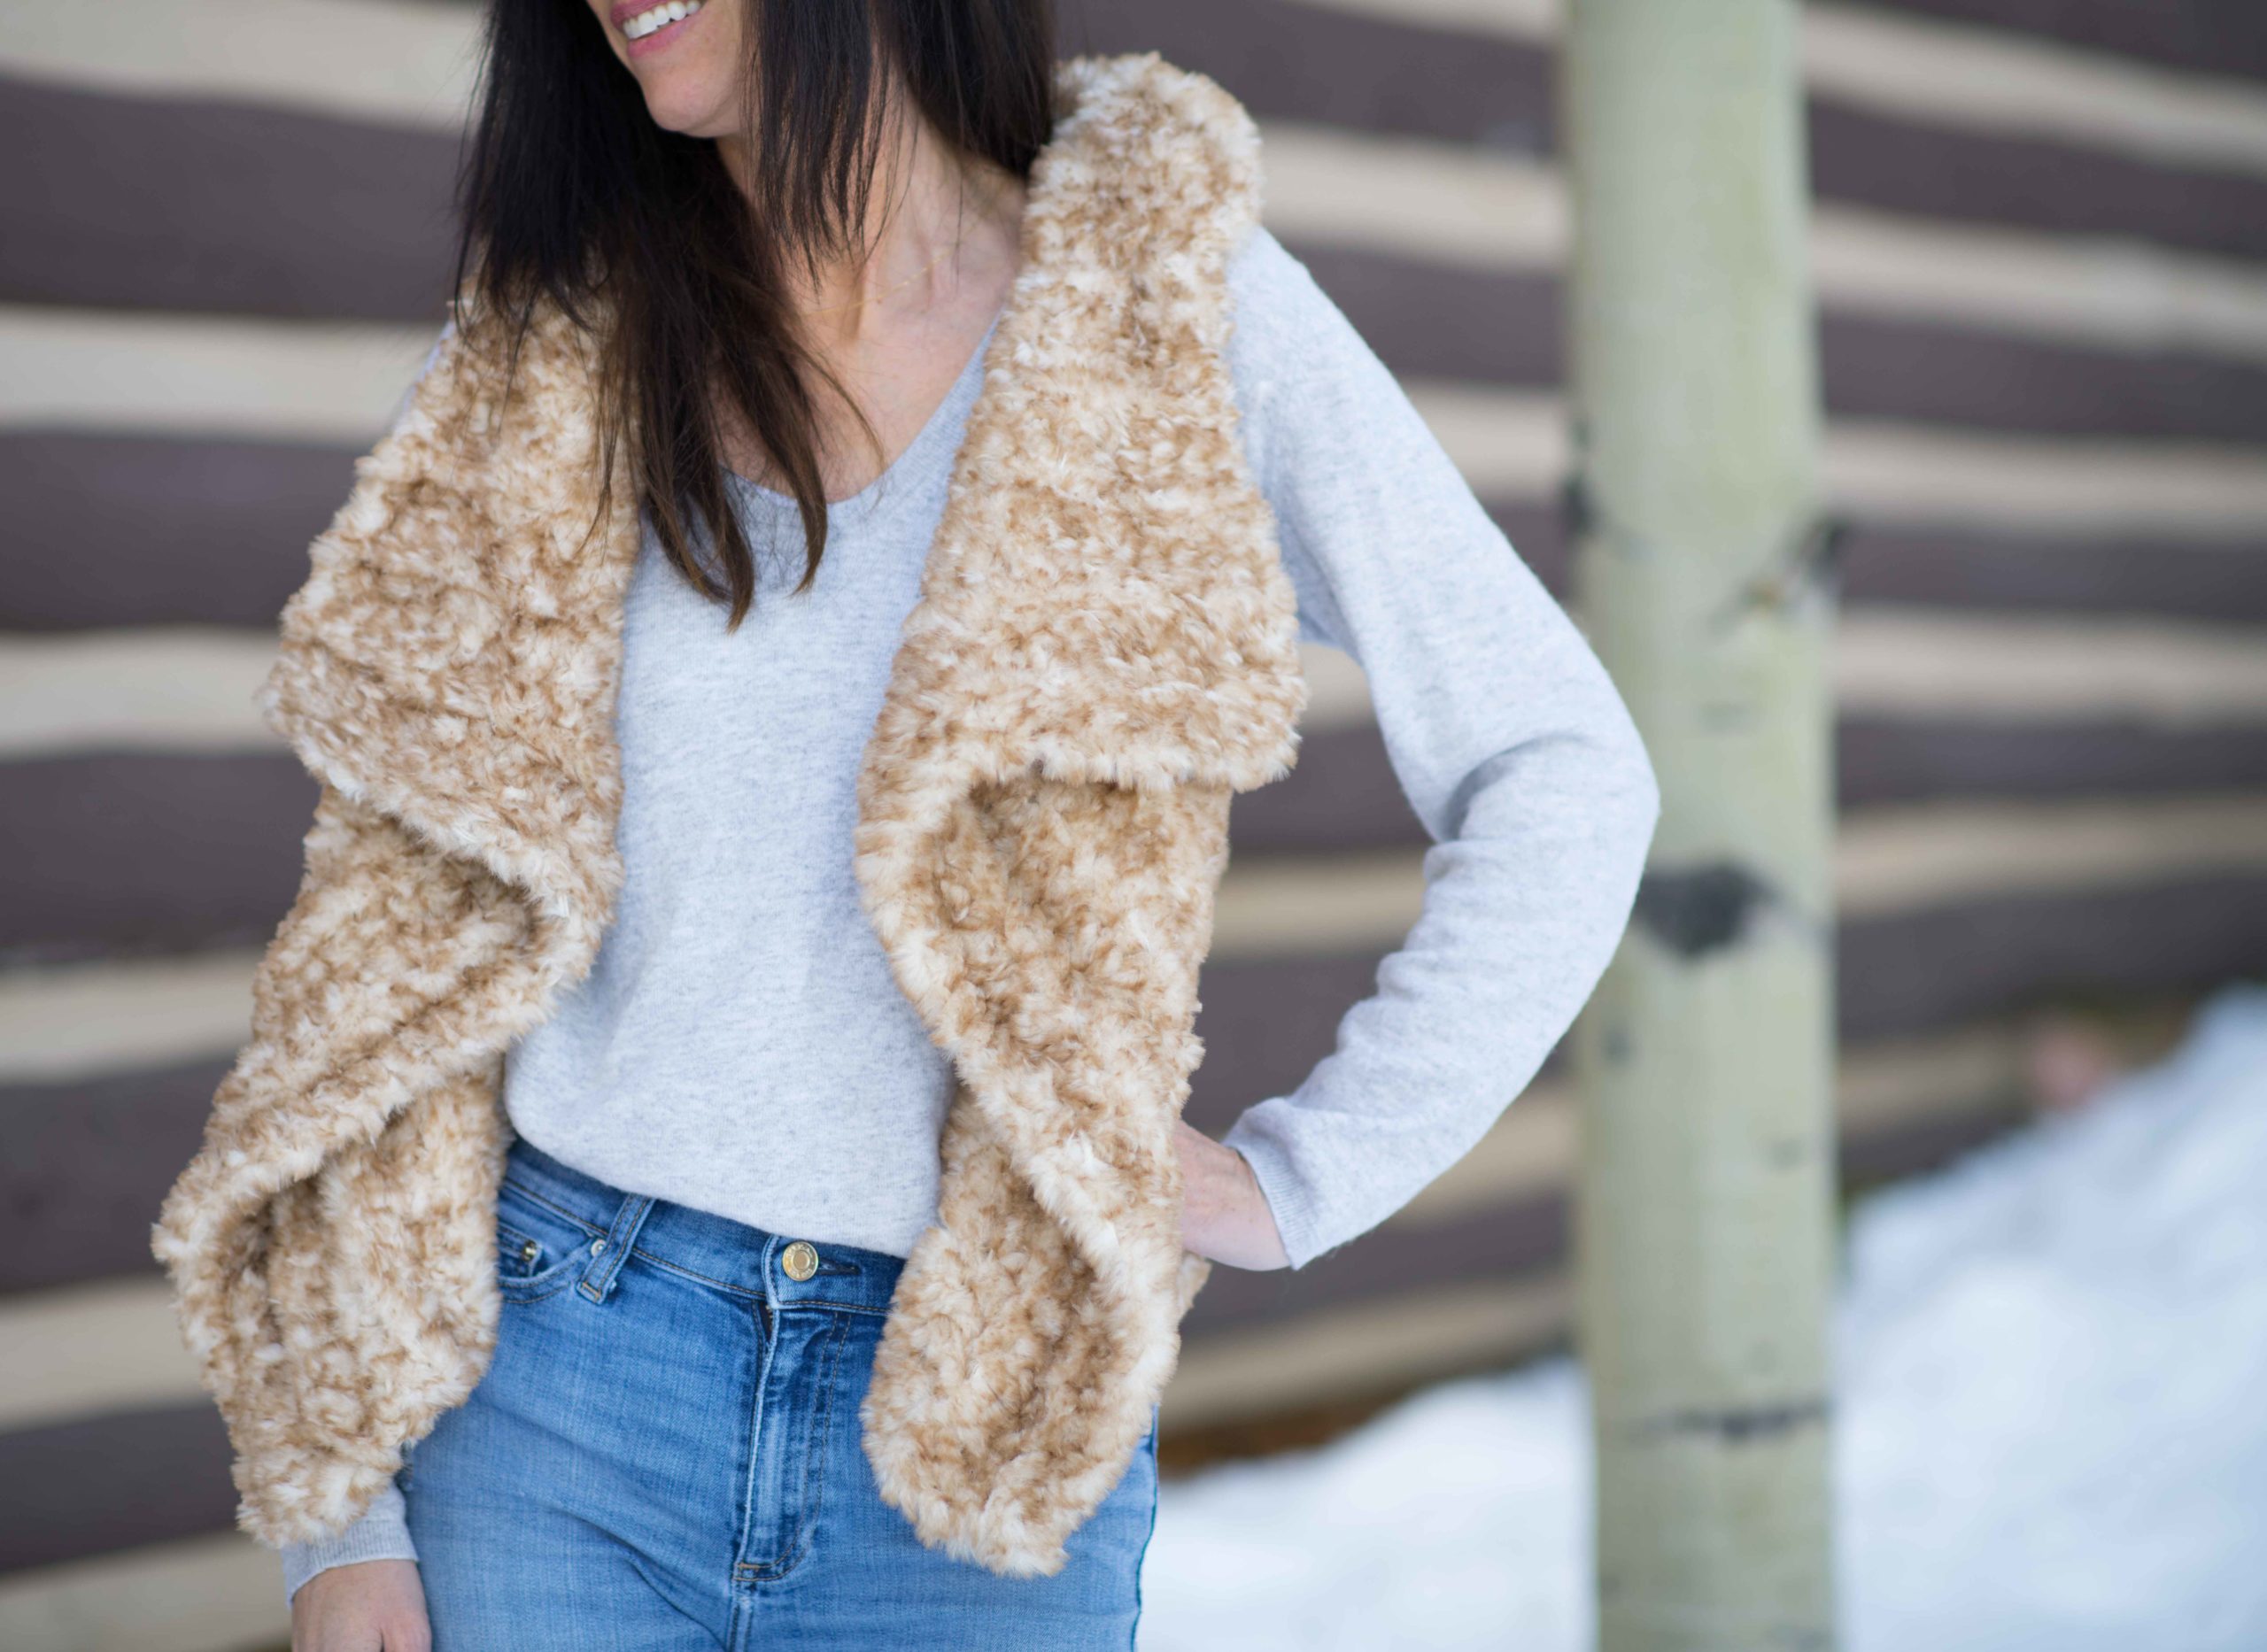
Hello friends! I’ve been wanting to design something like this crocheted cowl vest since last year when I saw a similar sweater in a store front during my visit to New York City. It looked like the coziest, most comfortable thing to wear in the winter. What I love most about this vest is the large cowl neck that’s super simple to create and adds a lot of warmth and coziness. It’s also super easy to make since it’s essentially two rectangles that are seamed and the turtleneck is added at the end. Once again, it’s made with one of my fave stitches, the granite stitch which gives it almost a knit or woven look. The chunky yarn really seems to make the stitches “pop” and the wool is warm for cold days. The color options are of course endless with this crocheted vest! For fall it would be stunning in a rust or a taupe color, don’t you think? What colors would you use?
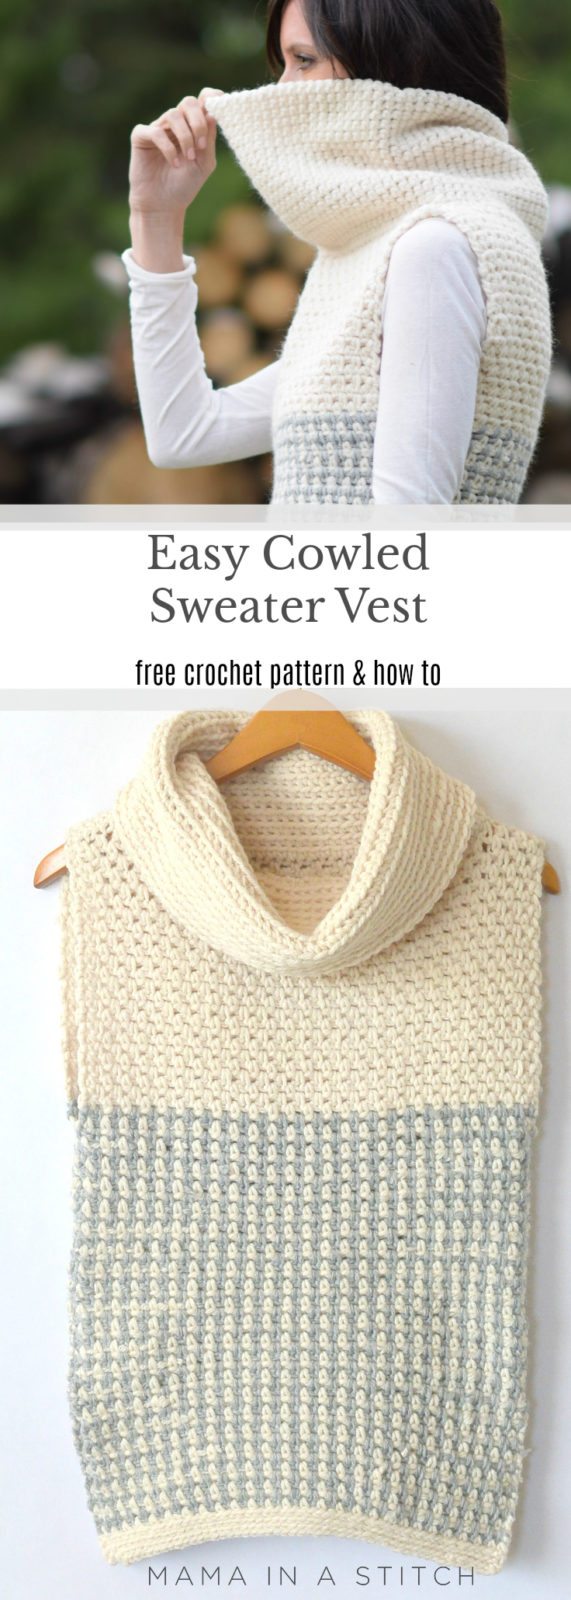
The bottom edging is made with several rows of simple slip stitches which appear to be knit. The entire vest is simple to make with basic crochet stitches and no complicated shaping. (You know me, I don’t like shaping or tons of counting stitches)
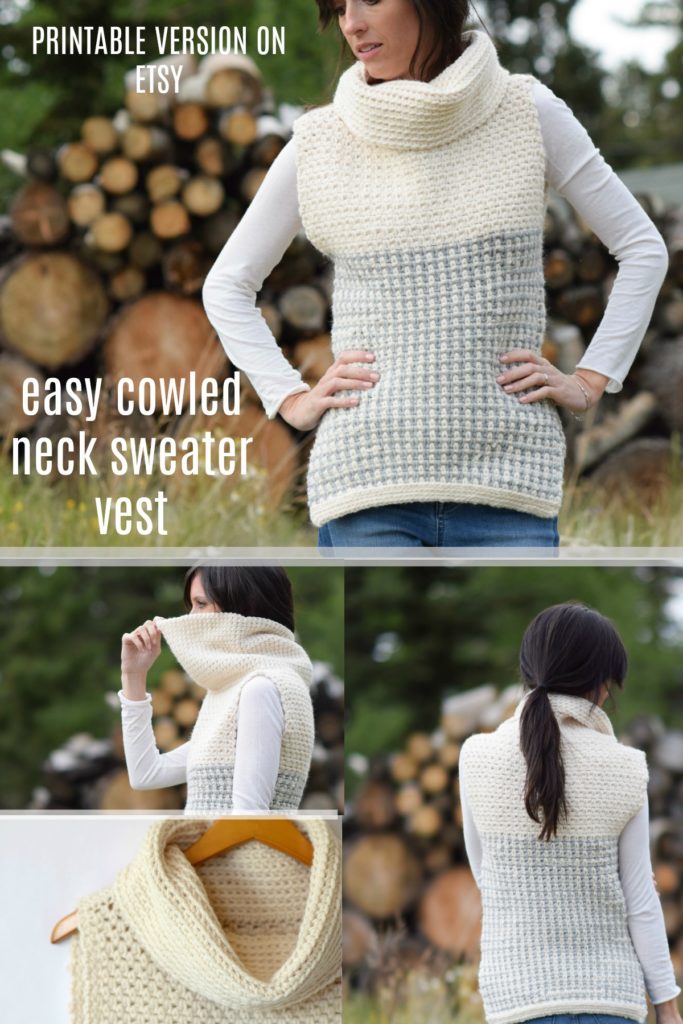
Explanation: This beautiful cowl neck crocheted vest will keep you warm and on trend this fall and winter. The construction is super simple and the stitch pattern stunning. Enjoy!
Level: Easy + (You should be very comfortable with basic crochet stitches)
You will need:
Size K 6.5mm crochet hook
Size L 8.0 mm crochet hook
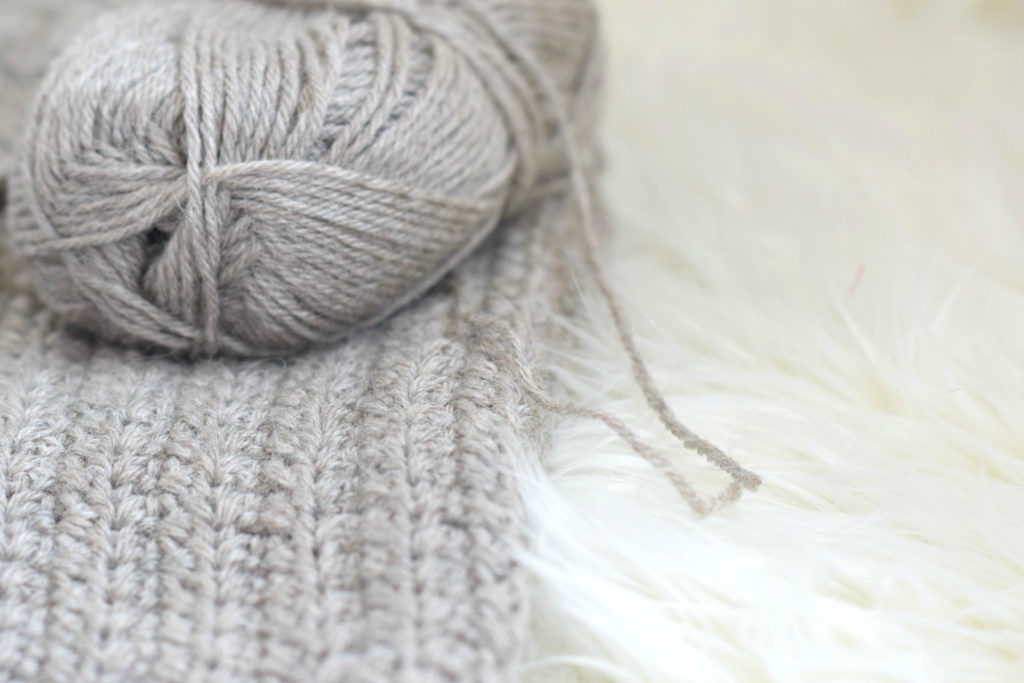
Lion Brand Yarn Wool Ease Chunky Yarn (*Approximate Yarn Needs) in Fisherman 4 skeins & 2 skeins in Silver Grey (140 g/skein) (Pattern uses approximately 528 g) If you make this in a solid color only, you need 4 skeins only **PLEASE NOTE: I made a boo boo and don’t have exact amounts of yarn for each color listed. The entire sweater uses exactly 528 grams (4 skeins will do it if you make a solid color), however I’ve only listed a guesstimate of how many Grey and Fisherman skeins you will need.
Scissors
Tapestry Needle to weave in ends
Abbreviations and Skills needed:
ch – chain
sc- single crochet
sk st – skip stitch
blo– through the back loop only
ch sp – chain space
Gauge Approximation: 3 stitches per inch & 2.75 rows per inch
Bust Size Circumference Approximation:
XS/Small 32” inches
Pattern is written for a XS/S size
**However, if you would like to modify it for a larger size, you can refer to the following:
Medium: Add 6 chain stitches to starting chain of each panel
Large: Add 12 chain stitches to starting chain of each panel
X Large: Add 18 chain stitches to starting chain of each panel
Note: You may need to purchase more yarn for larger sizes. In addition, for the sizes Large – XL, ensure your piece is at least two inches longer than the pattern indicates for the XS/Small size by crocheting for more rows and more length. By adding the chain stitches above, your piece should measure approximately these sizes around the bust:
Medium 36” inches
Large 40” inches
XL 44” inches
Notes:
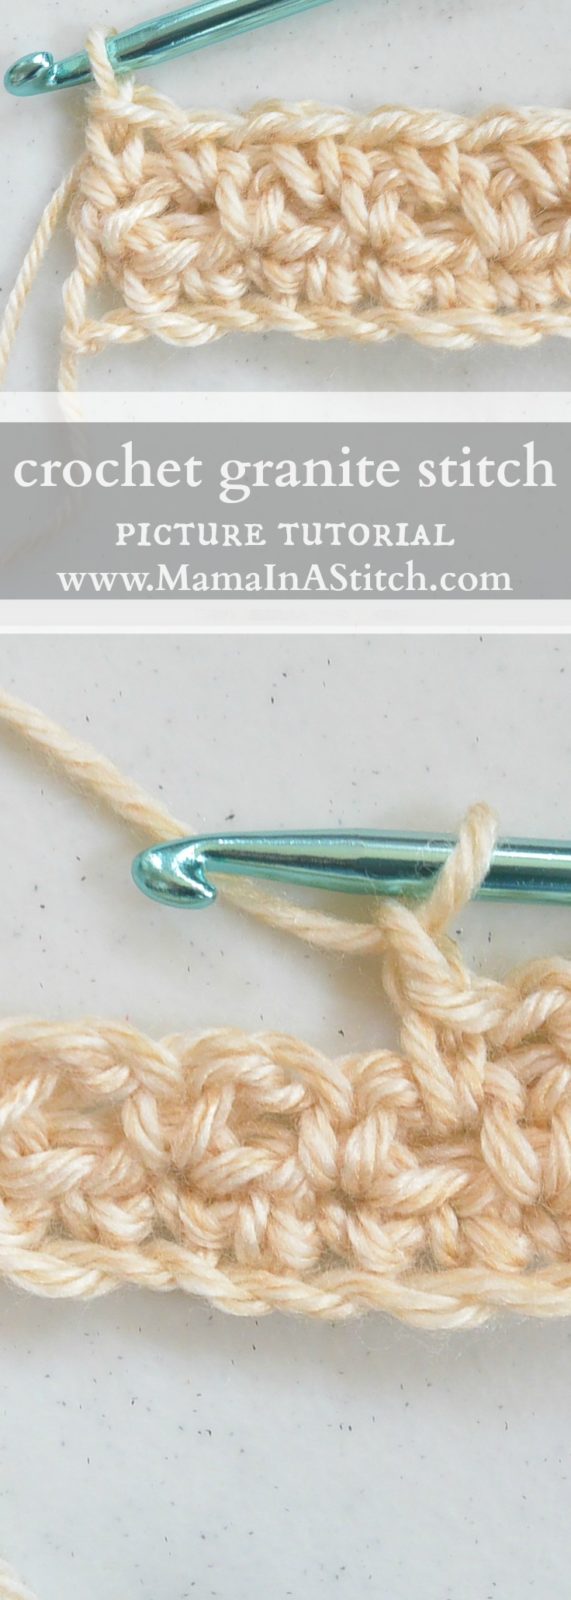
This sweater is crocheted with the granite stitch (aka moss stitch). If you have never used done this stitch, you may want to practice on a small swatch before you attempt the vest. Simply follow along with the tutorial on my blog. You can find the full picture tutorial on how to make this stitch on my blog here: https://www.mamainastitch.com/how-to-crochet-the-granite-or-moss-stitch/
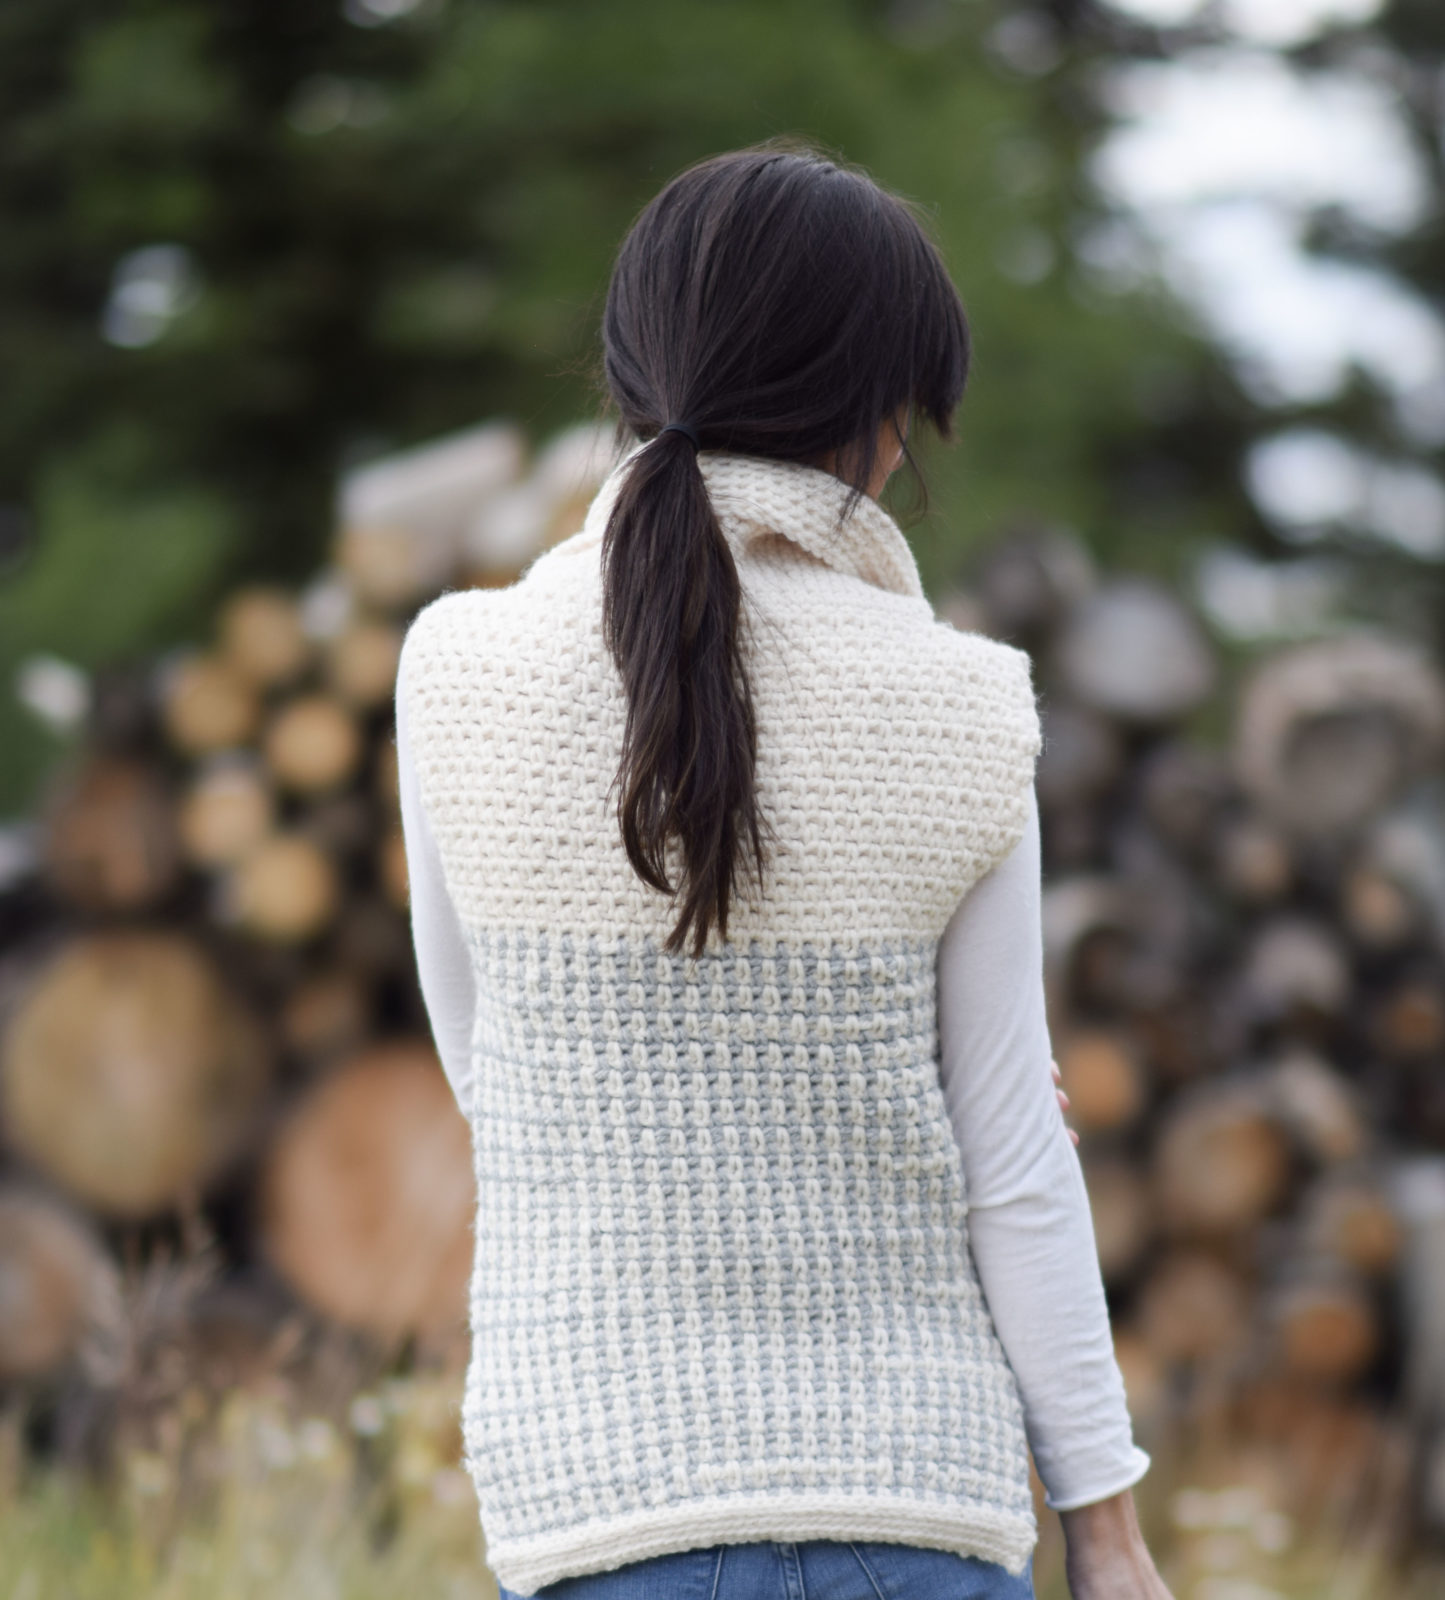
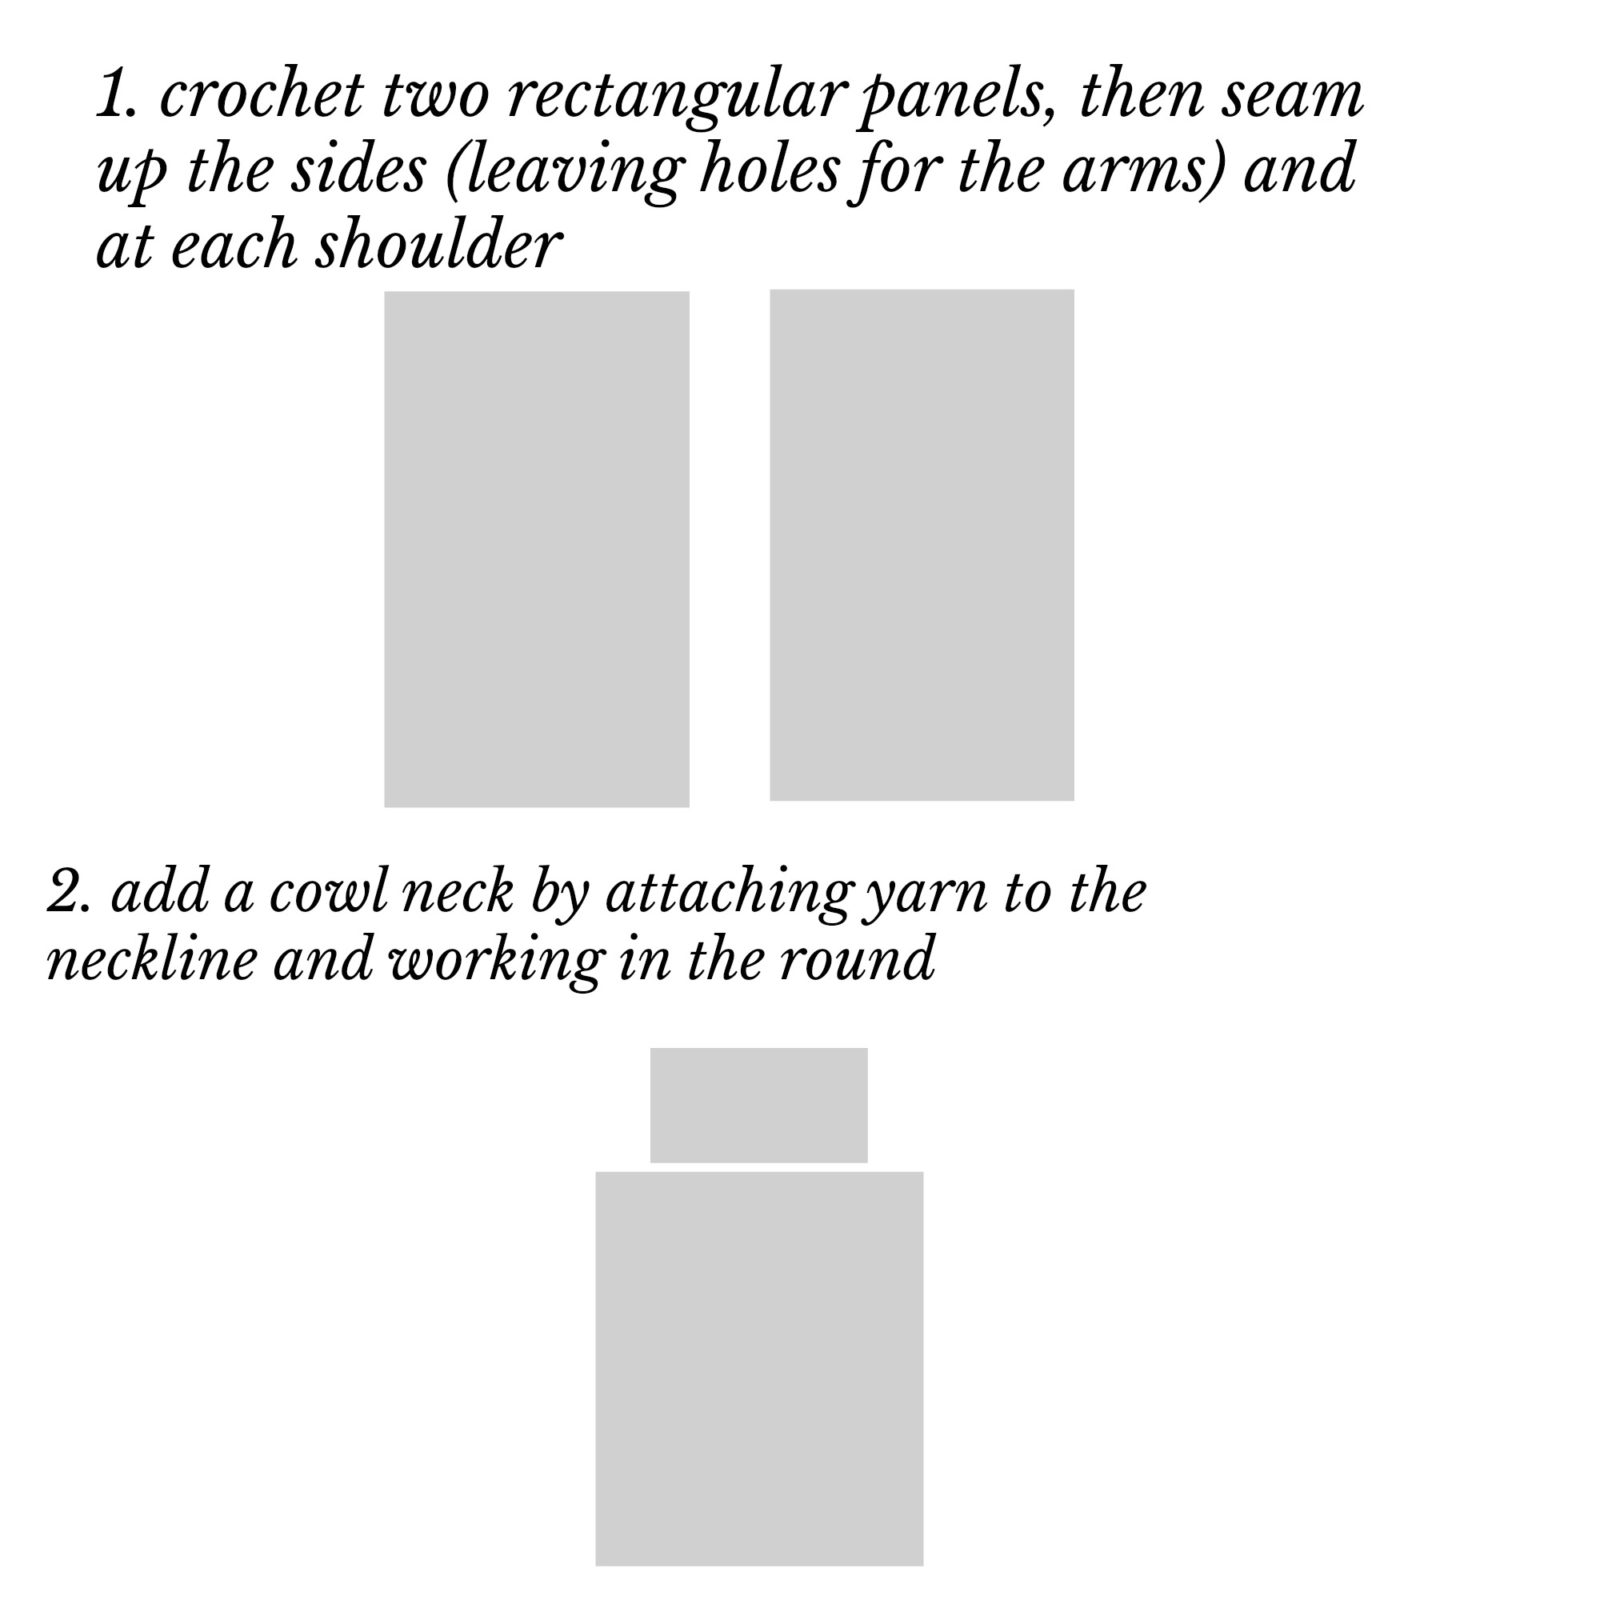
This sweater is worked flat and is made by creating one front panel and one back panel which are then seamed. It is worked from the top down.
You may also choose to forgo the striping and make this a solid color. This will use only 4 skeins of the Lion Brand Wool Ease Chunky yarn.
*Crochet loosely if you want a more relaxed fit as the stitch work can get tight.
*You will crochet the cowl neck in the round, so you should be familiar with crocheting in the round.
Crocheted Cowled Sweater Vest Pattern
Ch 49 with Fisherman (Pattern written for XS/S – Please see “Note” above on suggestions to adjust sizing for larger sizes)
Row 1 Sc in 2nd st from hook, *ch 1, sk ch, sc in next ch. Repeat from * across. Sc in last stitch of row.
Row 2 Sc in in 1st sc, *ch 1, sk st, sc in ch sp below. Repeat from * across. Sc in last stitch of row.
Repeat row 2 for approximately 8” inches (You are simply making single crochet stitches in the chain spaces below across the row)
**At this point, you should consider measuring your piece across to see if it will fit across your bust. Make adjustments if needed by either changing your hook size or your tension. Two of these panels seamed should fit around your bust comfortably.
Striped Section:
Change color to Silver/Grey
Repeat row 2
Change color to Fisherman
Repeat row 2
Continue this pattern, alternating the color Silver/Grey and the color Fisherman for each row until your entire piece (from top to bottom, including both the solid Fisherman and striped sections) measure approximately 21.5” inches long.
Bottom Edge
Row 1 With Fisherman, slip stitch across row, ch 1, turn
Repeat row 1 until you have approximately 1” inch of slip stitch rows
Tie off and weave in ends.
Repeat this pattern to make the back panel of your crocheted top.
Seaming:
Side Seaming:
Lay pieces together in order to seam. Begin your seam 9” inches from the top of your pieces. (This 9” inches will be the opening for the arms) Seam from this point downward with a simple whip stitch. End your seam 6” inches from the bottom. This will create an opening of 6” inch opening at the bottom side of your top adding style and room for the hips. Repeat this on both sides.
Top Seam:
You will now seam at the shoulders. Attach your yarn to the outer edge and seam evenly inward on each side leaving a space in the center of approximately 11.5” inches. Tie off and weave in ends.
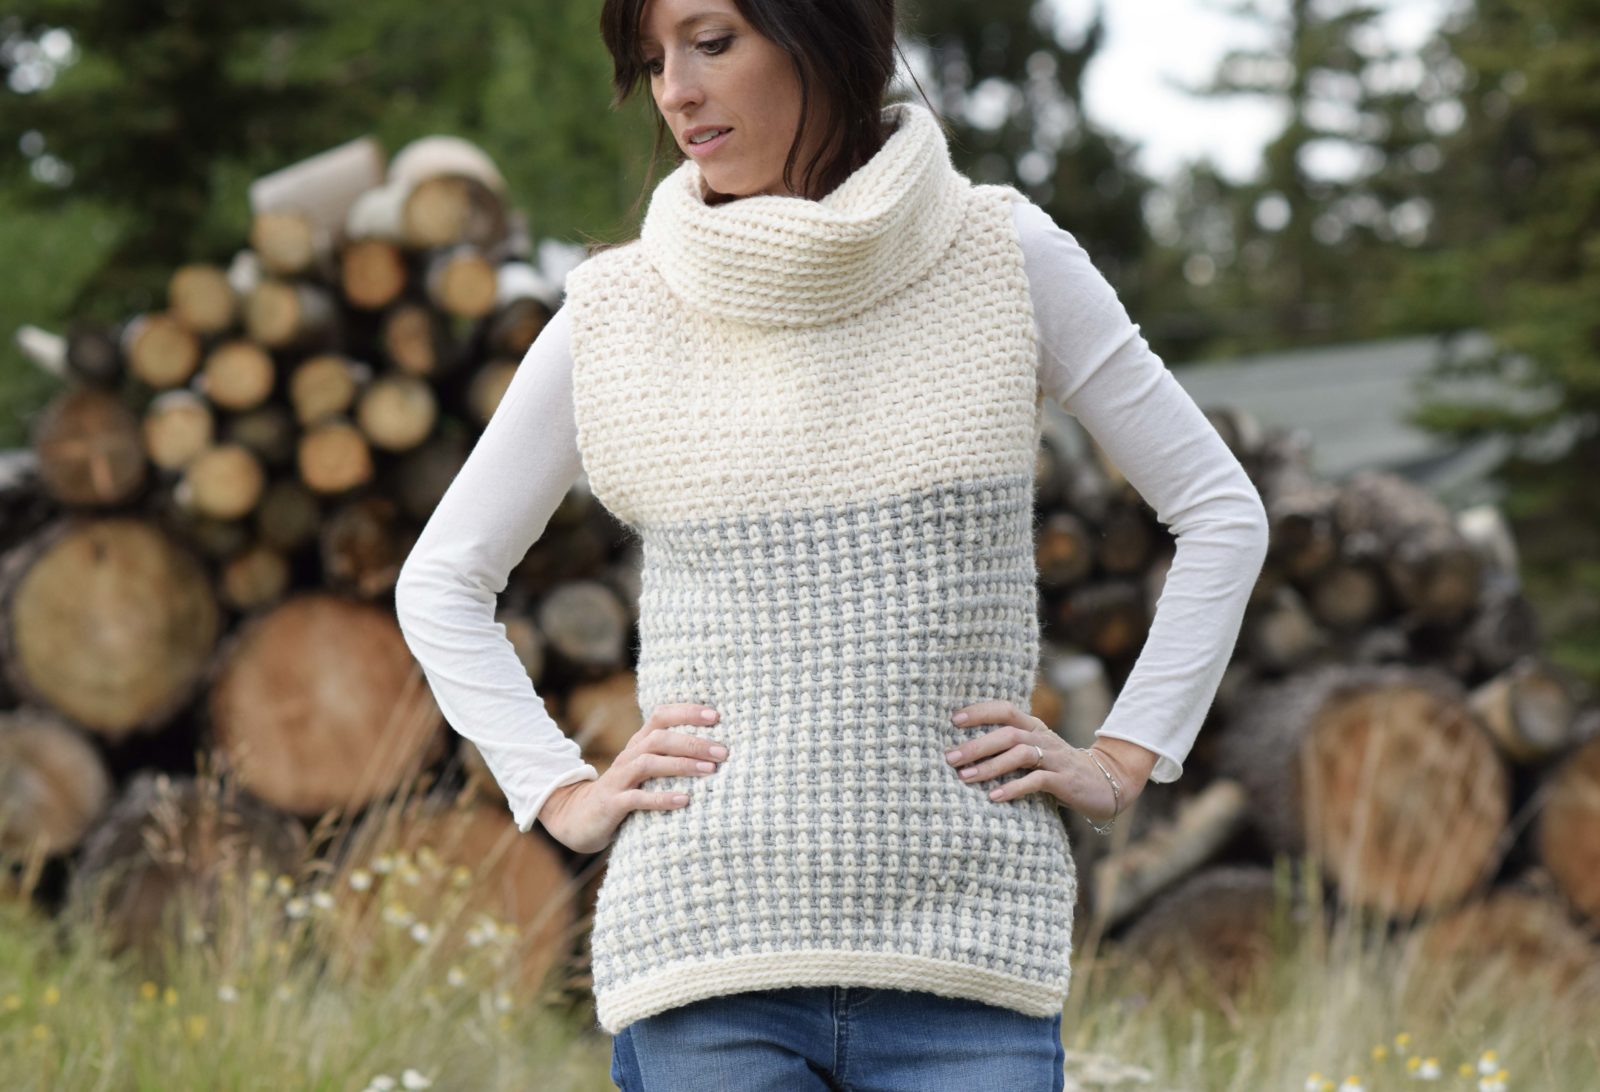
Cowl Neck Portion:
With your size L 8.0 mm crochet hook, attach Fisherman yarn to neck opening. **Work this section in continuous rounds. No need to join in the round or count rounds with stitch markers.
Round 1 Sc evenly around
Round 2 Sc blo evenly around
Repeat round 2, working in continuous rounds until neck cowl measures 8” inches tall. Tie off and weave in ends.
That is all there is to it! Two rectangles and an easy peasy neck.
I hope you enjoyed vest and let me know if you make one! And feel free to follow along as I share several fall inspired patterns over the next several weeks as part of my Cabin Fever Fall Collection! Thanks so much as always and have a lovely day my friends!
XO
Jessica
If you liked this, you might also like:
![]()
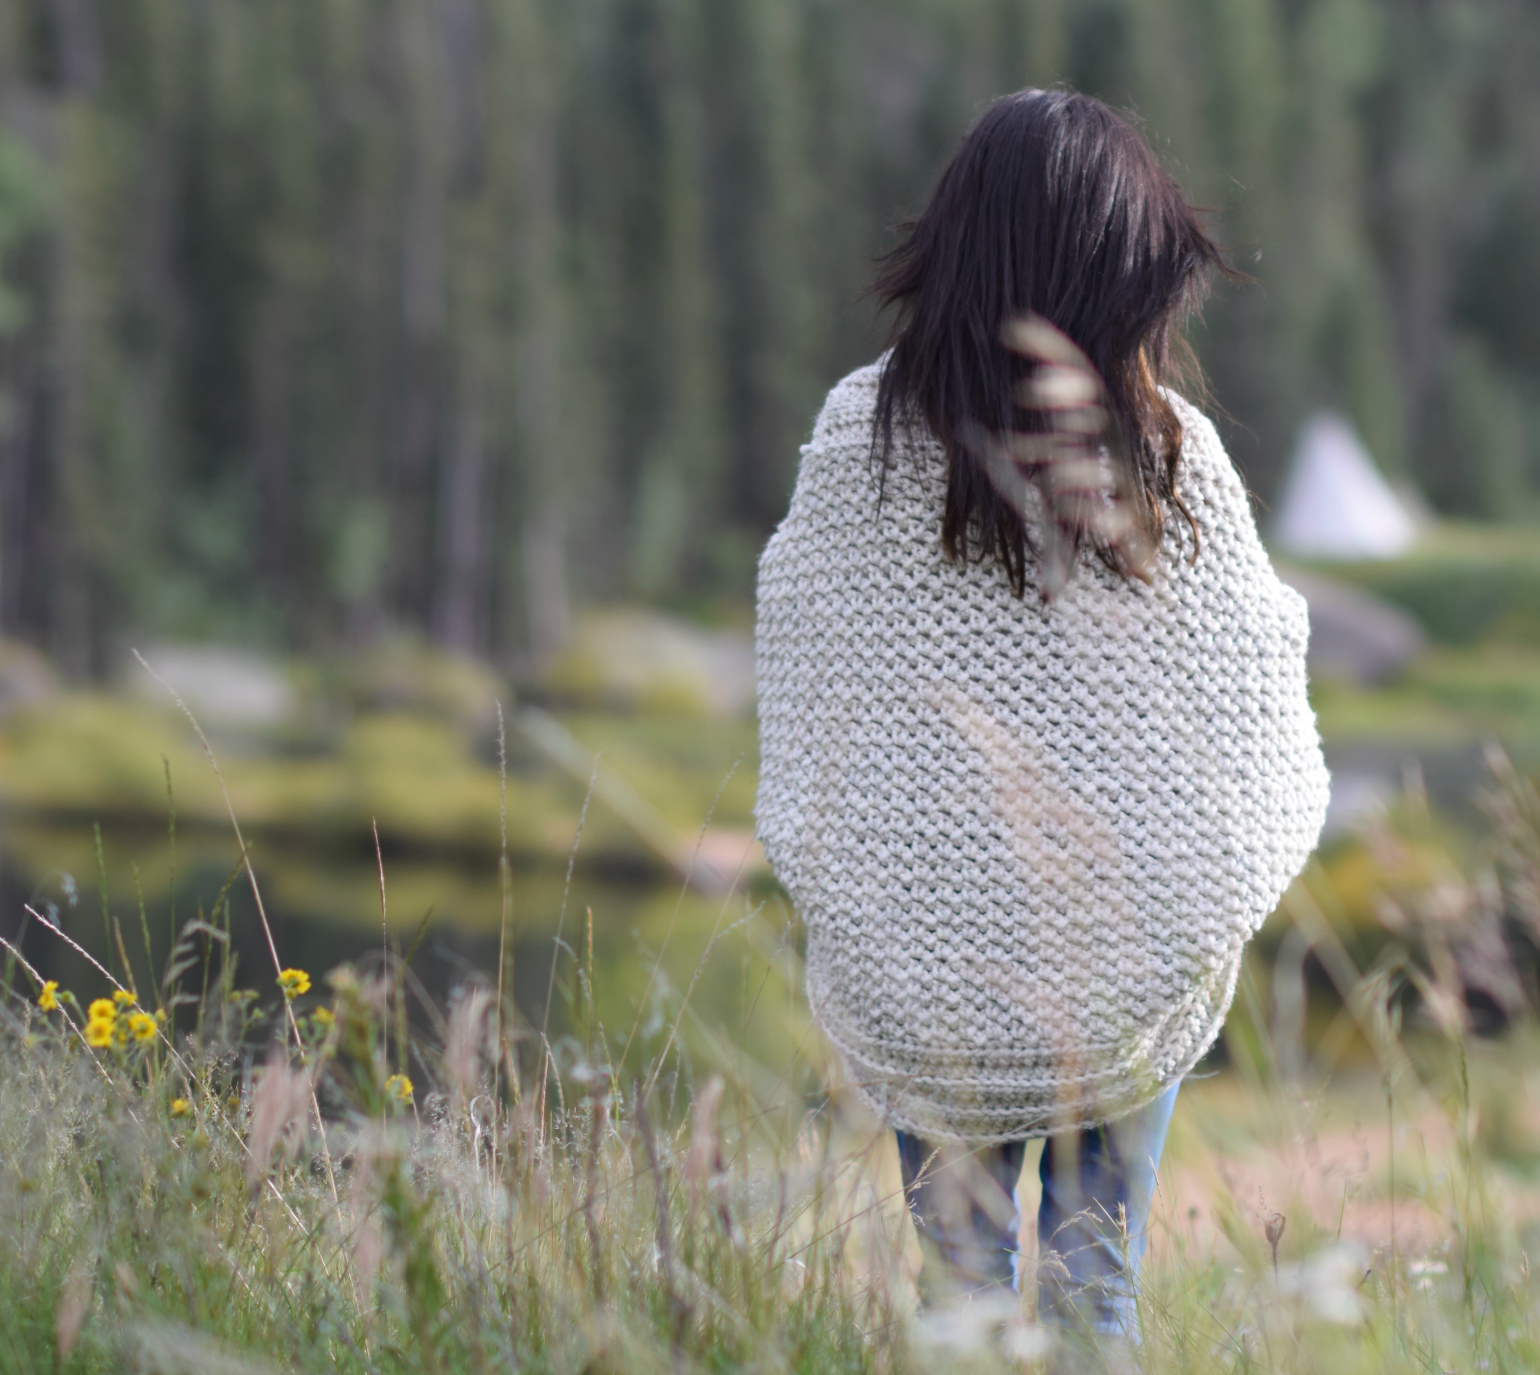
Light Frost Blanket Sweater
![]()
Baja Blanket Sweater

In ❤️!! Can’t wait to start this after I start and finish your shrug!!!
Ahhh! That’s awesome! I hope you’re enjoying the shrug!
Love this and will be so nice and warm to wear when the snow starts flying!! Can’t wait to get it started so it’s ready for the snow!!! Thank you again for another great pattern!!!!!!!!
Aww, you’re welcome Brenda. So happy that you like it. And the snow will be here before we know it!
Simply beautiful!!! I hope to see a knit pattern soon. Your patterns are the best
Thanks so much!
I’m pretty sure I’ll be making this for my 3 y/o & myself. Love it.
In the two-color section, did you carry the yarns along, or did you run them up the sides? (I’m guessing that as you seamed the edges later, you didn’t cut the yarns at each end as you went.) Thank you for the pattern!
I’m curious about this as well. I don’t typically do stripes, and this seems like it would result in a lot of loose ends…any advice on how best to handle them?
This is nice! I better learn quick! The snow Wil be here before you know it!
I really love this! Do you think it would be possible to add sleeves? I made your Light Frost Blanket sweater for my daughter and it turned out really nice 🙂
Very nice! I wonder how this would look with planned pooling. Thanks for sharing your talent with us!
I enjoy your work Jessica
Hi Jessica. I love this pattern but I would like to do it in cotton because I get a lot of statics on my body. Which yarn do you recommen.
Thanks in advance
Yocasta
I have trouble finding chunky cotton yarn, but you could always hold two strands of worsted weight yarn together. 🙂 Just be sure to check your gauge and also that you have enough stretch in the fabric.
Thanks
Did you use your K Size hook for the entire body and the L for only the cowl/neck part? Thanks
Yes Nicole – thanks for asking. The K was used throughout – but let me say that if you crochet tightly, please use the L. The fabric can get tight!
You are SUPER talented. I found your site from Pinterest and I am thrilled I did! You are too cute and remind me of my adult daughters they are tiny & petite. (Both 5.5″ & 110 lbs & 102 lbs). I think this will look really cute on them both and will be making as Christmas gifts for them in their individual taste of colors. Since you appear to be teeny tiny as they are, I think your patterns will be PERFECT as long as I match the gauge! Best wishes to you and your family!
Hi Chellie! Thanks so much for your sweet words. I’m so glad that you found me on Pinterest! Yes, your daughter sound just my size – haha! I hope you enjoy making this – just be sure to crochet loosely or consider going up a hook size. The fabric can get tight depending on how tight you crochet. Best wishes to you too Chellie and thanks again for your note to me!
Well I made it and it is beautiful but sadly it is too small.
I’m so sorry to hear that Chevy!
That’s ok, life is full of do overs. I’m already making it again.
I’be got another Kimono wip that I ended up making from the light frost shrug I finished that was too big!
Oh wow! That’s too bad to hear it turned out too large!
Probably a stupid question but do you still chain one at the end of each row when you’re turning?? I see that you chain one and turn at the end of each row on your tutorial for the granite stitch but not in this pattern. Thanks!!
Yes! Thanks for the reminder about that!
hi Jessica,
My name is Monica. I just ran across a picture of your sweater vest. I clicked on it and found your website. It’s absolutely beautiful, exactly what I was looking for, and I’m going to try it. I am not a blog, facebook, social media person. I would just like to know how to get the pattern so I can print it and try to make this vest? Also by subscribing does this allow me to watch a tutorial video on the vest?
Hi! Sure thing – you can see the pattern here:
https://www.mamainastitch.com/easy-crochet-cowled-sweater-vest/
I’d go up a hook size probably so that it isn’t quite as tight if I make it again. 🙂
I always LOVE your patterns and I have done the moss stitch so many times, but I did notice in the pattern, you did not say to chain one at the end of the row. When you click on your tutorial, it states to chain one at the end. Did you chain one on this pattern or not? Just want to make sure before I get too far into it. I love this vest so much!
What is the size of yarn used? Worsted 4ply? I didn’t find any specific details
I used a chunky 5. Thanks!
Looking forward to trying some of your patterns
I made this sweater and I love it. Thanks for sharing this pattern.
Hi Vera! So glad to hear that! Thanks for letting me know and you’re welcome of course!
Hi! I have made the body of your tunic using worsted weight yarn and the wattle stitch. I am about to start the cowl but notice that your pictures seem to show the cowl folded over and, therefore, inside out. When doing sc blo, the horizontal lines are on the outside (that’s perfect) but if you then fold the cowl down, the back side would be showing, not the front (and that’s bad). How is your cowl folded but still showing those horizontal lines? .
Thank you for the beautiful pattern and for your help.
Hi I love your pattern and want to do it in a worsted weight with a H hook, it would be a medium size and was just wondering how many stitches do you think I would need for the rectangles. Thanks so much Vanessa
I love this! I’ve made two of your Light Frost Blanket Sweaters – and want to do this – but I think this will have to wait til weather start getting cooler.
I’ve promised myself that I’m going to finish the blanket I’m presently working on – before I start something else….we’ll see if I can keep that promise!
Thank you so much for all you share with all of us! You are so very generous! For those like me who are on tight retirement budget, free patterns can make a big difference in whether or not I take on a project! I am sincerely grateful to you! Not only are your patterns beautiful! – and mostly quite Easy! – but you share so freely with us.
Blessings to you and your family from a grateful fan!
Hi I’m trying to make this beautiful tunic for a friend but I cannot find this yarn. Is there any substitute you can recommend? Thank you
How do you print the pattern without all the ads. I can’t even read it.
You can copy and paste it into Word if you’d like. 🙂