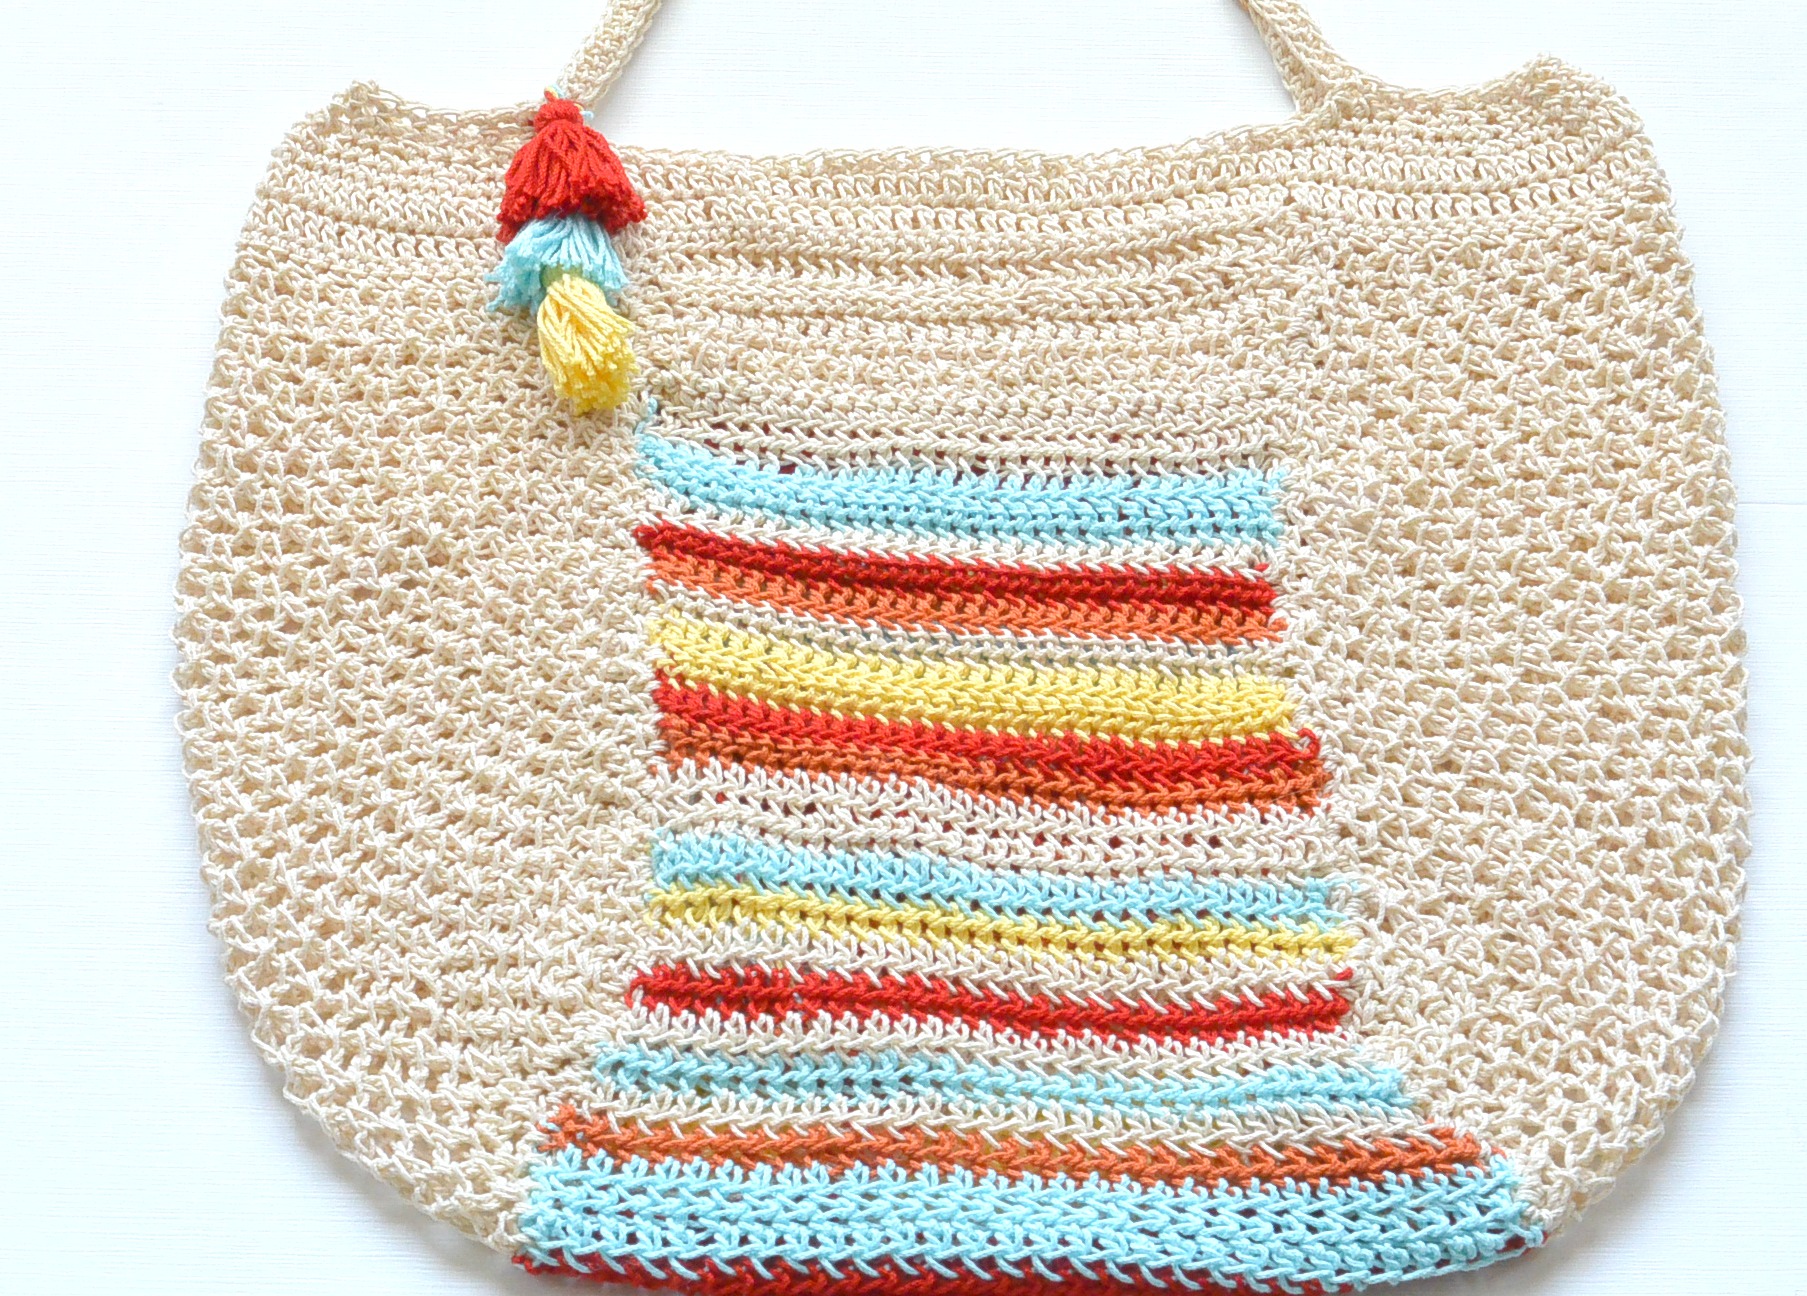
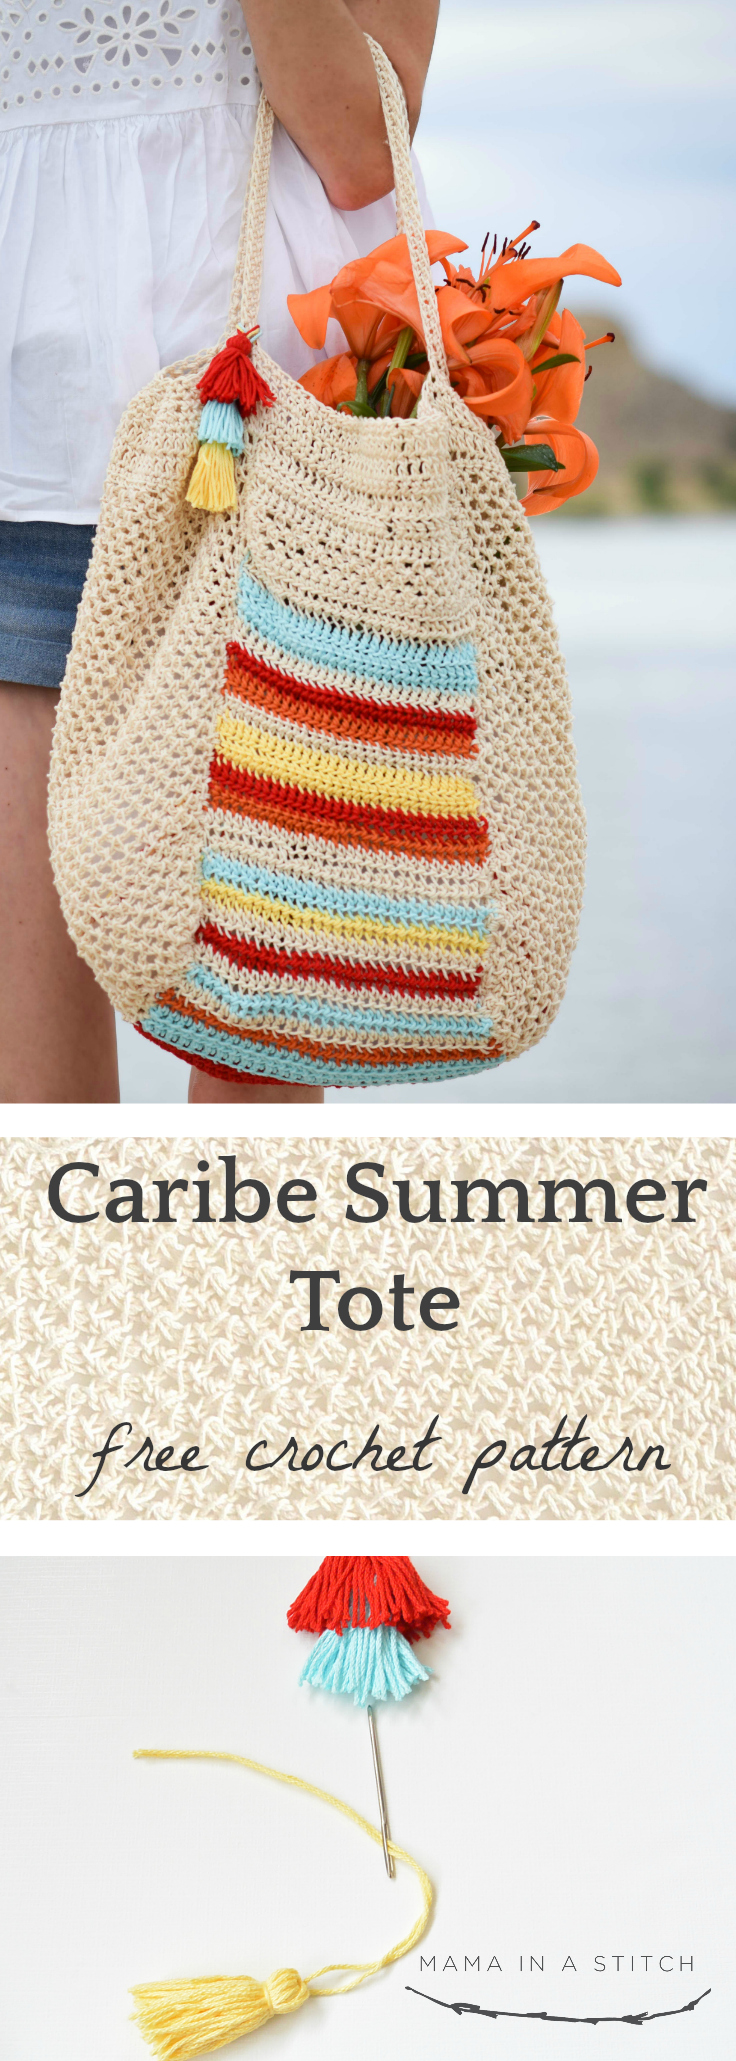
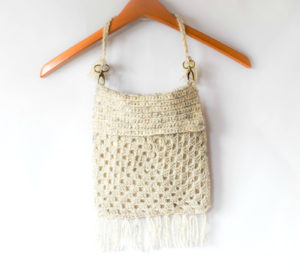
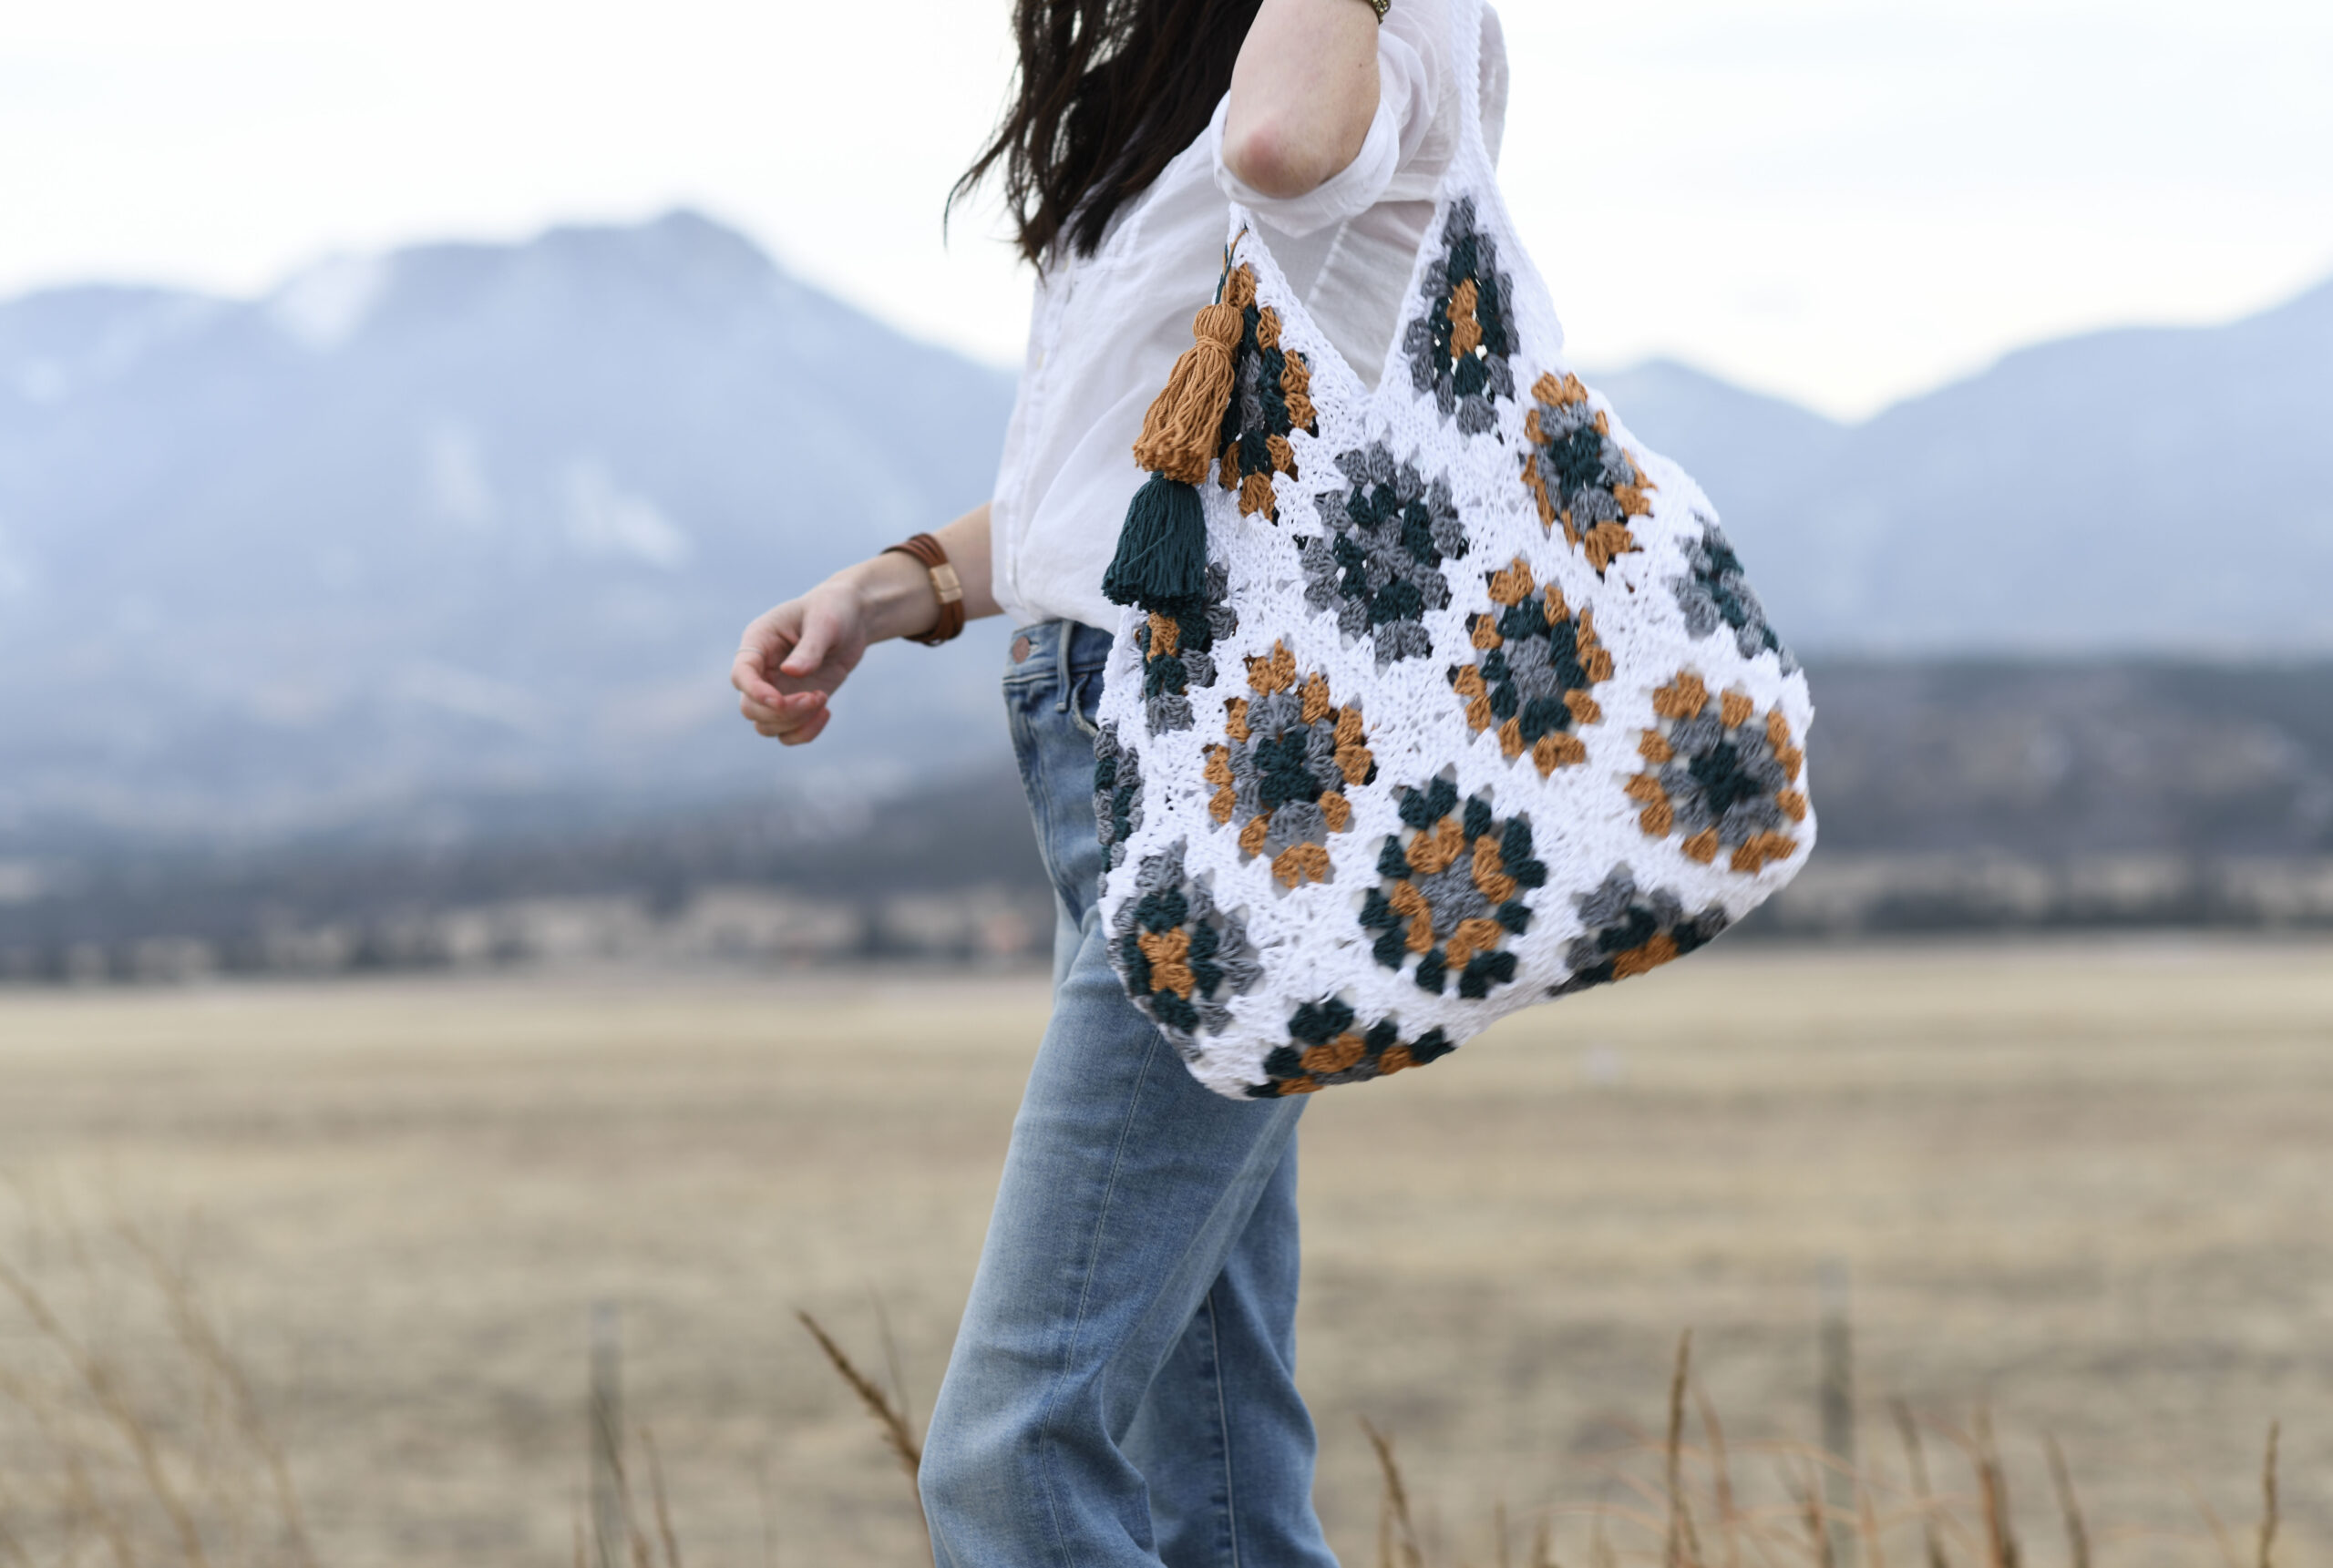
Caribe Big Crocheted Bag Pattern
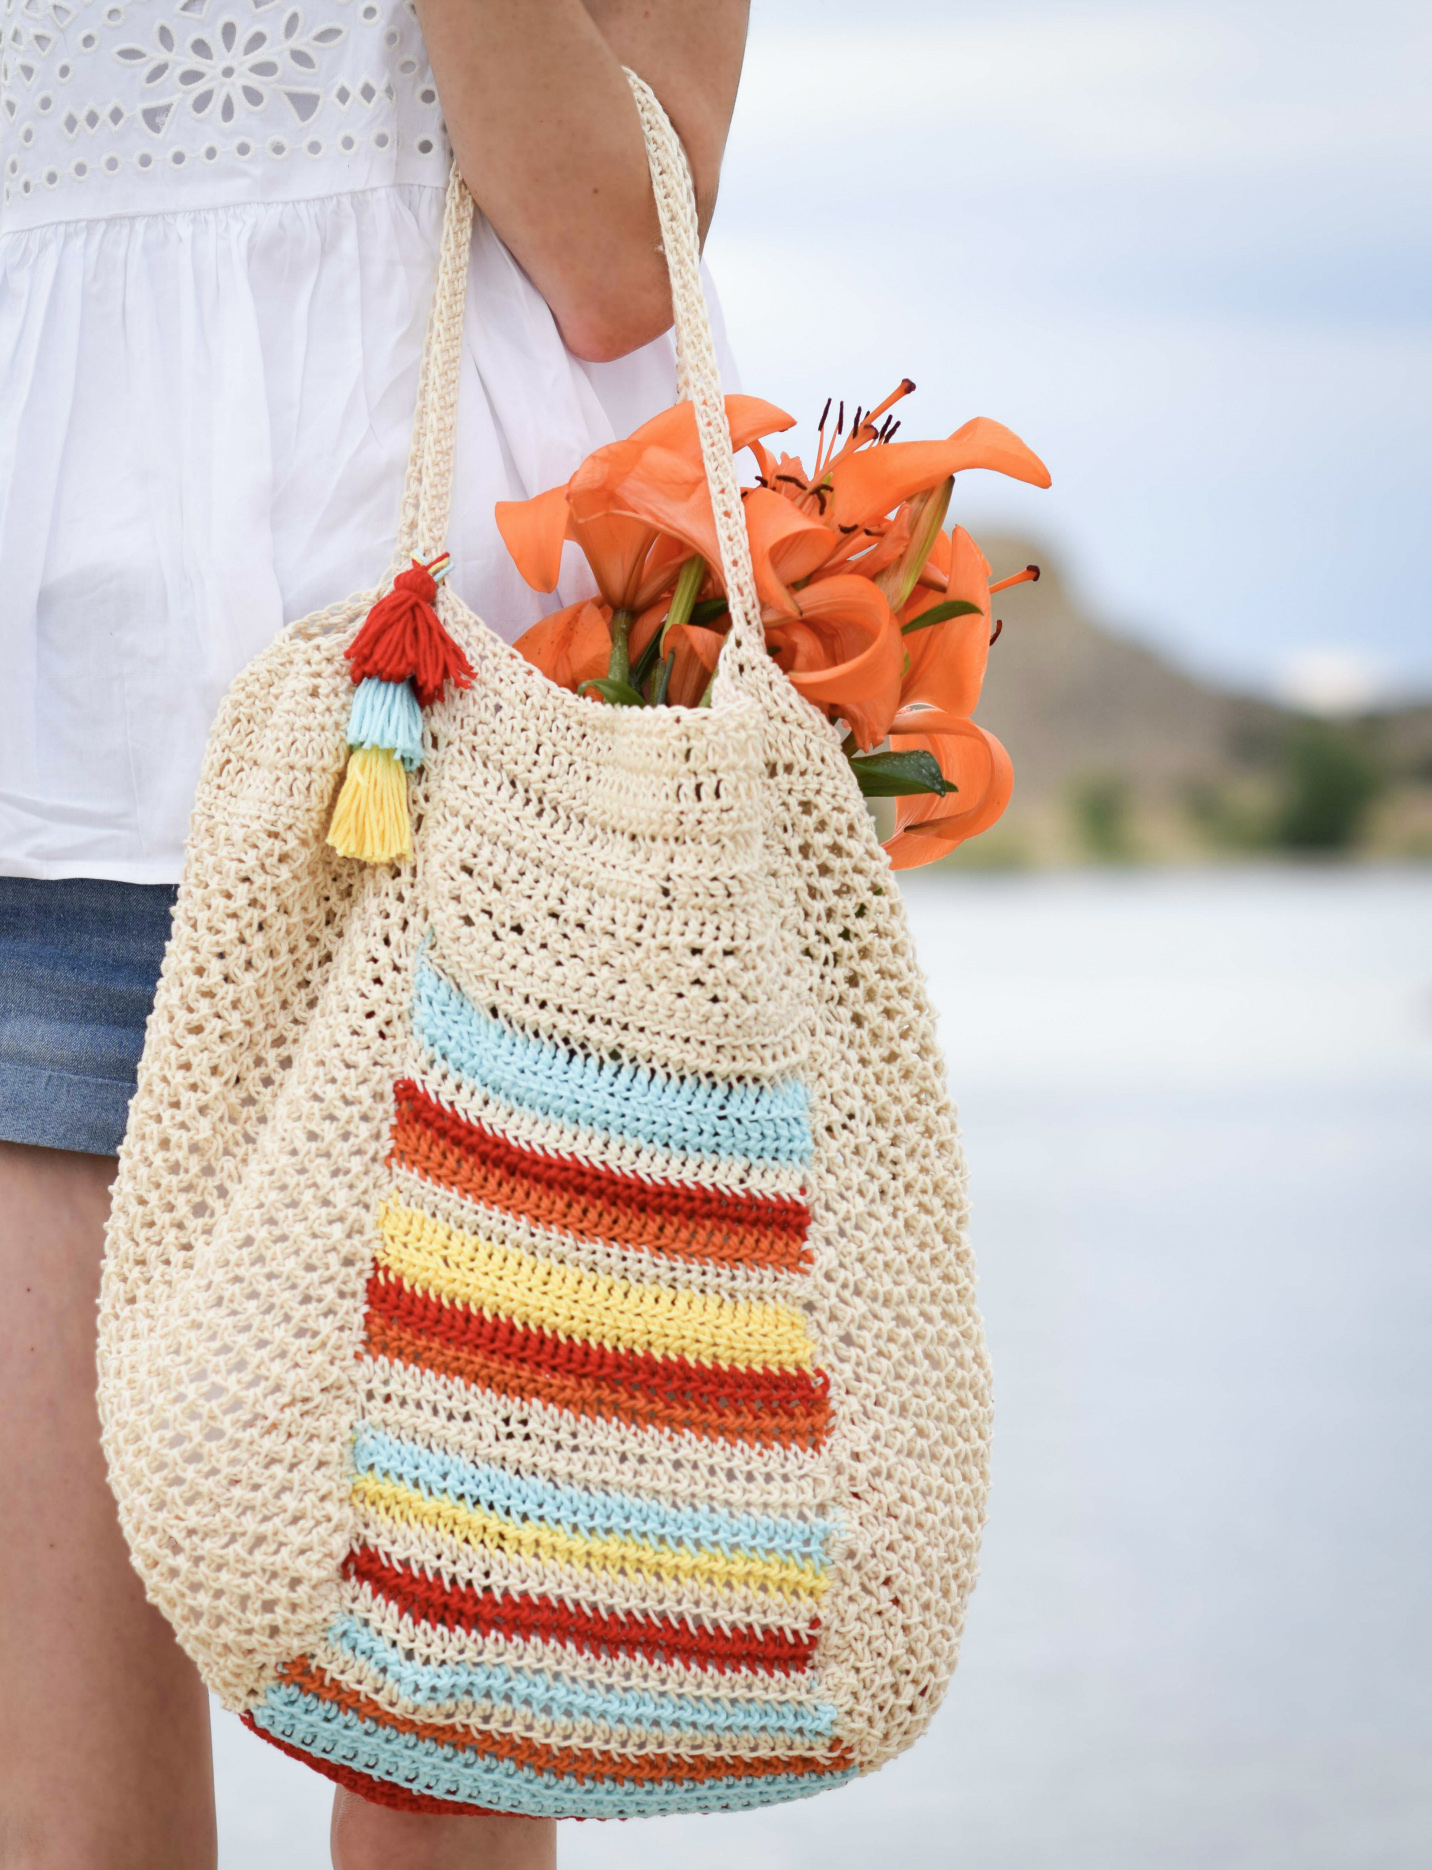
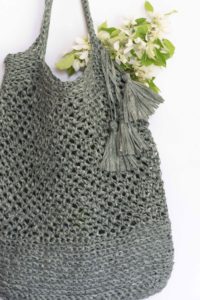
My summer necessity….a big bag. I’m constantly throwing snacks, towels, sunscreen and who knows what else into a tote and heading out the door for trips around town. When I thought about making this crocheted summer bag, it made sense to stick with a good cotton in some bright colors. It’s rare for me to use colorful yarns, but if there is ever a time to use them, it’s with a vacation-esque summer tote, right? The yellow, red and aqua tones in the tote remind me of the happy colors of the Caribbean, hence the name! It’s crocheted with mercerized cotton making it light yet durable for summer use. The simple crochet stitches are easy to work and it can easily be customized with your fave summer colors. 😉 You can scroll down to see the free pattern below, or you may choose to purchase the full kit from Lion Brand Yarn here(currently on SALE), or you can find the printable version from my Etsy shop here.
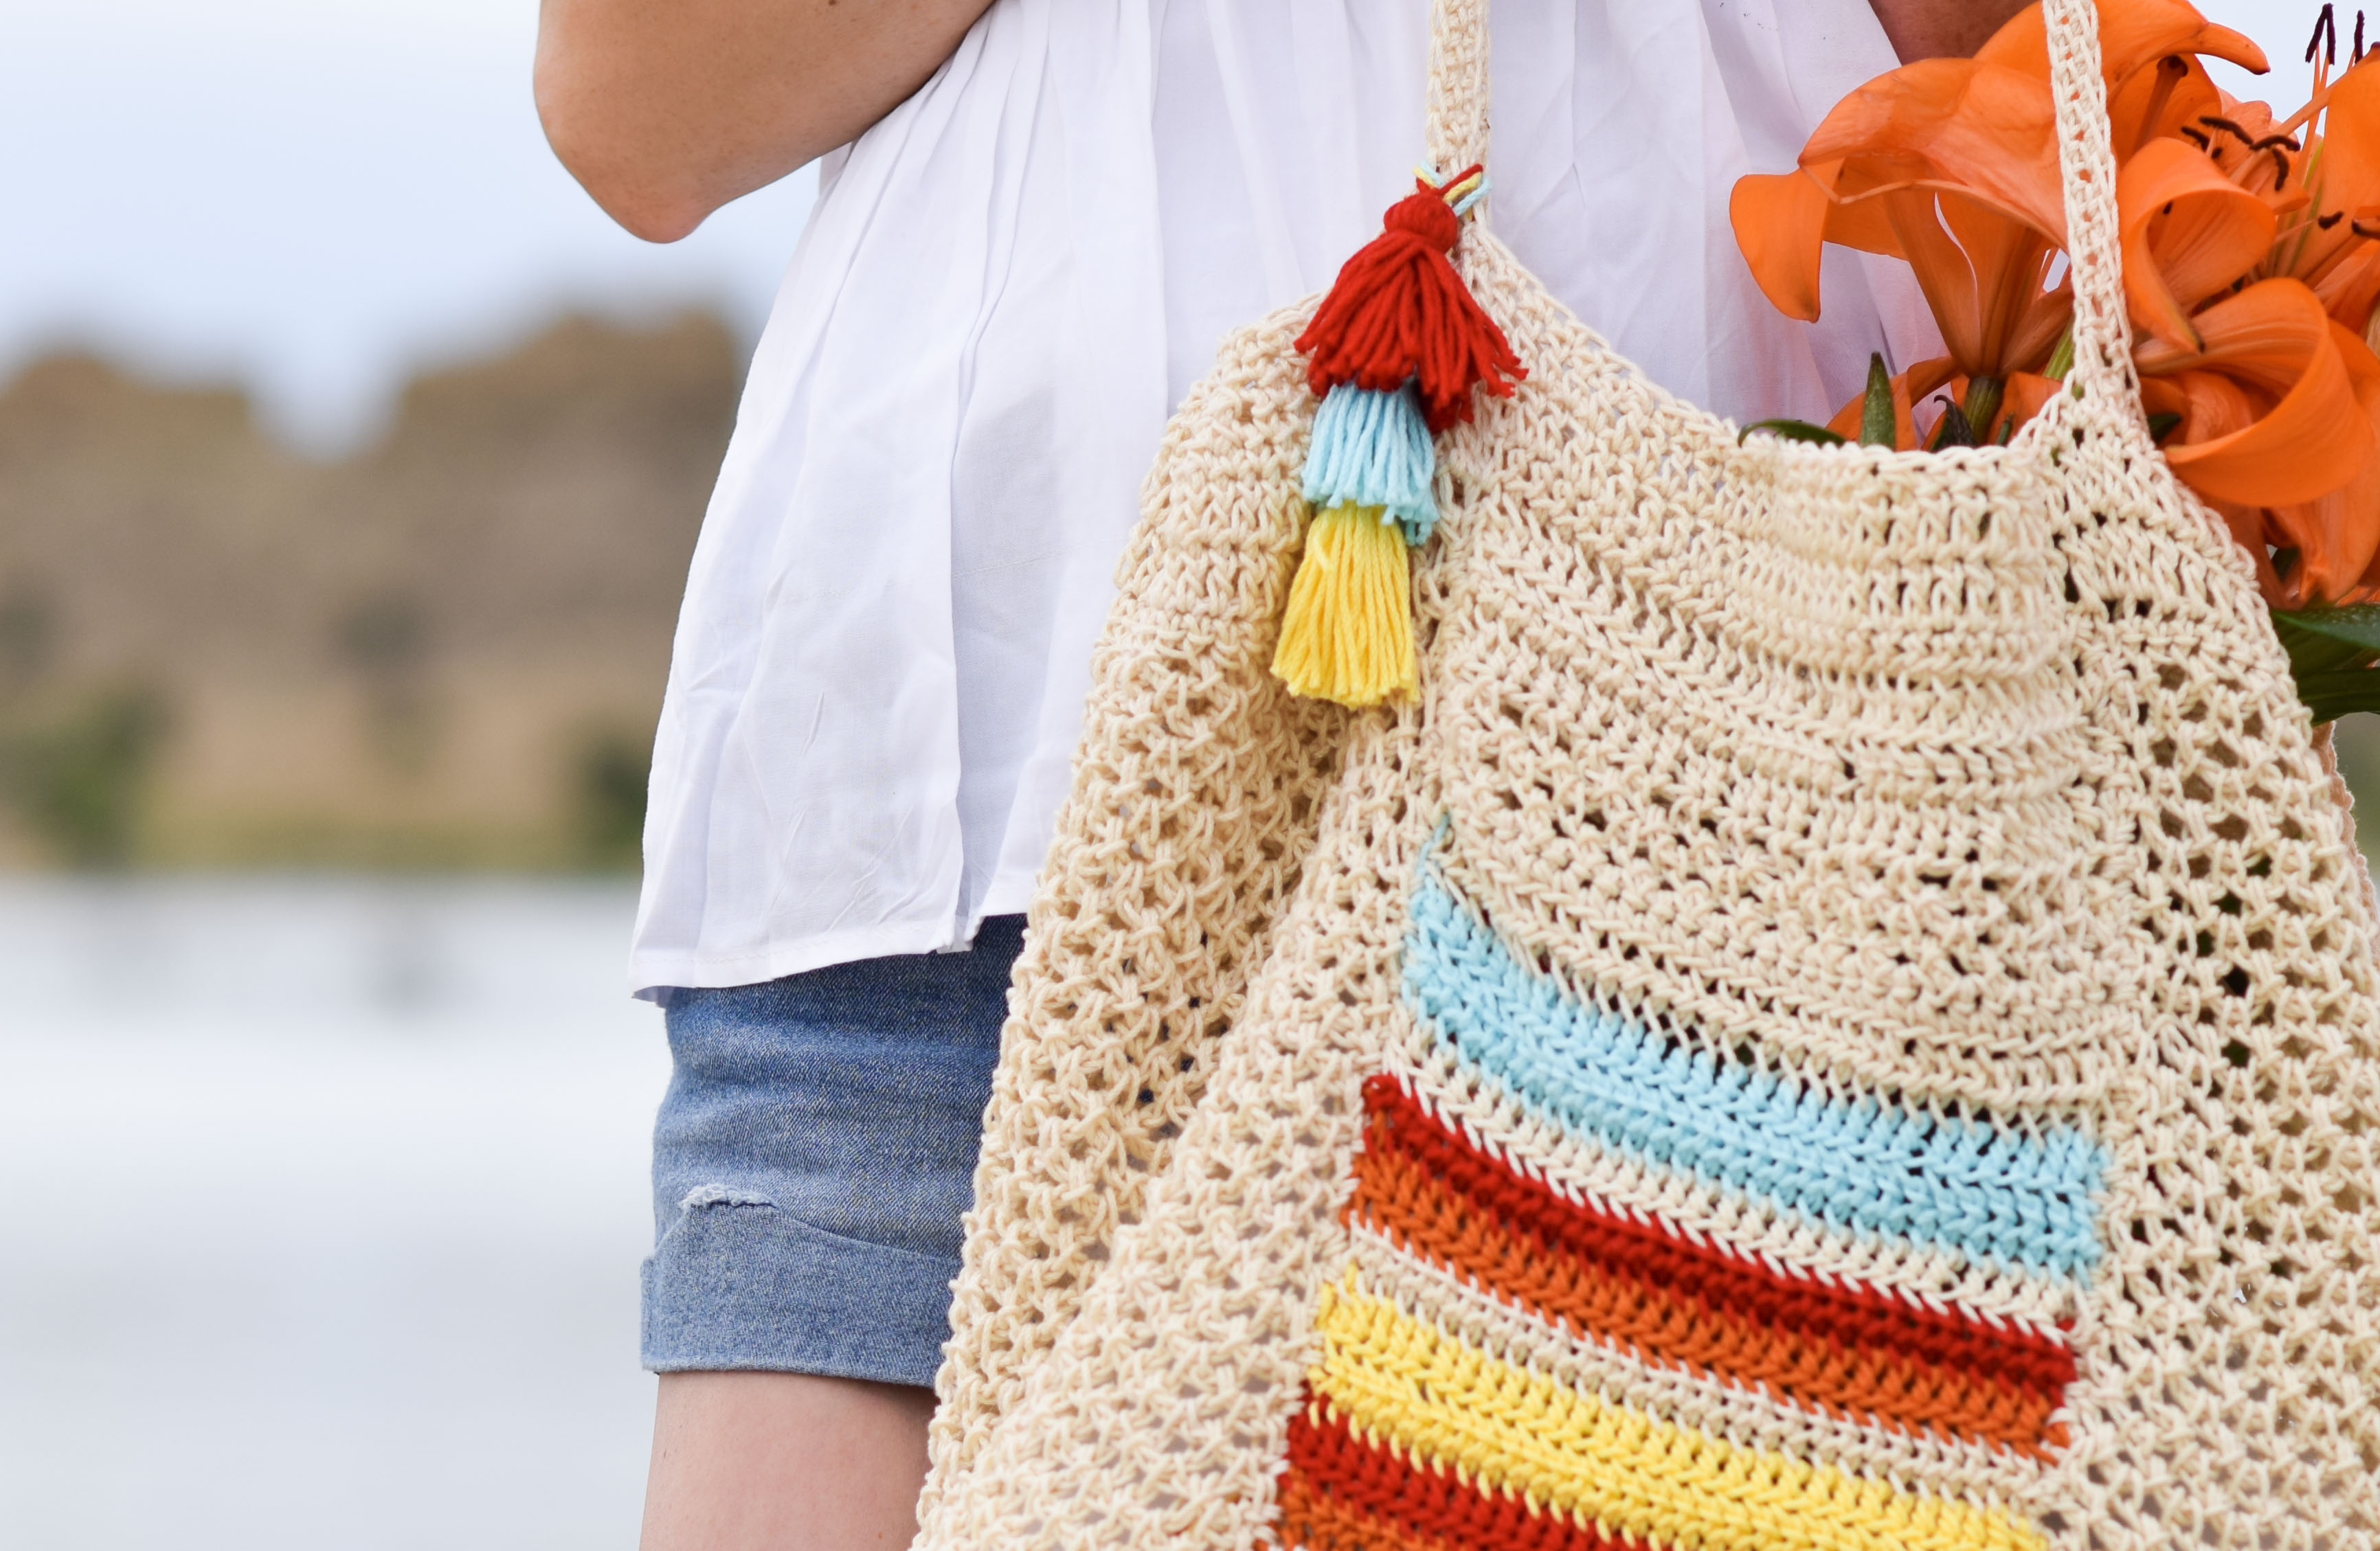
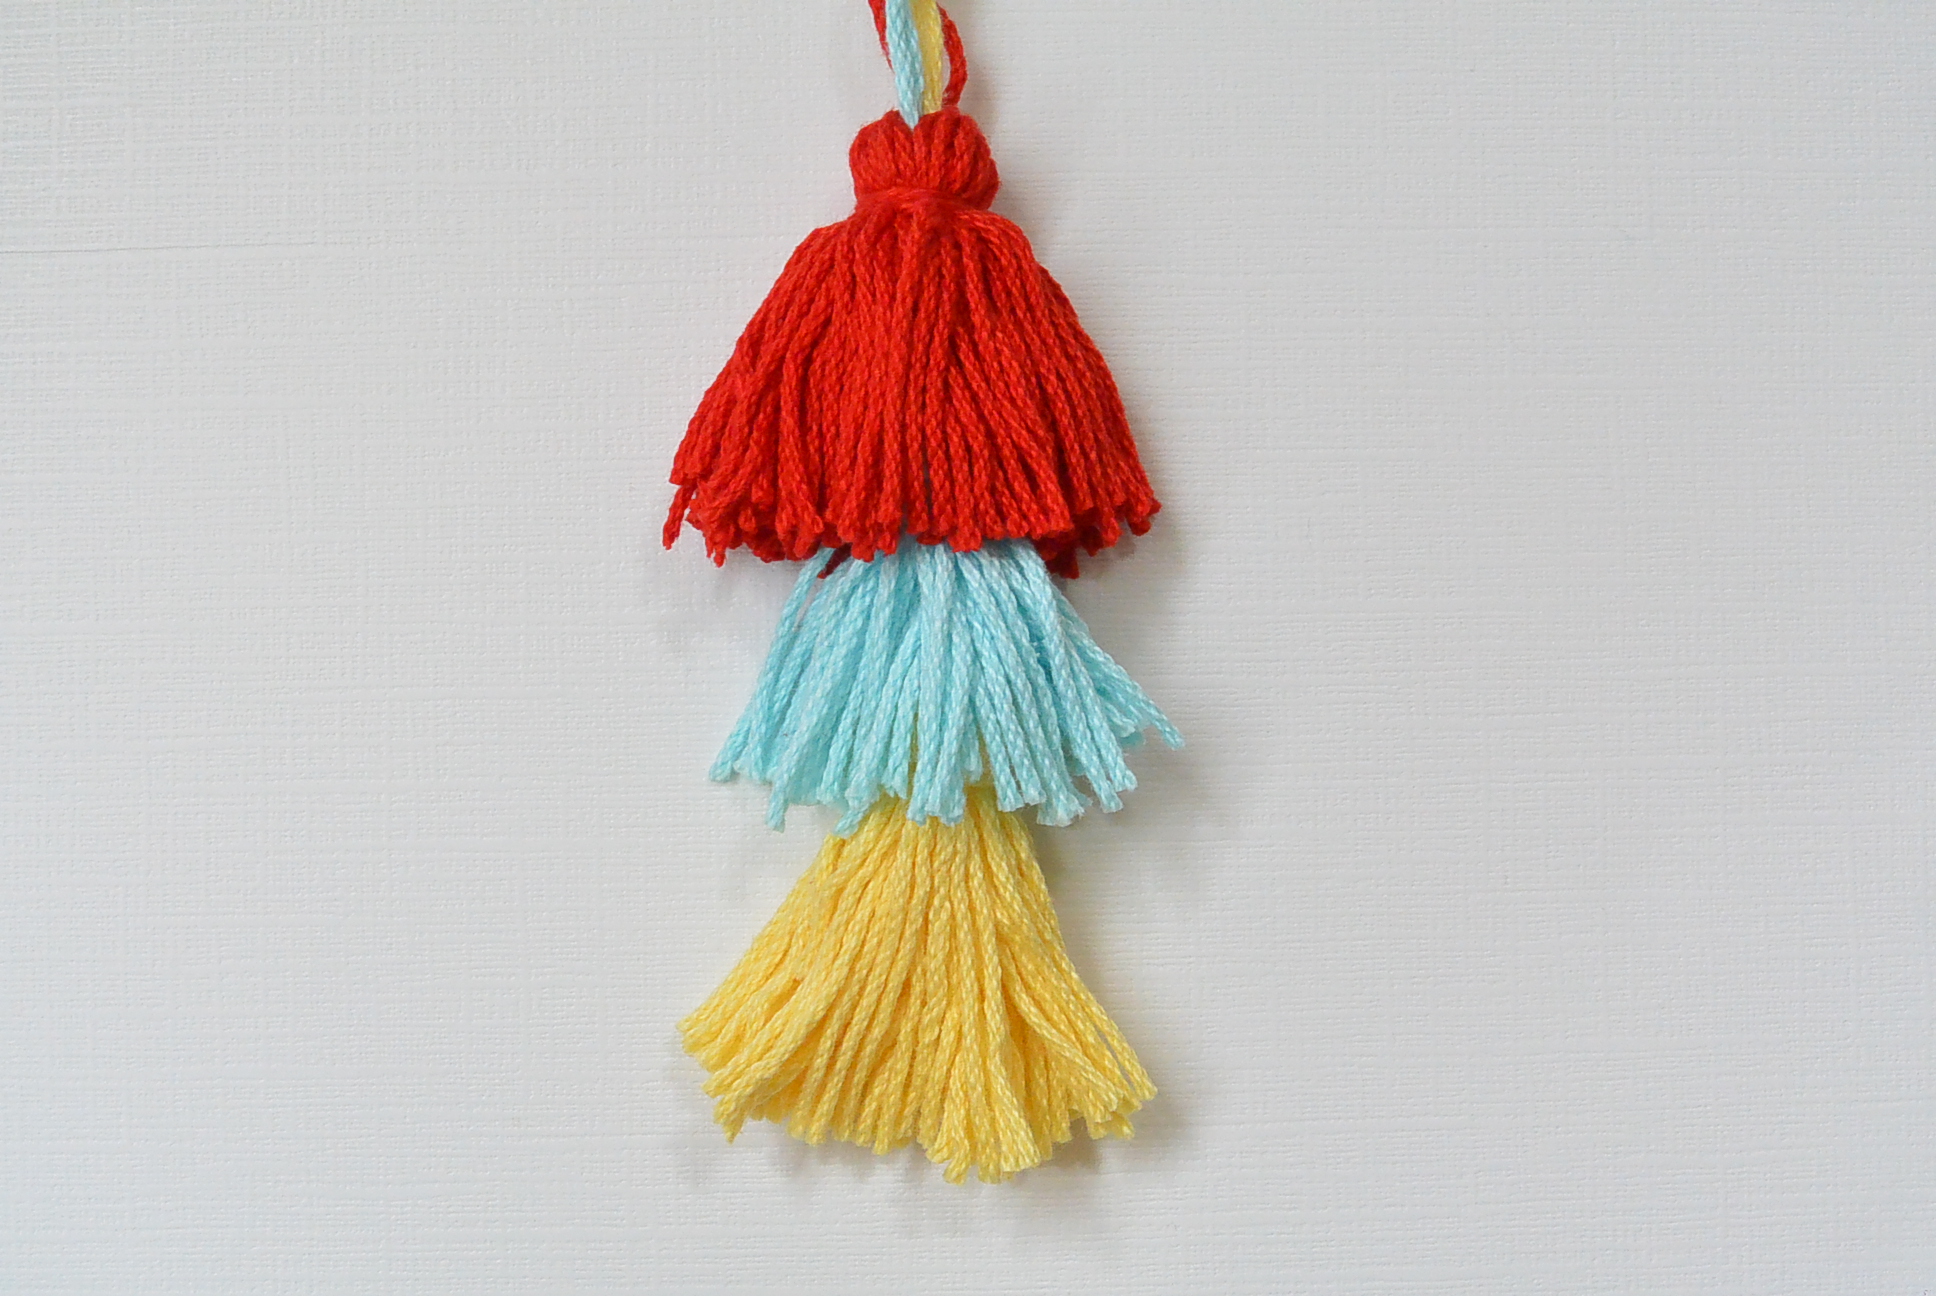
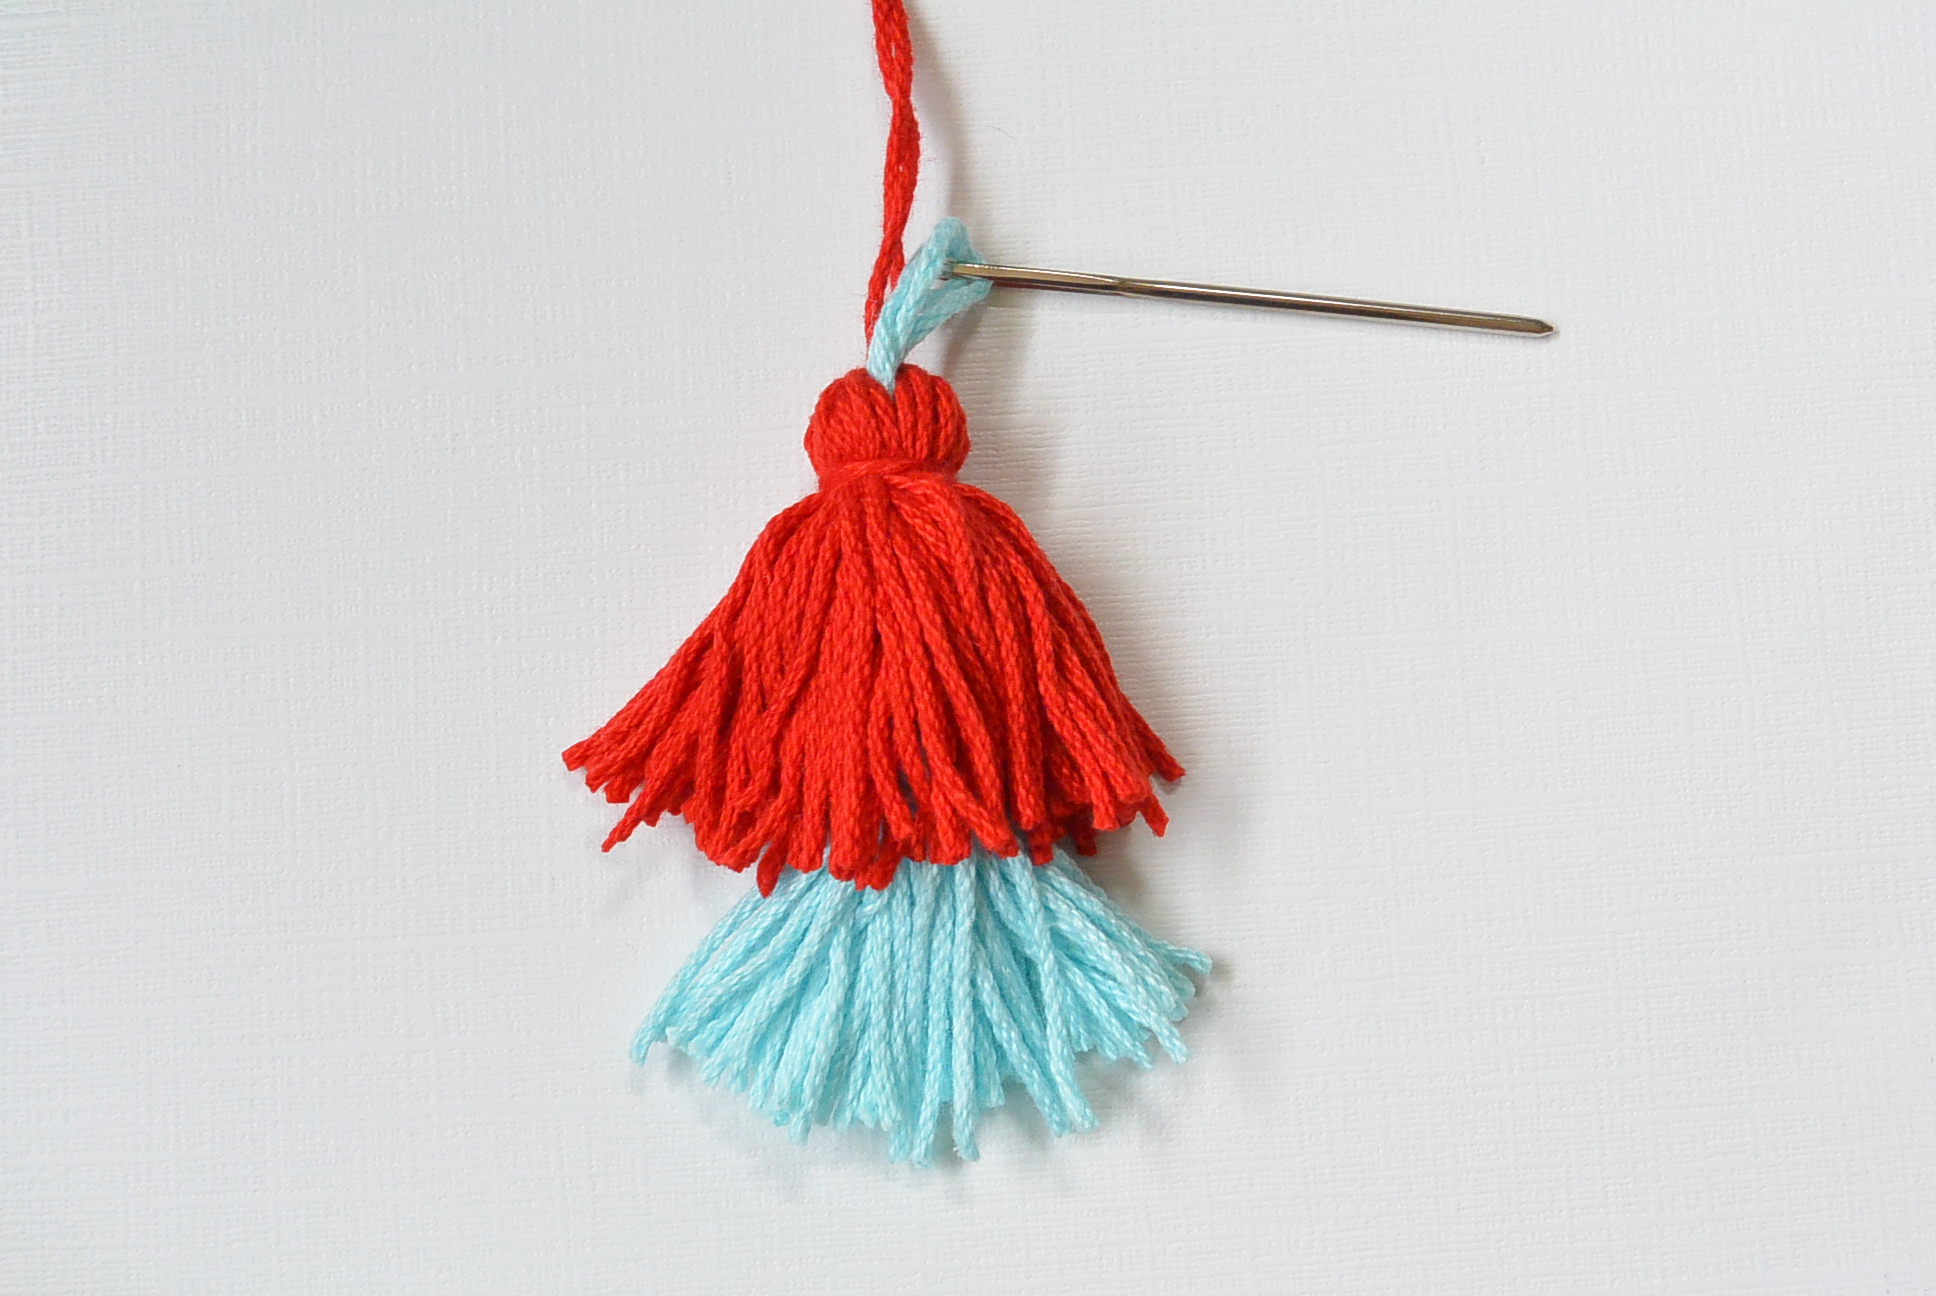
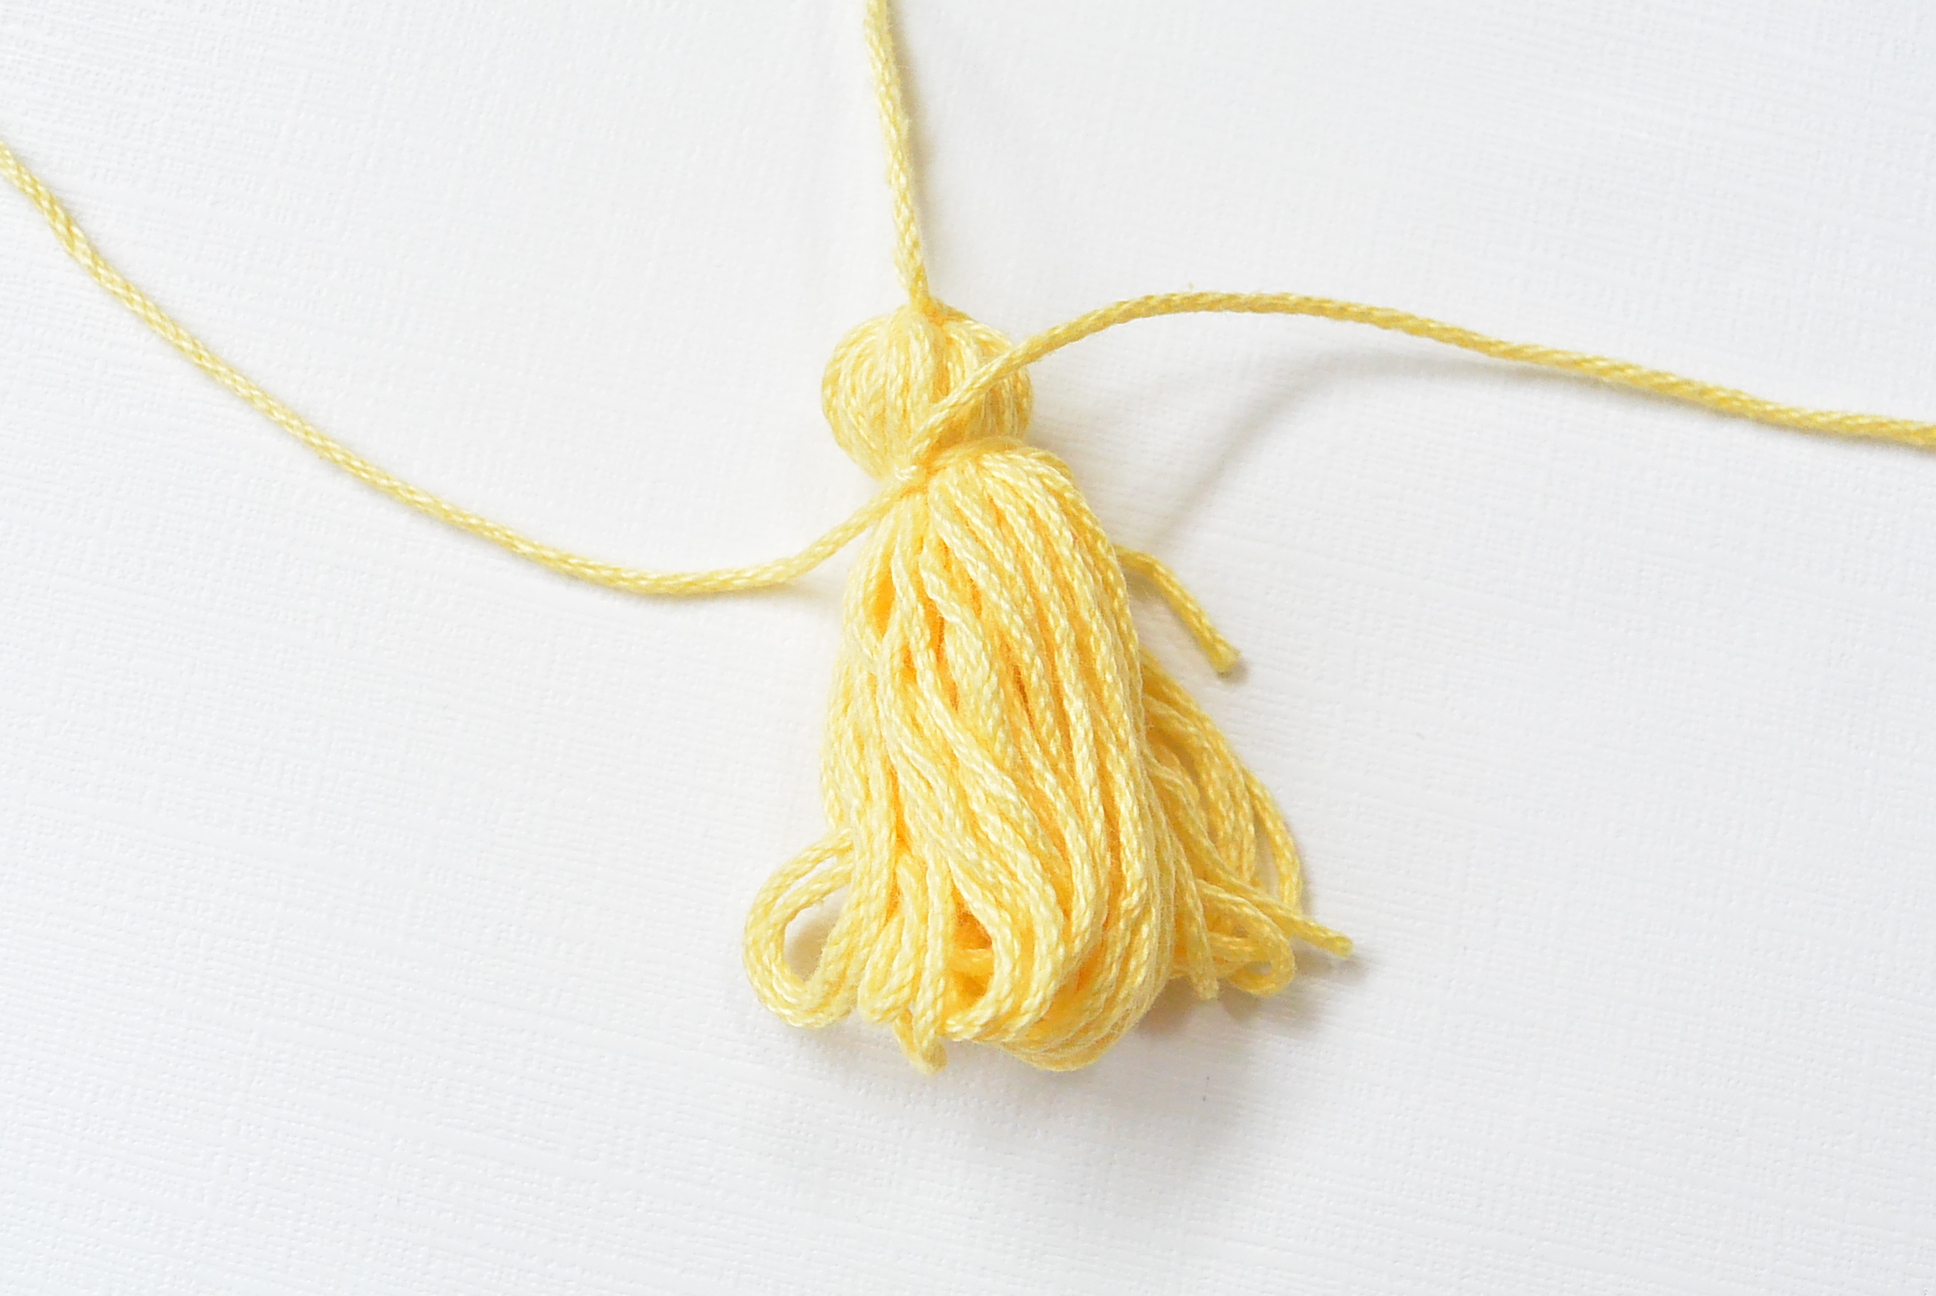
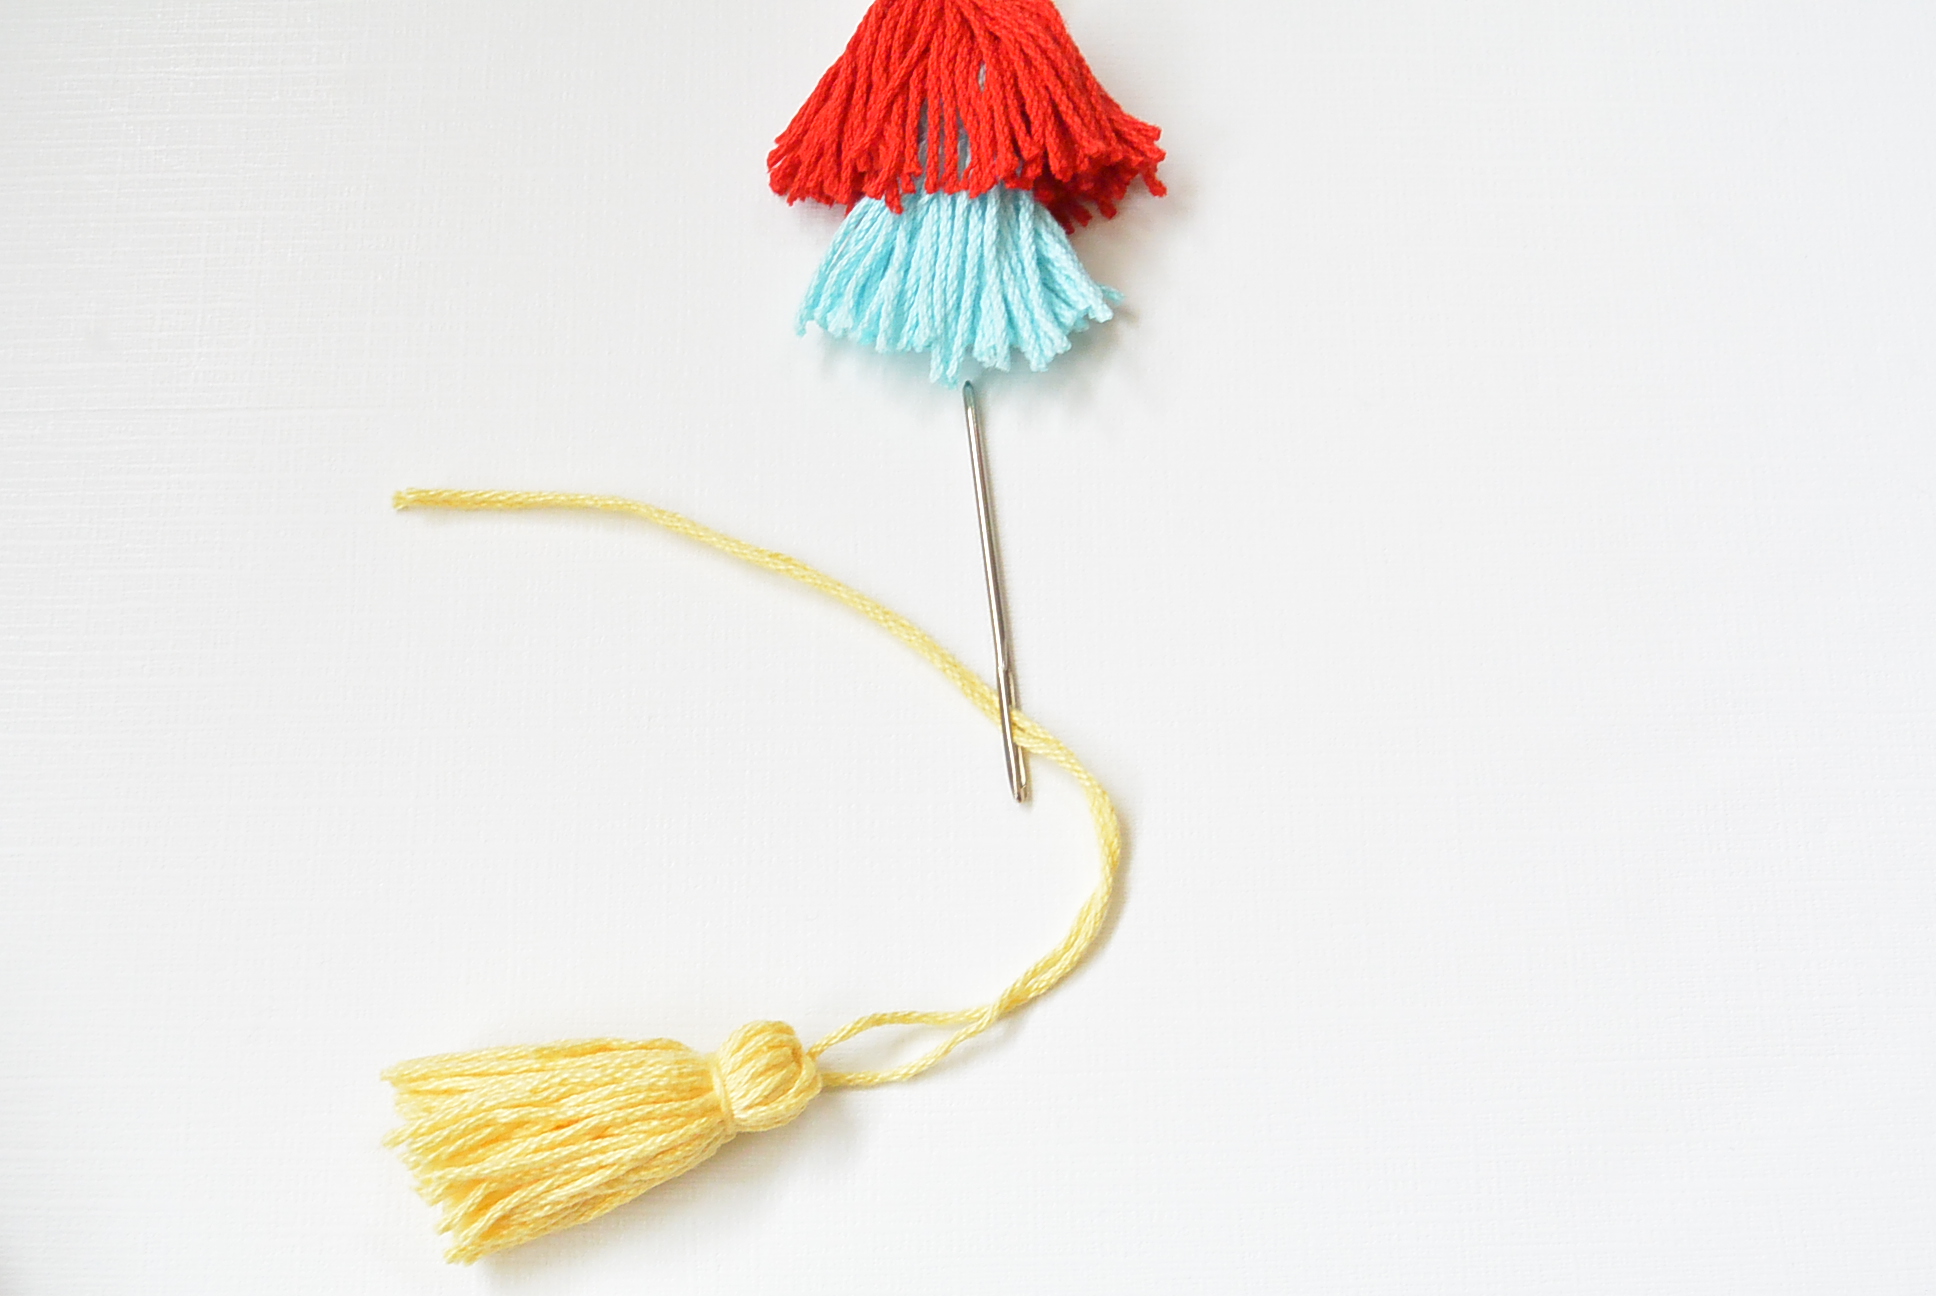
The construction of the bag is different than you might think right off the bat as it’s crocheted as three separate panels and then worked in the round to finish. This method gives it the interesting center striping and contrasting stitch patterns. Even though it’s a small detail on my bag, I think the tassel adds so much! You can find a photo tutorial below on how I made this three colored tassel. I’m thinking that I’d like to add several more to give it more drama and color.
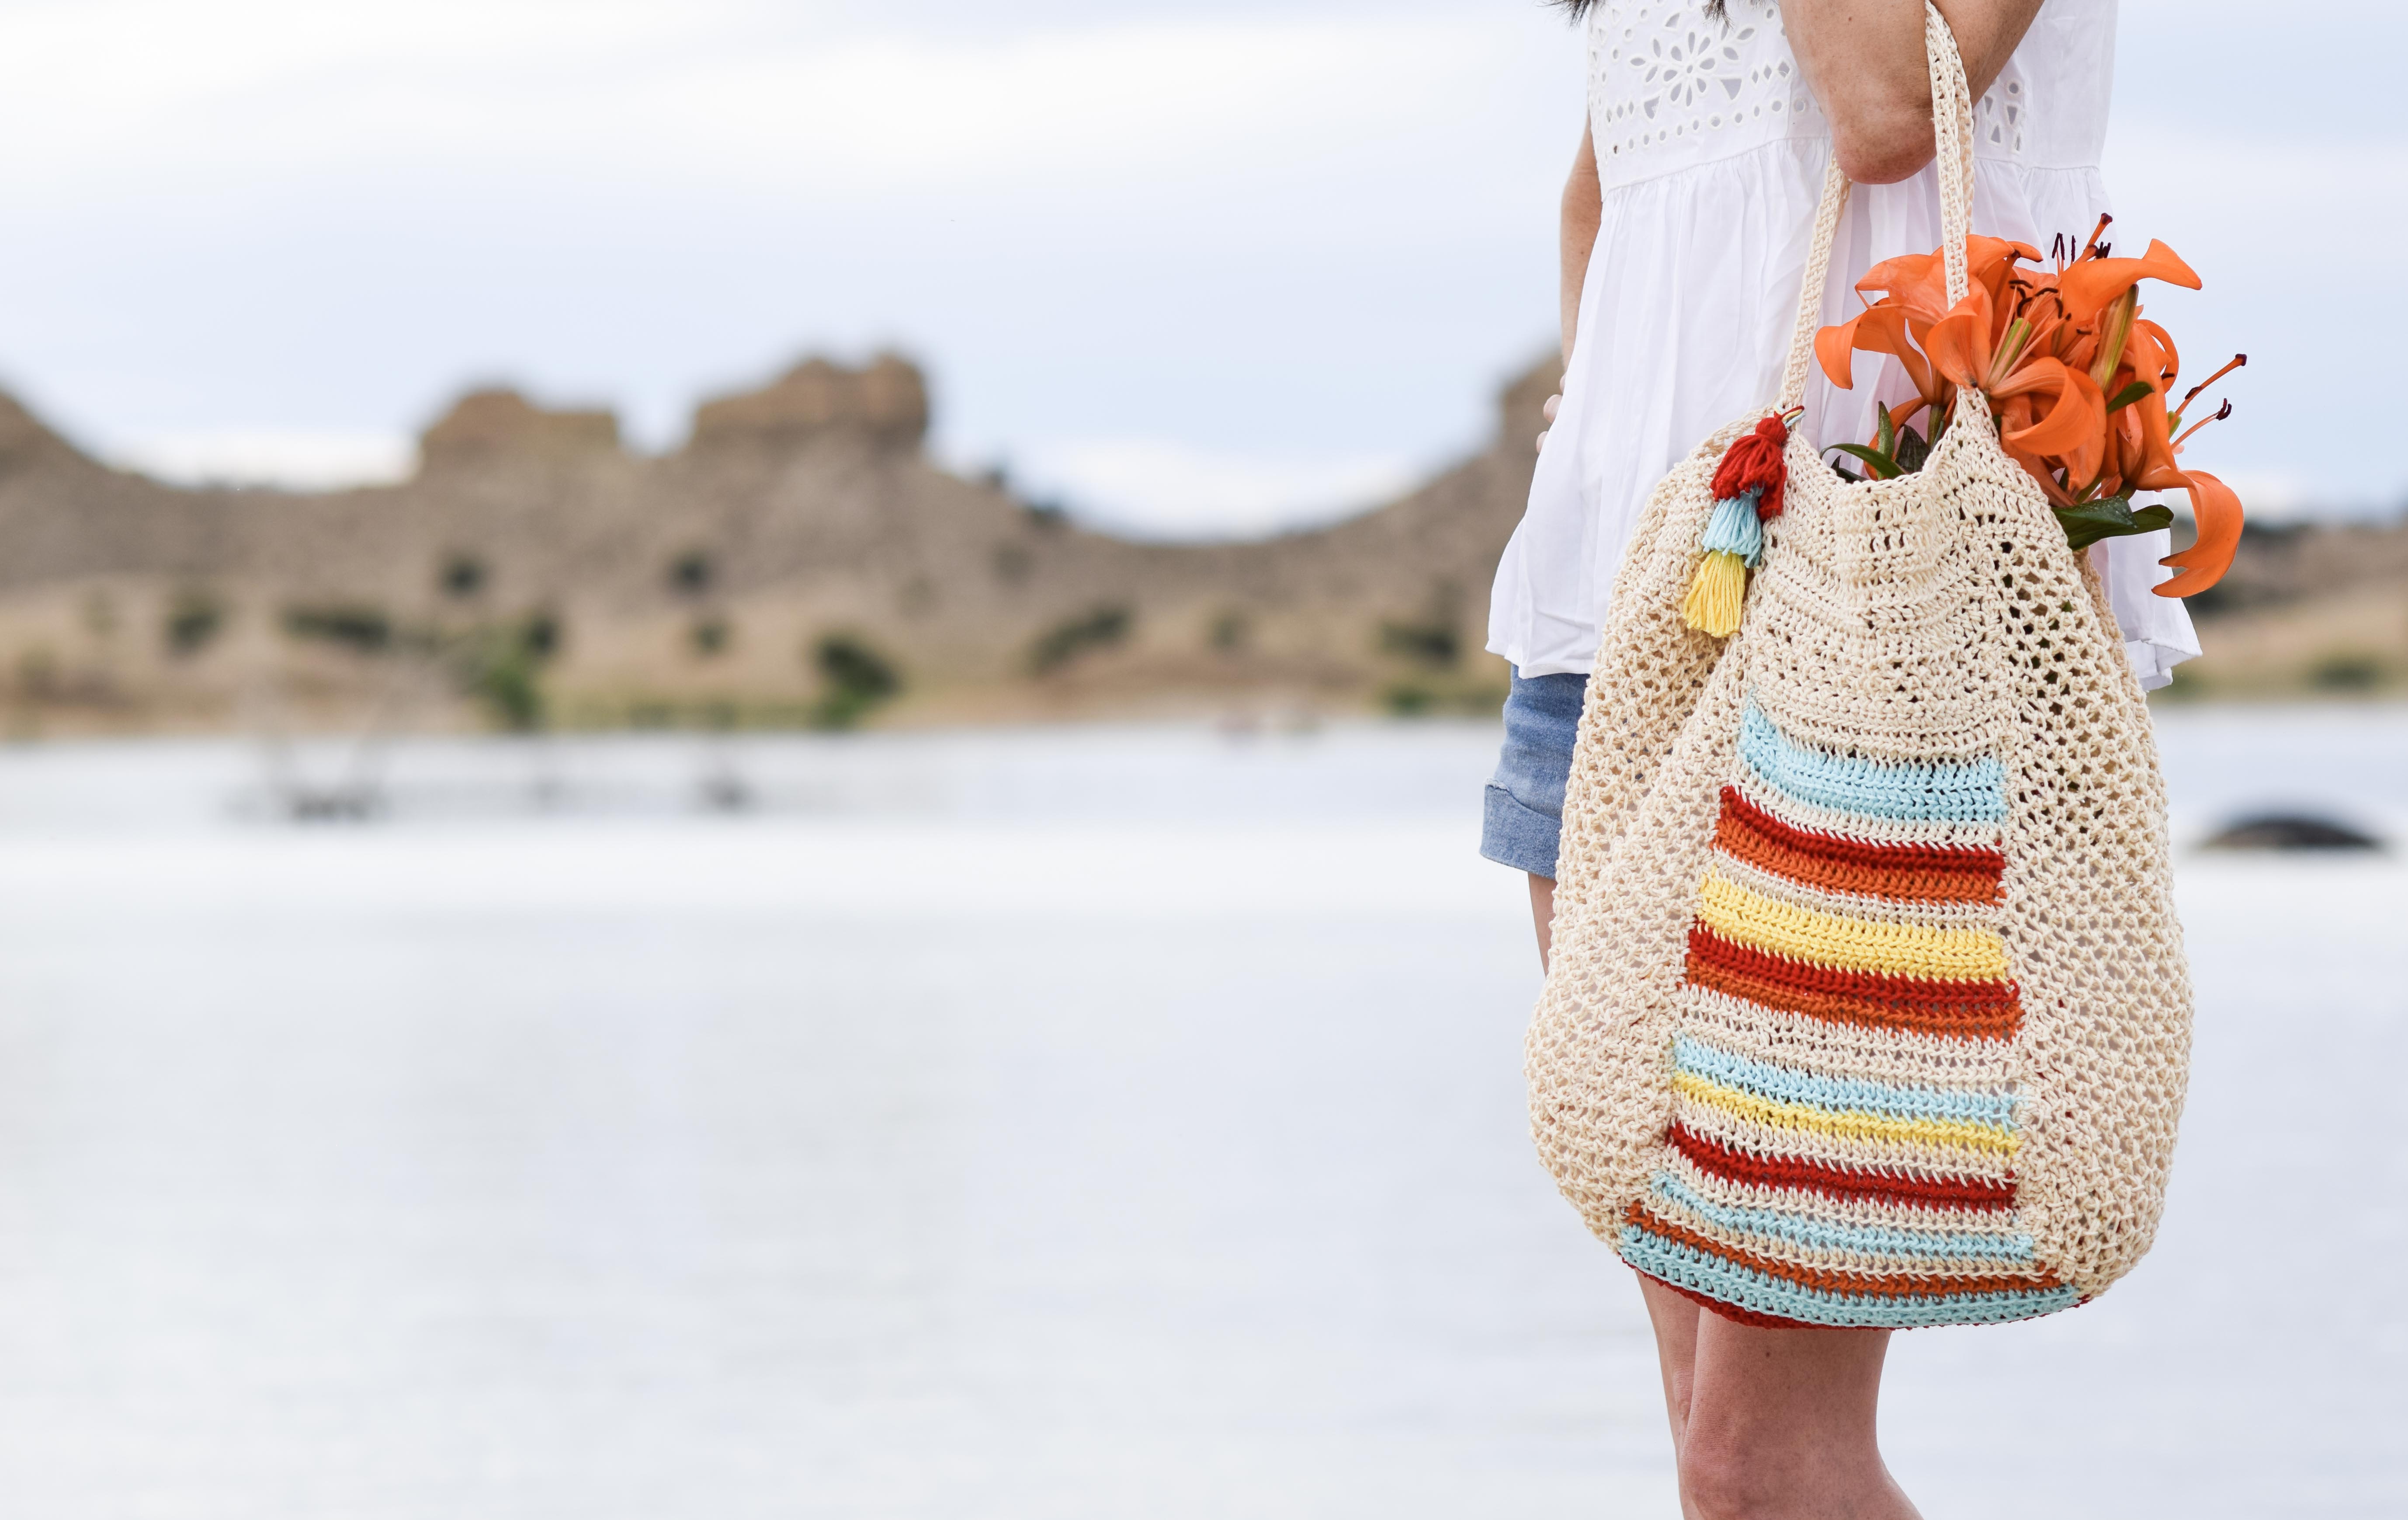
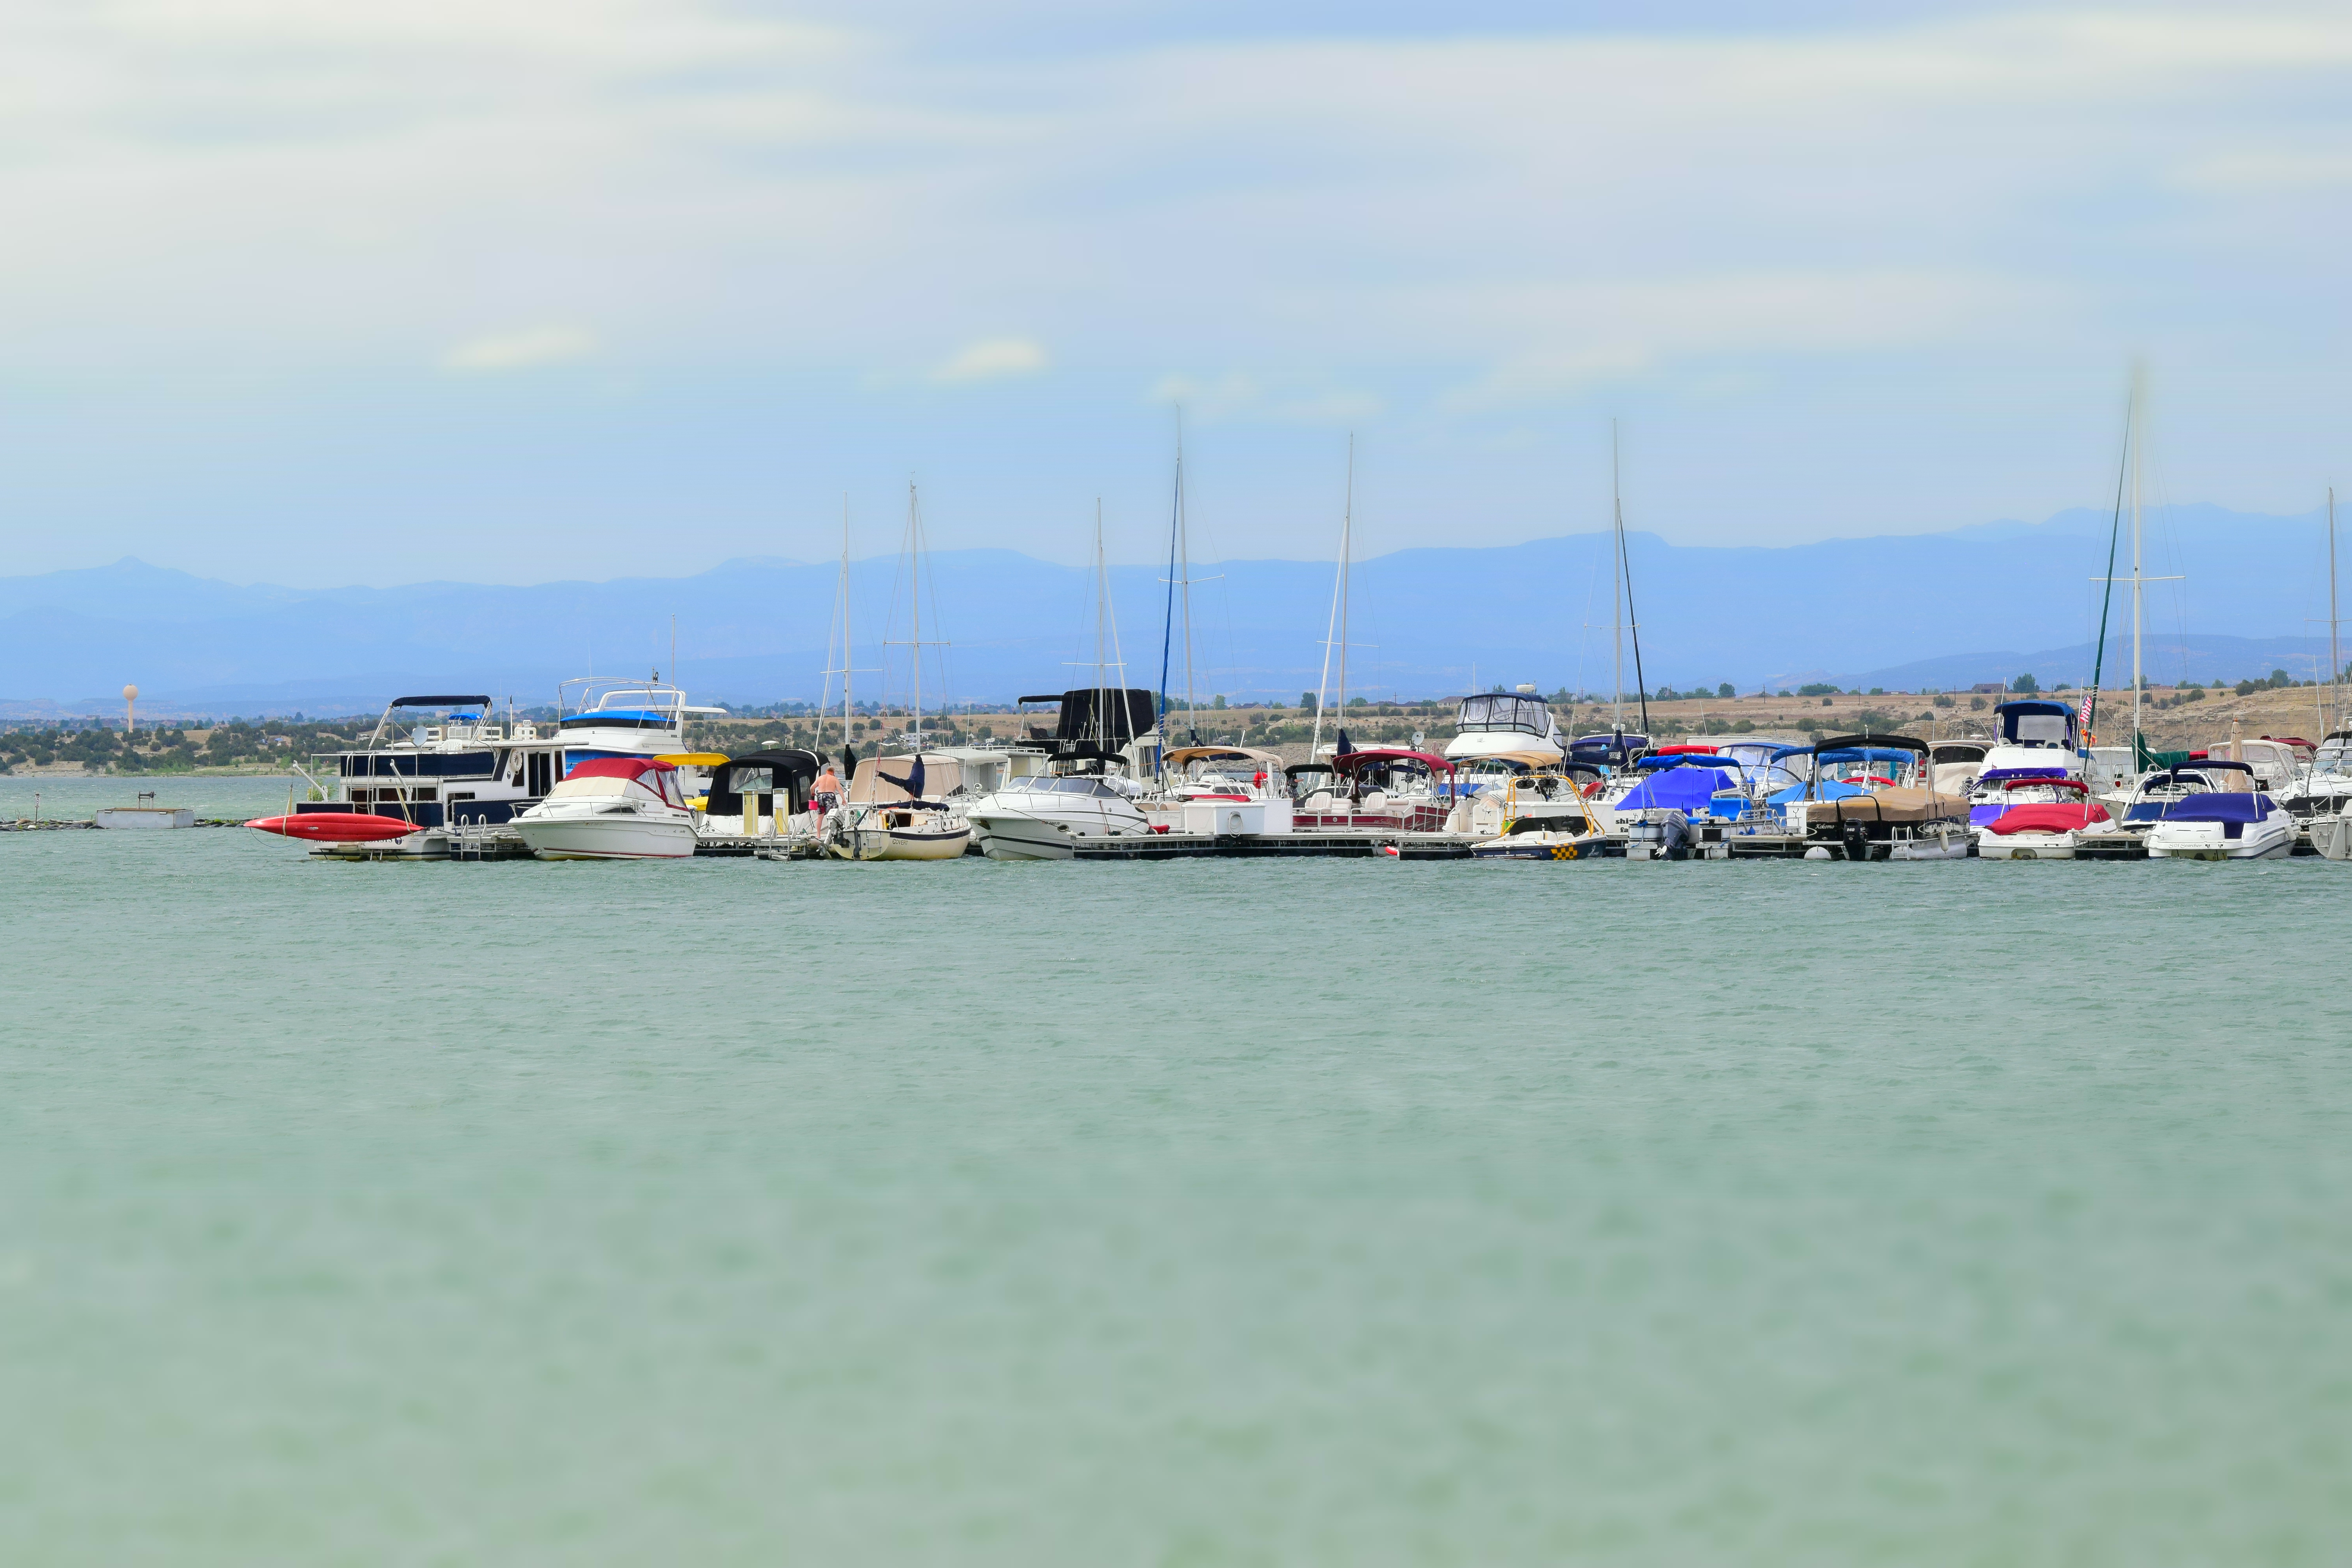
Below: We are pretty far away from the Caribbean here in Colorado, but some pretty boats and a lot of water can make it feel like vacation. (Photo taken on our trip to Lake Pueblo State Park)
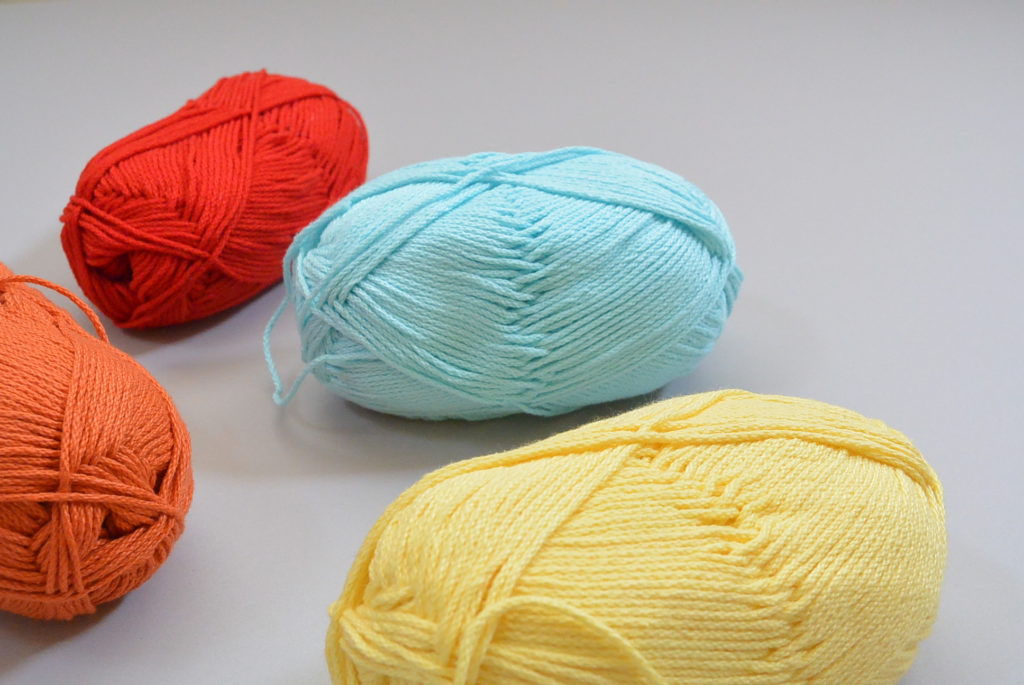
Above: I love the 24/7 cotton from Lion Brand. It holds it’s shape really well and washes up nicely too. Since it’s mercerized, it has a bit of a sheen to it and seems a bit more “sturdy” than other cottons.
With this project, I think it’s helpful to first see the step by step process in pictures, and then I’ll get to the pattern. So let’s get started!
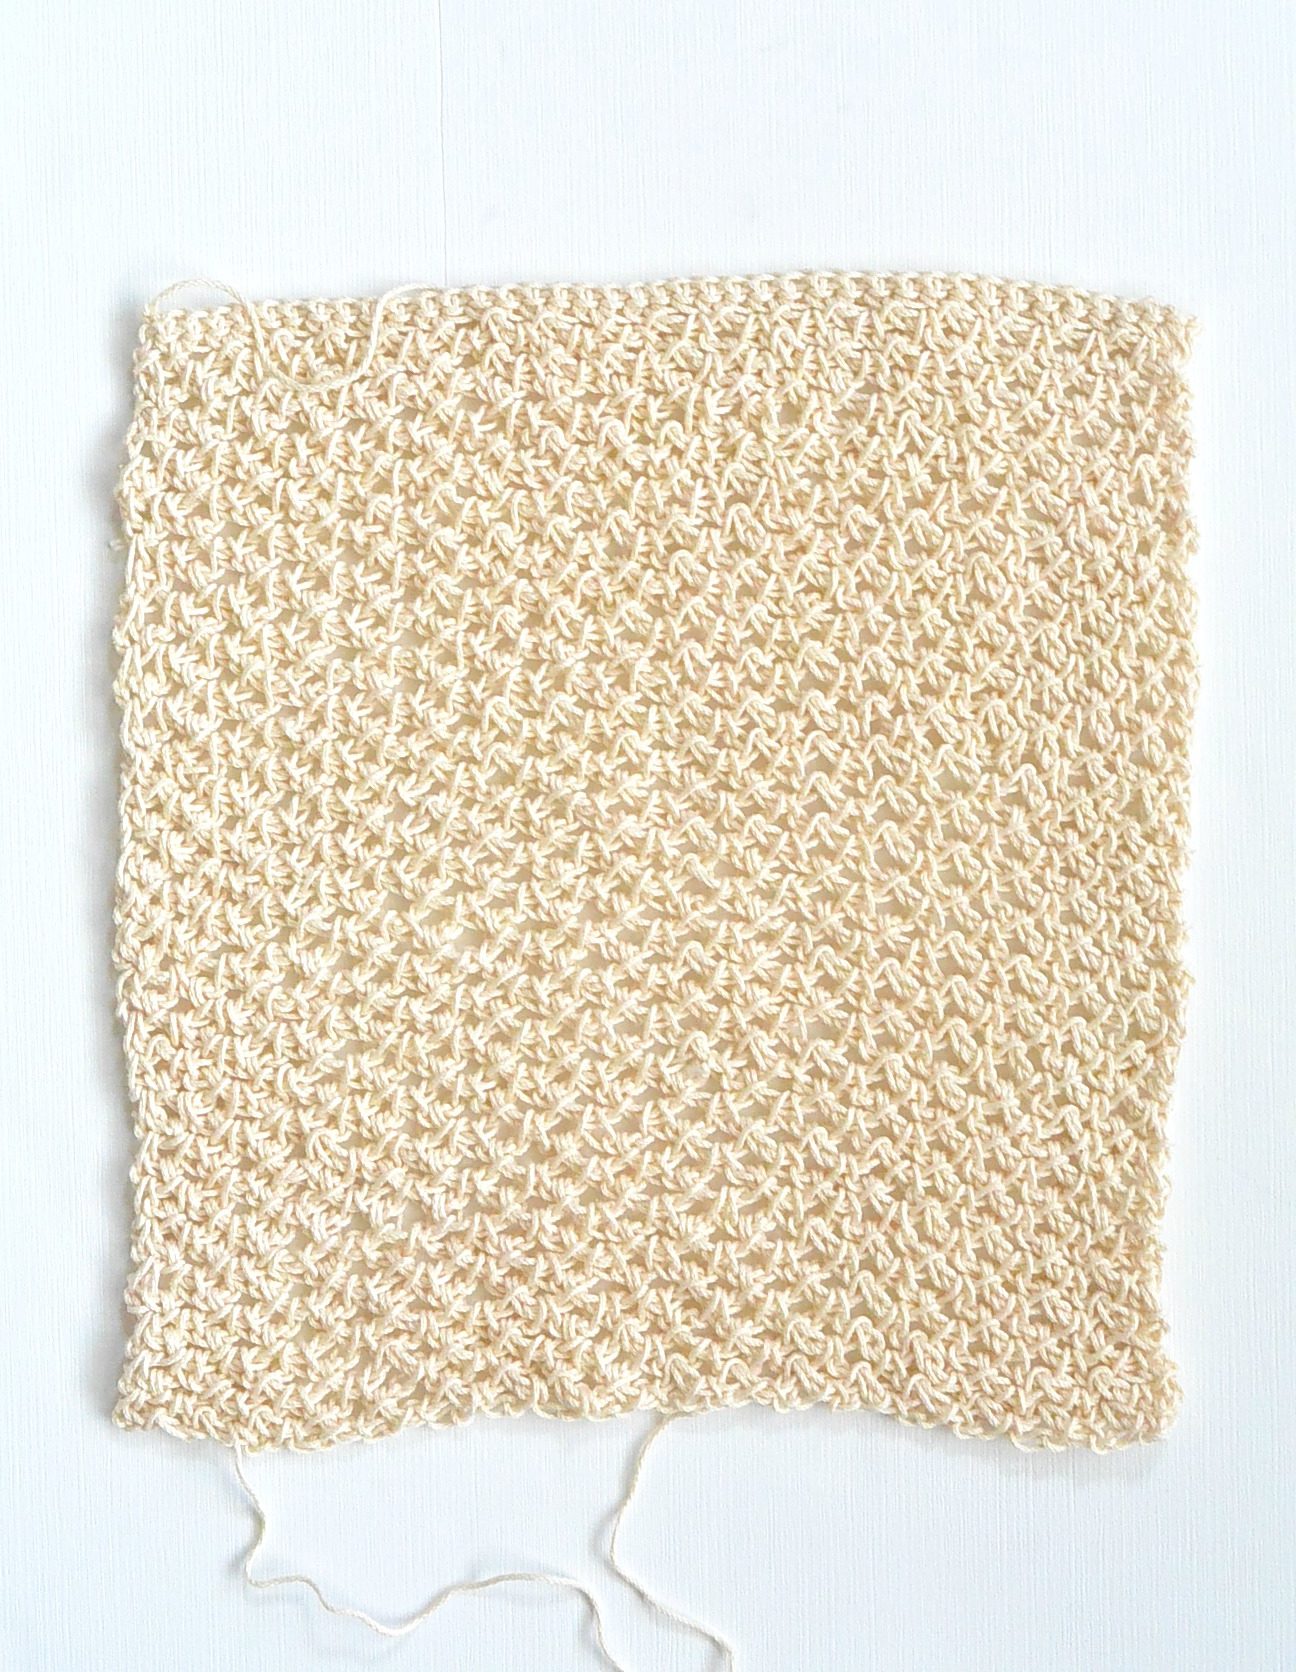
Step 1:
Crochet two matching panels which will be the sides of the bag
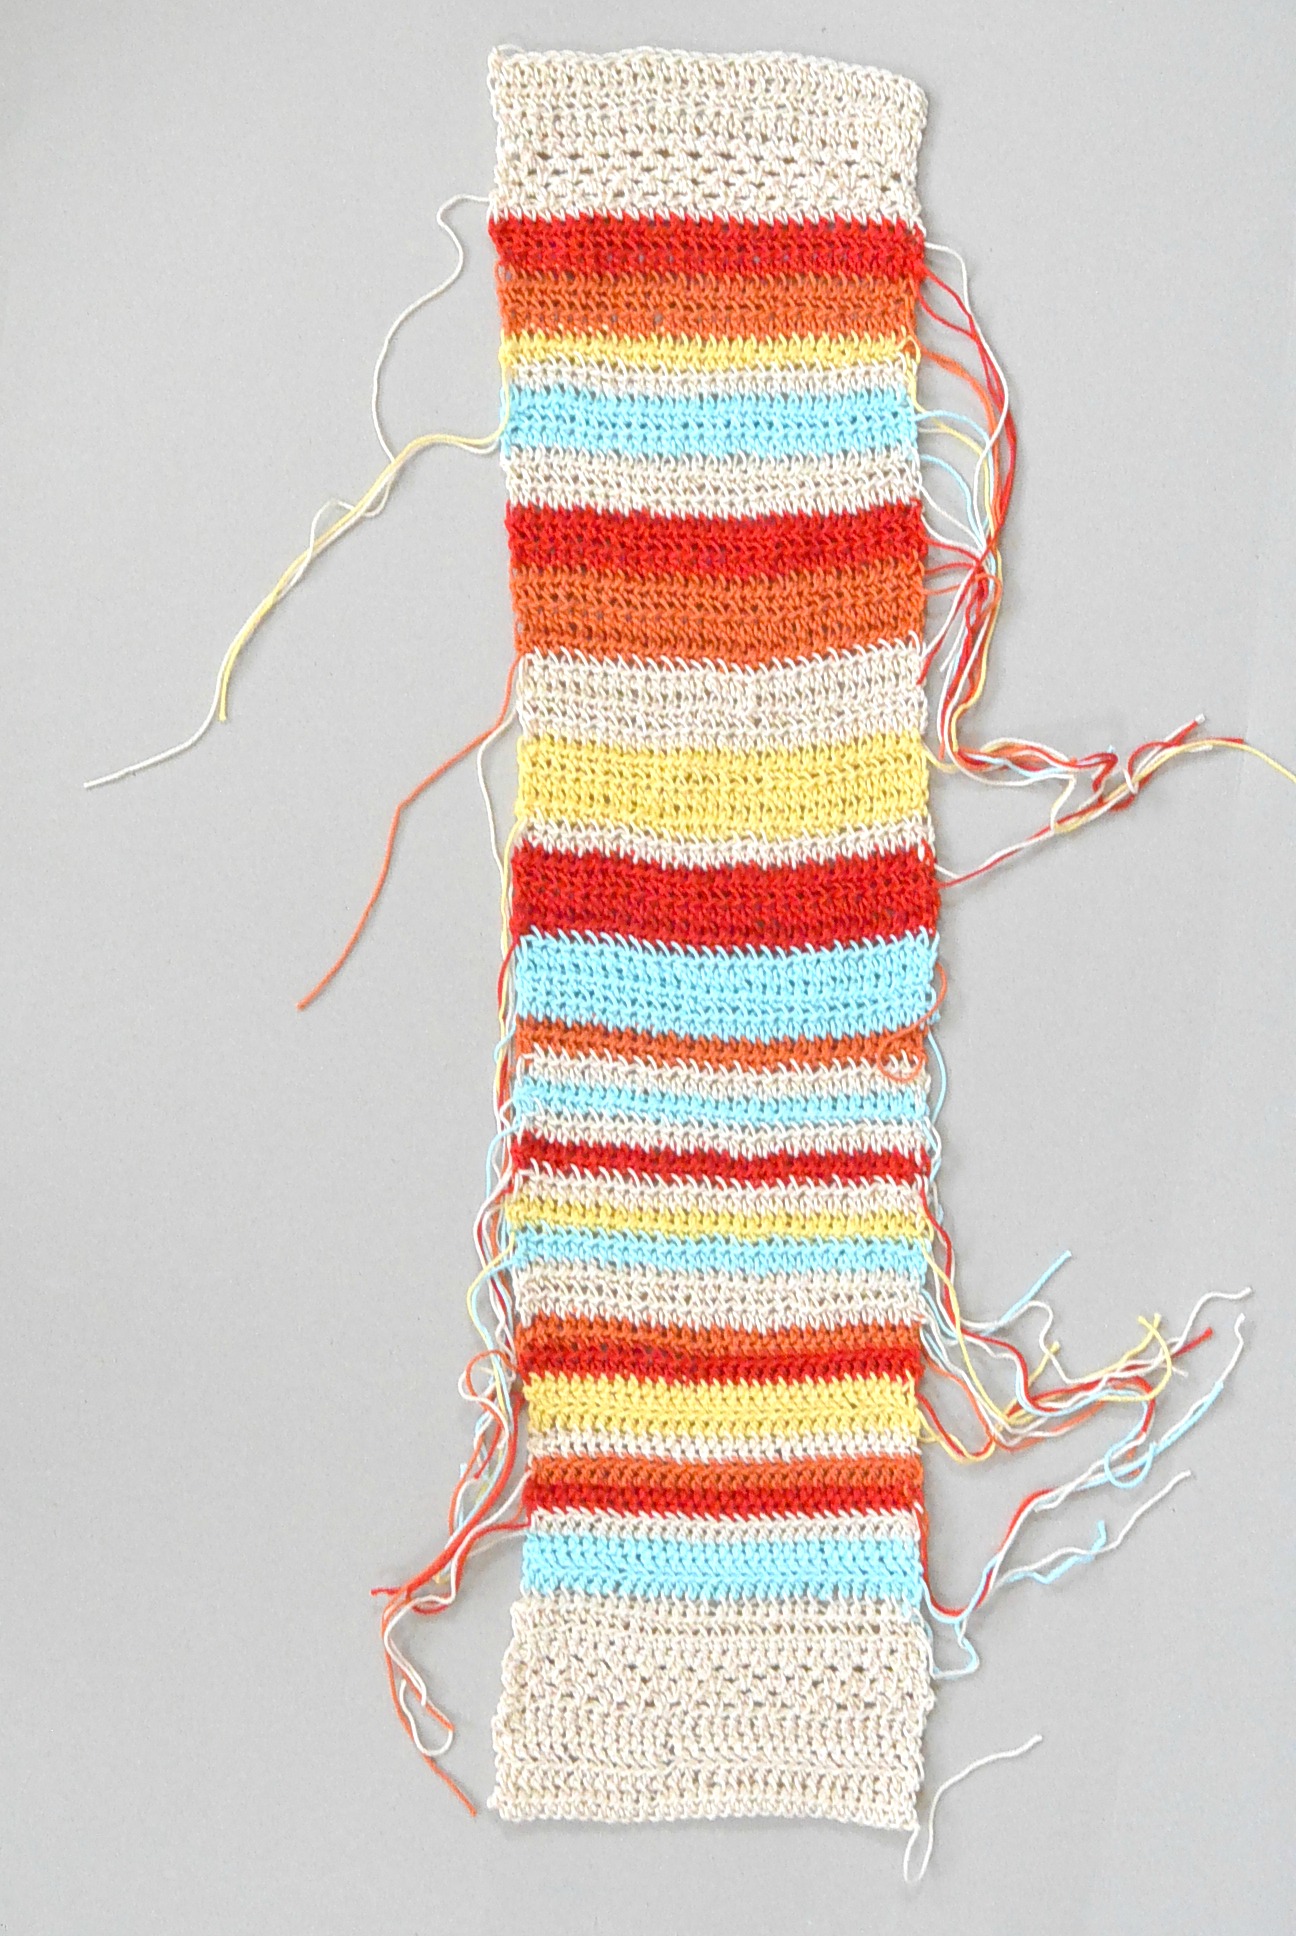
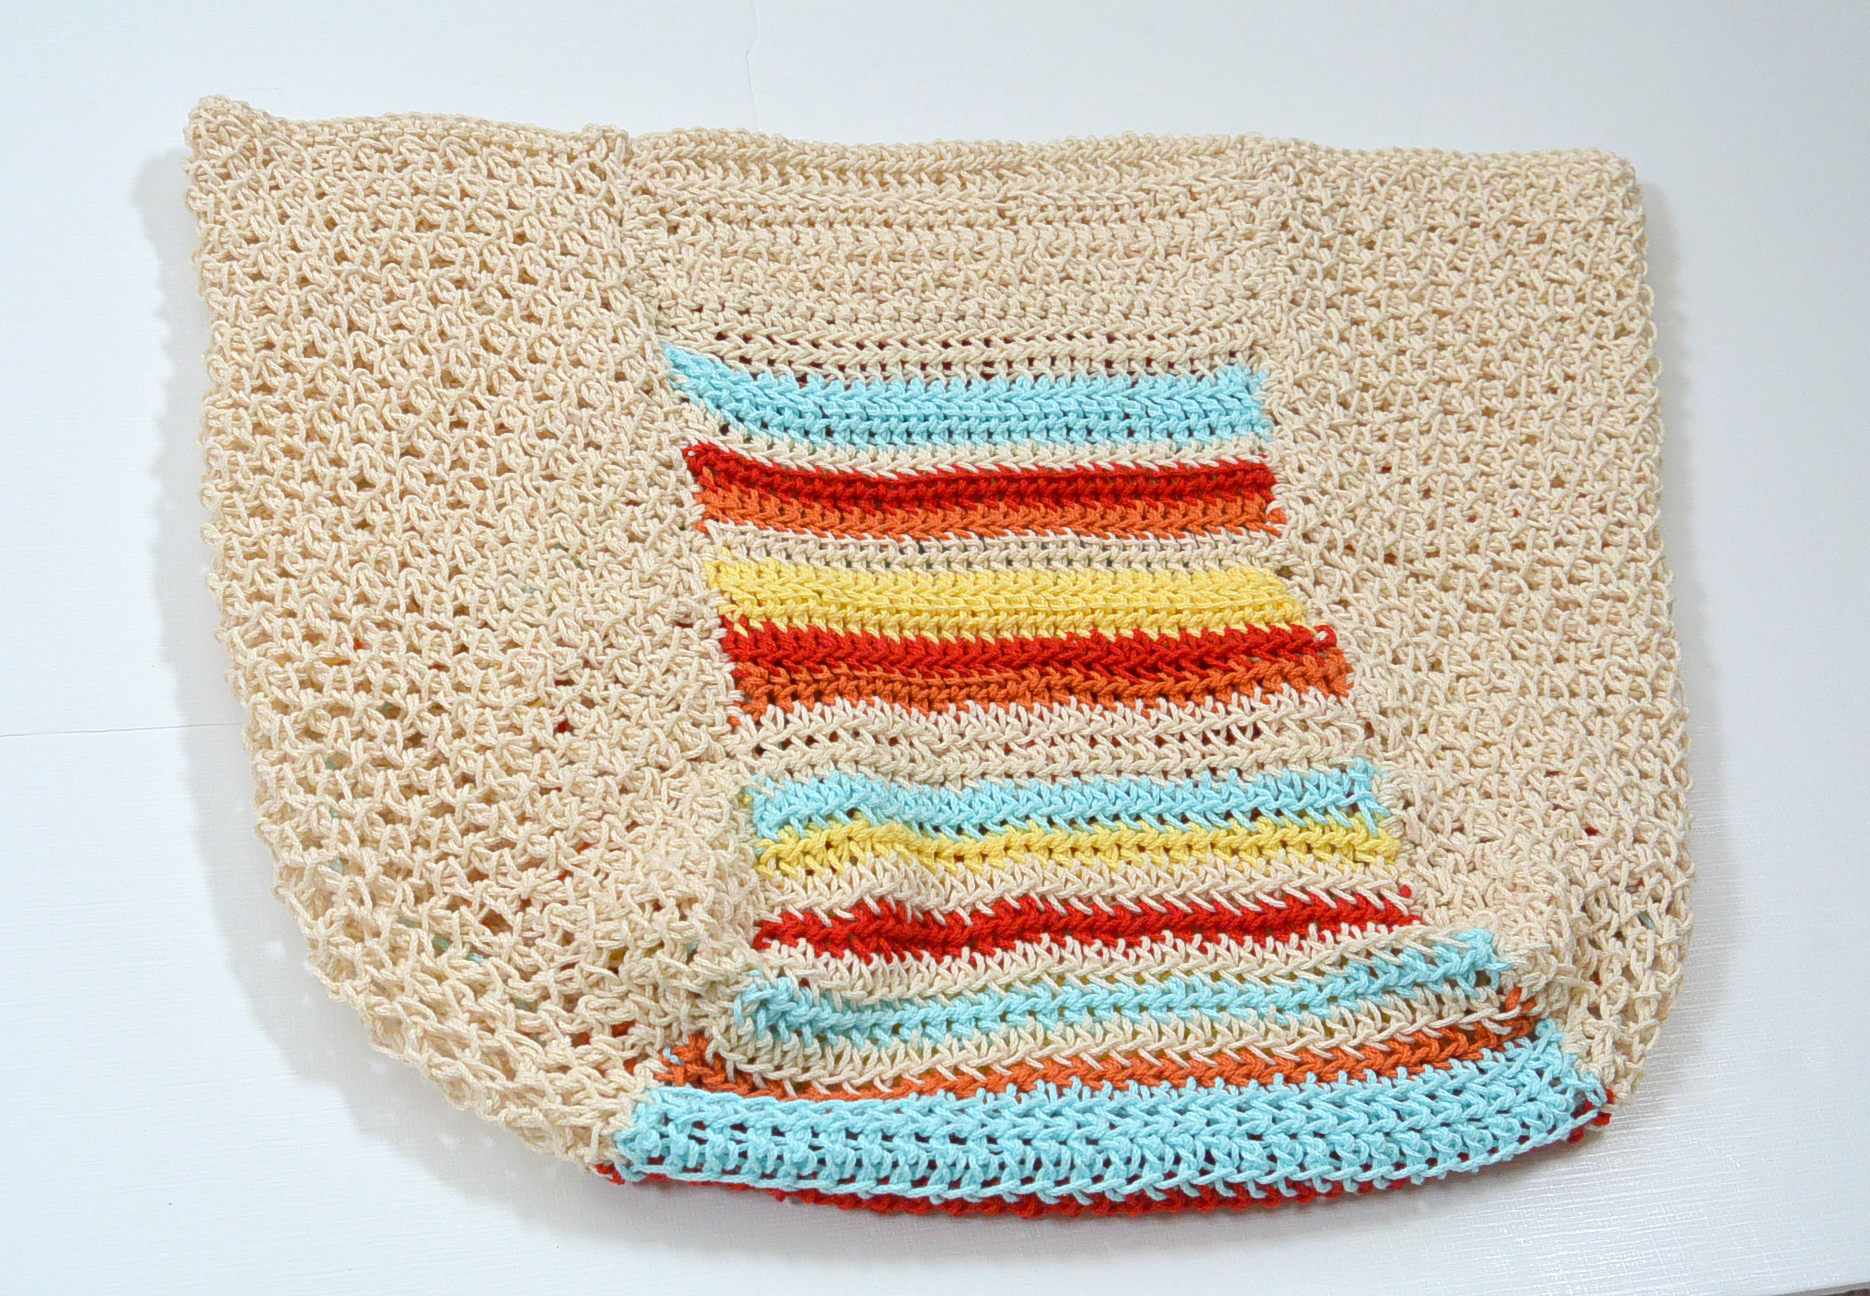
Step 2:
Crochet a center panel which will act as the front, bottom and center of the bag
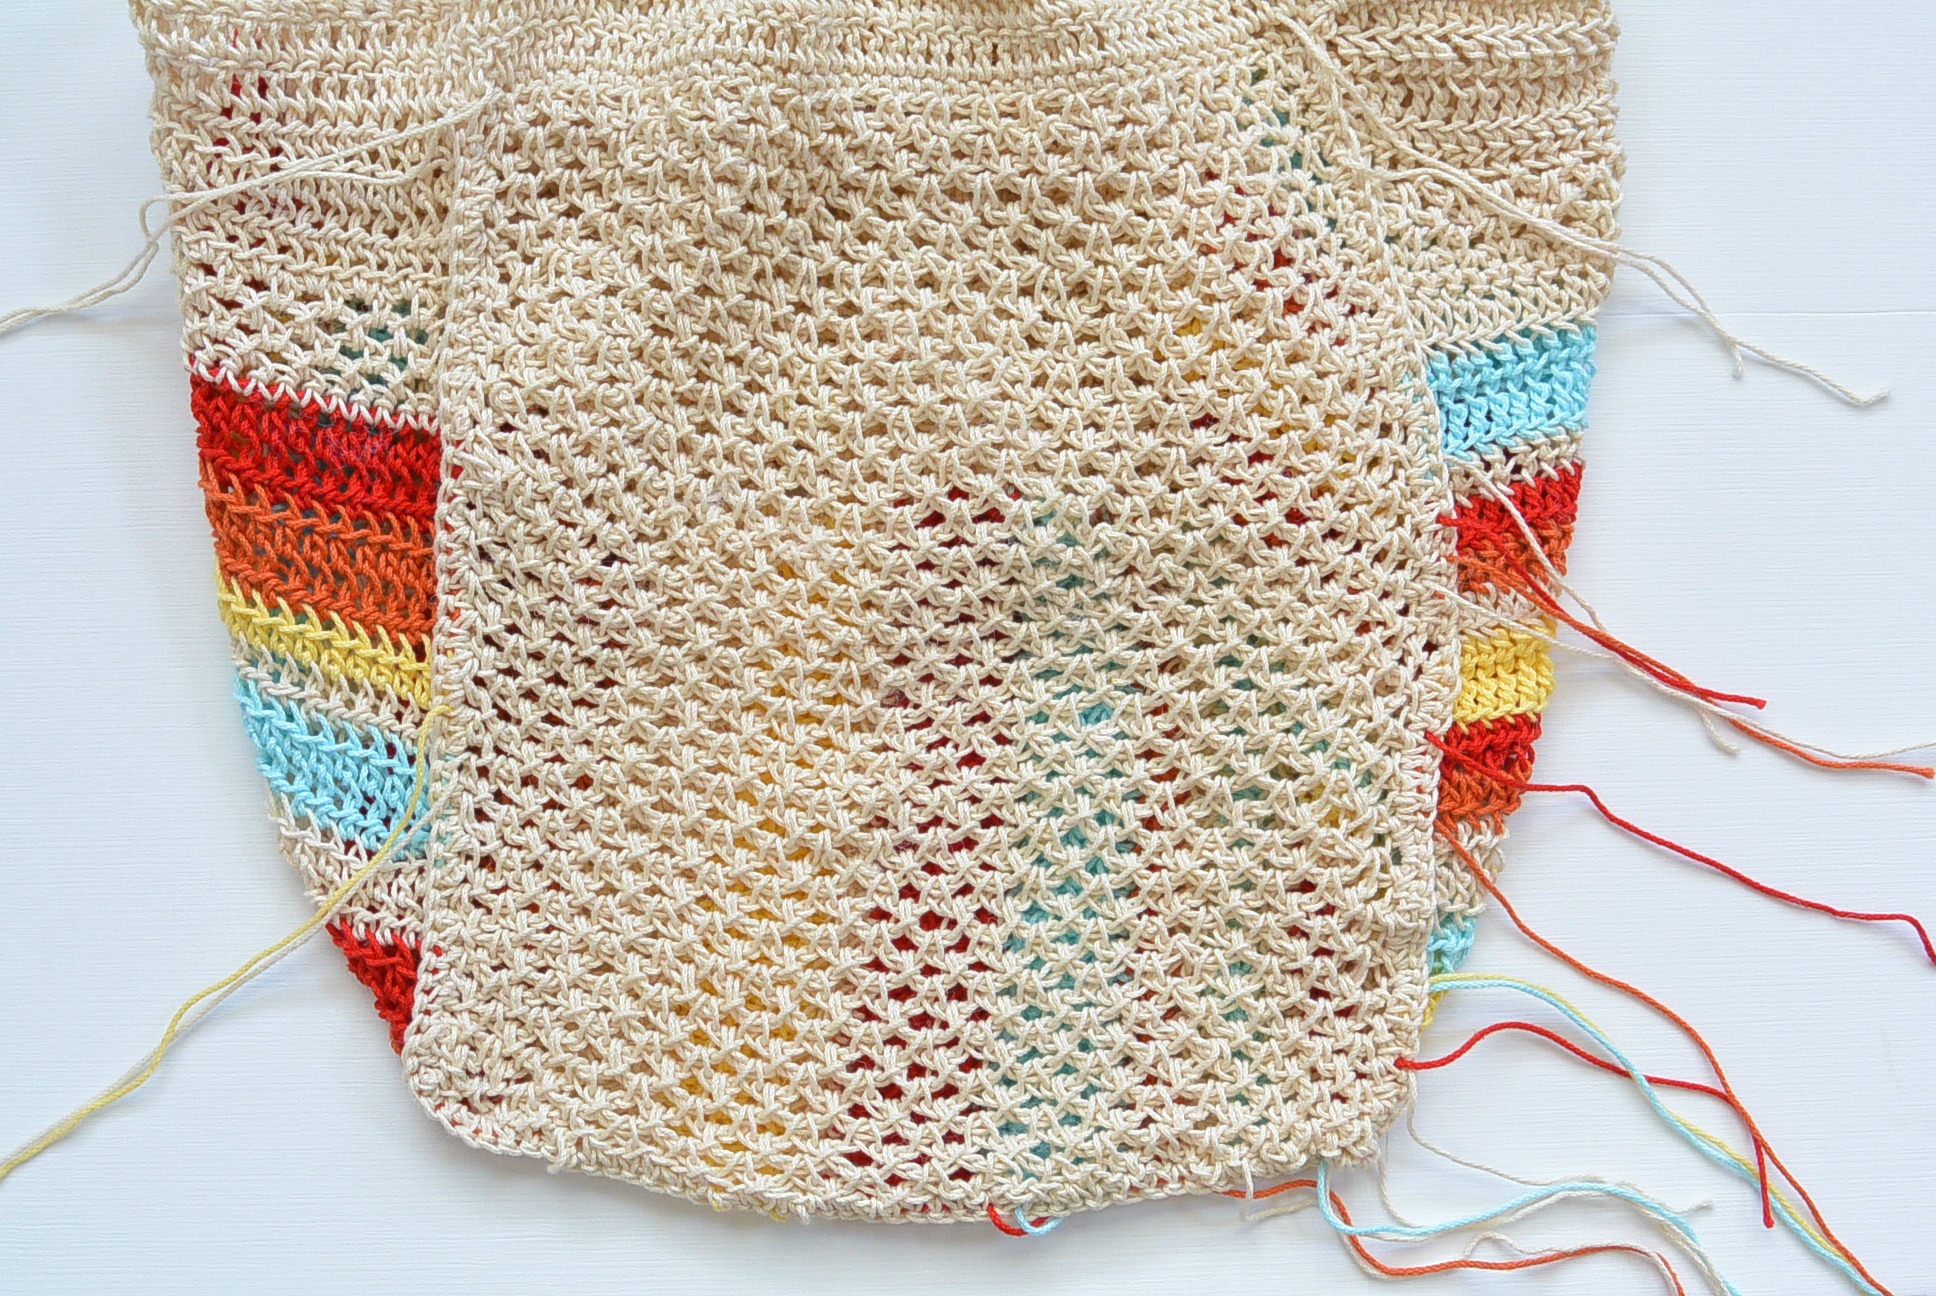
Step 3:
Seam these three pieces together
Step 4:
Finish the bag by working in the round on the top.
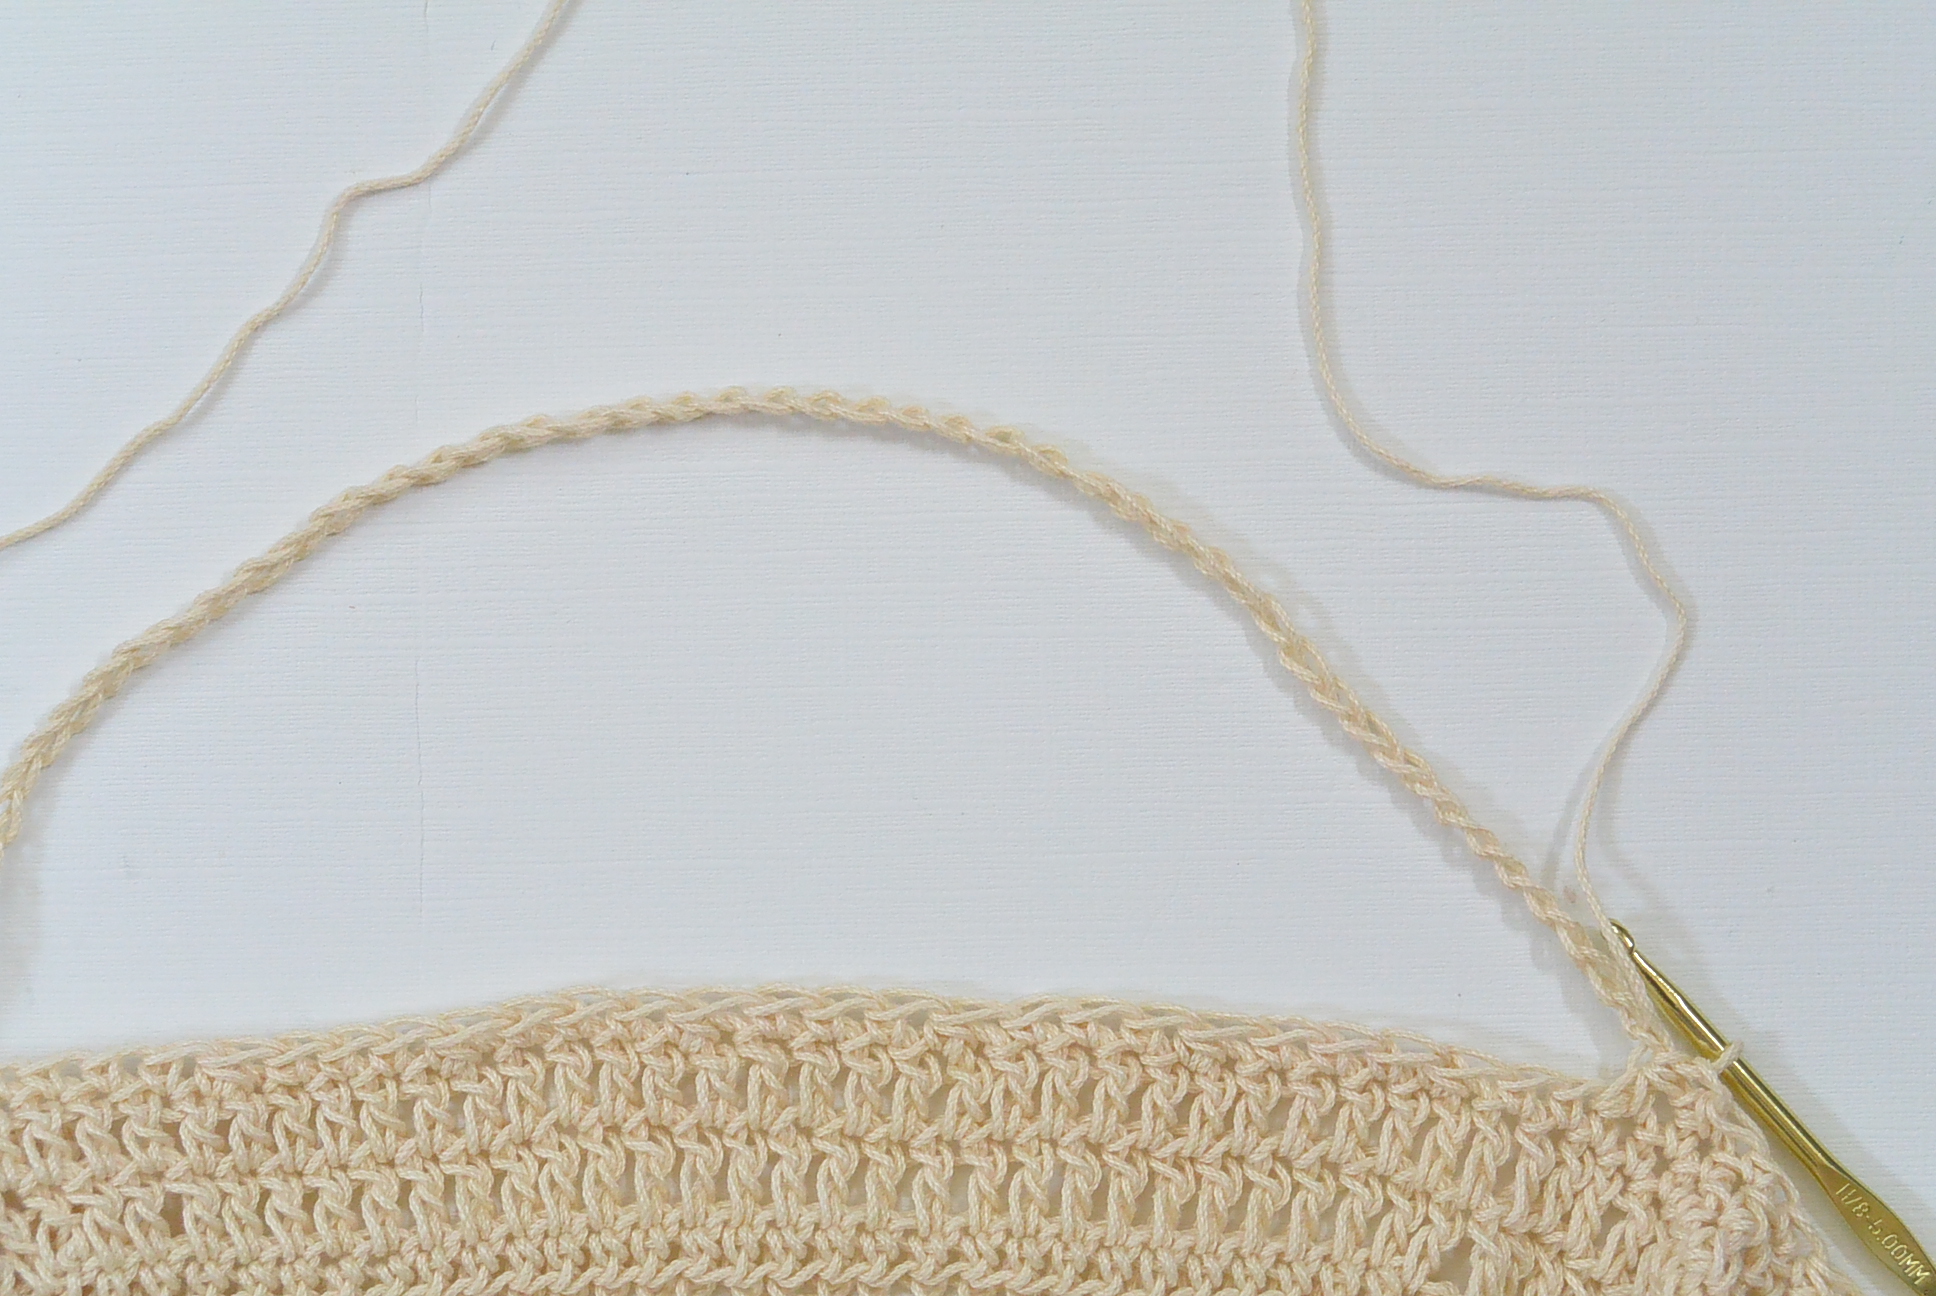
Step 5:
Make a chain on each side and attach with a stitch to create the handles. Continue to work around.
Step 6:
Make as many or as few tassels as you’d like, attach and enjoy!
Okay, now for the official pattern! See it below, or like I mentioned earlier, you can find the printable version for purchase in my Etsy shop (here)
Pattern Description: A large, summer bag inspired by the sandy shores of the Caribbean. Playful stitches and striping make this a beautiful tote that’s perfect for hauling around towels, your picnic lunches or your latest finds at the farmers market.
Skill Level: Easy +
Materials:
US Size H 5.0 mm crochet hook
US Size J 6.0 mm crochet Hook
3 skeins Lion Brand Yarn 24/7 Cotton in Ecru (100 g/skein) (Find the full kit available on the Lion Brand Yarn Website HERE)
1 skein Lion Brand Yarn 24/7 Cotton in Lemon (100 g/skein)
1 skein Lion Brand Yarn 24/7 Cotton in Red (100 g/skein)
1 skein Lion Brand Yarn 24/7 Cotton in Tangerine (100 g/skein)
1 skein Lion Brand Yarn 24/7 Cotton in Aqua (100 g/skein)
(Pattern uses approximately 250 g of Ecru & 100 g or more of contrast colors with additional tassels)
Gauge: Not important for this pattern
Dimensions (approximate): 19.5” wide and 16” long
Abbreviations:
ch – chain
hdc – half double crochet
hdc flo – half double crochet through the front loop only
sc – single crochet
sc2tog – single crochet two together (decrease)
sl st – slip stitch
ch-2 sp – chain two space
CC – change color
st – stitch
Notes: This bag is crocheted by first making two side panels and then a center panel. Each panel is then seamed together. To finish, the bag is worked in the round at the top and handles are added over the last few rounds. The side panels are made with a simple mesh stitch, and you can find a full tutorial online here: https://www.mamainastitch.com/how-to-crochet-an-easy-mesh-stitch/ This stitch is also used for a few rows in the center panel. Feel free to make this your own by changing the colors and striping in the center panel to your taste!
Caribe Bag Crochet Pattern Instructions
Side Panel:
With Ecru yarn and your size H crochet hook
Ch 41
Row 1 Sc in each st across the row, turn (40)
Row 2 Ch 2, sl st into 4th st from hook (this is also the 2nd to last st of previous row), *ch 2, sk st, sl st into next st, repeat from * across, turn. (40 ch stitches)
Row 3 Ch 2, sl st into ch-2 sp, *ch 2, sl st into next ch-2 space, repeat from * across row. (40 ch stitches)
Row 4 – 5 Repeat row 3
Change to size J hook
Next, repeat row 3 until entire piece measures 12” long, tie off and weave in ends.
Repeat “Side Panel” pattern to make a second panel.
Center Panel:
With Ecru yarn and your size H crochet hook
Ch 34
Row 1 Hdc in 3rd ch from hook and in each st across the row, turn (32)
Row 2 Ch 2, hdc flo in each st across the row, turn (32)
Row 3 Repeat row 2
Row 4 Ch 2, sl st into 4th st from hook (this is the 2nd to last st of previous row), *ch 2, sk st, sl st into next st, repeat from * across, turn. (32 ch stitches)
Row 5 Ch 2, sl st into ch-2 sp, *ch 2, sl st into next ch 2 space, repeat from * across row, turn. (32 ch stitches)
Row 6-7 Repeat row 5
Row 8 Ch 2, 2 hdc in each ch-2 sp across the row, turn. (32)
Row 9 Ch 2, hdc flo in each st across row, turn. (32)
For the remainder of this center panel pattern, until indicated, repeat row 9 for each row making color changes when instructed.
CC (Change color) to Aqua
Row 10 – 11
CC to Ecru
Row 12
CC to Red
Row 13
CC to Tangerine
Row 14
CC to Ecru
Row 15
CC to Lemon
Row 16-17
CC to Red
Row 18
CC to Tangerine
Row 19
CC to Ecru
Row 20 – 21
CC to Aqua
Row 22
CC to Lemon
Row 23
CC to Ecru
Row 24
CC to Red
Row 25
CC to Ecru
Row 26
CC to Aqua
Row 27
CC to Ecru
Row 28
CC to Tangerine
Row 29
CC to Aqua
Row 30-32
CC to Red
Row 33-35
CC to Ecru
Row 36
CC to Lemon
Row 37 – 39
CC to Ecru
Row 40-42
CC to Tangerine
Row 43 – 45
CC to Red
Row 46 – 47
CC to Ecru
Row 48-49
CC to Aqua
50 – 51
CC to Ecru
Row 52
CC to Lemon
Row 53
CC to Tangerine
Row 54-56
CC to Red
Row 57-58
CC to Ecru
Row 59 Ch 1, sc in each st across the row, turn
Row 60 Ch 2, turn, sl st into 4th st from hook (this is the 2nd to last st of previous row), *ch 2, sk st, sl st into next st, repeat from * across, turn. (32)
Row 61 Ch 2, sl st into ch-2 sp, *ch 2, sl st into next ch-2 space, repeat from * across row, turn. (32)
Row 62 – 63 Repeat row 61
Row 64 Ch 2, *2 hdc in each ch-2 sp, repeat from * across row, turn.
Row 65-66 Ch 2, hdc in each hdc across the row. Tie off and weave in ends.
The length of this center panel should equal the approximate measurement around one entire side panel, excluding the top of the side panel. Measure each side and bottom of one side panel and this total length should be close to the length of one side of the center panel. Adjust if needed by adding or removing rows.
Tie off and weave in ends
Seam
With the Ecru yarn and size H crochet hook, single crochet seam the two side panels evenly to the center panel with the original chain of side panel on top. It might be helpful to attach the side panel and center panel with pins or other method to hold it in place as you seam. Tie off and weave in ends. Note: Turn bag so that seams are inside of the bag before moving onto the Upper Portion of Bag. See photos below for additional assistance with seaming.
Upper Portion of Bag
Mark rounds as needed
With the size H crochet hook and the Ecru yarn, attach yarn to top of bag.
Round 1 Dc evenly around bag
Round 2 Dc in each dc around
Decrease
Round 3 Sc in each of first 3 stitches, sc2tog, *sc in each of 3 next stitches, sc2tog, repeat from * around.
Round 4 Sc in each of first 2 stitches, sc2tog, * sc in each of next 2 stitches, sc2tog, repeat from * around.
Stitch counts aren’t important for this section as you decrease
Handle
Next, when you reach the stitch that lines up with the location of the outer seam where you attached the Center Panel to the Side Panel (this is also where the color begins), chain 50, attach chain with a slip stitch to opposite side in the stitch that lines up with the center panel and side panel seam. See photos below. You will notice that the handles line up with where the colors begin and end on the bag.
Repeat this for both sides.
Continue working in rounds, crocheting 2 single crochet stitches followed by a decrease of sc2tog. When you reach the handles, do not decrease, simply sc into each ch stitch on the handle. Continue working around, following this stitch pattern until you’ve made two rows of single crochet stitches on the handles. Tie off and weave in ends.
Tassels
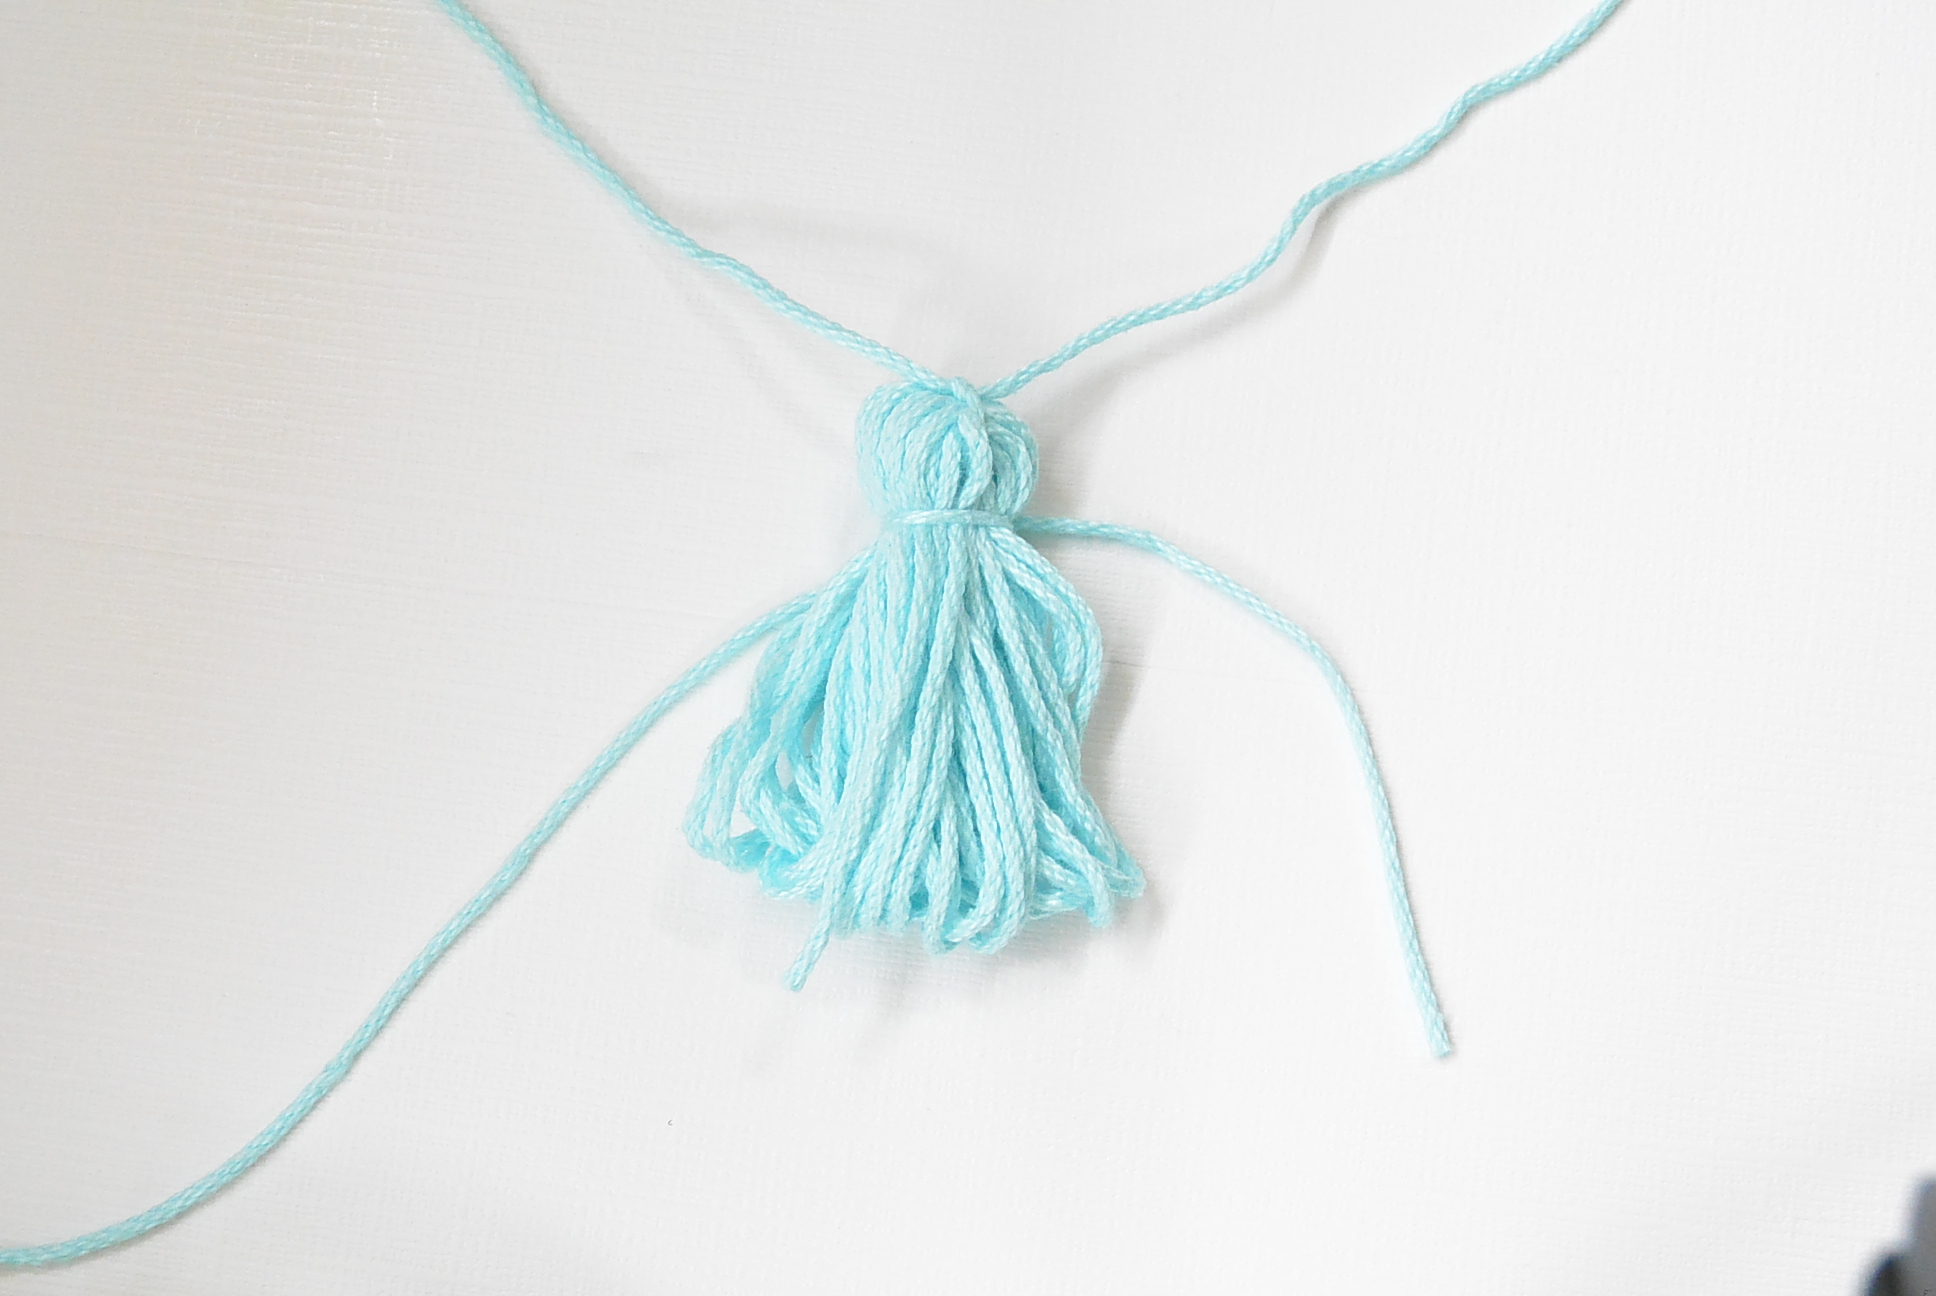
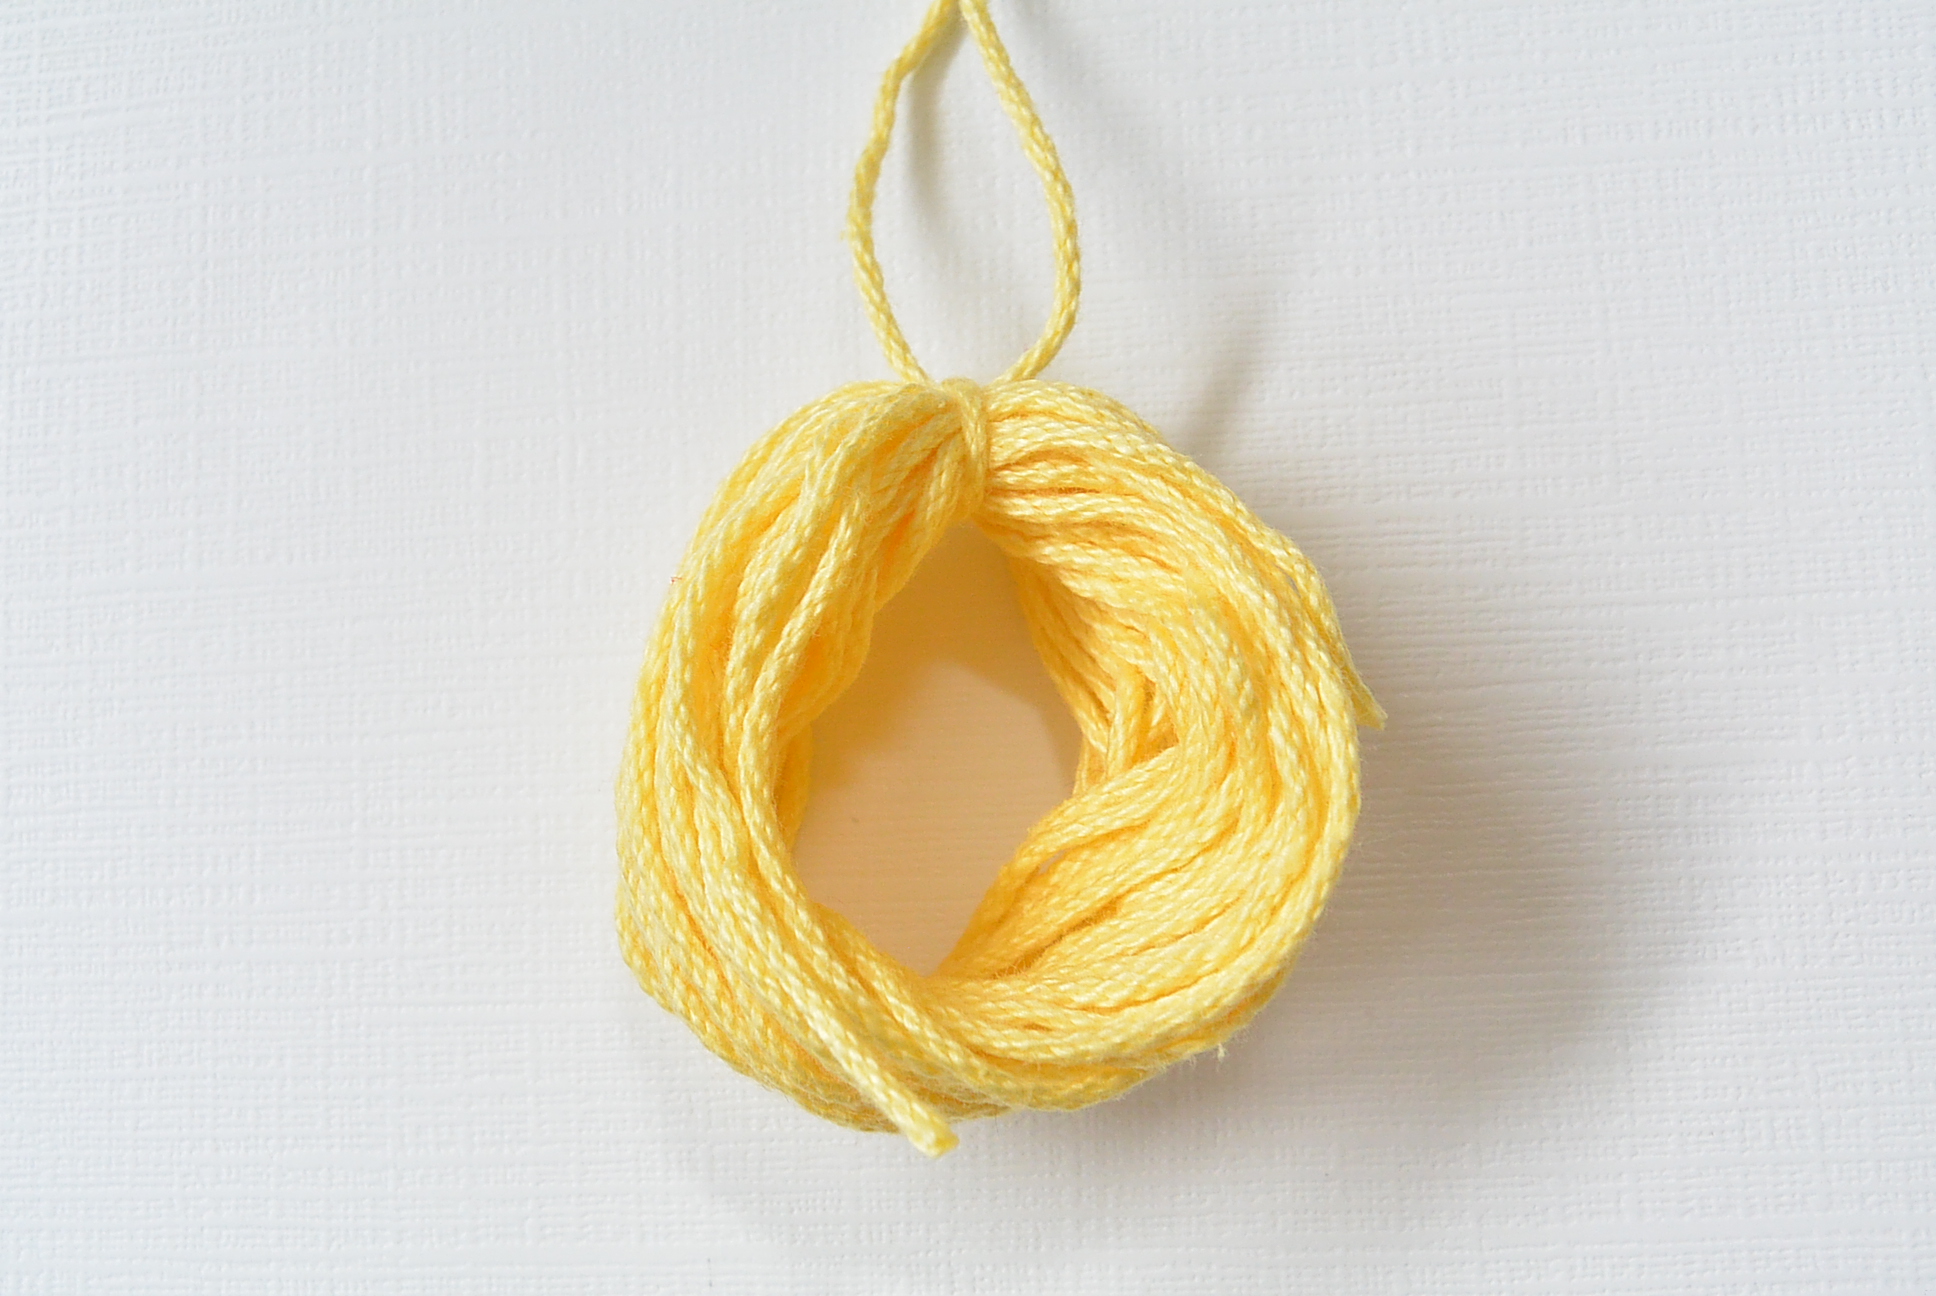
While optional, tassels give the bag a playful look and add texture and dimension! Add several for a dramatic look or just a few for more color. Make them as large or small as you’d like. See tassel picture tutorial below.
Hope you enjoy your new “Caribe” summer bag!
XO
Jessica
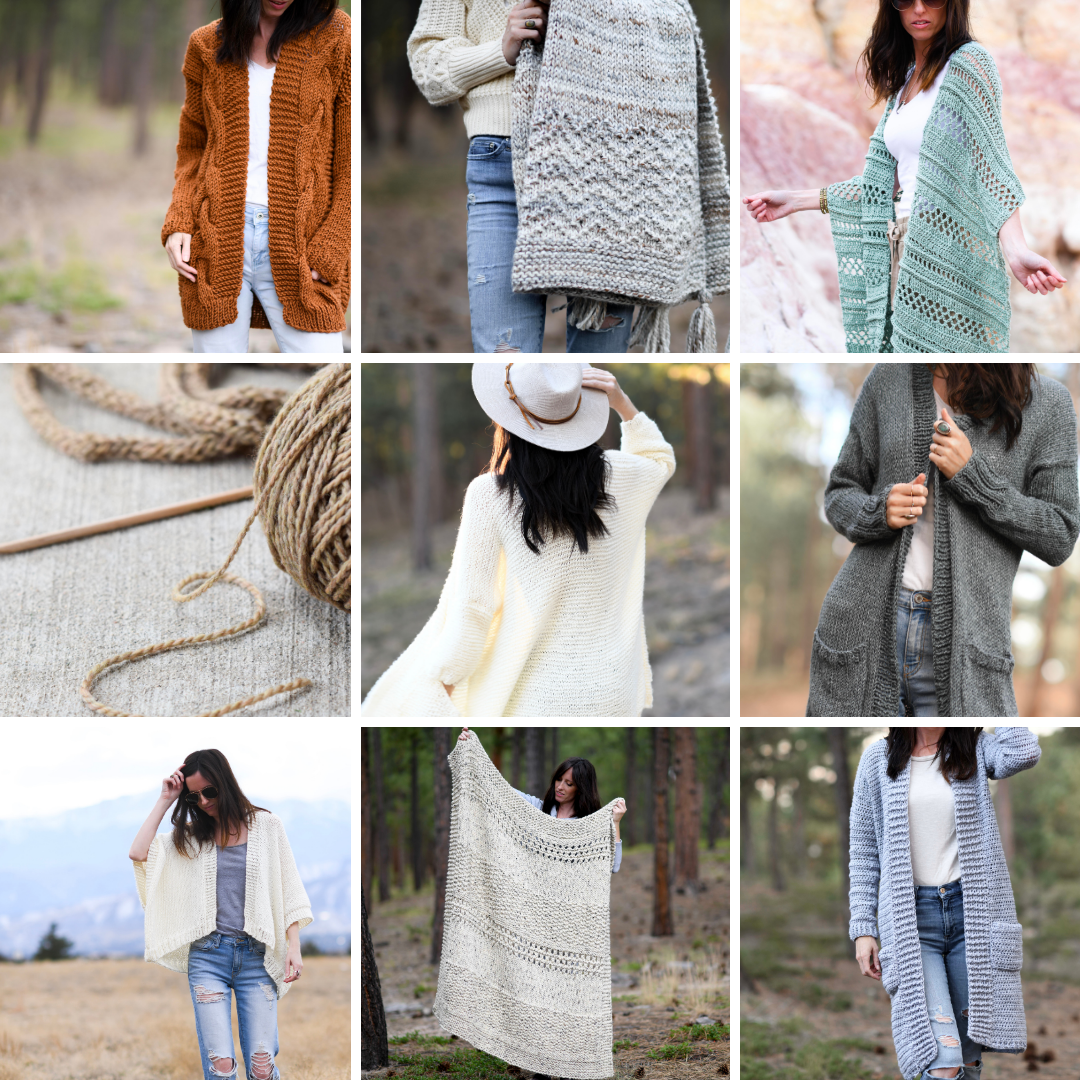
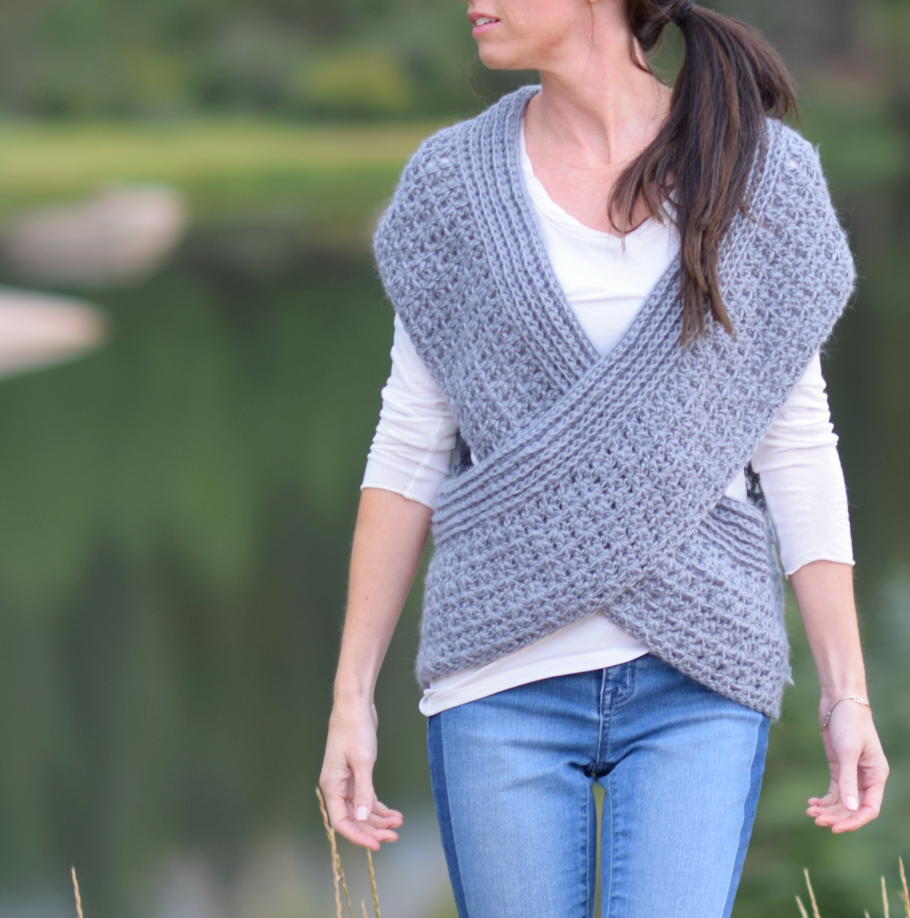
If you like this, you might also like:
Palmetto Market Tote Crochet Pattern
Thank you to Lion Brand Yarn for sponsoring this post! All opinions are 100% my own.

Shut the front door! This bag is amazing! I am absolutely going to make it and the tassels too! Genius…seriously.
Thank you so much for releasing this pattern! I already have a ton of the 24/7 cotton yarn so I didn’t want to have to buy the kit. Your work is appreciated!
Simply wonderful
This is such a fun and pretty bag!!! I love the stripes and those tassels are just too fun! My mind is racing with color ideas. My 12 year old would love a rainbow theme (ok, so would I!)!!
I love your “step out in color”! Yours is my favorite site – I want to make everything! I love your photos and I am from Colorado also! I am gonna make this bag base white with red white and blue panel. Thanks for sharing!
What a beautiful bag!!!
This is a beautiful bag! I’m gonna make it, though it’s very hard for me to find 24/7 cotton here in Canada. Thanks for such easy and chic patterns!
Wow! It’s so pretty!
Jessica! This is georgous!! I’m so proud of you – so talented and working with Lion Brand! You go girl! Xo
You’re the best Esther!
I WANTED A KNITTED VERSION. ☹️
Beautiful design! Just wondering if the panels should be blocked before sewing them together? I know on your simple mesh tutorial you had to block the pattern once done.
This one doesn’t need to be blocked.
One more great bag pattern! I love the sunny colors and the really clever construction of the bag. Crocheted items like bags are really nice to make when it is warm. No wool! Who doesn’t need a beautiful, practical bag? I do. And not only one. Nice gifts, too. Thank you for sharing your patterns.
You’re welcome Mila! I agree – love a good summer bag. 🙂
Very nice bag. Used lots of LB cotton in my market bag making days. Not cheap but great cotton.
Love the bag, however I’m having difficulty with the seaming. How do the rectangle side panels attach to the center piece? So far I’ve attached one side of the side panel. Are two of the side panel sides supposed to attach to the center piece or just one?
Thank you,
Corinne
I am having a very difficult time trying to figure out how to piece the three panels to the center panel.
I’ve sat here for probably five nights staring at this thing trying to figure out how to put it together. I don’t want to give up as I have spent a lot of time crocheting these pieces and I would love to use the bag. Can you offer any additional assistance on how these are supposed to go together? I’ve looked at the pictures but I still can’t figure it out help please.
I am also having difficult trying to figure out how to seam the three pieces together. Can you help? When I seam them side by side the bag seems especially wide and I cant’t see how to finish the plain panels.it is so beautiful I would really like to get it finished.