Vintage Knit Tie Headband Pattern
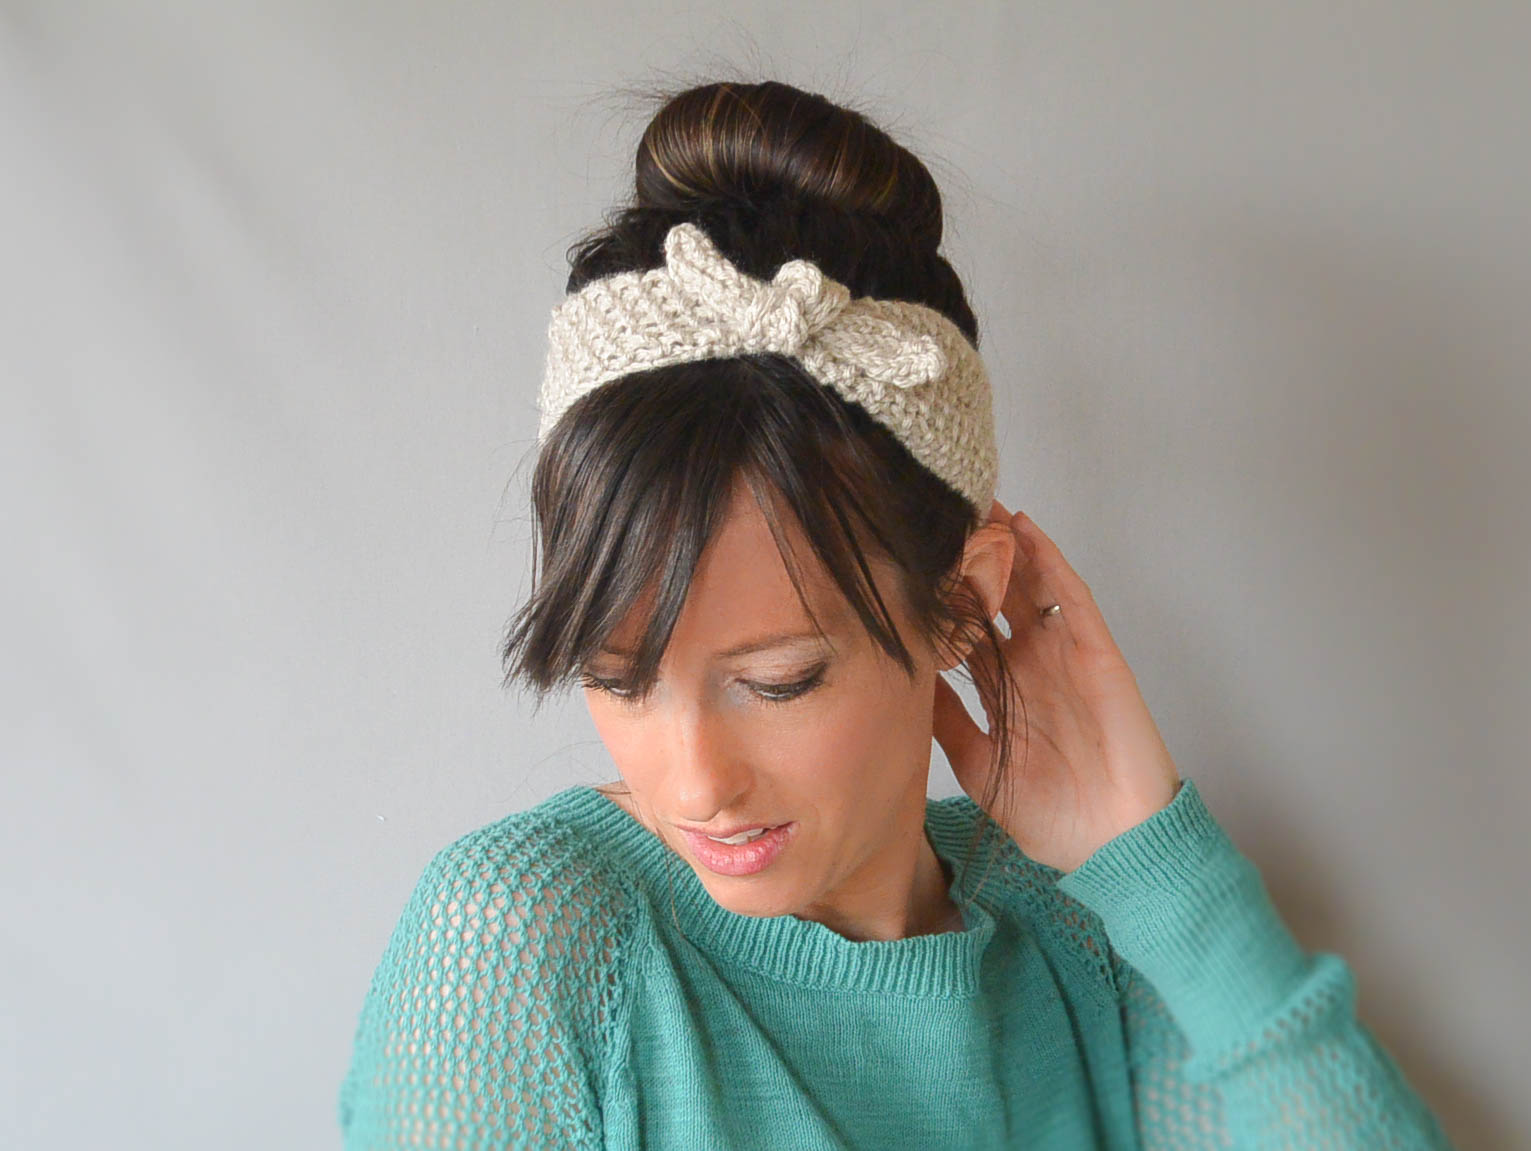
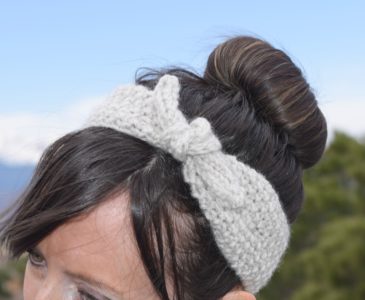
For a while now, I’ve wanted to knit a vintage looking, tie up headband. After walking around downtown a couple of weeks ago on a warm spring day, I spotted a headband like this, only it was made with red and white fabric. The whole rockabilly look is so cute, but I could never pull it off. This is as close as it gets for me. 😉
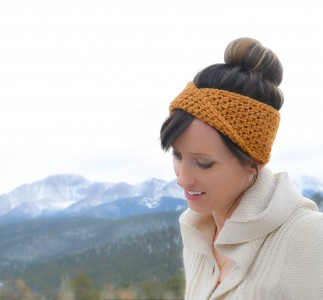
Spring could be the perfect time to wear this or give it as a gift, don’t you think? I had dreams of wearing it out in the garden with baby girl on a hot spring day and having a quintessential spring photo to post. Unless that spring photo was meant to include a foot of snow and me donning a giant parka and frozen purple lips, there aren’t going to be any outdoor pictures. (Just the one you see below that I took on my deck just before the snow 😉 )
[social_warfare]
There really isn’t anything tricky to this headband, but I had to remind myself how to “make one” (M1) when knitting. I know, it probably seems funny that I needed to remind myself how to do this. Decreasing has always been easy for me, but increasing just doesn’t stick with me as well for some reason. The increases and decreases are very minimal.
Notes:
This is headband is made in one piece.
You need to know how to knit, purl, knit 2 together, make one.
Abbreviations:
m1 – make one (Increase by making a stitch. It’s so easy, do a quick search on YouTube if you don’t know how to do it)
k – knit
p – purl
k2tog – knit two together – decrease
You will need:
US Size 8 Knitting Needles
Less than one skein Lion Brand Vanna’s Choice in Linen (or your choice of color) comparable worsted weight yarn

Lion Brand Vanna’s Choice Heather Yarn – $3.08
Retail Price: $4.40
You Save: $1.32
from: Craftsy
(Above link is an affiliate link, which I make a small commission on if you purchase through the link)
Scissors
Tapestry needle to weave in ends
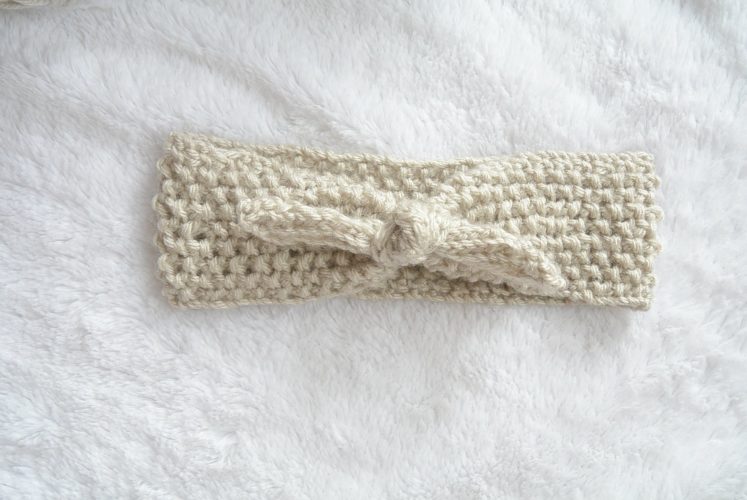
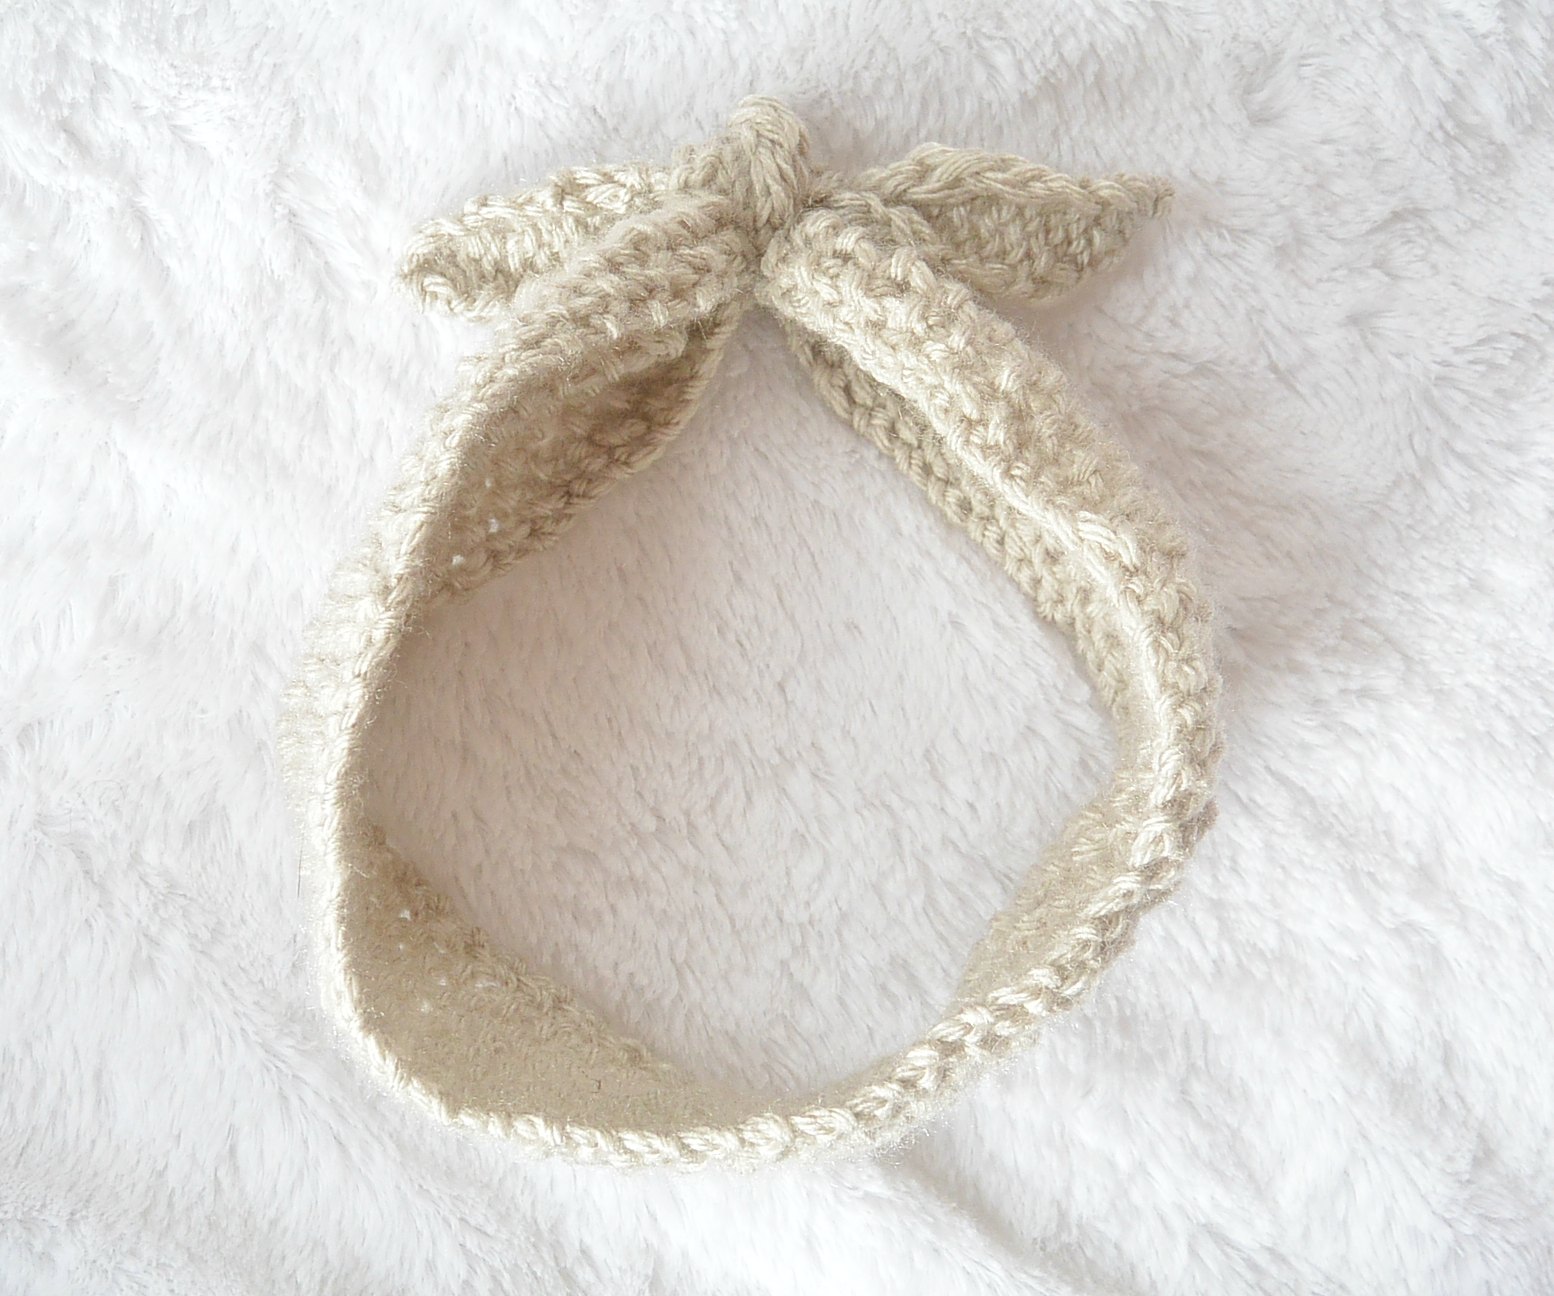
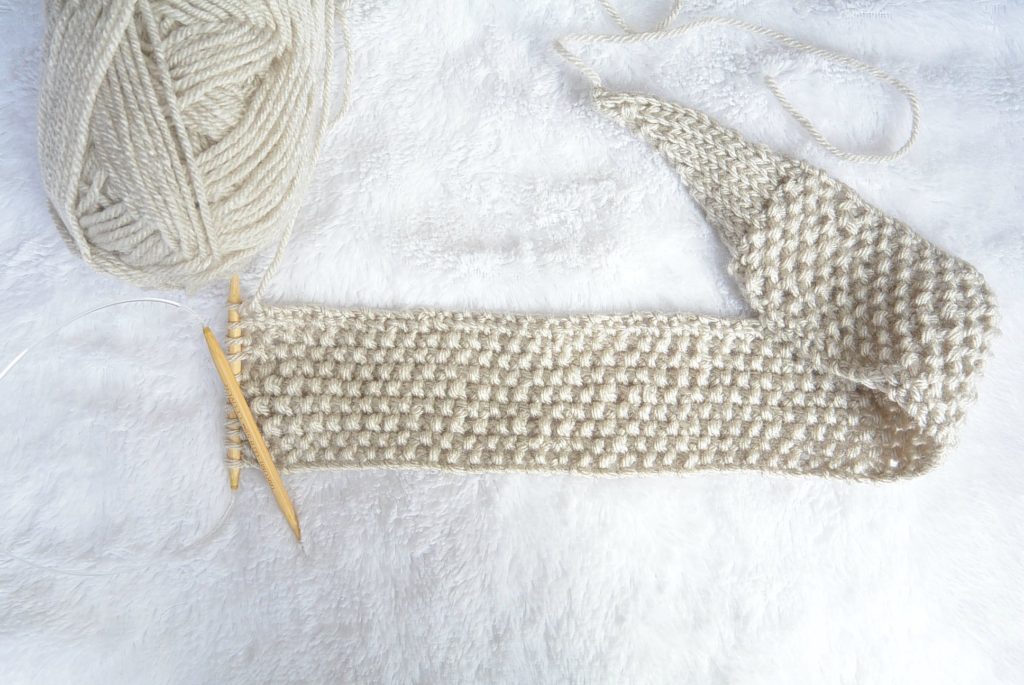
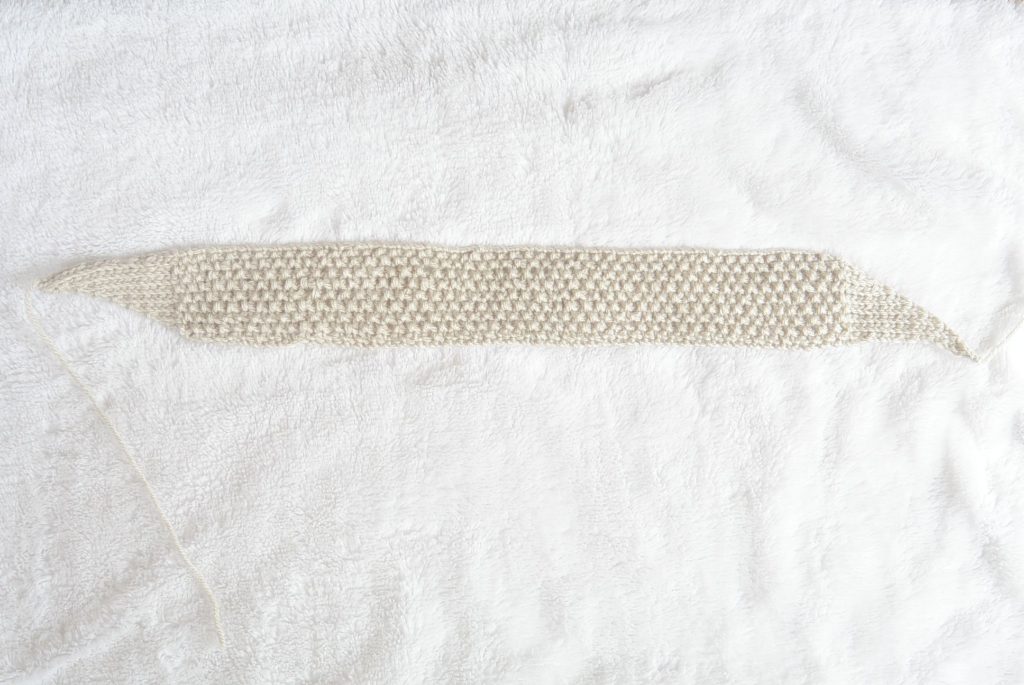
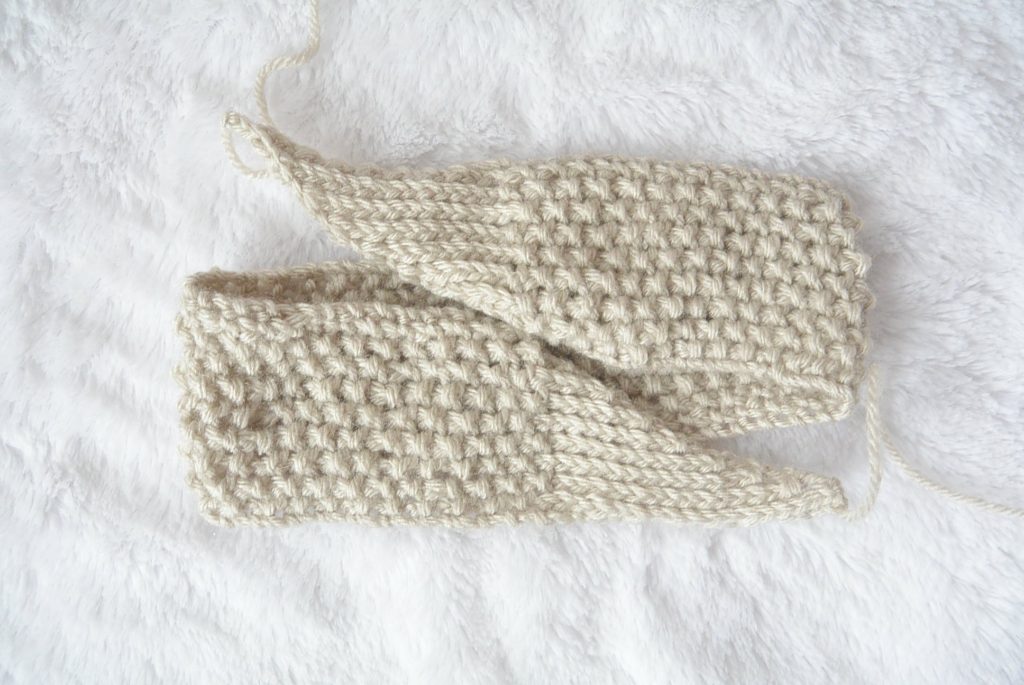
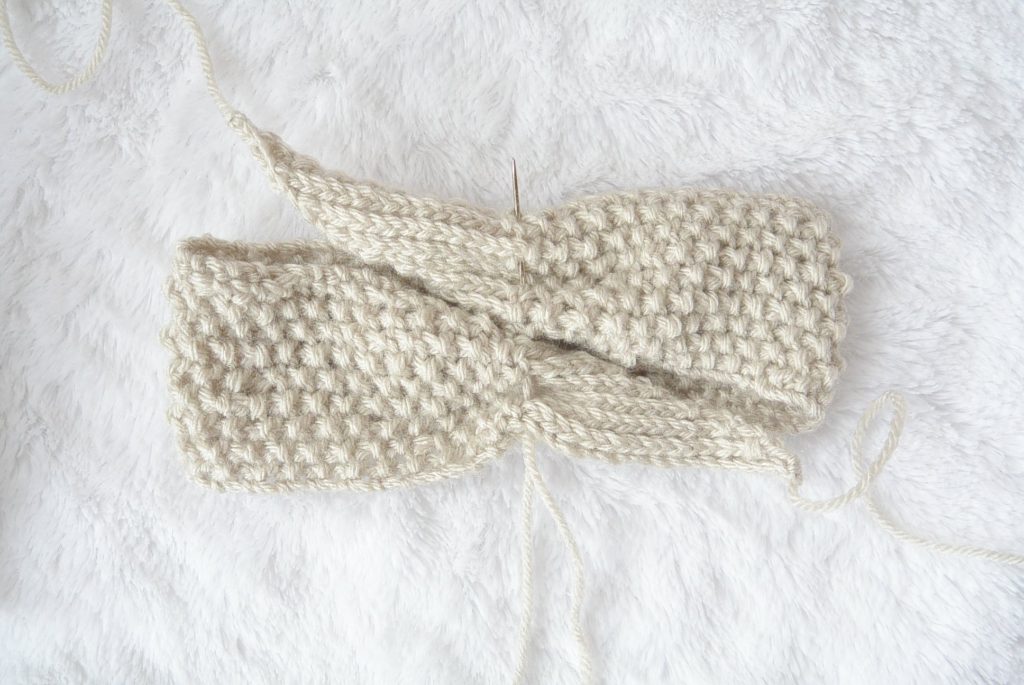
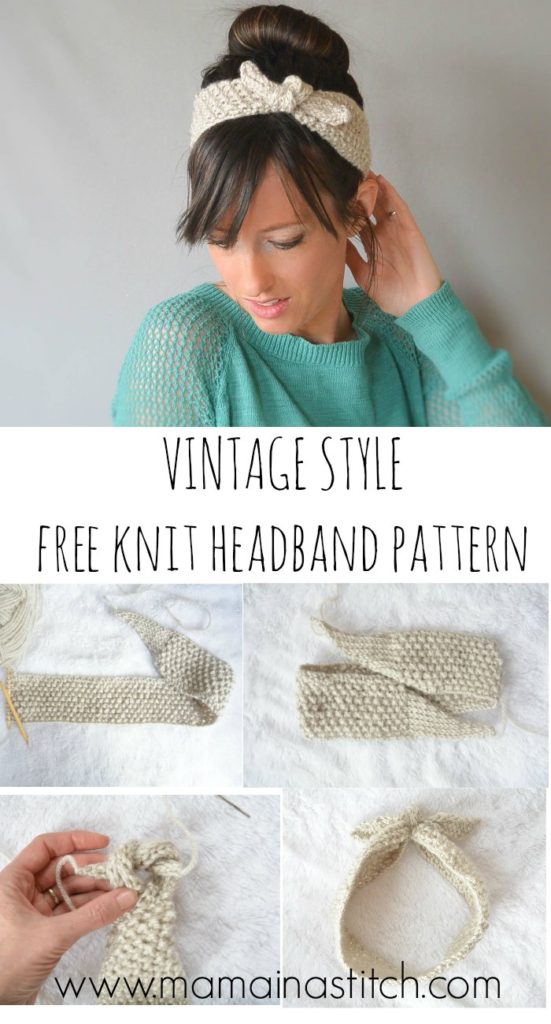
First, here’s the pictures of how you put the headband together (then, check out the written pattern below!):
**The length of the seed stitch section is the length that will go around your head. The headband is stretchy, but make you can make this larger or smaller by increasing the length of the seed stitch portion. You may want to test it on your head before tying it all off!
Pattern:
Cast on 1 stitch (You will begin working in stockinette and increasing, or “make one” (M1) at the end of each KNIT ROW ONLY)
Row 1 M1 (With the one stitch on your needle which you cast on, you will “make one” to have a total of two stitches)
Row 2 Purl across row
Row 3 Knit across row, m1 at last stitch
Repeat Row 2 and Row 3 until you have 11 stitches on your needle
Next Row: k1, p1 across row (this pattern will create the seed stitch)
Repeat this k1, p1 for each row until you have a total length of 20 inches from the beginning (the beginning, meaning the cast on row)
Once you’ve reached 20″ length total , end on a wrong side row (purl side).
Decrease:
(Now just as we “made one” on each knit row above, we will decrease or “k2tog” at the end of each knit row in this section. We are ending with a section of stockinette, just as we started with a section of stockinette)
Next row – Knit across row, k2tog
Next row – Purl
Continue in this stockinette, knitting 2 together at the end of each knit row, until you have only one stitch left on your needle.
Cut yarn, pull through and tie-off. Weave in ends.
Creating the Tie-Up on the Headband (You can check out the picture tutorial above as well)
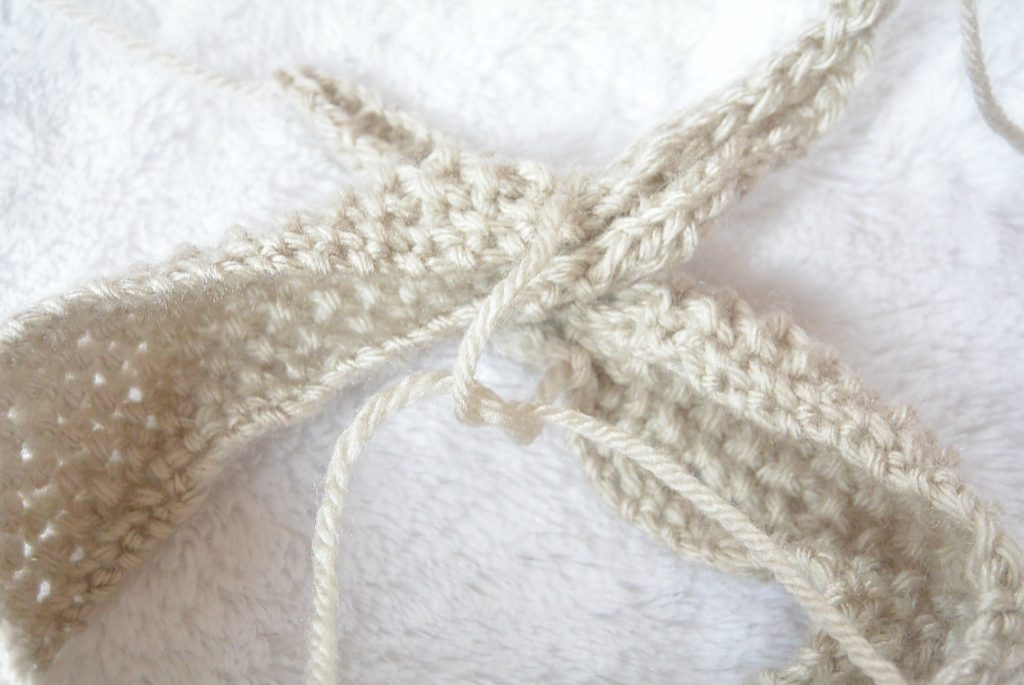
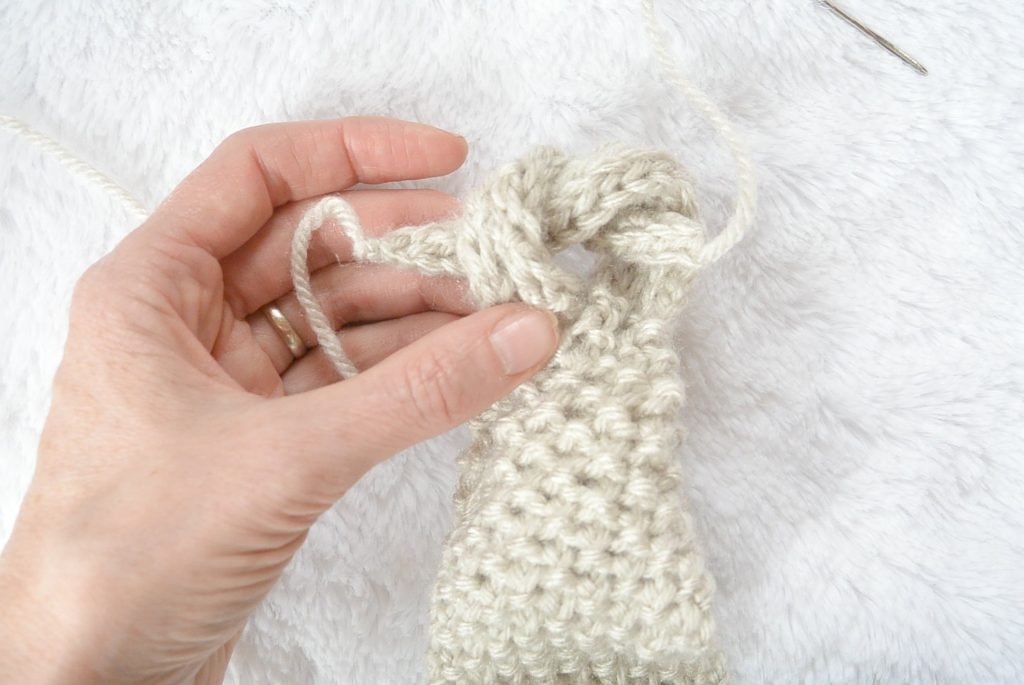
Line up the headband as pictured , with the stockinette sections lying next to each other. With your tapestry needle and a length of yarn, work the yarn through the two sides, and pull together. Essentially, you are cinching it up. Now tie a knot underneath the headband. Weave in ends.
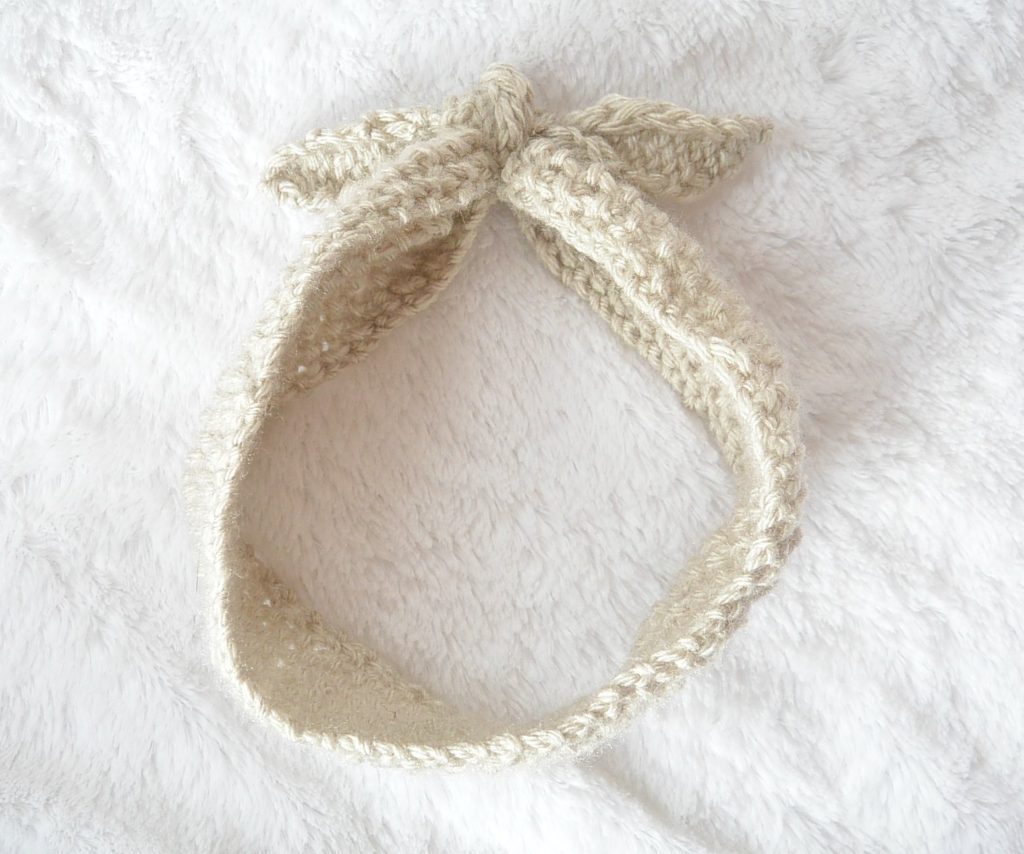
Take the two ends of stockinette, and tie over one time (just like the first step of tying your shoes), and pull tightly. You’ve got your cute little rock-a-billy knot!
Look at you, you hipster. 😉
What do you think of the vintage look? Likey, or no likey? 😉
Thanks for taking the time to let me know in the comments section below!
Don’t miss a post!
[jetpack_subscription_form] |
You might also like:


Likey!!!! Alot!!
Ha ha! So glad you “likey”, Esther. 😉 Thanks friend.
Thank you, not the one pattern but others. This will be easy to do on a trip and use for charity or small church festivals, it is okay to sell them after making them?
Hi Maureen – thanks for letting me know! Yes, feel free to sell anything you make from my patterns Maureen. Great idea to make quick knits on road trips.
I think that it is a great pattern and I can’t wait to give it a try. A friend of mine is having brain tumor surgery in a few weeks and I have been looking for headbands to make as a fundraiser. Thank you for allowing us to sell items made from your patterns!
Have a wonderful night. 🙂
Aww, I wish your friend the best with her surgery and health. How scary. I’m so glad that you like this and you’re welcome! I just ask that if anyone sells online they make sure to let people that it came from my blog. Best to you Suzanne!
Thankfully, hers is a benign tumor, but it is causing other problems. It is affecting her vision, hearing, and balance. I would be happy to put a link back to your blog where I sell the headbands. 🙂
Thanks again!
That’s good it’s benign, but still a difficult situation I’m sure. Hope all works out for her and she gets well soon. I’m so glad you would like to use my patterns and thank you so much for linking back! I so appreciate it.
like a lot!
Oh good – thanks Sylvia!
This headband is adorable!!! I don’t typically wear anything on my head, but I just might have to give this one a try!!! Thanks for another fun pattern, Jessica!!!
You know what Doreen, I wear headbands for short periods of time. Sometimes I wear them just to go out, then I’ll take it off when I get home. Glad you think you might like to try this one!
Love it! Thanks for sharing
I crocheted one some days ago but I love how it looks knitted. I definitely need to learn how to knit 🙂
https://soldenochedecocrochet.blogspot.com.ar/
It’s fun to both knit and crochet for sure Cintia.
I so love this headband. Easy and cute
I’m so glad Jacqueline! Thanks so much for taking the time to let me know!
super cute… reminds me of something I had in the 80’s with a modern touch. Good work!
You’re right! I usually think 50’s style when I see it, but it is 80’s also! Thanks for the kind words about it.
Women wore this style in the 40’s…ever see a pic of Rosie the Riveter & others of that era?
Yes, you’re right!
Love that this one stays tied. Thinking of my 10 year old, curly-headed granddaughter. Definitely a “curl tamer” that will look cute!
That will be so cute on a curly haired little girl! How precious. So glad you like it!
I do like it — a lot! Personally, I have very shot hair, so I don’t tend to wear headbands. But I volunteer at a Youth Drop-in and Shelter and I offer to teach any of the teenage girls how to knit. A lot of them have long hair, and this pattern seems ideal for them. Thanks!
Thank you for taking the time to work with those young ladies! What a wonderful skill that you are teaching them with knitting. I’m so happy that you think this pattern may work for them. 🙂
I love your pattern; I’m an experienced crocheter but needed a simple yet interesting project to build my knitting skills. I’m halfway through my first one right now. I have four daughters ages 12-26 so I see a lot of great potential in this one! Thank you for your clearly written instructions!
Hi Lisa! How lucky you are to have so many lovely daughters. I just love having a little girl! I’m glad you are enjoying the pattern and thank you for taking the time to let me know! You’re welcome of course!
This is so cute and I basically want to make one for everyone I know!!
Haha! Thanks Alysa. So glad you like it enough to want to make one for everyone. Lol!
This is all I wanted…what I was looking for…a beginners simple tie up pattern. However I don’t understand the sewing instructions at the end & pics don’t help me much…just don’t get it (not your fault) I will look for something similar on youtube. Thanx much for this…really cute & so are you! 🙂
Have lots of left over yarn from different projects. This looks like the ideal chance to use them. Will try soon should be great gifts for Daughters and Grand-daughters
Great to hear June!!
Perfect 🙂 I had my surgery 3 weeks ago, hair slowly regrowing. Today I purchased a knitted band, and started thinking, I could make this.
I don’t know if people are not reading the pattern or automatically improvising but it is impossible to M1 in on cast on stitch. Do you possibly mean KFB perhaps? The headband is adorable but perhqps you should fix that mistake in your pattern.
Wondered the same thing. Make 1 adds a new stitch between 2 existing stitches using the bar between the 2 when you separate them.
Easy and fun to make…I made one for my sister and she ordered MORE…so I need to get busy. thanks !
I thought it was just me! Thank you for clarifying. Things are running smoothly now!
Hi there – How many yds of worsted yarn did you use? I have a gorgeous aran wool that I would love to use for this, but it’s only 87 yds.
Jessica, how do I make one with one stitch? I know how to make one but I’m baffled how to make one with only one stitch. Help please! Thank you, Pam
Hey Pam! Start with two stitches. I need to correct this!
So you start with 2 stitches. I’m confused with the two ends (ties)as in your photo the two ends(tie), one end looks like it decrease/increase at different ends of the knit row. Your pattern tells to you m1 and descrease at end of knit row so that would make both ends look the same not like Your photo.
A couple of friendly tips. Start with one stitch and knit front and back instead of make 1. Use KFB in place of every M1 in the pattern, makes it much easier and has the same results. Also at the end where you begin working the second tie section, instead of decreasing at the end of the row, make your decreases at the beginning of all the right side rows by knitting the first two stitches together. The result will be the ends slanting in opposite directions just like the picture shows. If you decrease at the end of the row like the pattern says, you will end up with both ties slanting in the same direction and they will stick up in an awkward position when you wear the headband. The width is perfect but if you want to make the headband wider, use a cable cast on – one stitch on each end of the first seed stitch row. Hope that helps.
Hello! I was wondering how you would go about making it a little wider? I made one of these the other day and it came up to 2.5 inches wide. How can I make it 3.5 inches wide without making the tie too long?
I love the pattern, I am going to start it tomorrow after work can’t wait! Last weekend I made your Toque cabled hat and I love it, so did my friends at work!! Thanks again for your beautiful patterns❤️
So happy you liked that Toque Hat, Karen! Thanks so much for letting me know that you enjoy my patterns. Made my day!
Love the Vintage Headband pattern. Made one to give it a try & loved it, so will continue in another color…Thank You!
Hi,Jessica I follow you and make a lot off your pattern I want do this headband for my daughter and her baby daughter how can I do baby one 3/6 months can u help me
Thank you so much for the pattern! I did this on a KB loom and it turned out perfect. I work in a long term care home so this has been perfect for my coworkers and I to use to save our ears from medical masks. The residents have been asking for me to make some for them too!