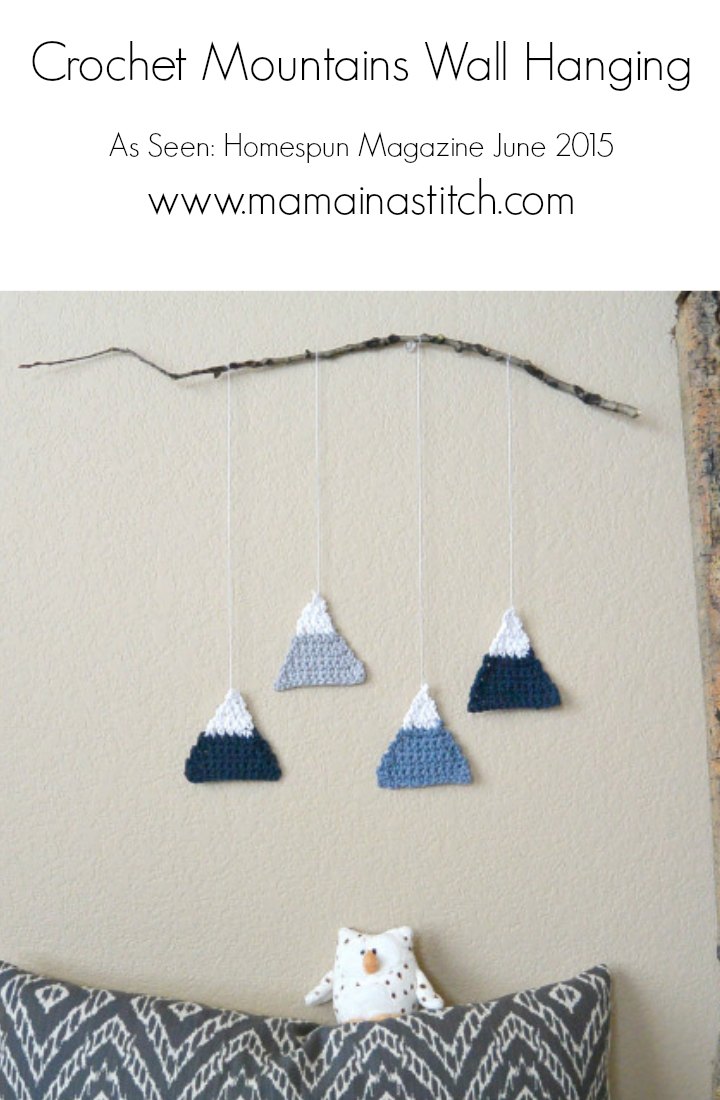
Crochet Mountain Wall Hanging – As Seen In Homespun Magazine
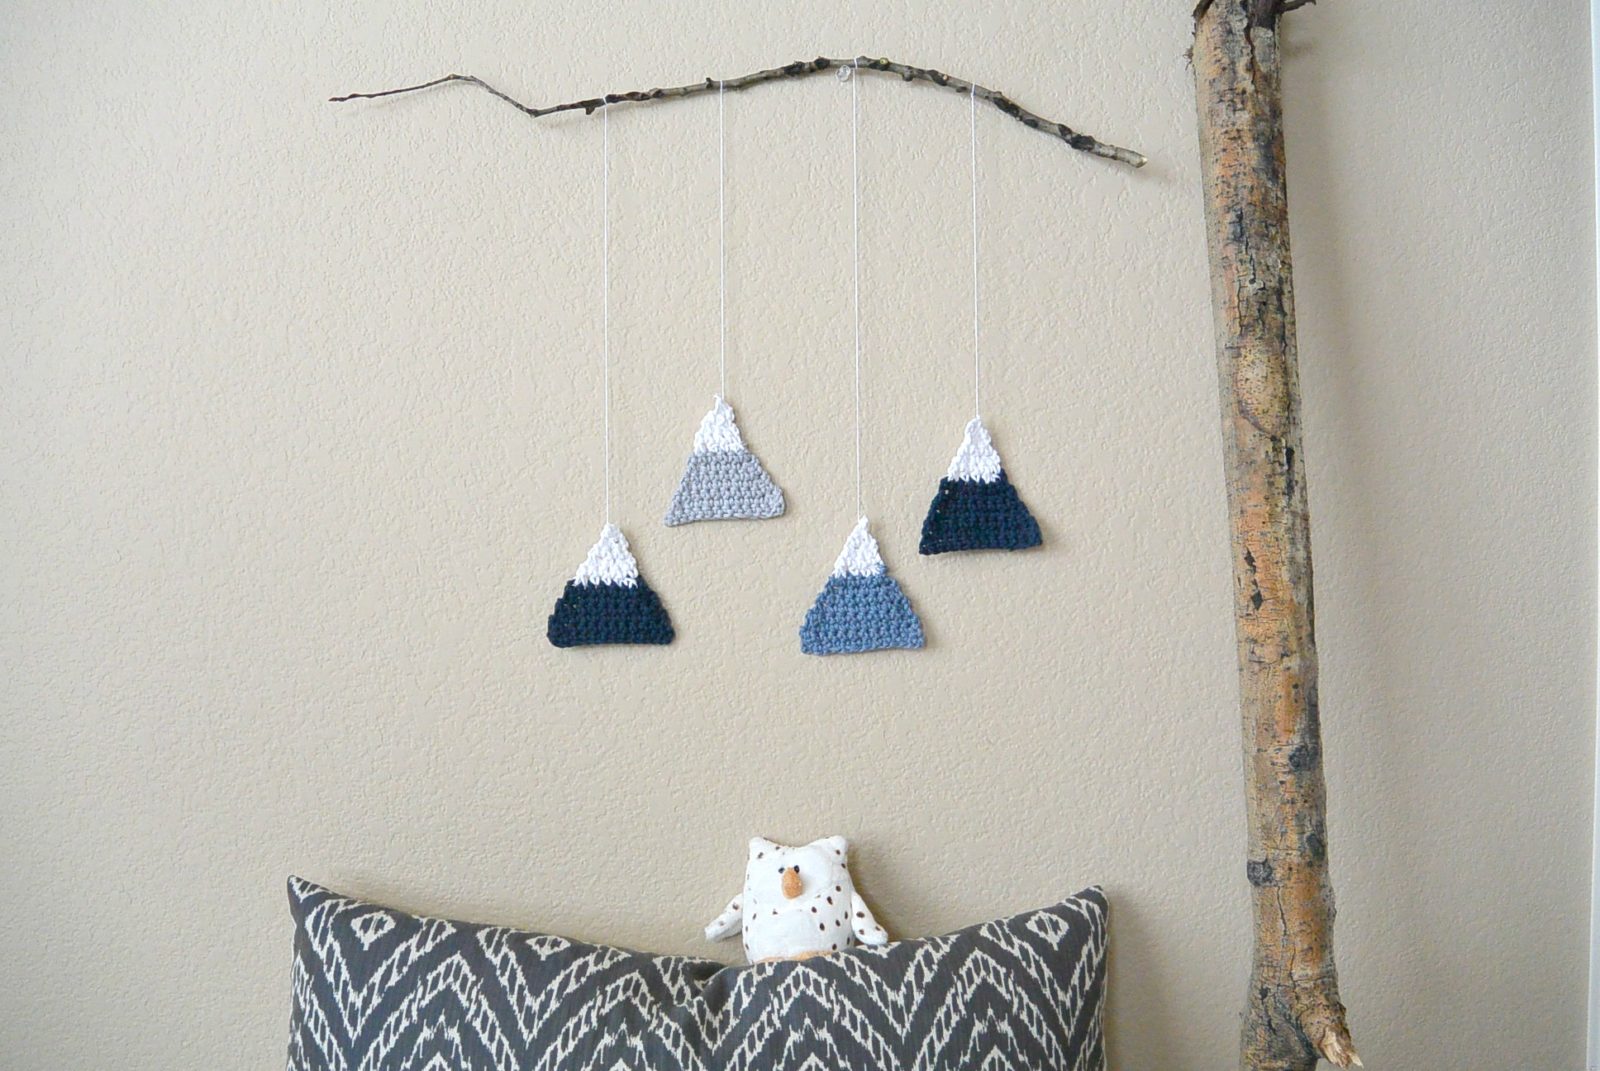
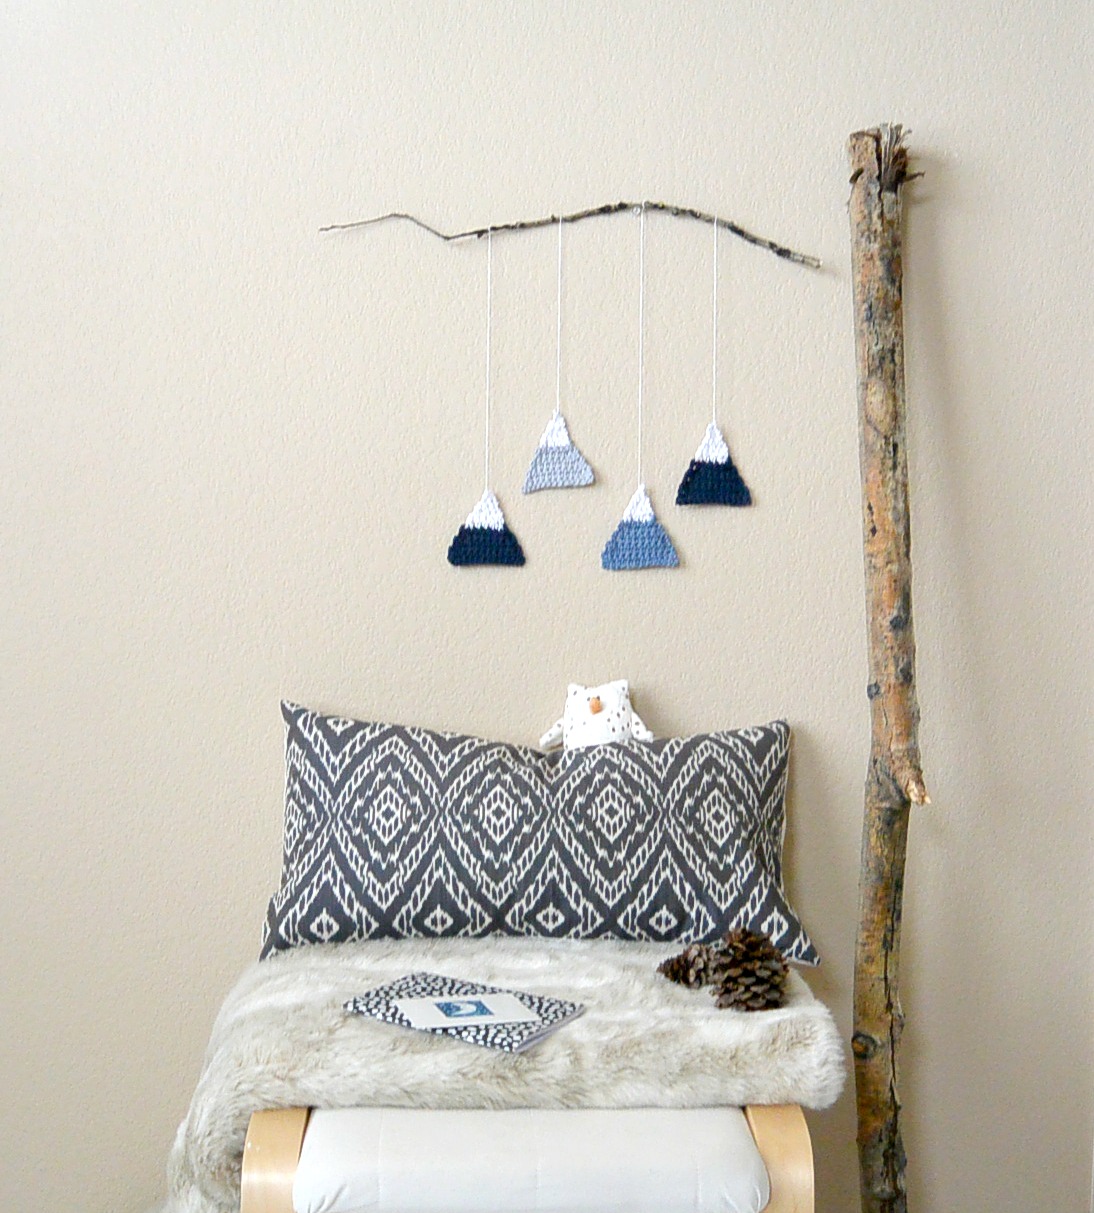
I love making things for my daughter and me to wear, but I also really enjoy making things for our house. Instead of another accessory (though I will be posting a knit scarf in the next week), I went for a new wall hanging. Triangles are fun, and there are so many things you can do with a crochet triangle. From pillows to garlands, to mountains, (as you see here) the sky is the limit. I had to remind myself how to crochet a triangle, and will do my best to explain how I did it in my pattern. These mountains hang from an aspen branch to add a touch of geometry and rustic charm to the room – sounds fancy, huh?!
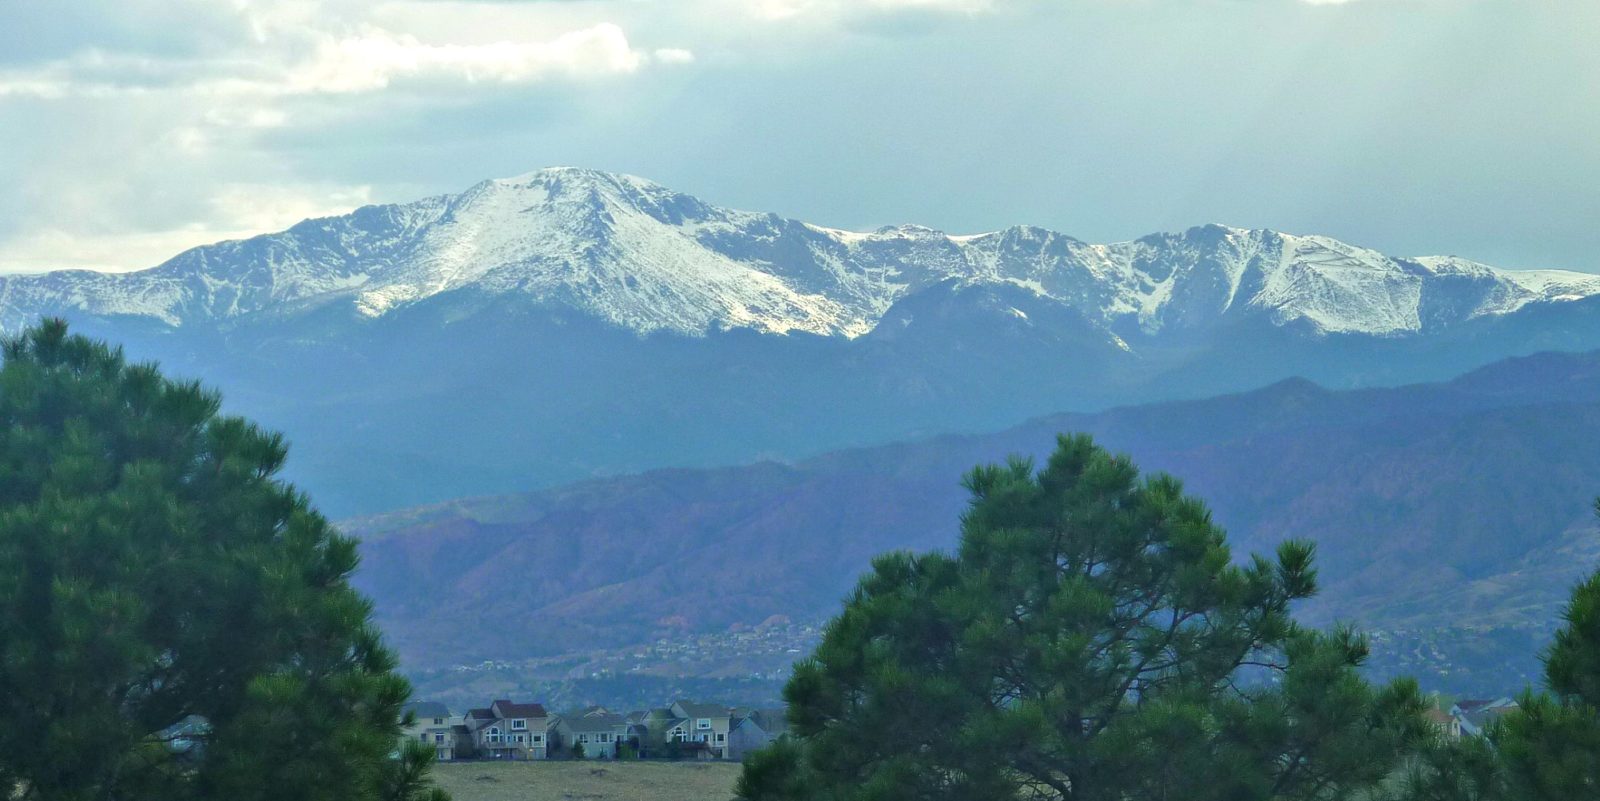
Growing up in Colorado, the mountains have been a big part of my life. Besides them being my compass when I drive around (it’s easy for me to get lost when I don’t see mountains to the west of me – ha ha! ), they are an ever present reminder of nature’s beauty and how small my life problems normally are.
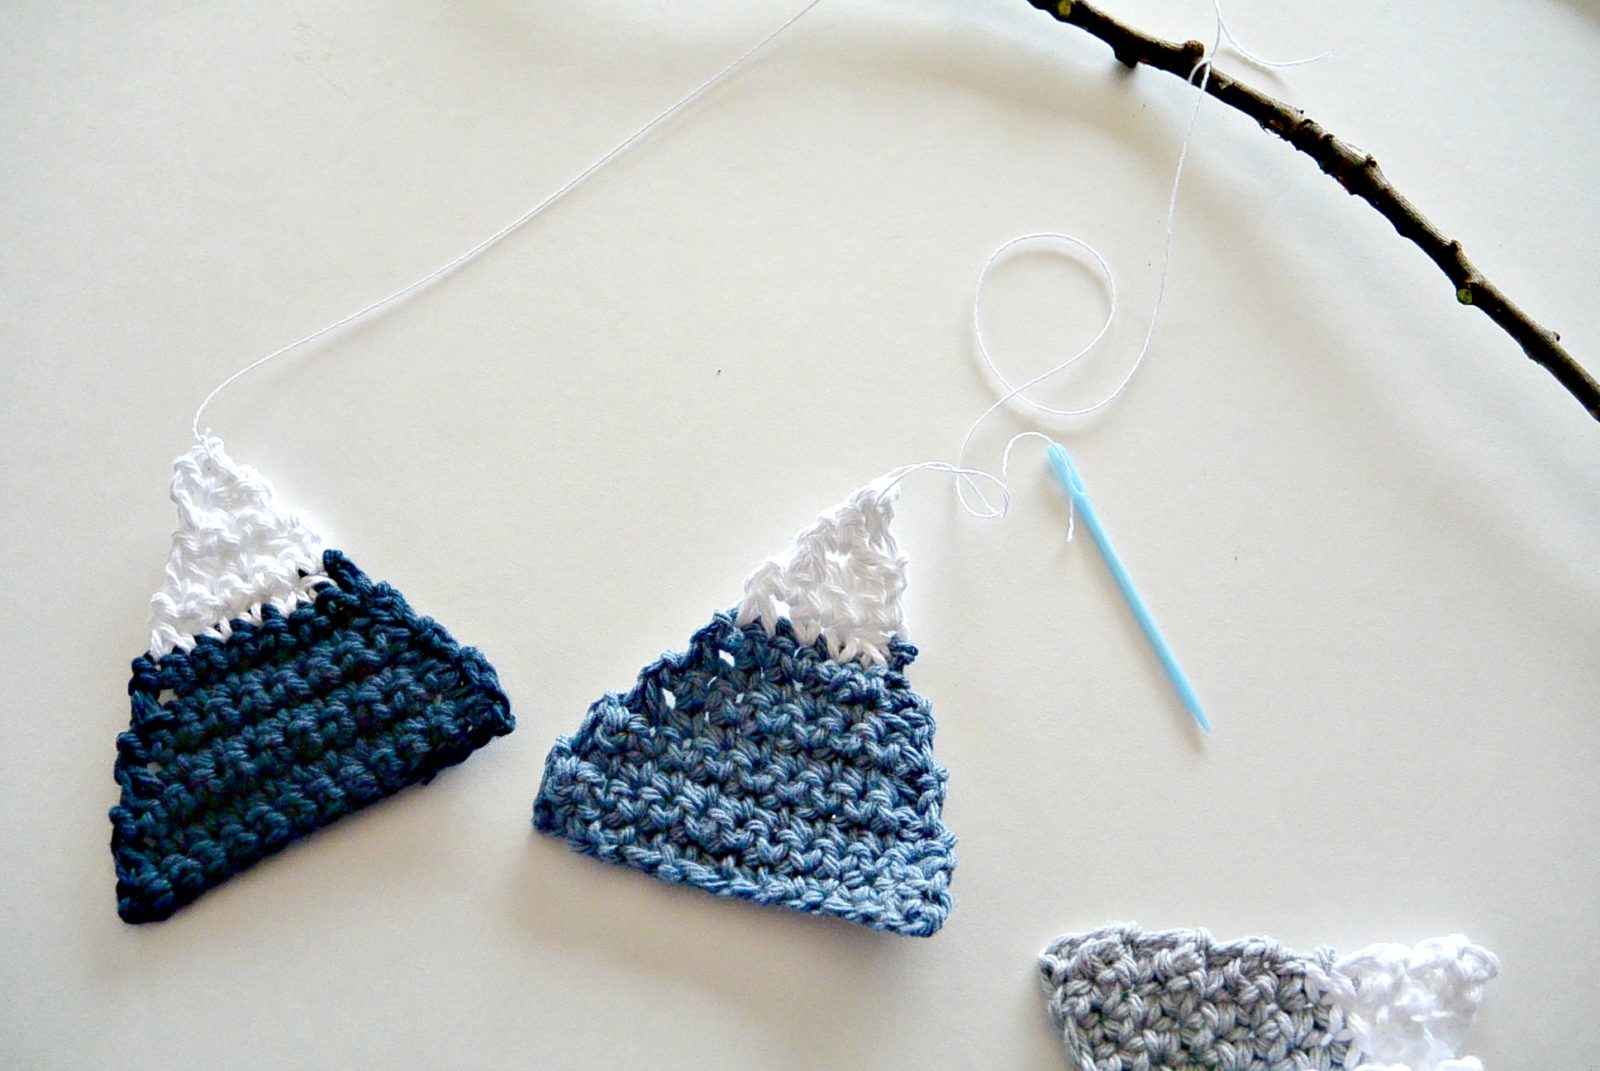
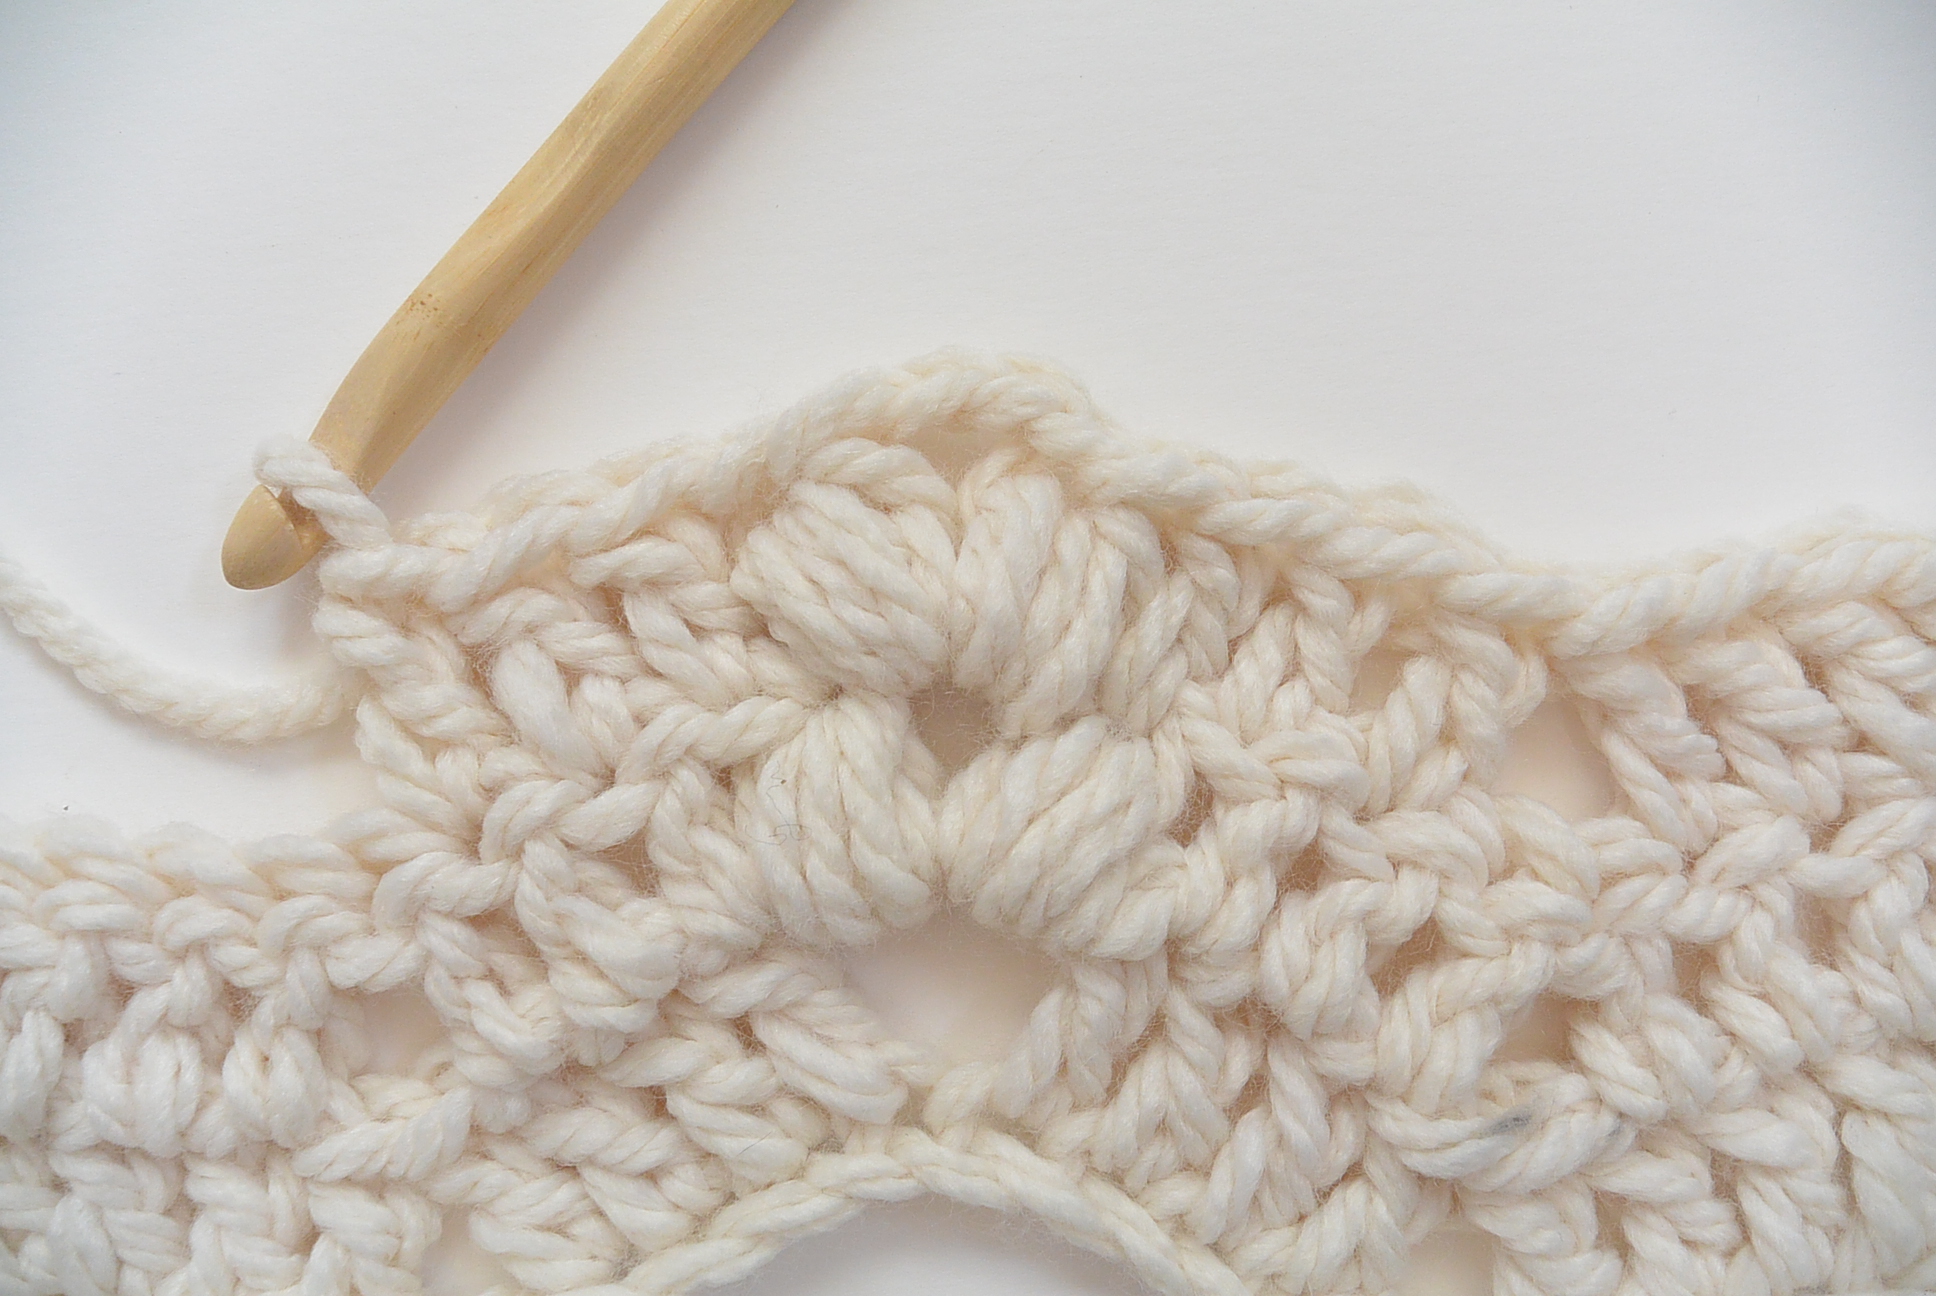
You need to know how to single crochet, and decrease for this pattern. Pretty easy! I start with a chain for the bottom of the triangle and work up to the tip. Every other row is decreased. If you already know how to crochet a triangle, then you don’t need my pattern. If you aren’t sure, and want some guidance, go ahead and follow the pattern below.
You will need:
Size G Crochet Hook
Worsted Weight Yarn ( I used Lily Sugar N Cream in Navy Blue, Light Blue, Grey and White)
Scissors
Tapestry Needle
Tree Branch ( I got one from the Aspen Tree in my backyard 🙂 )
Thin string
Pattern:
Chain 14
Row 1 SC across (13 stitches), Chain 1, Turn
Row 2 Decrease, Single Crochet 9, Decrease (so you decrease the last two stitches, and the first two)
Row 3 SC (11 stitches) across row, Chain 1, Turn
Row 4 Decrease, SC (7), Decrease
Row 5 SC (9) across row, Chain 1, Turn
Row 6 Decrease, SC (5), Decrease, Chain 1, Turn
Row 7 SC across row (7), Chain 1, Turn
Row 8 CHANGE TO WHITE FOR THE SNOW Decrease, SC (3), Decrease, Chain 1, Turn
Row 9 SC (5) across, Chain 1, Turn
Row 10 Decrease, SC (1), Decrease, Chain 1, Turn
Row 11 SC (3) across, Chain 1, Turn
Row 12 Decrease, SC (1), Chain 1, Turn
Row 13 Decrease, Tie Off, Weave in ends
Assembly:
Cut four strings to various lengths in order to hang your mountains.
Take your crocheted mountains, and using your tapestry needle, pull through end of string. Tie a knot at top of the mountain. Tie your string to the branch. Do this for all four mountains.
Hang your branch from a couple of small nails in the wall.
Admire the geometric beauties that you have just created! You could totally make this into a mountain garland rather than a branch wall hanging as well.
Enjoy!
If you liked this, feel free to check out my other easy knit and crochet patterns and subscribe to my blog or newsletter! You can also find me and my new patterns (always free) on Facebook. Thanks for stopping in!


Wow, that view is unbelievable, lucky you! No wonder you were inspired to create mini-mountains – I love the way you have them displayed with the rustic wood:)
It’s true, Sheila! I am lucky. You’d think I’d take the mountains for granted after having lived here for so long, but I appreciate them everyday. Thanks for the kind words about the wall hanging!
This is so cute!
Thanks you, Alexis!
I love this one!
Thank you so much! It was a lot of fun to make. Especially breaking that branch…Lol
really adorable!!!!
xxxxx Ale
Thank you, Ale!
Congratulations! Your design has been chosen as a Judges’ Nominee for Best Wall or Hanging Ornament 2015 in The Crochet Awards!
Oh my goodness! What an honor! Thank you so very much.