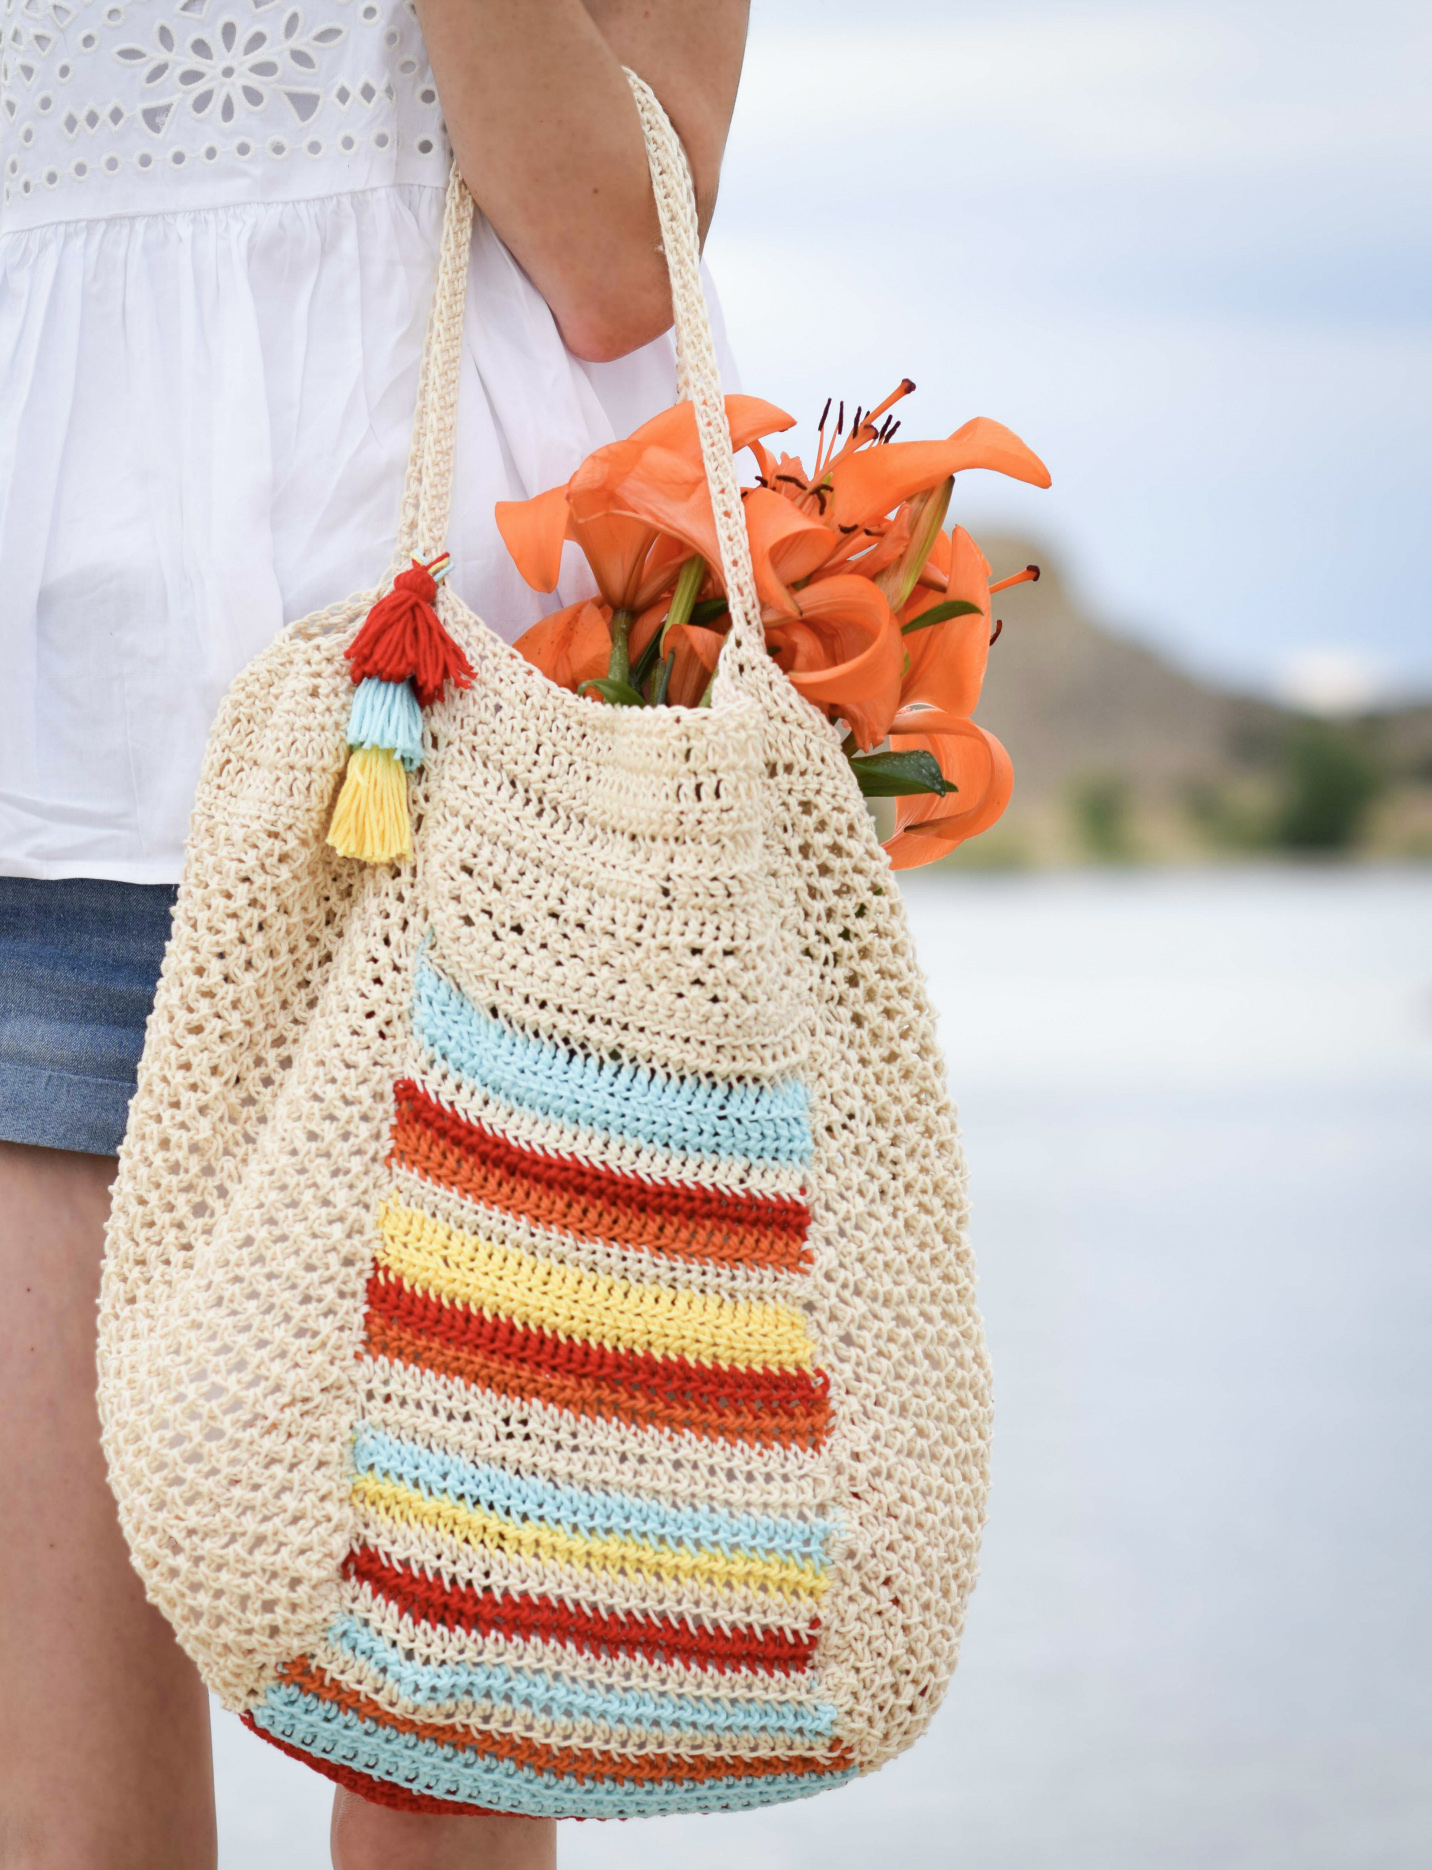
Big Blooms Flower Bag Crochet Pattern

This crocheted flower bag is an eye catcher with it’s large flowers and big squares! It’s so easy and fast to make, and it’s super sturdy with a standard canvas tote lining. Check out the full, free crochet pattern and tutorial below!
You can see the free pattern below, or may choose to grab the printable from Etsy HERE or the kit from Lion Brand Yarn HERE.
If you follow me, you might remember when I first made my Sunny Blooms Blanket with super bulky yarn. It was a project that I had wanted to tackle for a long time – a blanket with really big, really easy flowers.
That blanket led to the Harvest Flower Throw, and now this BIG BLOOMS Bag. 🙂

One of the best things about this bag is how quickly it works up. It’s also the sturdiest bag I’ve ever made because it’s lined with a store bought tote. I made sure that the squares are sized just right!
Read on for more info on what size bag to buy and how you attach it to your crochet.

While I chose some muted colors, you can use any colors you like. I actually ordered this yarn many months ago but am now just getting to share with it with you!

As long as you’re working with a chunky #5 weight yarn, you’re all set.

Don’t forget, the free pattern is below and you can also grab the ad-free, printable version from my Etsy Shop HERE! It includes the picture tutorial as well.
Description:
This beautiful, chunky, flowery tote is an eye catcher and it’s so quick and fun to make! Whip out eight giant granny squares that come together for the perfectly sized tote bag. There are instructions included on how to line it with a basic canvas bag so it’s sturdy and gorgeous for years to come! Perfect for back to school, or to haul around this fall and winter.
Materials:
1 Lion Brand Yarn Hue + Me in Mustard Kit available HERE
1 Lion Brand Yarn Hue + Me in Artichoke
1 Lion Brand Yarn Hue + Me in Salt
Each skein contains 125 g & 137 yds/skein
Pattern uses approximately 370 grams of yarn
US size N 10.0 mm crochet hook
US size P 11.0 or 11.5 mm hook (optional)
16”x16” or 16″x15″ tote bag to line bag (can be found on Amazon) optional but suggested
Sewing needle and thread to attach bag lining
Scissors
Tapestry needle
Measuring Tape
Size (approximate):
16” x 16”
Gauge:
Each flower square should measure approximately 8” x 8” inches
Pattern Notes:
You’ll crochet 8 flower granny squares that are worked separately and then seamed together following the instructions in the Assembly section. The squares are crocheted in joined rounds. Do not turn at the end of each round. To change colors, tie off, and join the new color (or use your preferred method).
While you can make the bag without a liner, it’s recommended to line the bag so it doesn’t stretch out! The easiest way to do this is by purchasing a basic 16” x 16”inch canvas or cotton tote (check Amazon or your local craft store). You will simply place that bag inside the crocheted bag and sew them together at the top. This makes for a durable, beautiful bag!
Abbreviations (US) & Skills:
ch – chain
sp – space
ch sp – chain space
st – stitch
dc – double crochet
tr – treble crochet
rep – repeat
rnd – round
sl st – slip stitch
hdc – half double crochet
Big Blooms Flower Bag Crochet Pattern
See the color combos on this page and the square pattern on the next page.
*Use the size N 10.00 mm hook to crochet all squares. The larger hook is used for the flat slip stitch seam when the bag is seamed.
Make 4 – Mustard 1st rnd, Salt 2nd rnd, Artichoke final 2 rounds.
Make 2 – Mustard 1st rnd, Artichoke 2nd rnd, Salt final 2 rounds.
Make 2 – Artichoke 1st rnd, Salt 2nd rnd, Mustard final 2 rounds.
Flower Square Pattern
With your size N hook, Ch 3, join with sl st to form a ring.
Rnd 1 Ch 3 (counts as dc), 11 dc in ring, join with sl st in top of beg ch 3. Tie off. (12 sts total around)
Rnd 2 Join next color in any space between two stitches of Rnd 1, ch 3 (counts as dc), 1dc in same sp, *2dc in next sp between sts, repeat from * around, sl st to join in top of beg ch 3. Tie off. (24 sts total around)
Rnd 3 Join next color in any space between groups of 2 stitches, ch 3 (counts as st), 2dc in same sp, *3dc in next sp between pair of 2 sts, repeat from * around, sl st to join in top of beg ch 3. (36 sts total around)
Rnd 4 Ch 3 (counts as st), 2dc in same sp, 3dc in next sp between groups of 3 sts, (3tr, ch2, 3tr) in next sp between groups of 3 sts which is the corner of the square, *3dc in next 2 spaces between groups of 3 sts, (3tr, ch 2, 3 tr) in next sp between groups of 3. Repeat around, sl st to join in beg ch 3. Tie off. Weave in all those ends!


Next, move onto Assembly.
Assembly + Helpful Photos
Using the larger hook if needed, sew four squares together for a front panel and four together for a back panel using the Mustard yarn and a flat slip stitch seam. Feel free to modify your seaming method as well. Note that the larger hook may be used for the seams as seaming can tend to be tight and pull the fabric together. Adjust your tension or hook if necessary.
After the front panel and back panel of the bag are assembled, place wrong sides together and slip stitch seam the panels together along the sides and bottom. Leave the top open.
Tote Bag Insert
Insert your tote bag into the seamed granny square bag. With a sewing needle and thread, work along the top of the two bags, sewing the canvas tote to the crocheted bag.
For the sturdiest bag, leave the handles of the purchased tote bag out for use. However, if you’d rather have crocheted handles as pictured, see the following crocheted handle instructions and crochet the handles BEFORE inserting your liner. You may still line the bag and create crocheted handles. In this case, cut the canvas or cotton tote handles off with fabric scissors.

Crocheted Handle Instructions (If lining bag and crocheting handles, cut off handles of purchased tote)
With your Mustard yarn, single crochet around entire top of the bag one time. Next, work the waistcoat stitch around. As you continue, and your hook is 4” inches from the side of the bag, make a chain of 32 stitches, then connect the chain to the opposite side of the bag, 4” inches from the other end with a slip stitch. Continue to crochet and repeat this on the other side of the bag to make the second handle. Slip stitch around until you reach the handle chain stitches. Work half double crochet stitches on each handle, and slip stitches along the top of the bag to finish.


Isn’t this a great bag? I hope you enjoyed it!

More Crochet Bag Patterns:
XO,
Jessica