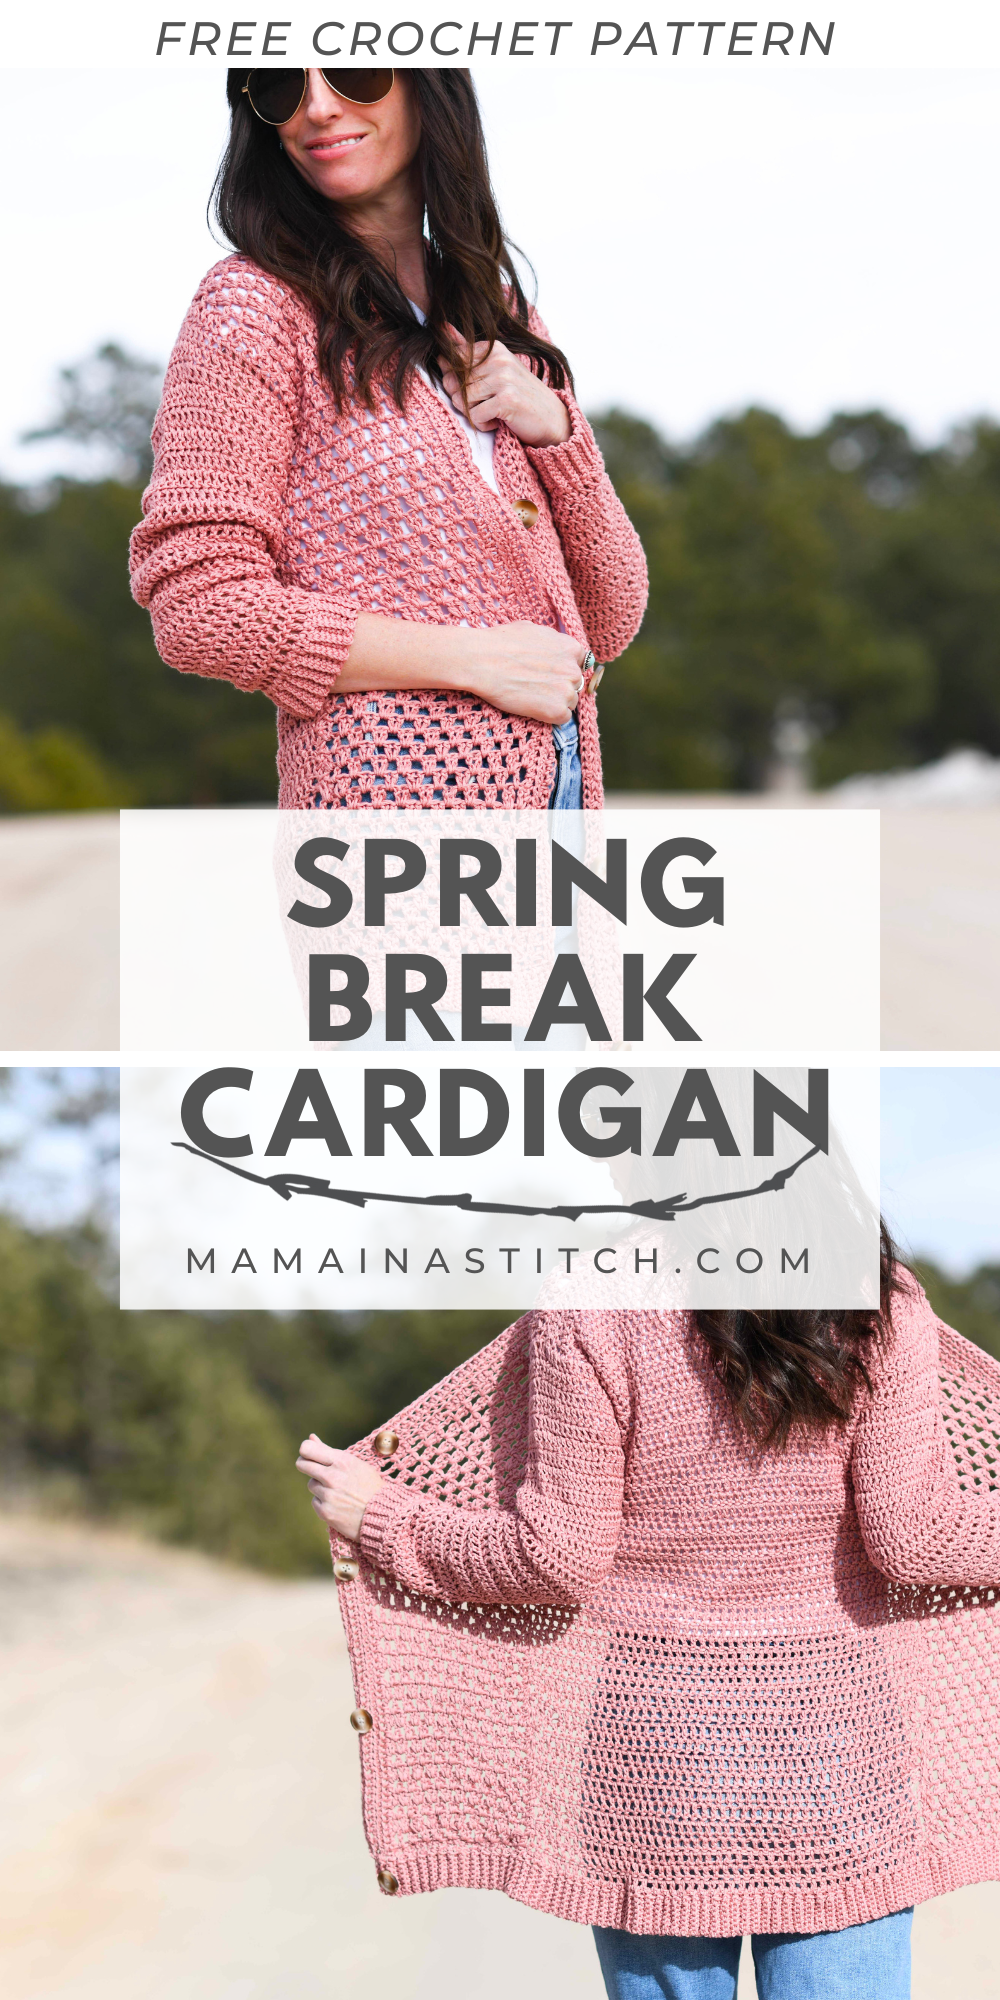
Light Cardigan Crochet Pattern
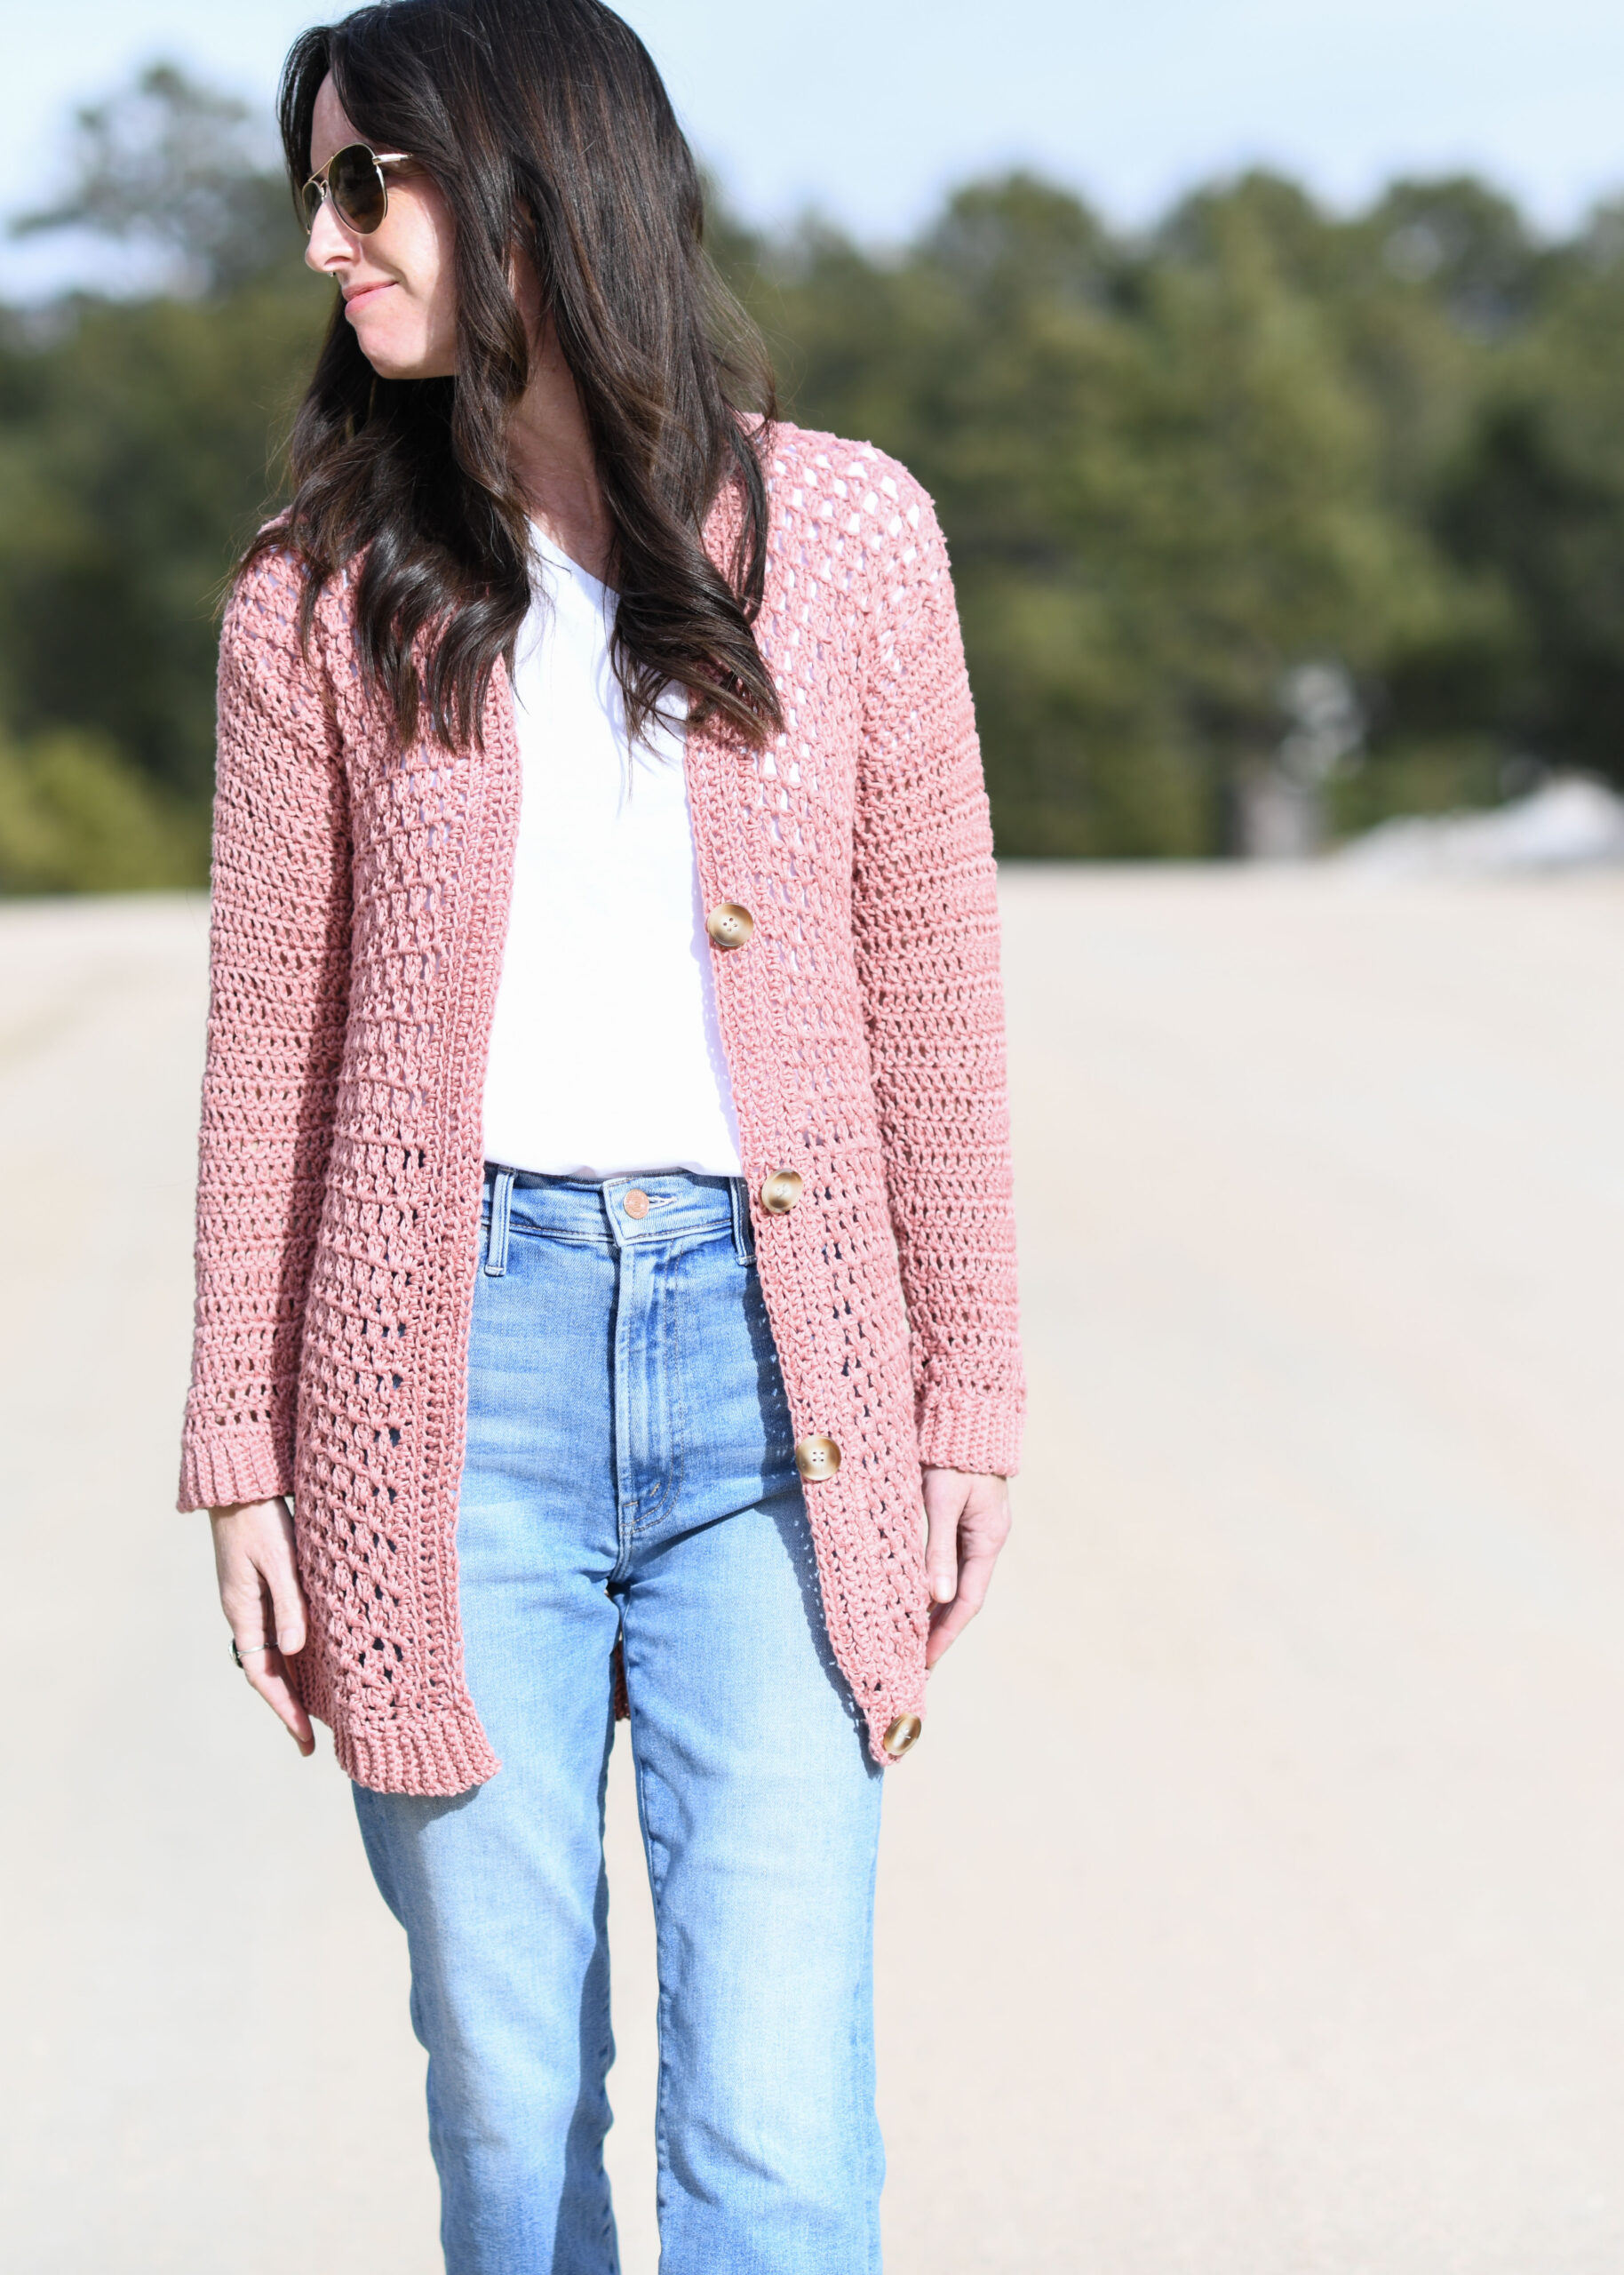
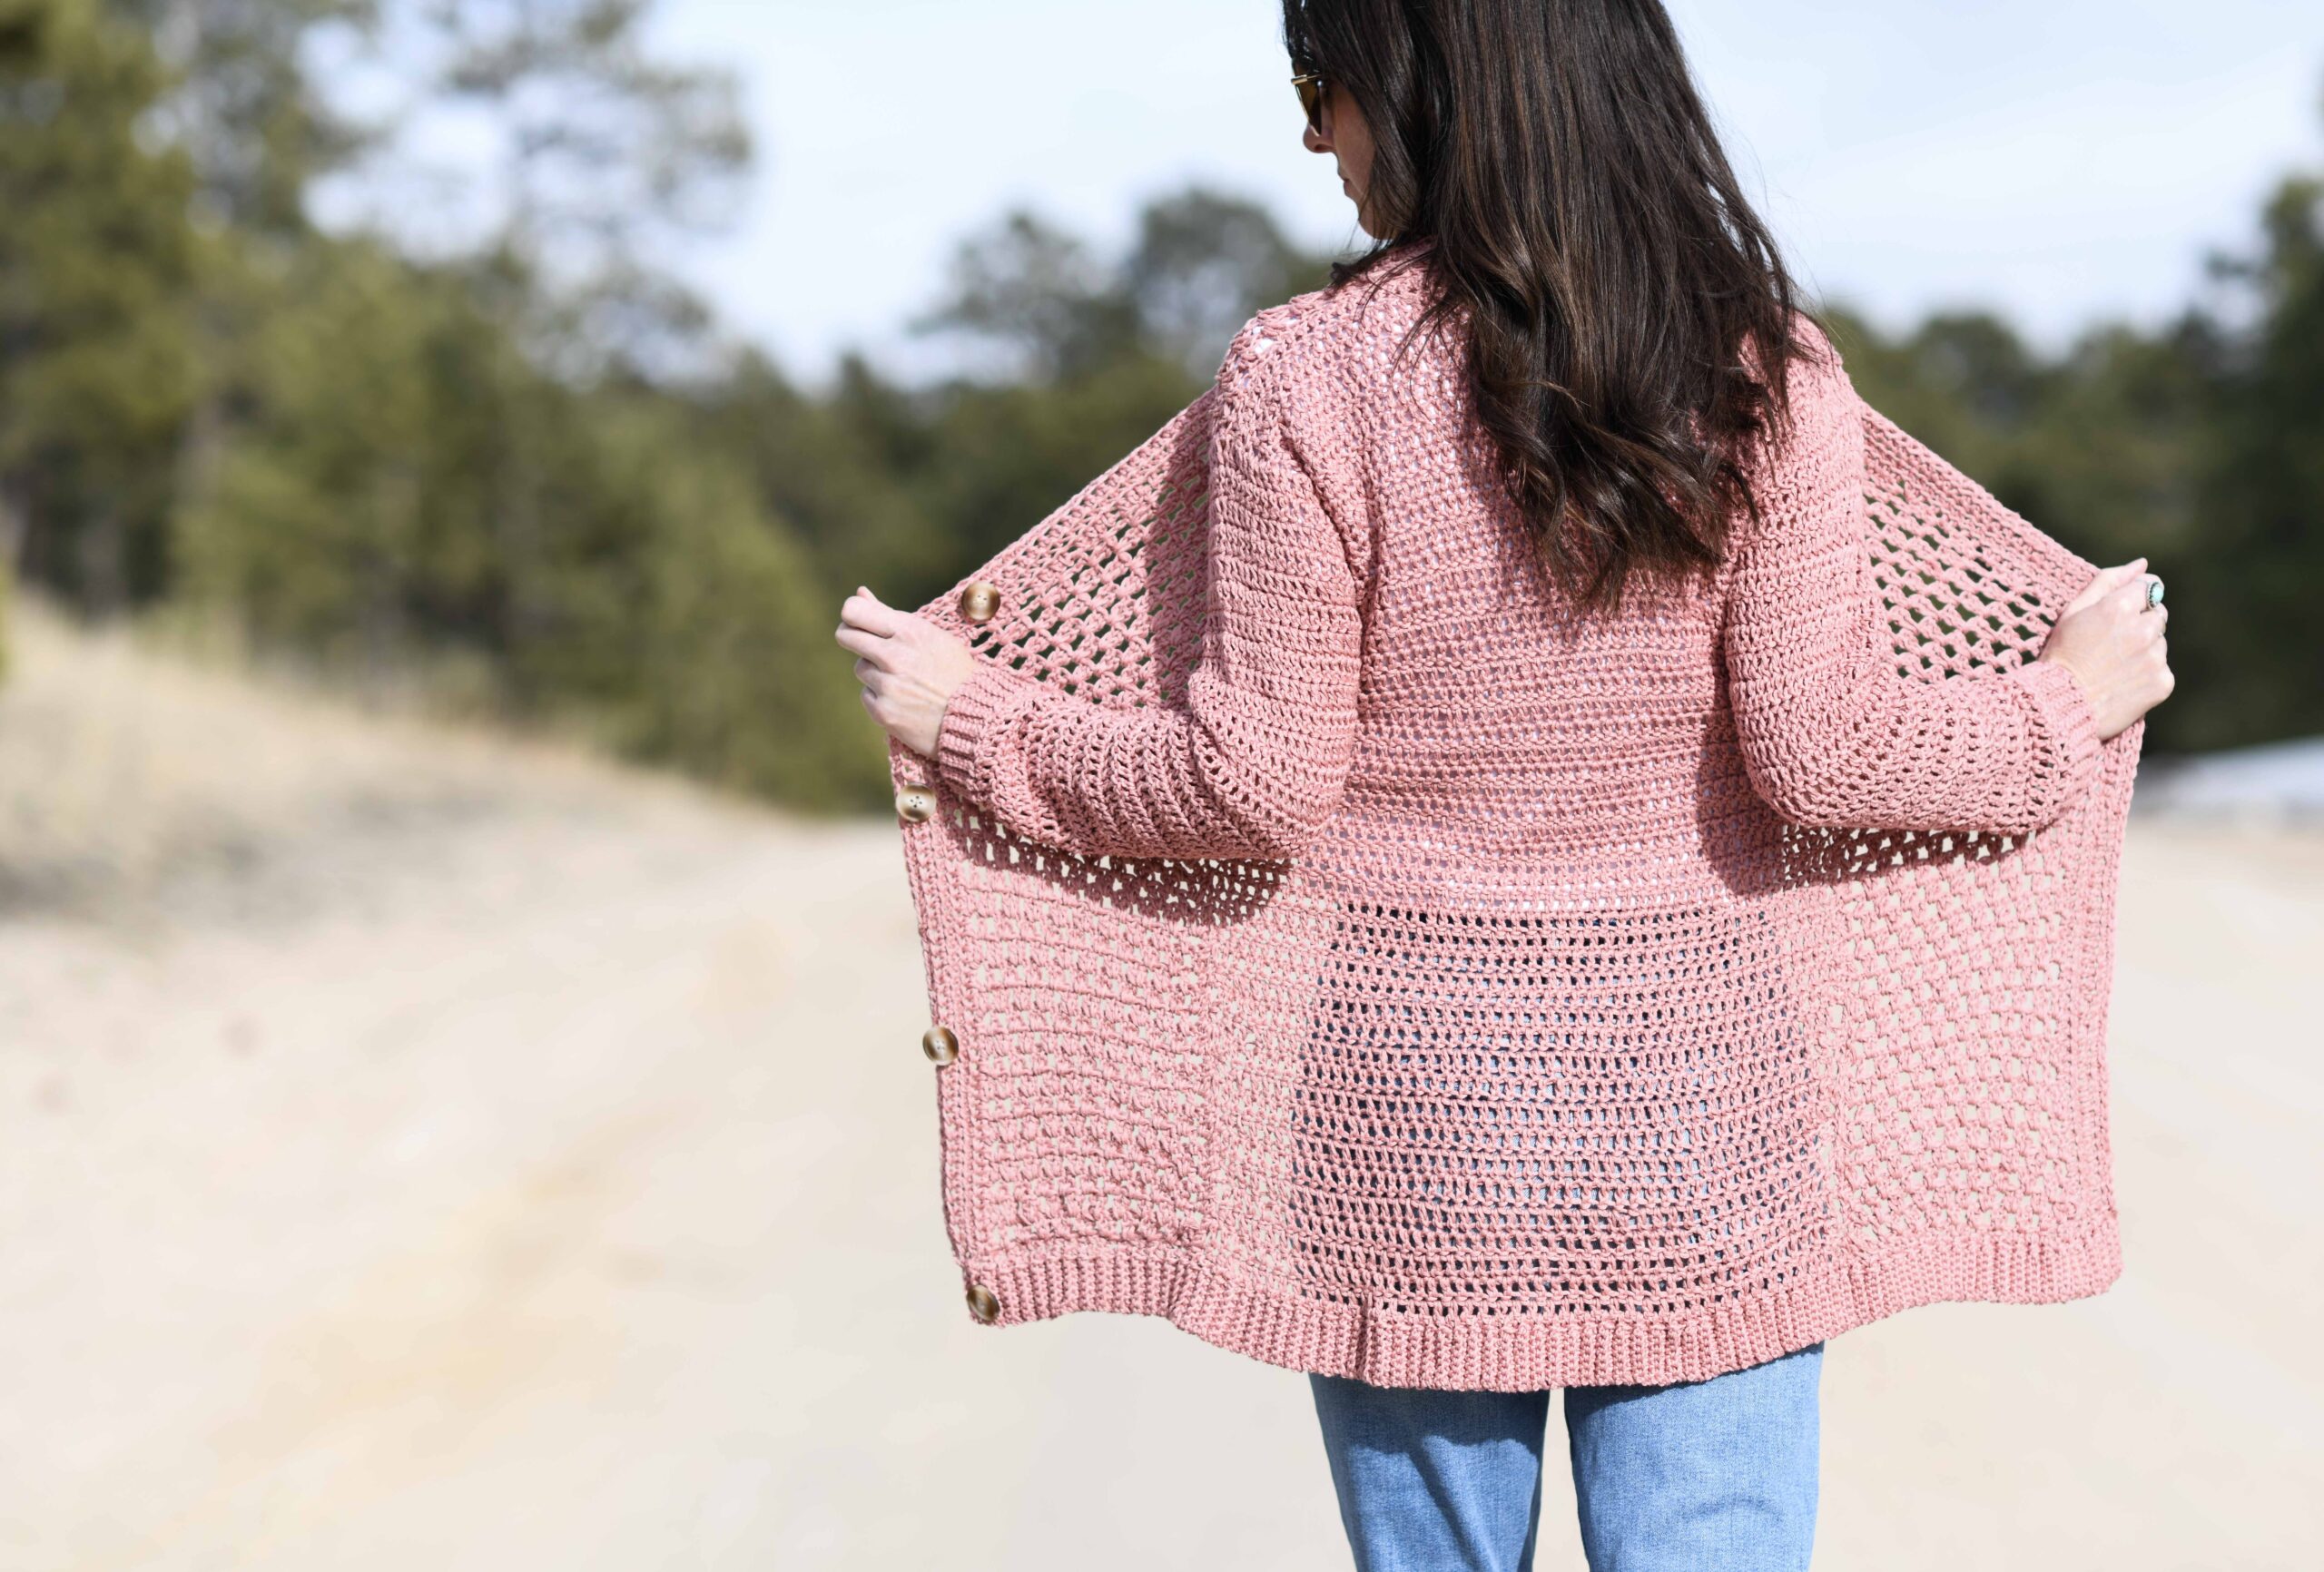
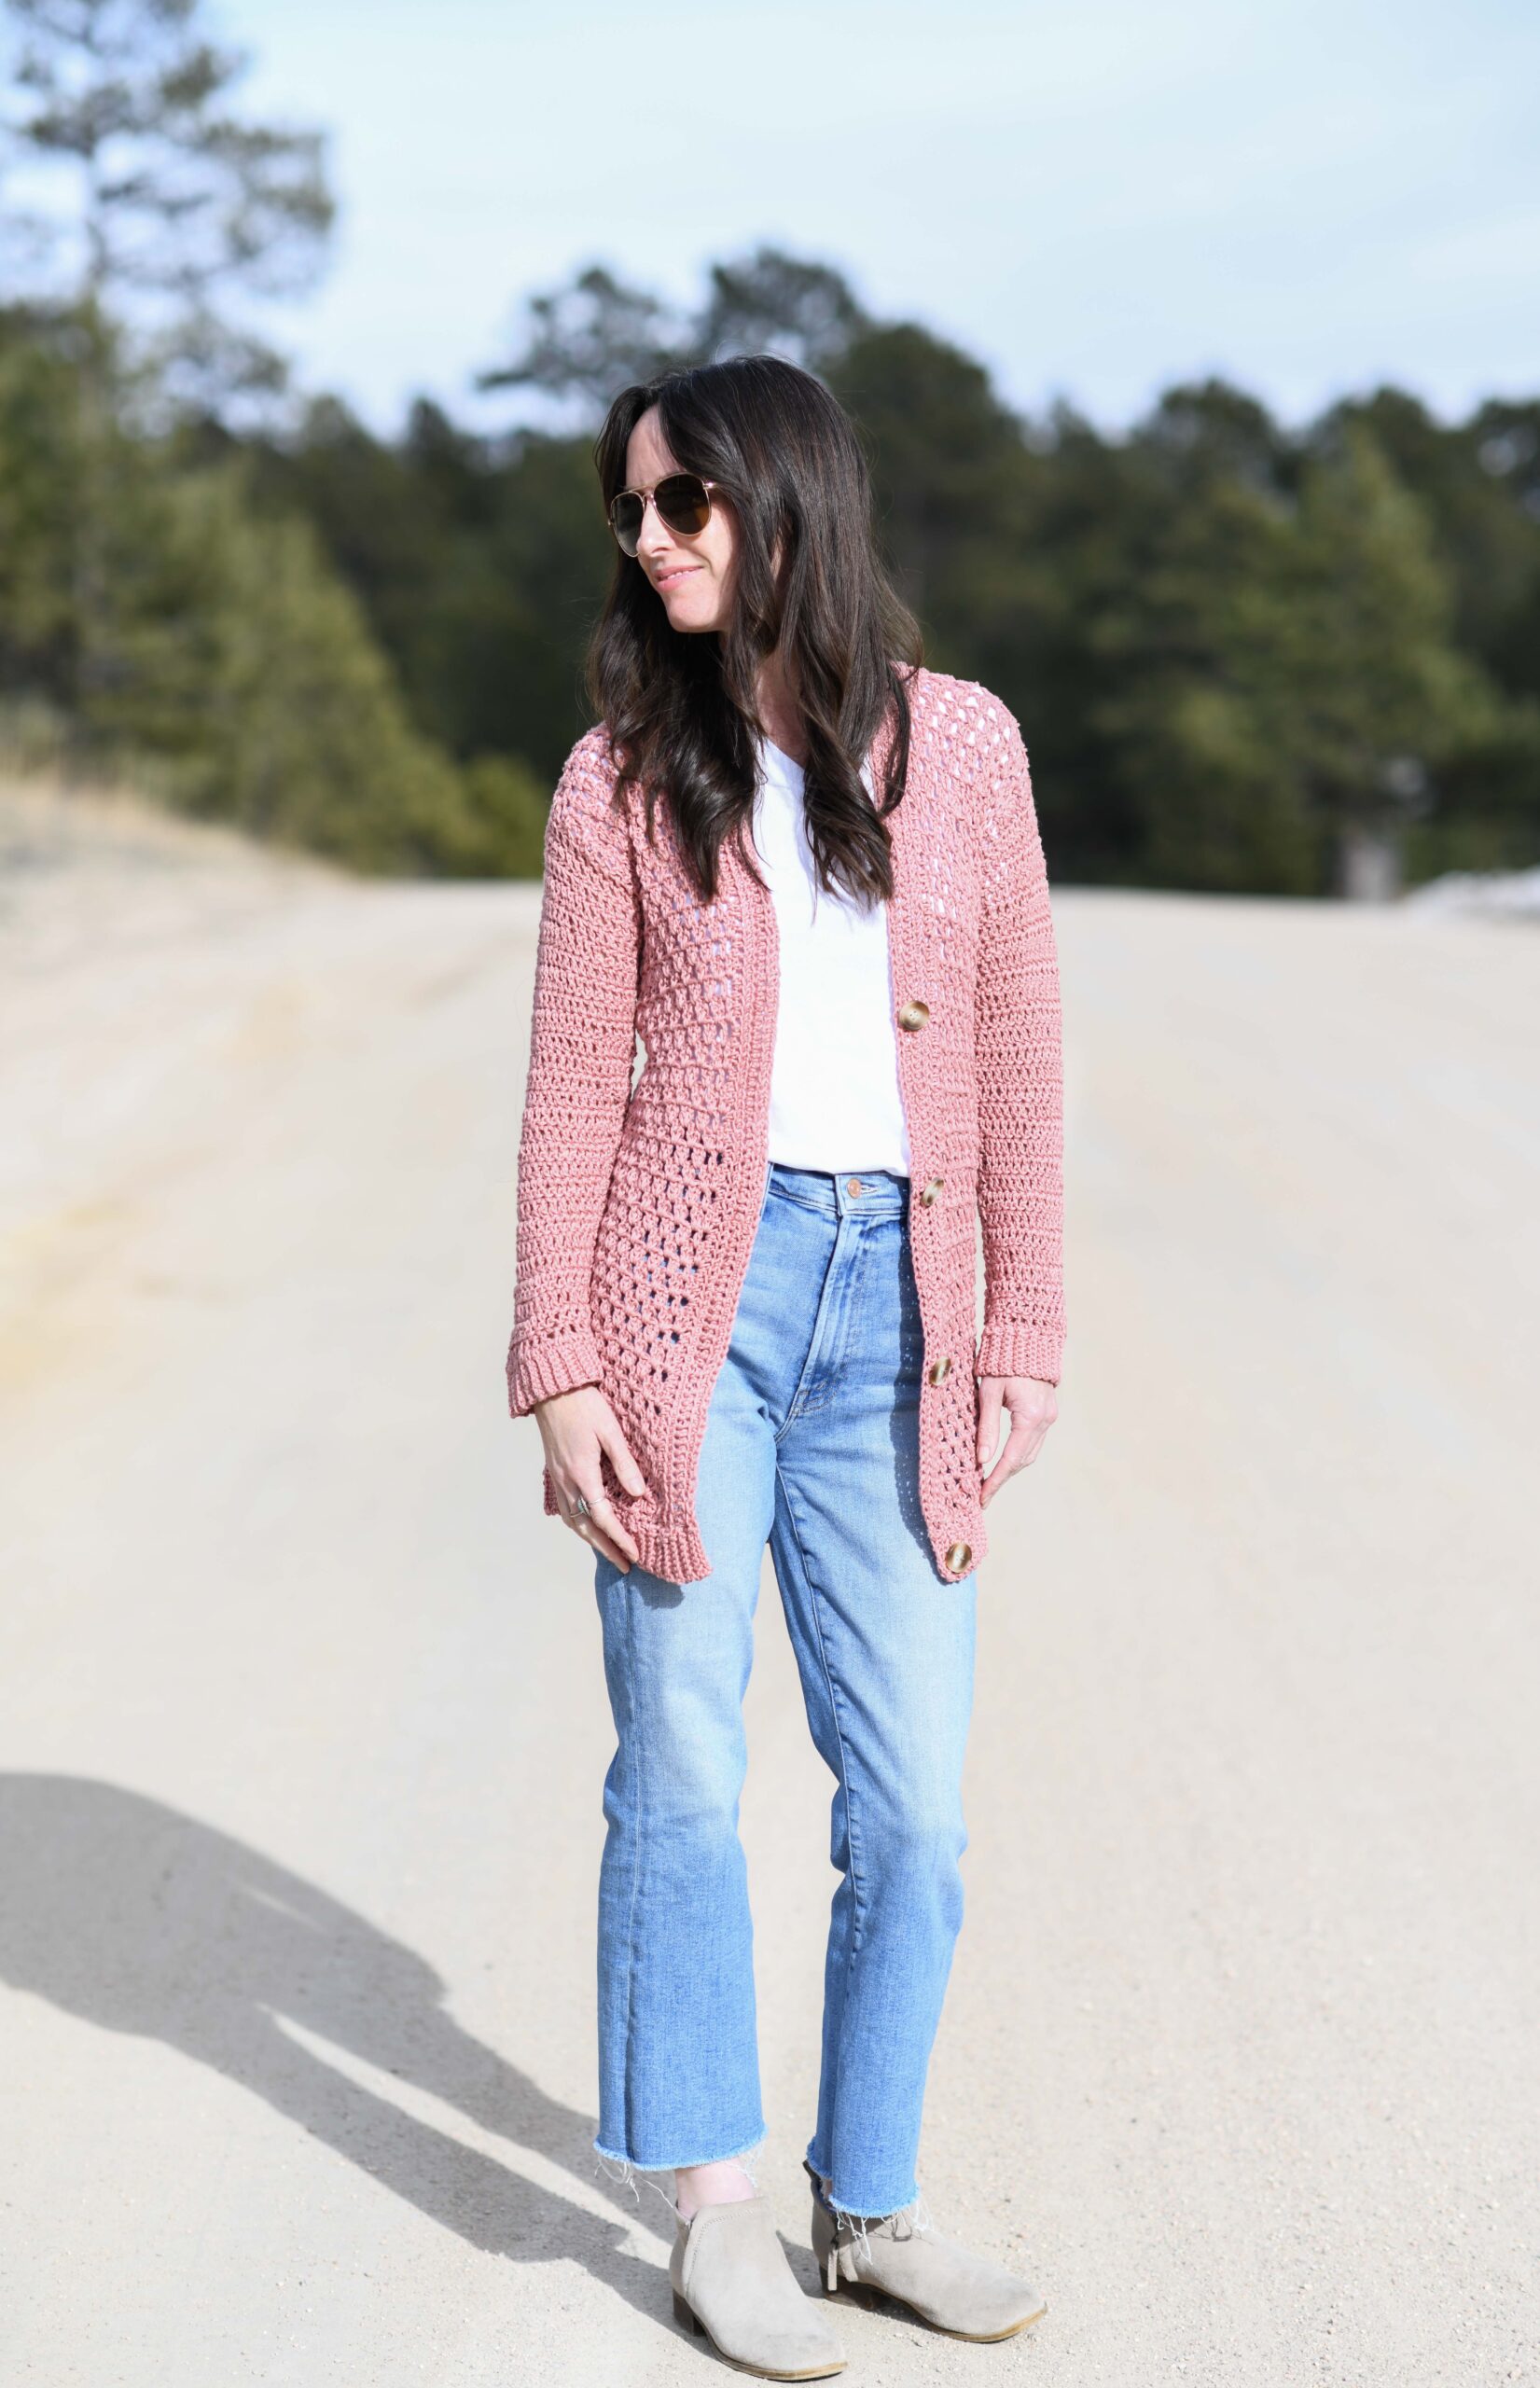
I’m so excited to share today’s light cardigan crochet pattern the “Spring Break Cardigan”! It’s easy, soft, and perfect to wear all summer long.
After making a lot of blankets over the last year, it’s kind of nice to have another wearable on the blog. AND to have a wearable that’s made with the warmer months in mind! Yay for light cardigan crochet patterns!
Scroll down to see the full, free pattern below, or you may choose to purchase the ad-free printable version from my Etsy shop HERE, or the kit from Lion Brand Yarn HERE.
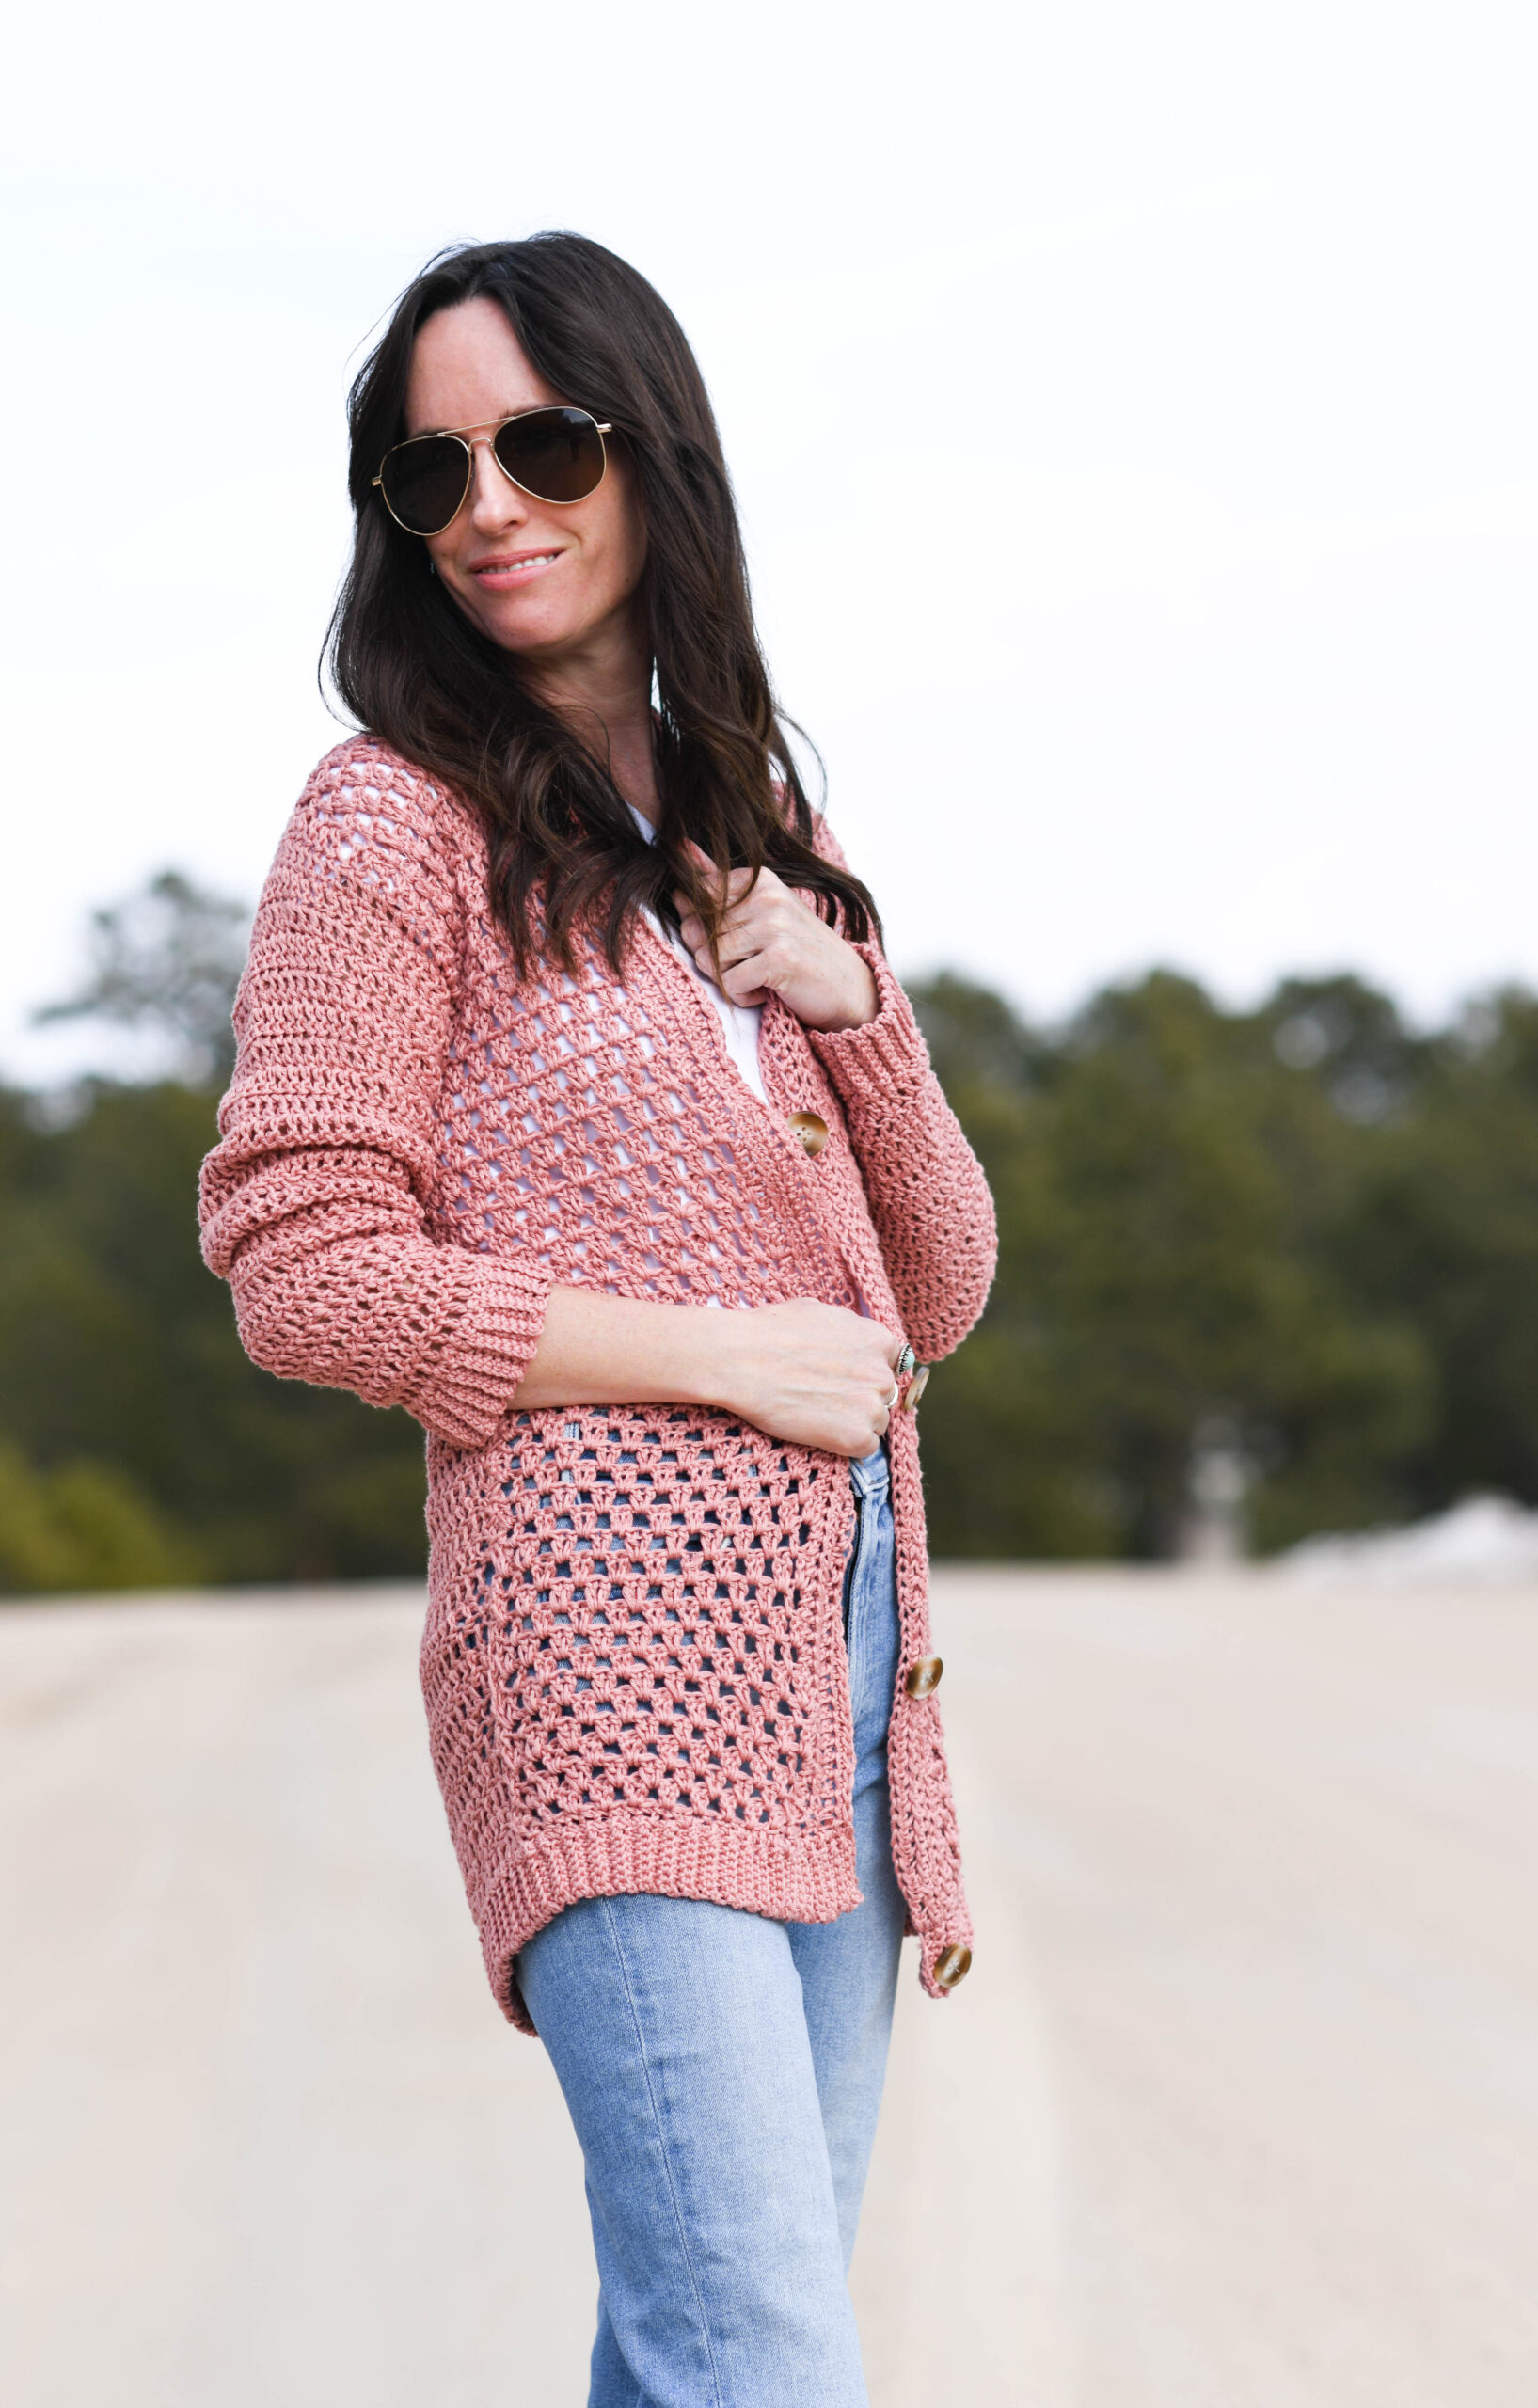
This light cardigan features airy stitches and a SUPER soft yarn. I wanted to make just a good, classic crocheted cardigan for warm weather.
It was inspired by my popular Verano Longline Cardigan Pattern HERE that some of you may have crocheted in the past! You can see many similarities, but this one is shorter and is a tad easier. Read on for more details below!
It’s indeed super easy as there is very little shaping. You will just do some basic decreasing on the sleeves.
What Yarn Do I Use To Make a Light Crochet Cardigan?
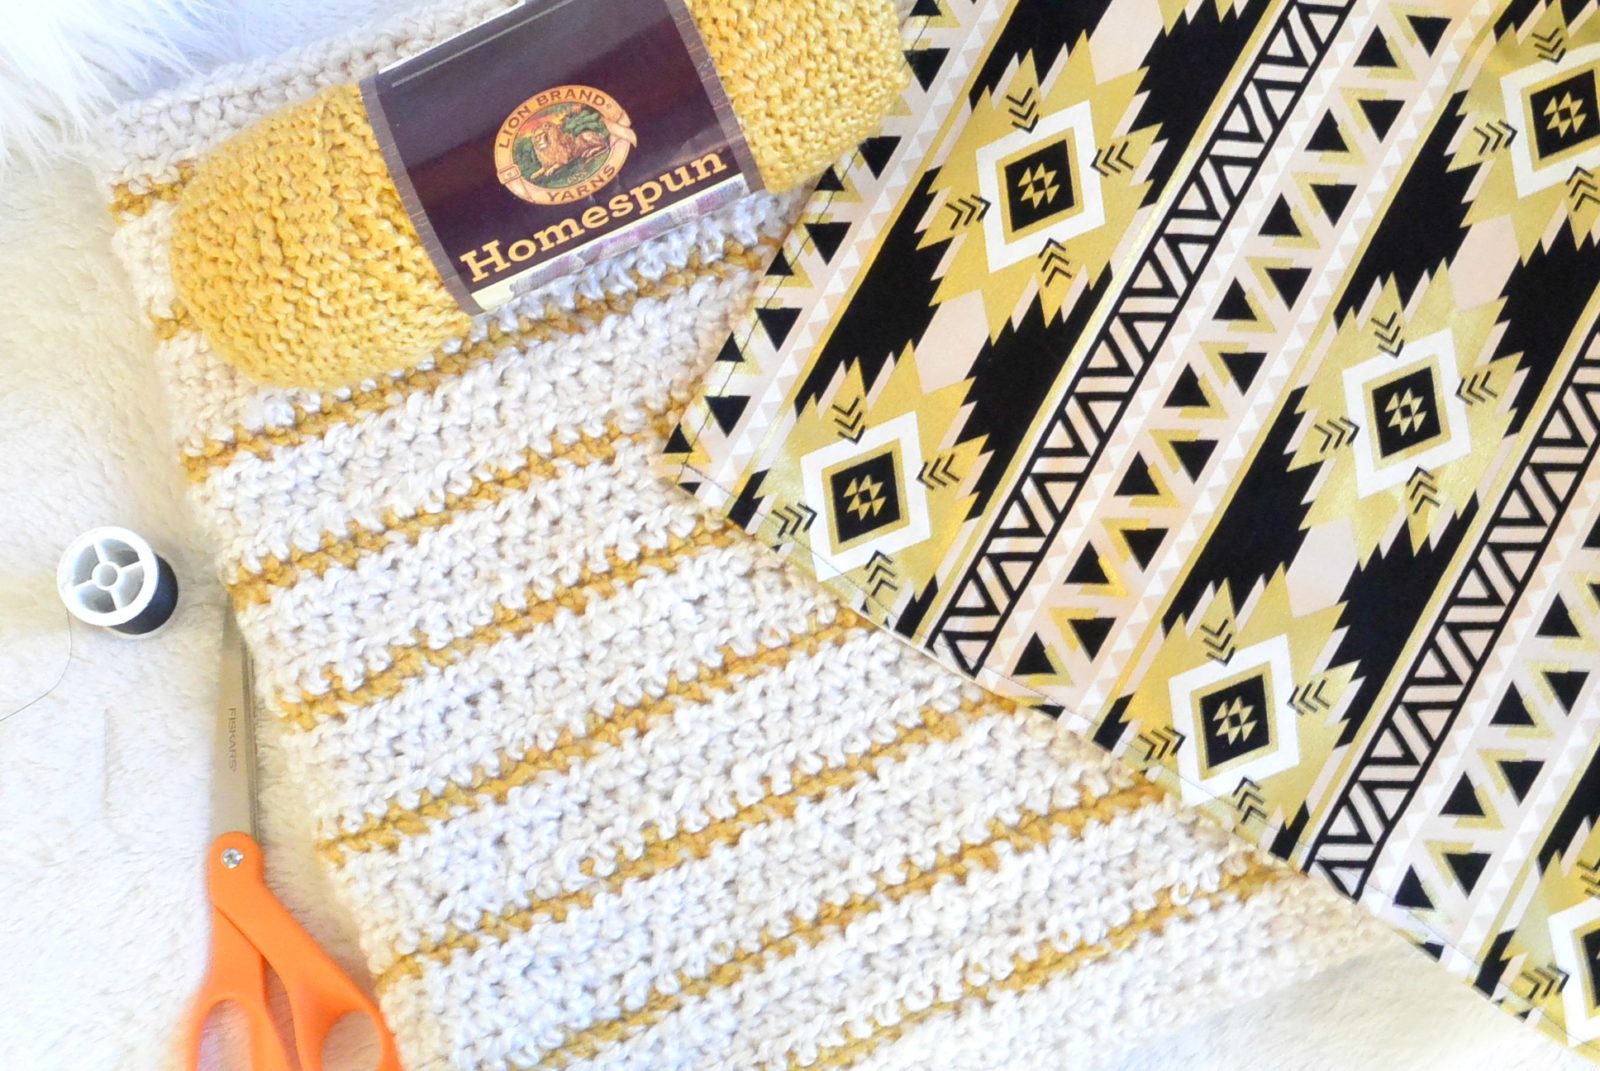
You can use any light #3 yarn that you like. I’ve chosen to use Lion Brand Yarn light #3 Coboo. It’s super soft, easy to find, and has a lot of yardage in one wee little skein.
What Stitches Do I Use for A Light Crocheted Cardigan?
There are a lot of stitches that you can use, but I favor v-stitches for an airy look! I also like to use a larger hook than what the yarn calls for on occasion because it makes the stitches naturally larger and airier. Today’s pattern uses a combo of v-stitches and double crochet stitches.
This sweater has a nice little length that covers the bootie lol, but it’s not as long as the Verano Longline. It features clean, straight lines, so I think it’s pretty flattering on just about anyone! Just note that it is fitted, so if you like a roomier feel, consider going up one size.
While I have quite a few chunky crochet cardigan patterns (Alamosa Crocheted Hoodie), this light crochet cardigan pattern is hopefully a good option for those of you who live in warmer climates. It’s one request I get quite often!
How Do I Add Buttons To A Crocheted Cardigan?
Simply sew on the buttons with a needle and thread, just as you would on any normal shirt or sweater.
In this particular pattern, the stitches should be large enough to fit the buttons through the fabric without having to crochet button holes. However, you need to make sure of that by checking it on a swatch before you just whip out your sweater! Adjust your hook size or stitches accordingly.
How Do I Crochet This Light Crocheted Cardigan?
You’ll see the full, detailed pattern and instructions below, but here are the basic steps on how to crochet this!
- Crochet a rectangular back panel following the stitch pattern
- Next, crochet two smaller rectangular front panels
- Seam the front panels onto the back panel, leaving openings for the arms
- Crochet sleeves onto the cardigan
- Finish with ribbed edging and trim (add buttons if desired)
That’s it!
Okay, let’s get to this pattern!
Remember that you may also choose to purchase the ad-free, printable version from Etsy HERE!
Light Cardigan Crochet Pattern
“Spring Break Cardigan“
Description:
This light, comfy cardigan is spring worthy and features a great lengthy fit. The modern crochet stitching and ultra soft feel make it a go-to! It’s perfect to wear with your favorite jeans, skirt, or even cut-offs this spring and summer. You should be comfortable with basic crochet skills and stitches in order to make this fun project. Enjoy!
Skill Level:
Easy +
Materials:
US Size H 5.0 mm crochet hook (or size to obtain correct gauge)
5 (6, 7, 9, 10, 11, 13, 15, 17) Lion Brand Yarn Coboo light #3 in Mauve 100 g/skein
Pattern uses 440 (550, 665, 799, 929, 1086, 1263, 1420, 1609) g Convenient kit available HERE
4, 25mm (1”) buttons for front of cardigan (optional) I got mine on Amazon!
Sewing needle and thread for buttons (optional)
Measuring Tape
Tapestry Needle
Scissors
Sizes:
XSmall, Small, Medium, Large, XL, XXL, 3XL, 4XL, 5XL (little positive ease – go up a size for a roomier fit if desired)
Please follow the key throughout the pattern according to the
size you are crocheting:
XS (S, M, L, XL, XXL, 3XL, 4XL, 5XL)
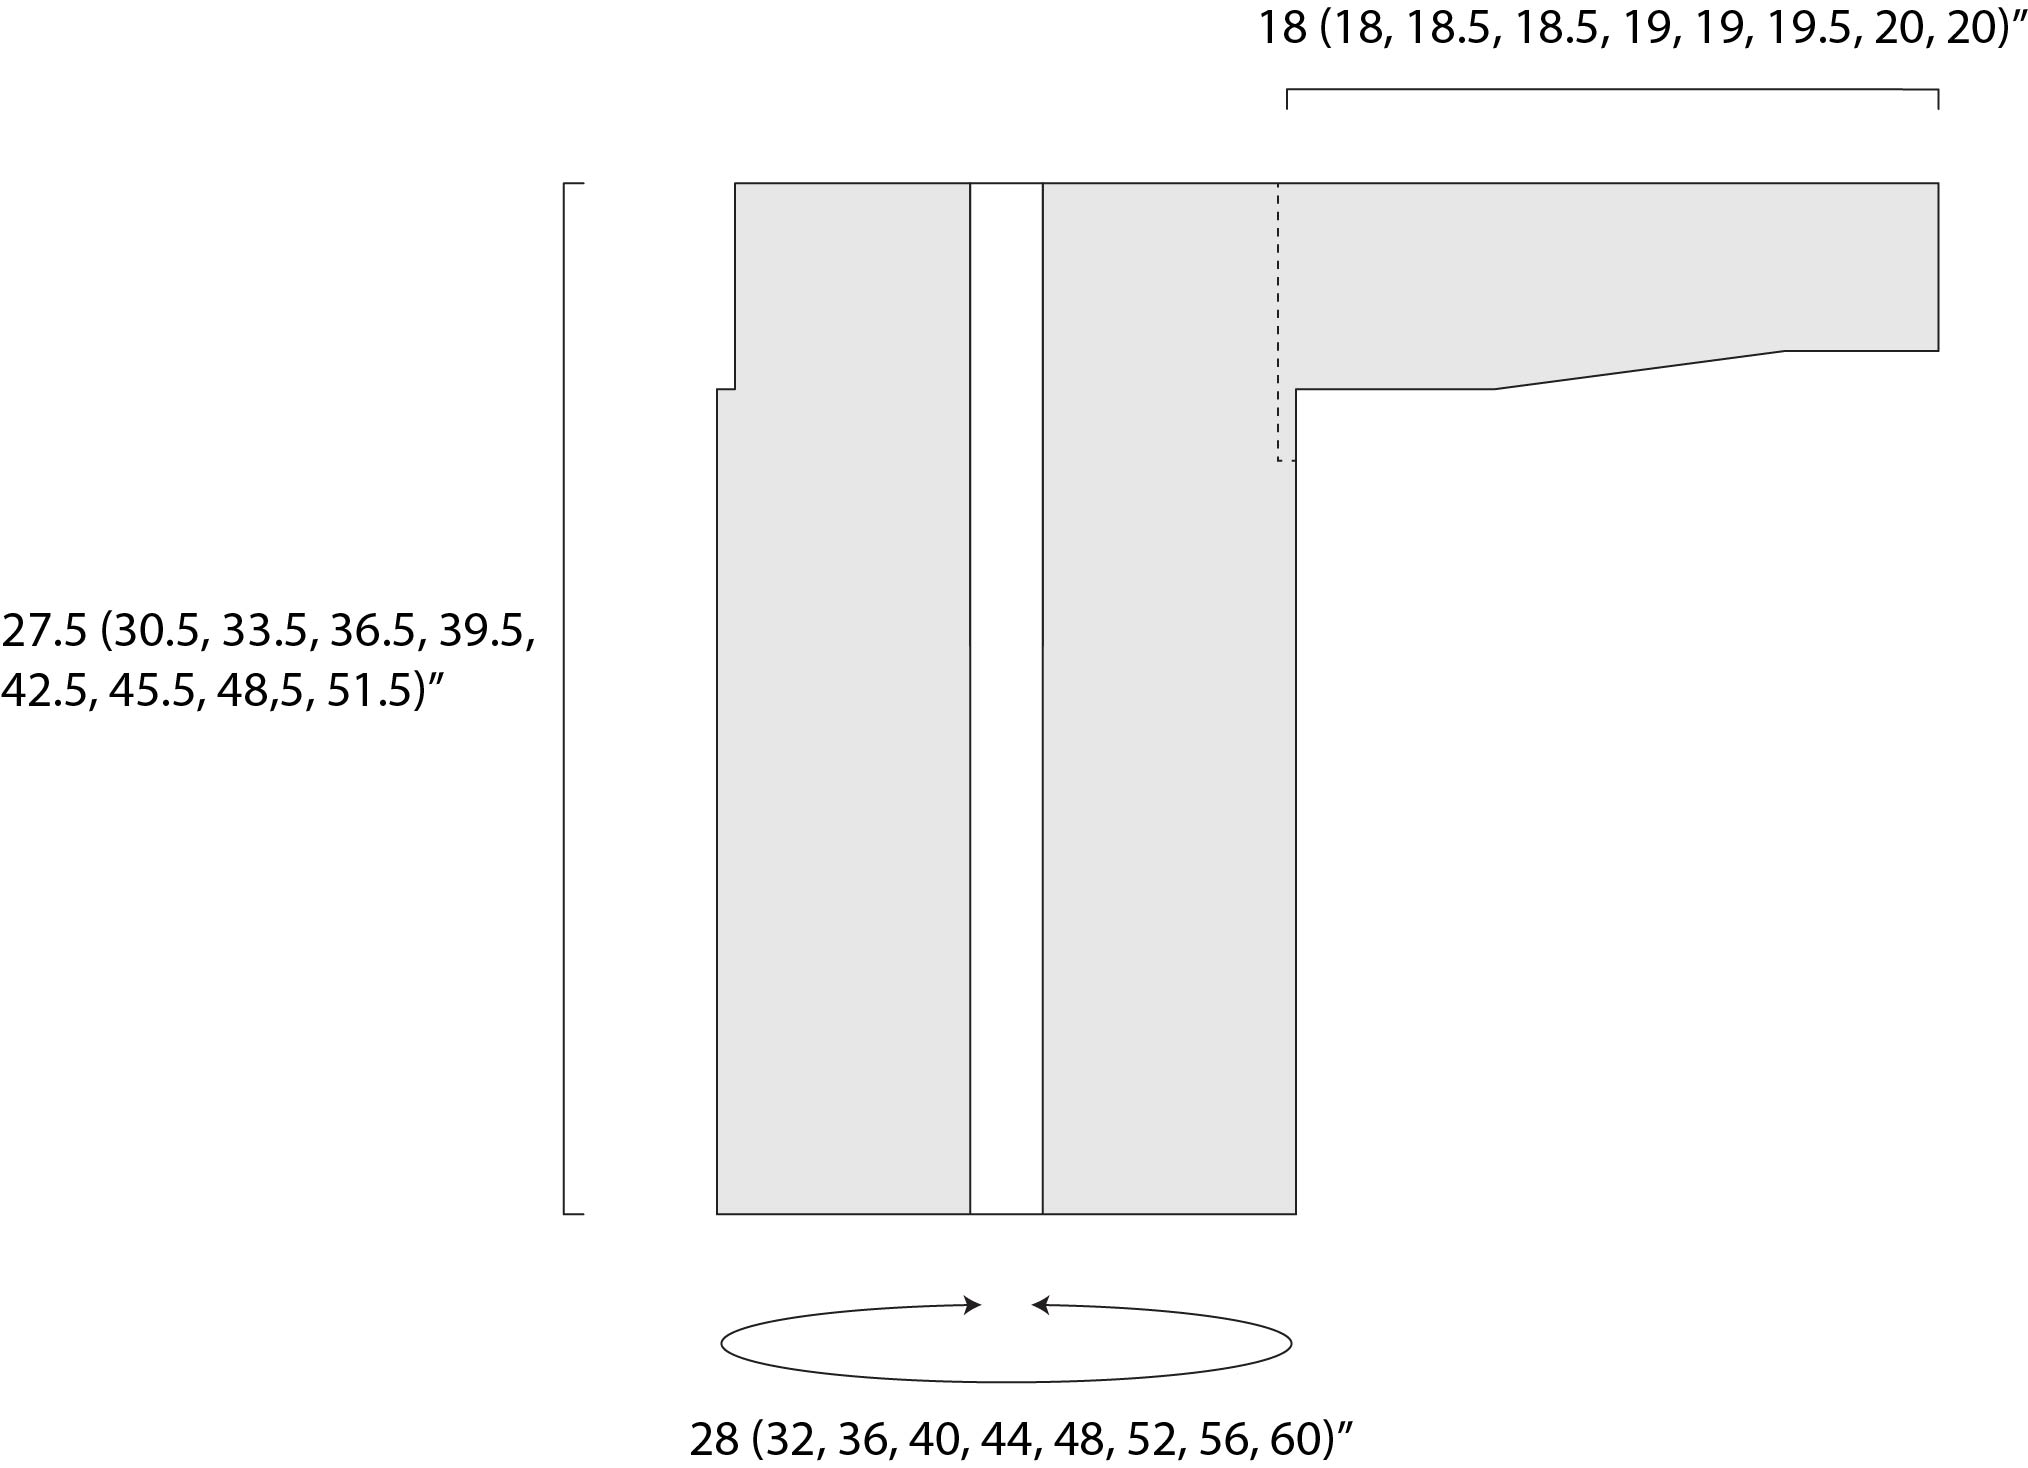
Width:
XS – 14”
S – 16”
M – 18”
L – 20”
XL – 22”
XXL – 24”
3XL – 26”
4XL – 28”
5XL- 30”
Bust Circumference:
XS – 28”
S – 32”
M – 36”
L – 40”
XL- 44”
XXL – 48”
3XL – 52”
4XL – 56”
5XL – 60”
Length (approximate):
XS – 27.5”
S – 30.5”
M– 33.5”
L – 36.5”
XL – 39.5”
XXL – 42.5”
3X – 45.5”
4XL – 48.5”
5XL – 51.5”
Abbreviations & Skills:
ch – chain
st – stitch
sc – single crochet
sc blo – single crochet through the back loop
hdc – half double crochet
dc – double crochet
sk st – skip stitch
hdc flo – half double crochet through the front loop only
Gauge:
Approximately 14 sts and 7 rows in 4” x 4” of double crochet. Adjust hook size accordingly to obtain correct gauge before beginning to ensure your sizing turns out correctly.
Notes:
This cardigan is made by crocheting three rectangular panels and seaming them at the sides and shoulders. The back panel is crocheted with double crochet stitches and the front panels are done with the simple v-stitch. Sleeves are crocheted directly onto the sweater by picking up your yarn and working around the arm openings. The inner edging/collar, cuffs, and bottom ribbing is added after the panels have been seamed and assembled. You may make the cardigan longer by crocheting more rows on each panel – keep yarn needs in mind.
Have fun!
Light Cardigan Crochet Pattern – Spring Break Cardigan
Back Panel Pattern
Double Crochet Section
Ch 50 (57, 64, 71, 78, 85, 92, 99, 106)
Row 1 Dc in 4th ch from hook and each st across. 48 (55, 62, 69, 76, 83, 90, 97, 104)
Row 2 Ch 3 (counts as dc st here and throughout the pattern), turn, dc in each st across the row.
Repeat row 2 until panel is approximately 26” (29”, 32”, 35”, 38”, 41”, 44”, 47”, 50”)
Tie off and weave in ends.
Front Panel Pattern (Make 2)
Ch 22 (26, 28, 32, 34, 38, 42, 46, 50)
Row 1 Dc in 4th ch from hook and each st across. 20 (24, 26, 30, 32, 36, 40, 44, 48)
V-Stitch Section
Row 2 Ch 3 (counts as st), turn, dc in next st, *sk st, 2dc in next st (v-stitch made); repeat from * across the row. 20 (24, 26, 30, 32, 36, 40, 44, 48)
Row 3 Ch 3, turn, dc in sp of v-stitch from previous row, 2dc in sp of each v-stitch across the row to last 2 dc sts, 2dc in sp between last 2 dc sts. 20 (24, 26, 30, 32, 36, 40, 44, 48)
Next, repeat row 3 until piece measures approximately 26” (29”, 32”, 35”, 38”, 41”, 44”, 47”, 50”)
and it’s equal in length to the back panel.
Tie off and weave in ends..
Make a total of two of these front panels.
Seam & Assemble
Place two front panels directly on top of back panel aligning outer edges, and leaving an opening in the middle for neck.
Shoulders
Using your preferred seaming method, sew the shoulders along the top on each side leaving an opening for the head and neck.
Seam Sides and Create Arm Openings
Using your preferred seaming method, sew up each side from the bottom-up. Leave arm openings that are approximately 6 ¼” ( 6 ¾”, 7 ¼”, 7 ¾”, 8 ¼”, 8 ¾”, 9.25”, 9.75”, 10.25”). Tip: Consider not completely tying off the seam at the bottom of the arm opening until sleeves are begun in case adjustments need to be made with the width of the opening.
Sleeves
Sleeves are crocheted in turned rounds. You will sl st to join and then turn as if to work a row.
Attach yarn to the bottom of the arm opening.
Rd 1 Ch 3, dc evenly around, sl st to join in top of ch 3. 39 ( 42, 46, 49, 52, 55, 58, 61, 65)
Rd 2 Ch 3, turn, dc2tog, dc in each st around, sl st to join in top of ch3. 38 ( 41, 45, 48, 51, 54, 57, 60, 64)
Rd 3 Ch 3, turn, dc in each st around.
Rd 4 Ch 3, turn, dc in each st around
Next, repeat rounds 2 – 4, in that order until sleeve measures approximately
16”( 16”, 16 ½”, 16 ½”, 17”, 17”, 17.5”, 18”, 18”)
Stitch count will decrease by 1 stitch every 3rd row.
Inner Trim Edging
Note: If you’re adding buttons to your cardigan, there is no need to crochet button openings. Buttons should fit through the half double crochet stitches in the edging. Crochet a test swatch of half double crochet and ensure the button fits through the stitches. If not, you may also sub double crochet stitches in this section to create larger stitches or you may crochet button holes as desired.
Attach yarn to bottom inner corner on the front of the cardigan.
Row 1 Ch 2, work hdc sts evenly across to opposite end of collar, working along the neckline. (tip: work approximately 2 hdc stitches in each dc st)
Row 2 Ch 2, turn, hdc flo in each st across.
Repeat row 2 for a total of 6 rows OR until the inner trim is your desired width!
Tie off and weave in ends.
Ribbed Sleeve Cuffs & Bottom Trim
1.Pick up yarn at bottom of sleeve or corner of bottom edging of cardigan.
2.Ch 8
3.Sc in 2nd st from hook and in each st across to sweater, sl st in next 2 sts of sweater
4.Ch 1, turn, sc blo in each sc across.
5.Ch 1, turn, sc in blo of each st across, sl st in next 2 sts of sweater.
Repeat steps 4 – 5 all the way around the sleeve cuff until you reach the beginning Ch 8, join the rows with a slip stitch seam.
For the lower edging of cardigan, simply repeat steps 4 – 5 until you’ve reached the opposite end. If you are adding buttons, create a button opening in the edging by making this change on the 3rd to last row of ribbing. Crochet 2 single crochet stitches, followed by a chain 3, (skip 3 stitches of previous row), slip stitch into next stitch, and finish the row as normal.
Tie off and weave in ends.
Buttons (Optional): Sew buttons evenly onto cardigan as desired. The fabric and stitching on the inner edging should be loose enough for buttons to fit through without making button holes with exception of the button hole created in the lower trim/edging.
Note: Feel free to modify this ribbing as you would like! There are a few ways to add ribbing onto crochet, so you can certainly make it your own.
That’s all there is to it, my friends!! Isn’t it soft and so easy?
Hope you enjoyed it!
More Crochet Cardigan Patterns To Try:
- Top Easy Crochet Cardigan Patterns
- My Boyfriend Sweater Crochet Cardigan
- Endless Eyelets Granny Cardigan Crochet Pattern
Happy making!
XO
Jessica