Mandala Beginner Pullover Knitting Pattern
This sweater is comfy, cute, right on-trend AND it happens to be a great beginner pattern as well! It is knit flat and seamed, making it a terrific first time sweater for new knitters.
See the full, free pattern below, or you may choose to purchase the ad-free printable from Etsy HERE or the kit from Lion Brand Yarn HERE.
Isn’t it convenient that so many of the stylish sweaters right now have simple silhouettes? It means for us knitters that we can make cute things without them being complicated. Enter the Mandala Pullover Pattern. 🙂
This pattern is knit flat, in rectangular pieces and seamed together. The sleeves have some slight shaping, but it is as simple as it gets. You only need to know how to knit and purl.
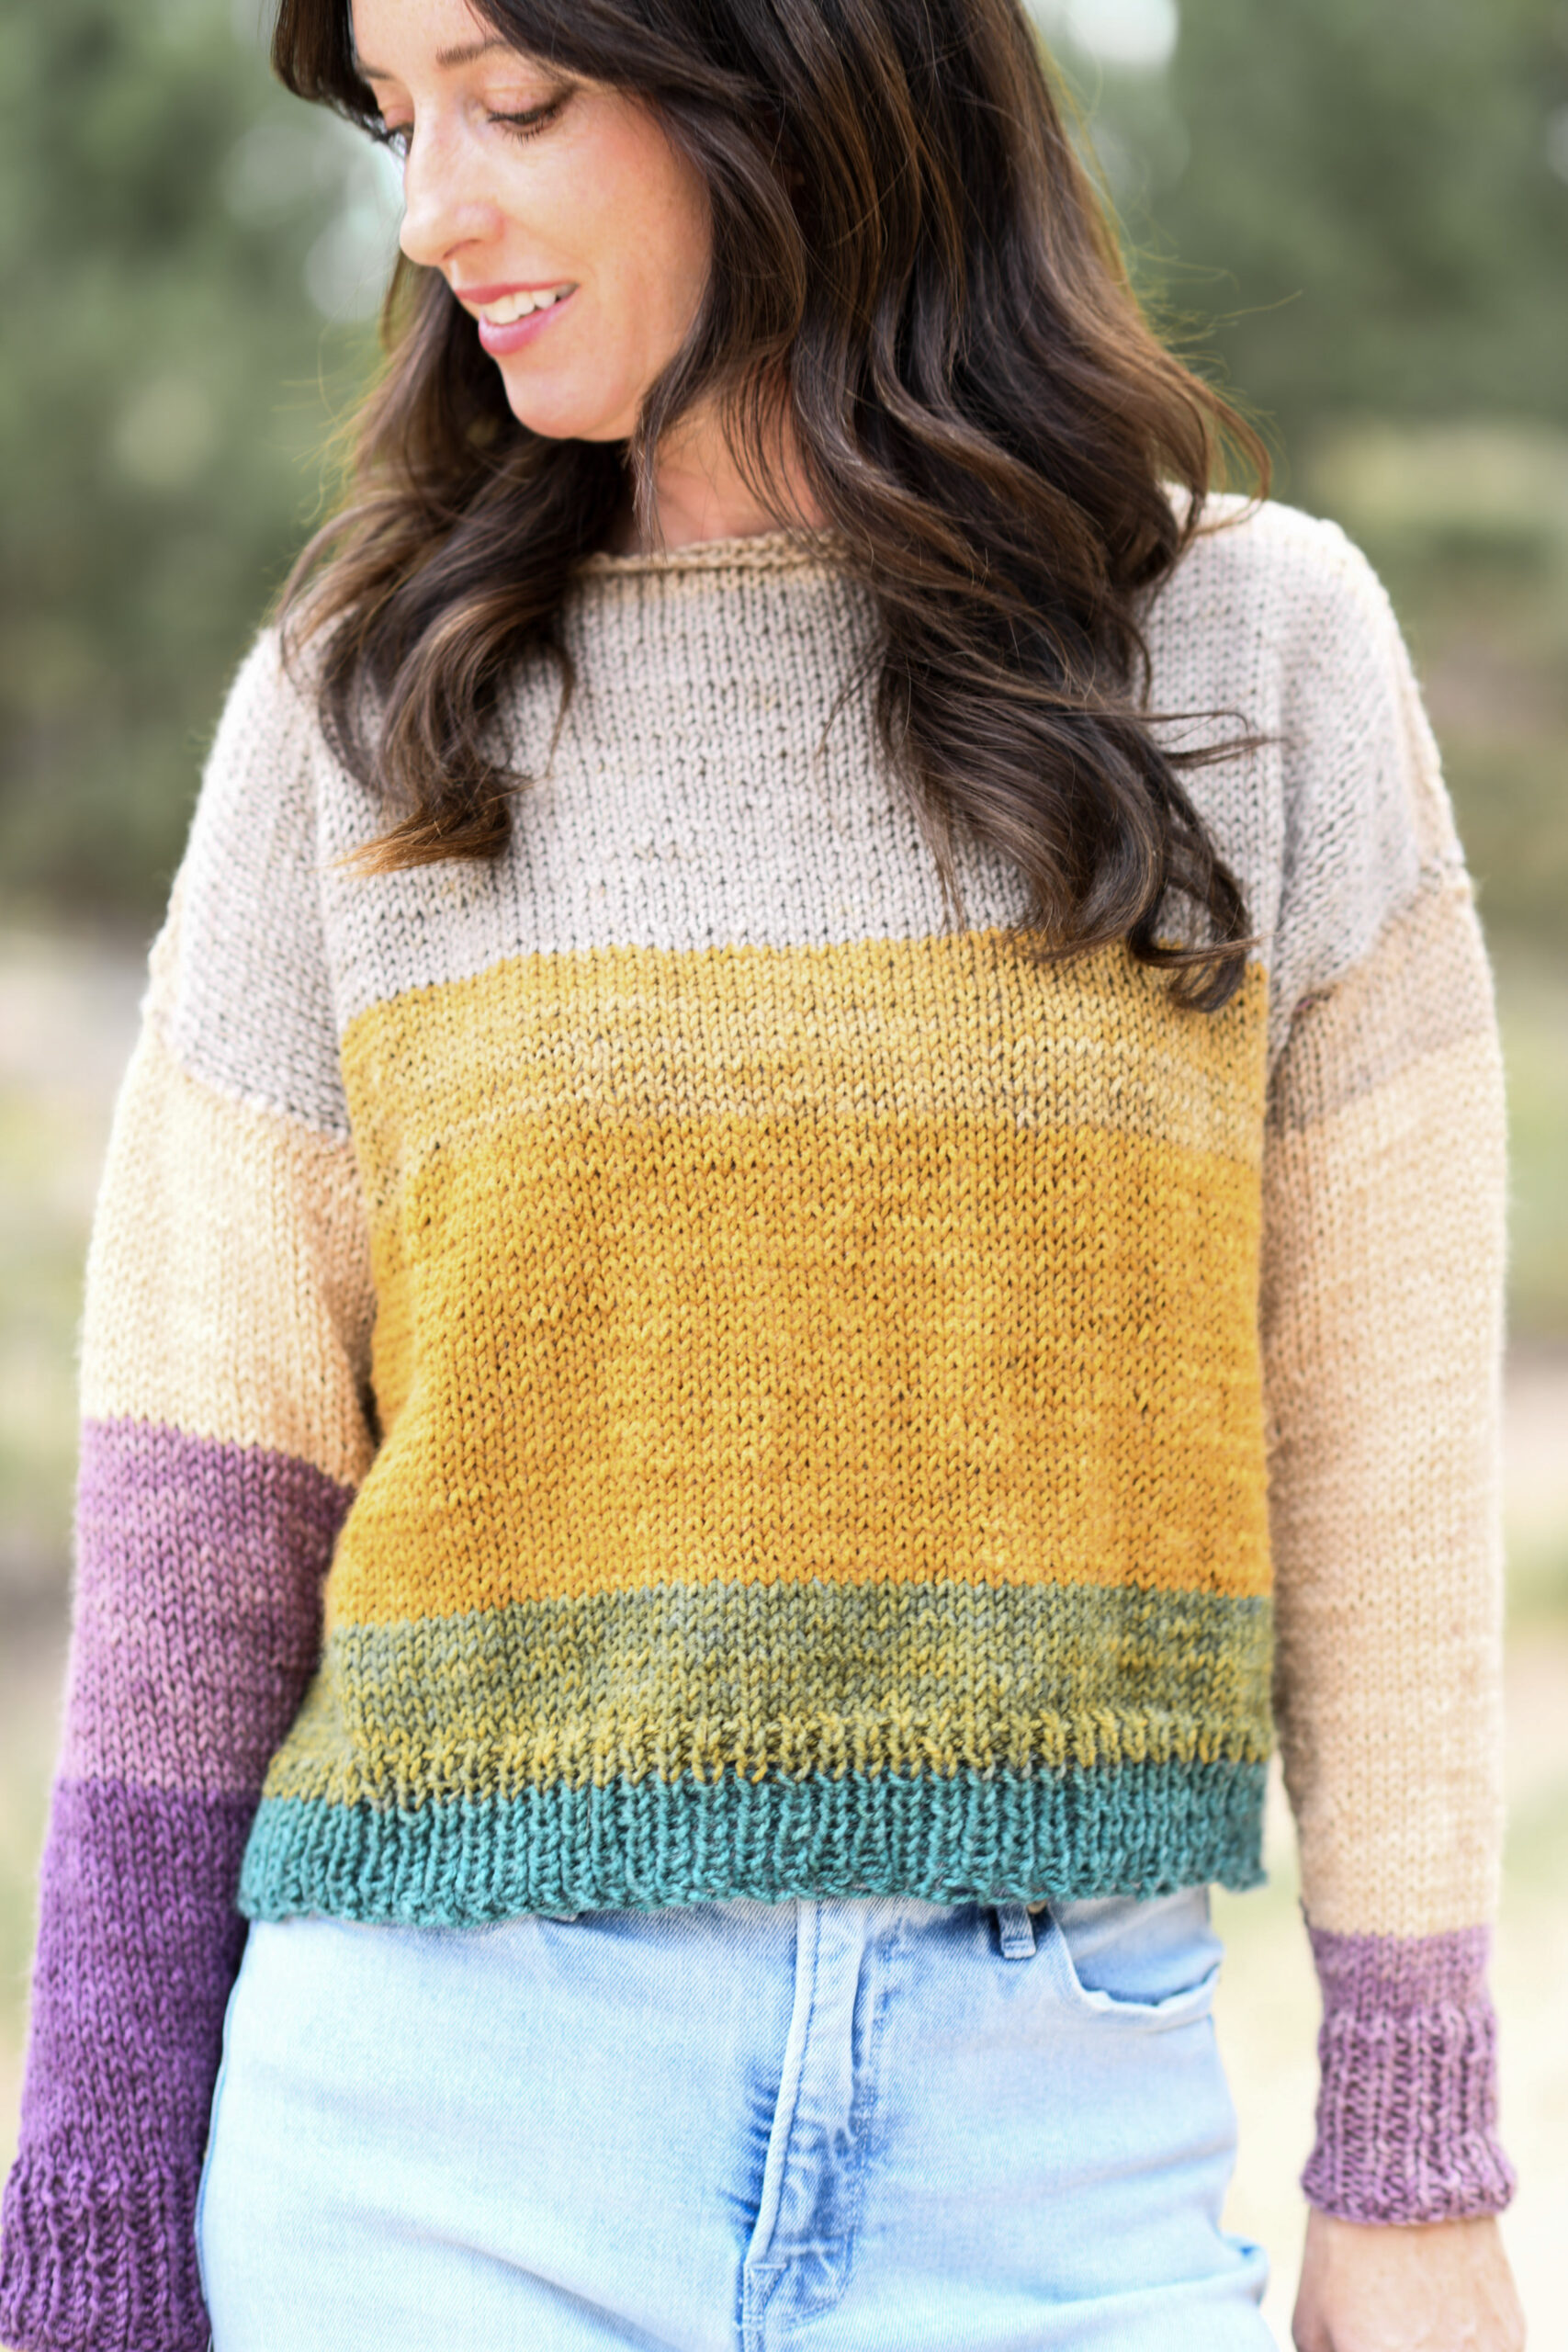
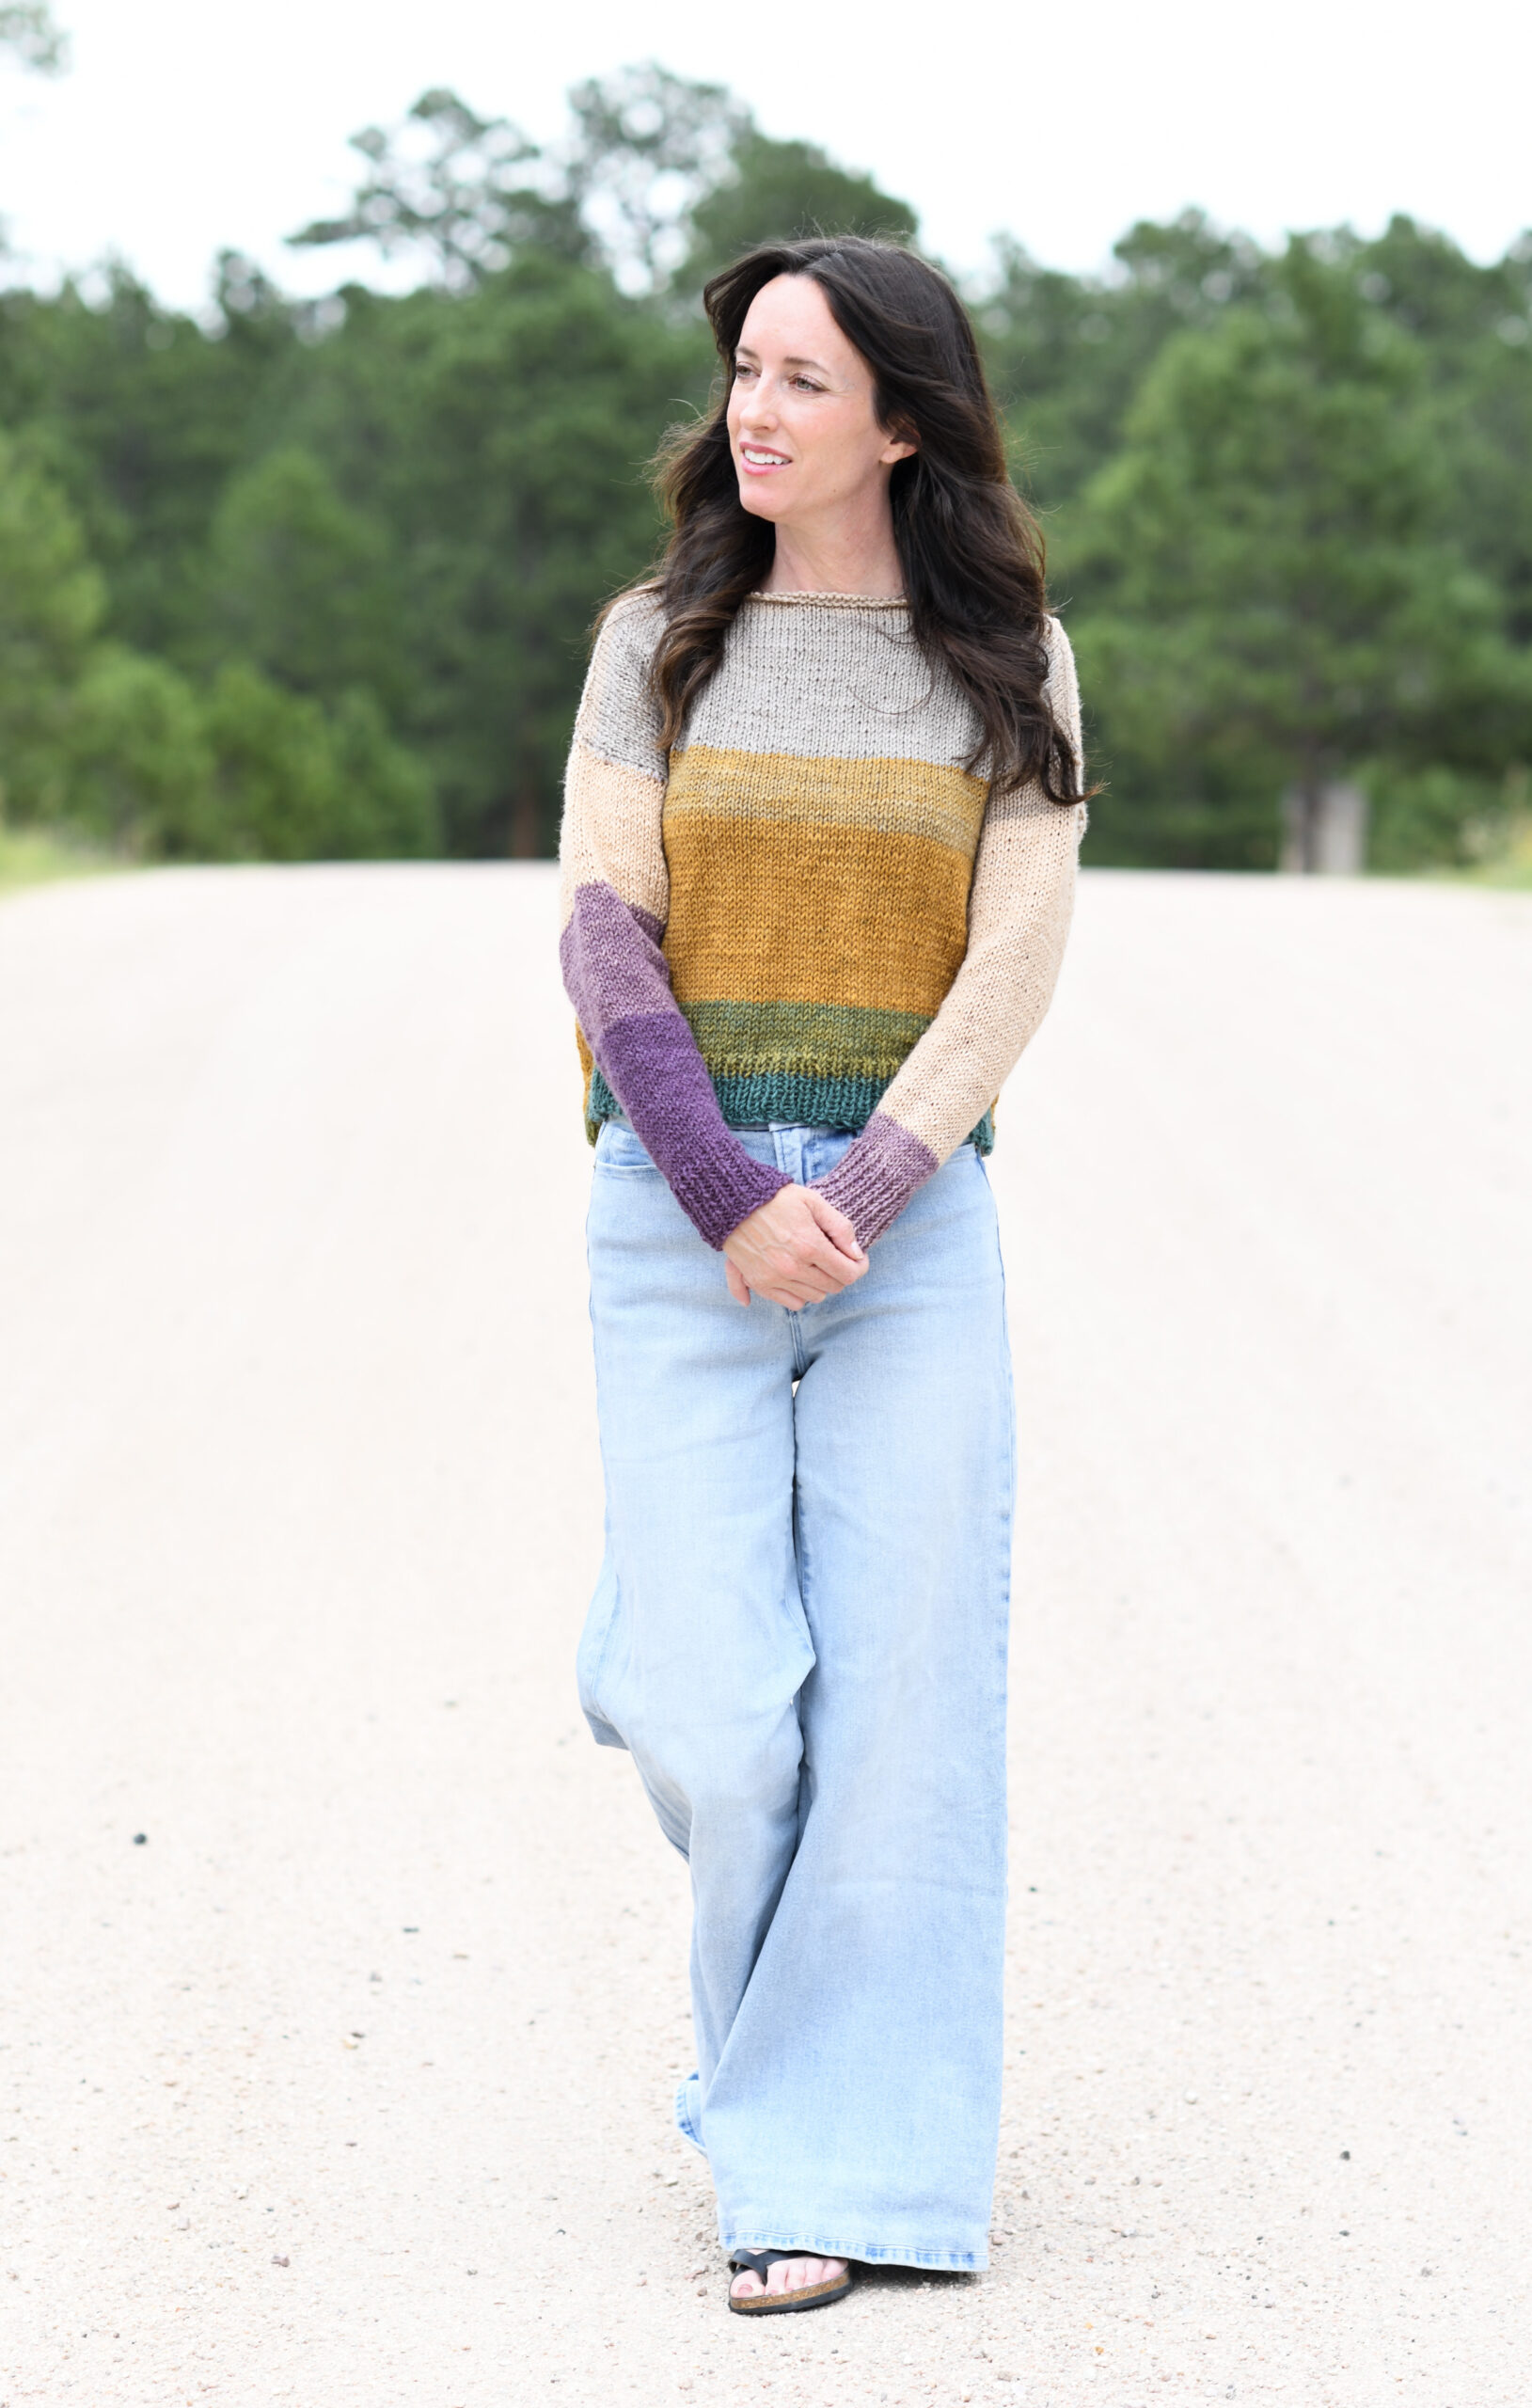
And aren’t the colors fun? Your sweater will be one of a kind because the colors will all come together slightly differently on the panels. You can also totally customize your sweater by picking your favorite colorway.

You’ll see in the measurements that this sweater features a wide, boxy fit. I’m about 110 lbs and 5’5″ wearing the smallest size.
As with most color changing projects, this one keeps you interested as you see the new colors emerge. I can definitely get bored with knitting a bunch of little stockinette, but the fun colors help!
Let’s get to this easy pattern!
See the pattern for free below, or as a reminder, you may purchase the ad-free, printable version from my Etsy shop HERE!
Mandala Beginner Pullover Knitting Pattern
Super comfy fabric and self striping yarn make this a beautiful yet laid back sweater to wear all season long! Featuring an on-trend oversized fit and minimal shaping, this pullover is perfect for new knitters or those looking for a simple project. The entire sweater is knit flat and seamed. Pick your favorite colorway to make this one-of-a-kind, colorful sweater that’s sure to impress!
Materials:
US Size 10.5 6.5 mm 29” circular knitting needles (sweater is knit flat)
2 (2,3,3,4,4,5) skeins Lion Brand Yarn Mandala in Warlock 590 yards and 150 g/skein
Pattern uses approximately 230 g (285,350,376,493,535,613) grams total
PLEASE NOTE: I didn’t get to the “rusty” color tones in my skeins of Warlock. Depending on where you stop and start skeins, you may have that color in your sweater! Each sweater will truly be one of a kind depending on your color choices, etc.
Measuring Tape
Tapestry Needle
Scissors
Dimensions (approximate):
Small, Medium, Large, XL, XXL, 3X, 4X
Please follow the key throughout the pattern according to the size you are crocheting:
S (M, L, XL, XXL, 3X, 4X)
Bust Circumference (approximate finished measurements featuring wide fit & positive ease):
S –41”
M – 45”
L – 49”
XL – 53”
XXL – 57”
3X – 61”
4X – 65”
Length (features a short fit):
S – 18”
M – 19.5”
L – 21”
XL – 22.5”
XXL – 24”
3X – 25.5”
4X – 27”
Abbreviations & Skills:
k – knit
p – purl
st – stitch
k2tog – knit two together (decrease)
1 x 1 rib pattern – You should know how to work a 1 x 1 rib pattern. (For row 1, work a knit stitch, followed by a purl stitch, repeating this pattern across the row. For row 2, knit the knit stitches and purl the purl stitches)
Gauge:
Approximately 16 stitches and 19 rows in 4” x 4” of stockinette stitch
Notes:
The entire pullover is knit flat and seamed to finish. Circular needles are called for as they can easily hold the stitches. You will knit a rectangular back panel, a rectangular front panel, and two sleeves. You may knit the sleeves in the round to avoid seaming if you’re experienced. This is a very forgiving pattern and you can adjust the sizing to make it your own! The sweater has a short fit, but can easily be adjusted. Feel free to knit for more or fewer rows on the front and back panels to make it longer or shorter (keep yarn needs in mind). Helpful tip: Hold the panels up to you as you go to ensure the length is working out! Adjust as needed while keeping yarn needs in mind.
Have fun!
Working the colors: Each sweater will be unique depending on the colorway you choose as well as the colors you begin and end with on each panel. You may choose to start with a certain color by winding yarn and saving it for later in the project.
Pattern
Panel Pattern Make 2 – Front and Back
Panels are worked from the bottom up
Cast on 90 (98, 108, 116, 126, 134, 142) stitch count remains the same throughout back panel pattern
Rows 1 – 12 Work 1 x 1 rib pattern.
Row 13 Knit each st across the row.
Row 14 Purl each st across the row.
Repeat rows 13 & 14, working stockinette stitch until panel is approximately 18” (19.5”, 21”, 22.5”, 24”, 25.5”, 27”) long.
Consider holding the panel up to yourself to check and measure the length before casting off. Adjust as needed while keeping yarn needs in mind.
Cast off and weave in ends.
Sleeve Pattern Make 2
Cast on 64 (68, 72, 80, 84, 88, 92) sts
Row 1 Knit each st across the row.
Row 2 Purl each st across the row.
Row 3 Knit each st across the row.
Row 4 P2tog, purl across to last 2 sts, p2tog.
Repeat rows 1 – 4, decreasing until sleeve panel width measures approximately 8” (9”, 10”, 11”, 12”, 13”, 13”) with an even stitch count on the needle. Note that this measurement is the width, not the length of your sleeve panel. (For example, there would be approximately 32 stitches left for a size small with an 8” wide measurement)
Next, knit in stockinette stitch until sleeve length measures 13” (13”, 13.5”, 13.5”, 14”, 14.5”, 14.5”) long OR proceed straight to the Ribbed Cuff if you’ve already reached this length while decreasing. An even stitch count is needed to work the Ribbed Cuff section.
Ribbed Cuff
Next, work a 1 x 1 rib pattern until entire sleeve measures approximately 17.5” (17.5”, 18”, 18”, 18.5”, 19”, 19”) long.
Cast off and weave in ends.
Assembly & Seaming
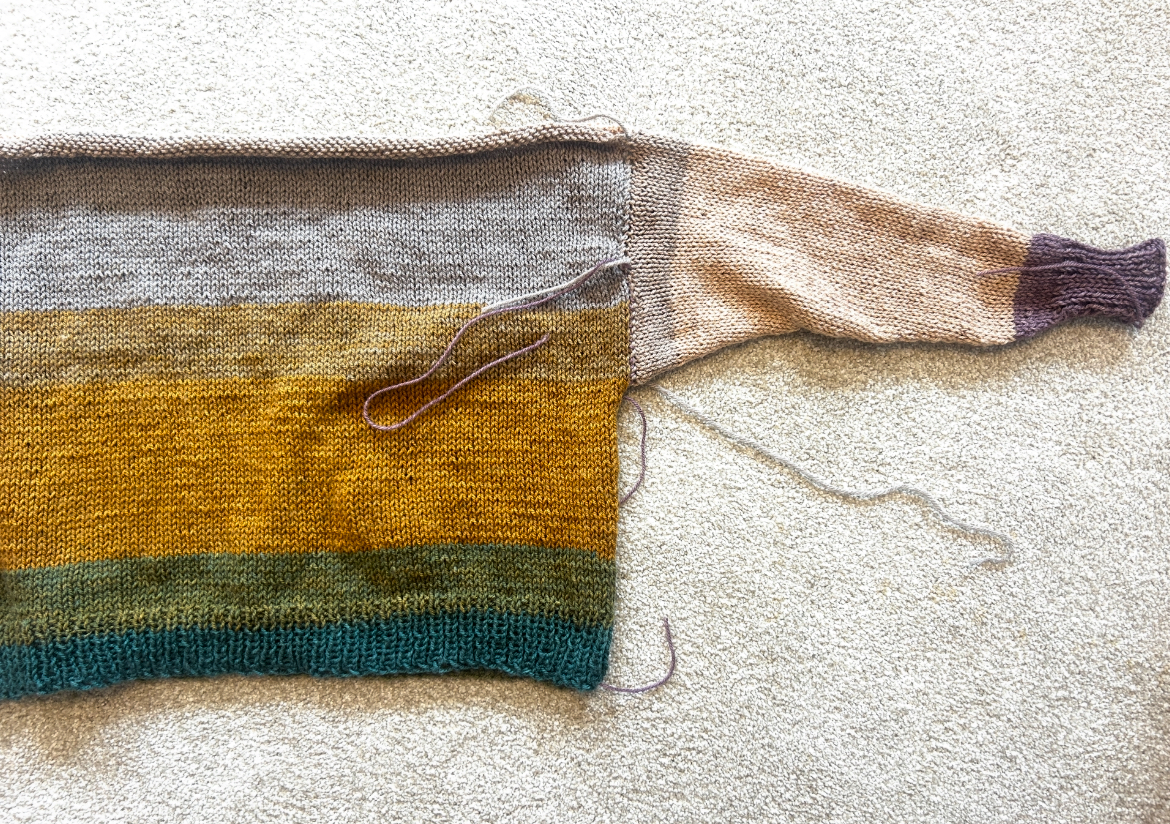


When seaming, consider leaving ends loose until completely done. This way, if any adjustments need made, you may take out your seam. It is helpful to seam with a length of yarn that is a similar color to the fabric that you are seaming.
Place front panel directly on top of back panel, leaving space in the middle and outer edges aligned.
Seam panels together at shoulders with a whip stitch seam working through one loop only on each side, or as desired.
Fold and sew sleeves using a mattress stitch seam.
Sew sleeves onto the cardigan with whip stitch or preferred seaming method.
Seam sides of front and back panels with mattress stitch seam.
Note: There are a few methods you may use to sew the sweater together. You may seam at the shoulders first and up the sides, then finish by attaching the seamed sleeves. You may also seam at the shoulders, then sew the flat sleeves onto the sweater while laid out. Next fold the sweater in half and seam up the sides and under the sleeves. There are many online resources on how to sew and seam sweaters if you need additional help.
Block to shape and size if desired.

I really hope you like this pattern and enjoy making it your own! A sweater is the ultimate knit project, so it’s really fun to wear something that you’ve made and show it off. 🙂
And if you liked this simple sweater, you might also like these 10 beginner friendly knit sweater patterns as well!