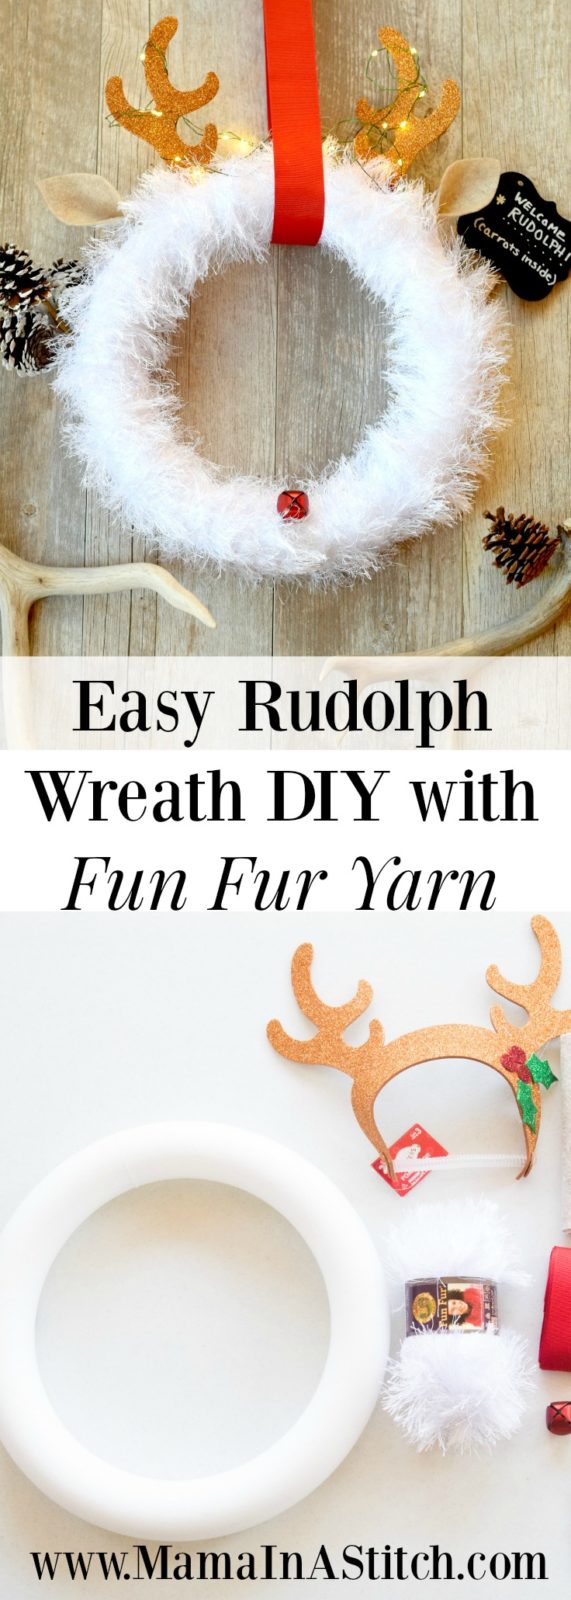
Rudolph Christmas Wreath DIY
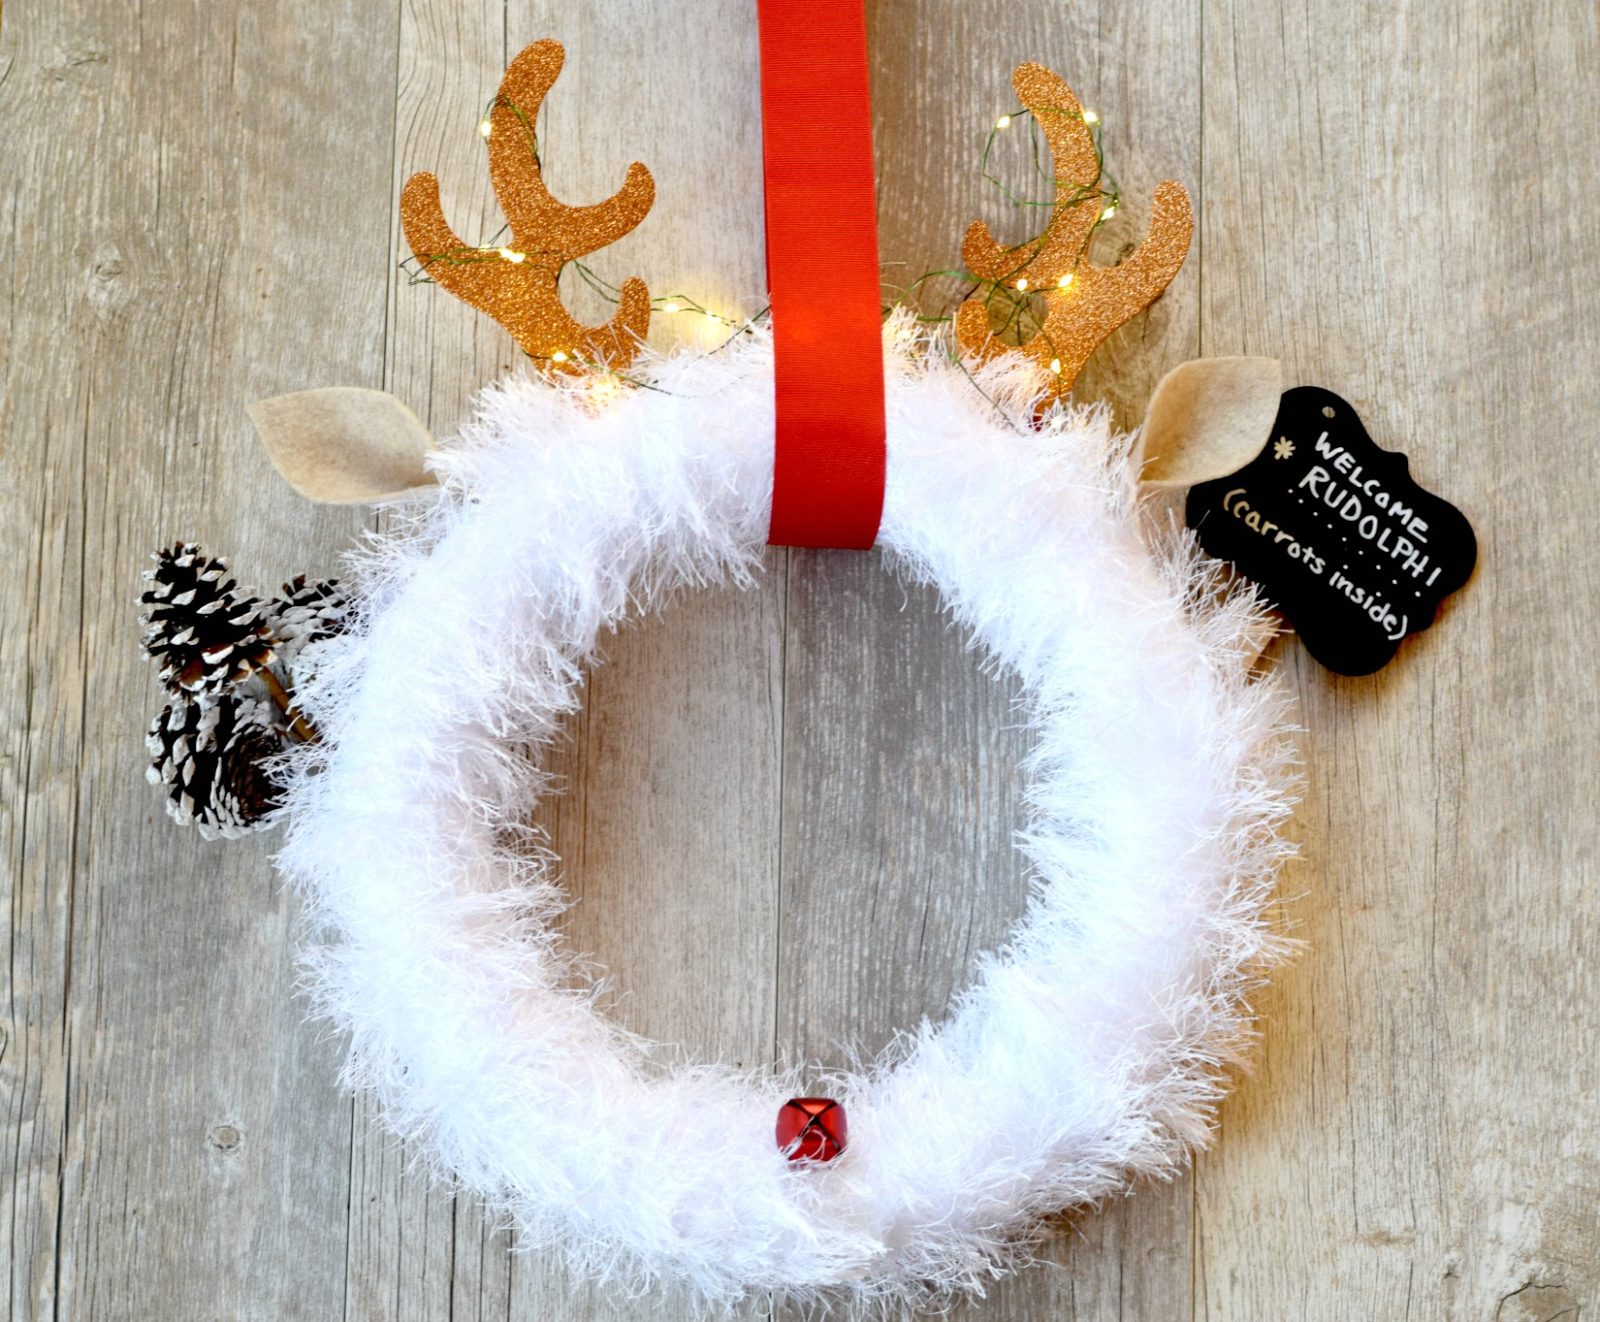
As a child, I was always just as excited that Rudolph would be visiting my home as I was that Santa would be arriving. We would always leave cookies, milk and carrots out for the reindeer before heading to bed. It’s so much fun to watch my daughter do the same thing now, and I can see her listening for reindeer on the roof Christmas eve. After doing so much knit and crochet with my most recent projects including the knit shawl and the blanket sweater cacoon, I was ready for a bit of something different. 🙂 This wreath is so easy and quite cheap! You can occasionally find styrofoam wreaths and foam antlers at the dollar store. This is also a project that allows for some major creative flexibility. Add an ornament for a nose rather than a bell, or use green fun fur and put all kinds of fun red and white pom-poms on it. And if you like this, you will love a spring wreath that I saw online a year ago which inspired this wreath and is made with the same fun fur concept! The possibilities are endless!
Watch my Video On How To Make the Fun Fur Wreath:

I’ve been a crazy knitting and crocheting machine these days, and I was up for something totally mindless. You could argue that most of my projects are pretty easy and mindless anyway, but this one involves simply unwinding a skein of fun fur yarn. Complete zone out time. It doesn’t get easier!
Below, I’m going to write out the instructions on how to make this wreath. I’ve also included a short video. This is my first attempt at making a video for the blog. Well that’s not entirely true. Actually, when I first started blogging, I did make a video for a washcloth and a knit triangle scarf. I’ve since removed them because I am so embarrassed by them! The washcloth video was filmed on my bed with the camera propped up on a pillow and it had horrible lighting. Ha! I still have a lot to learn about making videos, but I decided to just try it. Maybe I should master video techniques and buy some nice equipment before I share here, but it’s just not my style. This blog has always been real, and mostly I’ve learned as I go. This was a good practice video to edit, cut, play with lighting and so on. 🙂
How To Make A Cheap Fun Fur Reindeer Wreath:
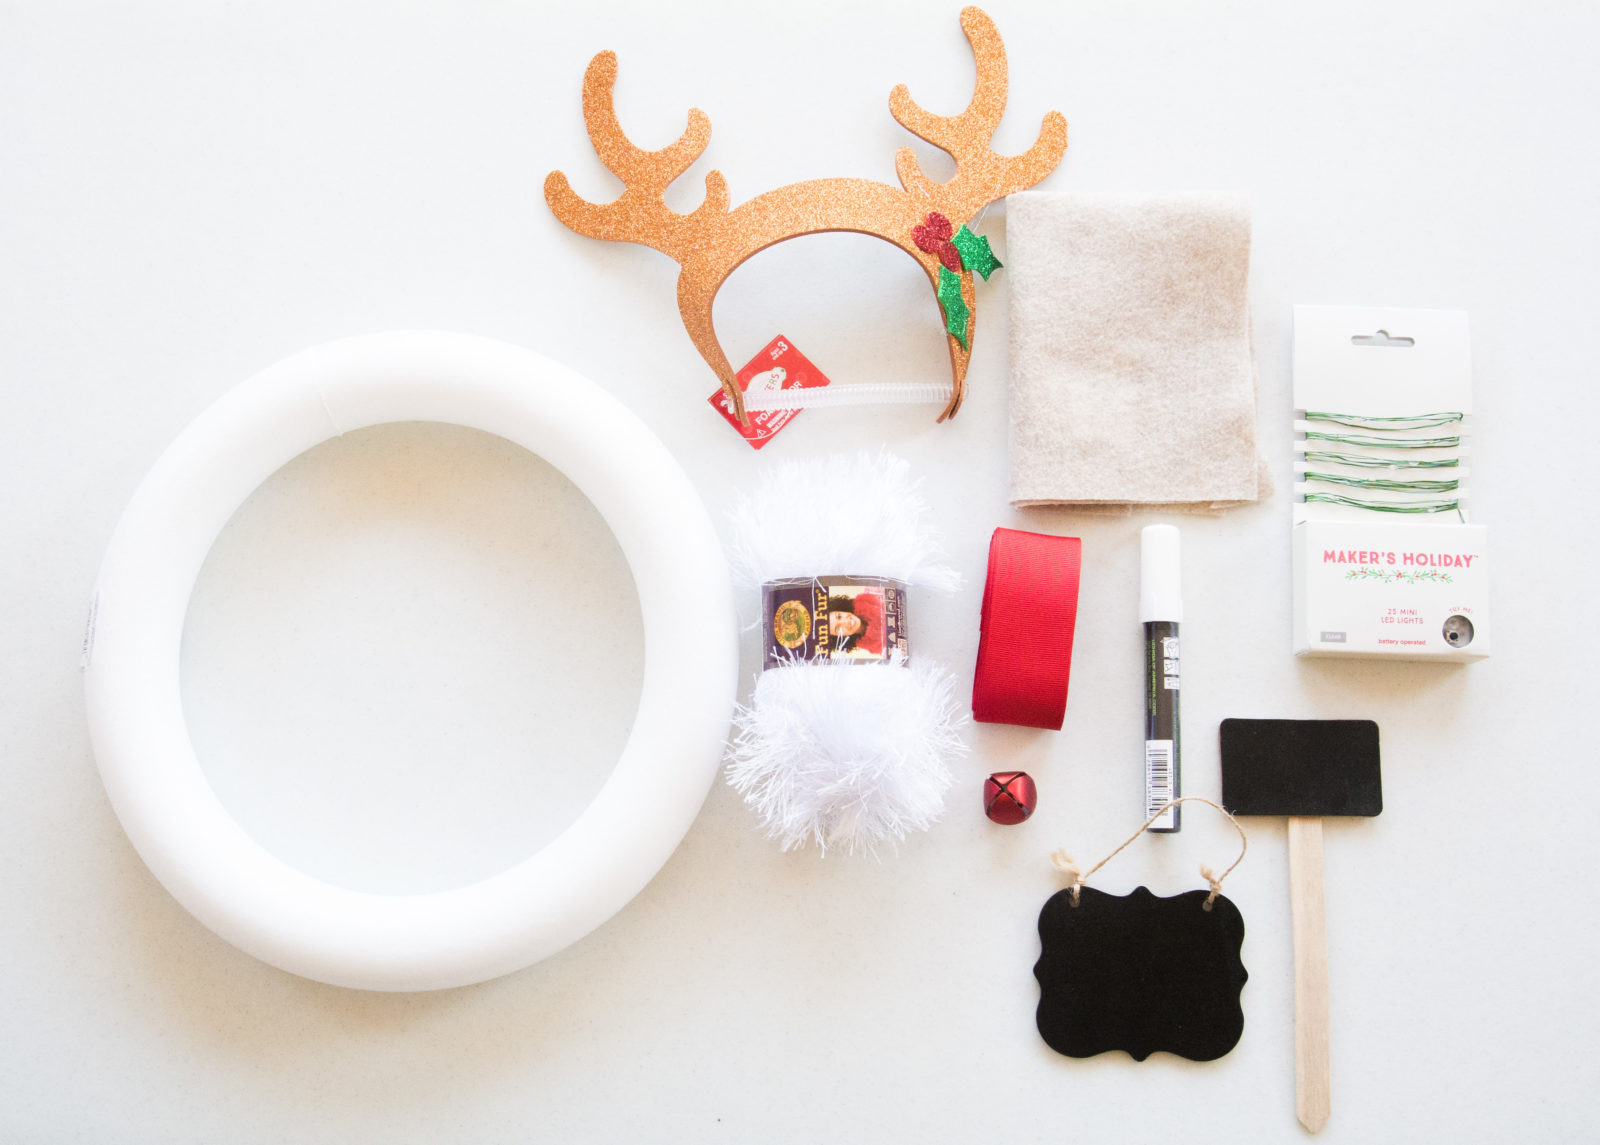
Supplies:
Styrofoam Wreath (Dollar Store or any craft store. I found mine at JoAnn’s)
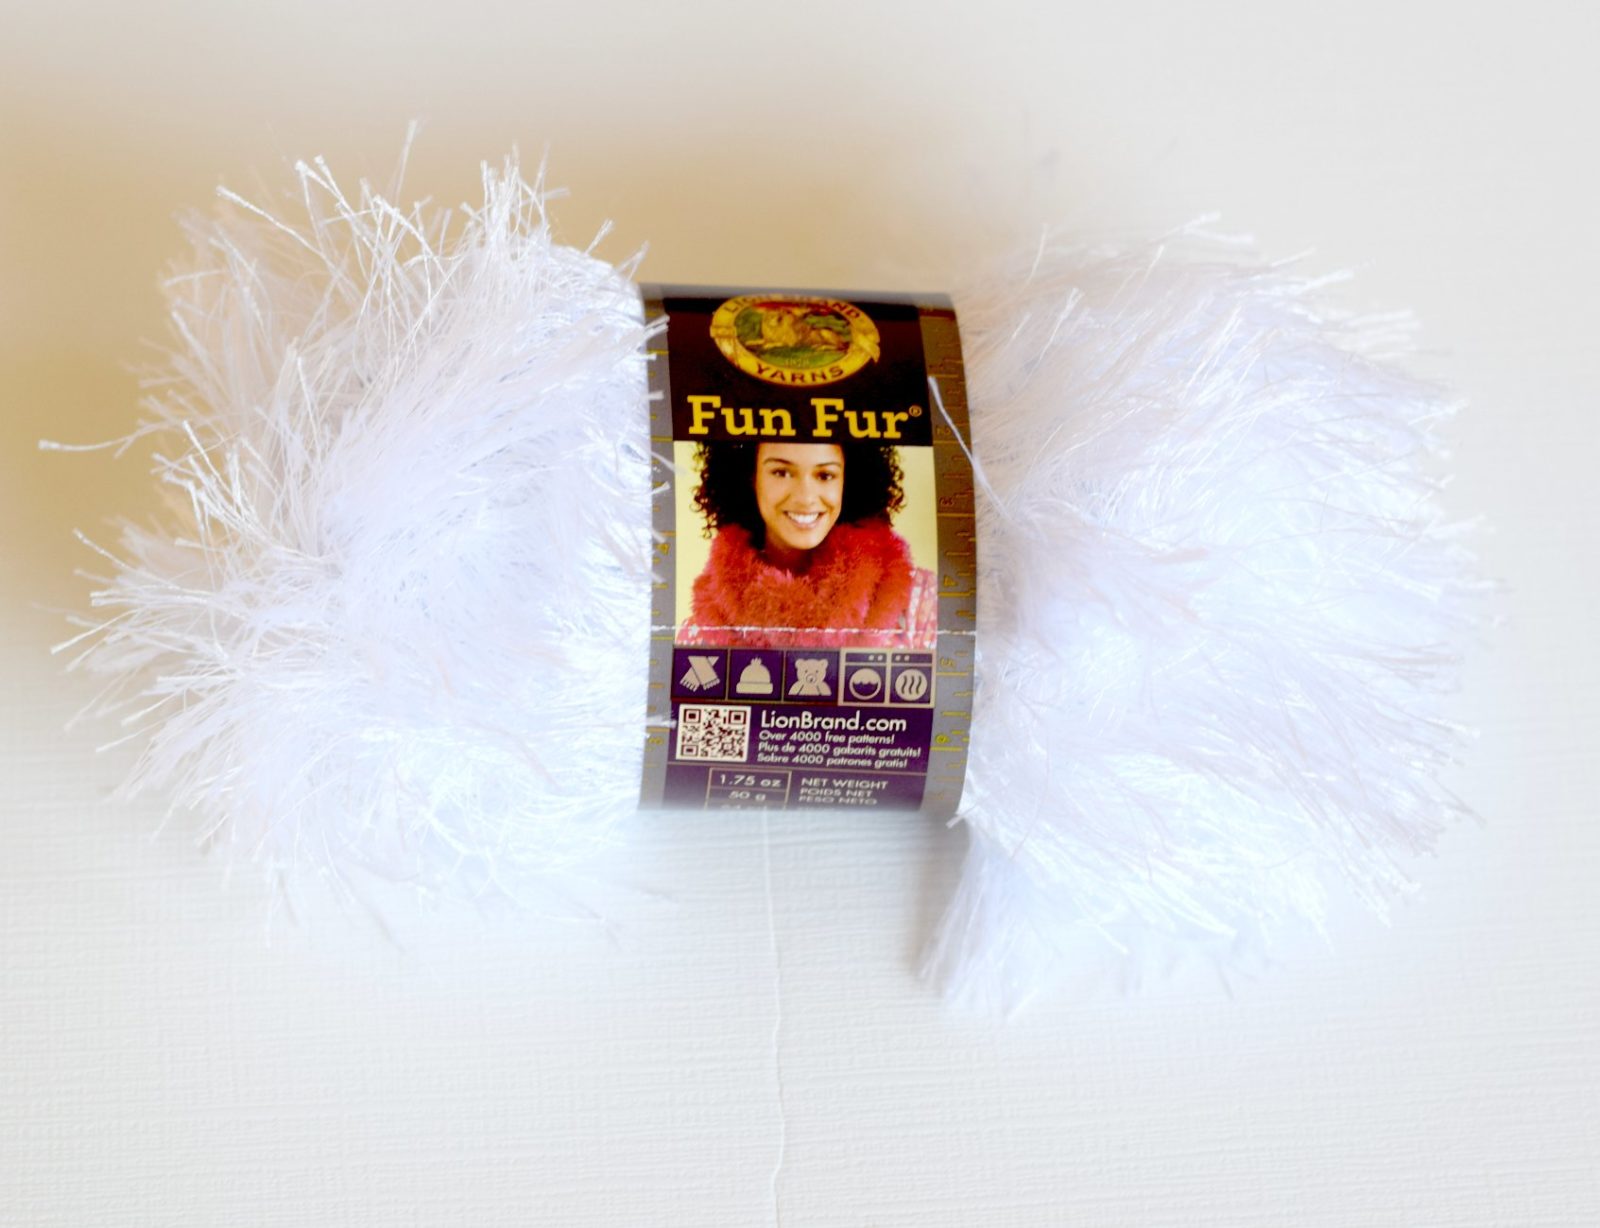
White Fun Fur ( I used Lion Brand Yarn fun fur which I found at JoAnn Fabric)
Tan felt
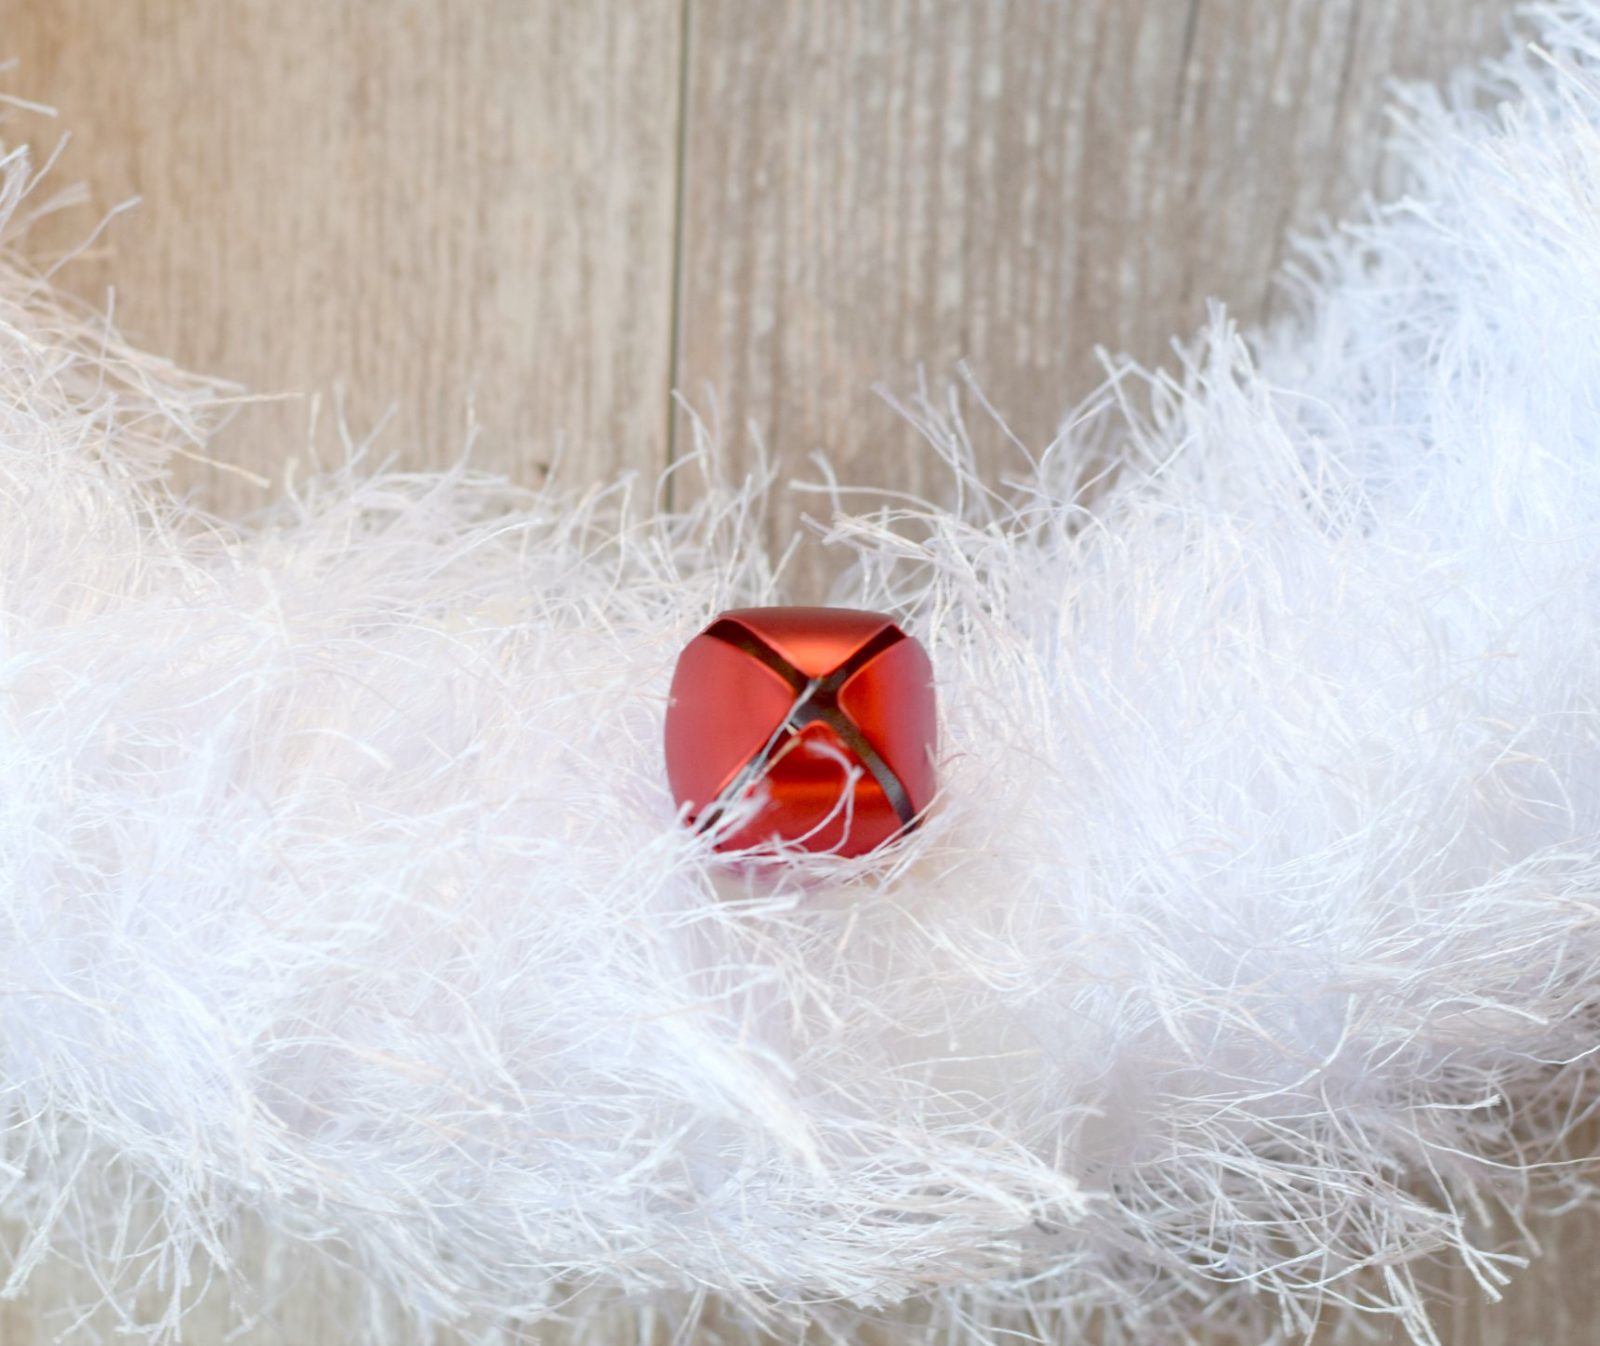
Red jingle bell (you could use a pom or an ornament as well)
Foam antlers or any antlers than can be cut off of a headband or hat (Antlers pictured are from JoAnn’s)
Hot glue
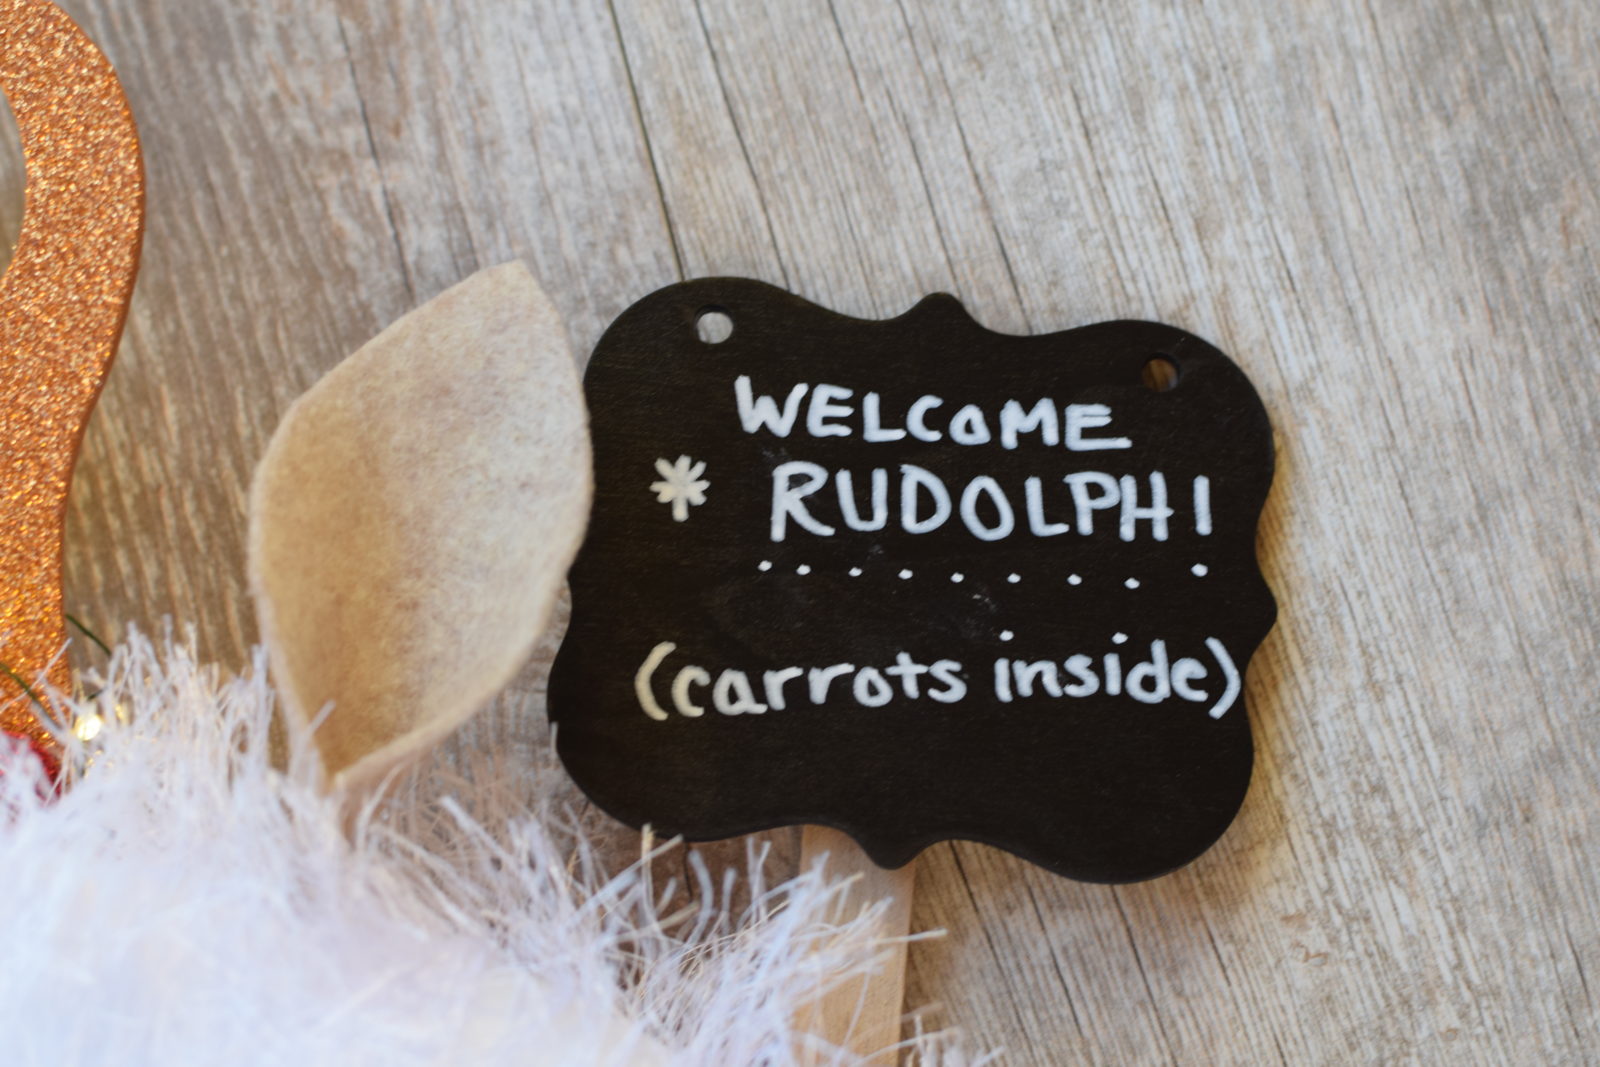
Chalk board tag for sign (Found at JoAnn’s)
White paint pen
Red bow
(Optional LED battery operated lights, pine cones on a stick found at the craft store)
Wreath Step by Step:
- Tie fun fur to wreath and knot. Wrap around wreath until you’ve used almost the entire skein of yarn. Save a couple of yards for tying on LED lights or any extras like pine cones.
- Cut Antlers off of hat or headband and attach with hot glue. Use a lot of glue, but careful not to burn your fingers!
- Attach red bell in bottom center of wreath for nose with hot glue.
- Cut out ears from felt, pinch together at bottom and glue to wreath (see video) Again, use a good amount of glue, but be careful not to get burned.
- Write the note “Welcome Rudolph – Carrots Inside” on chalk board sign with white paint pen and attach to wreath. If there’s no stick attach to your tag, you can use a popsicle stick to attach to the tag. Place stick on the wreath by putting the stick through the fun fur on the back. You can also take some of the fun fur yarn that you saved from earlier to tie and secure the sign to the wreath.
- OPTIONAL – Attach LED lights by securing to the back of wreath just below the antlers with several wraps of fun fur that you have saved from earlier. Tie tightly. Attach anything else that you’d like, including pine cones if you so wish.
- Attach large ribbon to the top in order to hang the wreath.
That is it my friends! I love my wreath and so does my girl. I hope that you will enjoy your wreath as well! Happy crafting, crocheting, knitting and whatever else you may be enjoying this weekend!


That is just TOO cute!!! I have to make one next week 🙂
Thanks for sharing and I LOVE your blog!
Oh I’m so happy that you like it Pam!! Let me know how it turns out!