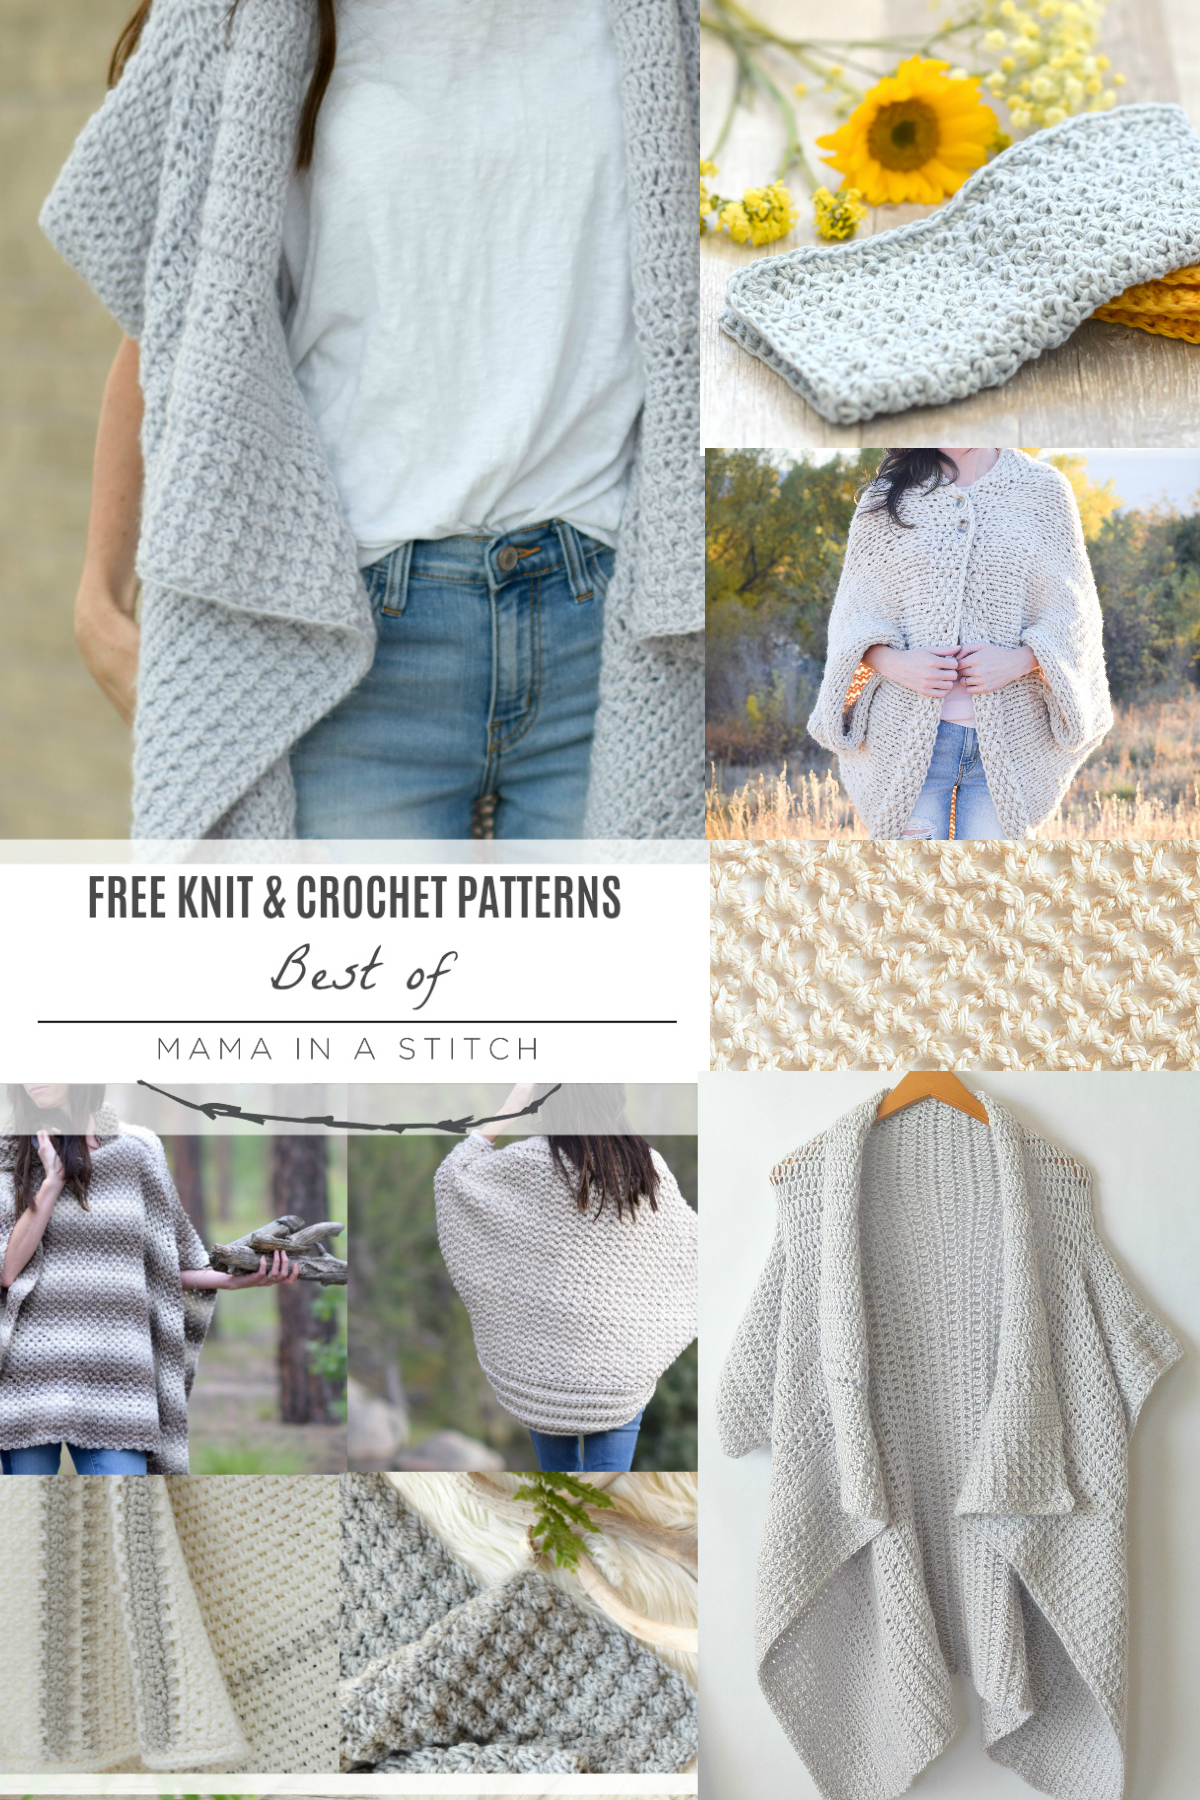
Triangle Wrap Top – Free Knitting Pattern

Today’s project is fun because it’s so simple, yet you can use it in a variety of ways! This triangle shawl can also be used as a top, cover-up or beautiful wrap. The stitches are easy enough for adventurous beginners and this really flies off the needles. It uses just three skeins of yarn or less and makes a great stash buster! While I love my Winding Cables Wrap for winter, this has to be my fave wrap pattern for summer.
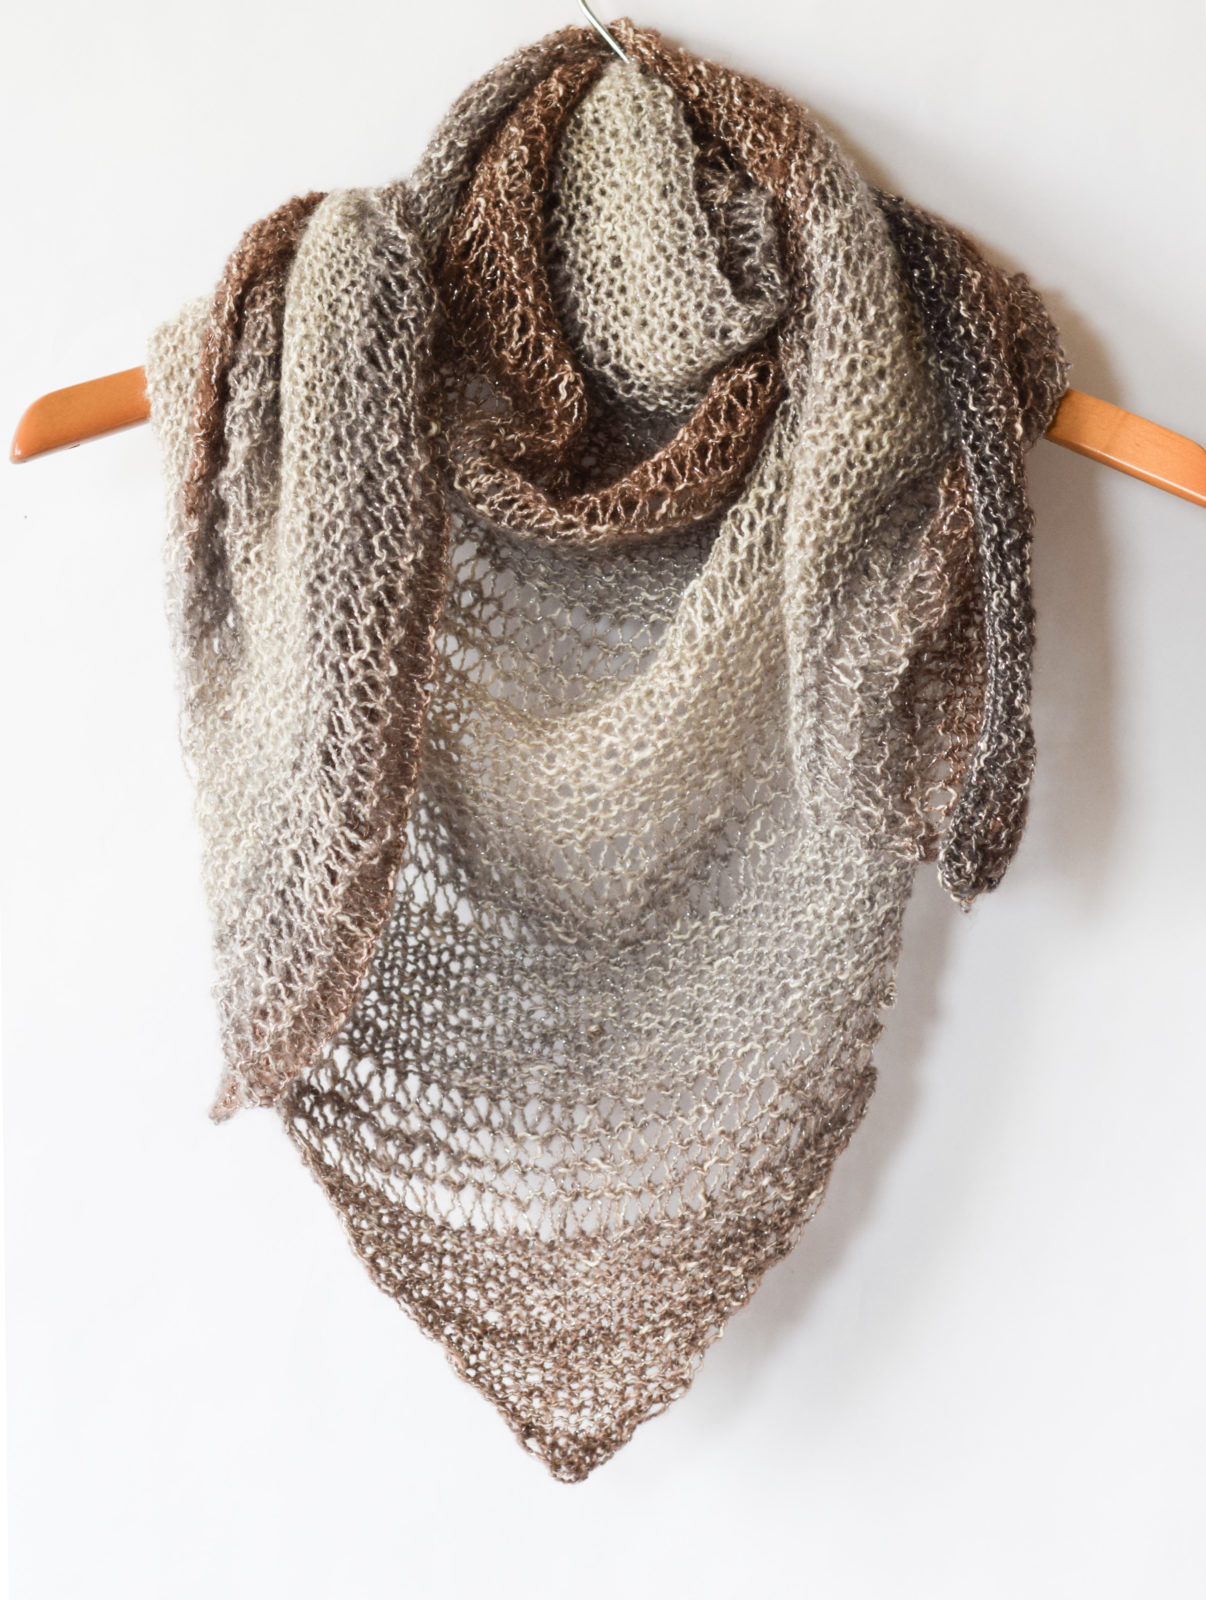
For this particular wrap, I chose to use Lion Brand Heartland in Acadia and Homespun in Hepplewhite. The needles are larger than what you’d typically use with a worsted weight yarn which gives the fabric a light, open look and feel. And although I stuck with my favorite neutrals, you can add as many colors or stripes as you’d like! You also don’t have to use the Homespun yarn – just use any worsted weight yarns that you have on hand.
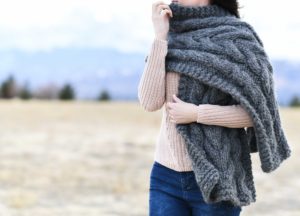
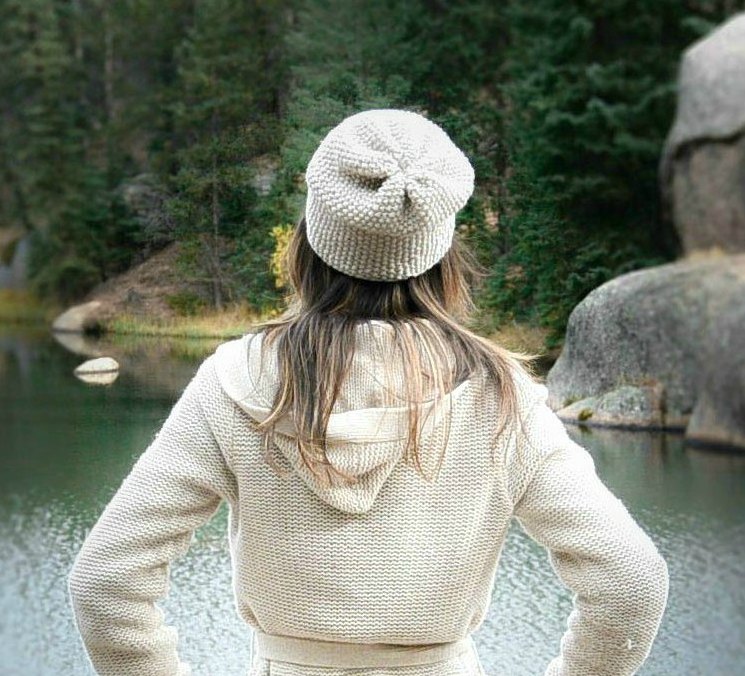
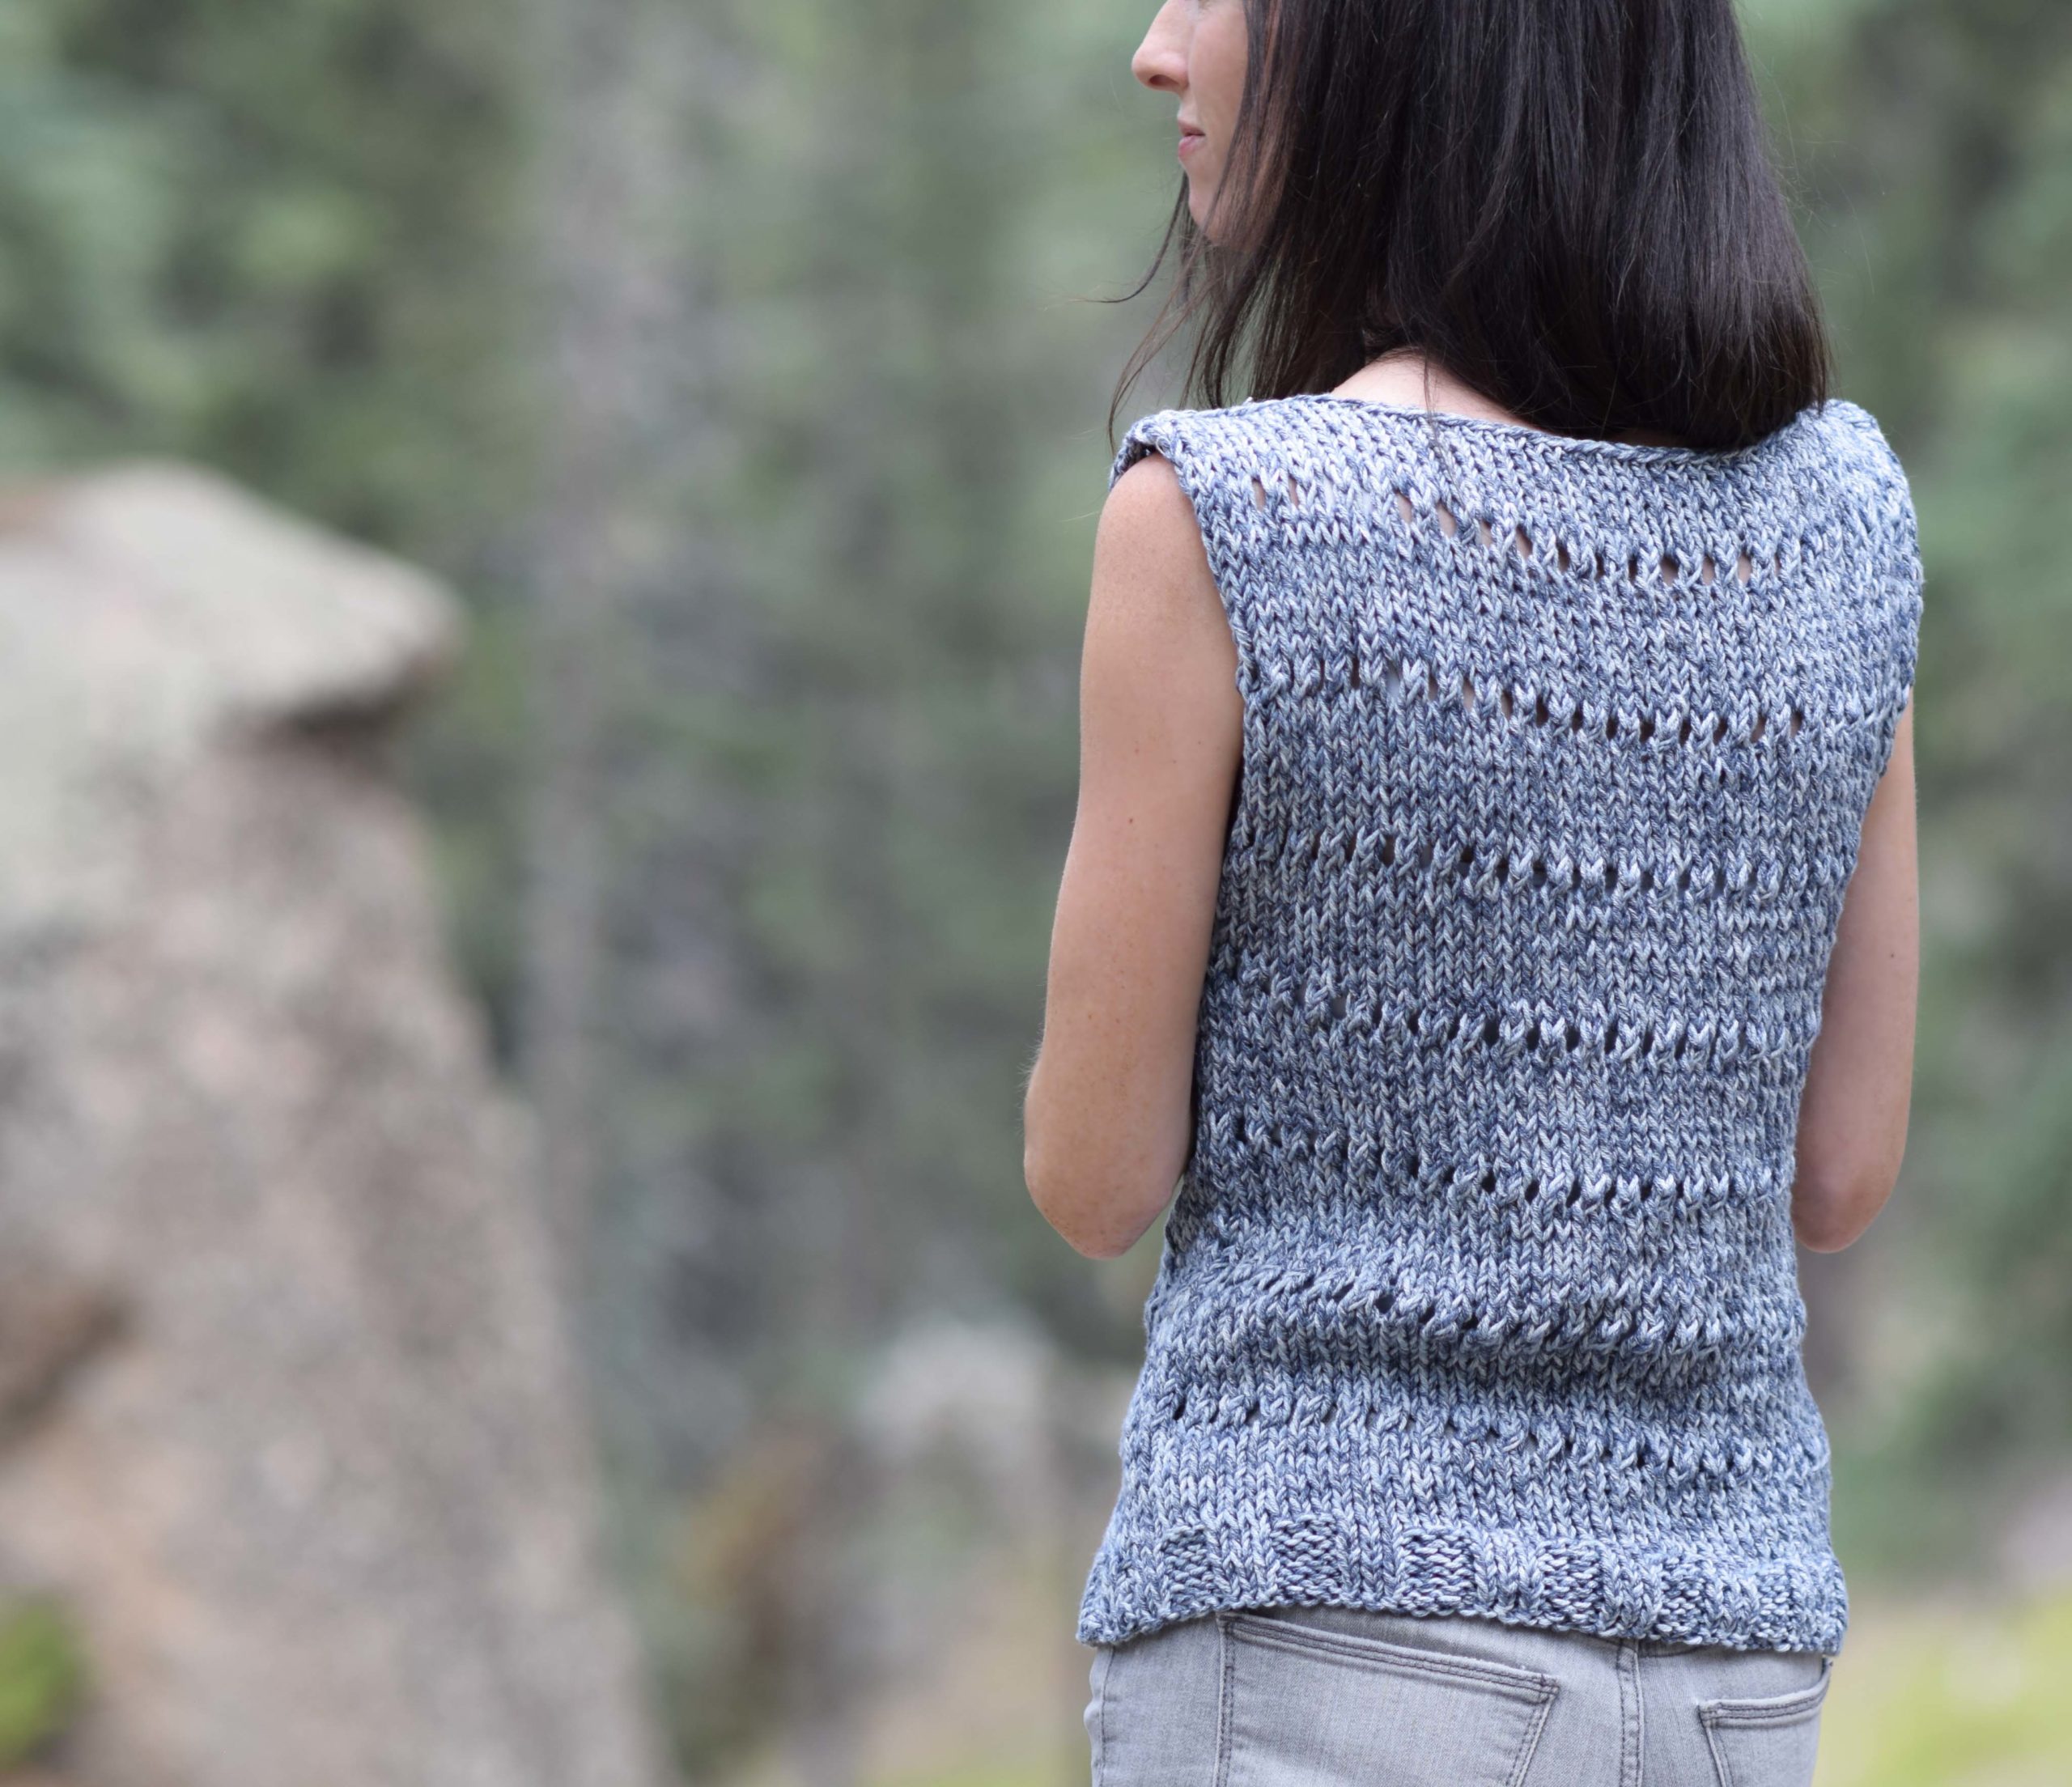
Below: You can see how light and summery the stitching looks when worn as a wrap or shawl.
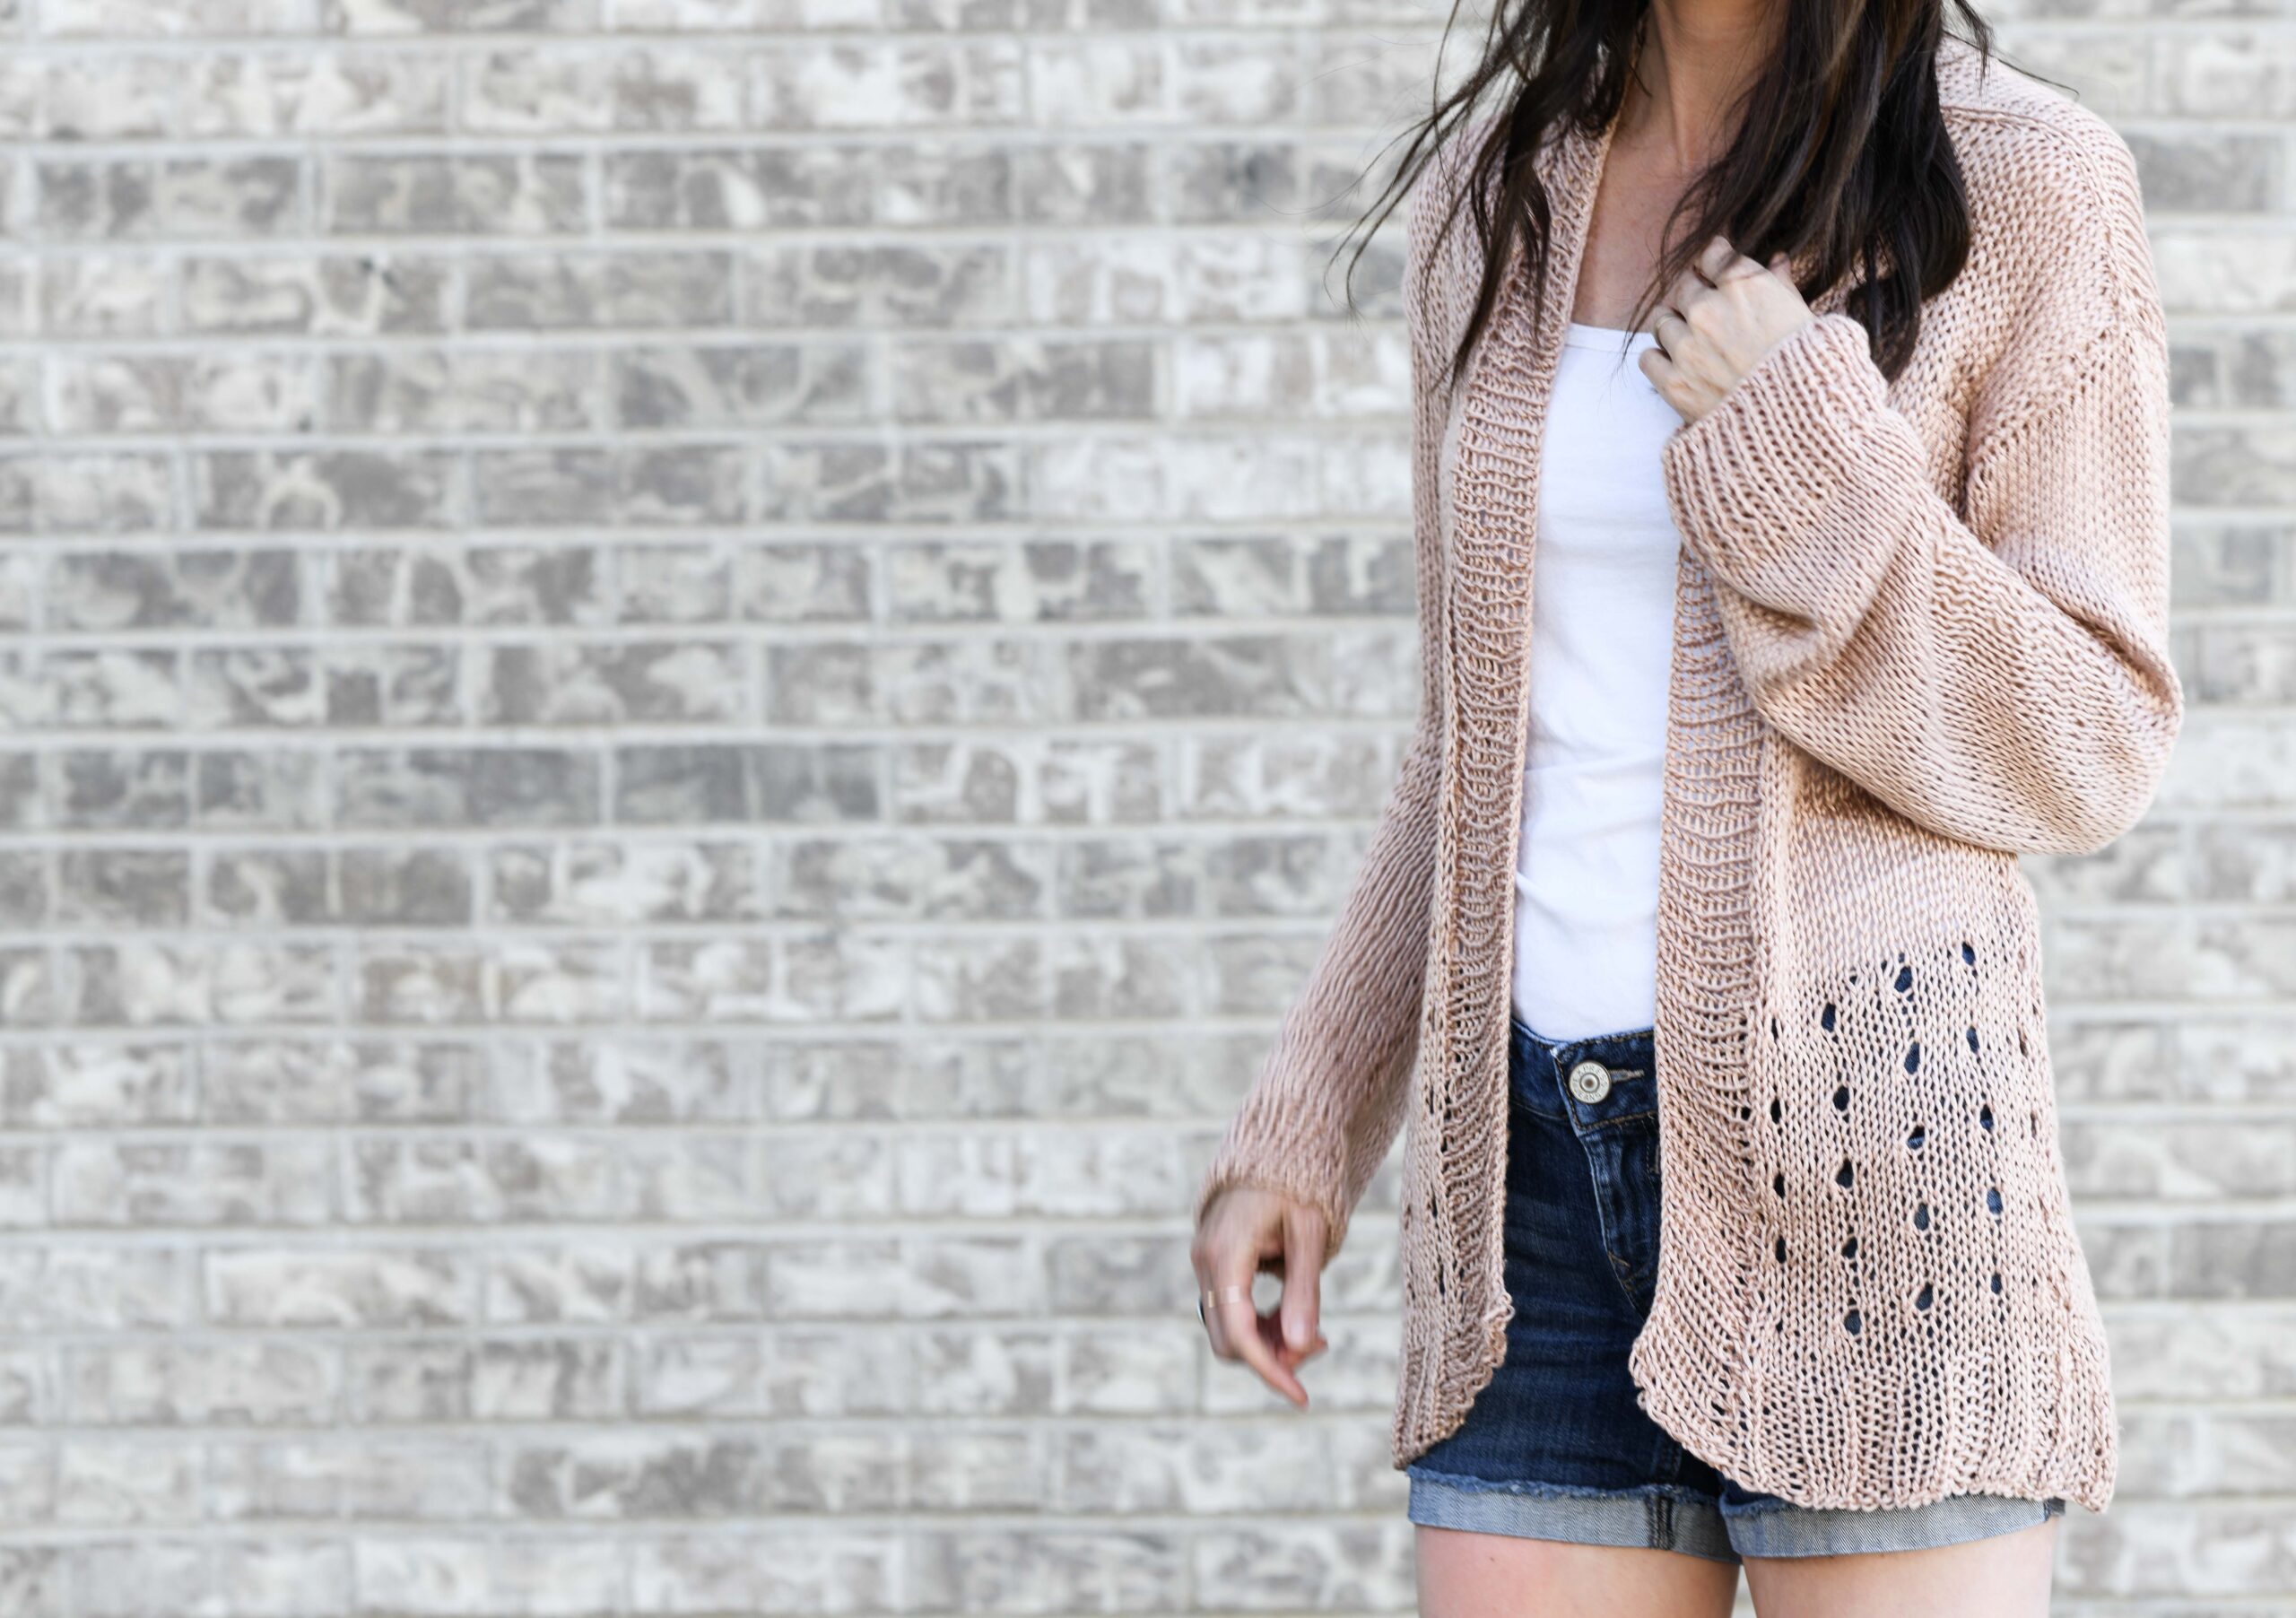
Below: Here it’s worn as a fun cover-up or top. It’s super cute and unique over a little tank.
Below: It got a little blurred out, but you can see where it ties in the back when worn as a top. 🙂
You’ll knit this by starting with just a few stitches and increase each row until your triangle is fully grown! Hehe! Drop stitch rows are included to add more texture and airiness. Once you finish the triangle, you’ll knit i-cords which will be used as the ties. If you want to simply use this as a shawl or wrap, there’s no need to add the i-cord ties. And I have to thank my neighbor Gwyn for the idea to make this piece!
As most of you know, I love to be outdoors and most of my photos are taken outside. However, the weather didn’t allow the luxury of going out into nature, so I hope you’re okay with my indoor pics! Below is an outdoor shot with some color inspiration for this piece. Aren’t the fields of gold so pretty? (Pueblo West, CO)
Shall we get started?!
-
See the FREE Pattern below
-
Get the ad-free, printable version from Etsy HERE
-
Get this pattern & all the other patterns as ad-free, printables HERE
Triangle Wrap – Top Knitting Pattern
Description: This simple piece can be worn as a top, wrap or cover-up! It features airy stitches and a soft yarn so it’s extra comfortable to wear. A fun and versatile piece that’s simple enough for adventurous beginners!
Materials:
US Size 11, 36” (or longer) Circular Knitting Needles
2 skeins Lion Brand Yarn Heartland in Acadia
1 skein Lion Brand Yarn Homespun in Hepplewhite
(Pattern uses approximately 200 g of yarn total)
Scissors
Tapestry Needle
Size: One size fits most
Approximately 62” at widest x 20” long
(I-cords each measure an additional 22” optional )
Notes:
This pattern is knit flat. It starts at the mid-point of the triangle and is worked by making simple increases and knitting across the rows. Drop stitch rows add a nice contrast and the Homespun yarn gives it textural interest. Finally, an i-cord is attached in order to wear it as a wrapped top.
Abbreviations (US) & Skills:
k – knit
yo – yarn over
st – stitch
cc – change color
kfb – knit in the front and back (increase)
You should be familiar with knitting a simple i-cord and drop stitches.
Gauge: Not important for this pattern, but mine is approximately 10 stitches in 4″
Helpful tips:
If you lose count of your rows, simply make sure you change colors on the same side each time. This will keep a consistent look. In addition, you should ensure that the triangle is at least 20” long and 62” wide when complete. Simply add more rows with the pattern repeat to make it longer if needed or desired.
If you prefer not to count rows, you may also knit this following the stitch pattern repeat and measure the sections throughout. You may work approximately 3” of Acadia knit stitch rows between each drop stitch/white detail. Again, simply make your color change on the right side each time. The pictured wrap was actually knit in this way. However, many folks like to count rows so I’ve written the pattern with rows below. Enjoy!
Triangle Wrap – Top Knitting Pattern
Cast on 3 stitches
Row 1 Knit across the row
Row 2 Kfb in 1st st of row, knit each st across to the last st of the row, kfb last st of row
Rows 3 – 15 Repeat row 2
Row 16 Kfb in 1st st of row, *yo, k1; repeat from * across to last st, yo, kfb in last st of row.
Row 17 Kfb in 1st st of row, *drop yo off of needle, knit next st; repeat from * across to last st of row, kfb in last st of row.
CC to Hepplewhite (right side)
Row 18 Kfb in 1st st of row, knit each st across to the last st of the row, kfb last st of row
Row 19 – 21 Kfb in 1st st of row, knit each st across to last st of the row, kfb in last st of row
CC to Acadia
Row 22 Repeat row 16
Row 23 Repeat row 17
Next, repeat rows 2 – 23 2 MORE times.
(You should have a total of 3 stripes)
Next, repeat rows 2 – 15 one more time.
Continue pattern repeats until piece measures approximately 20” long and 62” wide.
Note, if you’d like to make this wrap larger, just continue with this pattern until it reaches your desired size!
Cast off and weave in ends.
If you’d like to wear this as a wrapped-top, you will now knit the i-cord. If you want to use this as a basic triangle wrap/shawl, you’re all finished! Add tassels or a small i-cord and tassels as desired!
I Cord Pattern
(Follow the instructions below. You can also find many online video tutorials on how to knit an i-cord for extra assistance)
Cast on 4 stitches
Row 1 Knit each st across the row
Next, slide your work to the opposite end of your needles. Do not turn. You will then knit, tightening the first stitch of the row and knitting each of the next 3 stitches. Repeat this pattern by knitting each stitch across the row and then sliding the work to the opposite end to knit again.
Continue knitting until the I-Cord is approximately 22” long (fits most sizes). Cast off and weave in ends.
Attach each of the I cords to each outer corner of triangle wrap with a simple whip stitch.
Optional: Add tassels to the end of the I-cords. See how to make a tassel on the Mama In A Stitch blog at https://www.mamainastitch.com/how-to-make-tassels/
To wear, place triangle wrap on yourself as if to wear it like a shawl (on your back). Pull the two corner sides around the front and tie at the back.
I really hope you’ve enjoyed this summery little wrap – top!
XO,
Jessica
If you liked this, you might also like:
Super cute, Jessica!
This will definitely be on my list for the summer
Here in Sweden, shawls that can be worn tied at the back are traditionally called heart warmers. This is a really nice heart warmer and the homespun type of yarn reminds of old times. I love that it can be worn as a modern top. Sometimes it’s more practical to wear a top than to have a loose shawl.
So I made this wrap top/shawl. I love the results. It’s so practical to tie it on the back when riding my bike, playing with my grandniece etc. The tassels are very decorative. Thank you so much for this lovely pattern. Now I’m pondering what to make next. From your patterrns, of course!
Such a lovely summer piece. Would it be possible to create a similar airy triangle wrap top with crochet stitches?
I seem to be having trouble with Row 17. After the first stitch Kfb, it says to *drop yo off needle, knit next st. But after the Kfb, it sure looks like what is next on the needle is a knit st., not a yo. I have followed the pattern twice, anyway, and I end up with a lot of loose stitches on the shawl. Something is wrong! I have learned how to Kfb with this pattern, which is a cool stitch and fun to do. I have done yo’s before, and I looked up “drop yo off of needle” on You Tube (easy). So I don’t know what I am doing wrong! Ripped the shawl out 2X now, after Row 17 and its mess. Bummer! Can anyone help? I’d like to try again, since I bought yarn, but I’m afraid of Row 17 and that I will have to rip out once again. Thank you so much. :0(
So it does look like the next stitch after the kfb in Row 17 is, indeed, a knit stitch rather than a yo. Also, since I am a beginner/intermediate knitter, I did not know how to tell on the needle a knit stitch from a yo. Now I know: If you look at the two stitches on the needle, one will look straight (the knit stitch), and one will look slanted to the left (yo). Easy to tell them apart on the needle! This helps, because sometimes the stitches get twisted on the needle, but once you untwist them with your fingers, you can tell them apart, i.e. knit stitch from yo. Hope this helps! :0)