My Velvety Pullover Crochet Pattern

Scroll down to see the free pattern below, or you may choose to purchase the kit from Lion Brand Yarn HERE or the ad-free, printable PDF, featuring large print & all helpful photos from my Etsy shop HERE
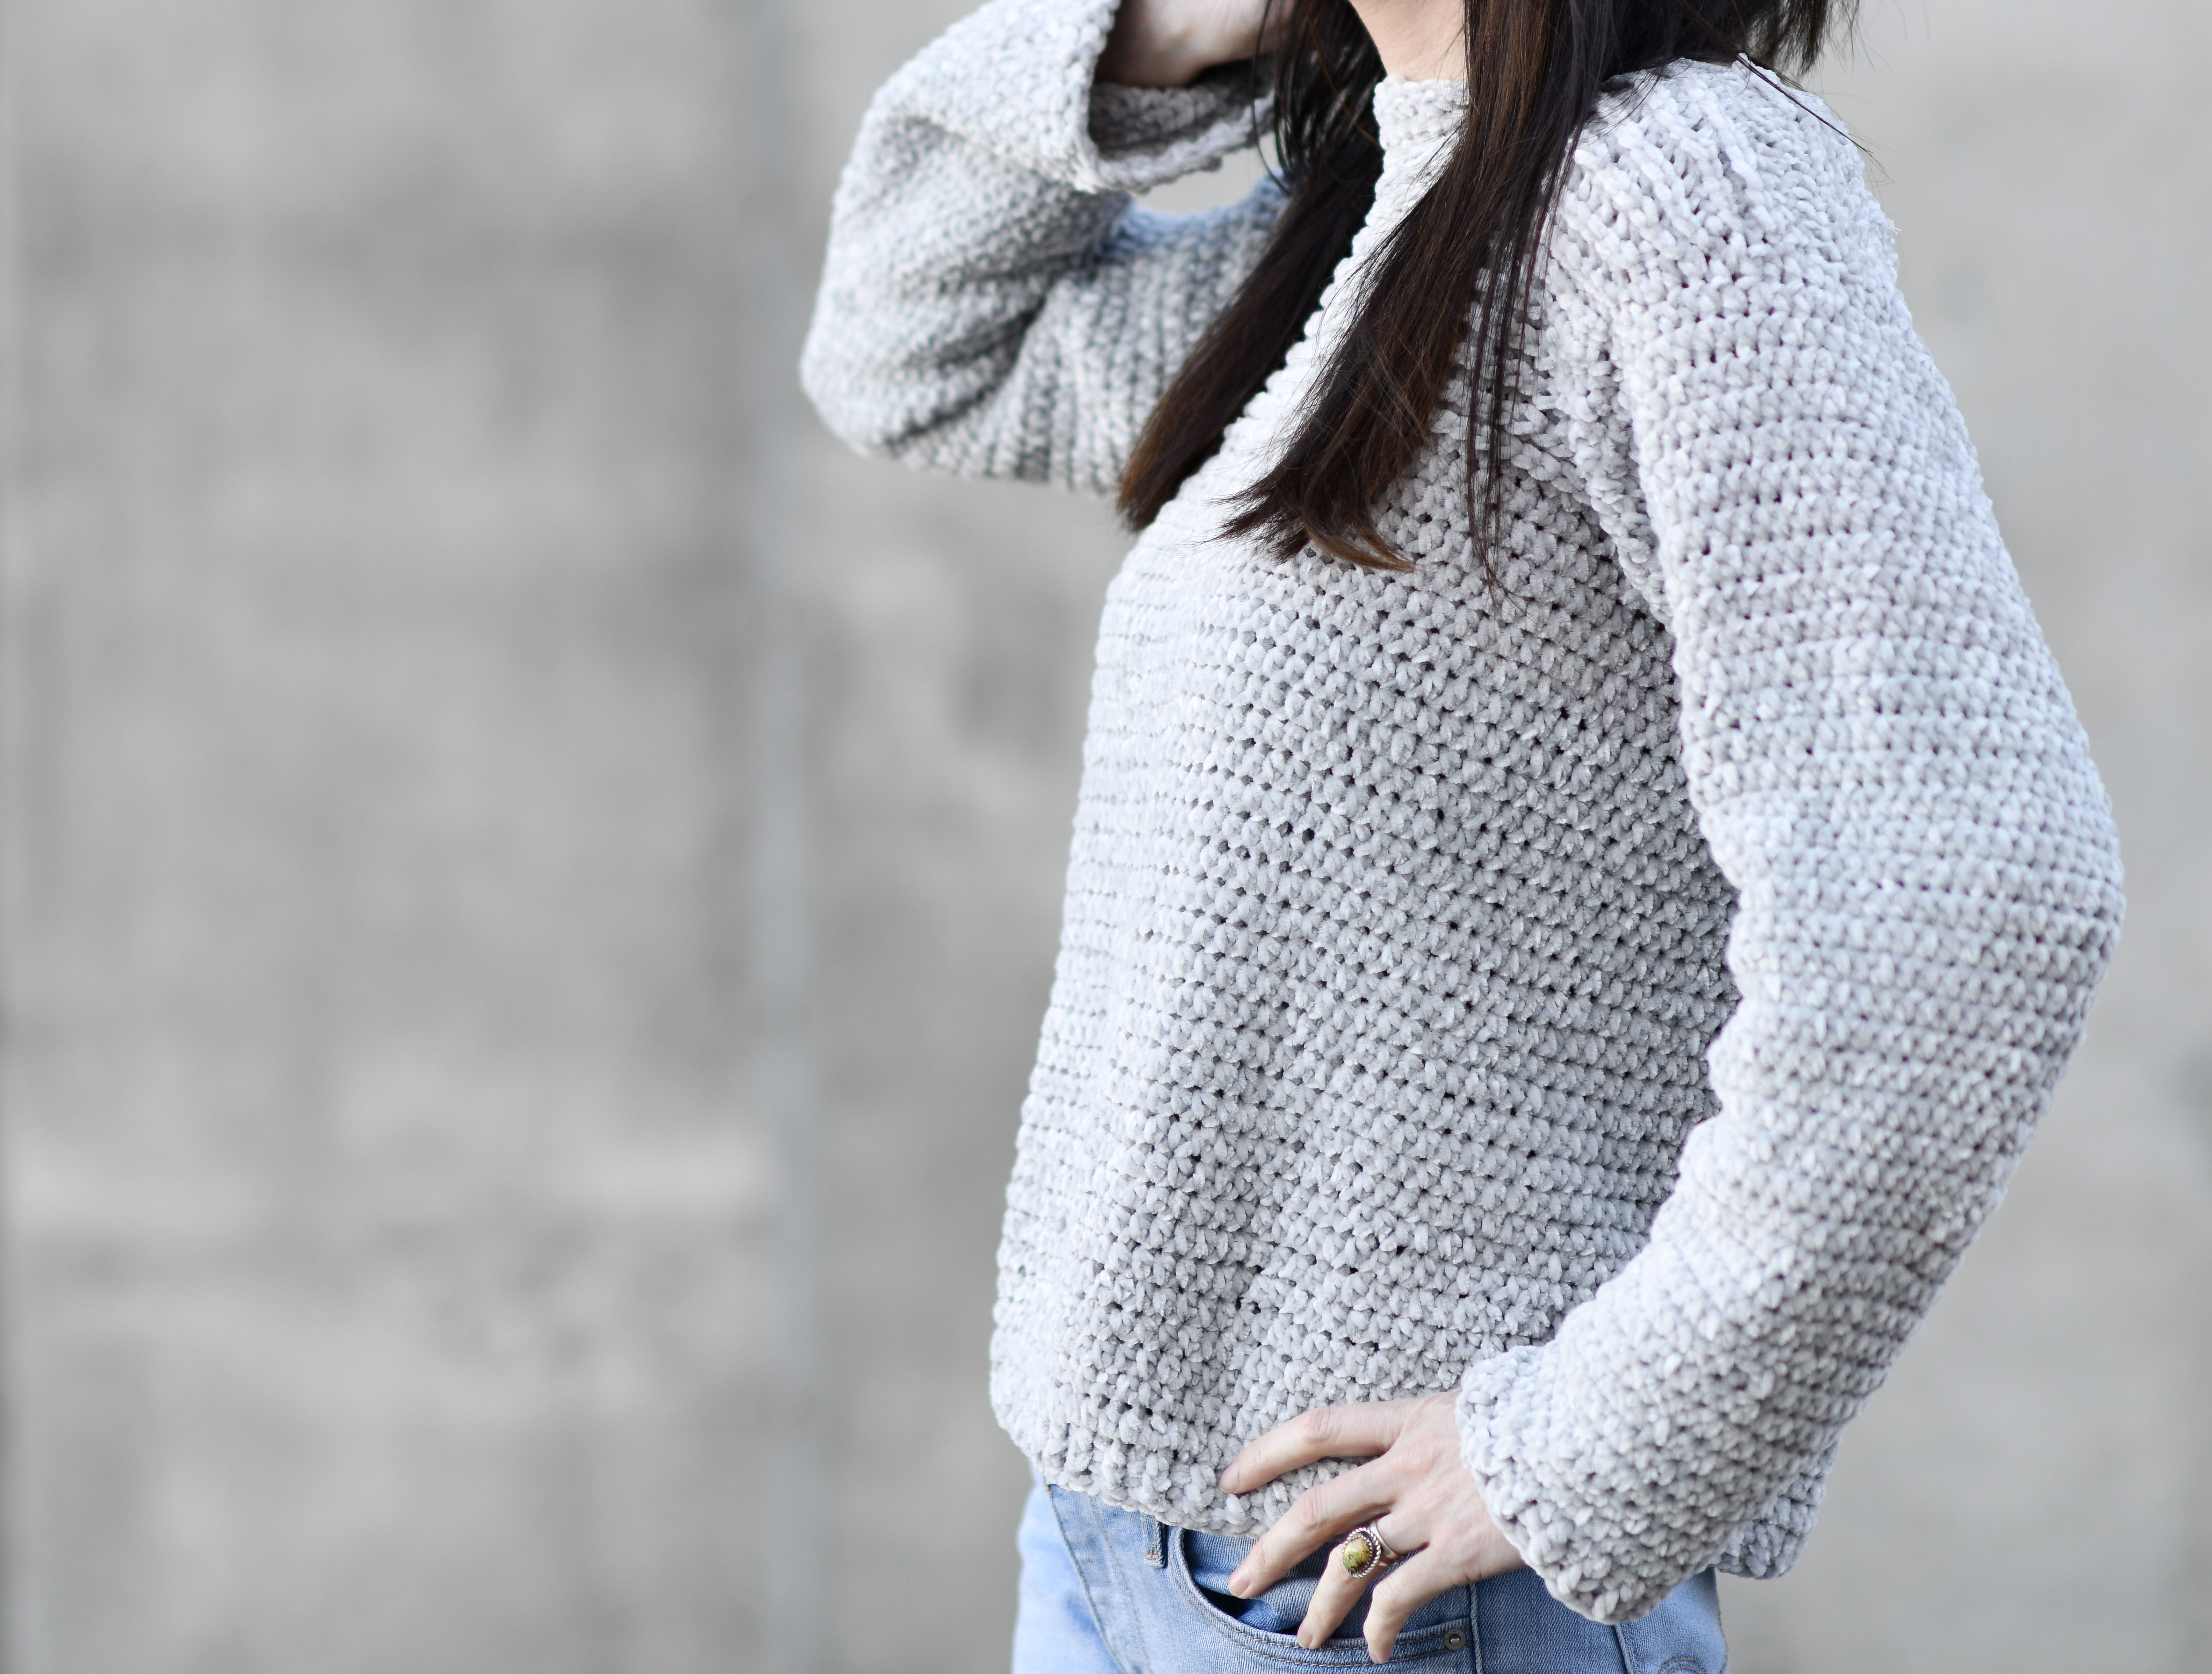
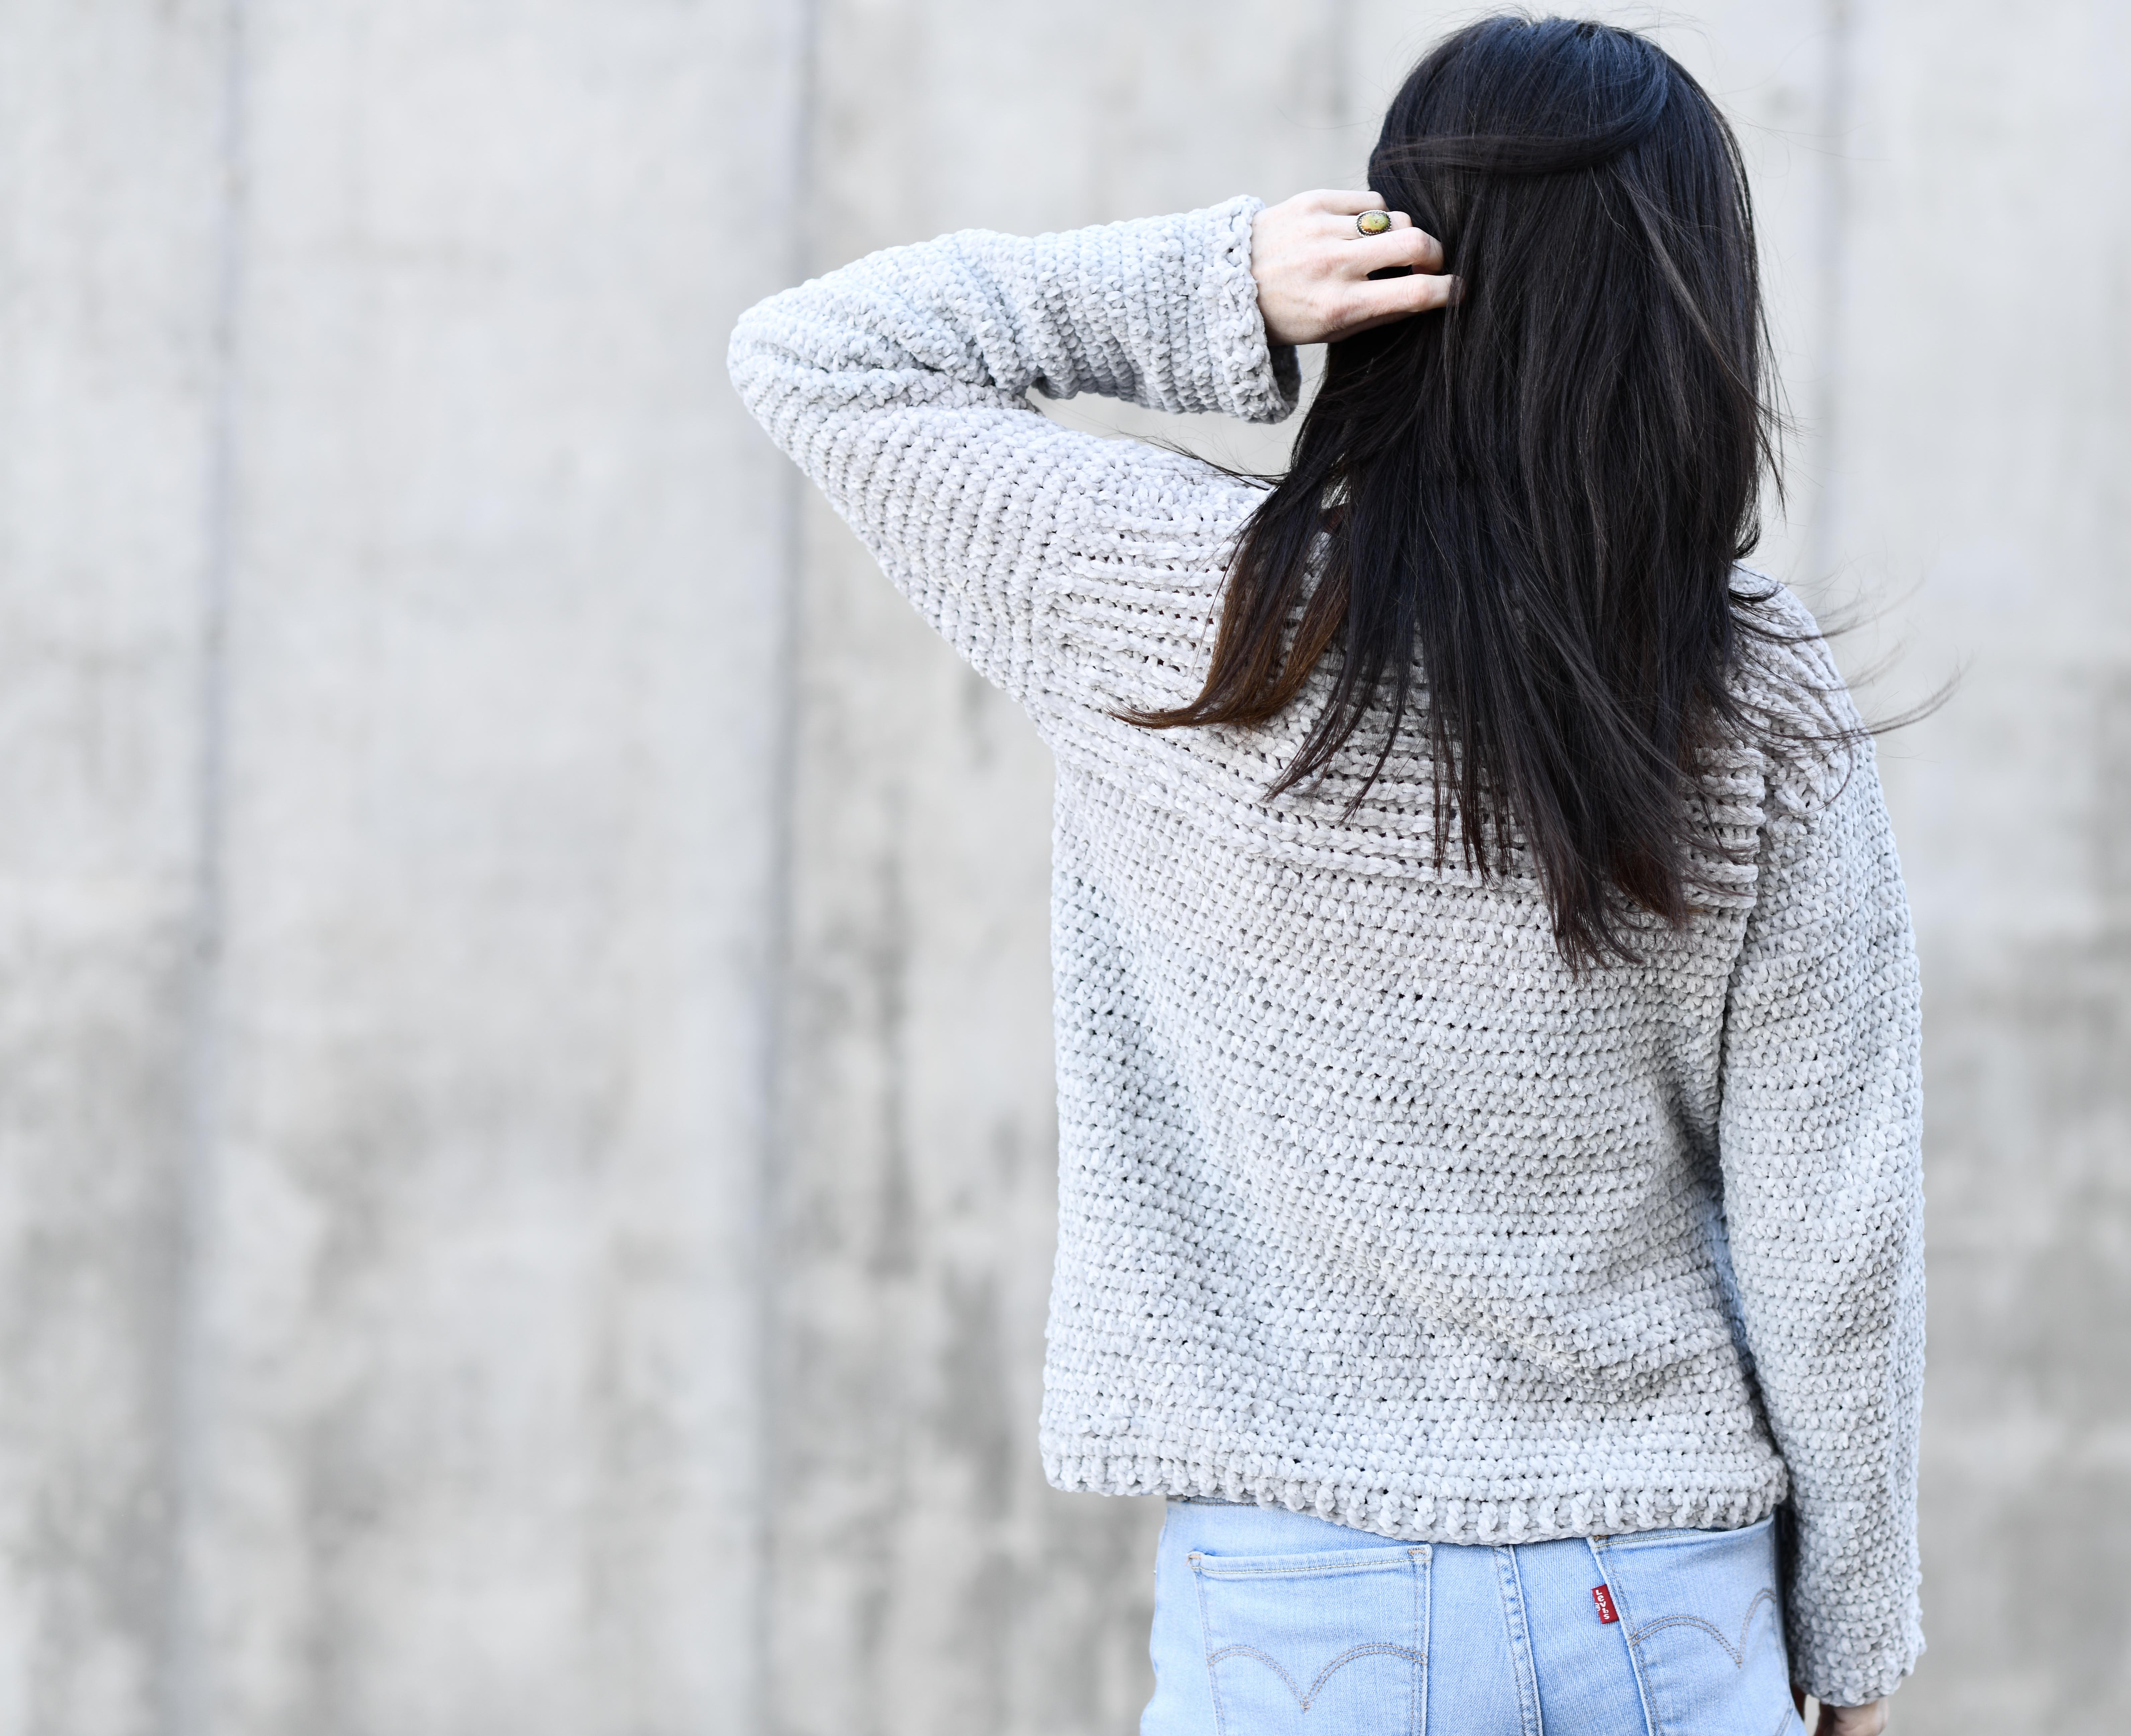
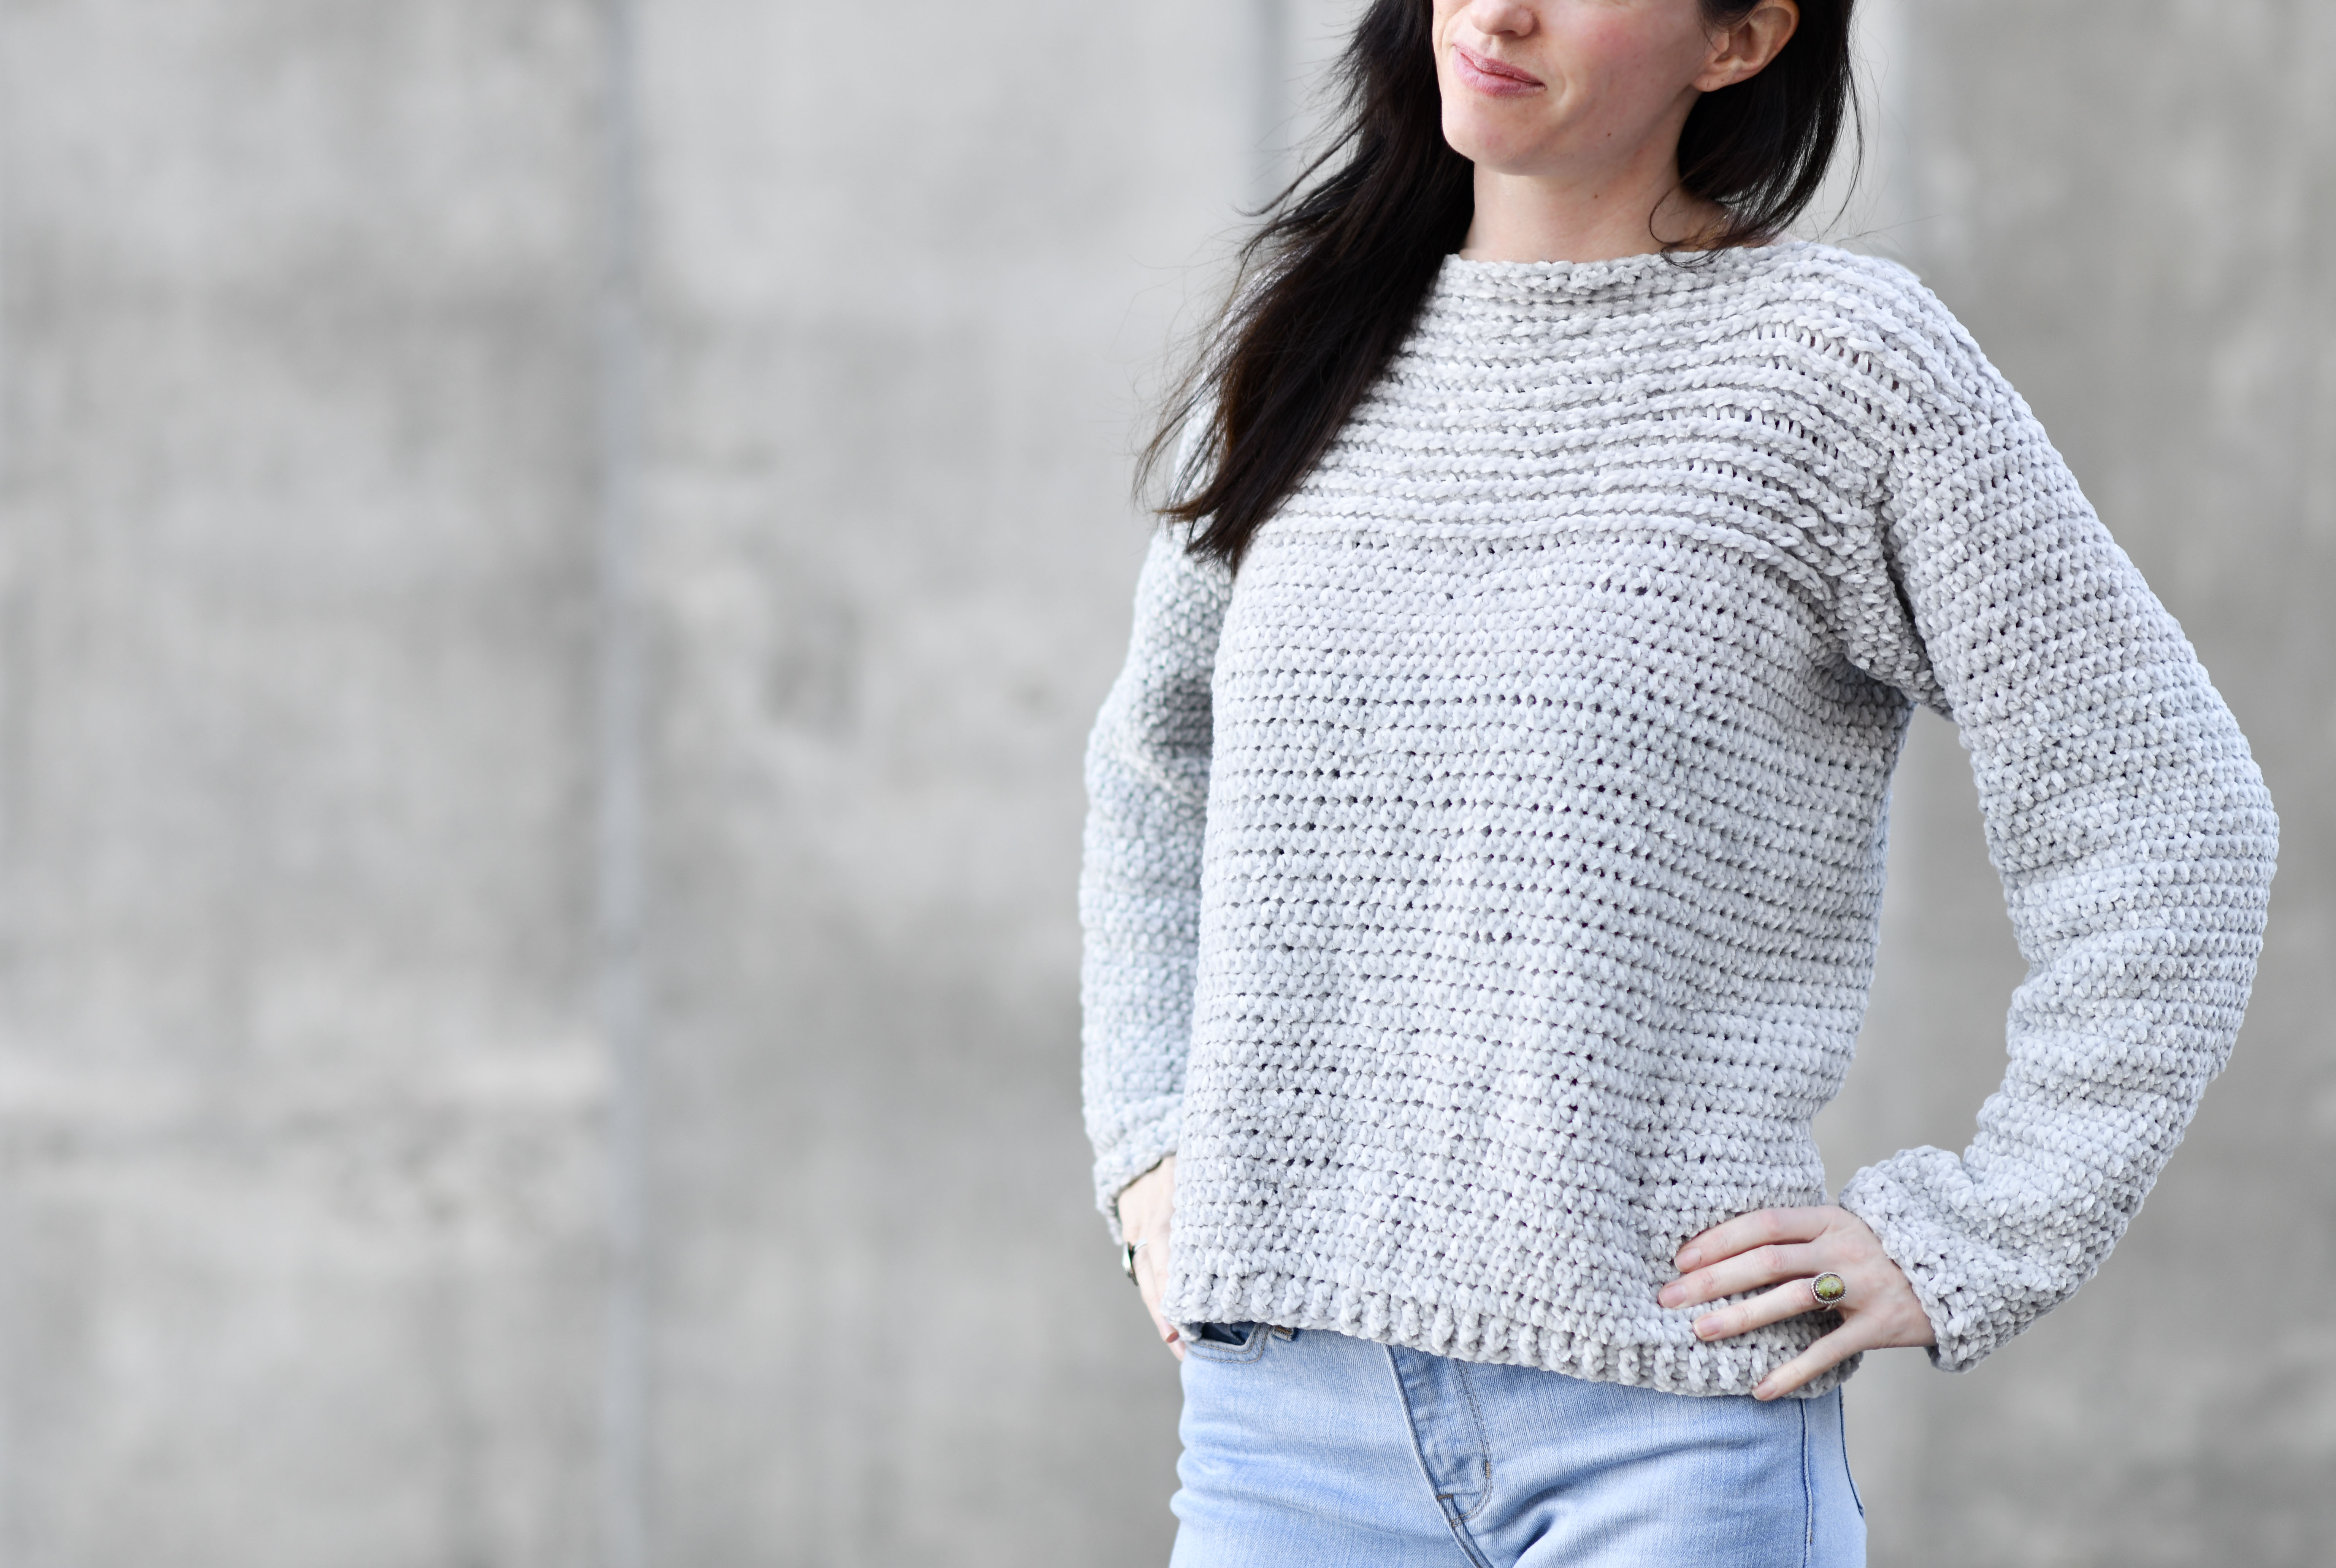
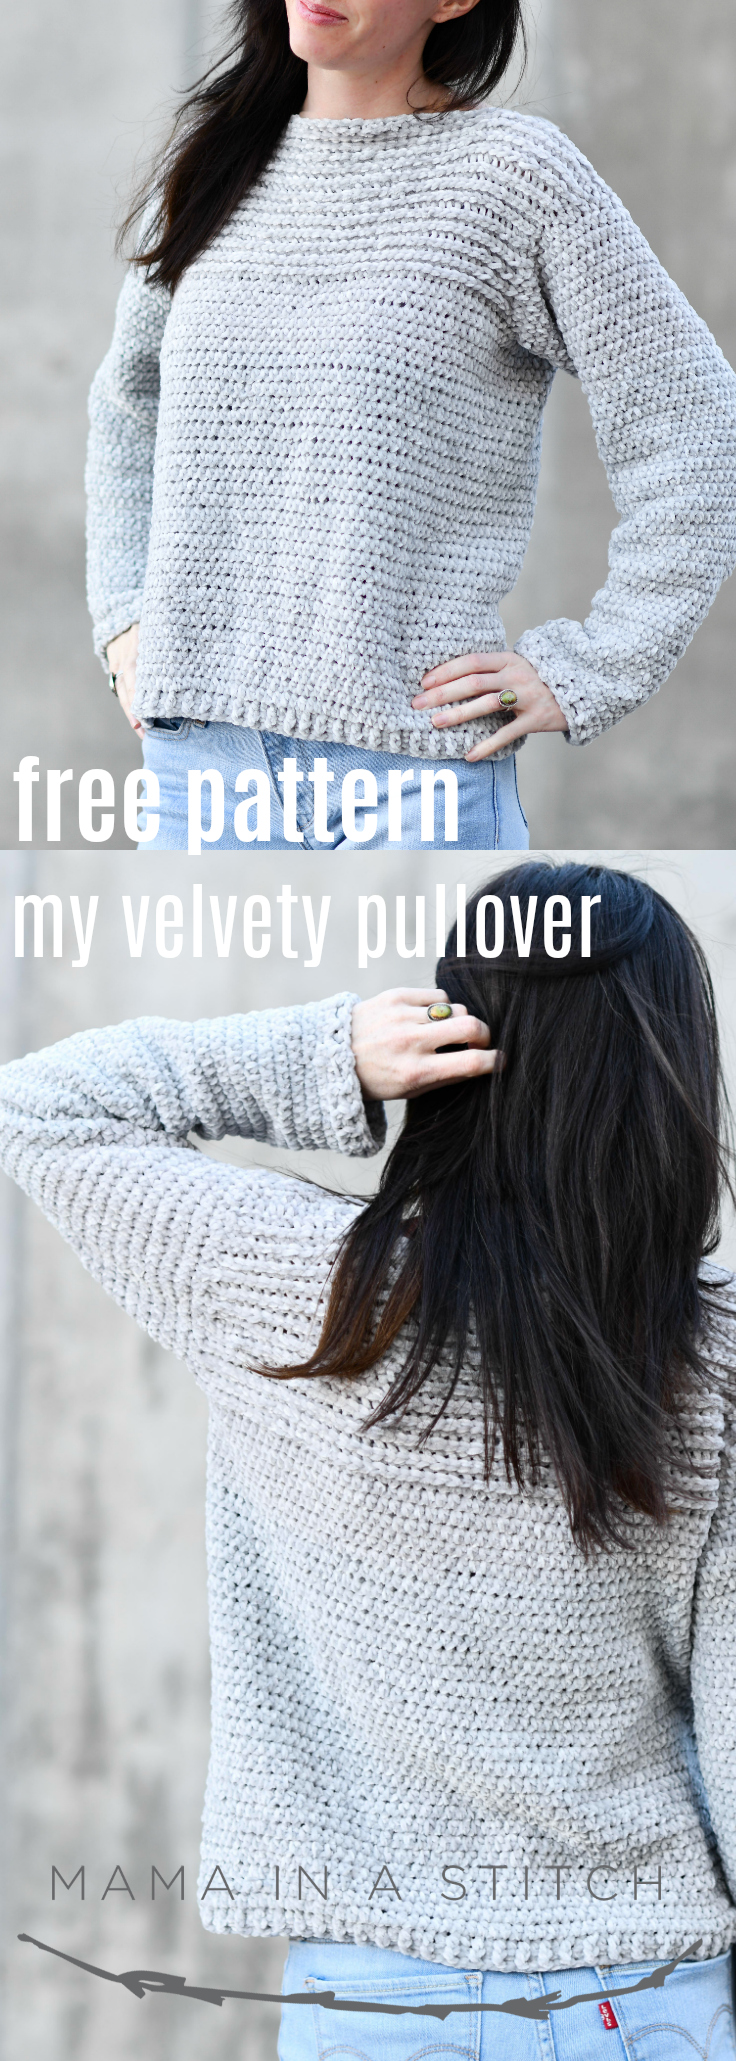
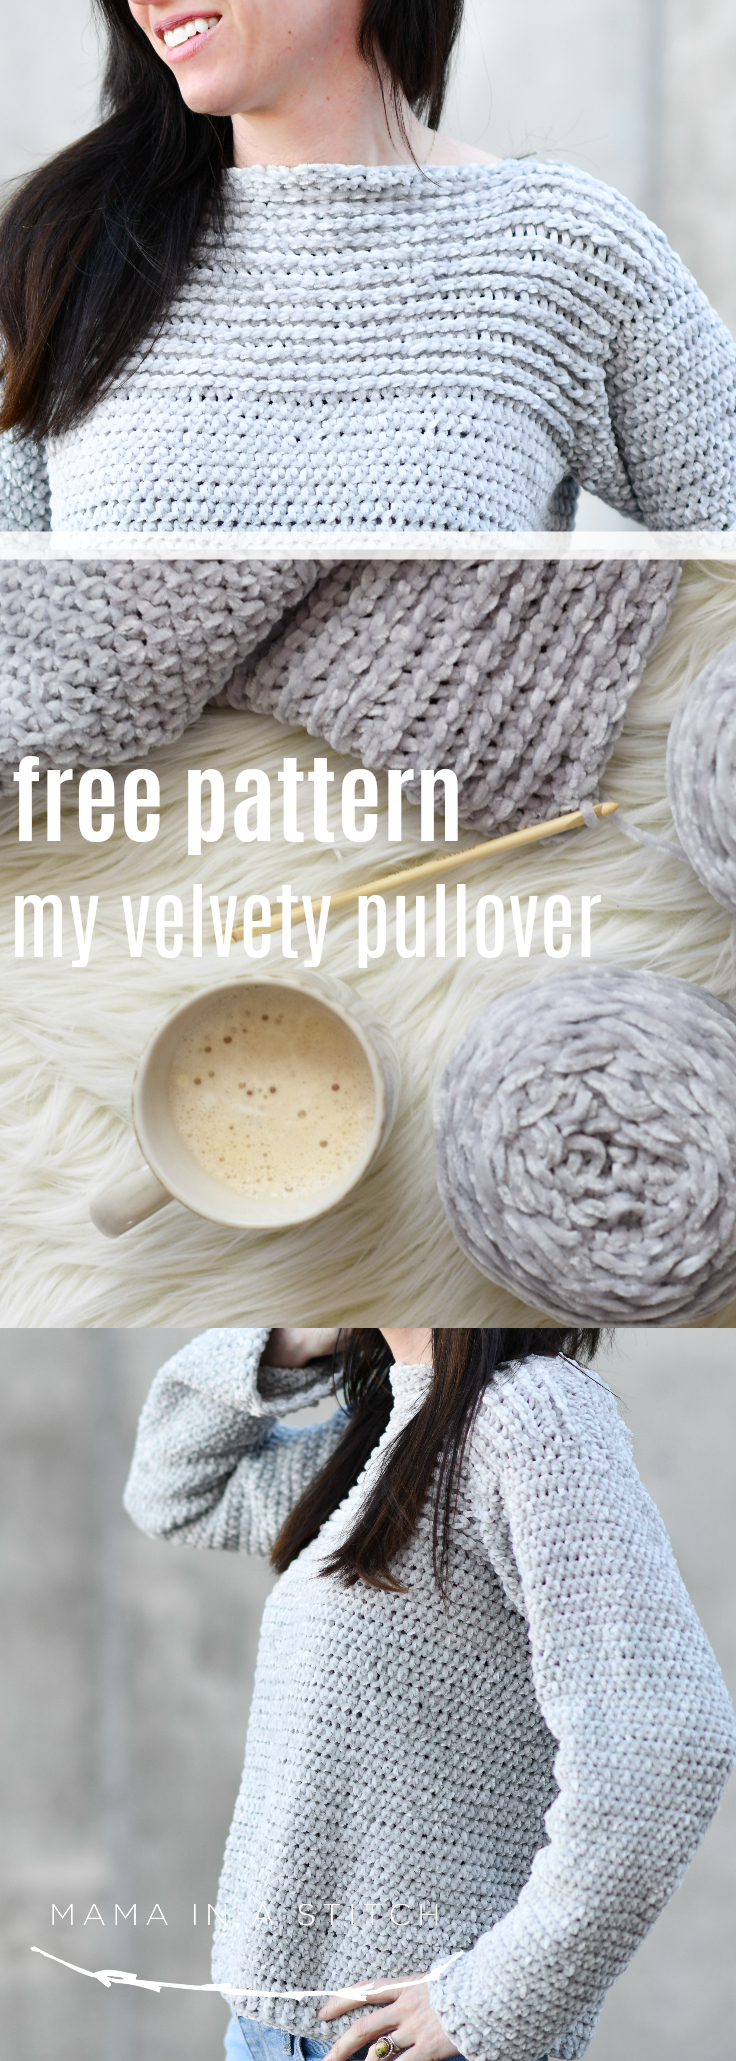
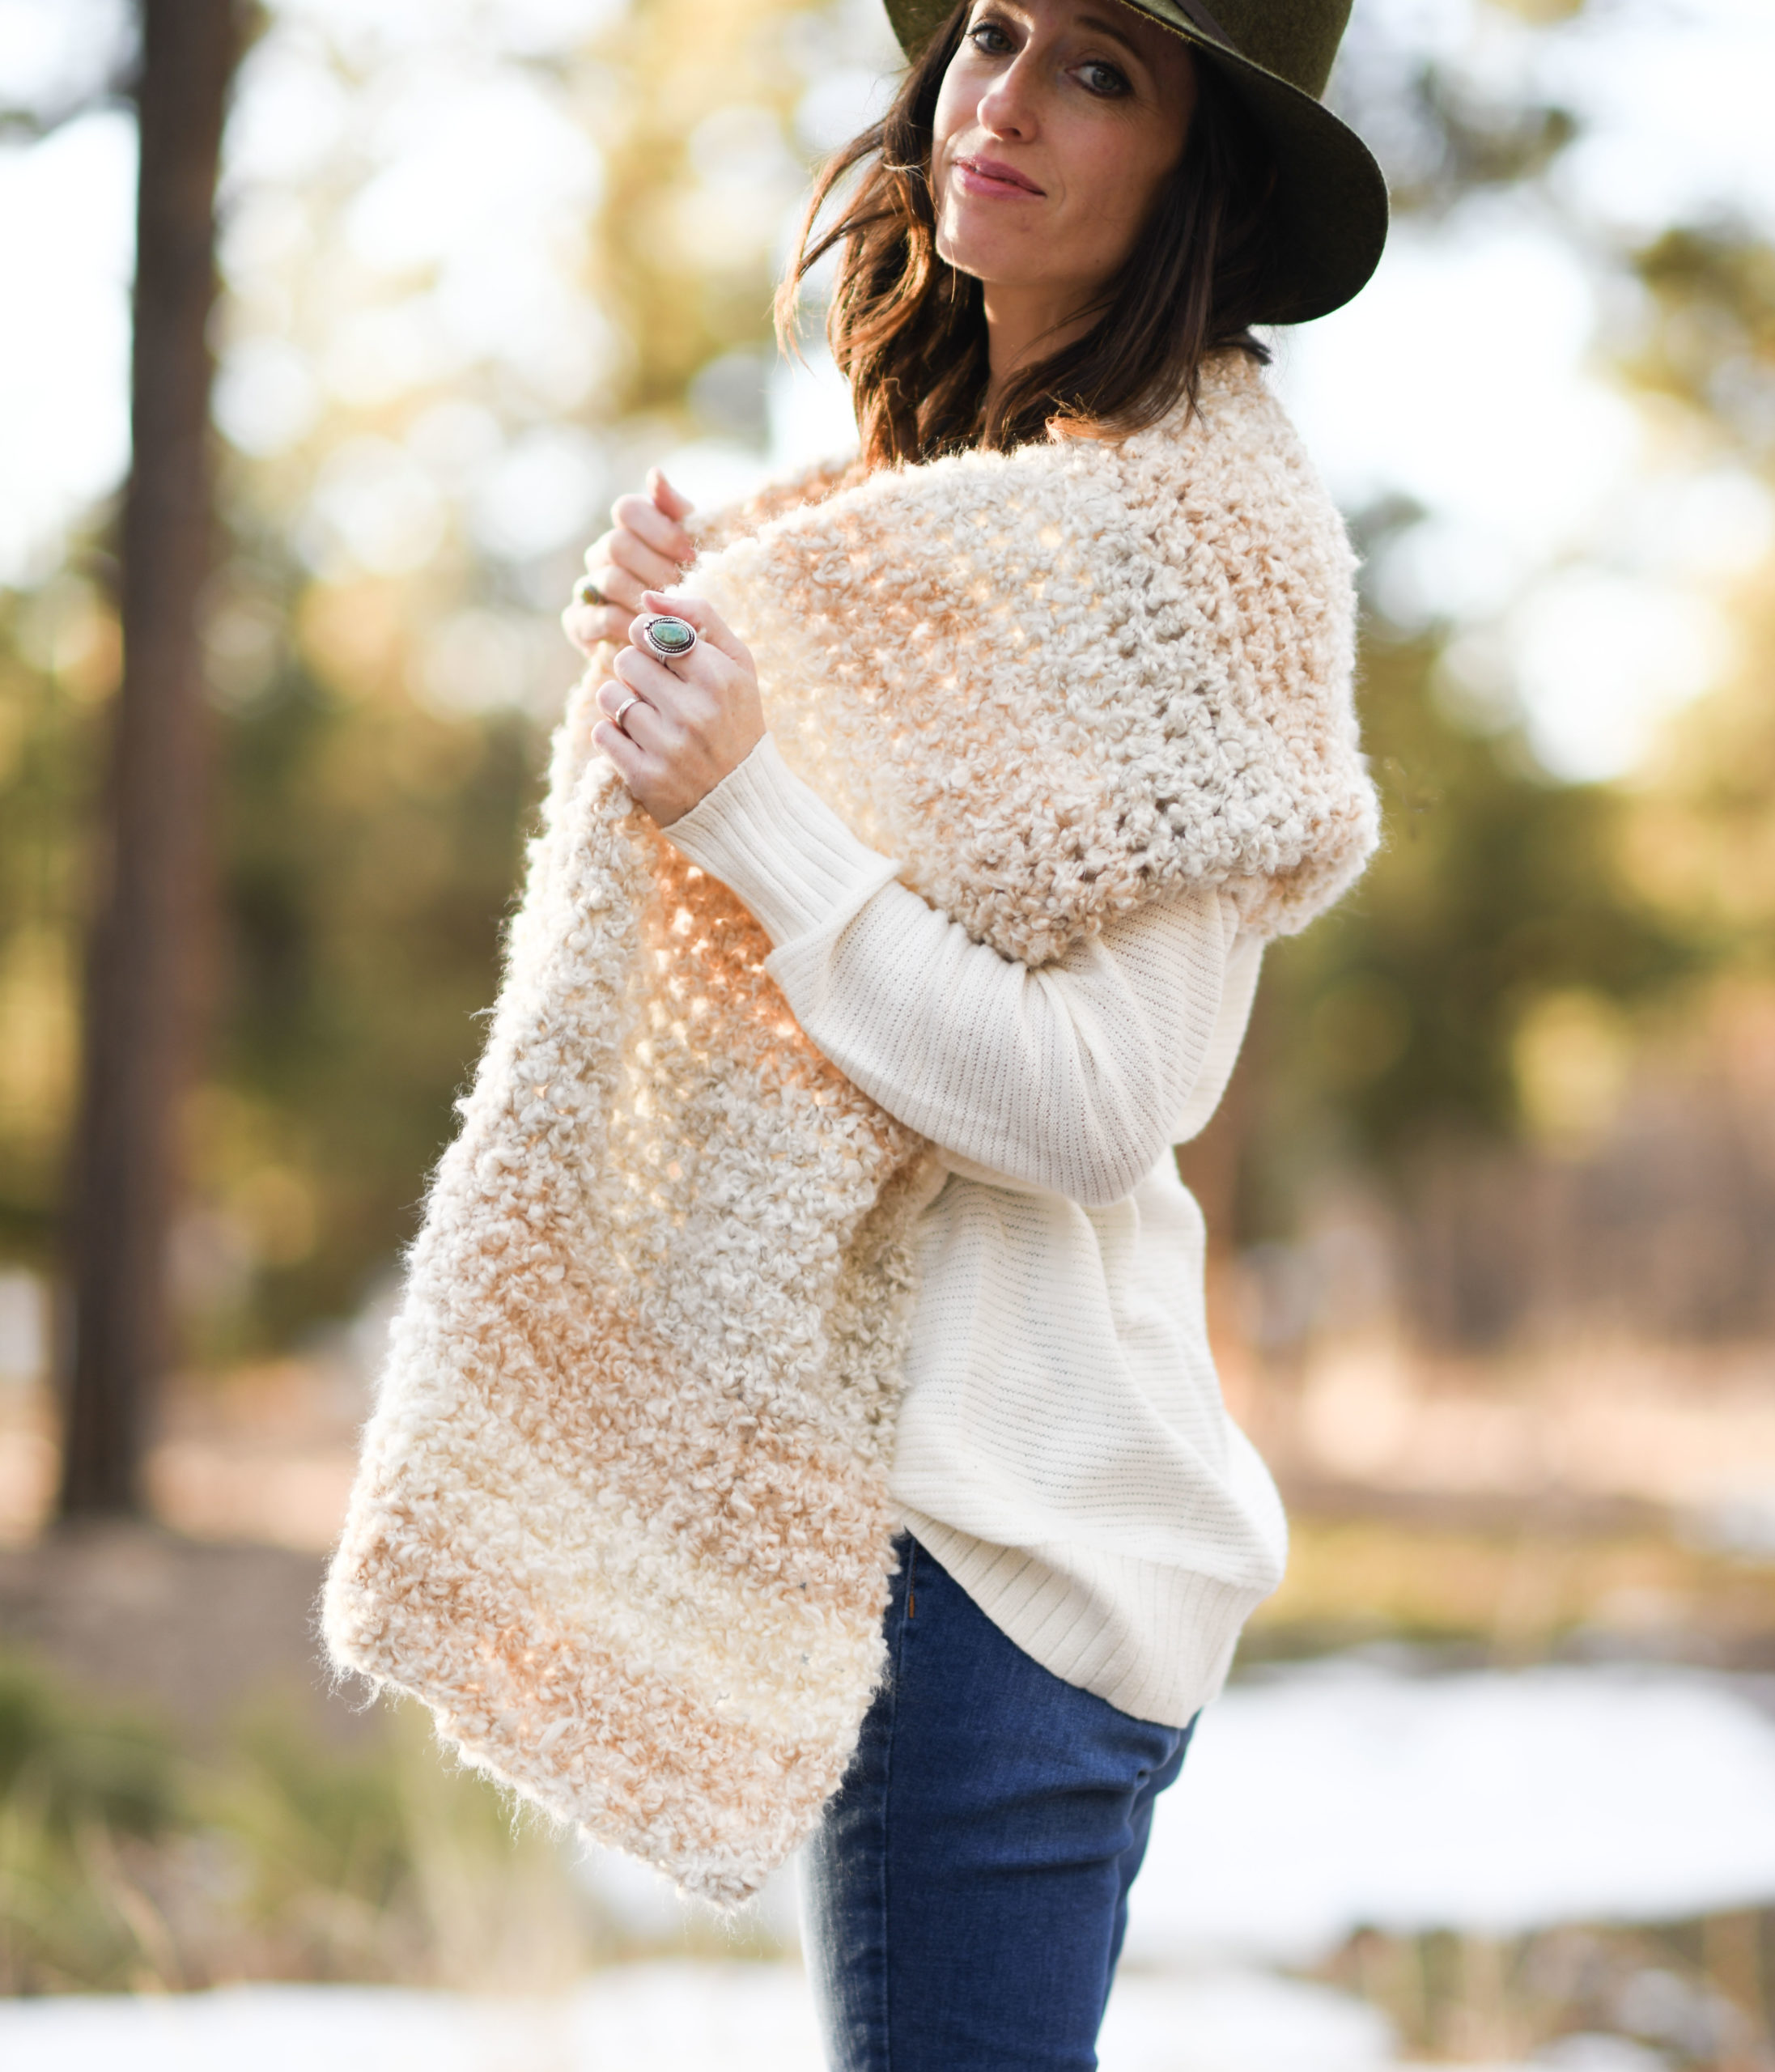
Ever since working on my velvet throw blanket, I couldn’t wait to get my hands on more velvet (here) to make a top. It’s just the lightest, softest yarn, and I can’t get enough! It definitely turned out to be the most comfortable pullover I’ve made yet.
This sweater’s a lot of fun because it has the look of knit but is completely crocheted. Different than many of my tops, this one has very little seaming because much of it’s worked in the round with half double crochet stitches. With this yarn, I wanted to make a timeless, go-to type top that could be worn to work and can also be completely casual. It’s also EASY, so check out the pattern and see what you think!
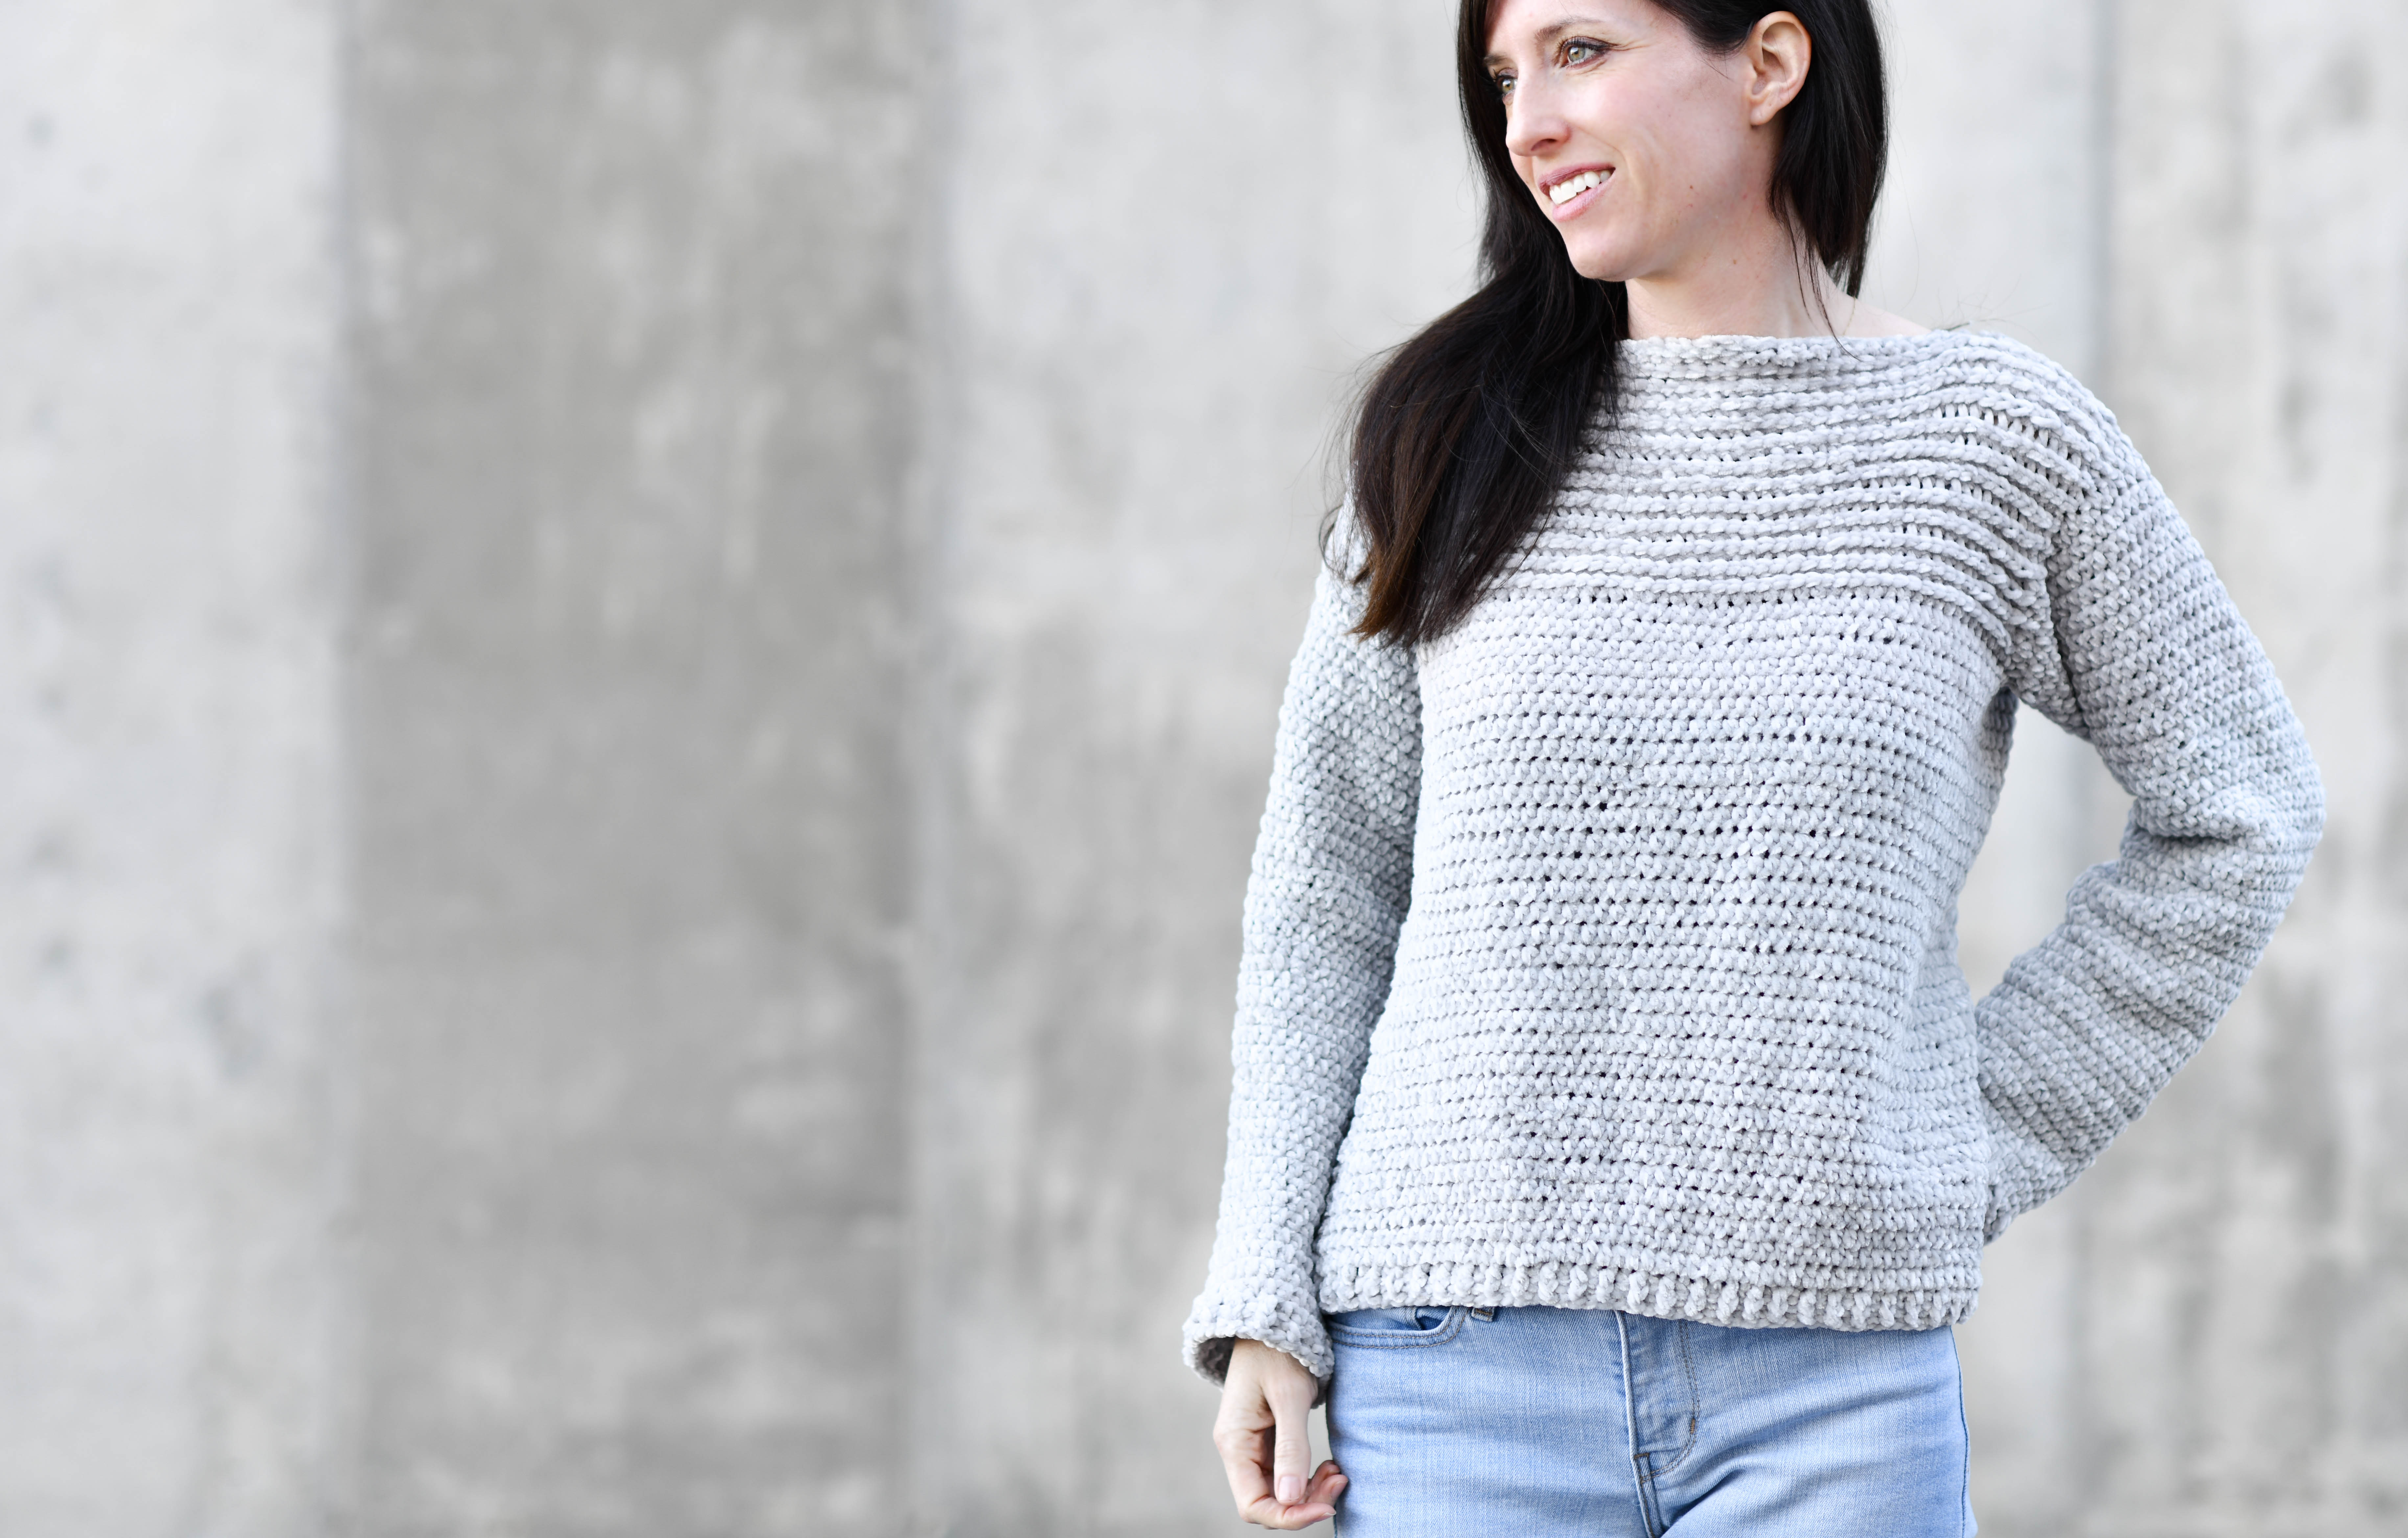
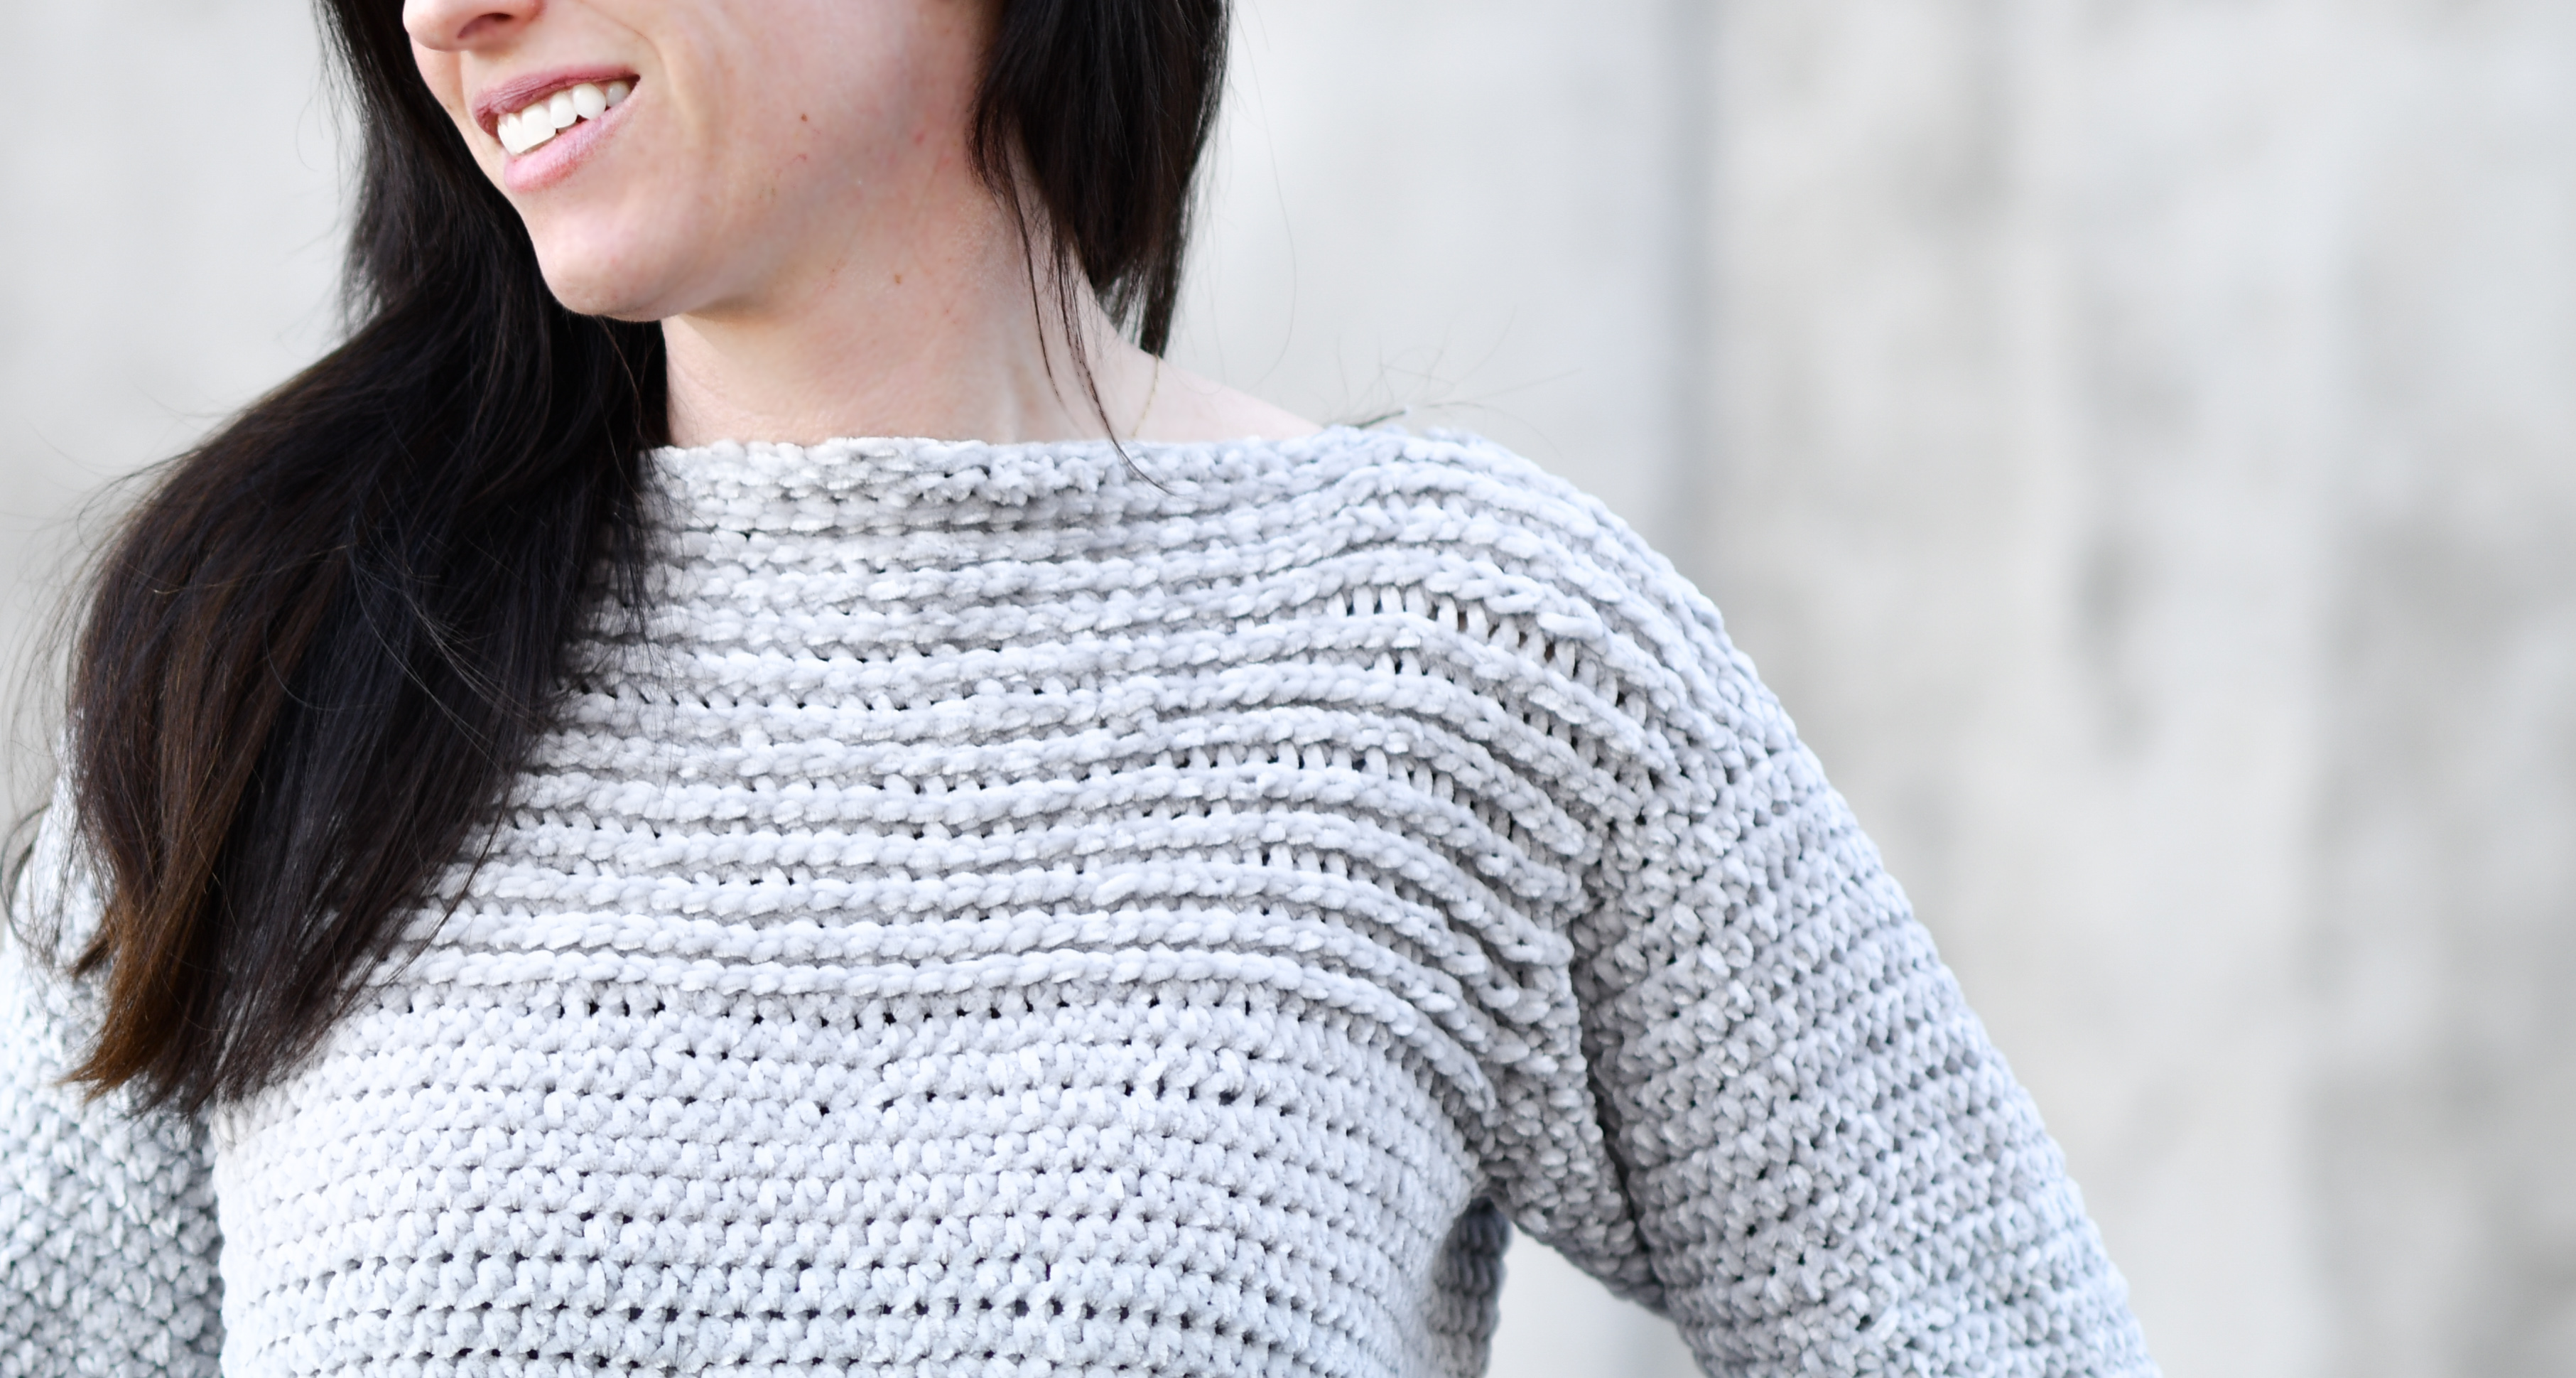
The upper portion of this crocheted pullover is made by crocheting slip stitches along the front of the sweater and then working some half double crochet stitches along the back. It gives it a raised, knit-like texture that adds some cool detail.
If you follow my blog, you know I mostly spring for using super bulky yarns because of how quickly projects work up. When I made my afghan, I held two strands together in order to make the blanket a little heftier and also so that it could be made a bit quicker. With this pullover, I used just the one strand of worsted weight yarn (I know – what’s gotten into me), but it creates the lightest, loveliest fabric. If I make another blanket, I’d like to do it with just the one strand next time. And let me just say – a baby blanket would be gorgeous with this!
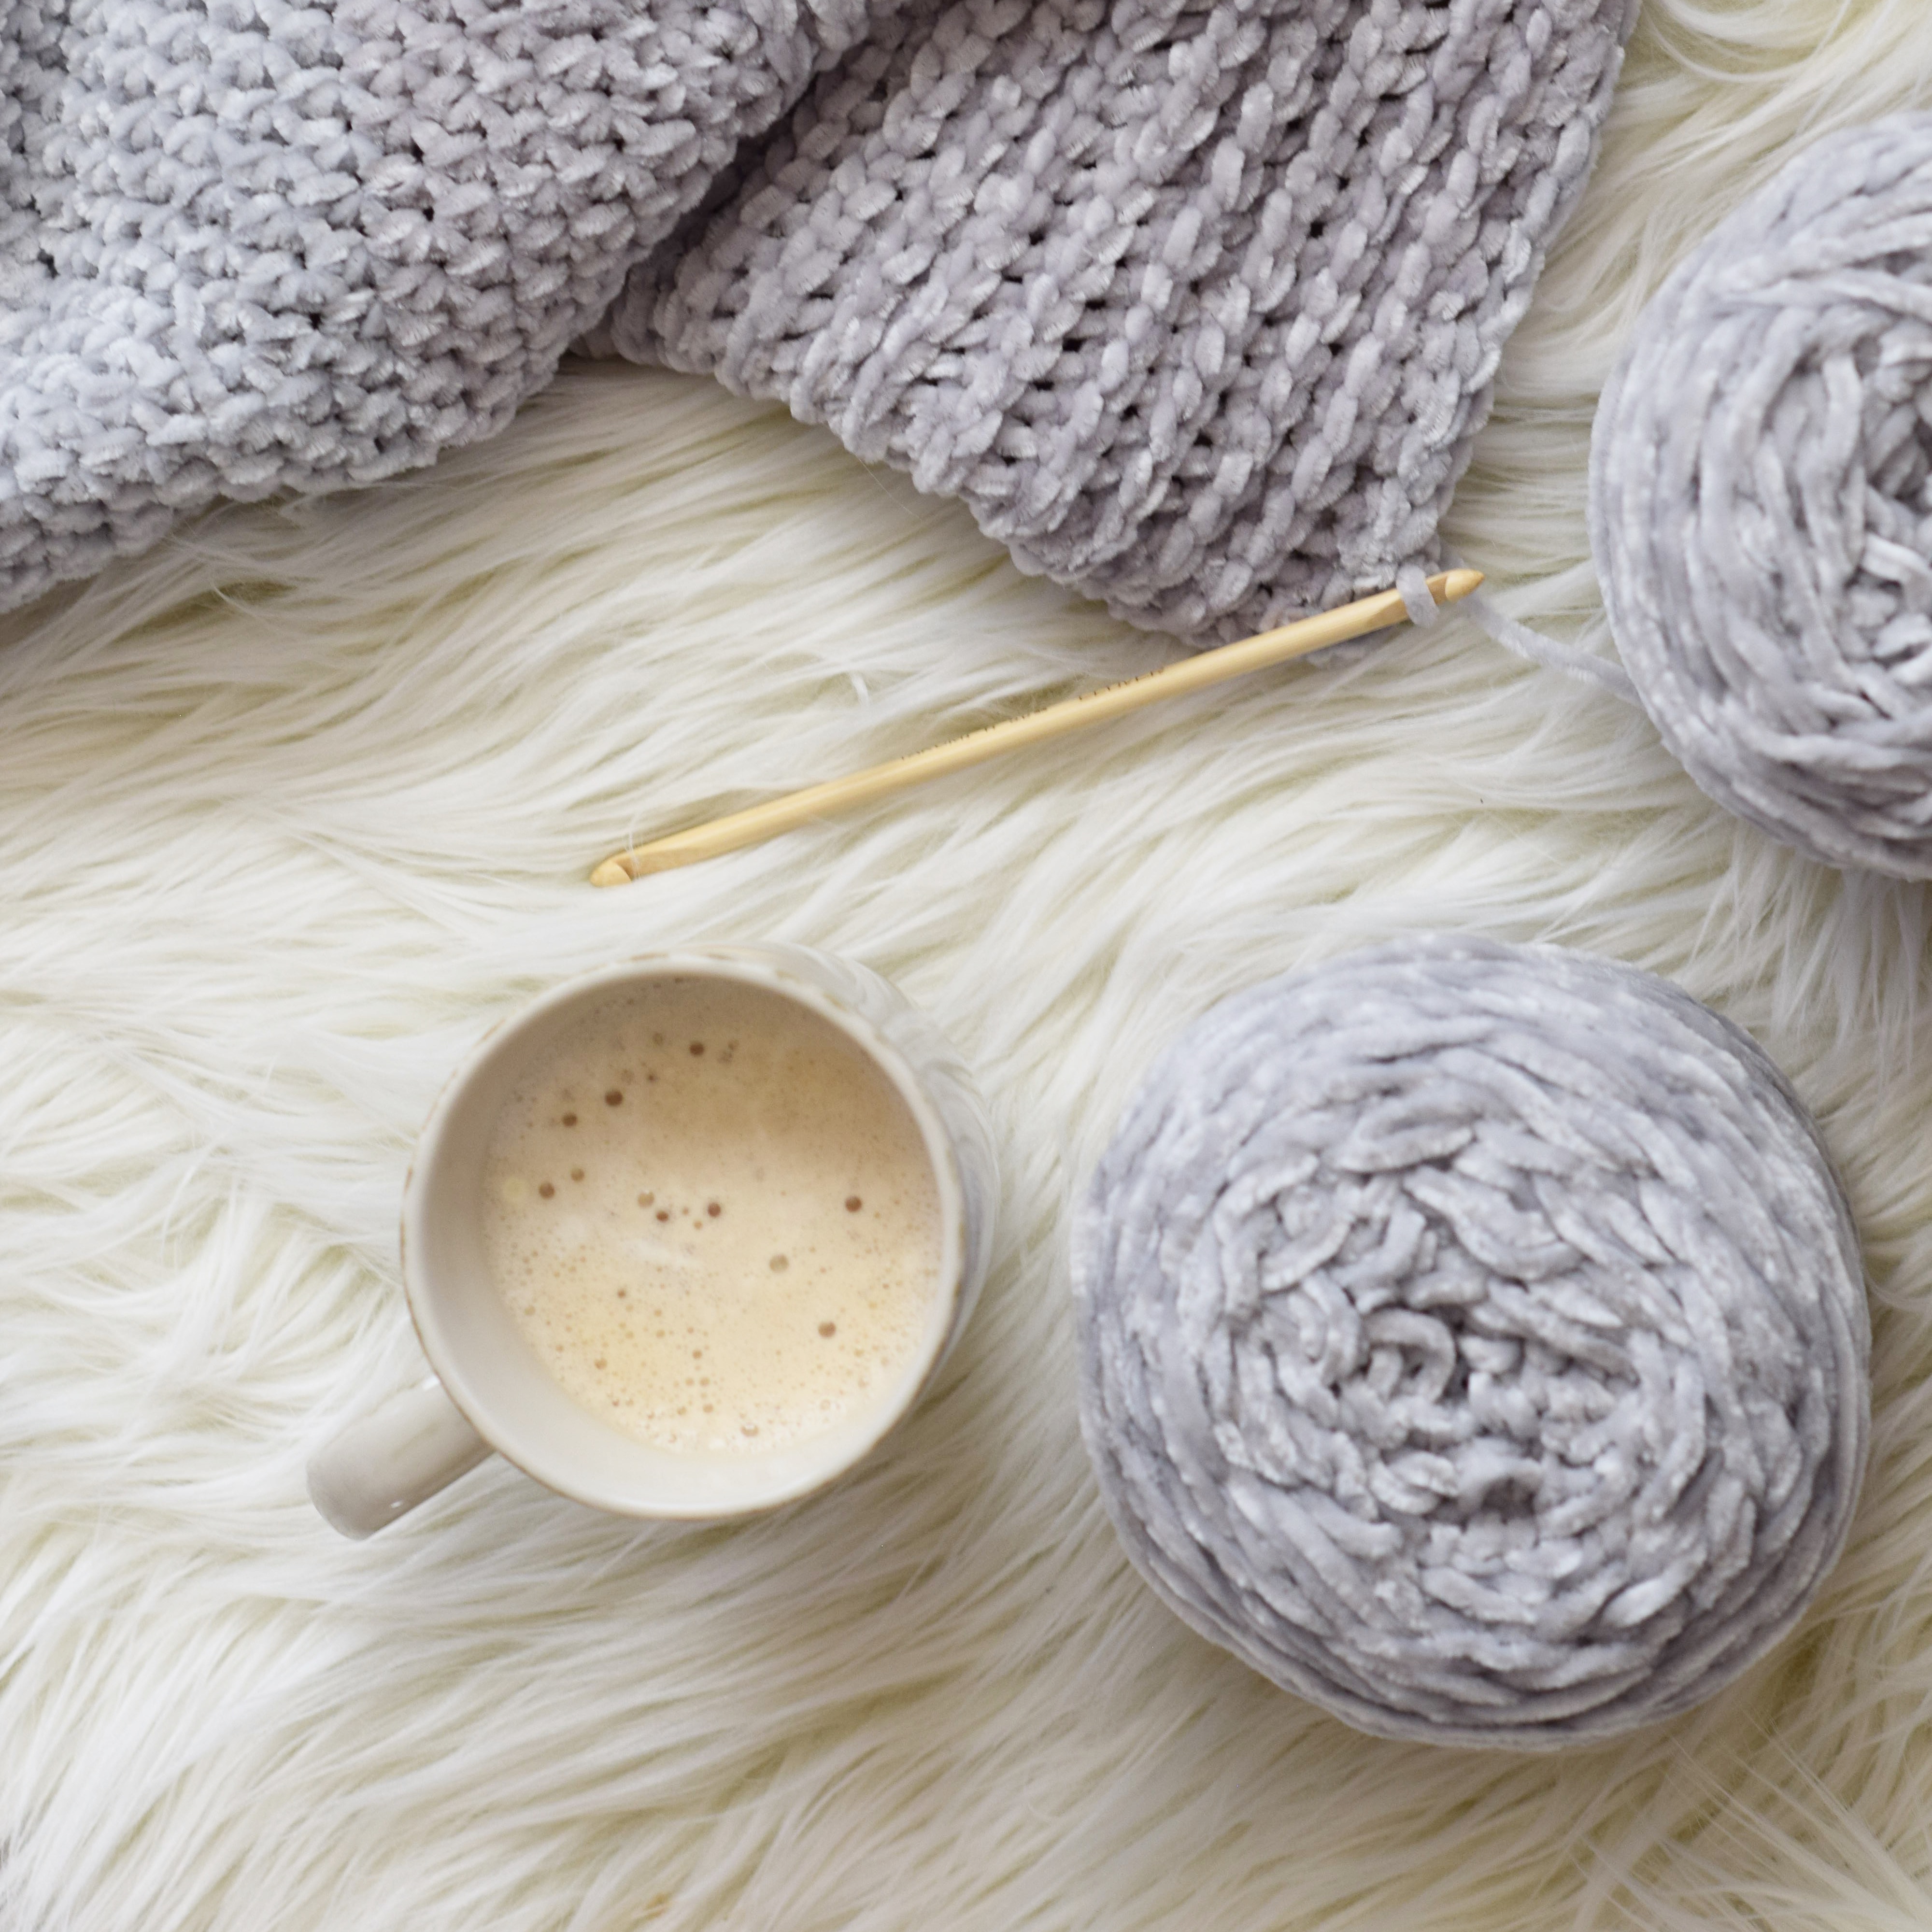
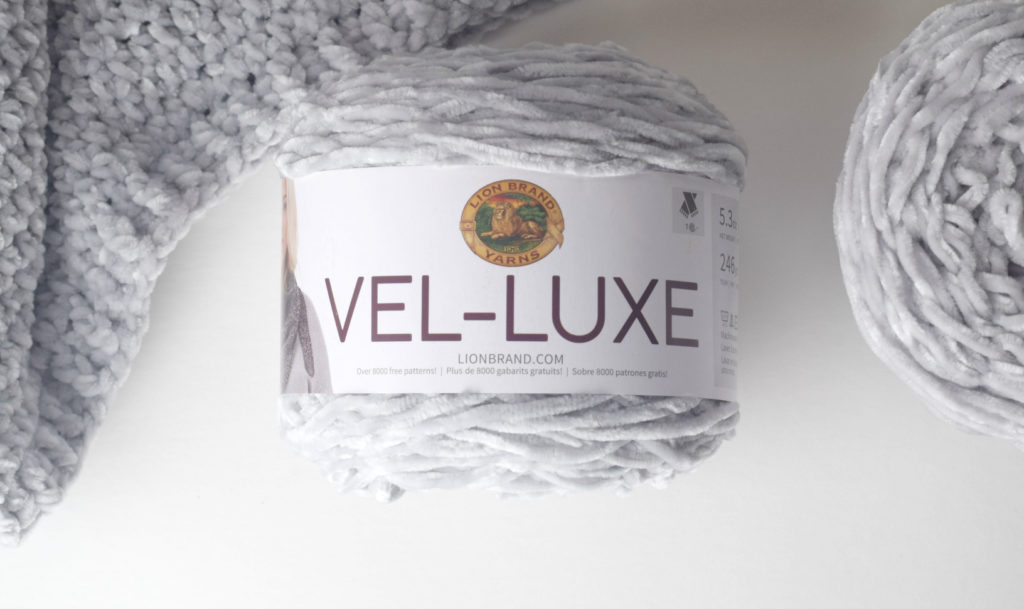
Below: This silver color is so beautiful. You can see all of the color options HERE. I’ve found some amazing deals on this yarn at Wal-Mart too!
I’ve included several photos to help you along at the bottom of this pattern. Definitely look it over and I’ll think you’ll find it’s pretty simple!
The full pattern is written below, or you may purchase the printable PDF from my shop HERE
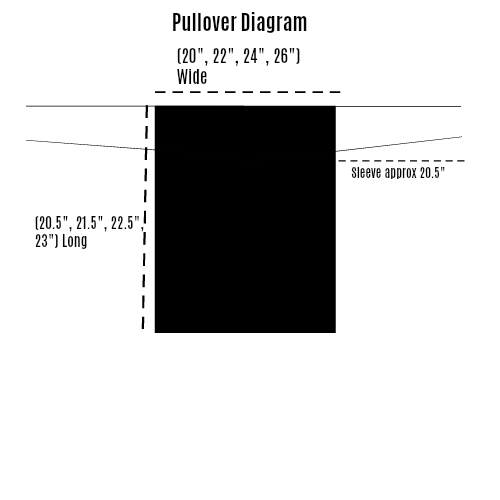
Please note: I’ve had a few questions as folks begin the pattern, thinking it appears too large after the first couple of rows. Remember that you are joining and crocheting in the round, so your chain is long but you’re joining so the width is half that length. The small measures about 20″ across give or take. This is exactly what the top measures that is pictured. I’m wearing it in the photos and am 5’5″ and 105 lbs for reference. Hope this helps!
My Velvety Pullover Free Crochet Pattern
Pattern Description: A luxurious pullover that’s simple to crochet and has the look of a knit sweater! Made with basic shapes and stitches, this makes for an easy and fun sweater project. Knit-like stitching along the top accentuates the texture of the velvet and creates visual interest. The pullover turns out to be super light and soft as can be. If you’re comfortable crocheting in the round and working simple decreases, you’re sure to enjoy this pattern. Chenille and velvet are back in a big way and this sweater will be your newest go-to!
Skill Level: Easy +
Materials:
US Size H 5.0 mm crochet hook
(4, 4, 5, 5) Lion Brand Vel-Luxe Yarn in Silver 150 g / skein (Kit available from Lion Brand Yarn HERE)
Pattern uses approximately (465 g, 537 g, 611 g, 676 g) total
Measuring Tape
Tapestry Needle
Scissors
Stitch Markers
Dimensions (approximate):
Small, Medium, Large, XL
Please follow the key throughout the pattern according to the size you are crocheting:
(S, M, L, XL)
Bust Circumference:
S – 40”
M – 44”
L – 48”
XL – 52”
Length:
S – 20.5”
M – 21.5”
L – 22.5”
XL – 23”
Cross Back:
S – 15”
M – 16”
L – 17”
XL – 18”
Sleeves Measurements:
Length: All sizes approximately 20.5”
Approximate width at widest point at upper portion of sleeve: (7.5”, 8.5”, 9.5”, 10”)
Approximate width at sleeve cuff: (5”, 6”, 7”, 7.5”)
Abbreviations & Skills:
ch – chain
hdc – half double crochet
hdc blo – half double crochet through the back loop only
hdc2tog – half double crochet two together (decrease)
sl st – slip stitch
st – stitch
sts – stitches
FPhdc – front post half double crochet (insert your hook from front to back around post)
BPhdc – back post half double crochet (insert your hook from back to front around post)
Gauge:
Approximately 11 ¾ stitches and 10 rows in 4” x 4” of hdc stitches (nearly 3 stitches in an inch)
Notes:
This pullover is crocheted in continuous rounds and is worked from the bottom up. Starting with your initial chain, you will join and then work half double crochet stitches for most of the sweater. Once you reach the upper portion and arm opening area, you will divide the stitches to make the front and back. These two halves are then worked separately and are worked in rows. Sleeves are then crocheted by picking up your yarn at the arm opening and crocheting in rounds to make each sleeve. To finish, simple cuffs are added to the ends of the sleeves and bottom of the pullover.
Pattern Instructions
Lower / Mid-Section of Pullover
Ch (120, 132, 144, 156) sl st to join
Work in continuous rounds
Rd 1 Ch 2 (doesn’t count as a stitch), hdc in 3rd st from hook and in each st around (120, 132, 144, 156 sts) Mark 1st stitch of the round if needed. Don’t turn at the end of the round and don’t join. Work the first stitch of next round into the 1st st of this round.
Rd 2 Hdc in each st around (no need to join at the beginning of the round)
Repeat round 2, working in continuous rounds until piece measures approximately 13” long.
Tie off and weave in ends.
Upper Portion / Arm Openings
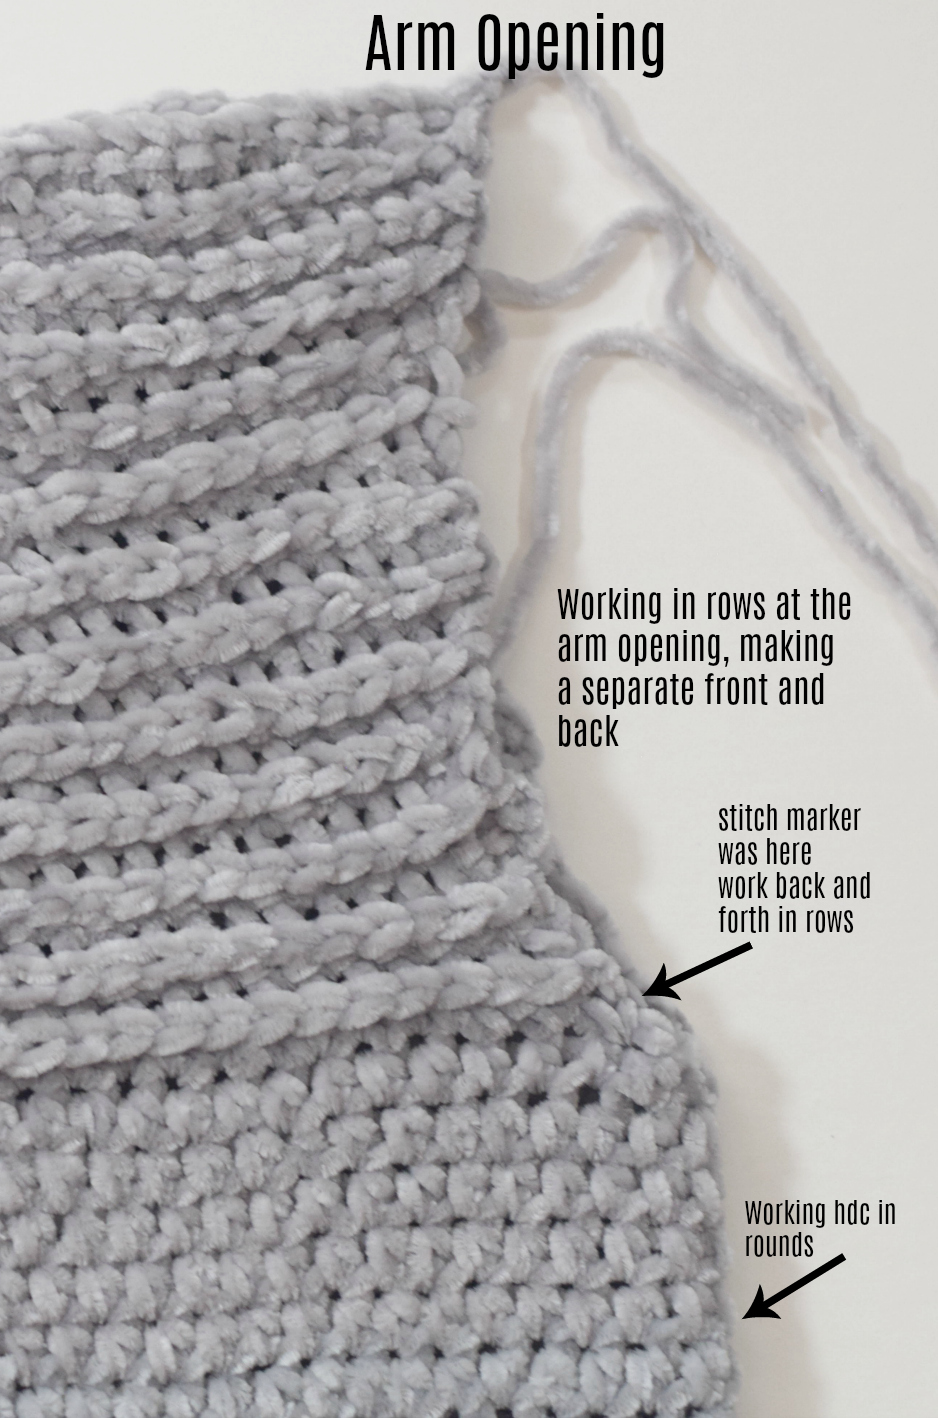
You will now work the front and back of the pullover in separate sections to create the arm openings and upper portion of the sweater. (See photo below)
In this section you will pick up your yarn, to work along the INSIDE of the pullover, and place a stitch marker to indicate this is the first stitch of your row. Count out (59, 65, 71, 77) stitches and place a second stitch marker at the (59th, 65th, 71st, 77th) stitch to prepare to crochet in rows.
Work into the first stitch and into each stitch across, finally working into the 59th stitch following the stitch pattern below. First you will work the front side, and then move onto the back side.
To make the back side, skip one stitch from the (59th, 65th, 71st, 77th) stitch and place a new stitch marker. This will be the 1st stitch of the back of your pullover. Count (59, 65, 71, 77) stitches over, and place another marker. You will work between these stitches to make the back. There should be one stitch on either side separating the two sets of (59, 65, 71, 77) stitches.
Row 1 Attach yarn, ch 2 (doesn’t count as st), hdc in 3rd st from hook and in each st across the row (59, 65, 71, 77)
Row 2 Ch 1, turn, loosely sl st into each st across the row (59, 65, 71, 77) (note: the gauge will be different for this portion and the slip stitches will tighten the fabric so that it is not quite as wide as the rest of your work. This is okay! If you crochet very tightly and you’d like it to be less noticeable, you may go up a hook size for this portion of the pattern. In addition, you may want to count your stitches as it’s easy to miss the last stitch of the row)
Row 3 Ch 2, turn, hdc blo in each hdc st in row below the previous row of slip stitches, repeat across the row (59, 65, 71, 77) (See photos for assistance)
Repeat rows 2 & 3 until this Upper Portion / Arm Opening section is approximately (6 ½”, 7 ½”, 8 ½”, 9”) long. The entire piece measures approximately (19 ½”, 20 ½”, 21 ½”, 22”) long.
Tie off and weave in ends.
Follow the above pattern for both the front and the back side.
Shoulders
Using your preferred seaming method, sew the shoulders evenly on each side leaving an opening for the head and neck.
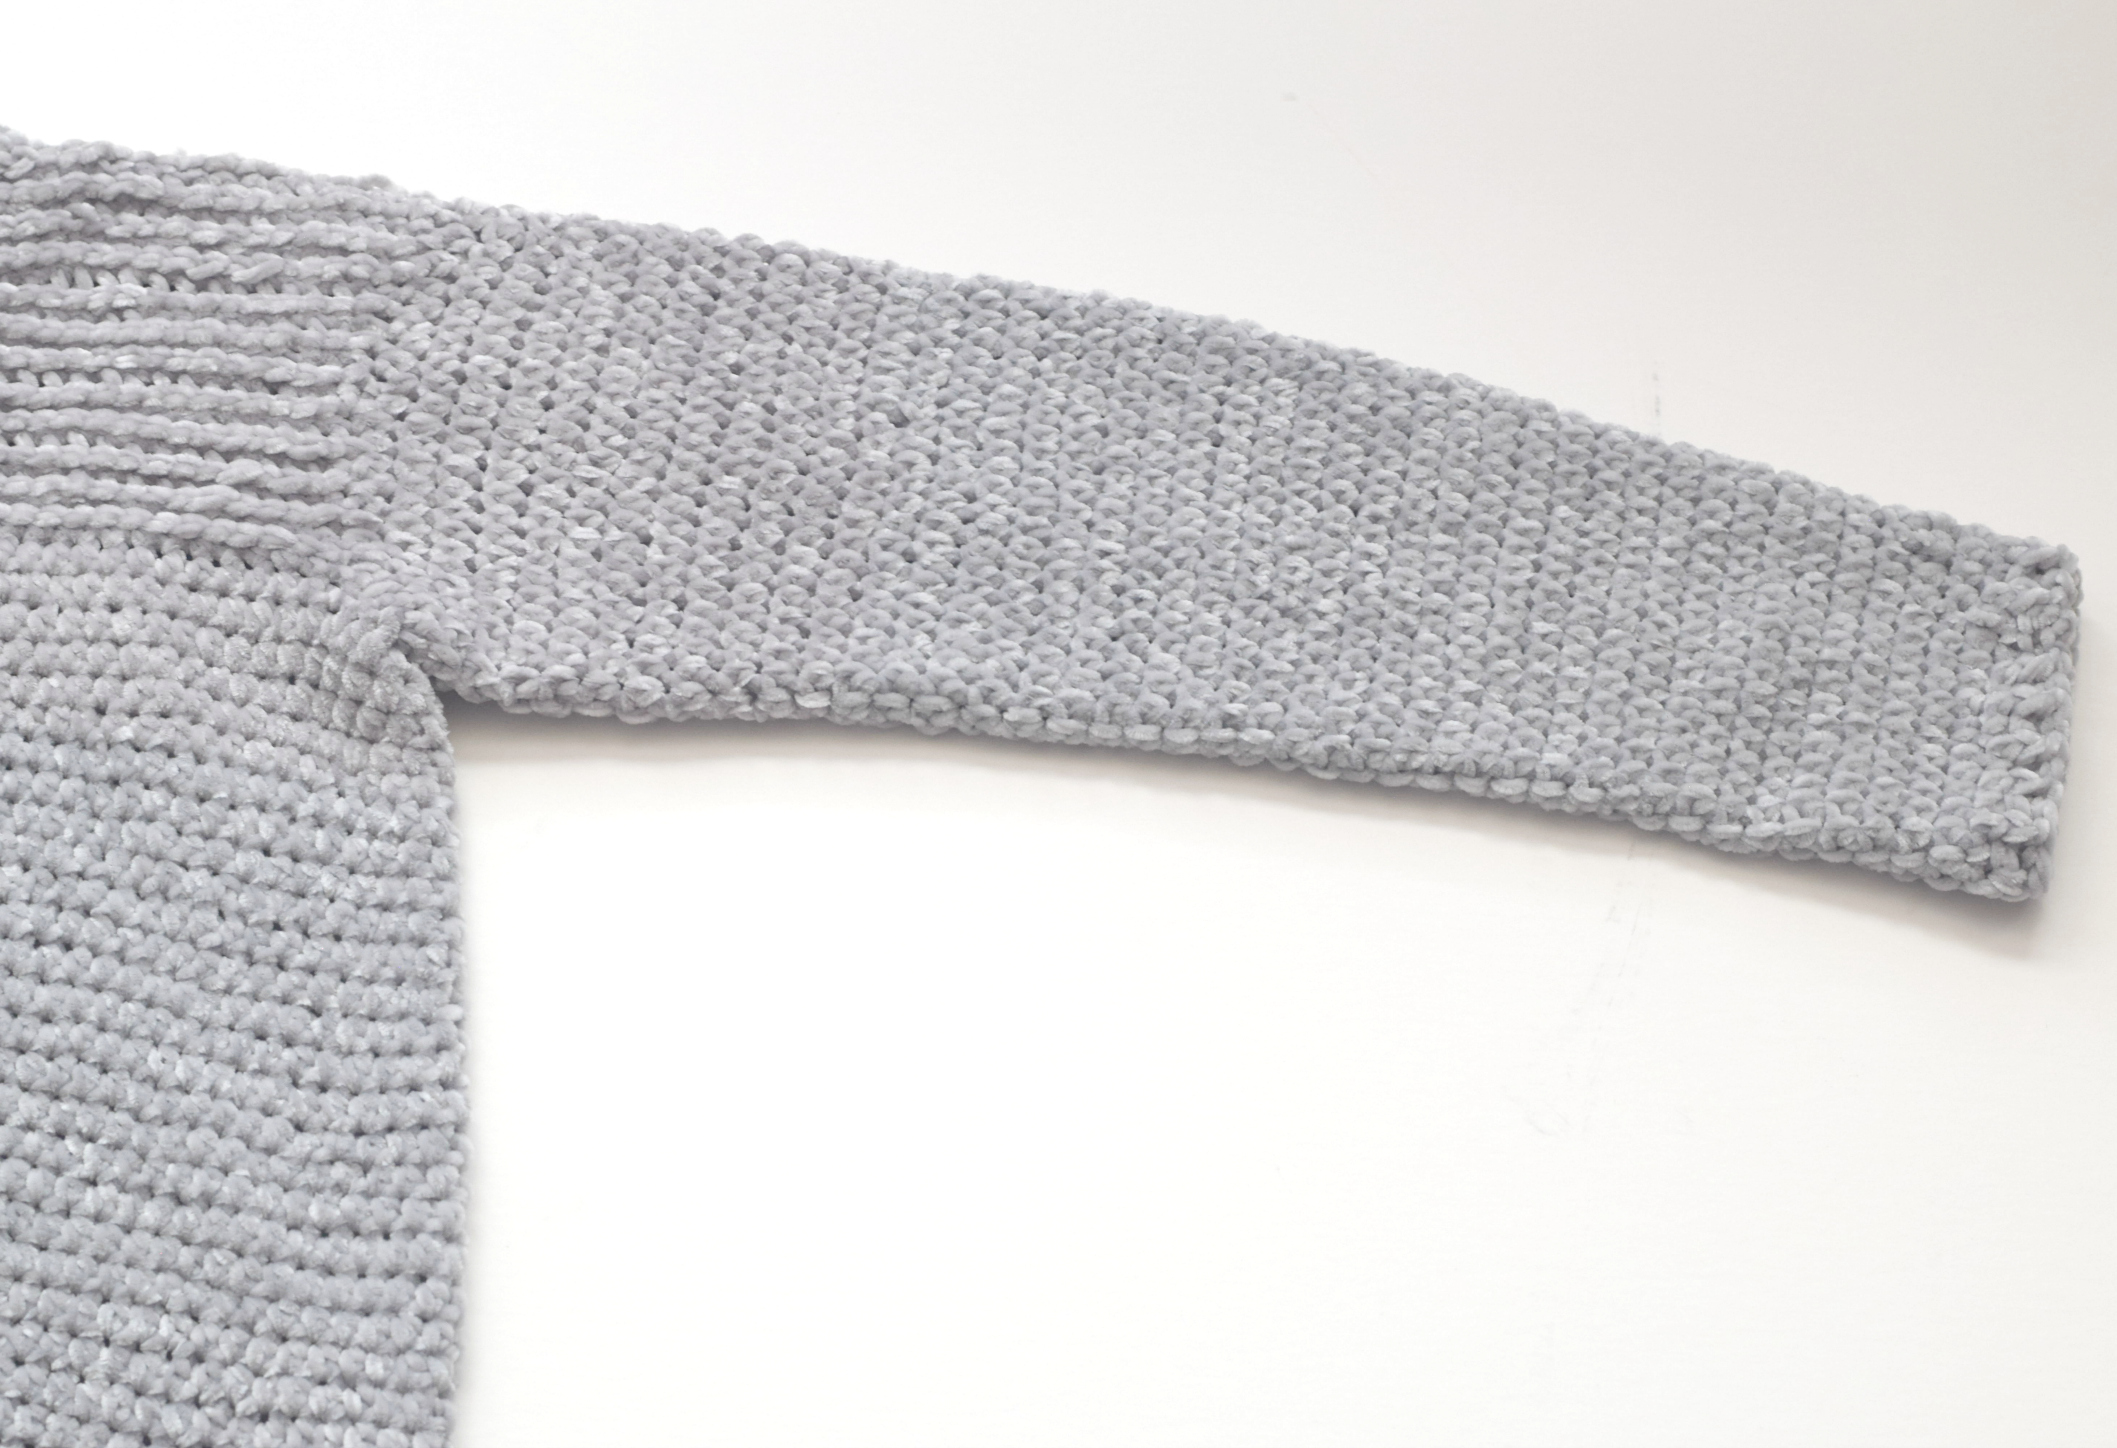
Sleeves
Sleeves are crocheted by picking up the yarn at the arm openings and working in continuous rounds.
There’s no need to join at the end of each round. Mark the first st of each round.
Attach yarn to bottom of arm opening.
Rd 1 Ch 2 (doesn’t count as st), hdc evenly around. Mark first st of round (approximately 48,54,59,62 stitches around )
Rd 2 1hdc in each st around
Rd 3 hdc2tog, hdc in each st around
Rd 4 hdc in each st around
Rd 5 hdc in each st around
Repeat rows 3 – 5 until sleeve is approximately 19.5” long, or as long as you’d like (keep yarn needs in mind). The stitch count will decrease by one stitch every third row.
Once the sleeve has reached 19.5”, finish the last stitch of round by skipping a stitch, slip stitching into the next stitch. Next, begin the Sleeve Cuff part of the pattern.
Repeat this pattern for the second sleeve
Sleeve Cuffs
Ch 2, work FPhdc, followed by BPhdc. Repeat this pattern, alternating a FPhdc st, followed by a BPhdc st around for one round. Sl st to join, tie off and weave in ends. (To make the ribbing work out perfectly, work an even amount of stiches around if possible)
Bottom Cuff
Attach yarn to the bottom of the pullover. Ch 2, work a FPhdc st, followed by a BPhdc st. Repeat these two stitches alternating a FPhdc followed by a BPhdc, around for one round. Sl st to join, tie off and weave in ends.
To make sleeves longer or sweater longer, you may add more length to the cuffs by crochet more rounds of cuff. Keep yarn needs in mind.
Photos:
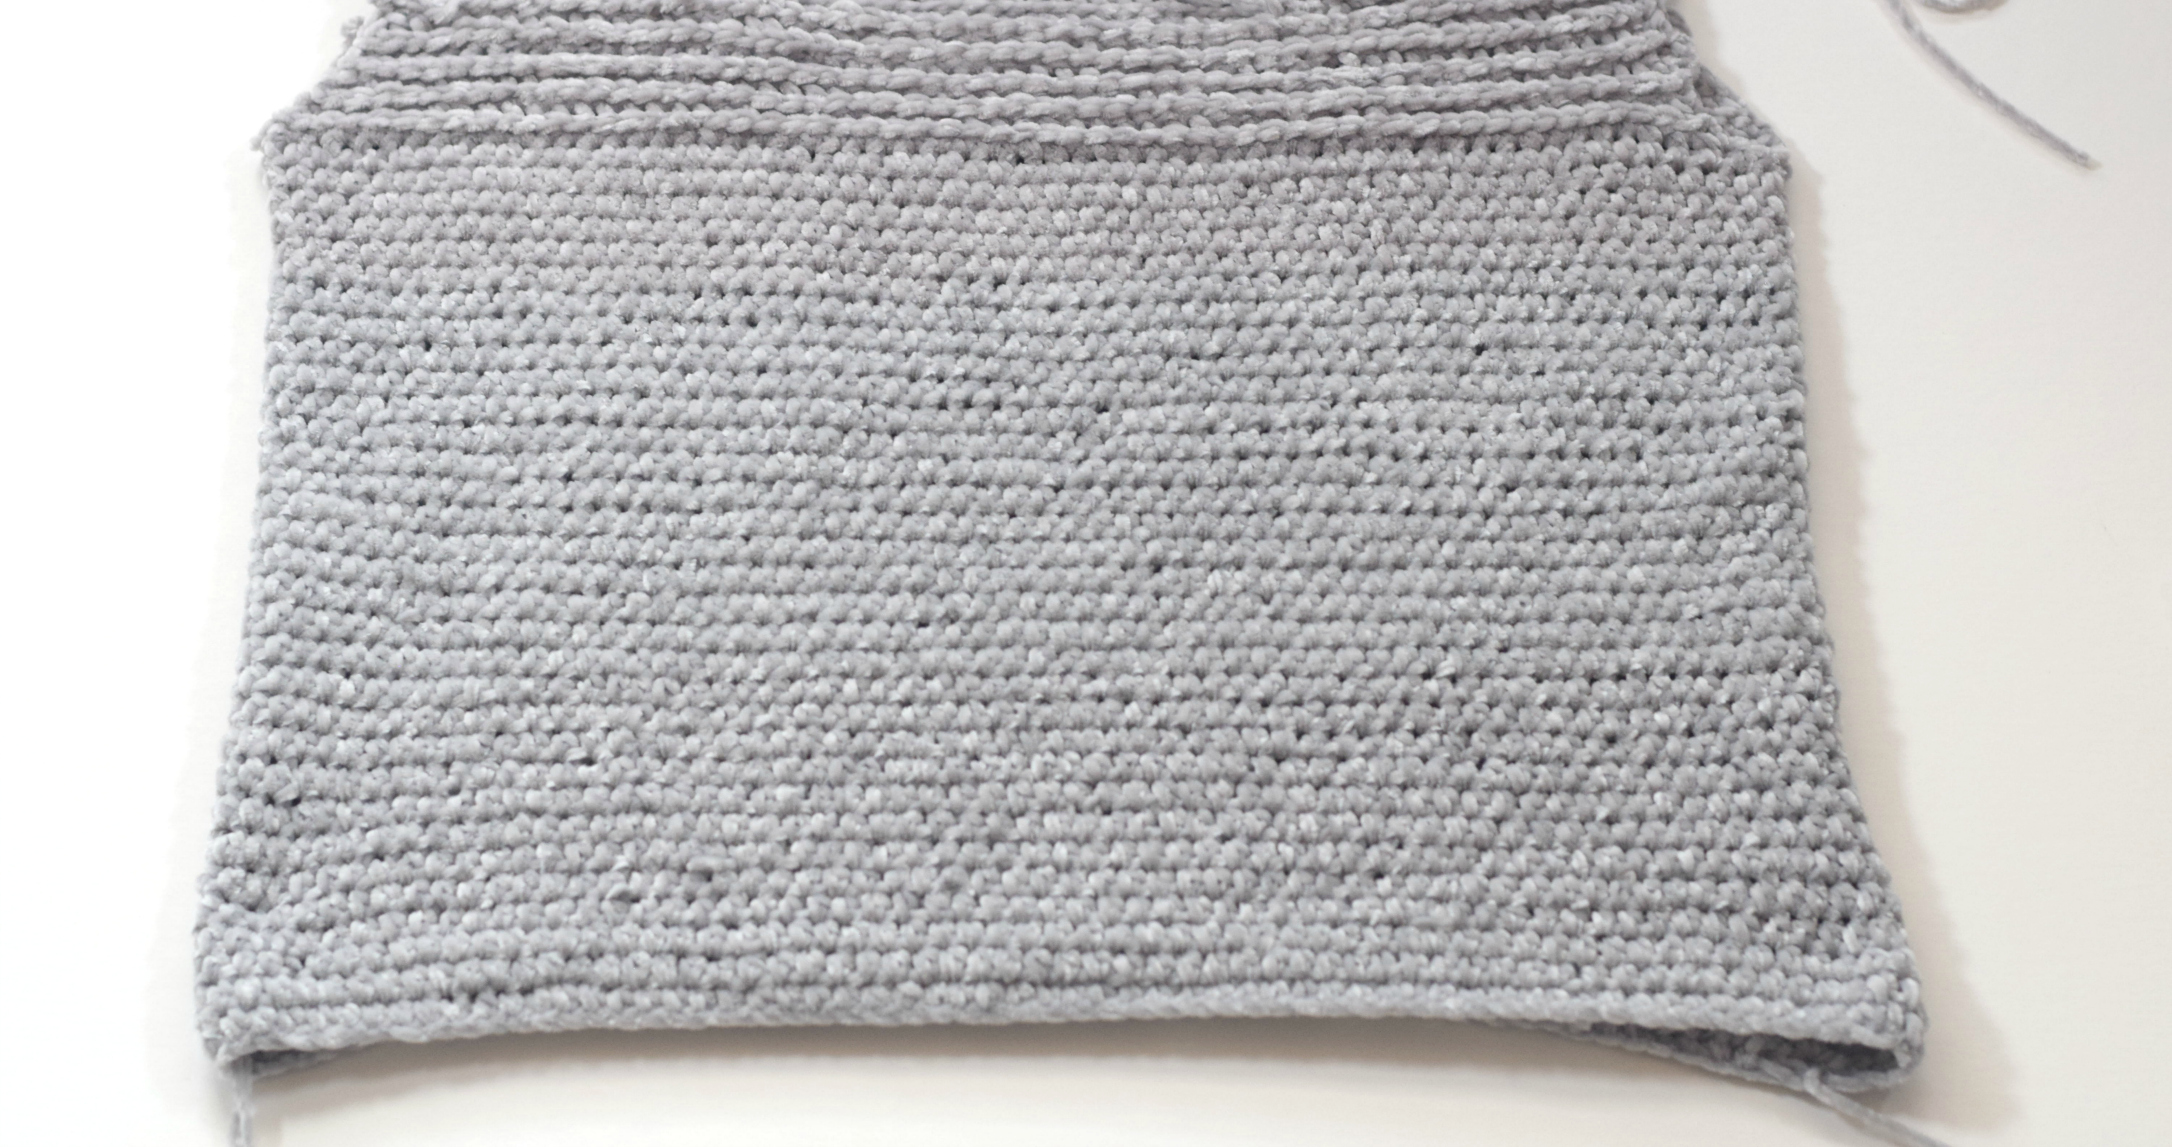
Below: Working hdc in continuous rounds creates a beautiful lower and middle portion to the sweater. The upper portion is worked back and forth in rows at the front and back of the sweater.
Upper Portion Stitch Tutorial
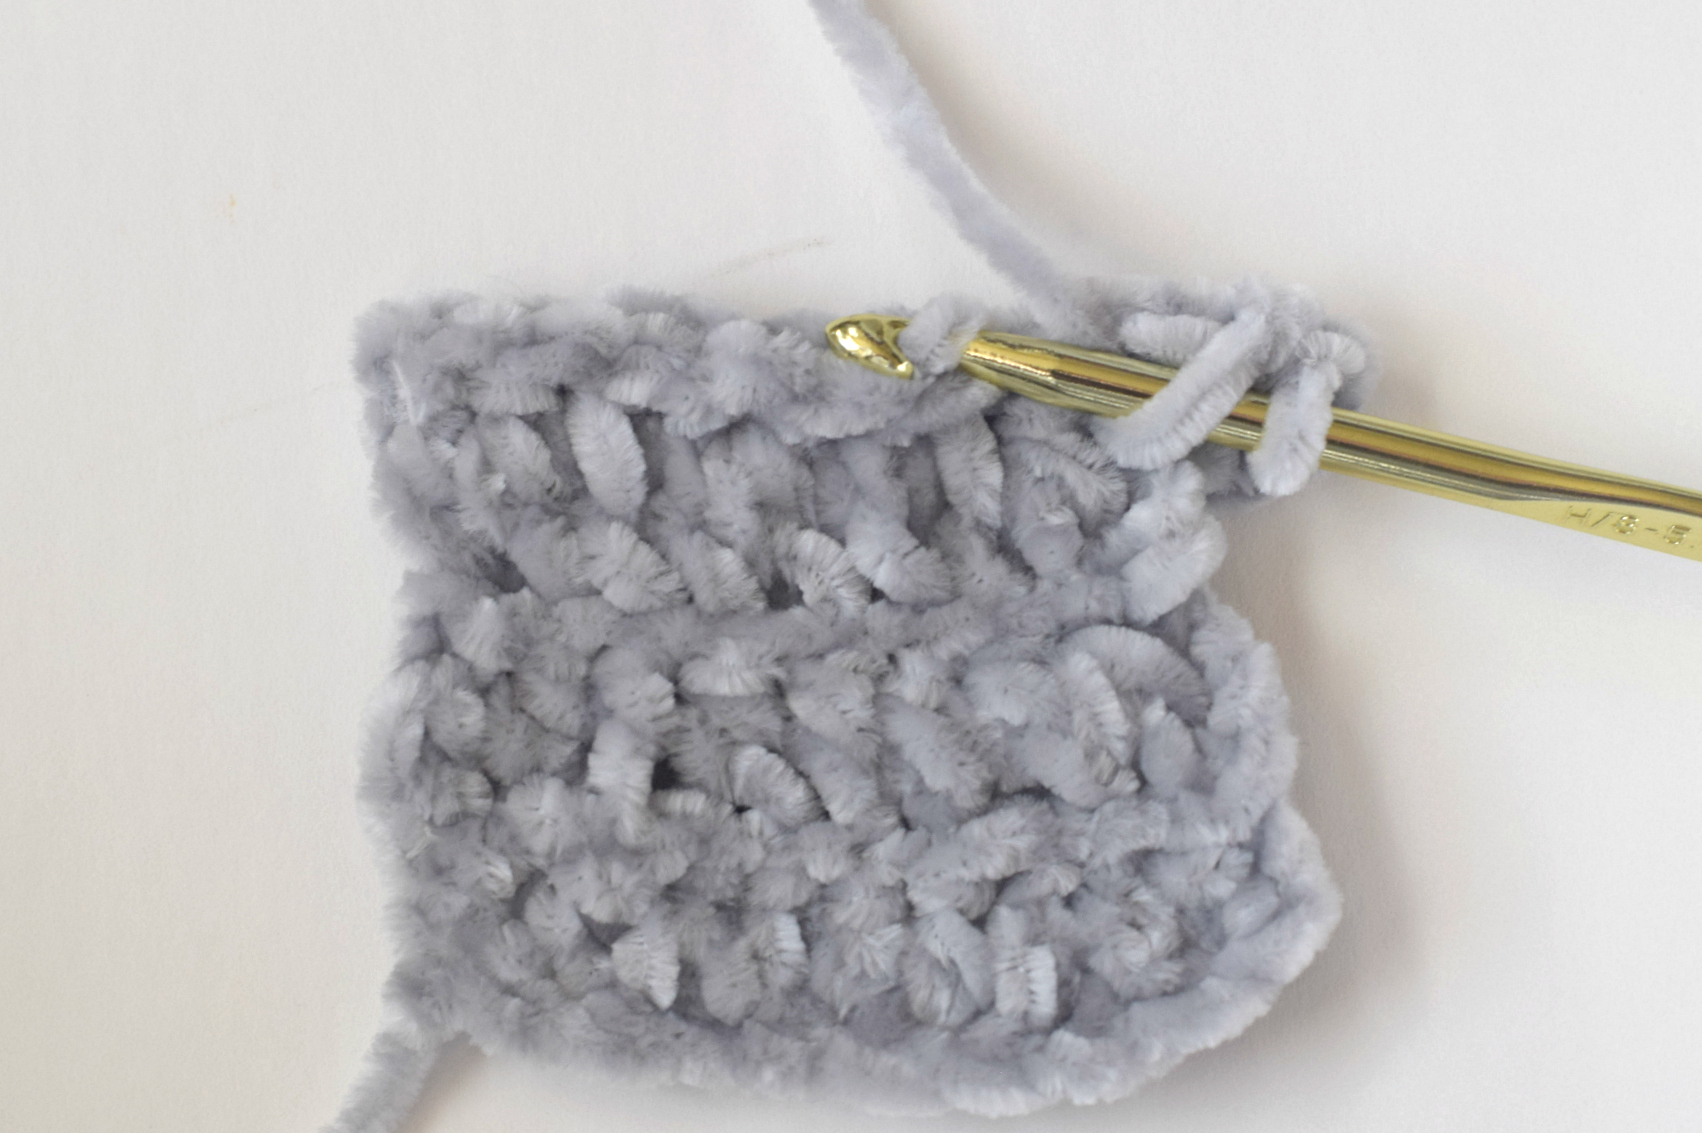
Below: Example of the right side of the sweater worked with slip stitches. Slip stitching into the hdc stitch.
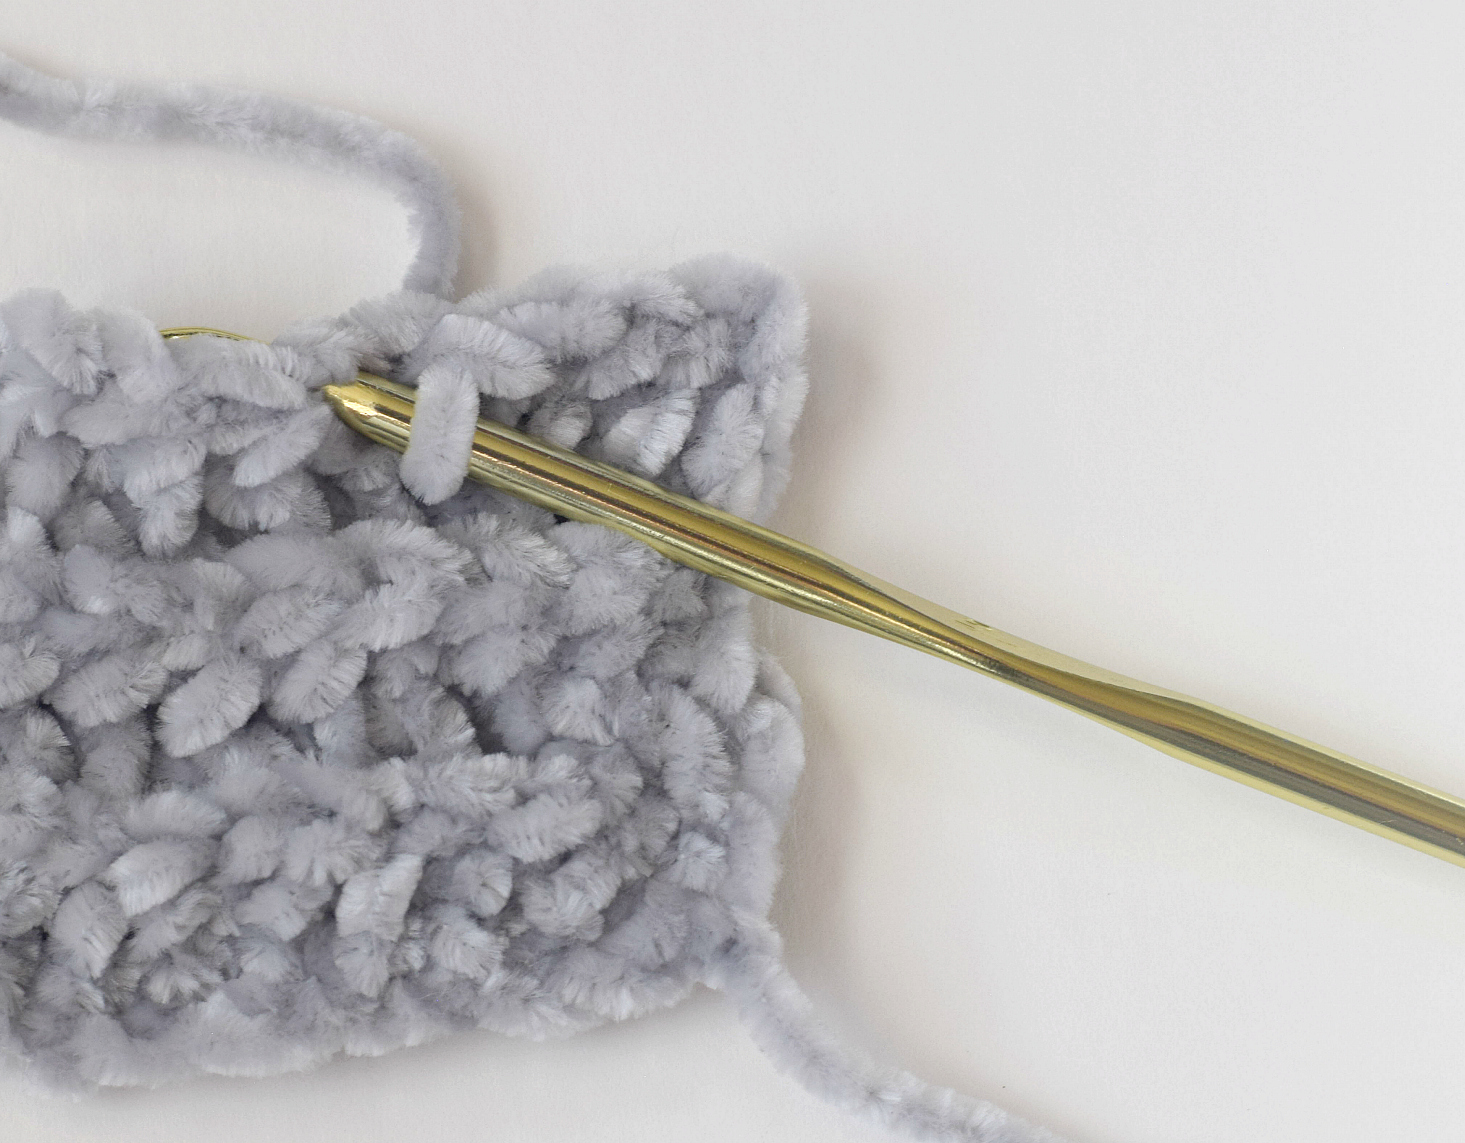
Below: An example of the wrong side of the upper portion of the sweater. Working the hdc into the back loop of the half double crochet stitch in the row below the row of slip stitches. You will notice that the slip stitches are on the right side of your work. Therefore, you will want to work into the back loop of the hdc stitches in the row below (pictured). It doesn’t appear to be a row below, but it is indeed the stitches of the row prior to the slip stitch row.
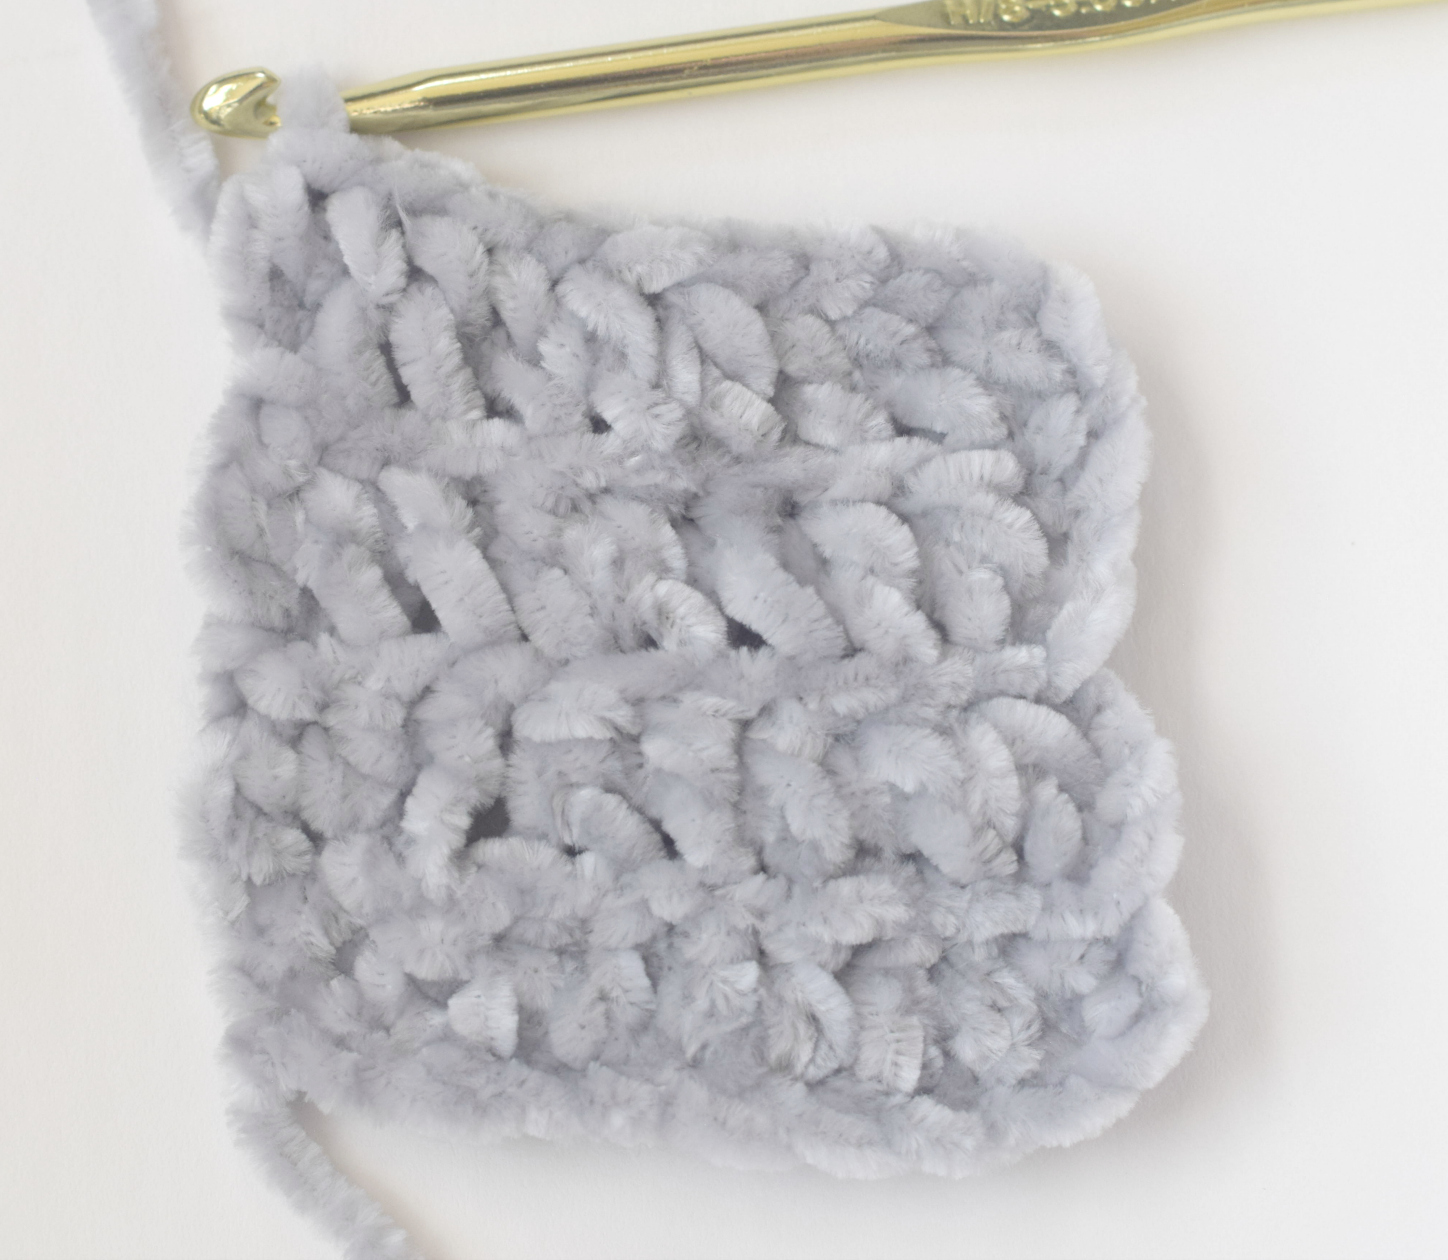
Below: The side worked with half double crochet stitches. This is the back side of the slip stitch pattern on the upper portion. The slip stitches on the front appear raised and knit, while this side is quite flat.
 \
\
Above: The gauge is smaller in the upper portion / arm opening area causing the fabric to pull in a bit at the arm openings. The upper portion is worked in rows on the front and back of the pullover.
I hope you guys like this sweater as much as I do!
XO
Jessica
Thank you to Lion Brand Yarn for sponsoring this post. All opinions are 100% my own.
If you liked this, you might also like:
![]()
I love it!!!! Going to buy yarn after work to start on this. Thanks so much.
Ahh! Yay!!!
So beautiful Jess! I love that it’s crocheted in the round. I’ve tried making a top in the round before and it wasn’t successful. I’m looking forward to see how you so beautifully managed to do so!
Thanks so much girl! This was the first time I’d done it myself, Mary! I really like doing it now!
So proud to see you and this beutiful sweater all over the Lion Brand newsletter yesterday. YAY FOR JESSICA. You must be absolutely beyond thrilled.
I will be doing some experimenting to upsize it for me, hopfully. Its gorge.
Congratulations.
Welcome back home.
Ahh! Thanks so much Marsha! It’s such fun for me and such an honor to make these projects. I hope to get better about making more sizes, but for now, I hope the upsizing works out for you!
Thanks for the sweet words, Marsha!
Please create a knitting pattern for this! It looks so comfy!
This is one of my favorites! Thank you!!
Ohhhh – a favorite! Yay! You’re welcome Cheryl!
Oh it is so beautiful! Any chance for us knitters to have a knitting pattern for this beautiful velvet sweater?
Take care,
Kera Burdick
Holy smokes! That is gorgeous!! Any chance of a knitted version? I swear you are making me want to learn to crochet (and I can barely knit!). Glad you had fun in NYC!! Ann
If you can knit at all, you can certainly learn to crochet! Crocheting is so much easier than knitting. You should give it a shot!
After seeing the throw you made with this yarn I made a simple one with this yarn in the eggplant and kept thinking it would make an amazing sweater! I have enough left that I will use your pattern but I’m going to make it a bit more tunic length to cover my butt!!
Thanks for your amazing patterns!
Jess, I luuurve this so much…but I can’t crochet. I did not inherit the crochet gene from my Nanna, though she tried very hard to teach me. My Mum couldn’t crochet either but we’d hoped it was one of those genetic things that skip a generation. Alas, not to be, so I’m begging you to create a knit version of this. It just looks super soft and snuggly…and I’d love the option for a longer version too.
Thanks for a fantastic blog, with some off the nicest patterns I’ve ever seen. You deserve the success you are having.
I’m making the double thread blanket now and it is gorgeous and cuddly warm!! Can’t wait to make the sweater, and may also try the pattern without sleeves for an early spring toss over. Keep them coming; love them all !!!!
Oh my! This is gorgeous! Just perfect for our Colorado weather! Can’t wait to try making this one. I adore the new velvet yarns! Thanks so much for the free pattern. Congrats on being in the Lionbrand newsletter!
Welcome home! I’m sure you had a good time. Unfortunately I can’t buy this velvet yarn here and ordering it from abroad would be very expensive. I love the look of velvet yarn and I’m sure it feels really soft. I loved the blanket and want to make it. Now I’m trying to find a velvet yarn as a substitution. I have a very nice store bought sweater in velvet yarn.
It looks like a great pattern. But how do you control the static electricity? I made a hat from this yarn. And it’s super soft and warm, but just thinking about putting it on starts my hair standing on end. Lol
Love the velvet yarn but it does tend to “worm” out after a while, depending on hook and stitch. Did you have this problem with the sweater or did the stitches stay nice and tight? Since you used a smaller hook and a denser HDC stitch, maybe it wasn’t a problem. Thanks!
Hi Susan,
I’ve heard that this can be a problem with velvet, but it hasn’t been for me at all with this sweater.
Here’s a little article on how to help prevent it that I found:
https://www.jimmybeanswool.com/secure-html/onlineec/instructionalArticle.asp?iaid=1
And THIS is why you are my favorite crochet designer! Another home run! I’ve got so many projects going on, but this is definitely going on my To Do list. Thank you for another simple, beautiful design.
Aww! Thank you so much Gin! I’m so thrilled you like it. Have a lovely day!
I saw this yarn yesterday and knew I just had to make something with it.
Thanks for the awesome pattern!
Will you clarify for me the bust measurement? Is it a finished garment measurement or body measurement?
This is the garment measurement
Anxiously waiting for this pattern for us knitters! I have made several of your projects, and they have turned out beautifully. Thank you so much
Hi Jessica, saw this pattern & loved the sweater so I gathered up my velvet yarn (already had 3 300g skeins in softened blue) and began to make it up. I decided the medium size would work for me based on the measurements given. However, working off of 132 chains the bottom half is huge on me, about 58”! I crocheted several rows and decided to stop as this would fit a very large person. The bottom ribbing may draw up a small amount but not enough for a “medium” size. I liked how the sweater fit on you or the model in the picture. I checked my gauge using a size H/8 crochet hook before starting & was right on. I’m not sure the small size would fit either. My hip measurement is 39”. Could I just chain a length with some ease and proceed from there for a better fit or …….suggestions?
Hi Karen!
Are did you join and crochet in the round? Just making sure since you mentioned rows – I’d like to get this figured out so it works for you!
Yes. I have started over chaining (& joining in the round) 92. Hopefully I’ll be able to work out necessary changes in the pattern to complete my sweater and get the fit right.
I cannot wait to make this! For once I am making something for myself!
Aww, enjoy!
Love this! I’m a relatively new crocheter, keeping my hook flying every 1-3 days since November. I’ve wondered about stitching in the round for a sweater… I’ll definitely be making this! Thanks for your free patterns! I’ve thus far made one of your totes, and your door mat. Your Light Snow Cardigan is next on my project list, hoping to start tonight!
Awww thanks Trish!
Hi Jessica! I just received the Vel luxe yarn in the mail! Can’t wait to start this sweater. When ever I buy a top, it’s always a size Large. But when doing the measuring for your pattern, it looks like I should make a Medium.
I’d hate to make it and have it too small. (My friend, who is smaller than I am would love it, tho!). Do you think it will stretch out a little after wearing it? Also, I would like to make it a little longer, which shouldn’t be a problem by adding more rows before starting the arm openings. So, should I make a medium and keep my fingers crossed that it will fit?
I have made 4 of your blanket sweaters for friends, and they love them. I’m in the middle of making another one for myself. Thanks so much for your patterns you’ve put on your website!!
Hi Connie! I’m so glad you like the yarn!! And I’m so pleased you’ve enjoyed the blanket sweaters! It’s really hard for me to say which size you should make. I am wearing the size small in the photos and weigh 105 and am 5’6″. It is a wide, loose fitting top so if you’d like to make sure it’s not loose, you might go down a size. If you’ve measured, I’d go with your gut and knowledge from taking measurements.
can you make a knit version or similar pattern for a knit version?? I love this and have been looking for ideas on what to make with my velvet yarn, but don’t know how to crochet!
Hello Jessica. This is another fabulous design. I have made all of your garments and love each one. However, I always follow along with your video tutorials. Is it possible that you will release one for the Vel-Luxe sweater? I am not confident enough in my ability to make it with only a written pattern.
Thank you.
What is your preferred seaming method for crochet garments?? I use a mattress stitch for knitting, but I am having a hard time figuring out what looks better with crochet. I’m not that happy with any of the methods I’m using.
Also, for those who want a knit version: I just used all the same measurements and knitting needle equivalent, I used a double rib for the bottom edging rather than adding later, I used stockinette stitch for the body (bottom up, in the round until arm), then work back and forth on front and back in garter stitch, ending with double rib :).
So awesome! Thanks for sharing how you made it knit!
Hi Jessica
In your pdf version (I am a member) of velvety pullover the size hook does not appear
Can you use a bulky yarn for this pattern?
You’ll have to stick with a worsted weight yarn in this case. 🙂
Jessica, I just wanted to thank you for sharing all your patterns. You’re a very talented and creative person. I always look forward to your next newsletter/ pattern in my email. Keep up the good work and inspiration! XOXO Maria Krauskopf
Thanks so much for the kind words, Maria!!! Made me super happy. 🙂
Wow that so good.useful work with the creative and amazing thoughts. I like it very much.