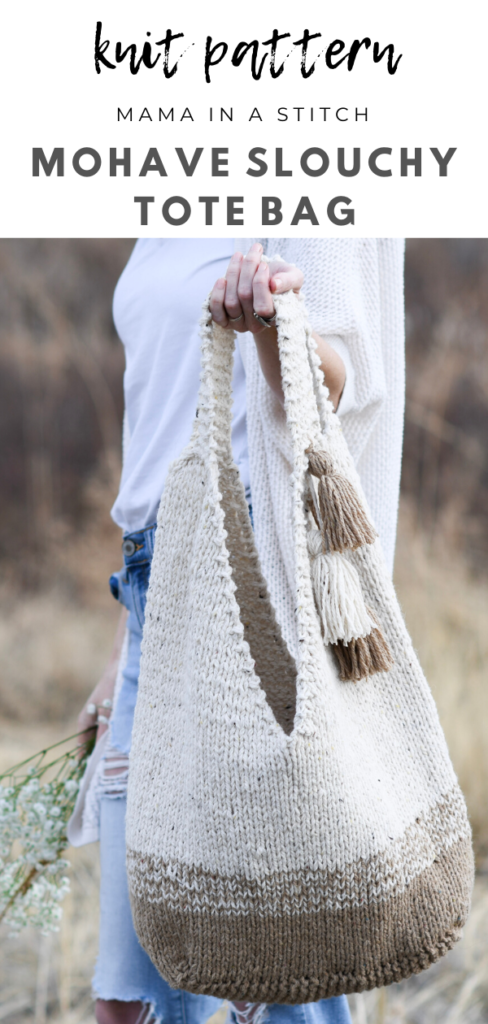
Mohave Slouchy Tote Bag Knitting Pattern
You can view the free, full pattern below, or purchase the ad-free printable pattern from Etsy HERE, or the kit from Lion Brand HERE.
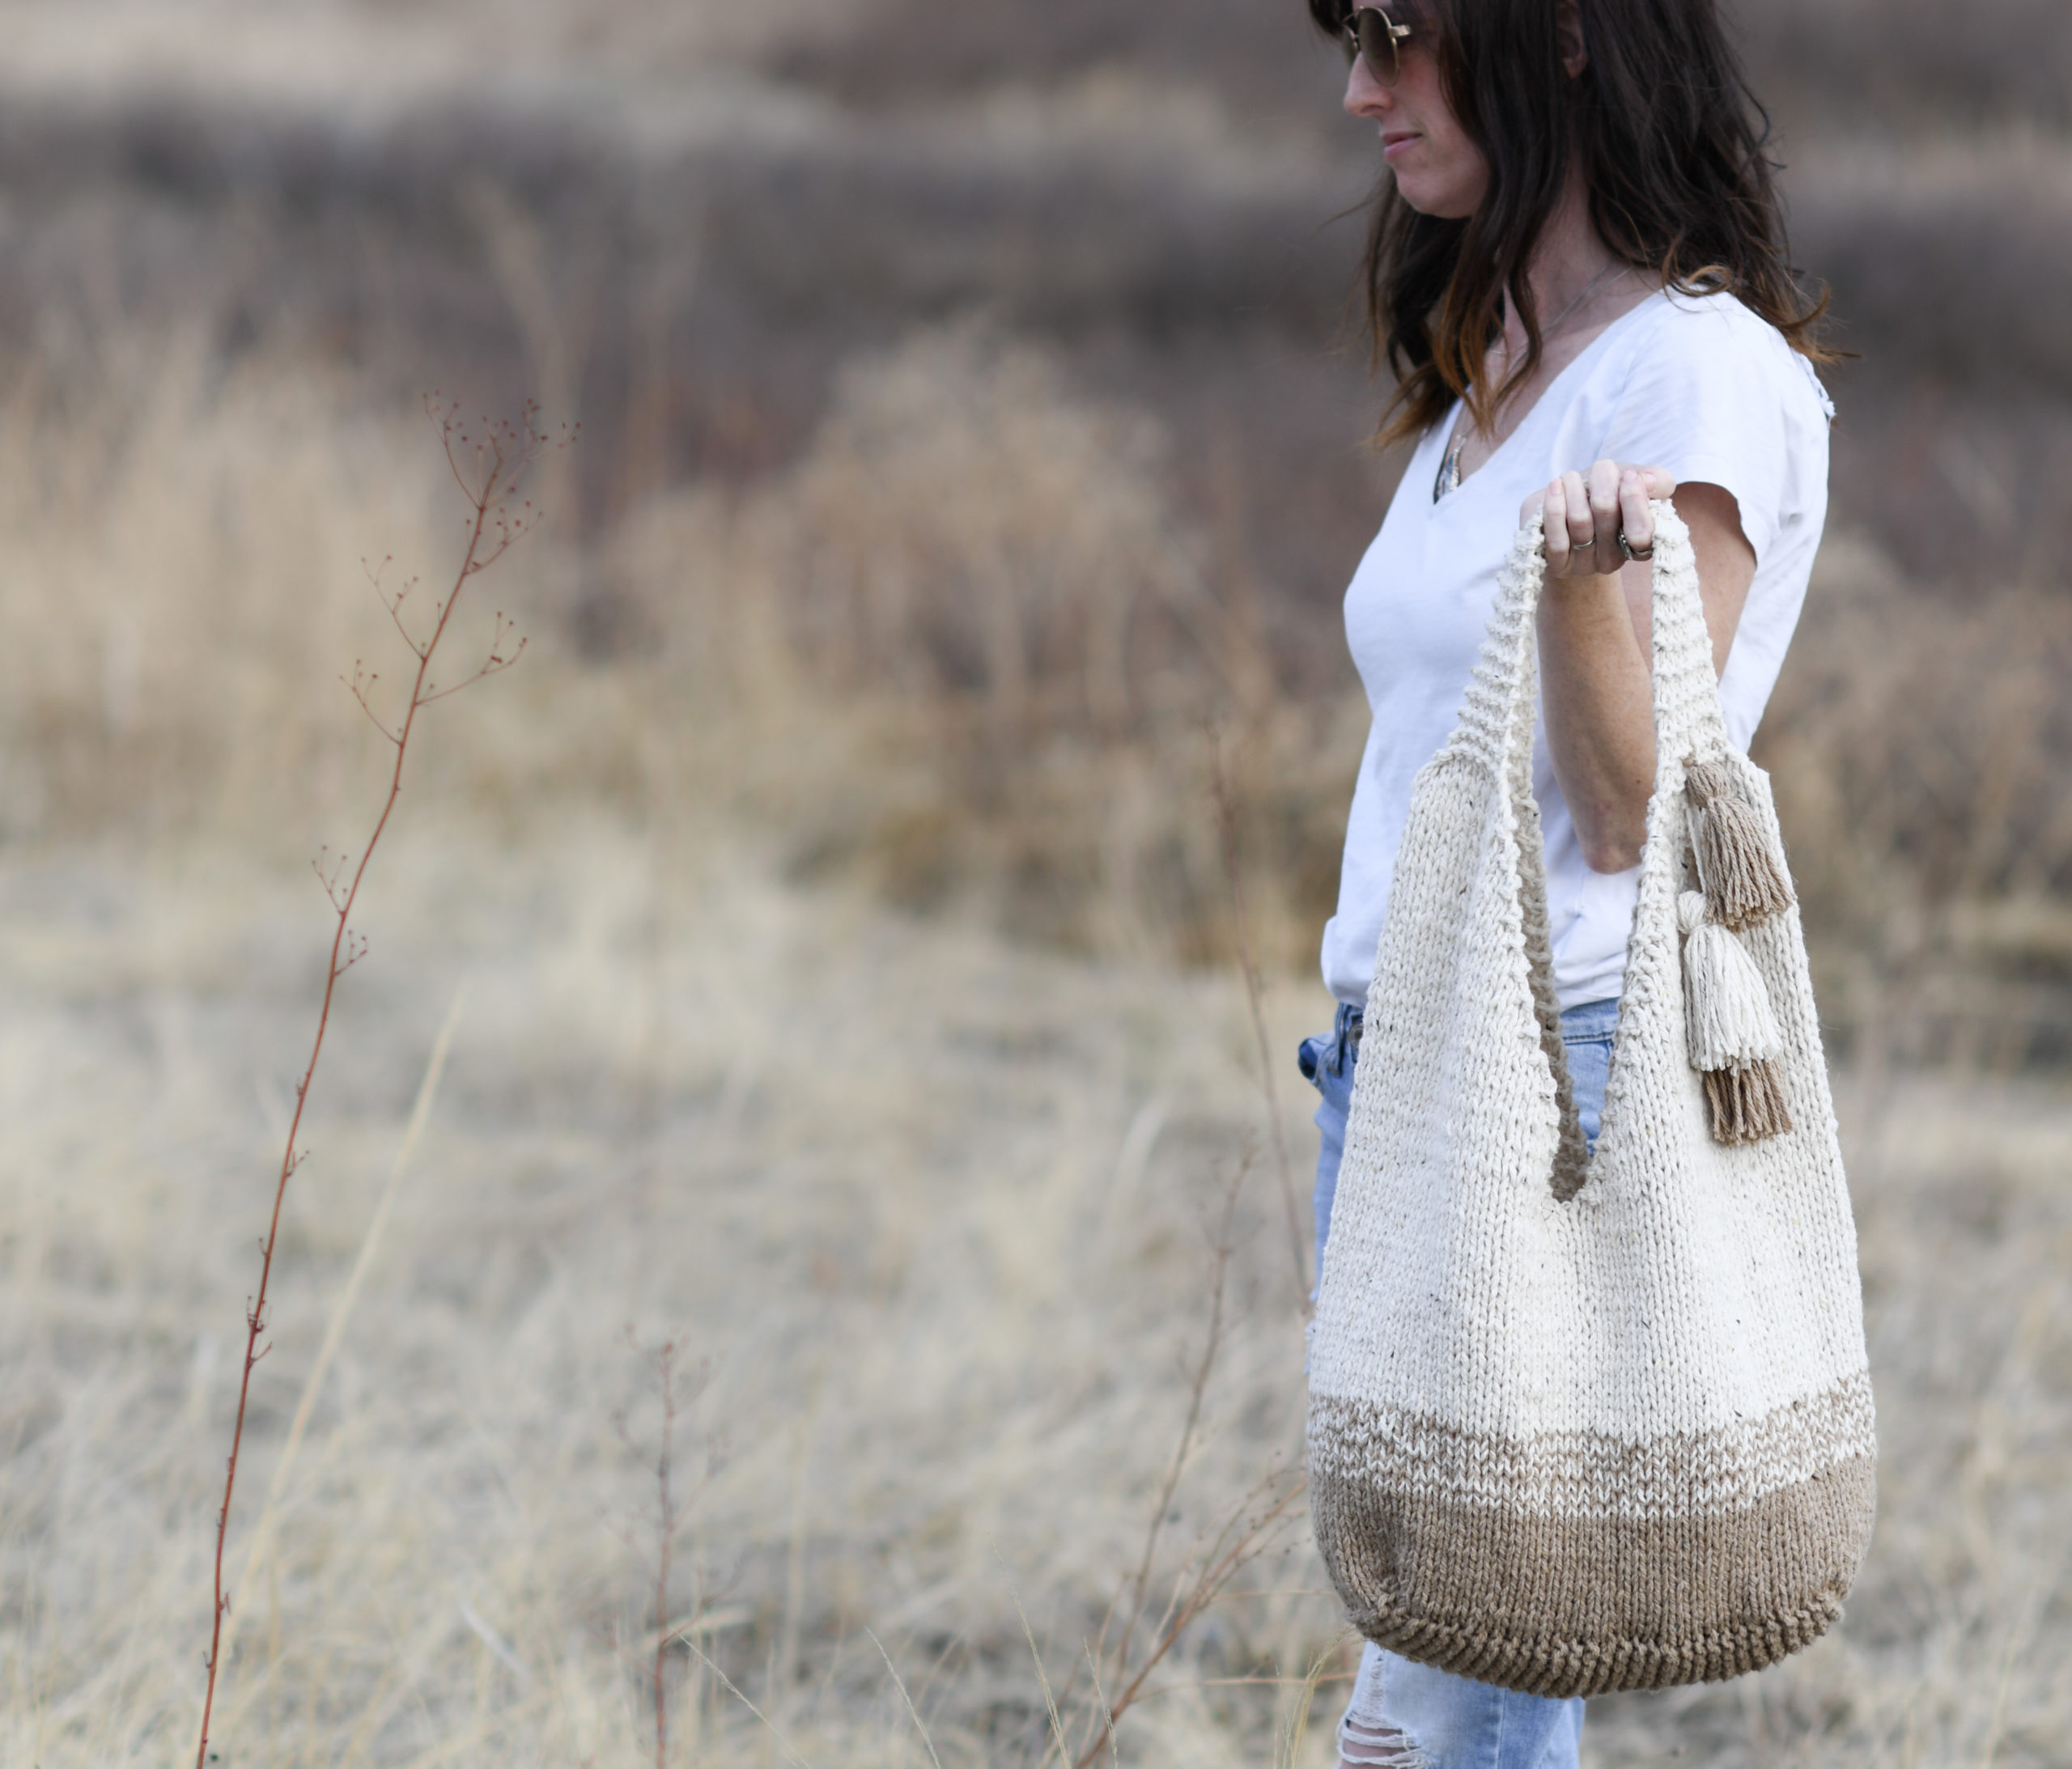
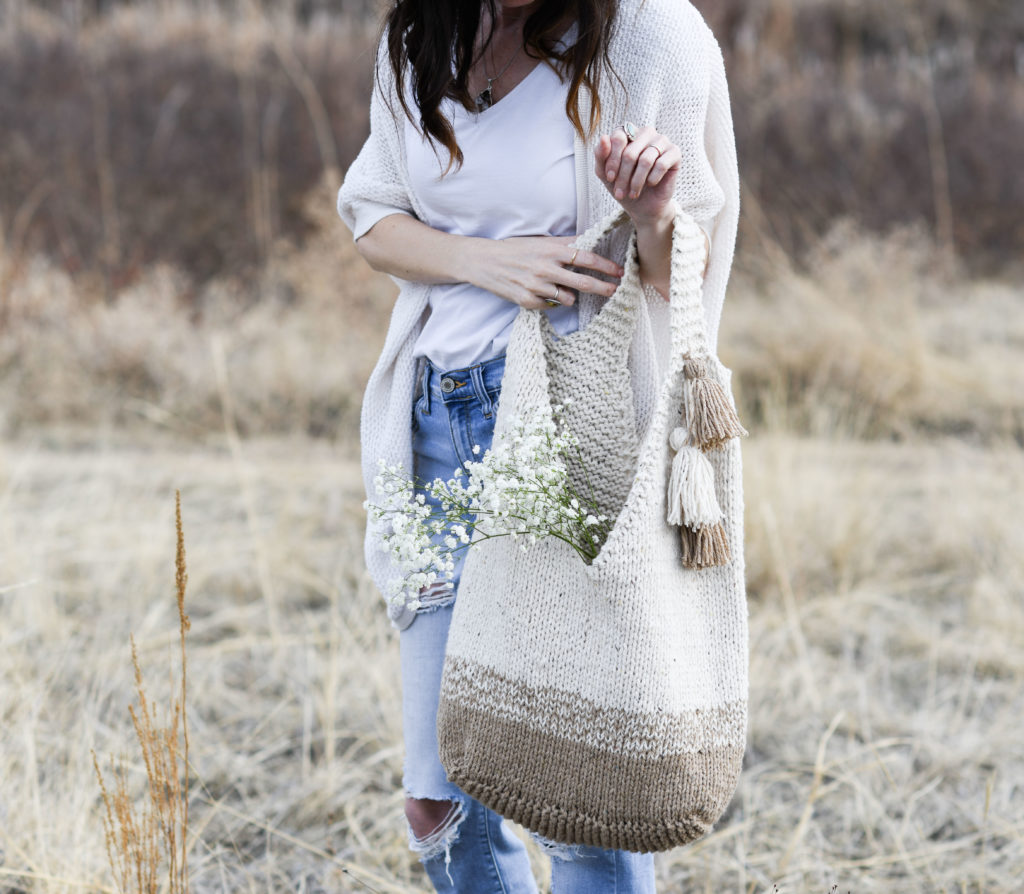
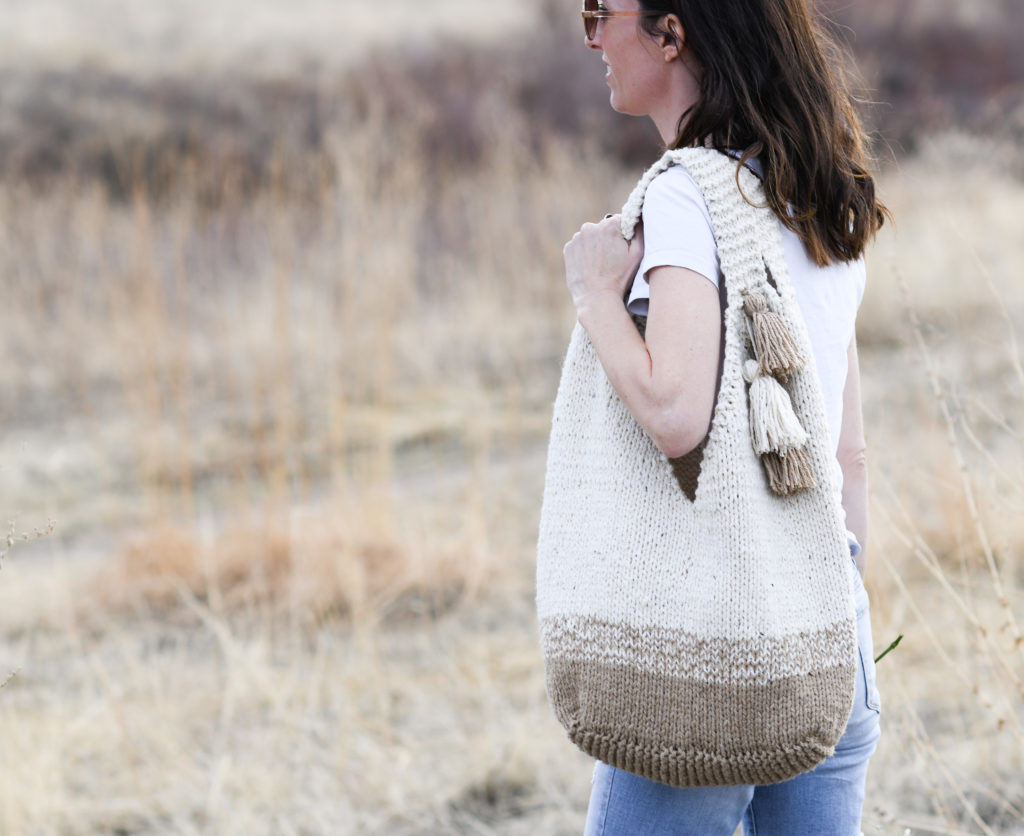
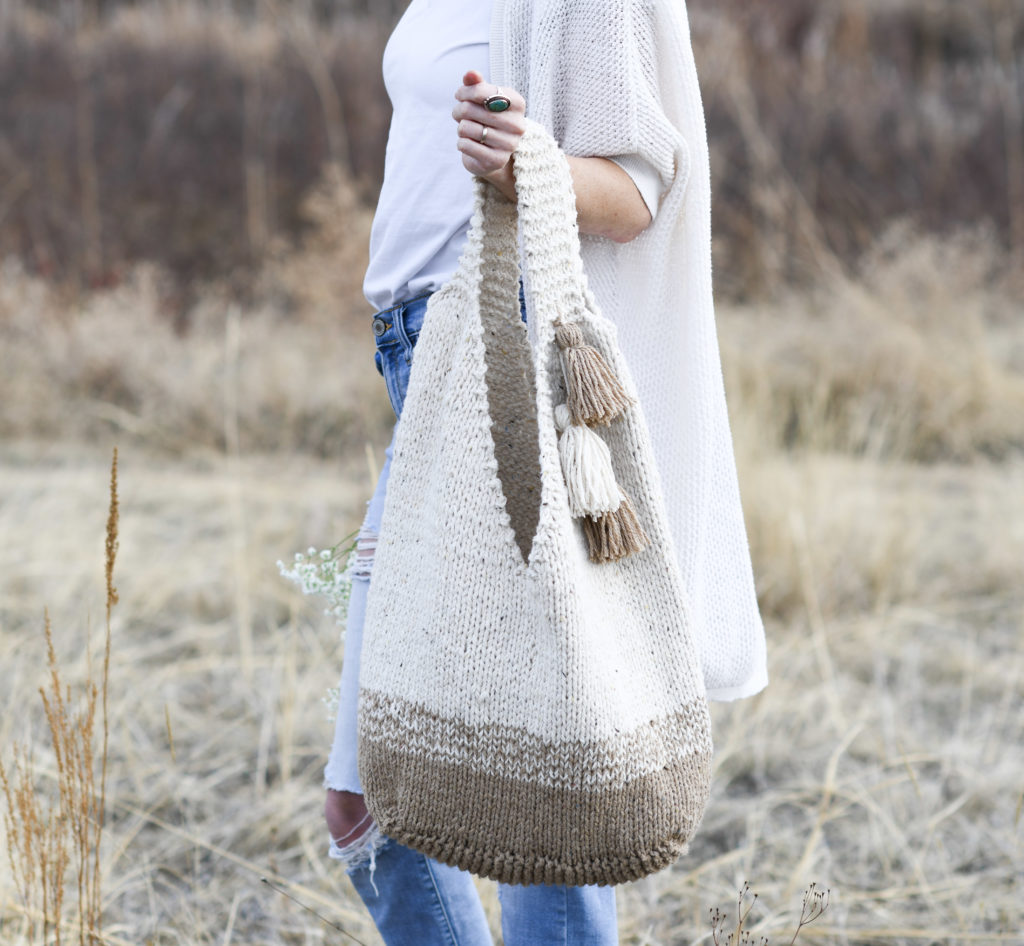
Favorite new bag here! 🙂 Today’s free knitting pattern is for a gorgeous, oversized knit bag that’s perfect to haul everything and anything! You’ll also see photos of my progress as I made the tote so you can see how it’s done! The bag itself is going to be super handy to use in summer months for day trips to the mountains with the fam or for fall outtings with friends. How would you use this bag?
I can’t wait to get out with this! It features beginner friendly, ombre colorwork, thick comfortable handles and ROOM!
I named it the Mohave Slouchy Bag Tote because the colors remind me of what you’d see in a desert landscape (the Mojave Desert in California). The bag also makes me dream of warm, summer days, and sand. 🙂 While I’ve made a few knit bags (Aspen Mountain Knit Bag, Farmers Market Bag, etc.), this one takes the cake.
So, how do you knit this slouchy bag? We start by knitting flat and creating a rectangular base. From there, you will pick up stitches, and knit in the round to make the main body of the bag. There are two basic color changes as you create the striping ombre effect at the bottom. Once you get to the point for the handles, you will split the stitches, and again work in rows to create each handle. Simple decreases are used to shape the handles and decorative center. These are all really basic stitches, but you do need to feel comfortable counting stitches, knitting in the round, and reading a pattern.
I definitely suggest you read through the pattern to make sure you completely understand before diving in! That’s actually a good idea for any pattern that you’re considering, right?
The entire bag is knit while holding two strands of the Re-Tweed worsed weight yarn together. This makes the fabric a bit thicker, heavier duty, and it also works up quicker! I’m really pleased with how Re-Tweed worked with this bag. It was easy to knit, didn’t split, and has a “sturdy” feeling. The yarn’s machine washable and dryable, and I love the rustic look. The natural color tones are right up my alley (of course – that’s me haha!).
And now for some of the visuals on how this bag came together! Keep scrolling down to see the full pattern!
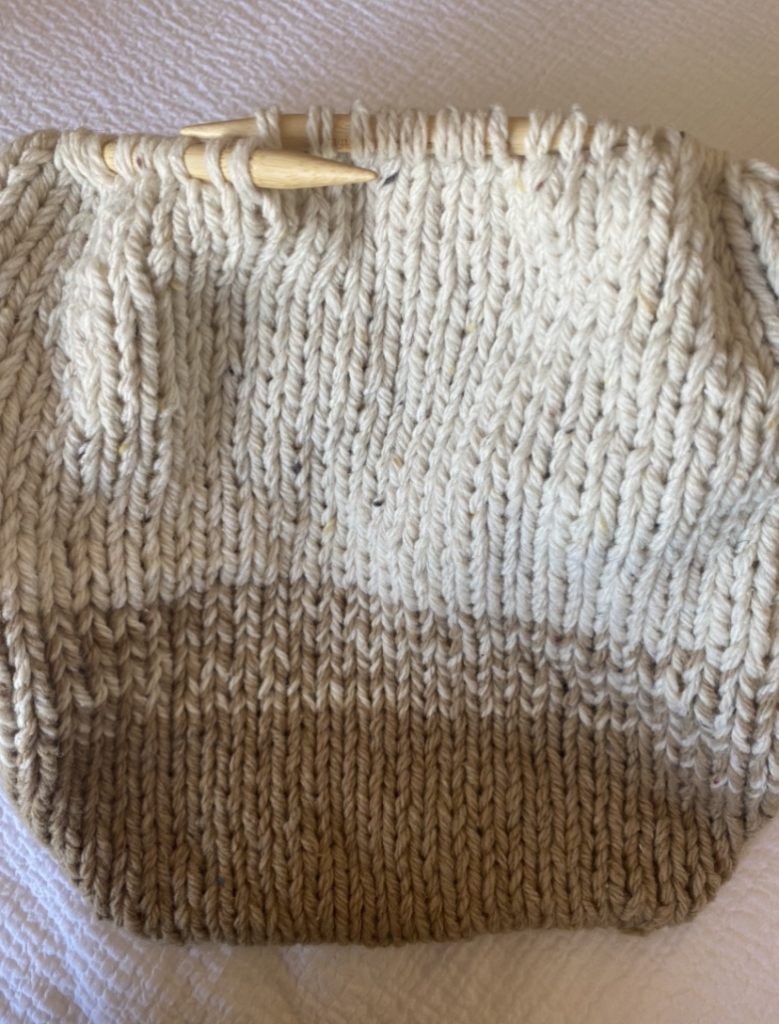
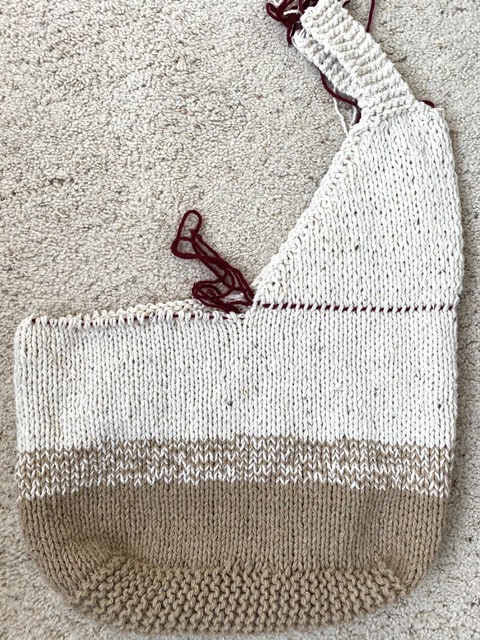
Below: I knit the flat base, then picked up stitches to knit in the round. After a couple of color changes, I’m working on the remainder of the body of the bag!
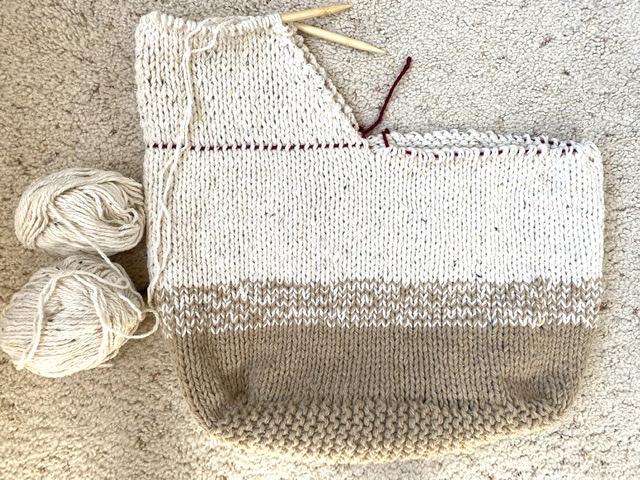
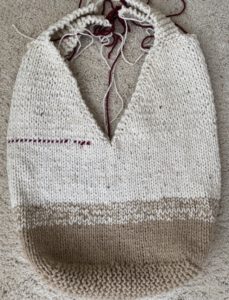
Below: I’ve now split the stitches to work the handles and decorative center. You can also see my lifeline! The scrap yarn is holding my stitches so I can work the second handle later.
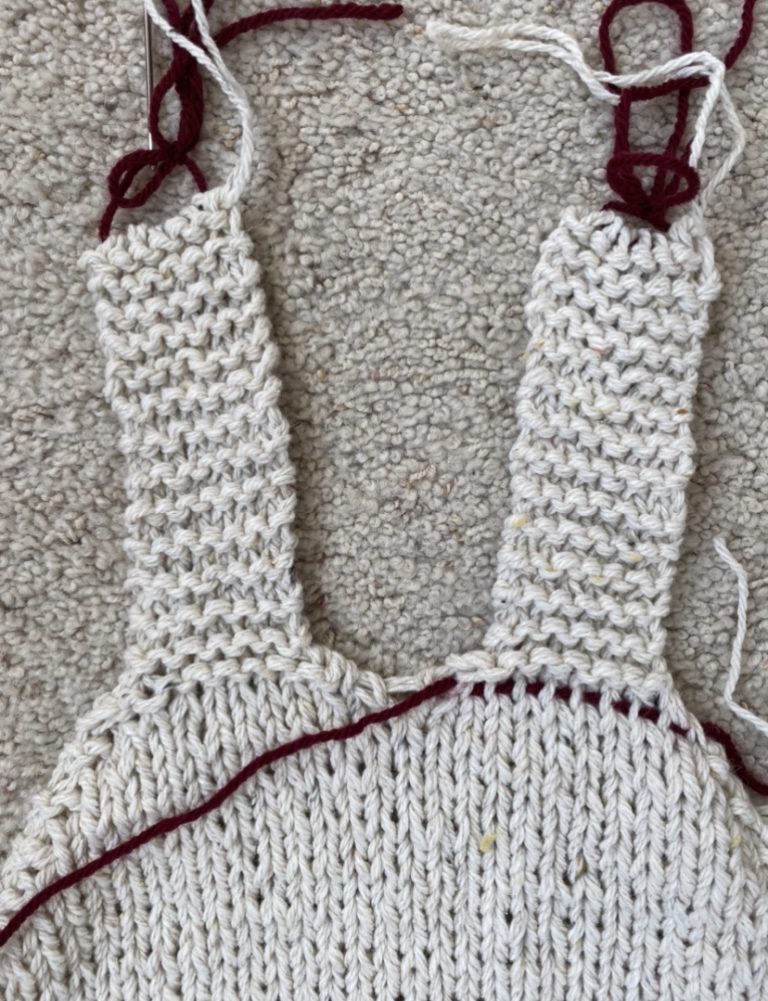
Now for the upper portion of the handles! There are two on each side.
Below: My finished handles are being “held” with scrap yarn so I can work the other side of the bag.
Below: Handles on both sides are complete. The bag’s nearly done! I just need to seam the handles at the top and block it!
Let’s get into the pattern! 🙂
Remember that you can see the free pattern below, or you can grab the printable, ad-free version (for purchase) in my Etsy shop HERE.
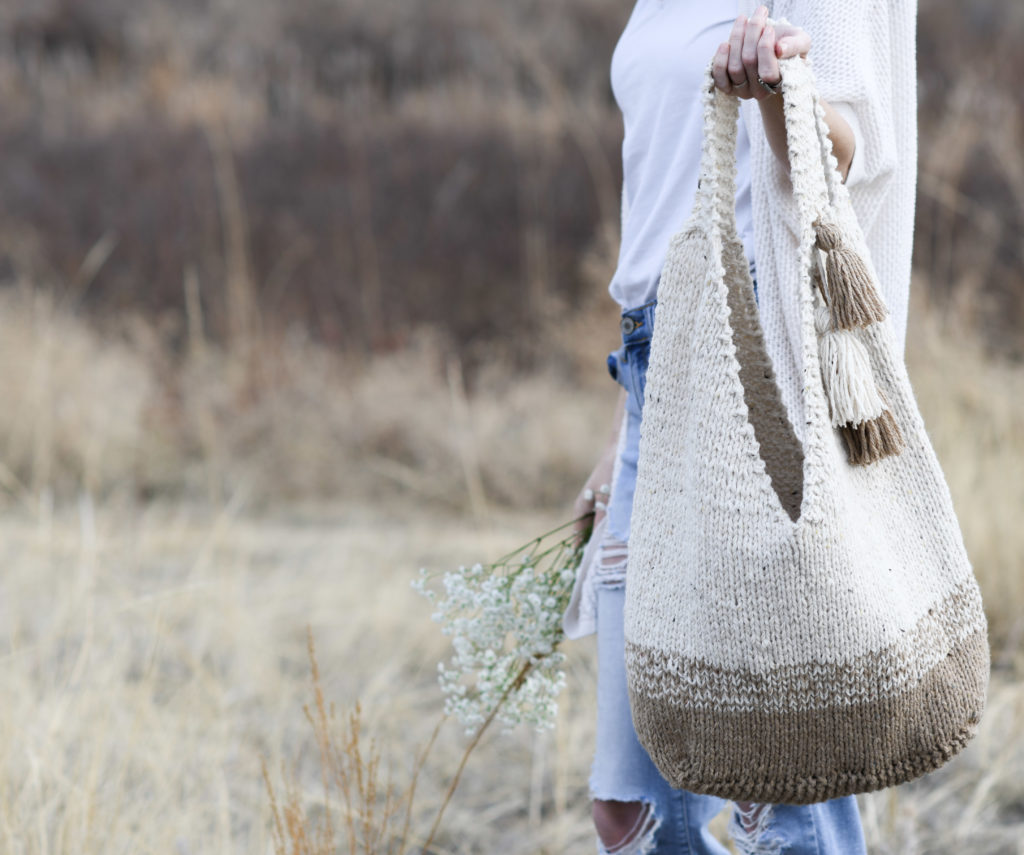
Pattern Description: Carry your necessities and more in this gorgeous, oversized knit bag. Featuring a slouchy design and wide straps, it’s both comfortable and practical. Playful tassels add fun and flair to your new fave knit tote.
Skill Level:
Intermediate
Materials:
US Size 11, 8.0 mm 16” Circular knitting needles
2 Lion Brand Yarn Re-Tweed in Peanut Butter (100g/skein)
Pattern uses approximately 330 g of yarn
Scissors
Tapestry needle
Sizes/Dimensions (approximate): 17” wide x 18” tall when laid flat
Abbreviations & Skills:
k – knit
p – purl
k2tog – knit two together (decrease)
CC – change color
pm – place marker
Gauge: Not important for this pattern.
Notes:
This bag is made by first knitting a rectangular base. Next, you will pick up stitches around the base and proceed to knit in the round. Stitches are then split to work the shaping at the top and then again at the handles. The entire bag is knit while holding two strands of yarn together. See photos at the end of this pattern for additional assistance. As you near completion of the bag, you may find that you need to split a skein of the color Hay in order to continue holding two strands together. Simply split the skein and wind the yarn by hand if needed.
Mohave Slouchy Tote Bag Knitting Pattern
Hold two strands of yarn together throughout the pattern
Base of Bag
Holding two strands of Peanut Butter together, cast on 18 sts
Row 1 Knit each st across the row
Repeat row 1, working in garter stitch, for a total of 62 rows
Sides
In this section, you will pick up stitches in order to knit the sides of the bag in the round. Stitch markers are placed in the center of the front and back of bag to indicate the location of the Handle Split (later in the pattern) and beginning of round.
Rnd 1 Pick up and knit 32 sts on long side of bag (pm after 16 sts), pick up and knit 18 sts on short side of bag, pick up and knit 32 sts on long side of bag (pm after 16 sts), knit 18 sts on short side of bag, knit 16 sts to marker on long side.
Begin rounds at marker. (100 sts total in each round)
Knit until bag measures 3” from beginning of side
CC Peanut Butter & Hay
Holding one strand of Peanut Butter and one strand of Hay, knit for approximately 2”
CC Hay
Holding two strands of Hay together, knit for approximately 4.5”
Handle Split
Row 1 (RS): K to marker, turn. Place remaining 50 stitches from second side onto scrap yarn to work second side later.
Row 2 (WS): K2, purl across to last 2 sts, k2
Row 3 (RS): K2tog, k across to last 2 sts, k2tog
Repeat rows 2 & 3, in that order, until there are 22 sts left on your needle
Upper Handle Split
Next, you will split the stitches again to create the two smaller garter stitch handles at the top of the bag.
Place 11 sts on scrap yarn to knit later.
With remaining 11 stitches on the needle, begin to knit the first handle following the pattern below.
Row 1 K2tog, k across to last 2 sts, k2tog (9 sts)
Row 2 Repeat row 1 (7 sts)
Row 3 Knit each st across the row (7 sts)
Repeat row 3 for 23 more rows or until upper handle is approximately 6”
Cast off
Next, place 11 sts held on scrap yarn onto needle
Repeat the above pattern for the Upper Handle Split to create the second small garter stitch handle on this side.
Next, you will knit the second side of the bag and handles.
Second Side of Bag & Handles
Place stitches from scrap yarn onto needles to knit second side of bag.
Work as for the first handle, following the pattern starting at the Handle Split section
Finishing
Whip stitch (or use preferred seaming method) handles together at top.
Block bag to shape and size as desired.
Using a portion of the remaining yarn, create three tassels (or more) and secure to bag for an extra fun detail!
And there you have it! A big bag to carry all the things. This bag would be awesome with a lining too! If you’re good with fabric and sewing, you might want to consider adding a lining for extra durability.
What do you think?
I hope you enjoyed this and I’d love to see your photos on Facebook or Instagram @mamainastitch!
XO,
Jessica


I’ve never knitted using 2 strands. Can you give me hints. Love the bag it is beautiful and can’t wait to try out pattern
Hi Christy!
You knit the exact same as you do with one strand. Simply put the two strands together to act as it’s one, knitting from the two skeins. Some folks like to wind the two skeins into one ball – this way it’s together “as one”. Does that help at all?
Yes it does. Thanks so much.
Hi, will you be having a crochet pattern for this?
Not totally sure yet Angie! But thinking about something similar. 🙂
This is so beautiful! I understand working with 2 strands of yarn but do you have any tutorials about about joining the new color. I feel like the knots etc I use are not the best! Thanks for any help you can give. I love your site and have enjoyed trying the projects!
Love this bag! Just ordered the kit on Lionbrand ….. the perfect summer bag!
Ahh! So happy you like it, Brenda! Let me know if you have any questions as you make it (email is best!)
I love this! I’d like to make it in chunky yarn, therefore I would not use two strands. What do you think? Anything else that might change! Thanks so much!
Definitely, the chunky yarn would work! Great idea. I also forgot to mention how this could be a great stash buster for any worsted weight, or chunky yarns. Thanks for commenting!!
Stash buster is a great idea! I’d love to do that but I have a mix of chunky and worsted weight. When I switch to worsted weight yarn do I just double it? Or should I triple it? Thank you!
Beautiful bag! Hope you are able to come up with something similar in crochet, as I don’t knit. Love the colors and size! Hope you and your family are staying safe!
Jessica has several nice patterns for crocheted and knitted bags and totes. I made the crocheted Manhattan Market Tote a couple of years ago. I’ve been using it a lot for toting all kinds of things. I even made one as a present. Mila
Love this bag pattern!!! Can I use Lion Brand Re-Up instead of Re-Tweed?
I think that would be lovely. 🙂 I love the Re-Up. It’s definitely a bit thinner than the Re-Tweed, so the look will be slightly different. But it would be sturdy!
Is there much stretch to this bag? I used cotton on one and it sagged too much! Is this tweed yarn a lot like tweed where it is more stable and not stretchy?
Ty
Hi Marnie! I haven’t gotten to use it heavily yet. It does stretch! The yarn is sturdy, but I still expect it to stretch. Hope I will have a better update soon.
Hi Jessica,
love the style! please work out a crochet pattern for us
thanks you for always sharing your work with us
regards Heather
Hi there…
Great pattern, one thing I came across…after knitting the base you say to cast off, weave in ends.. then you pick up stitches to knit in the round… If I read that right, you did not bind off the garter stitches…it says pick up 32 knit, pick up 18 knit, pick up 32 knit AND knit 18. To me that sounds like you left the 18 stitches on the needle.
Are you picking up the stitches one at a time and knitting into the hater ridge? Looks like an easy pattern to change colors or add more colors like a funky scrap bag.
Thanks
Do I cast off after the first 62 rows then pick up stitches?