Knit Coat Pattern
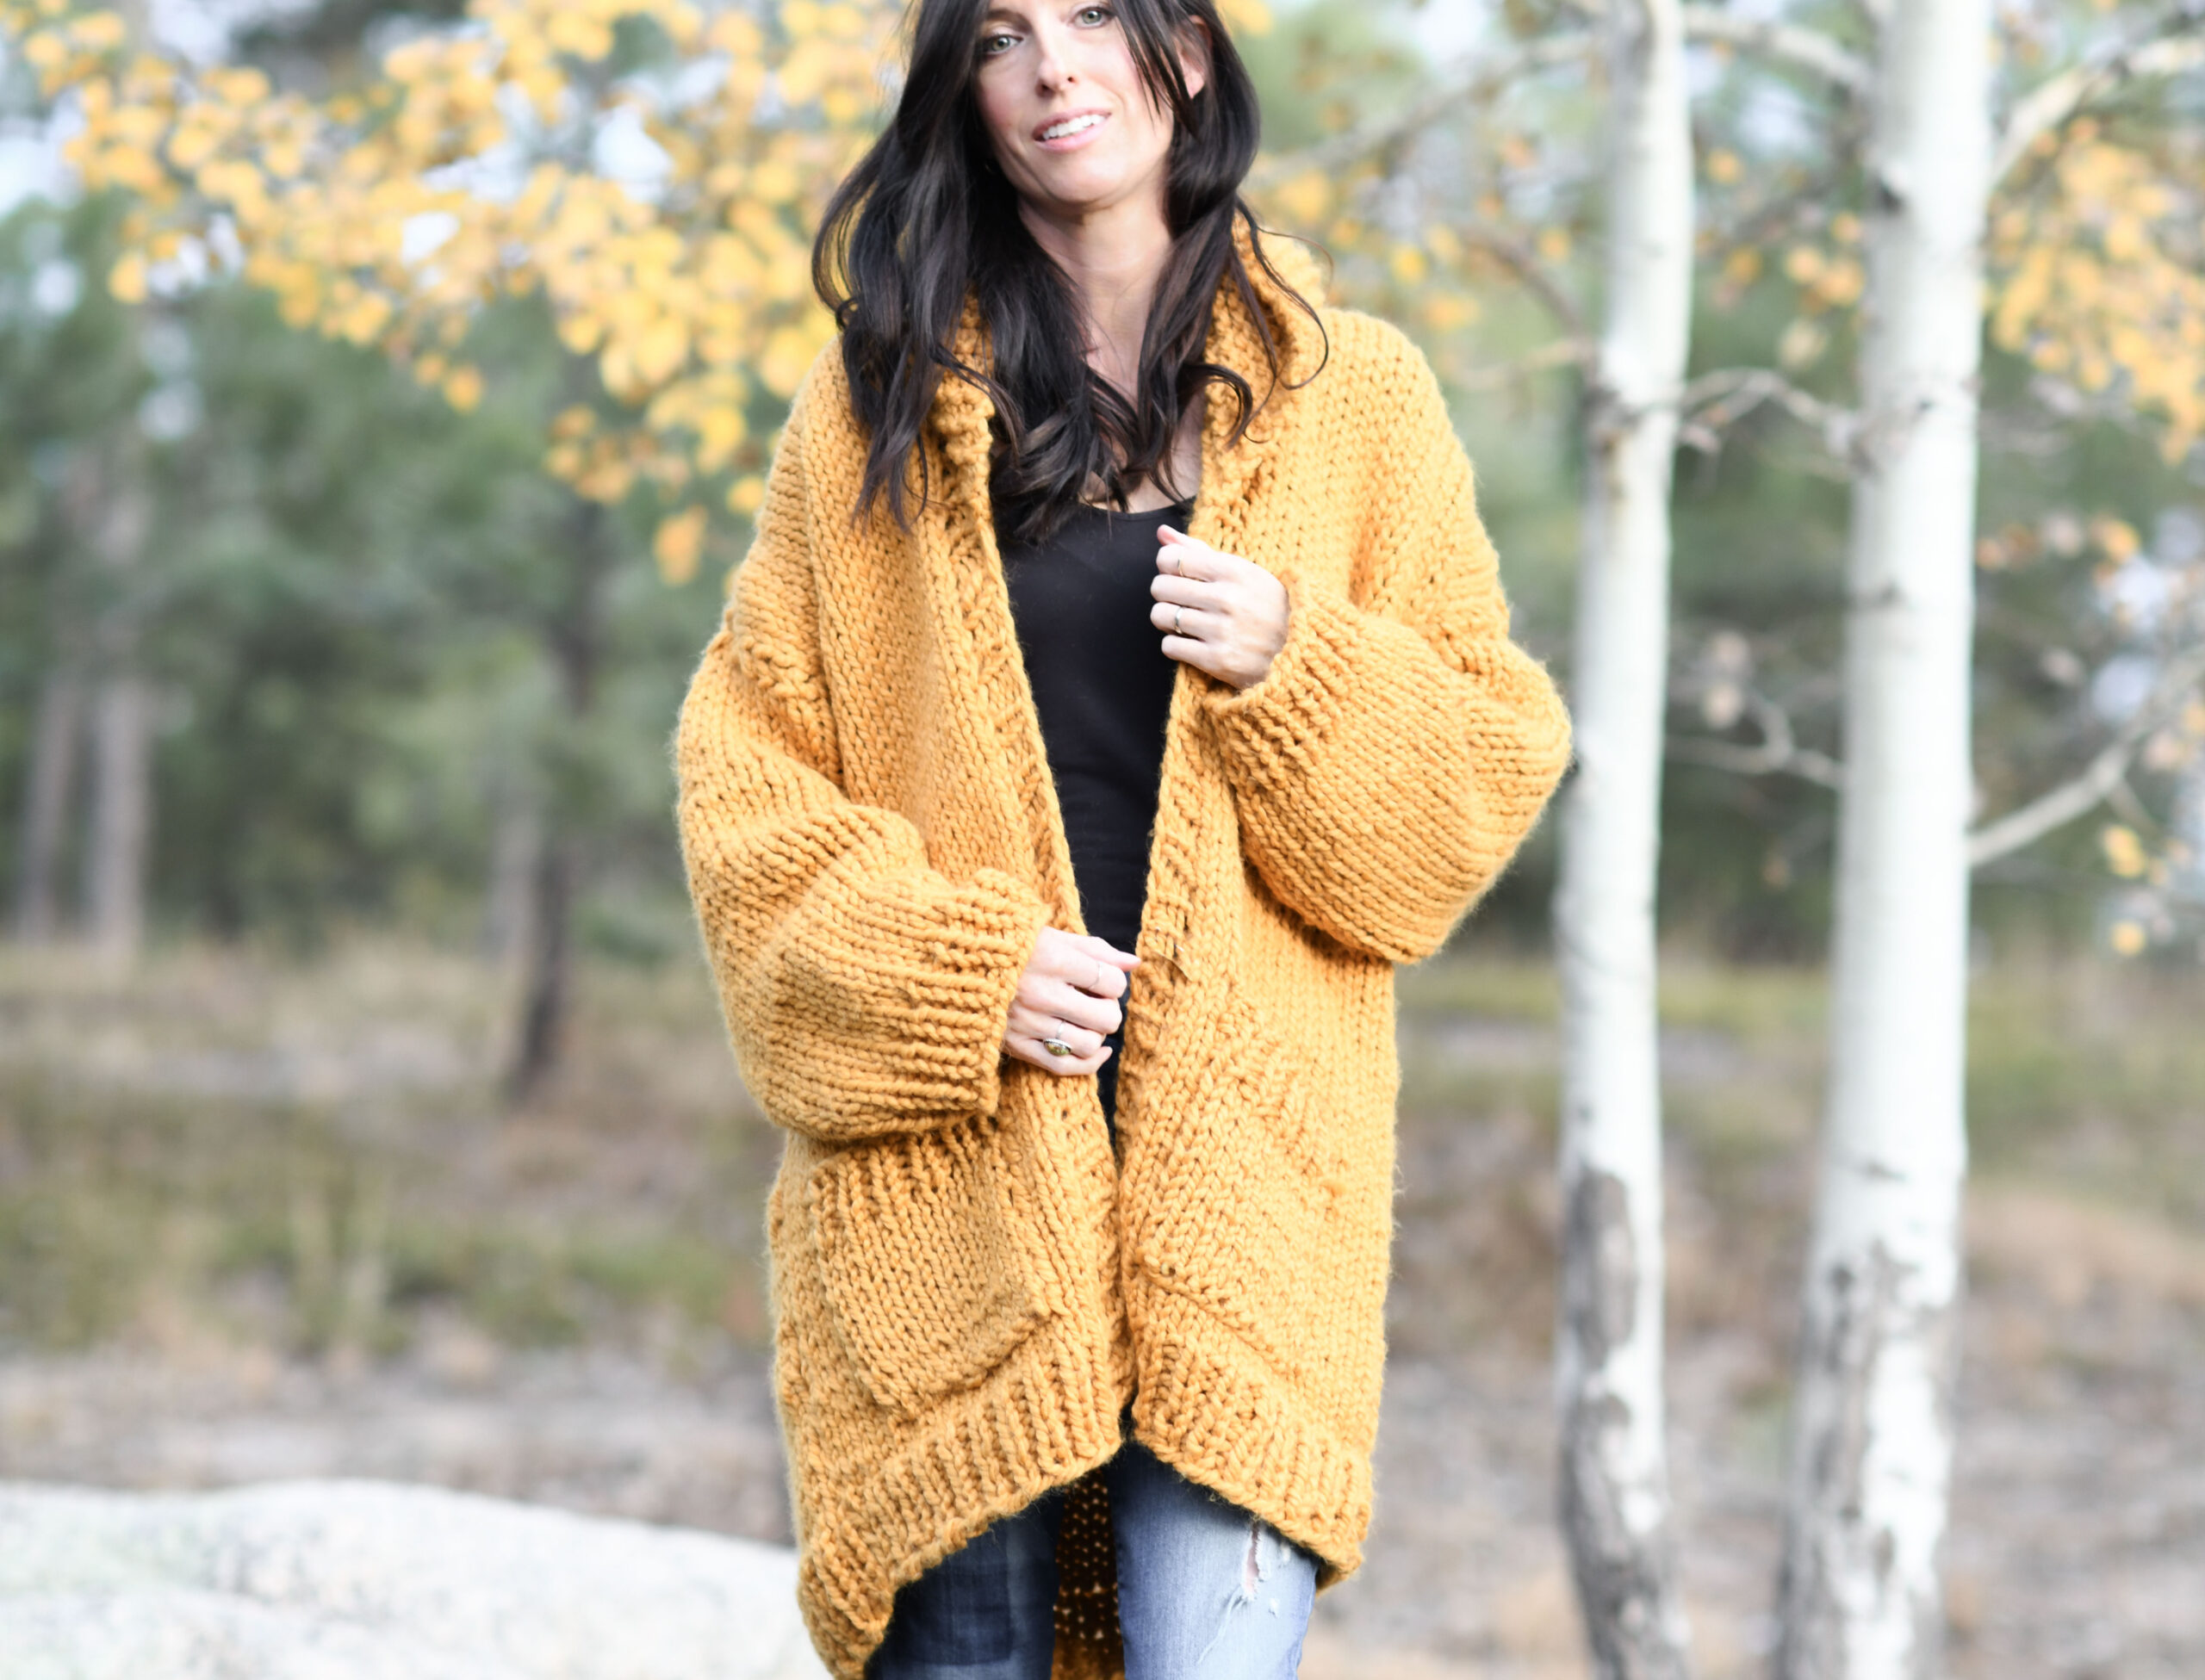
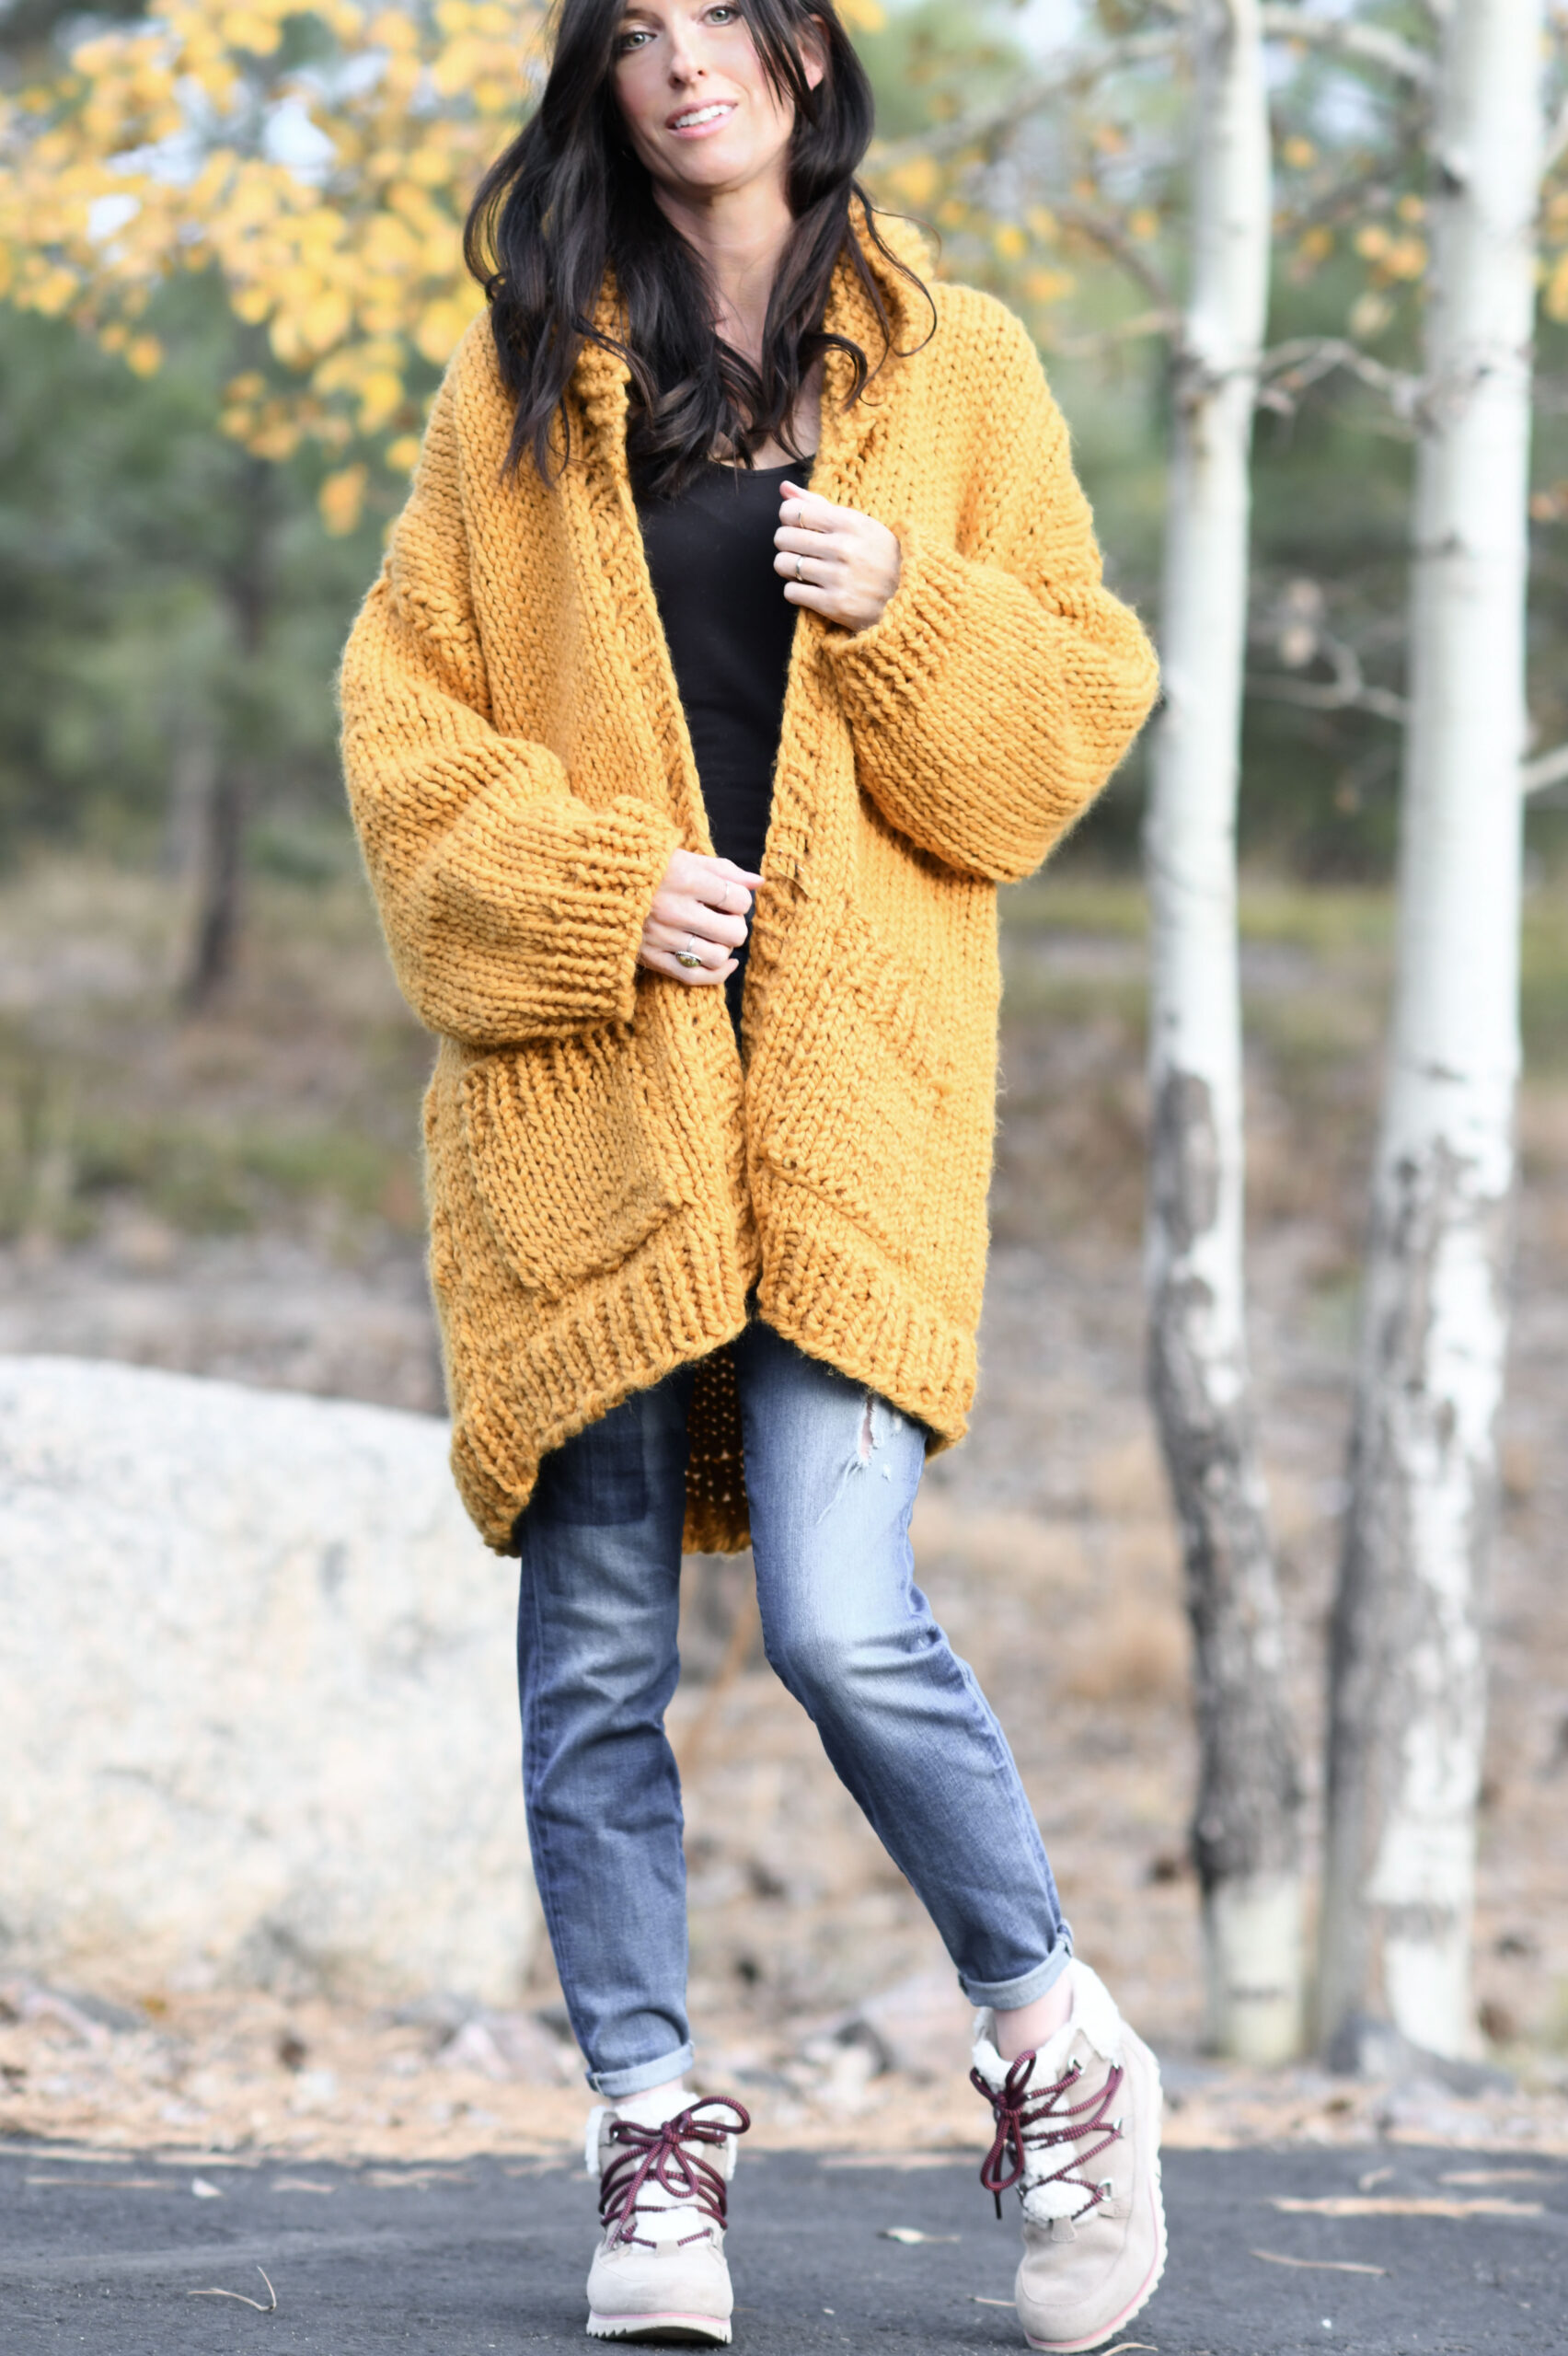
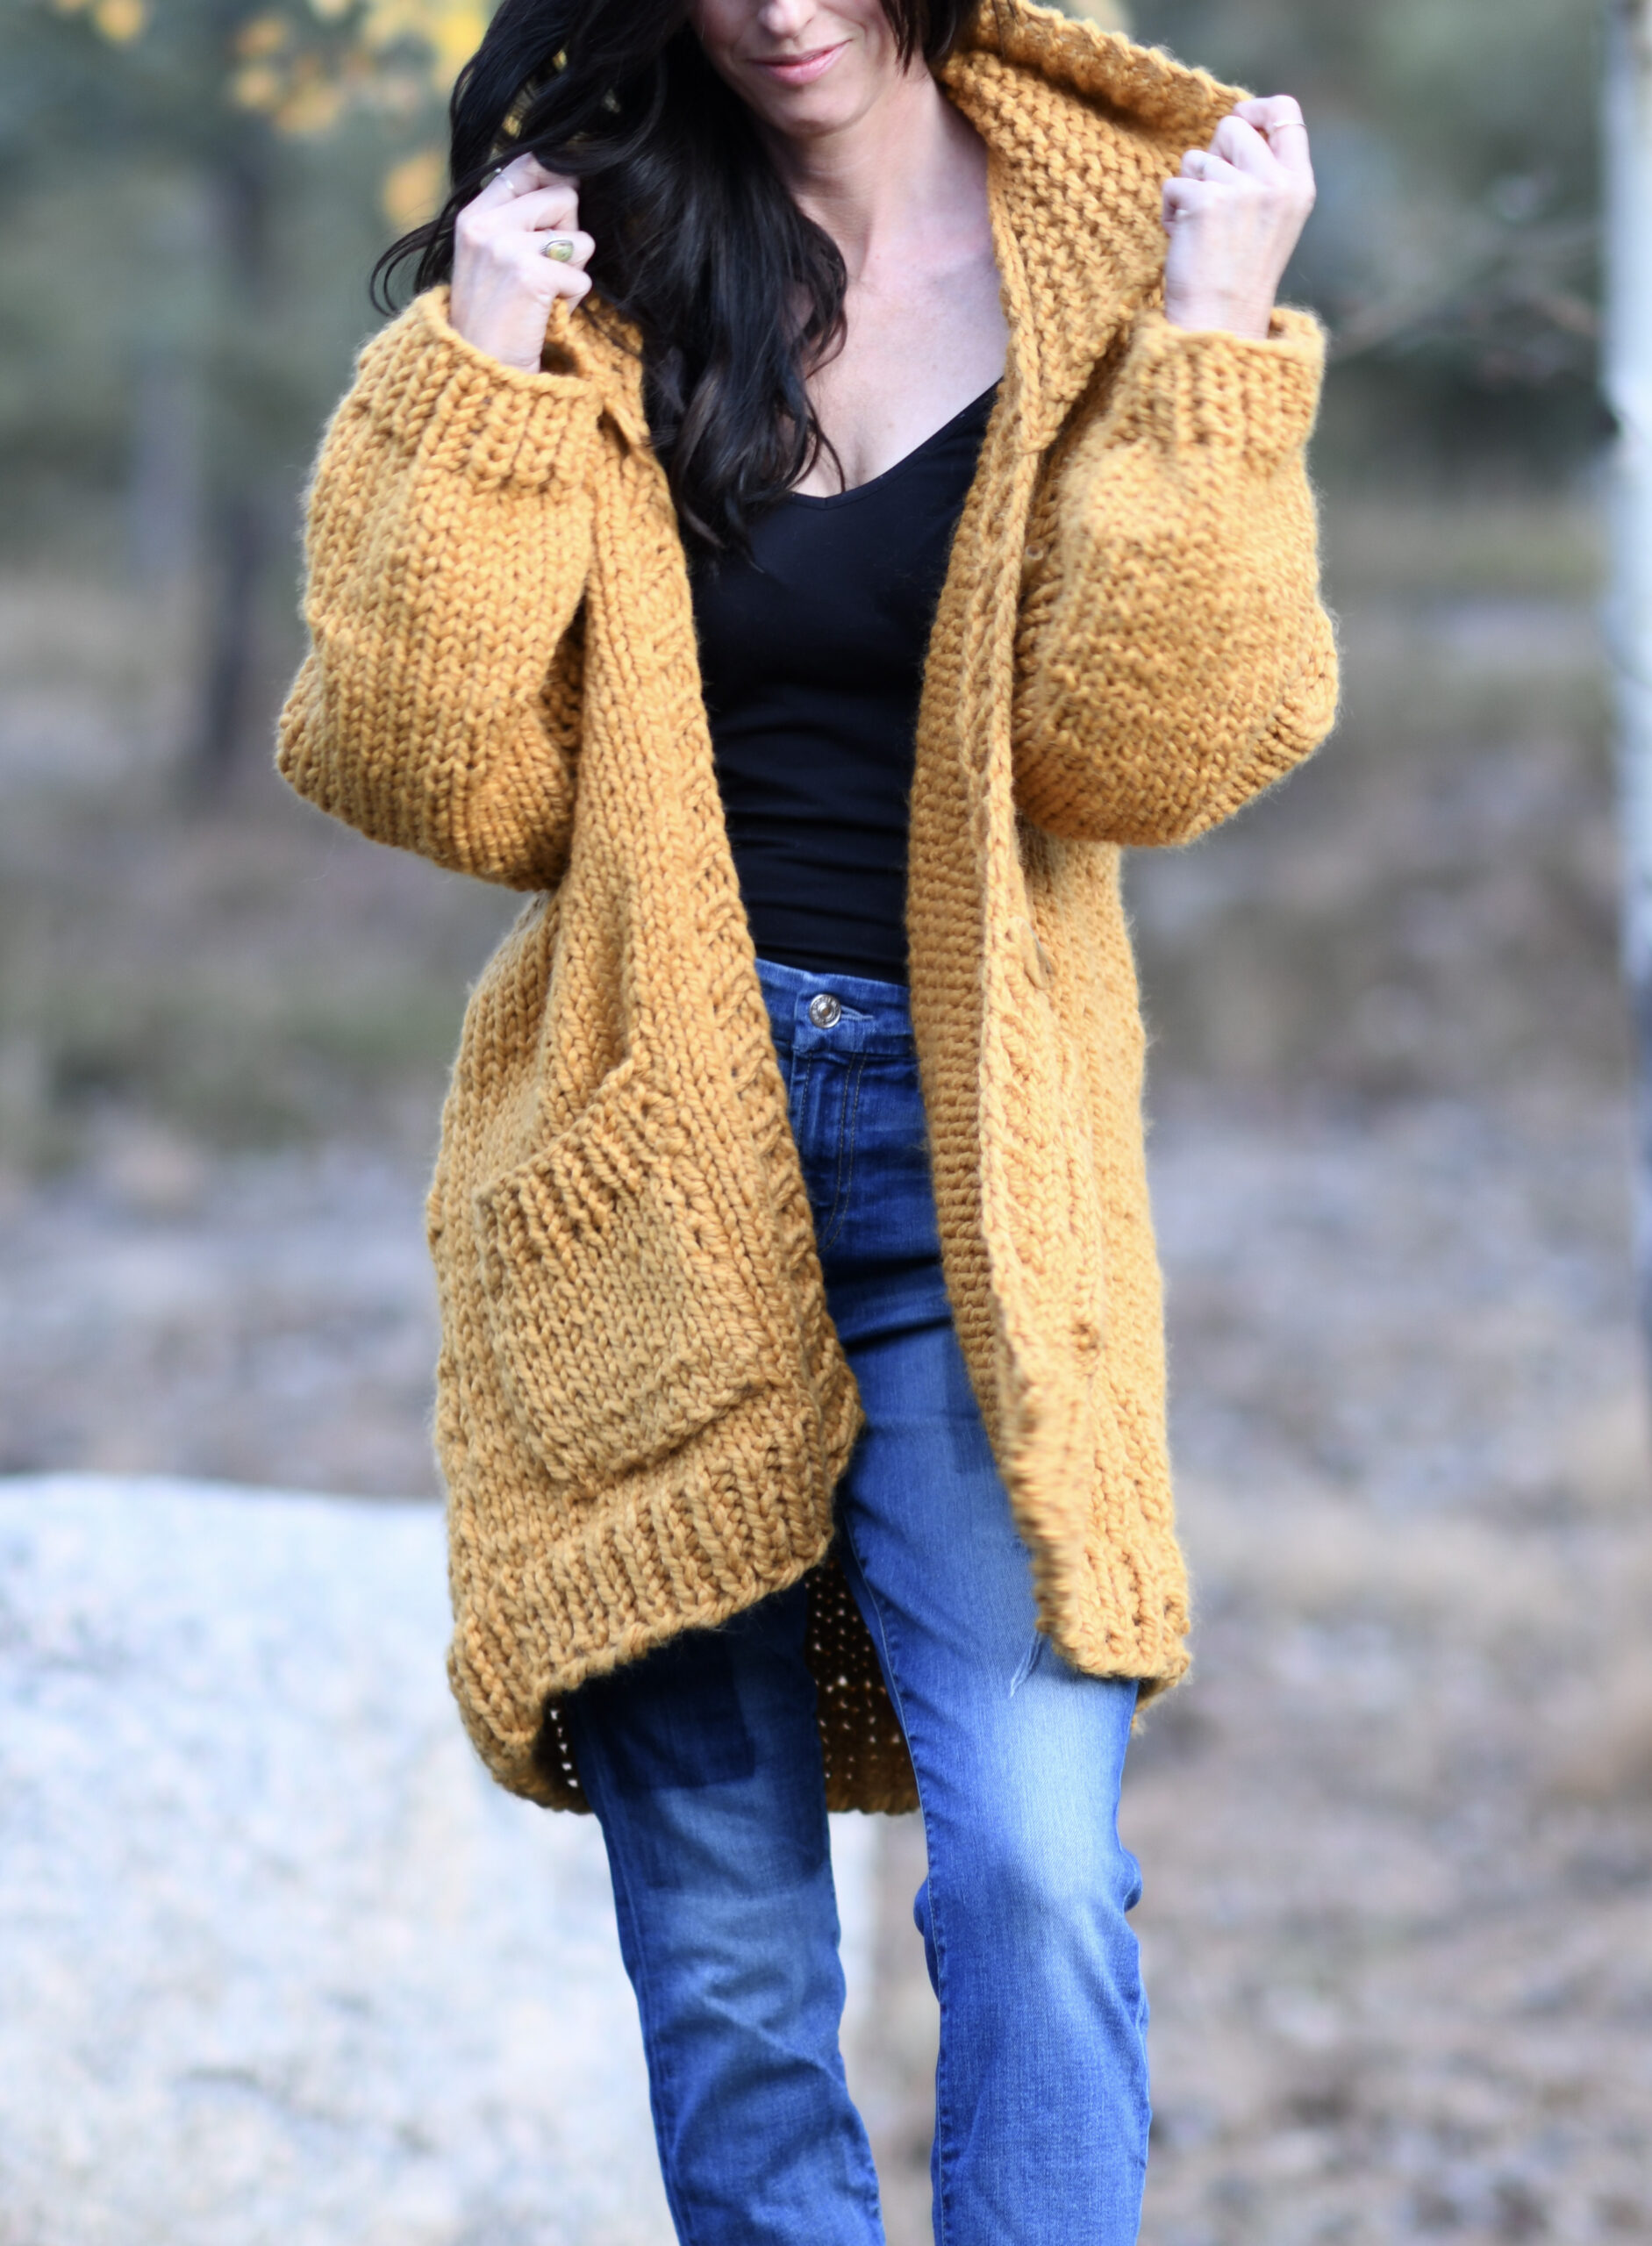
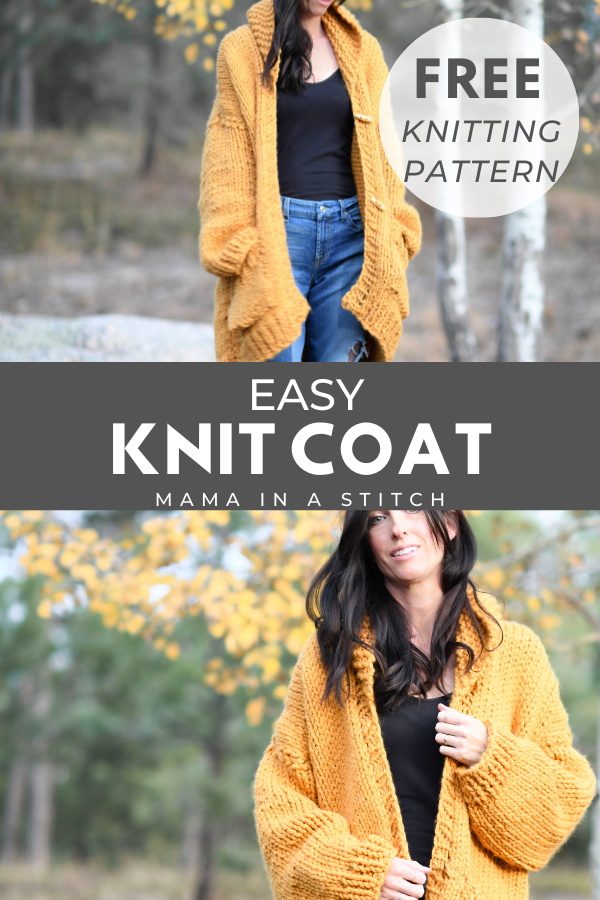
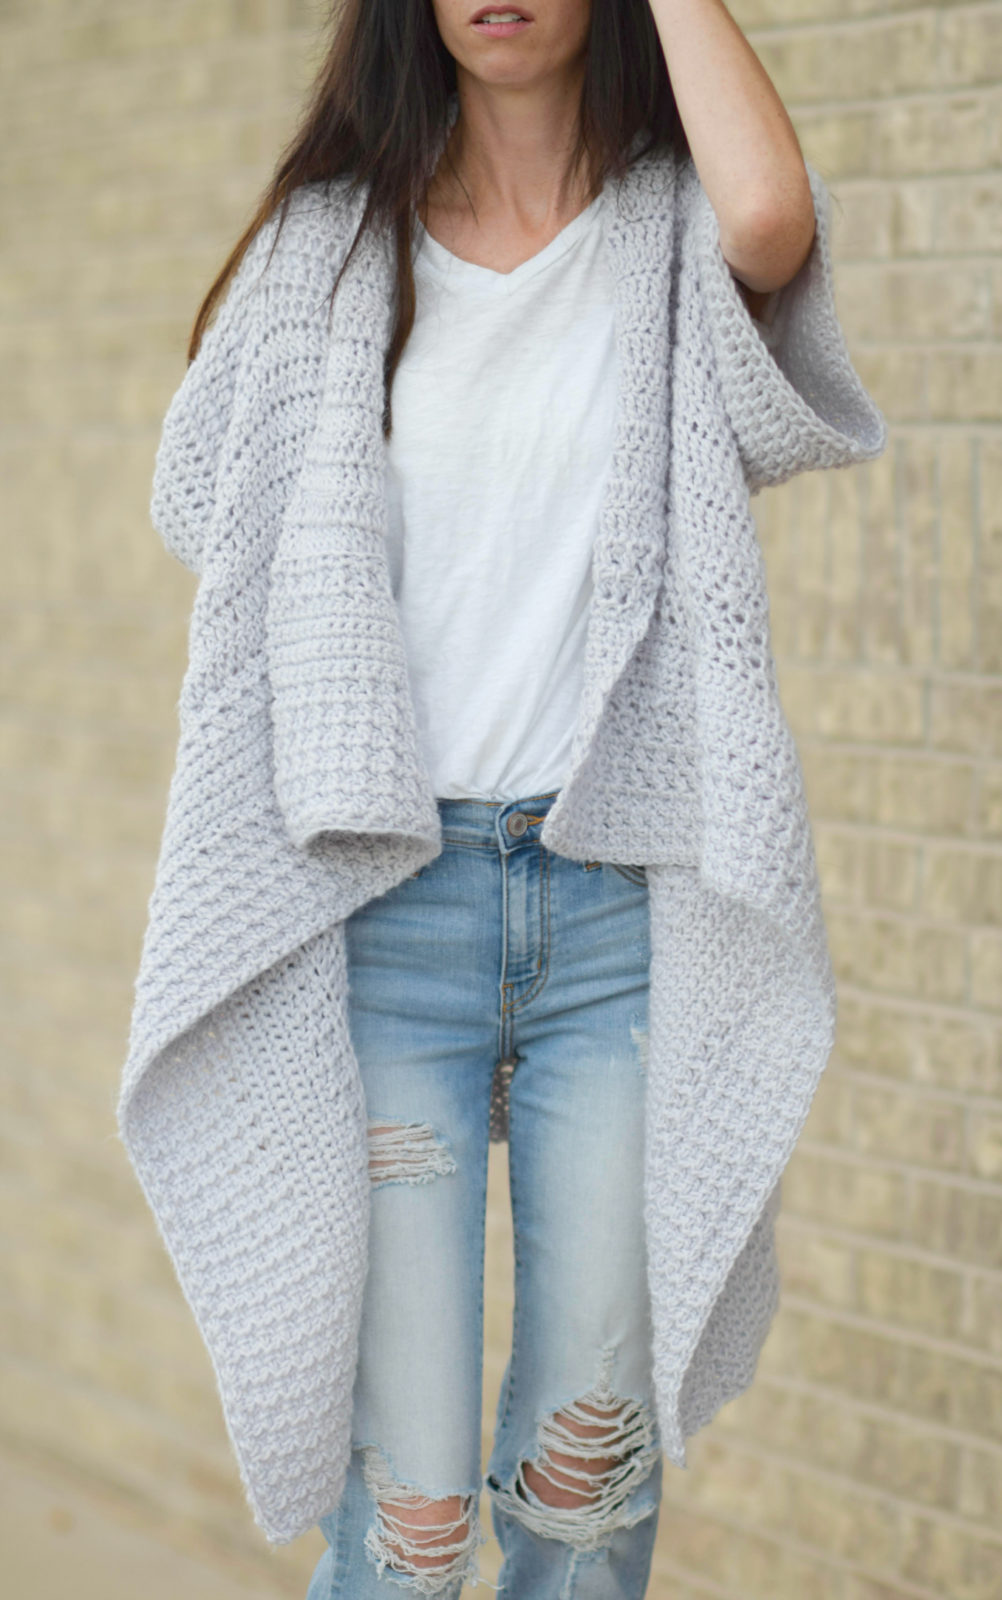
This “Big Knit Coat Cardigan” pattern is super simple, features an oversized fit, and is so warm! It’s easy enough for new knitters, dare I say, even adventurous beginners. Read on to see how to knit this coat that doubles as a big cozy cardigan (and check out the buttons I added!).
And I just LOVE this color – what do you think?! You can see the free pattern below, or grab the printable pattern on Etsy HERE or the kit from Lion Brand HERE.
How Do You Knit This Coat Cardigan?
If you’ve followed me for a while, there will be no surprises with how this sweater is made. 🙂
I love making sweaters that are knit flat because it makes it simple enough for most knitters, including beginners to make. This coat is no exception as it is knit flat, in rectangular panels, and seamed to finish. Easy easy!
You will start off by making three rectangular panels, two for the front, and one for the back. So yes, if you can make a scarf, you can tackle this coat. Next, you can knit the sleeves, which are also rectangles with just a touch of shaping. You will also knit basic rectangles for the two, optional pockets.
If you’re comfortable with knitting and purling, as well as ribbing, you are set to make this one! The one thing that folks do tend to need to learn if they are new knitters is how to pick up stitches. The collar section is worked by picking up stitches and knitting once the coat is assembled.
Can I Knit this Coat Sweater with Straight Needles?
Technically yes, but realistically probably not. Each piece of this coat is worked flat, so straight needles would work IF you can fit all of the stitches on your straight needles.
It may be possible with the smaller sizes, as the back panel is the widest, and I actually fit all of the stitches on my straight needles for the back panel. HOWEVER, when you pick up stitches along the neckline and collar, it’s a lot of stitches, and you may have trouble fitting them all on the needles. This is why I call for circular needles in the materials section. Circulars are longer, and therefore fit the stitches more comfortably. But you aren’t knitting in the round!
This is a video I found (HERE) that you might find helpful if you’ve never picked up stitches.
And if you’re looking at this and wanting to make it, but haven’t yet learned to knit, head over to my video tutorial here to get started on knitting. Once you get the basics down, come on back here to this pattern. It’s so much fun!
How Do I Add the Button Holes to My Knit Coat?
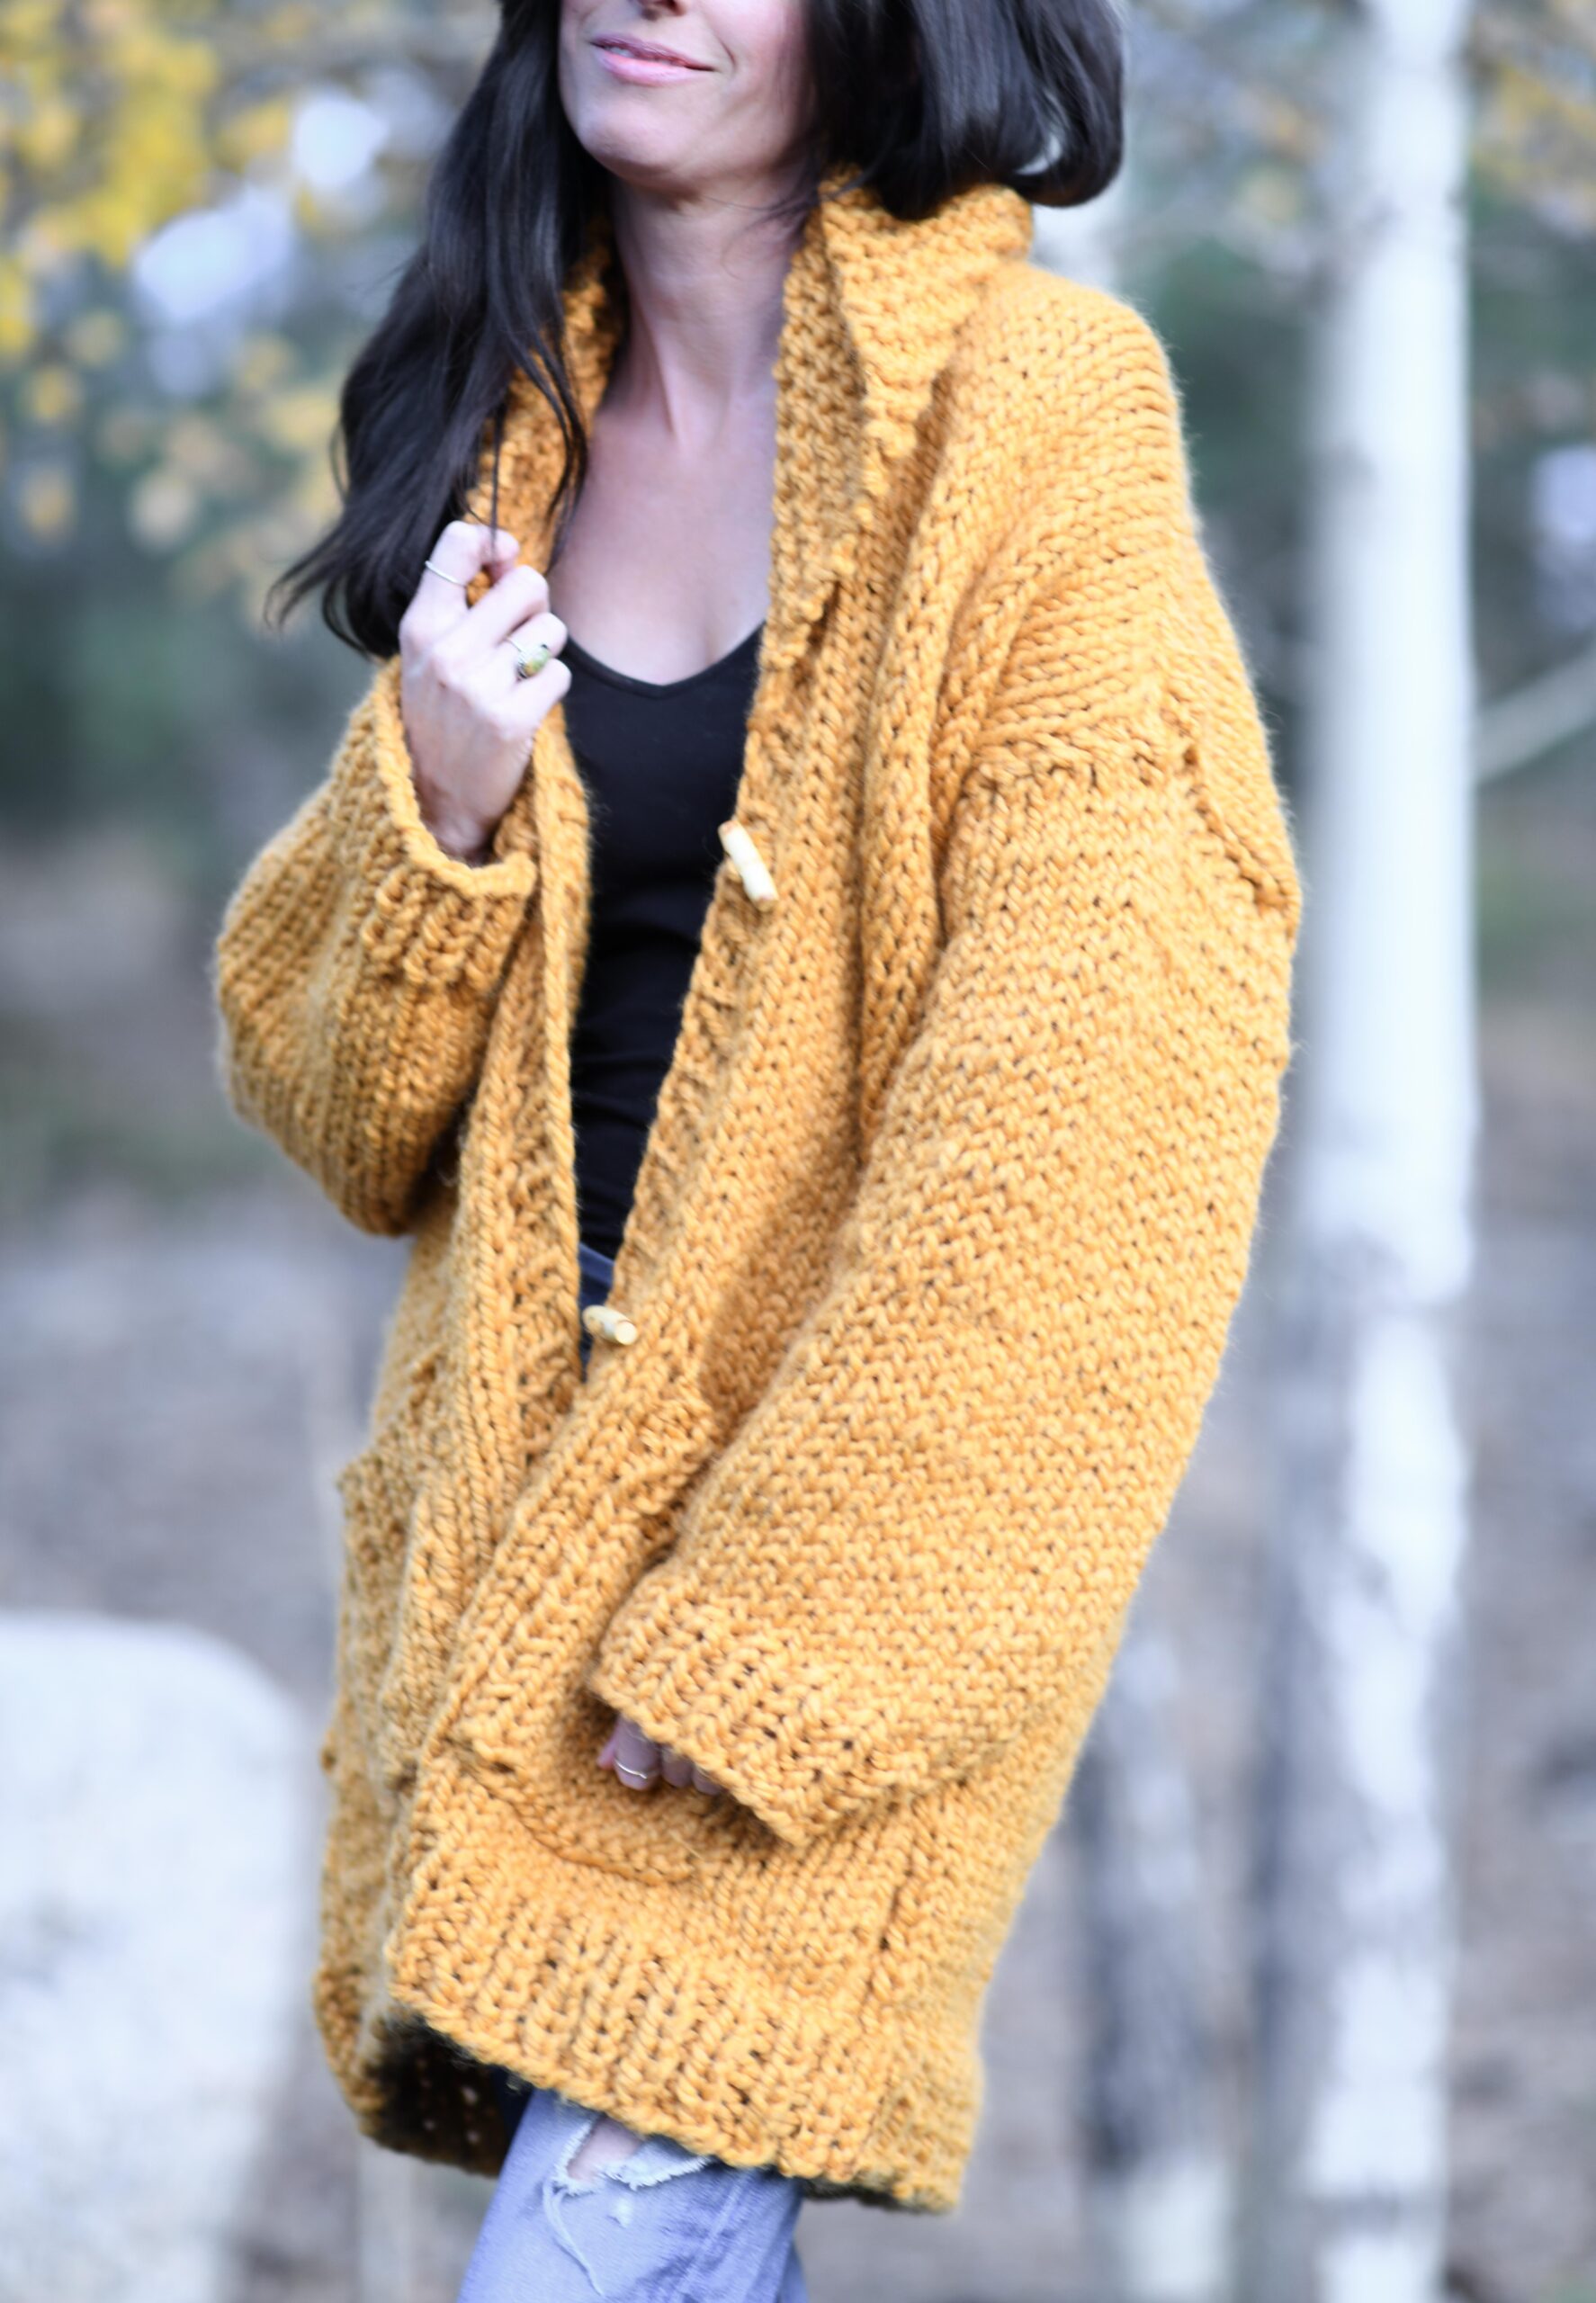
No worries!! The stitches are large enough that you don’t need to add any holes. Just place the toggle buttons anywhere you’d like, and button them to the fabric! Just pull the toggles through any of the stitches or in between the stitches. Easy right?!
What Yarns can I use for this Knit Coat?
This coat calls for a super bulky, #6 yarn. I used Lion Brand Wool Ease Thick & Quick which really is my go-to super bulky yarn. I love it because it makes projects quick. I also just really like the look of chunky knits, and this yarn has a high quality look and feel for a good price. If you are allergic to wool, or prefer to use a different fiber, that’s totally fine too! You will just need to be sure to find a super bulky #6 that works for you. Lion Brand Hometown USA is a 100% acrylic that could be a sub as well.
Hopefully that gave you a good idea on how you can knit this coat sweater, so now let’s get to the free pattern!
Remember that you can buy the printable ad-free version from Etsy HERE
BIG KNIT COAT CARDIGAN FREE PATTERN
Description: Chunky, oversized, and oh-so-warm, this hooded coat cardigan is sure to keep
you cozy all season long. Whether you’re curling up on the couch with hot cocoa, or going
for a brisk walk, you’ll be warm and toasty in this statement knit piece. Add buttons for a
functional, on-trend touch (not included with the Lion Brand kit). Simple construction and
minimal shaping make this doable for many knitters!
Materials:
US Size 15, 10 mm 36” circular knitting needles & straight needles (optional)
8 (9, 10, 12, 13) Lion Brand Yarn Wool Ease Thick & Quick super bulky #6 yarn in
Mustard 170 g/skein and 106 yds/skein Kit available HERE
Pattern uses approximately 1280 g (1475 g, 1684 g, 1906 g, 2140 g)
Scissors
Tapestry Needle
Measuring Tape
Gauge: Approximately 7 ¾ stitches and 11 rows in 4” X 4” of stockinette stitch
Sizes: Small, Medium, Large, XL, 2XL
Please follow the key throughout the pattern according to the size you are knitting:
S (M, L, XL, 2XL)
Note: There is a lot of positive ease. Model is wearing a size small, is 5’5” and has a 32”
bust. Fabric is also loose and stretchy. Length can easily be customized by knitting more
or fewer rows on each panel. Width can be customized by casting on more or fewer
stitches for each panel. Keep yarn needs in mind if customizing the size.
Bust Circumference (approximate):
S – 47”
M –51”
L – 55”
XL –59”
2XL – 6
Length (approximate):
S – 32”
M – 34”
L – 36”
XL – 38”
2XL – 40”
Sleeve Length:
S – 17”
M – 17”
L – 17.5”
XL – 18”
2XL – 18”
Sleeve Width when seamed (approximate width at widest point):
S – 8”
M – 8.5”
L – 9”
XL – 9.5”
2XL – 10”
Abbreviations & Skills:
k – knit
p – purl
st – stitch
sts – stitches
k2tog – knit two together decrease
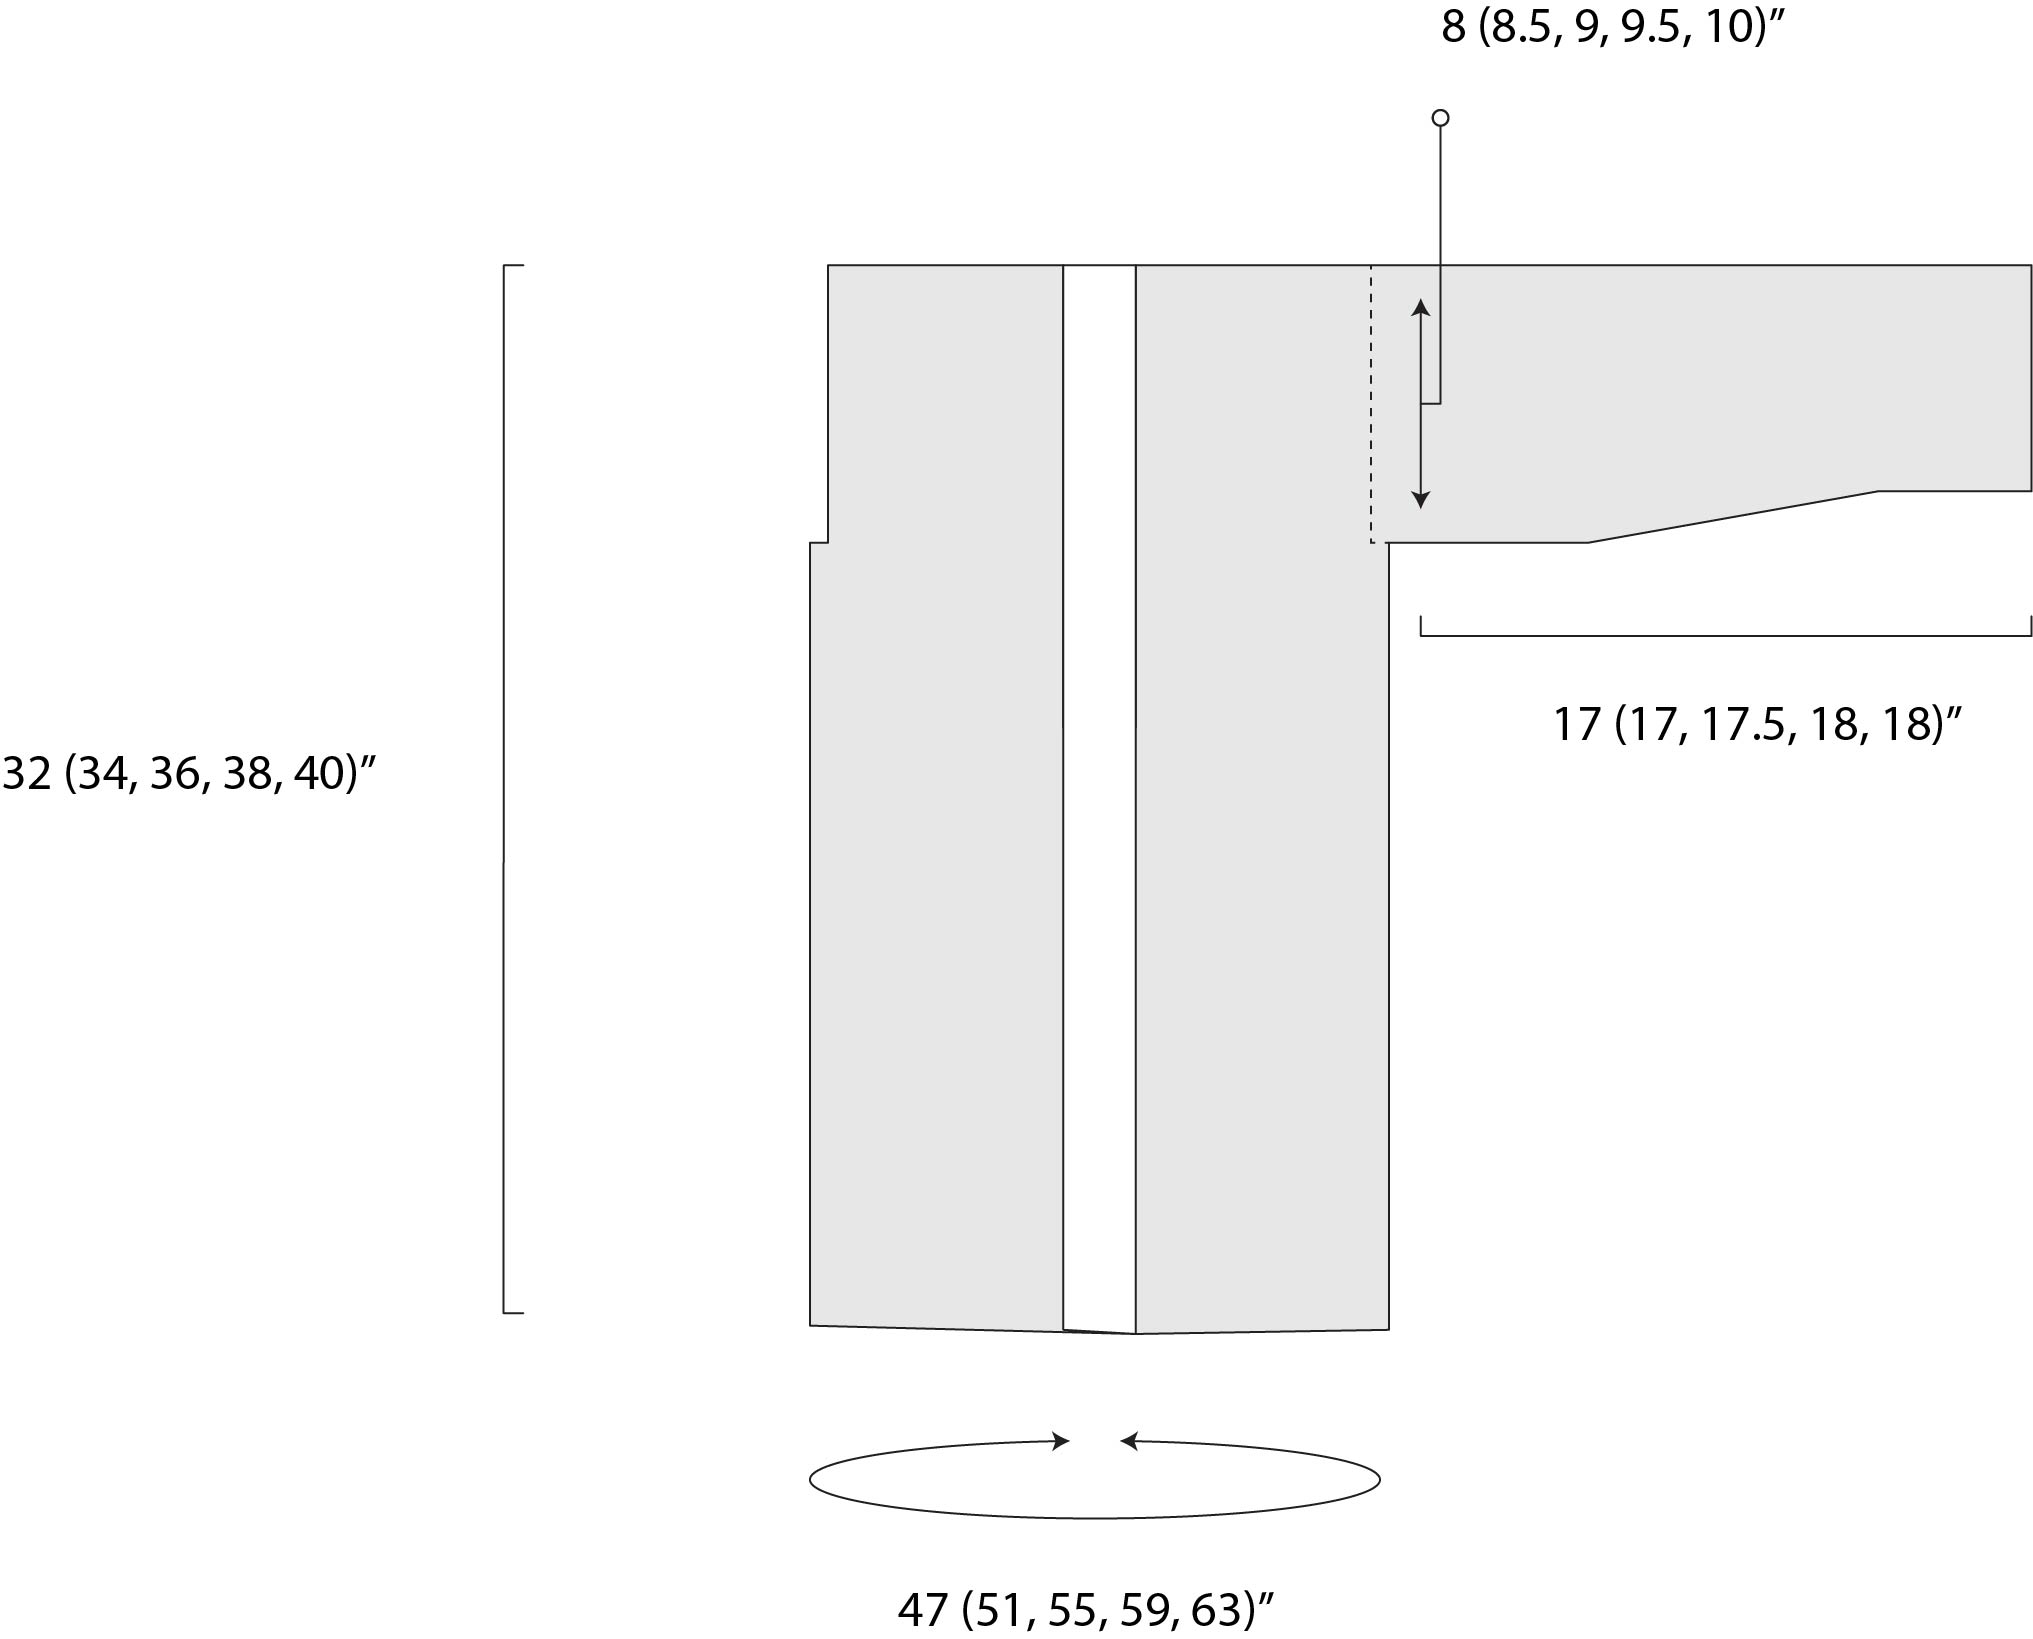
Pattern Notes: This coat is knit flat by making one rectangular panel for the back and two rectangular panels for the front (see schematic). Sleeves and pockets are also knit flat. The panels are seamed together to finish. If you’re experienced, you can certainly modify the pattern to knit the sleeves in the round and avoid seaming. The collar is knit by picking up stitches and knitting a 1X1 rib pattern. Consider blocking panels and sleeves to shape and size. The pattern calls for circular needles even while it is knit flat. The circular needles are necessary to comfortably hold all of the stitches. When working the collar section, you may pick up stitches halfway up each side and seam the two halves together at the back of the neck. Enjoy!
Knit Coat Cardigan Pattern
Back Panel (make 1)
*stitch count remains the same throughout the pattern
Cast on 50 (54, 58, 62, 66)
1×1 Ribbing Pattern
Row 1 *K1, p1; repeat from * across the row.
Rows 2 – 7 Repeat row 1.
Stockinette Stitch Section
Row 8 Knit each st across the row.
Row 9 Purl each st across the row.
Repeat rows 8 – 9, working stockinette stitch until entire piece measures approximately 32”(34”, 36”, 38”, 40”) then continue as indicated below.
Cast off and weave in ends.
Front Panel (make 2)
Cast on 22 (24, 26, 28, 30)
*stitch count remains the same throughout the pattern
1 x 1 Ribbing Pattern
Row 1 *K1, p1; repeat from * across the row.
Rows 2 – 7 Repeat row 1.
Stockinette Stitch Pattern
Row 8 Knit each st across the row.
Row 9 Purl each st across the row.
Repeat rows 8 – 9 until piece measures approximately 32”(34”, 36”, 38”, 40”).
The back panel and front panels should be the same length.
Cast off and weave in ends.
Sleeves (make 2)
Cast on 32 (34, 36, 38, 40)
Row 1 Knit each st across the row.
Rows 2 Purl each st across the row.
Rows 3 – 8 Repeat rows 1 & 2, in that order, working stockinette stitch pattern until sleeve
measures approximately 14” long. Next, move onto the Decrease Rows.
Decrease Rows
*each decrease row reduces stitch count by 2
Row 1 K2tog, k across to last 2 sts, k2tog.
Row 2 P2tog, p across to last 2 sts, p2tog.
Row 3 K2tog, k across to last 2 sts, k2tog.
Ribbing
Row 1 *K1, p1; repeat across.
Repeat row 1 until sleeve measures 17” (17”, 17.5, 18”, 18”) long (Tip: To double check
sleeve length, consider waiting to cast off until assembly. You can try on the partially
assembled cardigan and hold up the sleeve to check if the sleeve is as long as desired. Adjust length if wanted or needed.)
Pockets (make 2)
Cast on 14 (14, 14, 16, 16) sts (you’re knitting from the bottom up)
Row 1 Knit each st across the row.
Row 2 Purl each st across the row.
Repeat rows 1 & 2, working in stockinette stitch until piece measures approximately 4” long.
Finish by working 1 x 1 ribbing (k1,p1) until pocket is approximately 6” long.
Cast off and weave in ends.
Assembly
Place two front panels directly on top of back panel, aligning outer edges and leaving space
in the middle.
Using a simple whip stitch, sew the shoulders along the top on each side.
You may choose to sew sleeves onto cardigan before or after seaming the sleeves.
Seam sleeves using a whip stitch or your preferred method.
Seam up sides of the cardigan with a simple whip stitch.
Place pockets on the lower, center of each front panel, approximately 1” – 2” above the
bottom ribbing of the front panel. Sew with a whip stitch leaving the top of the pockets
open. The 1 x 1 rib stitch should be at the top of the pocket.
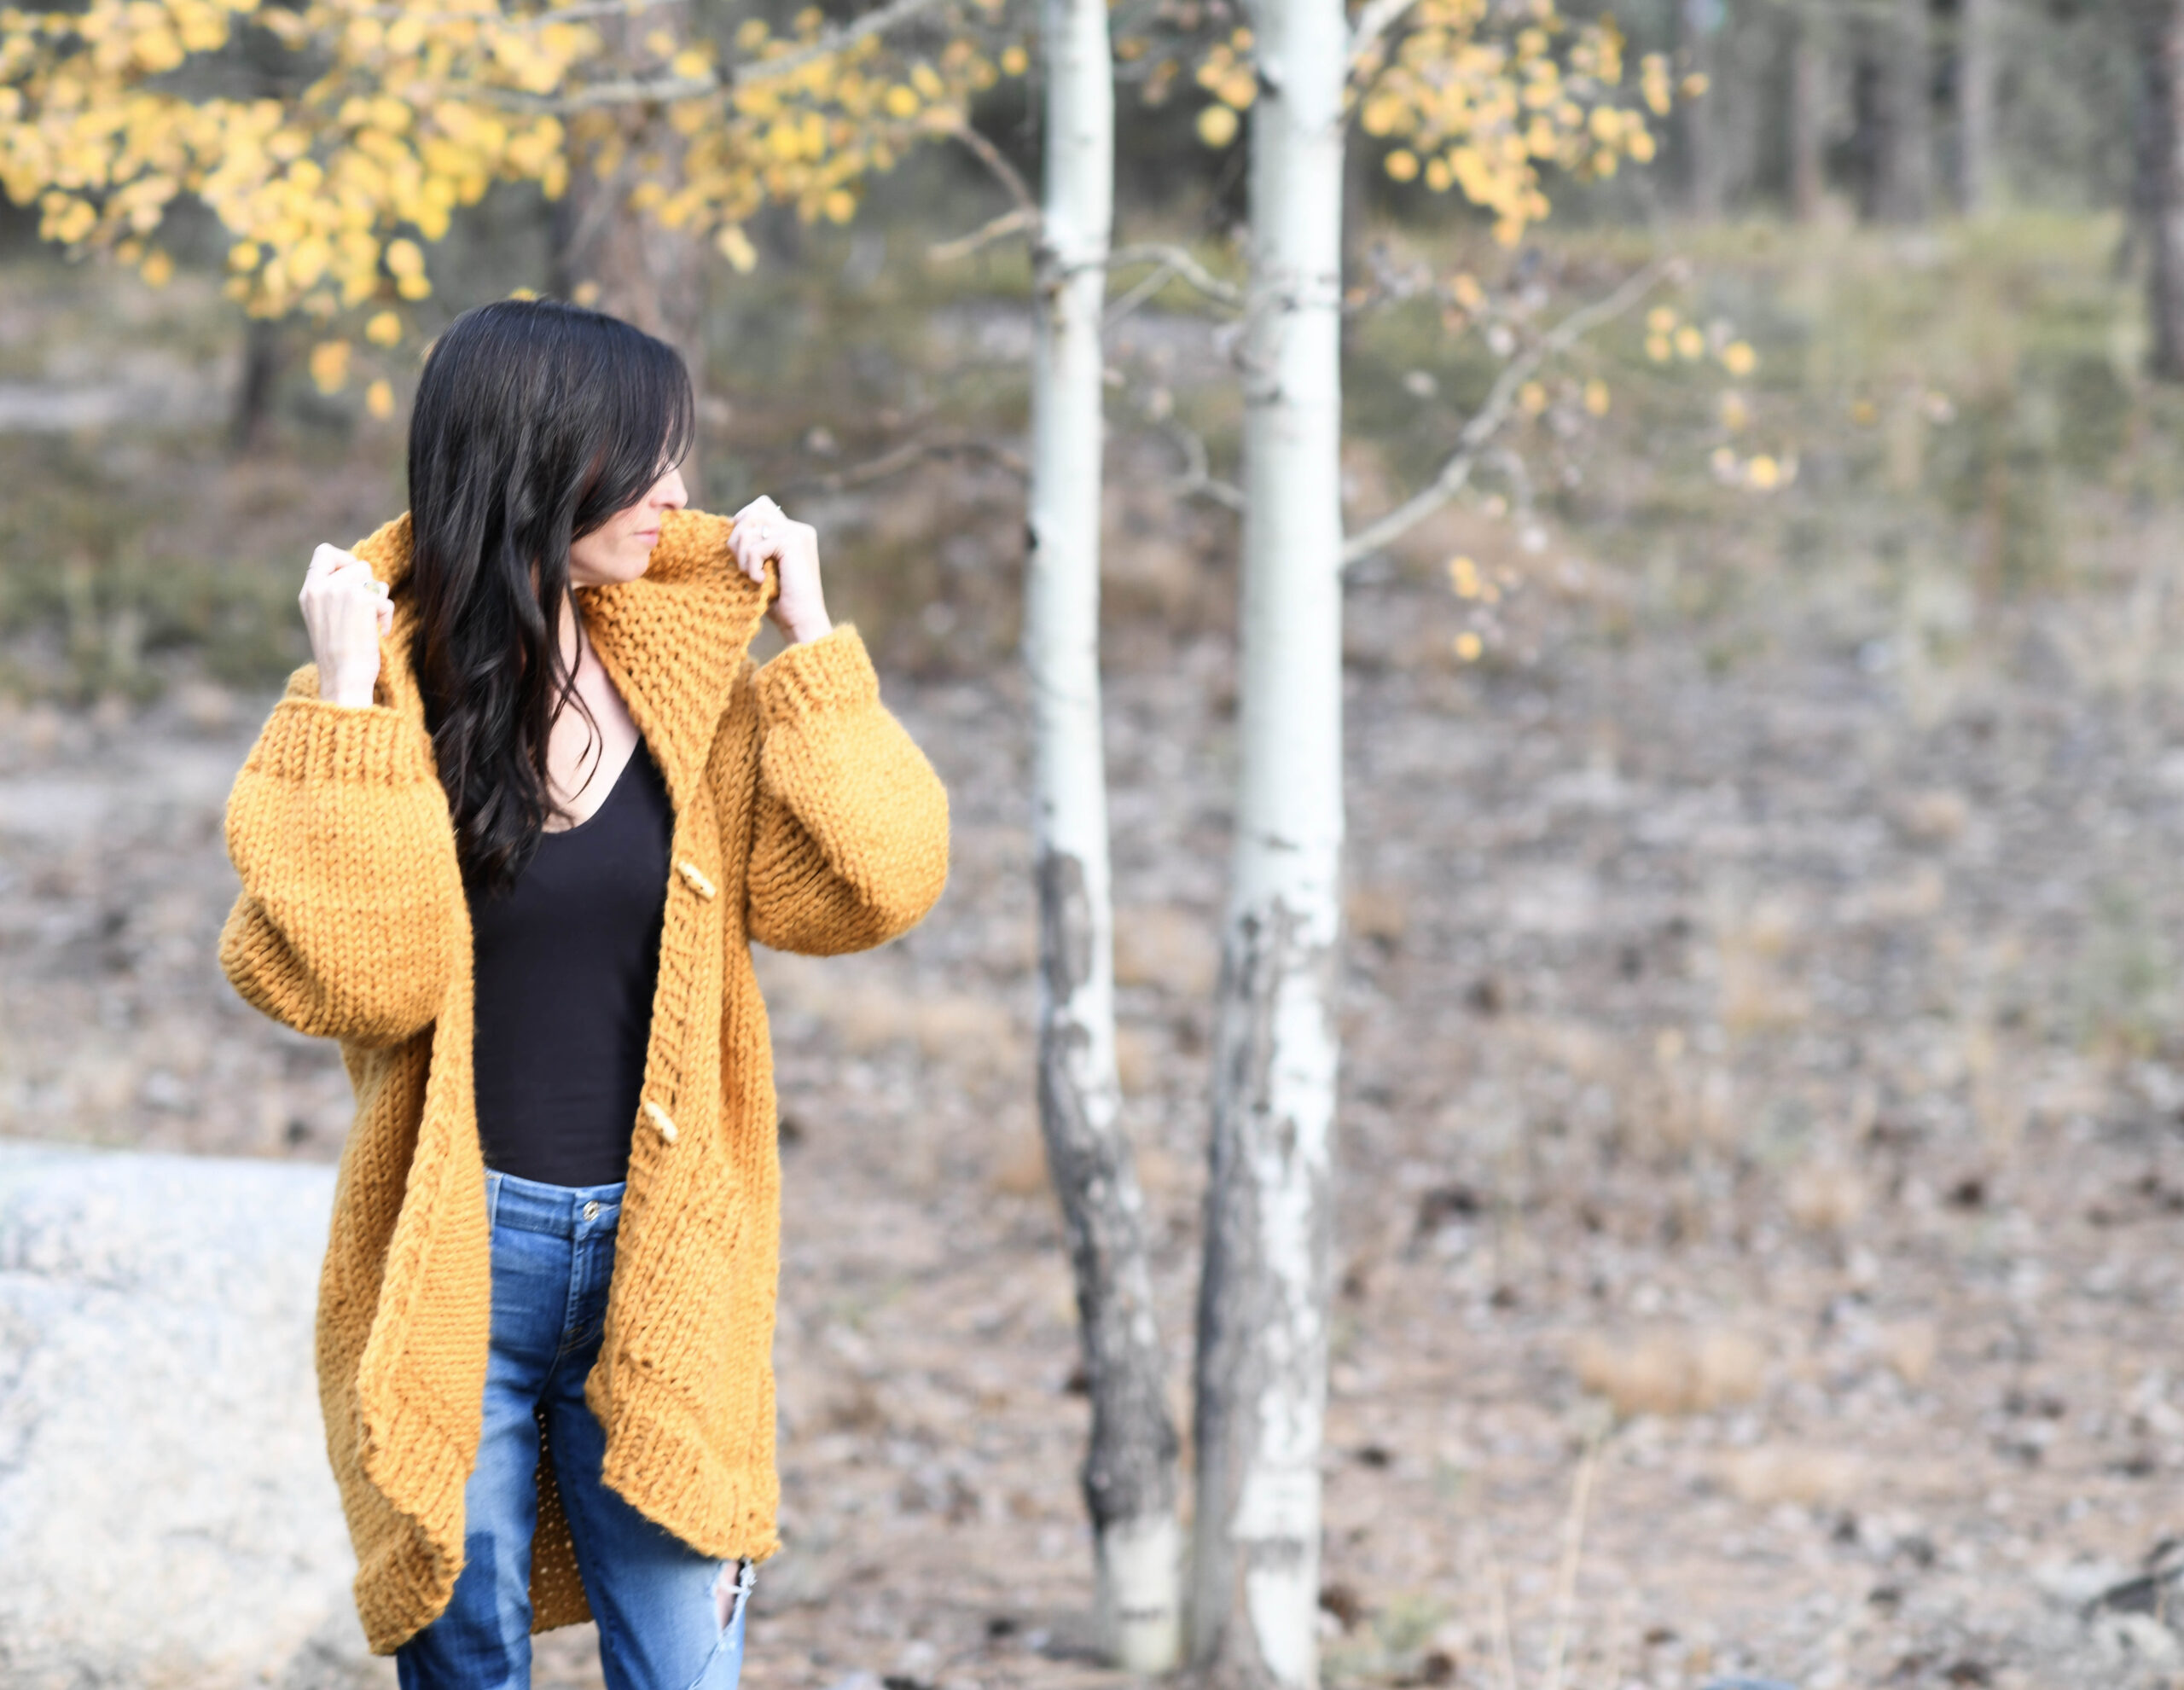
Collar – Neckline
Pick up stitches evenly along entire collar/neckline which extends from the bottom front of
the cardigan to the opposite side. See ribbing on photo if needed (pick up one stitch at each
row).
In order to comfortably fit all of the stitches on your circular needles, pick up stitches
halfway up the cardigan and work the pattern. Once done with that half of the collar, cast
off. Next, pick up stitches on the other half of the collar, work the pattern, and cast off. Seam
the collar together at the center back of the neck area.
Work a 1 X 1 rib stitch pattern until collar measures approximately, 2” wide or desired width.
Hood (optional)
Lay coat out evenly on a flat surface.
Measuring from the center back of the neck outward, place a marker 12” out on each side.
This will give you a centered length of 24” inches along the back of the neck and collar area.
Pick up stitches evenly along the 24” length.
Knit each row across until piece measures approximately 11” tall (all sizes).
Cast off and seam top of hood closed with a whip stitch seam and weave in ends.
Optional: Add 1 ½” to 2” toggle buttons (as many or few as you’d like) evenly along one side
of coat. No need to knit button holes as toggles will fit through the knit fabric!
Measurements/Schematic of Knit Coat Cardigan
And that’s all there is to this knit coat! Pretty simple, right?
If you’re looking for something a little less heavy, like more of a standard cardigan. Check out these knit cardigan options too:
I hope you enjoyed this one, my friends!
XO
Jessica
This post sponsored by Lion Brand Yarn all opinions are 100% my own.

you always have the best doable and cute patterns. Love the color,looks good on you!