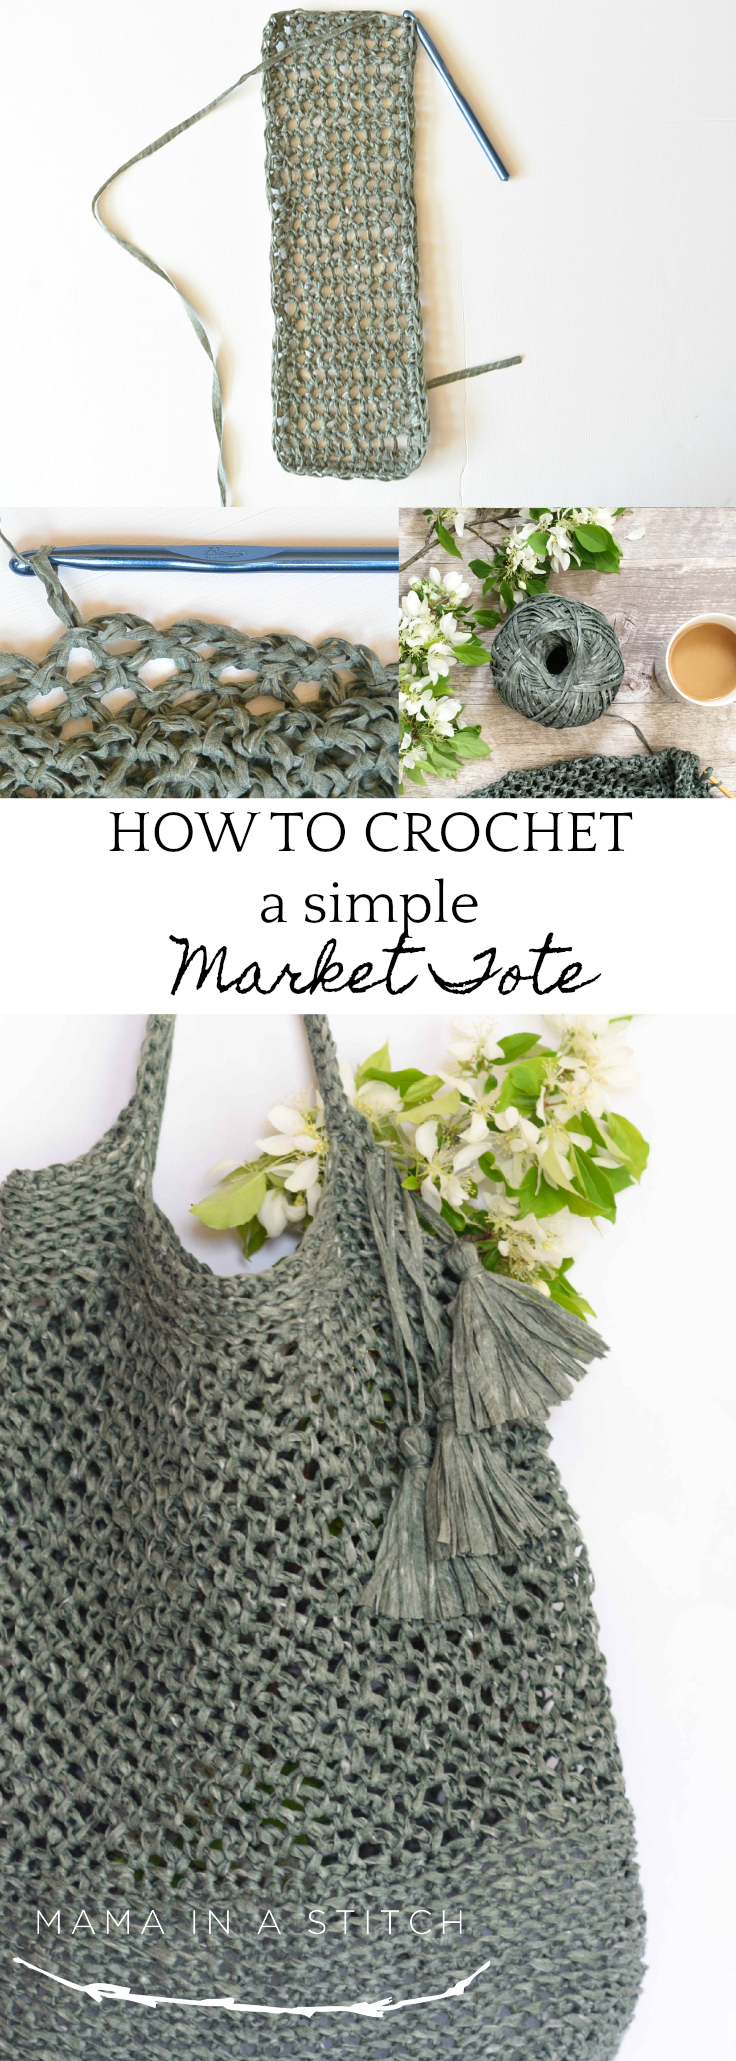
How To Crochet A Market Tote “Palmetto Tote Pattern”
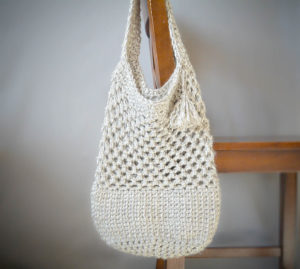
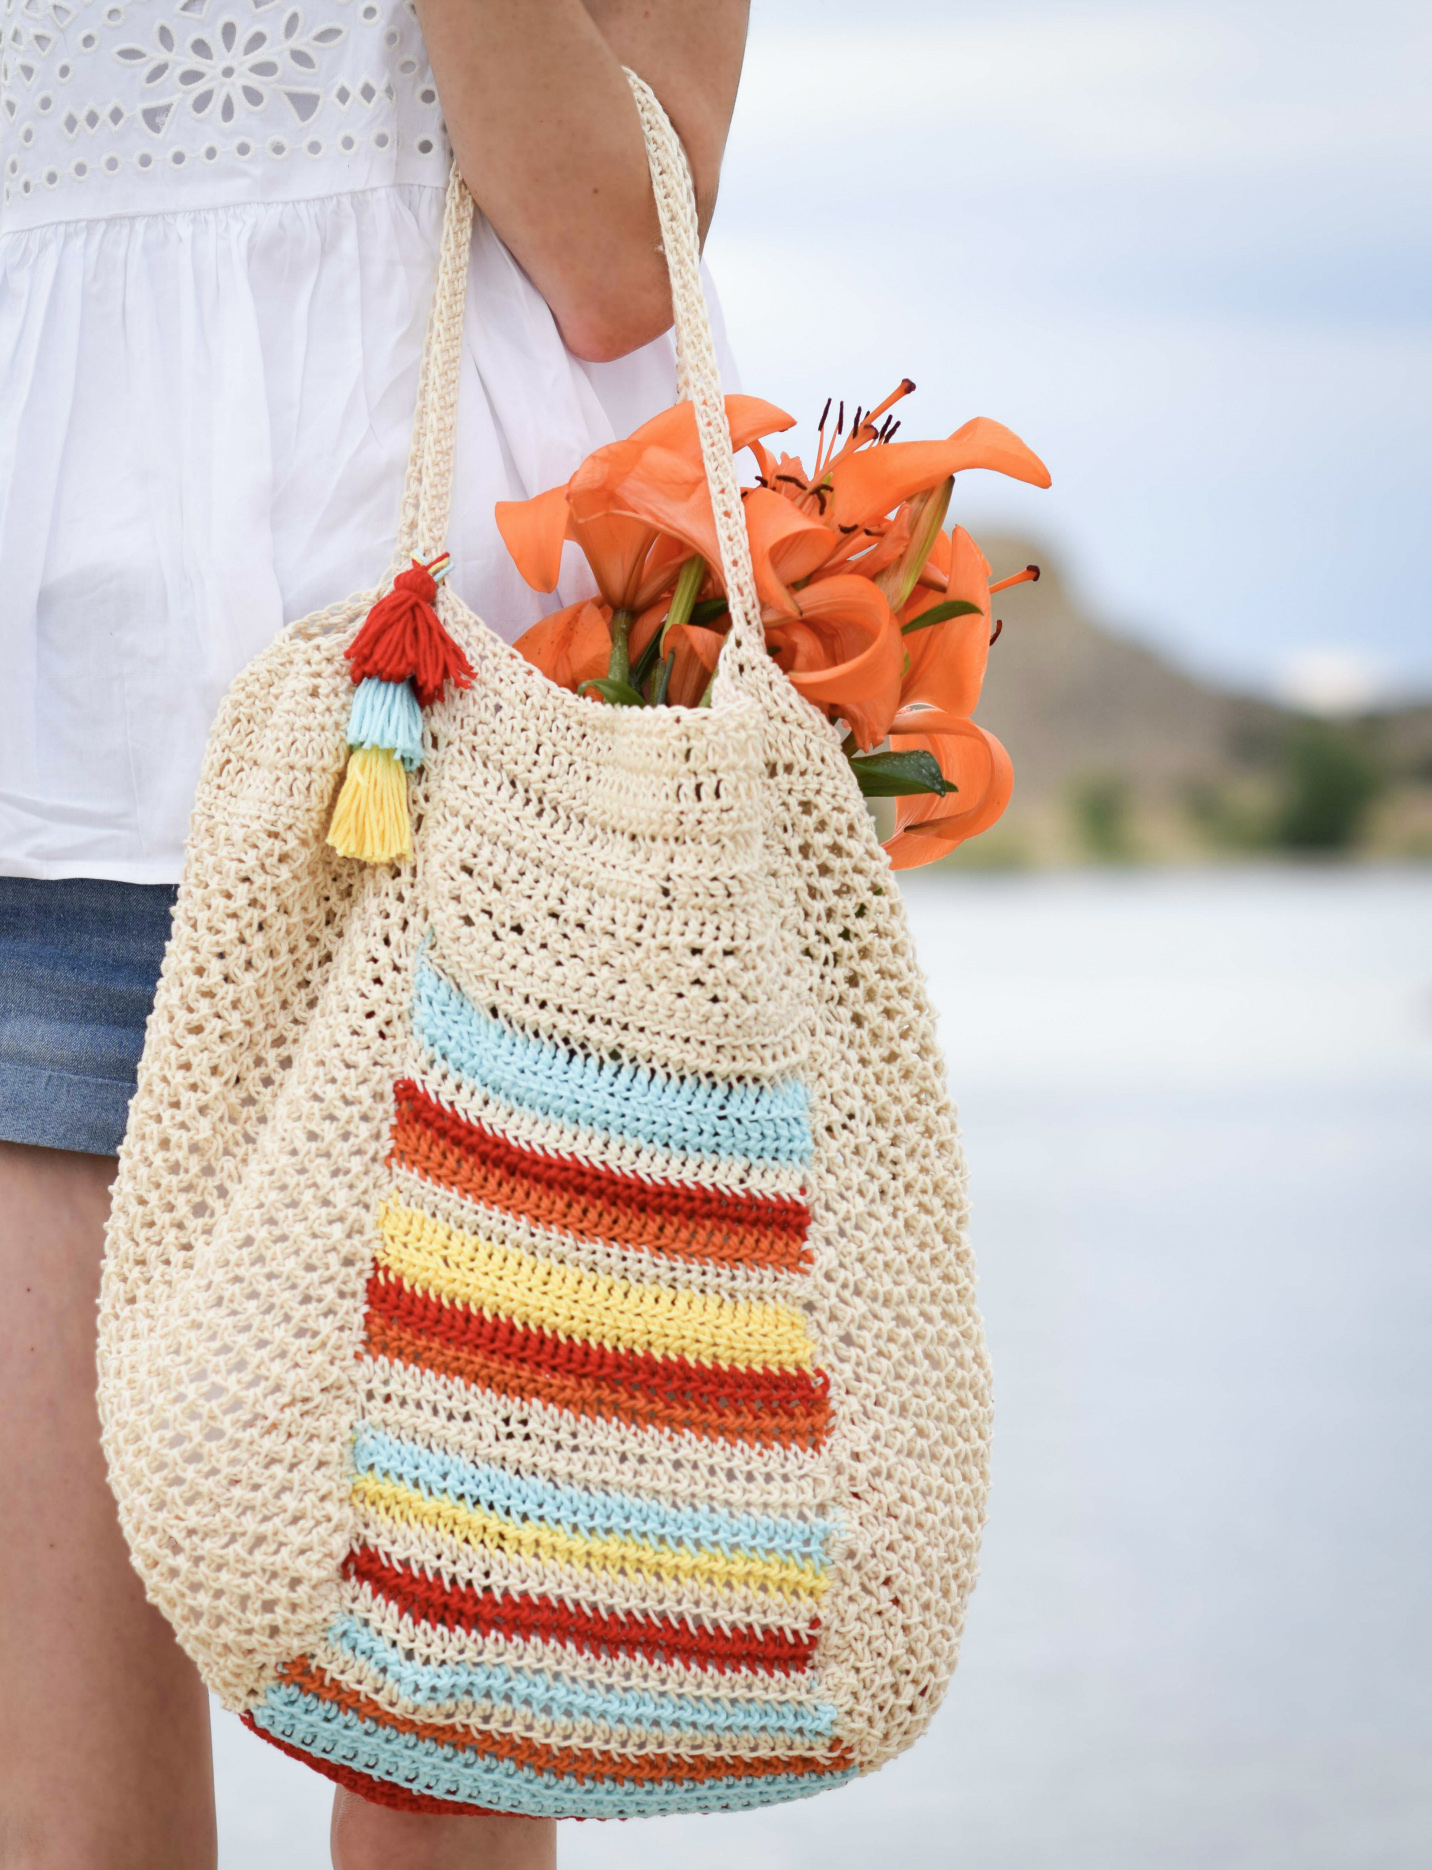
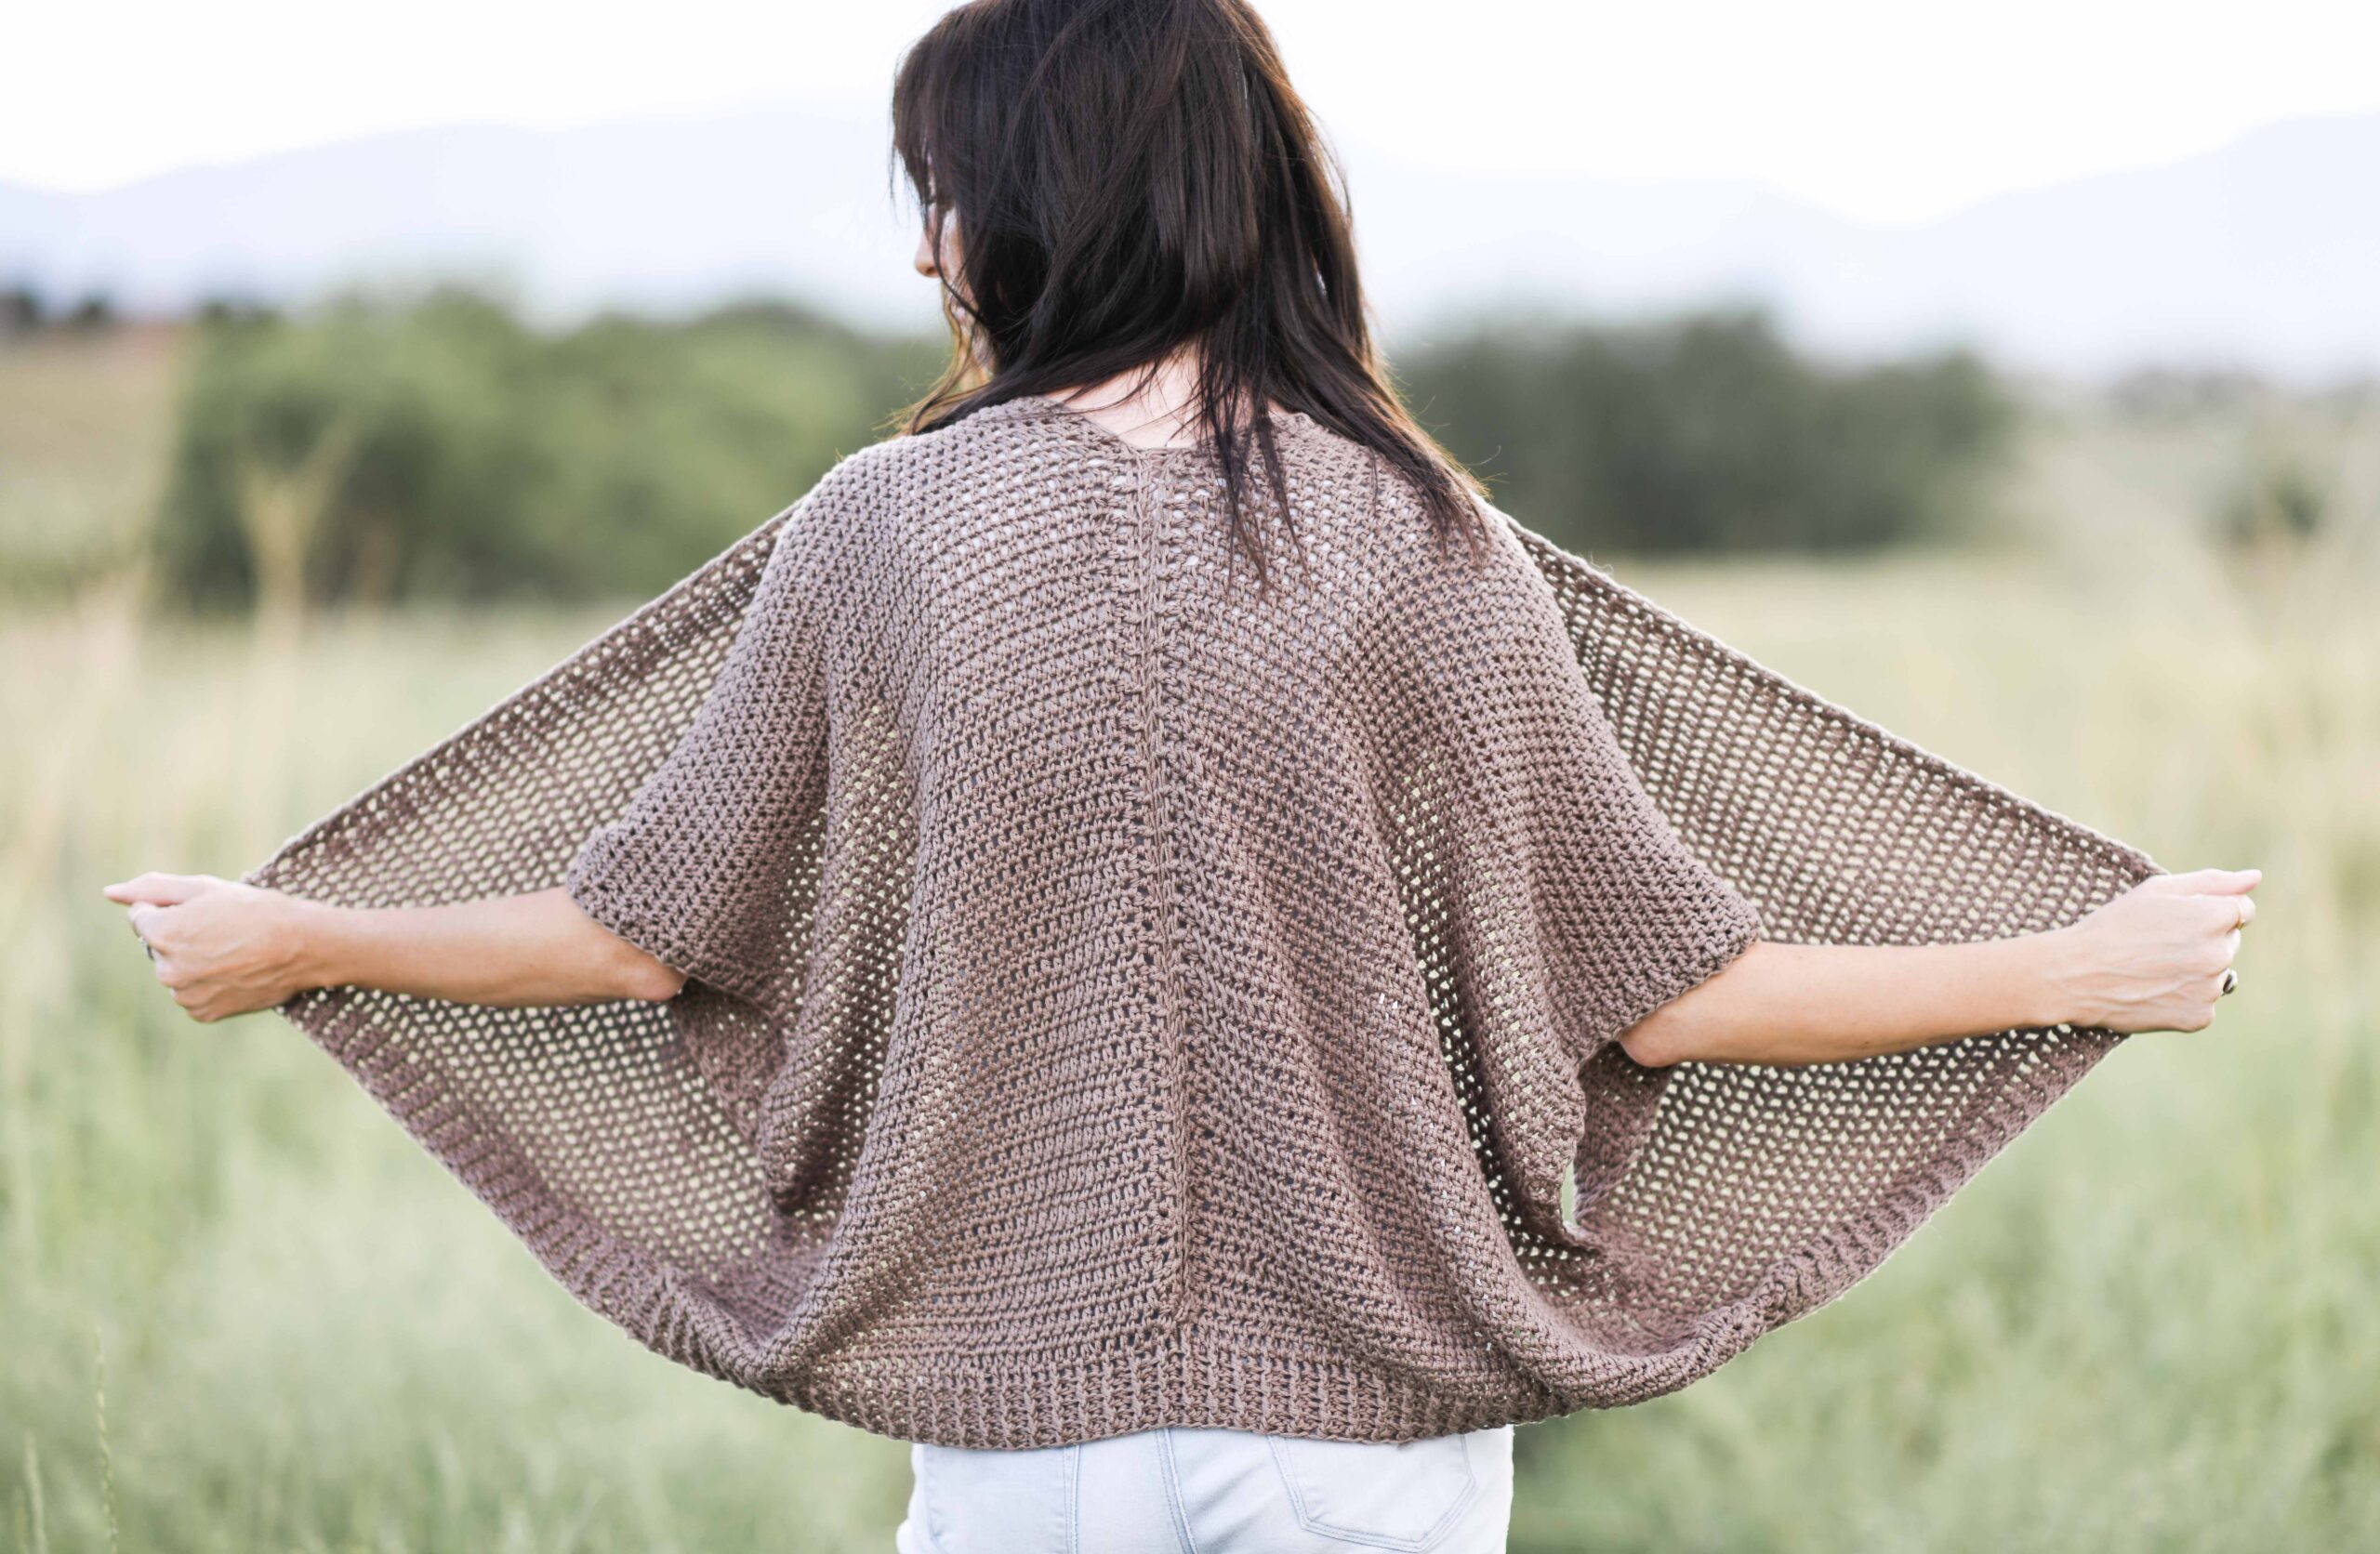
I’ve just finished crocheting this brand new market tote for spring! If you’ve crocheted a market tote, you probably remember that they’re generally pretty easy to make and work up really quickly too. These are great to use for just about anything, including a trip to the swimming pool or the farmers market. You’ll find the “How To” below for this bag as well as a picture tutorial so you can make one for yourself. 😉 Update: Lion Brand has made this into a kit that you can purchase HERE and the printable, ad-free pattern is now available for purchase in my Etsy shop HERE
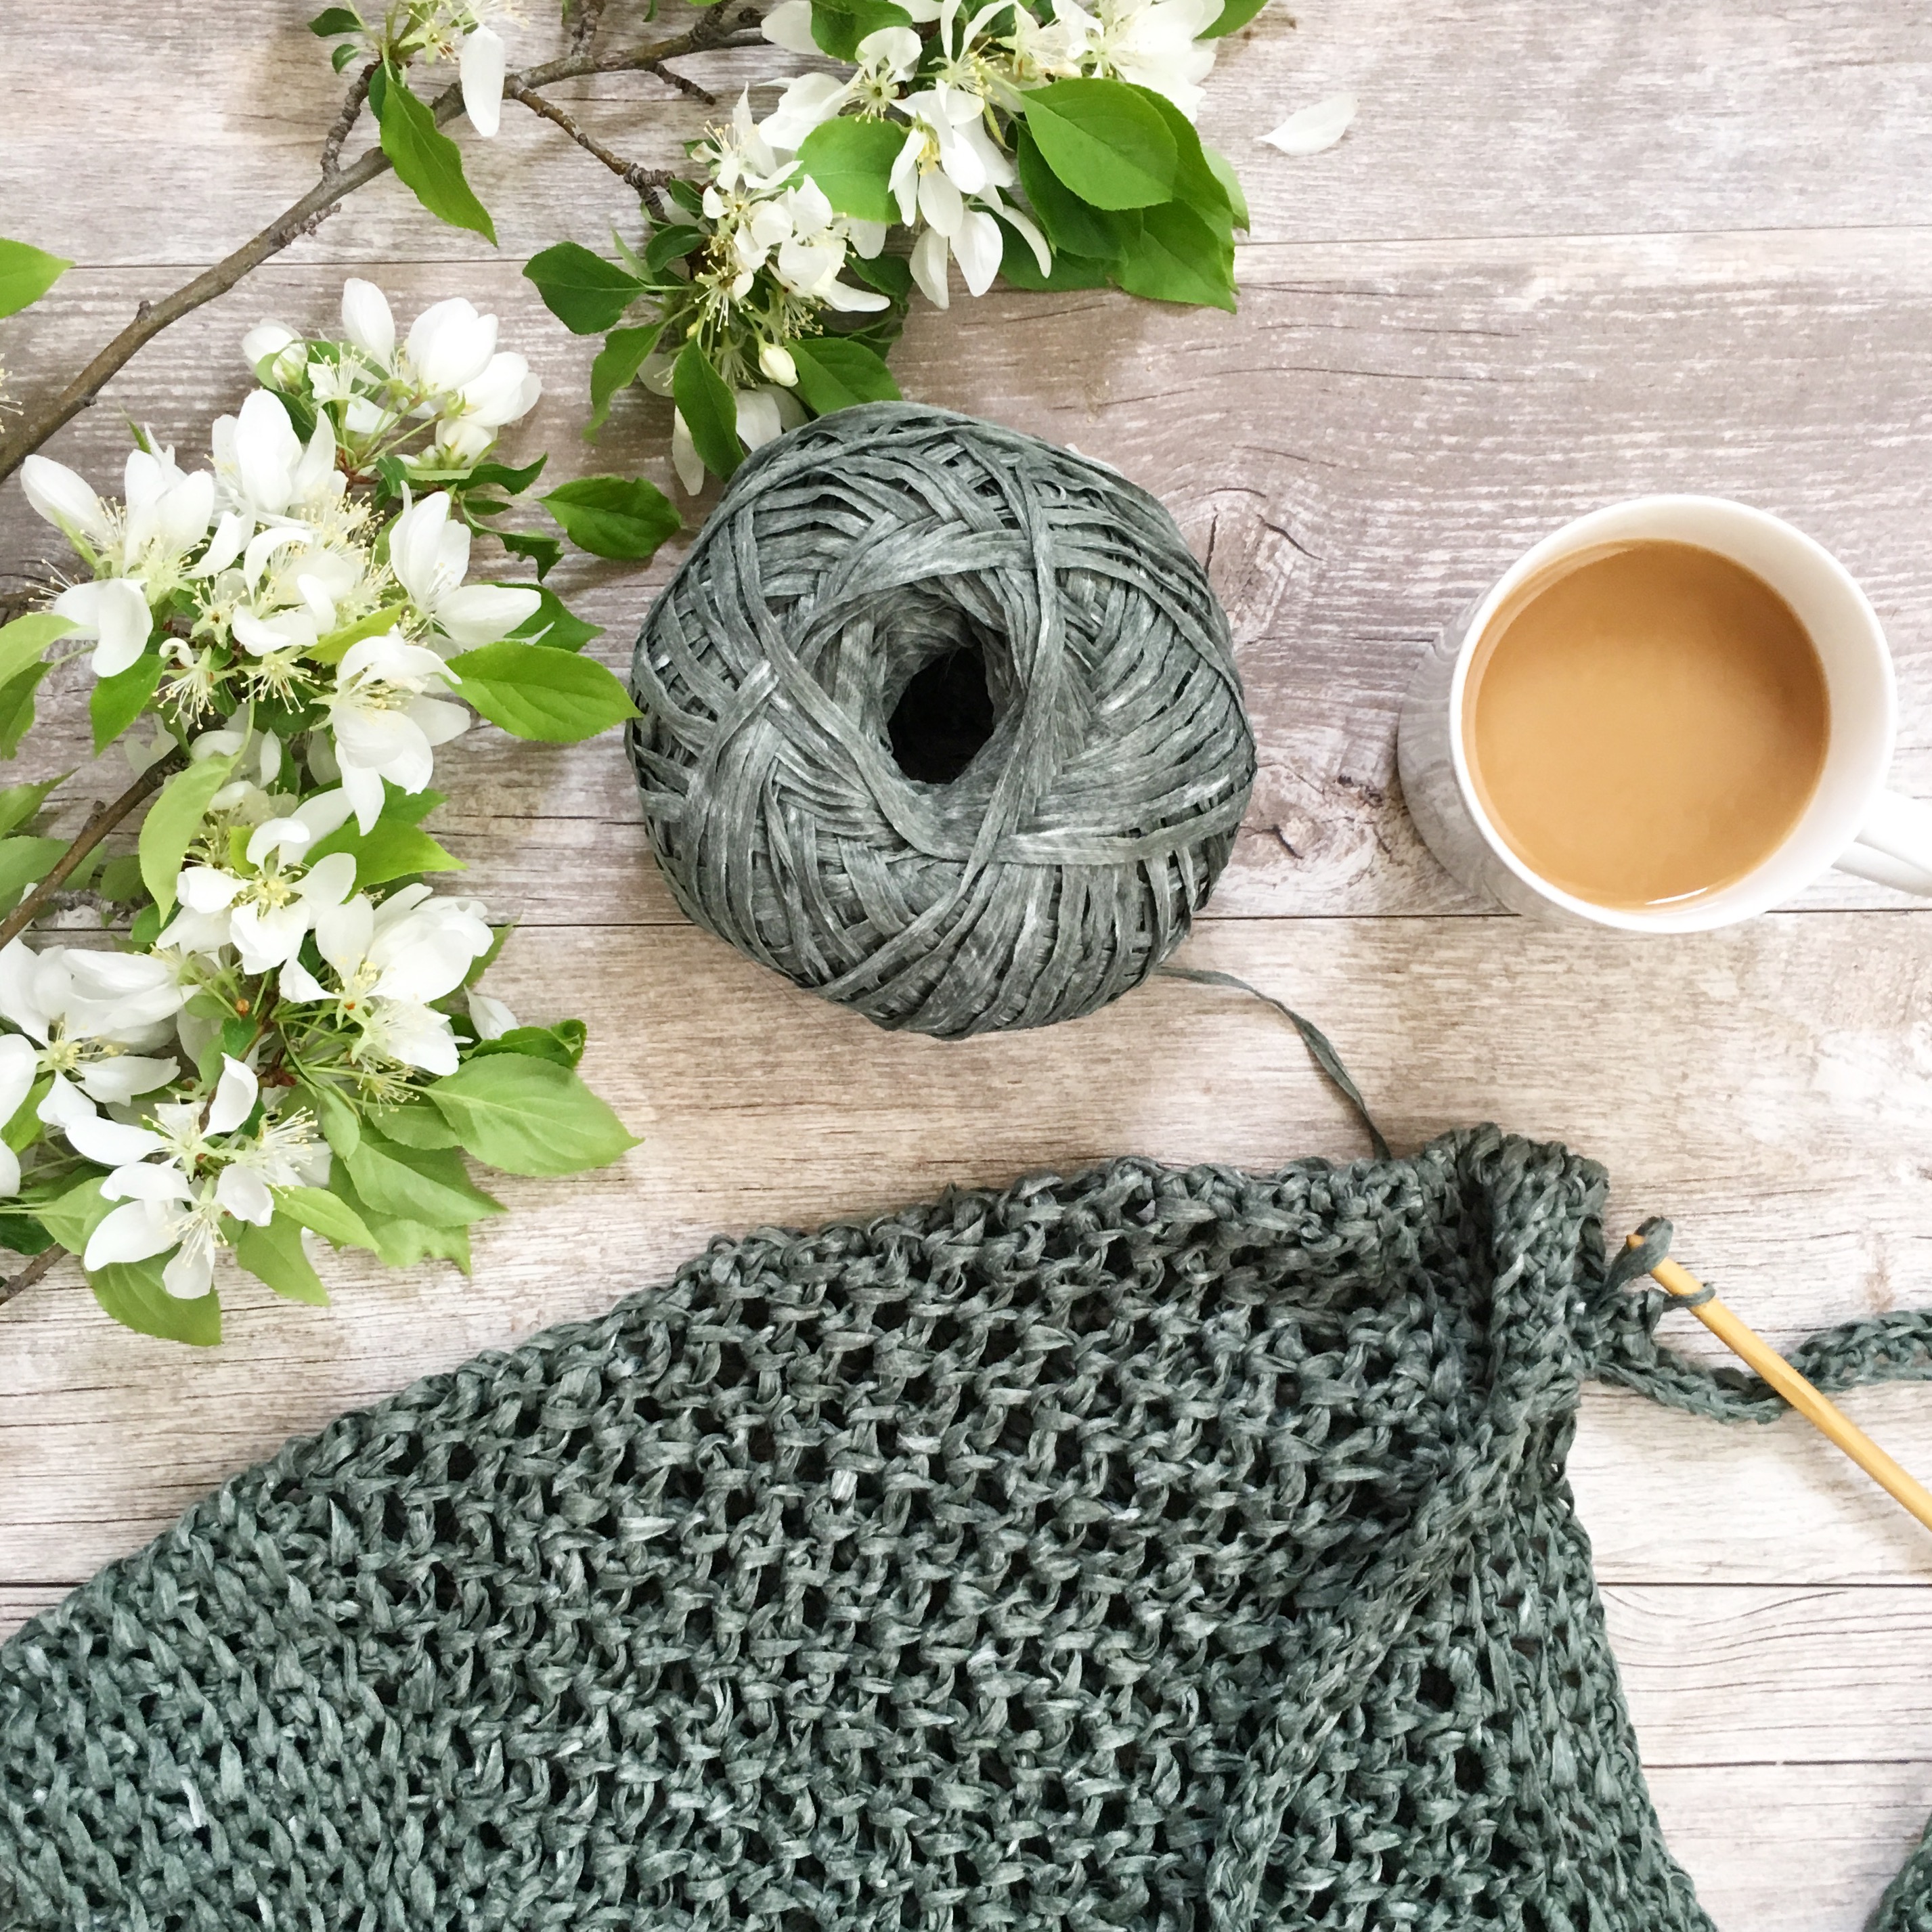
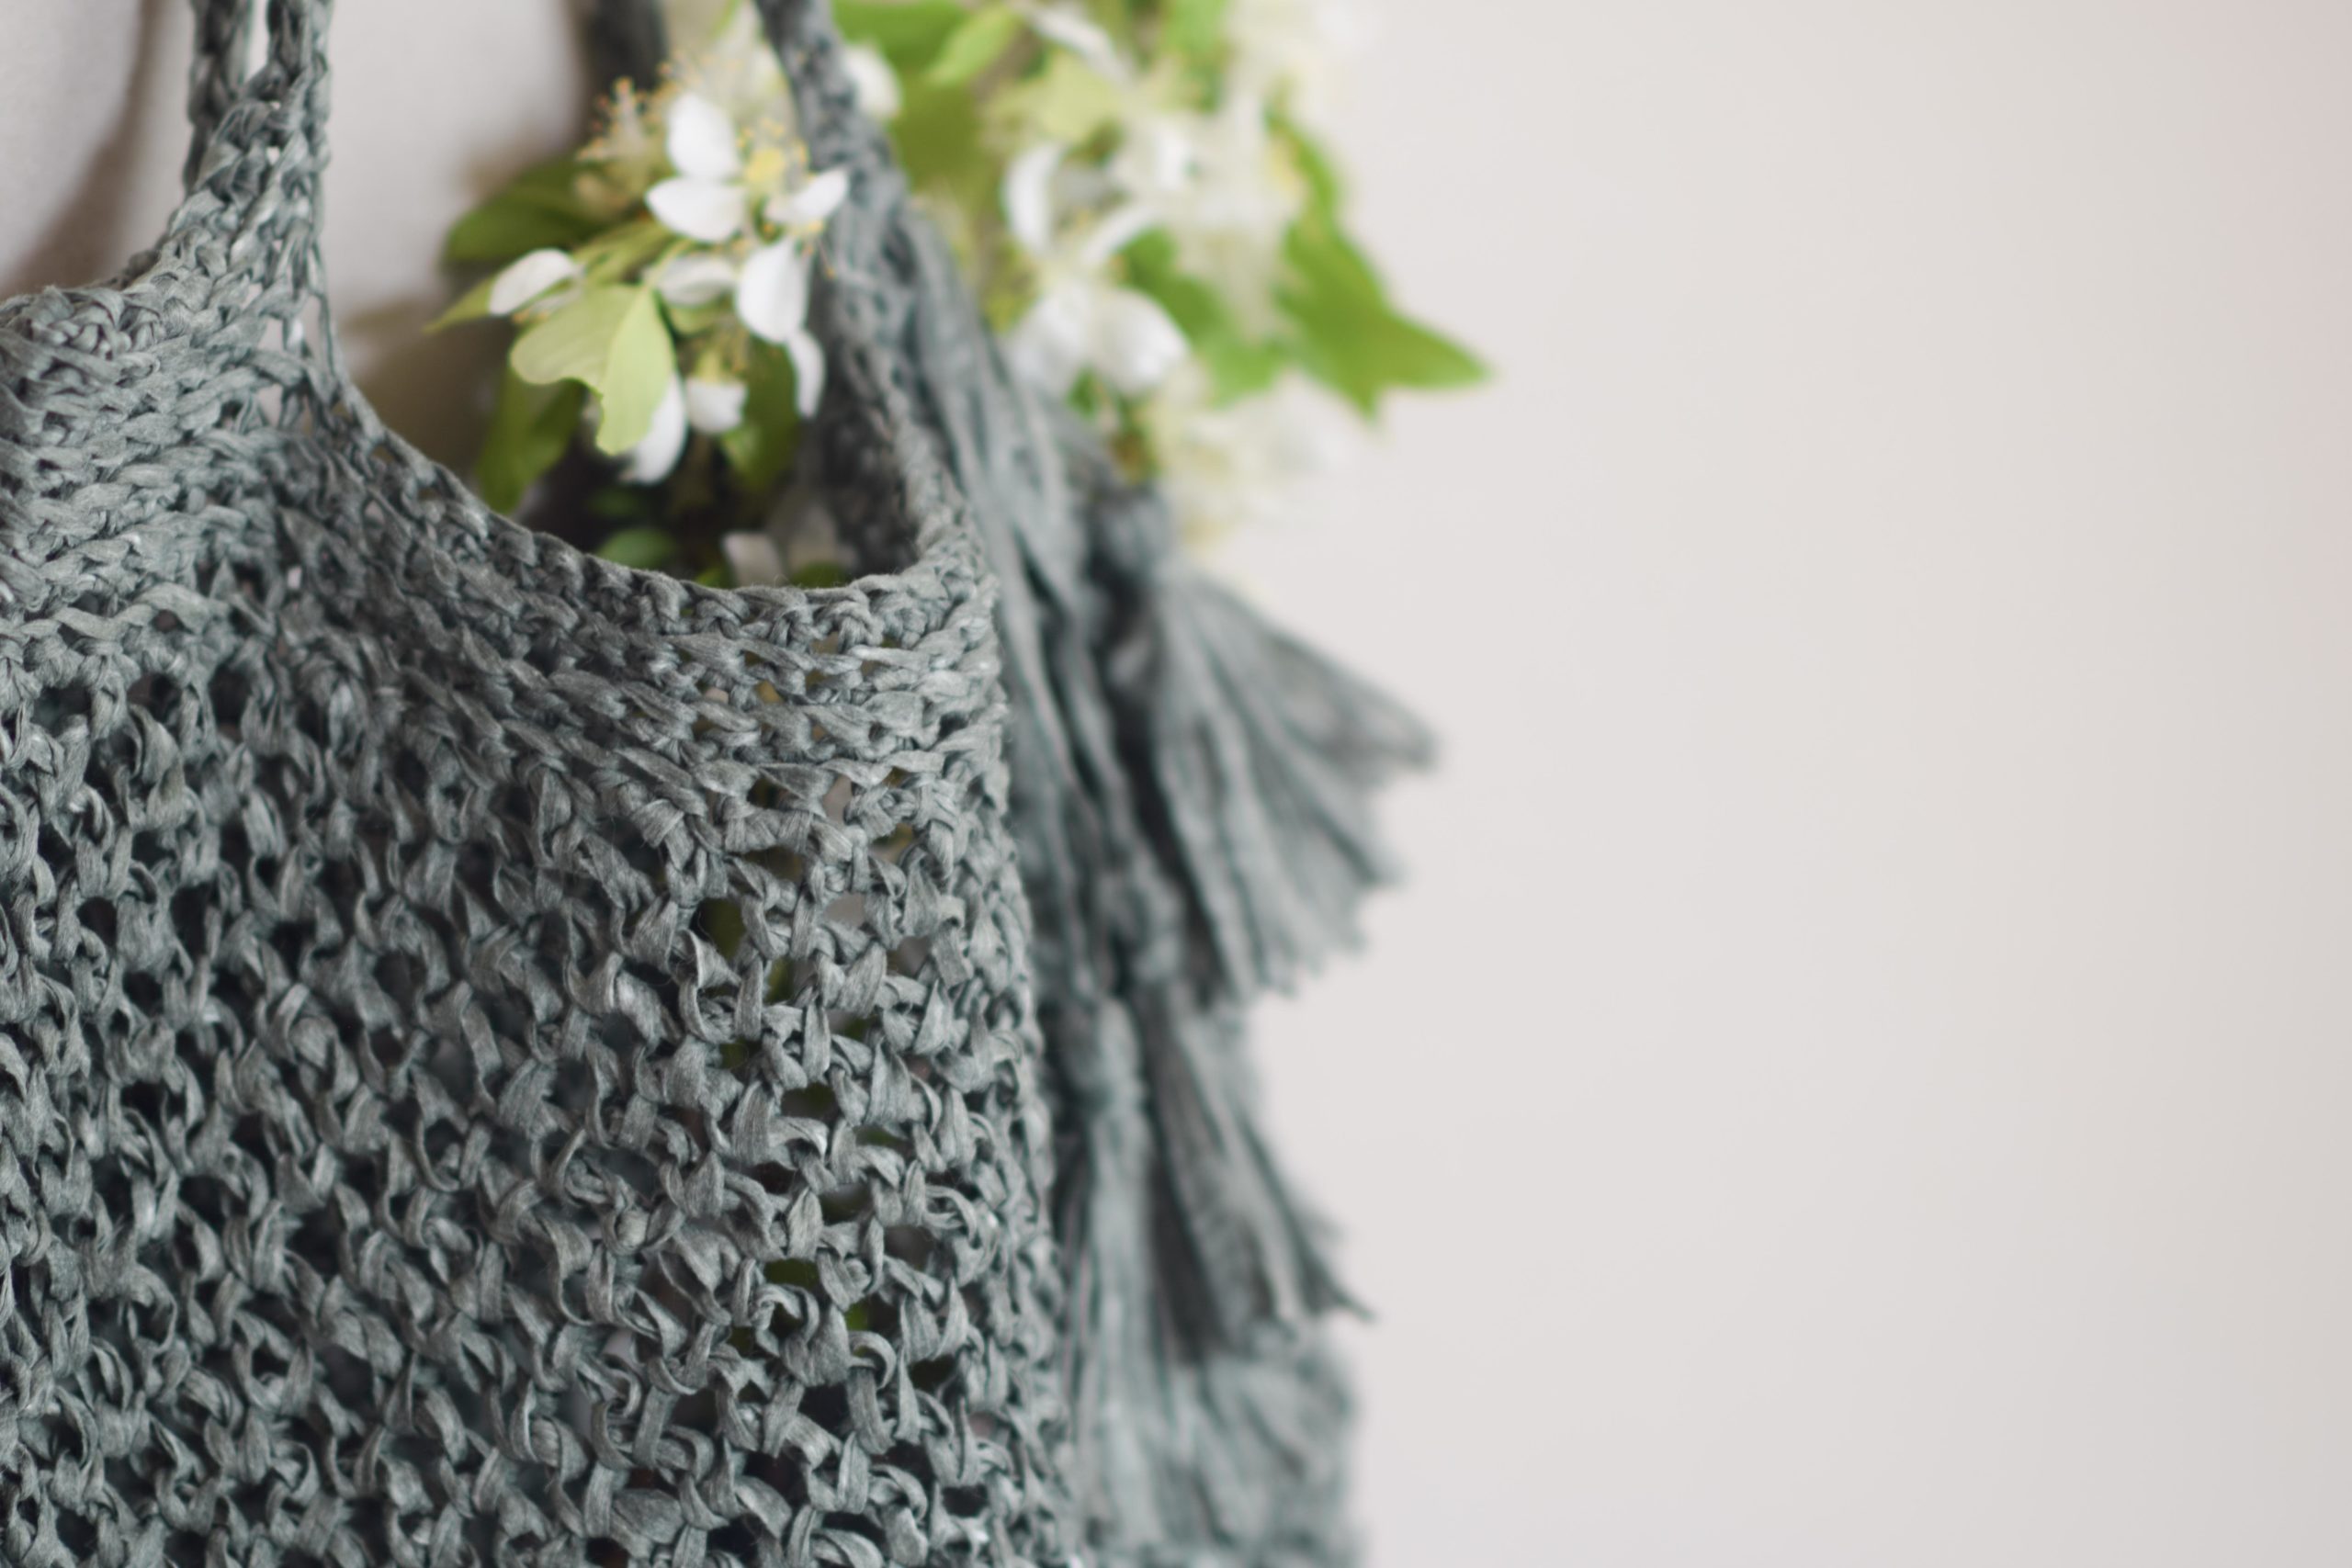
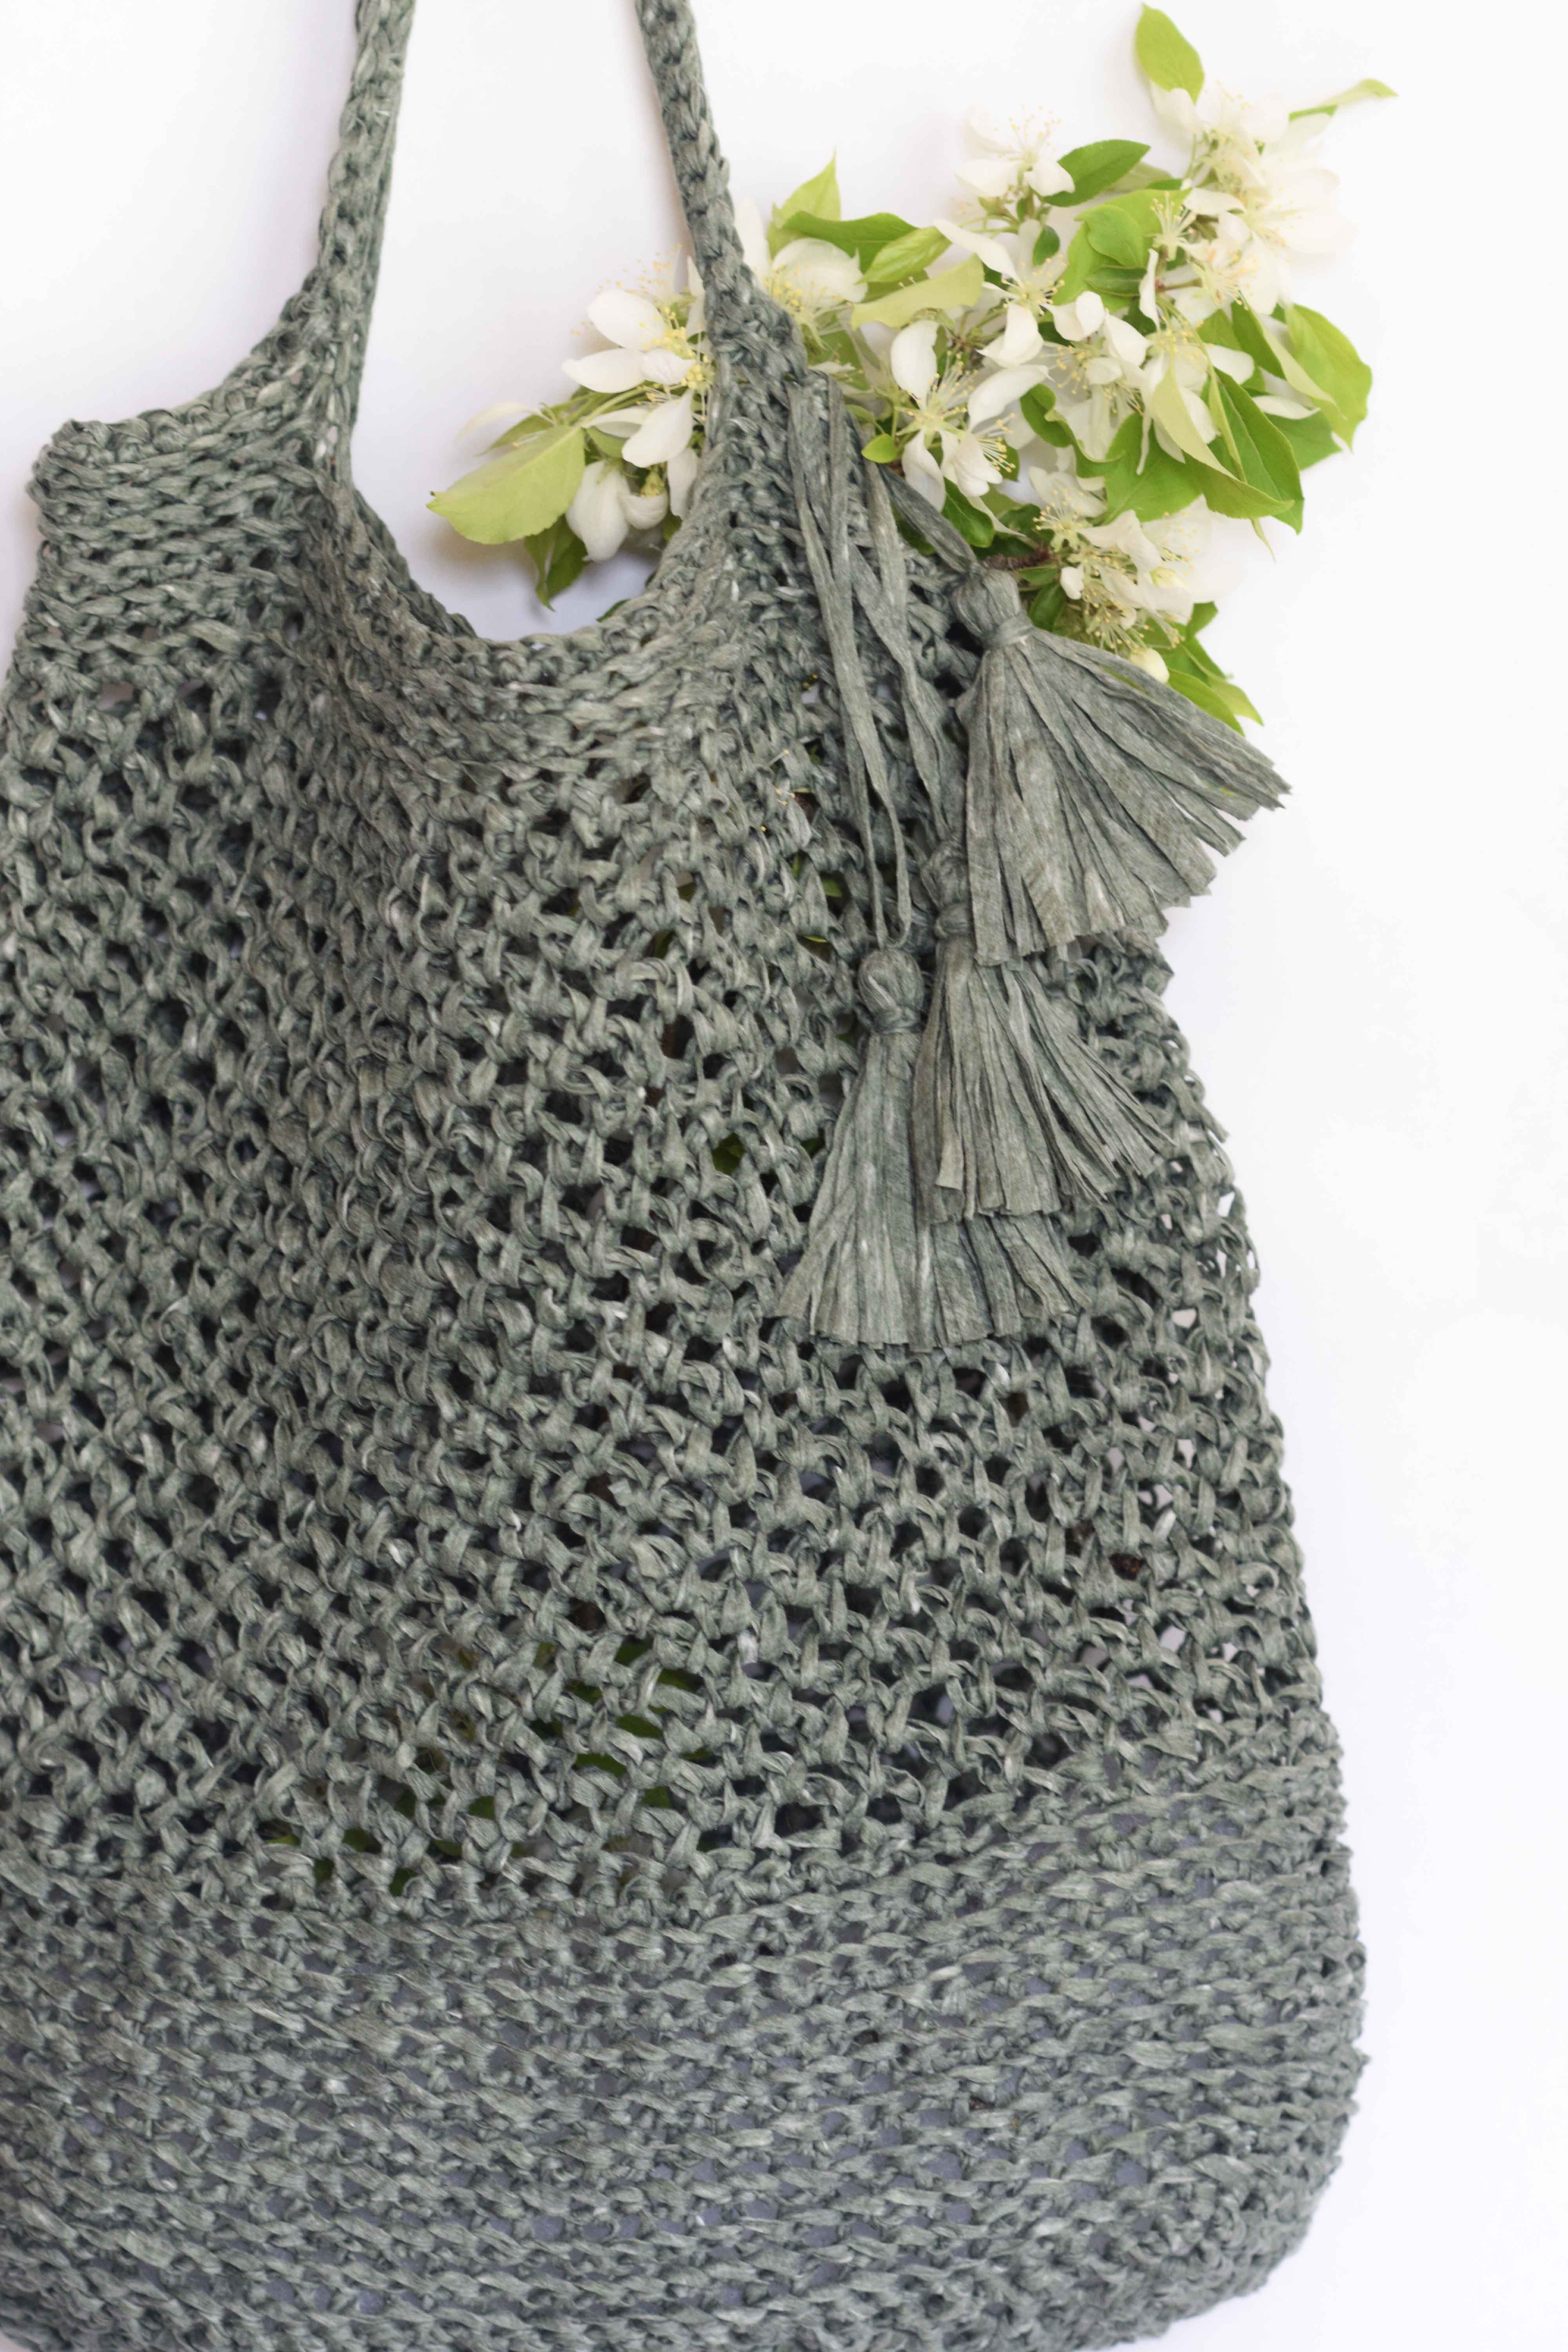
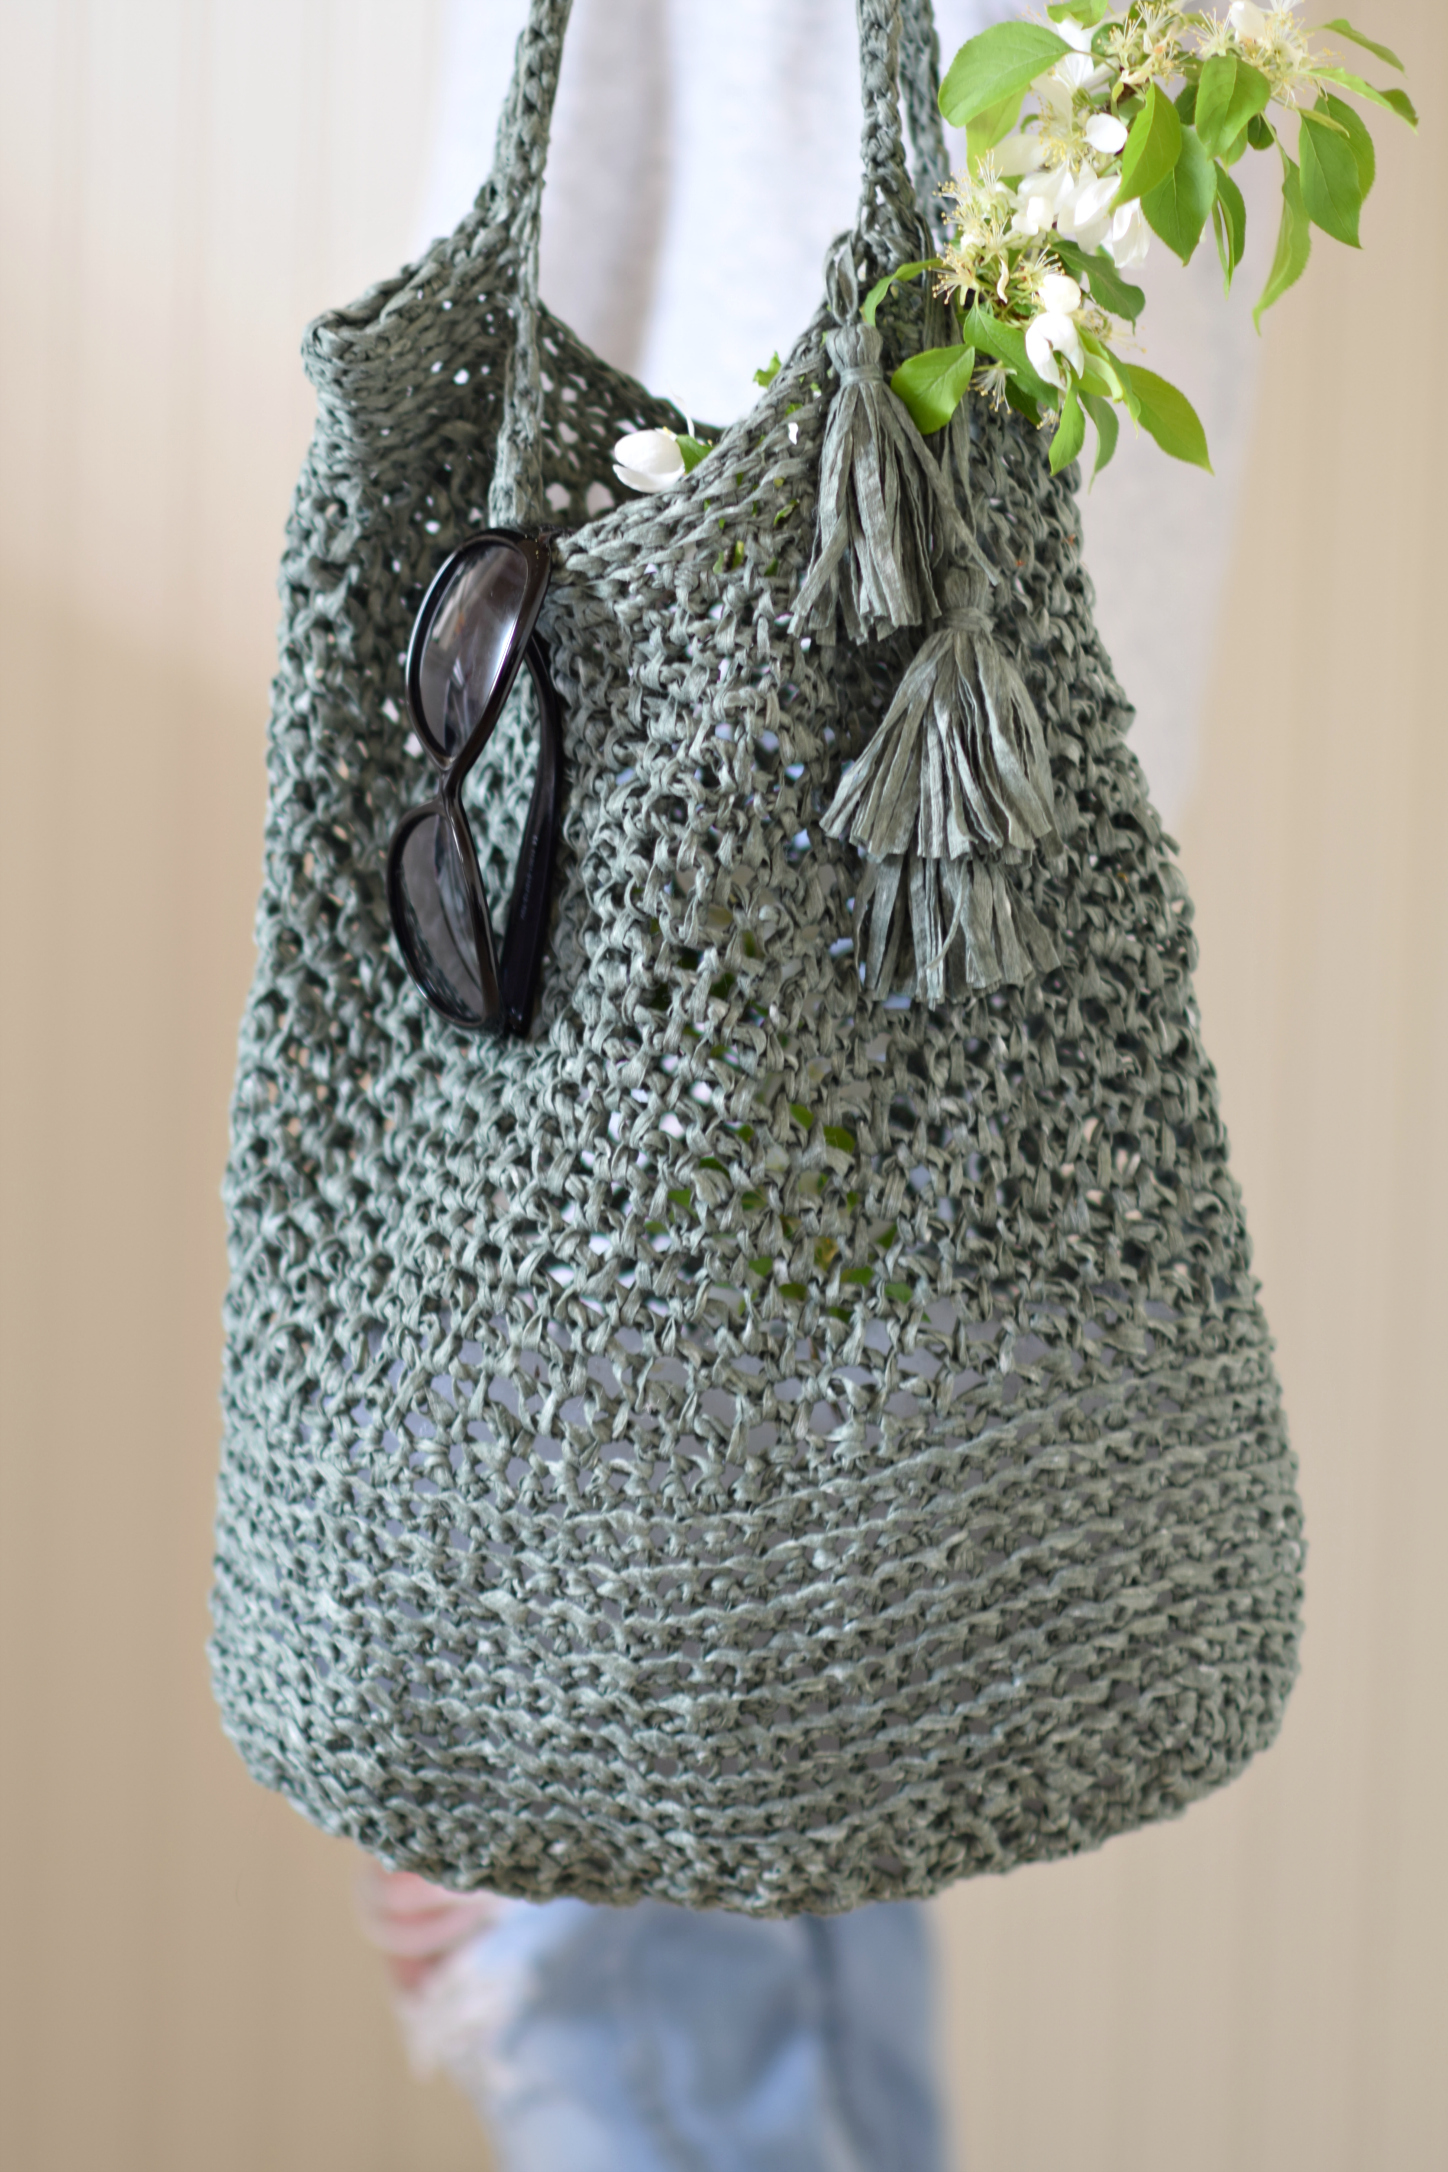
A girl can never have enough bags (lol) and this “Palmetto Market Tote” is super simple and cute for warm weather use. I’ve named it the “Palmetto” because the little tassels remind me of palm fronds. The yarn was just recently released from Lion Brand ( it’s called Rewind Tape Yarn) and I LOVE THE COLORS (see them all here). I can imagine making many more bags and even tops with the colors available as they are subtle and beautiful. In fact, this bag almost has the look of raffia or grass, but it’s as soft as can be and doesn’t break the way that raffia does.
The inspiration for this tote comes from natural baskets and woven bags. It also takes a nod from my Manhattan Market Tote Crochet Pattern (here) as well as some of the other totes that I’ve made in the past. You might remember this tote crochet pattern as well! If you know how to single crochet, chain and count stitches, you can make this. See below for the step by step tutorial!

Above: This yarn is so unique, super soft and very easy to work with. If you’ve never tried a tape yarn, I definitely recommend Rewind. The label includes a photo of a knit sweater that’s also really cute. I’m thinking I’d like to make a top with the Griege color.

Below: Remember the Manhattan Market Tote? It’s such an awesome bag to haul things around. You can probably see some similarities in the design of these two bags! This Palmetto Tote has a much lighter, open stitch work at the bottom and less bulky handles. The bottom of the Manhattan Market tote (below) is worked as a flat circle and then uses the waistcoat stitch which creates a super tight fabric.
Ready to get crocheting?! I’ve written this more as a “how to” than a rigid pattern. It’s meant to be a guide as well as a simple pattern to follow so you can make this bag easily. I often prefer to explain projects in “people terms” rather than pattern terms, so this is a little mix of both. Hope you enjoy!
How To Crochet A Market Tote – The “Palmetto” Tote Crochet Pattern
Bag Measures approximately 14″ X 17 “
You will need:
US Size L Crochet Hook
US Size K Crochet Hook
2 Skeins of Lion Brand Yarn Rewind Tape Yarn (here) from or comparable #5 Bulky Yarn (Find the full kit from Lion Brand here)
Scissors
Tapestry needle to weave in ends
Skills & Abbreviations:
ch- chain
sc – single crochet
sk st – skip stitch
sc flo – single crochet through the front loop only
sl st – slip stitch
ch sp – chain space (you will see this referred to as a ch 2 space)
Notes: This pattern is super forgiving! Your bag might turn out a bit bigger or smaller depending on how tightly you crochet. This is meant to be an easy, fun pattern and guide on how to make a tote!
Step 1 Making the Base of the Crocheted Market Tote
First, you’re simply going to crochet a rectangle with single crochet stitches
Chain 11 (With your Size L Crochet Hook)
Row 1 Sc in each st across the row, turn
Row 2 Ch 1, sc in each st across the row, turn
Repeat row 2 until the base of your bag is approximately 12.5″ long
Once you’re piece is 12.5″ long, you will move onto the Bottom Portion of the Bag in Step 2
Step 2 Crocheting the Bottom Portion of the Bag
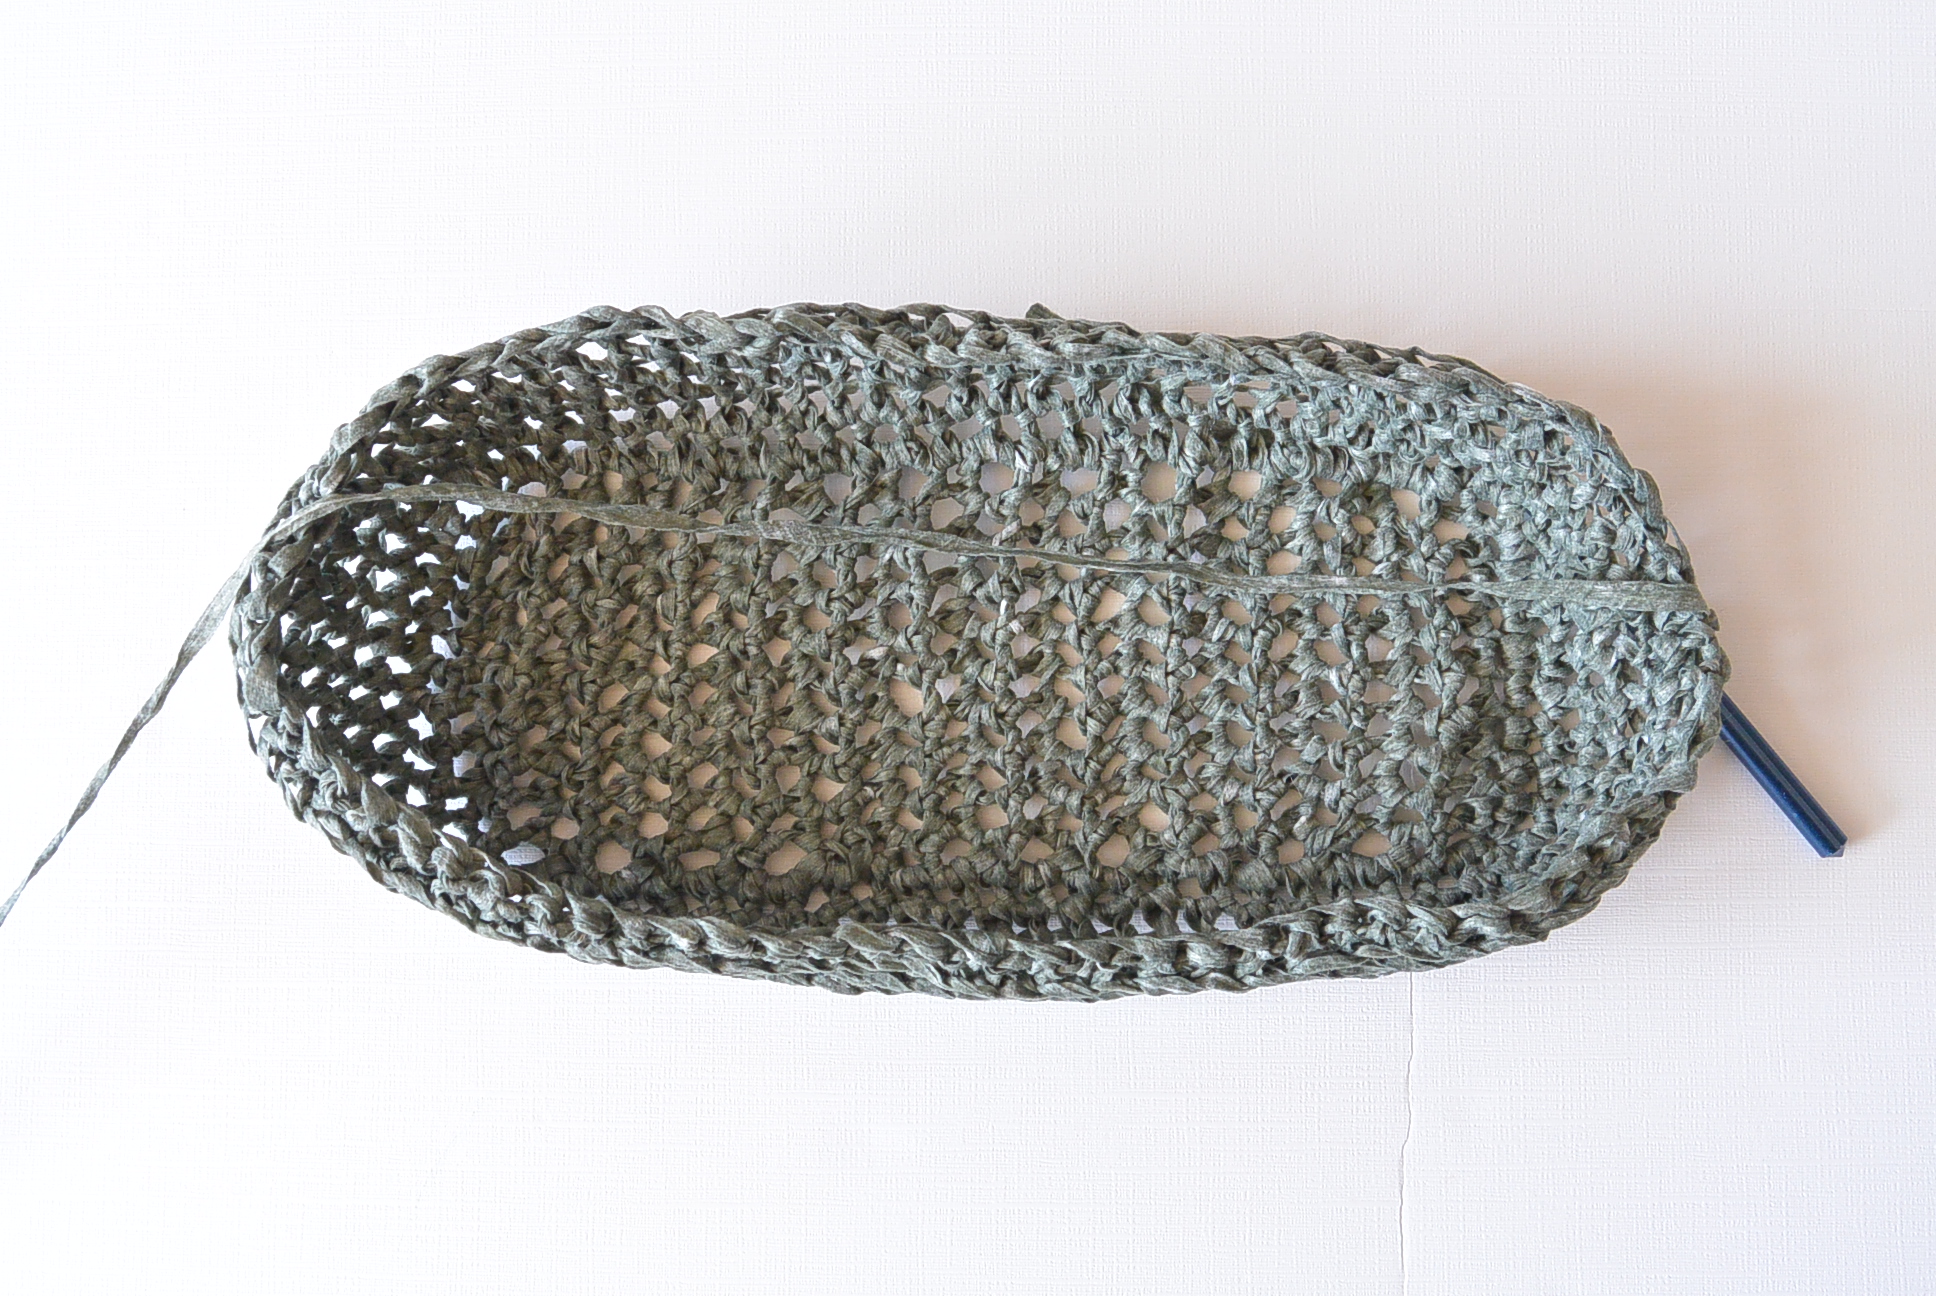
Round 1 Sc evenly around entire base of the bag (Mark rounds as needed)
Round 2 Sc flo in each st around (Work in continuous rounds – you don’t need to join rounds. Mark your rounds with a stitch marker as needed)
Repeat row 2 for approximately 4″
Above: Isn’t the texture cool? Single crochet through the front loops is one of my fave stitch patterns – and it’s so easy!
Once you’ve crocheted for 4″, you will move onto Step 3
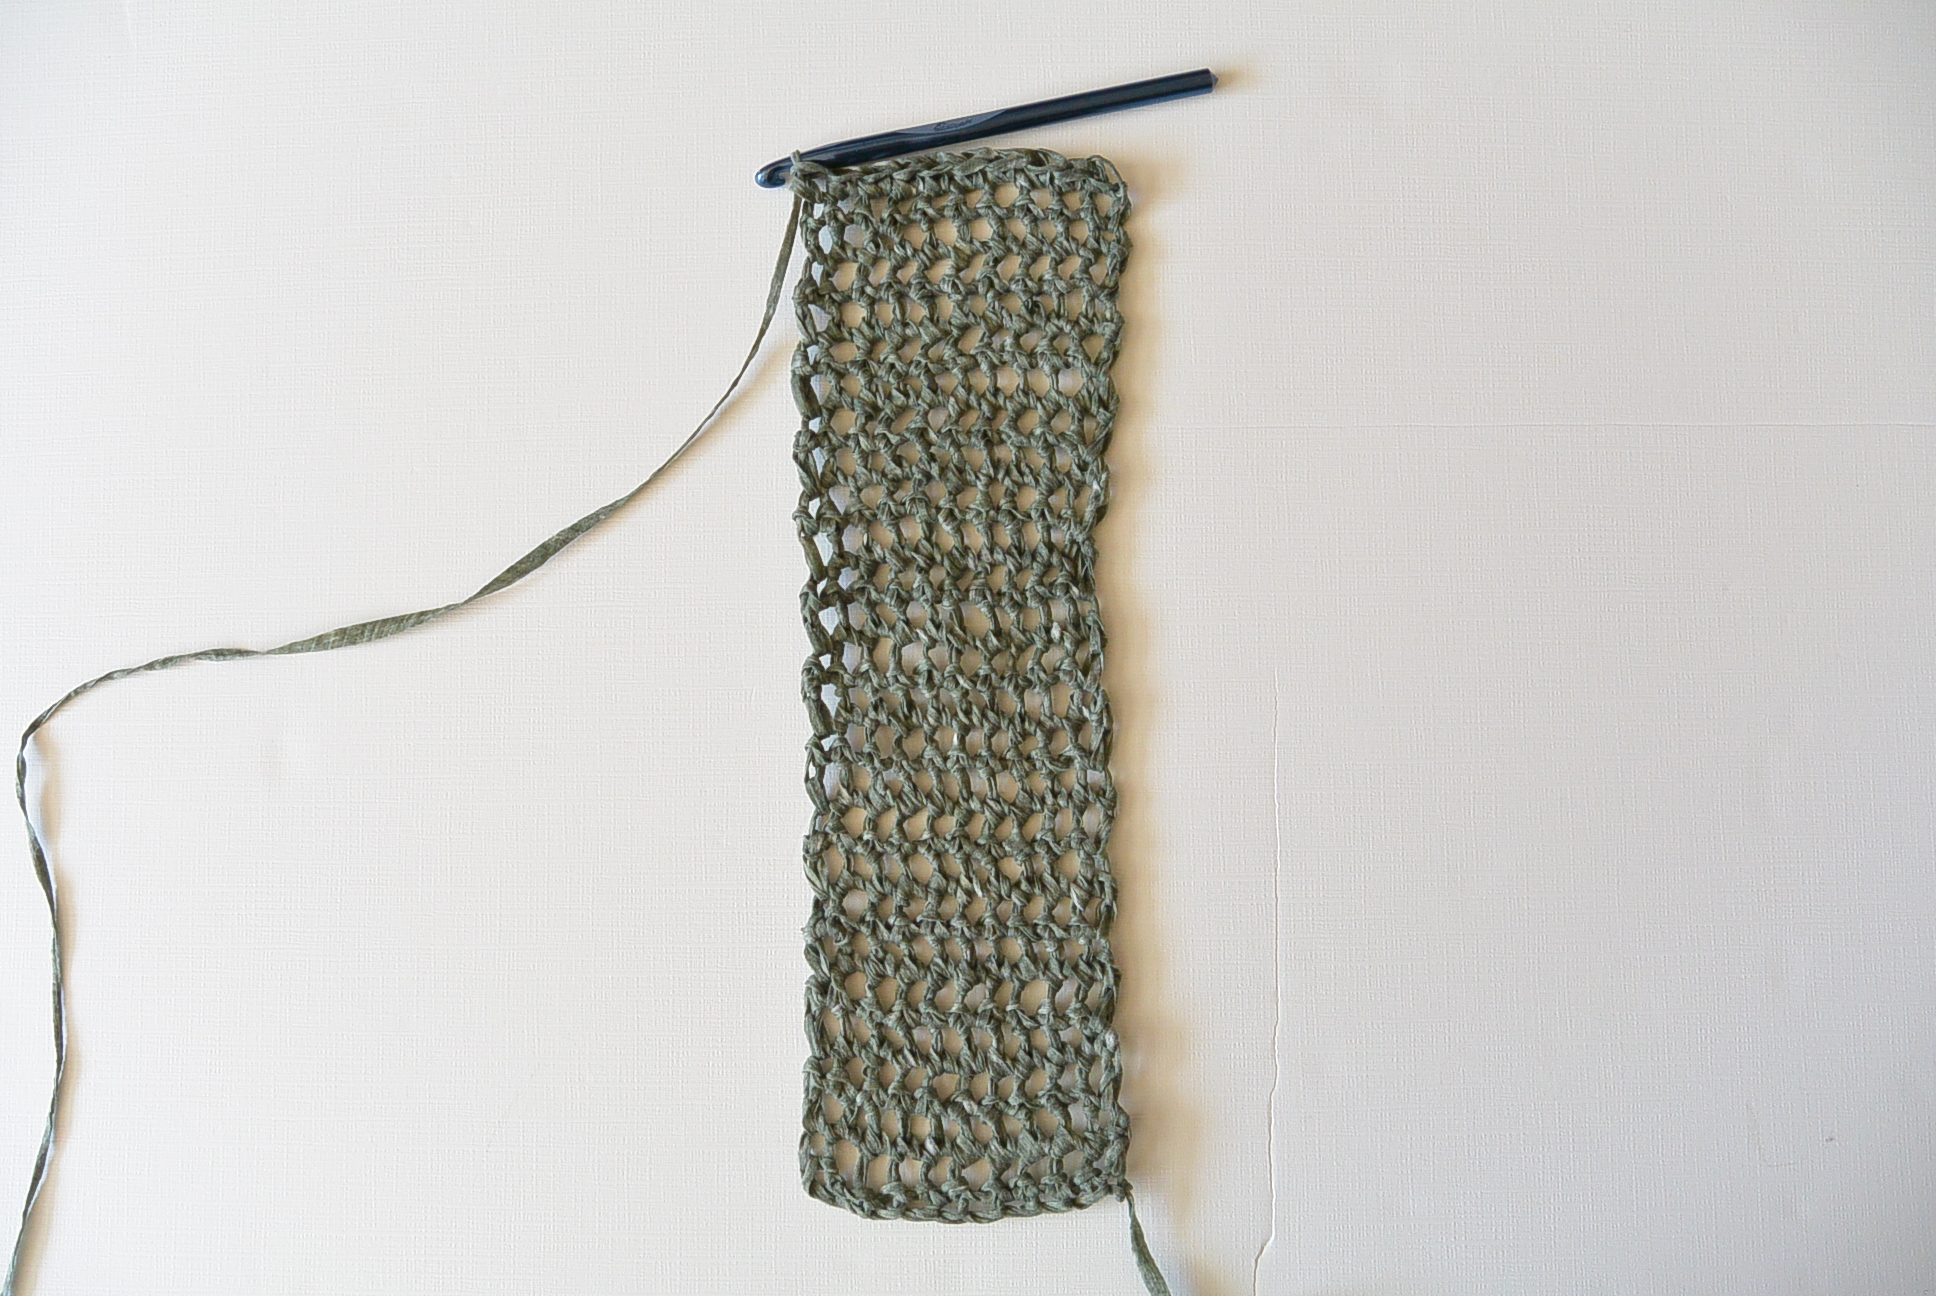
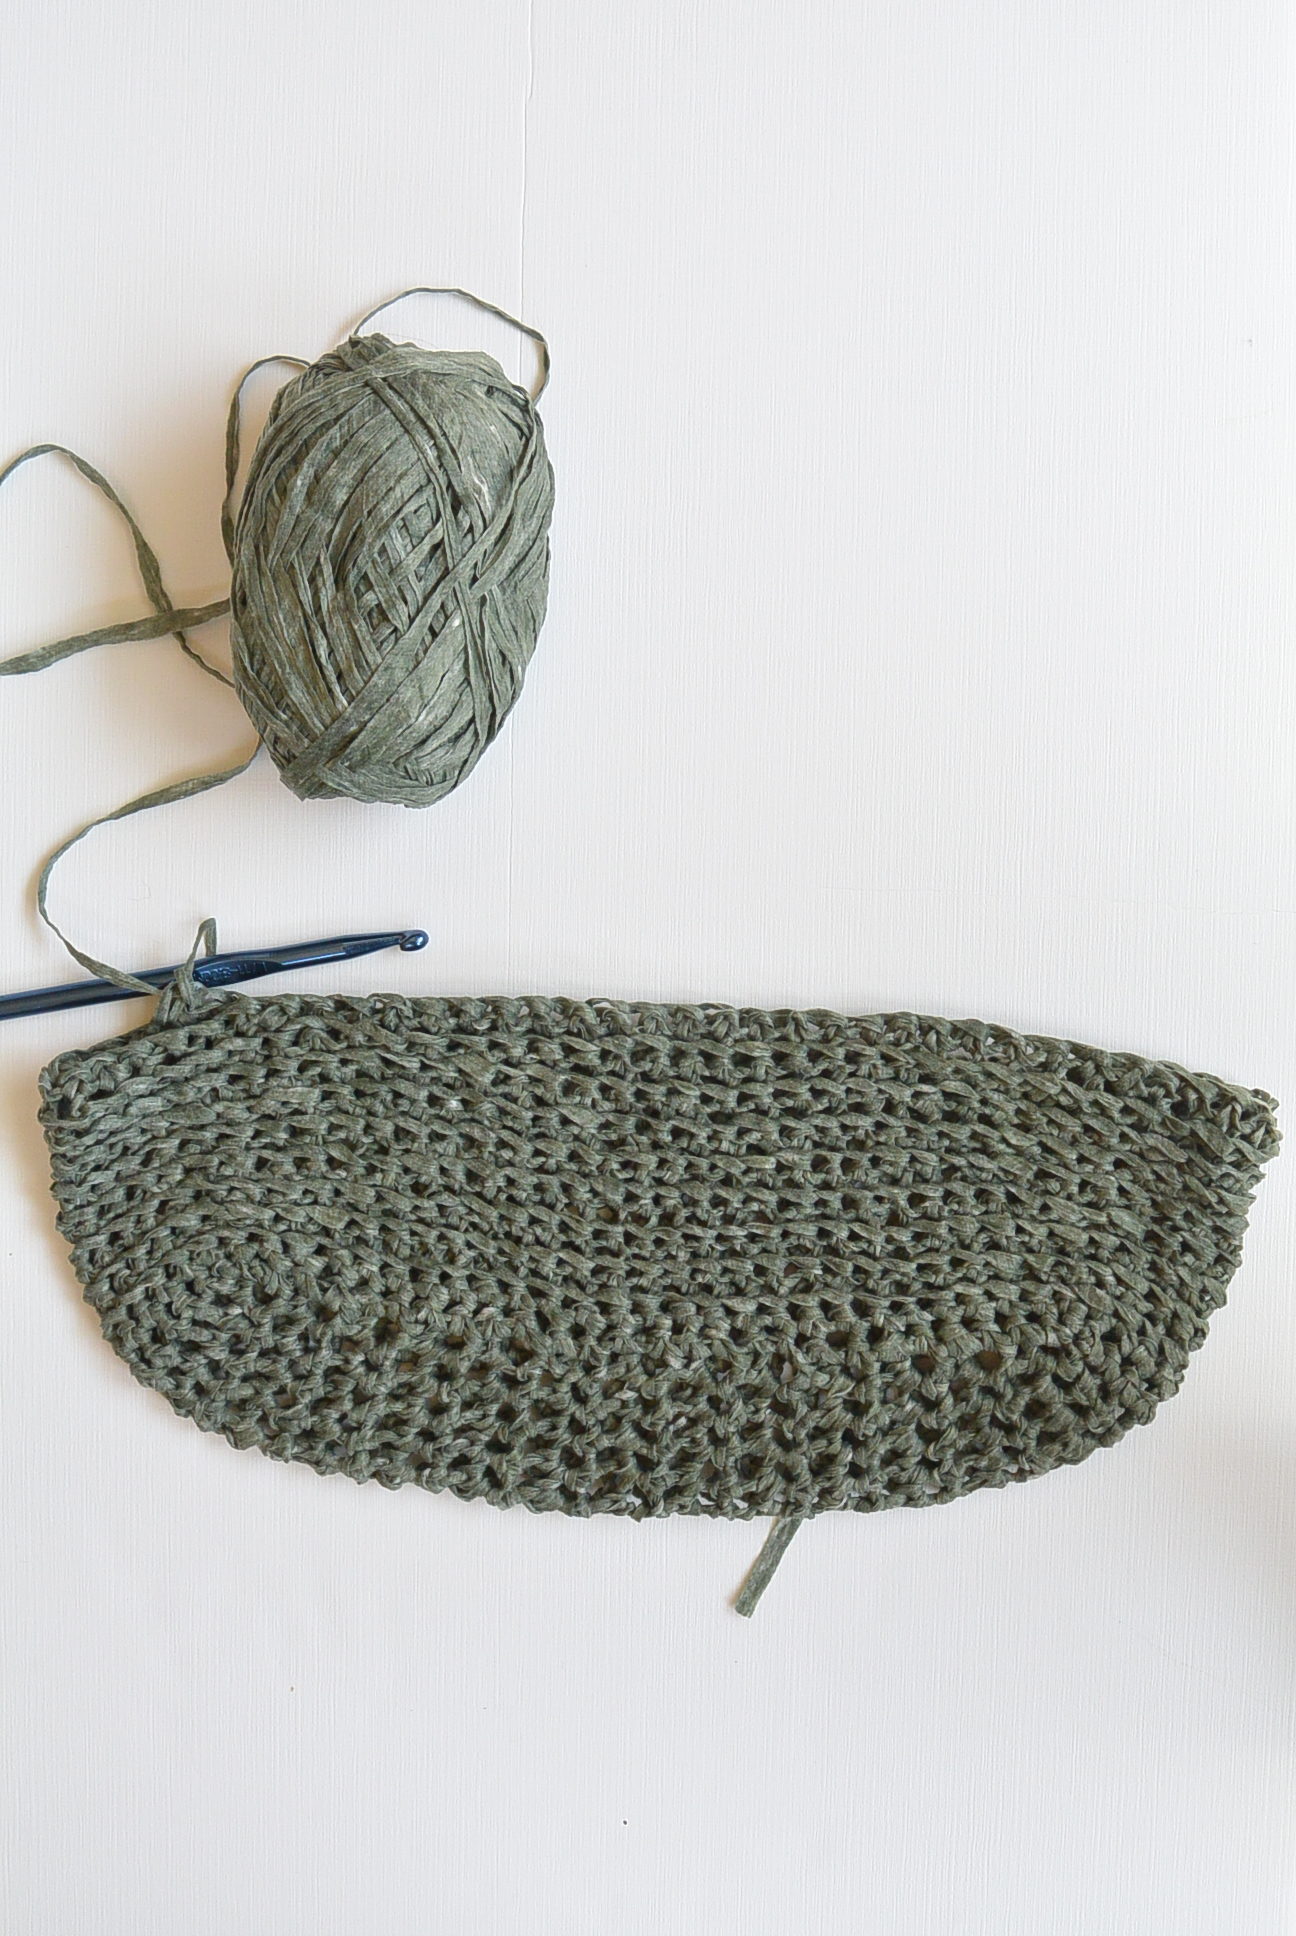
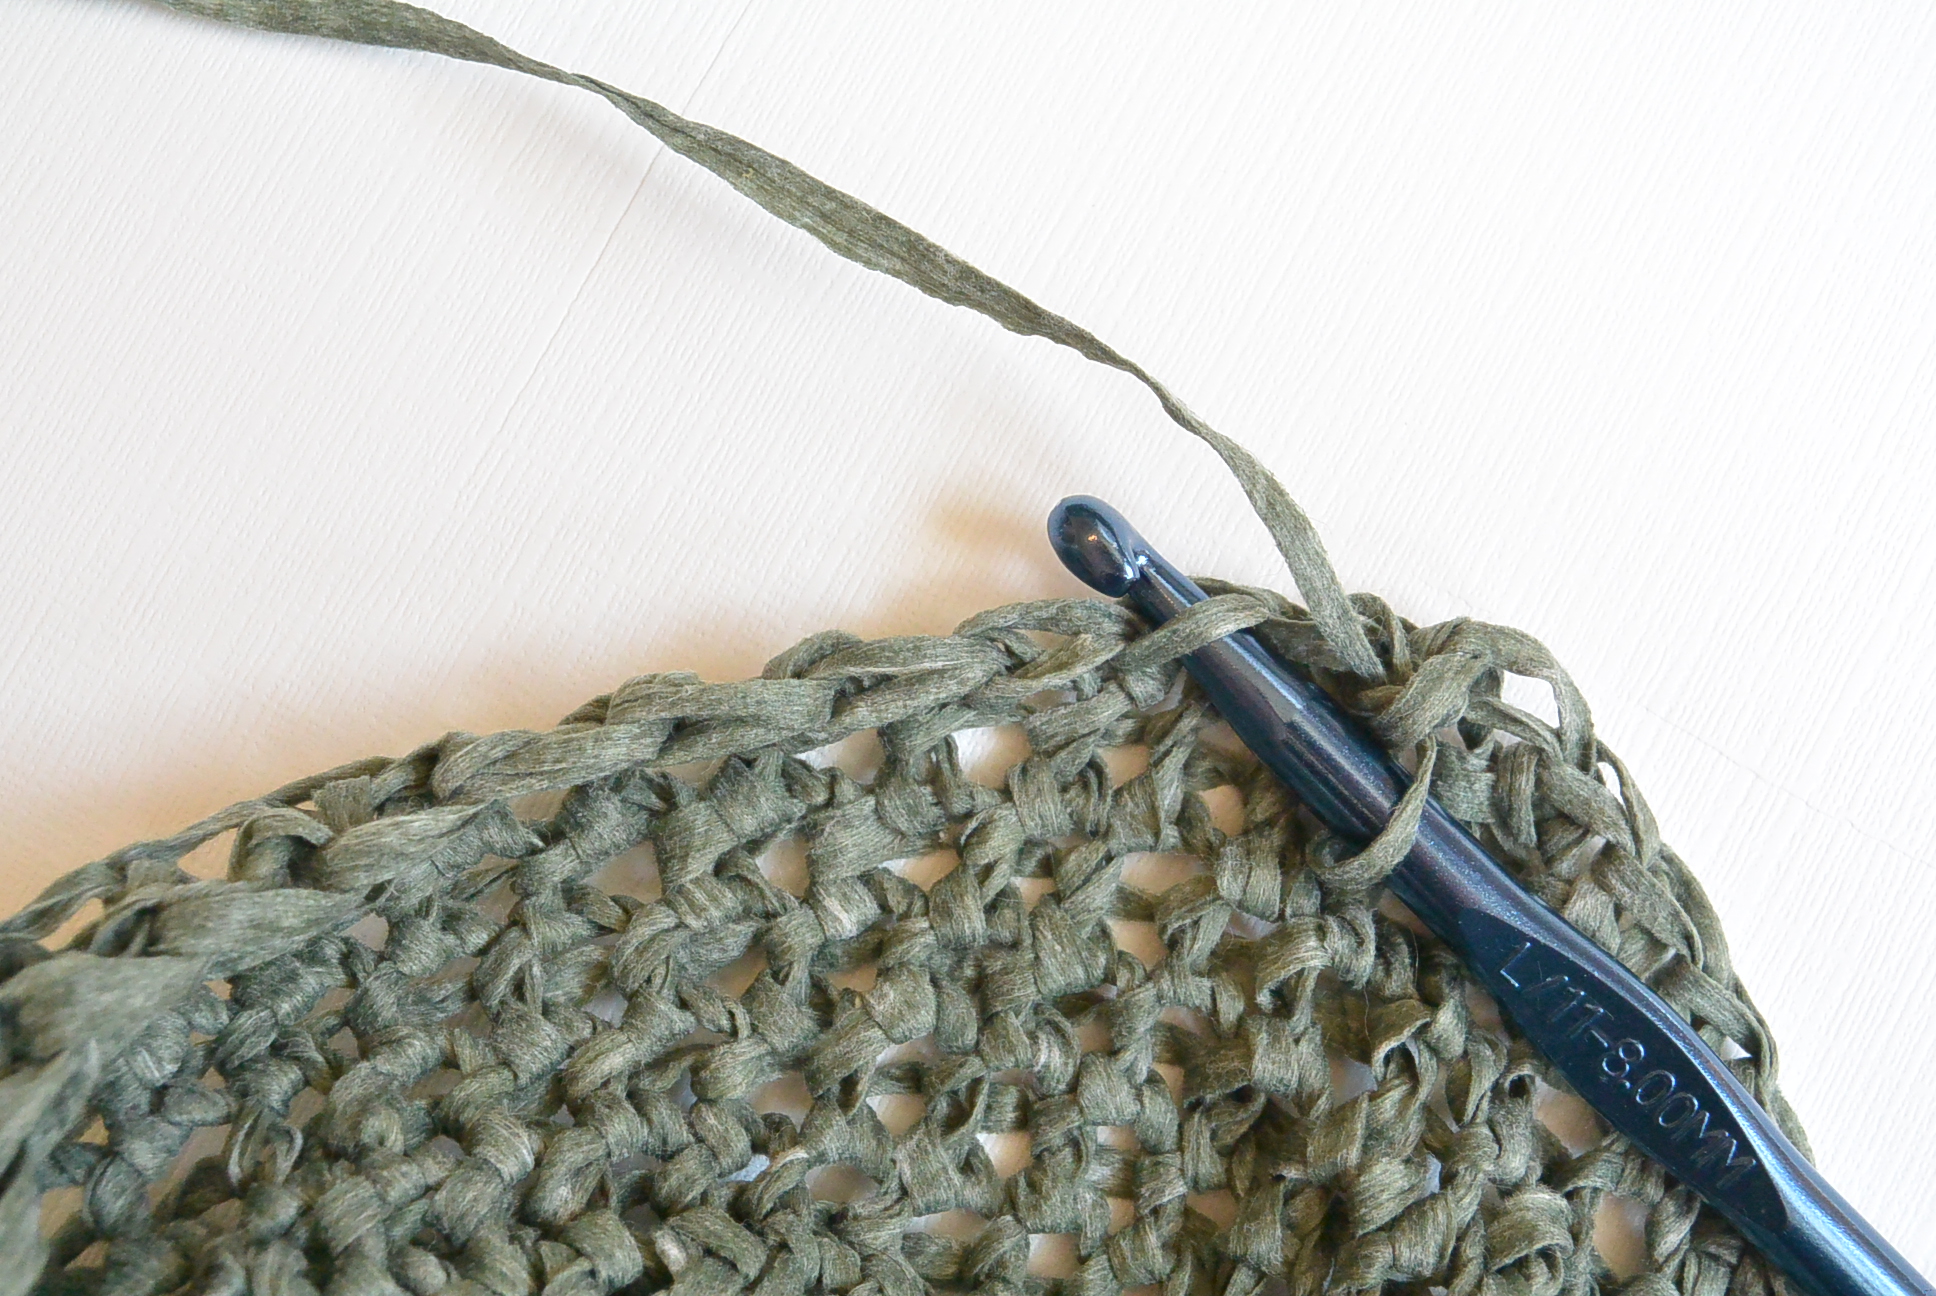
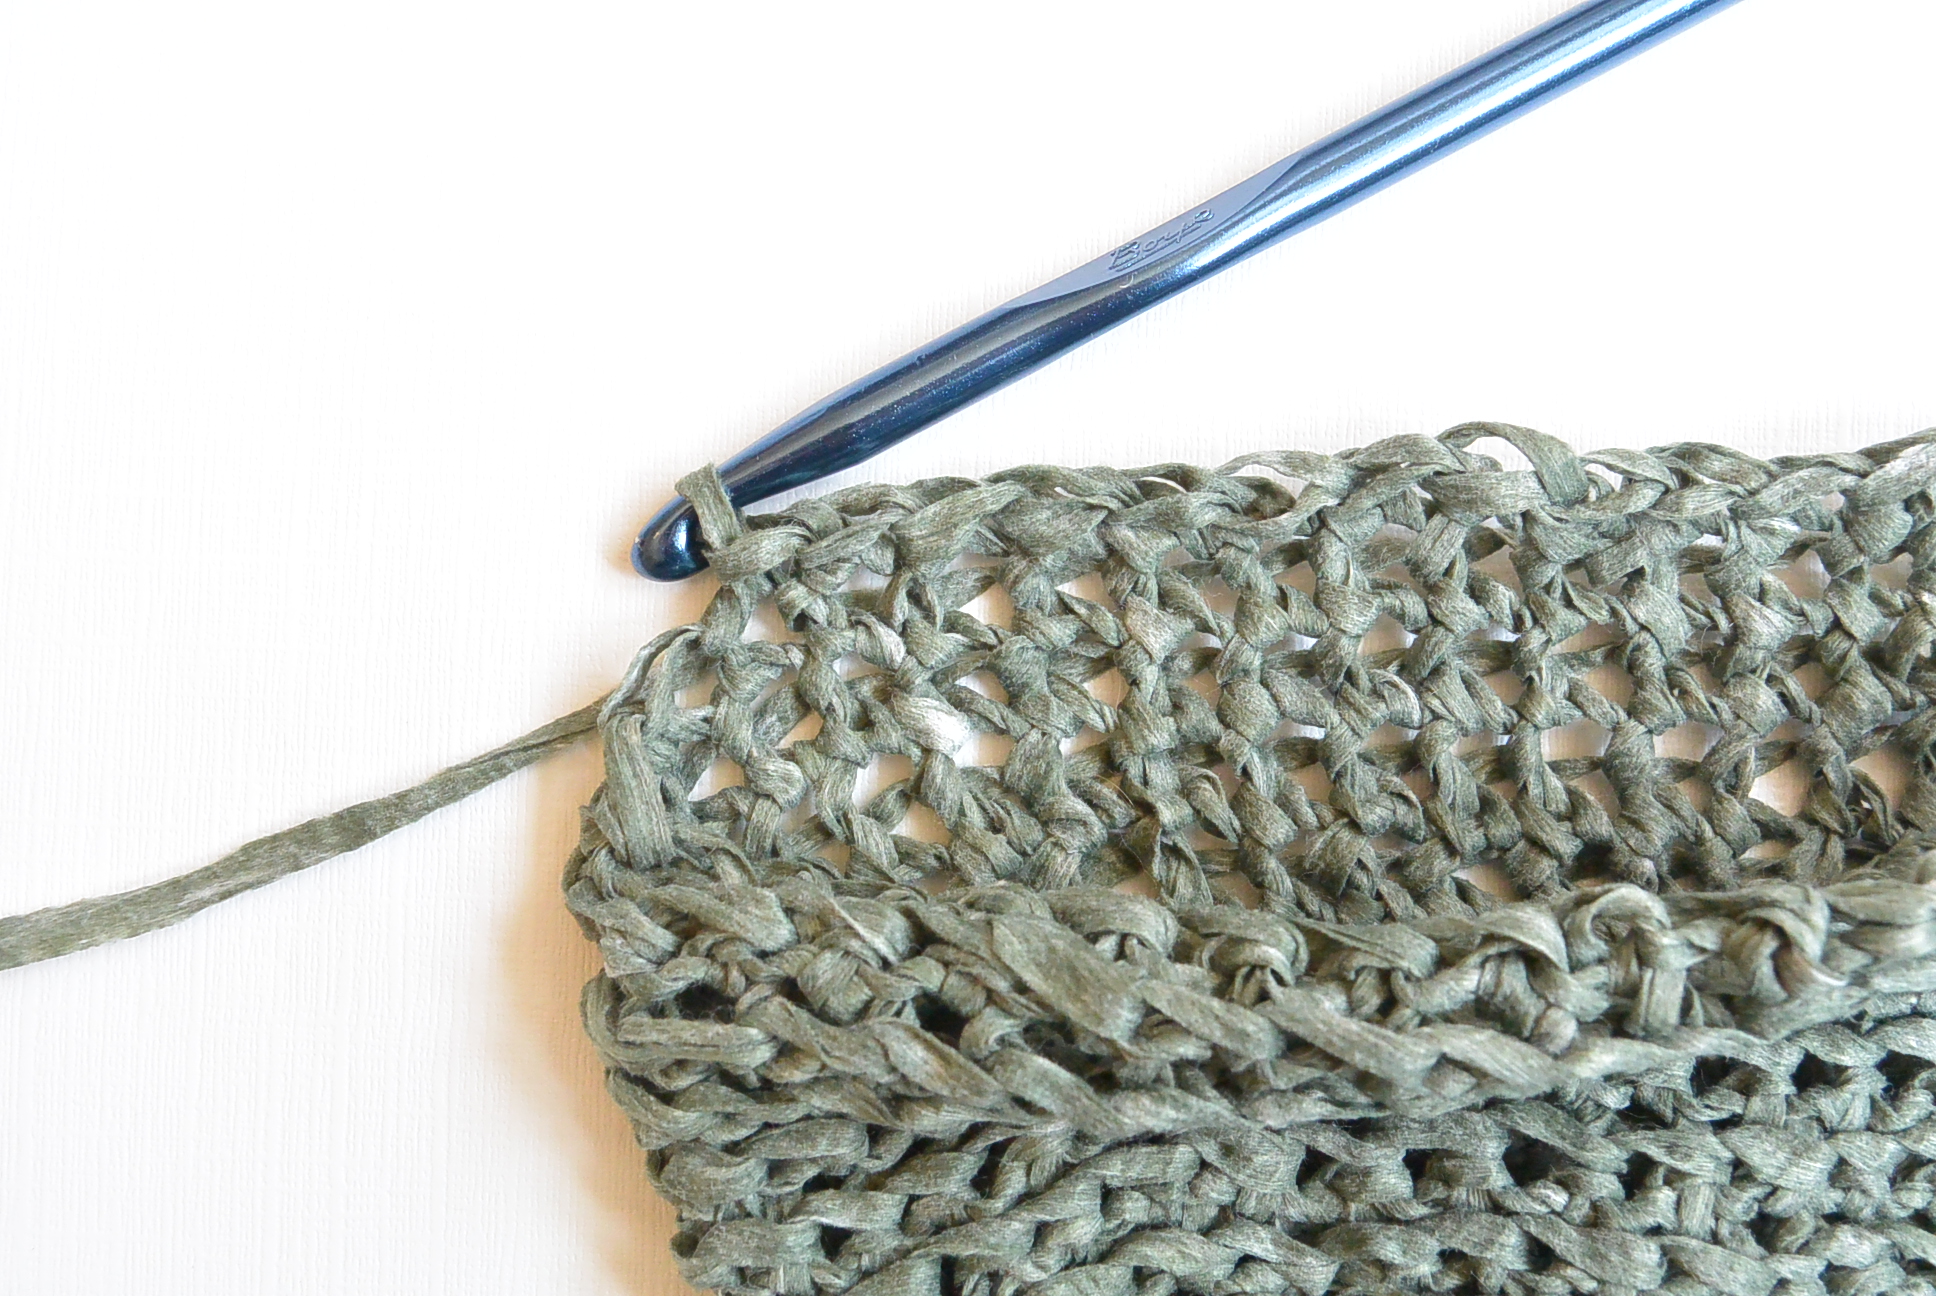
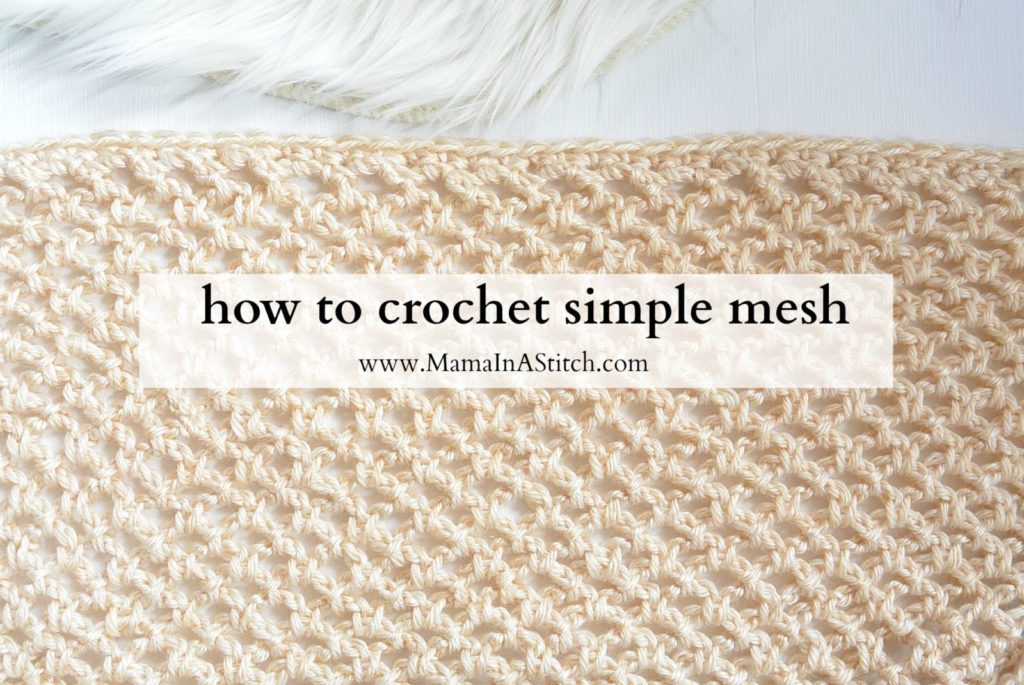
Step 3 Crocheting the Middle Mesh Portion
Round 1 Ch 2, sk st, sl st into next st
Round 2 Ch 2, sl st into next ch 2 sp
Repeat round 2, working in continuous rounds for approximately 9″
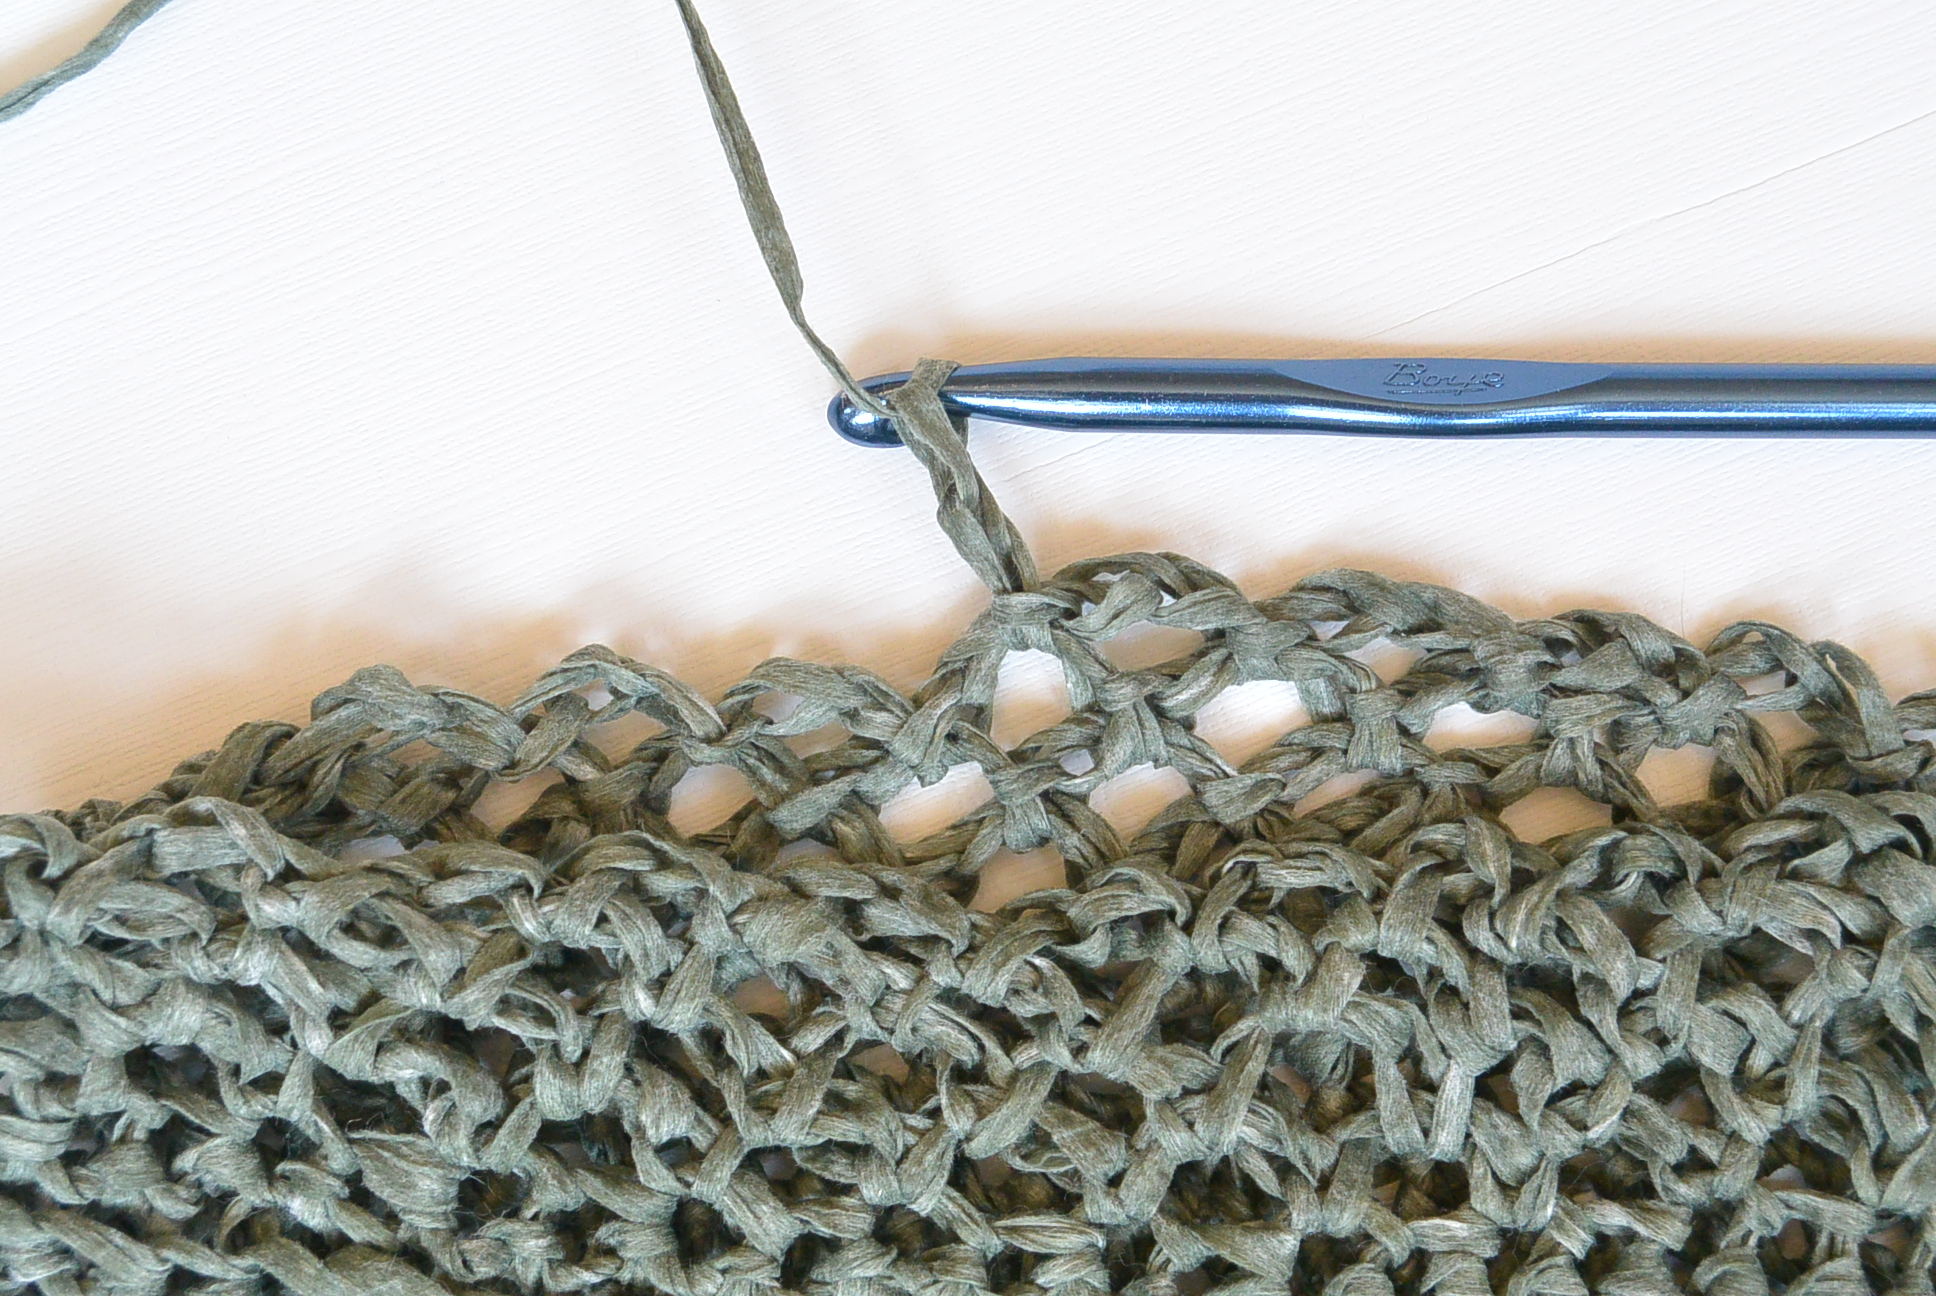
If you need some help with this mesh stitch, you can see my full tutorial and video here
Once you’ve completed approximately 9″ of the mesh pattern, you will move onto the top of the bag
Step 4 Crocheting the Top of the Bag
(Work in continuous rounds)
Round 1 2sc in each ch 2 sp around
Change to US Size K Hook
Round 2 Sc flo in each sc st around
Round 3-5 Repeat row 2
Step 5 Crochet Handles
Lay bag flat in front of you and place stitch markers approximately 8 stitches inward (or approximately 3″ inward) on each side, both for the front and the back
When you reach a stitch marker, ch 40, attach to other stitch maker with a single crochet stitch. Work around bag, by single crocheting through the front loop only to next stitch marker. Create another ch 40, which will be the 2nd handle, attach chain to bag at next stitch marker with a single crochet stitch. Continue to work around single crocheting through the front loop only. Once you reach each handle, single crochet in each ch st across, then continue to single crochet through the front loop only around the bag until your reach the next handle. For the final handle row, work slip stitches across each handle. Tie off and weave in ends.
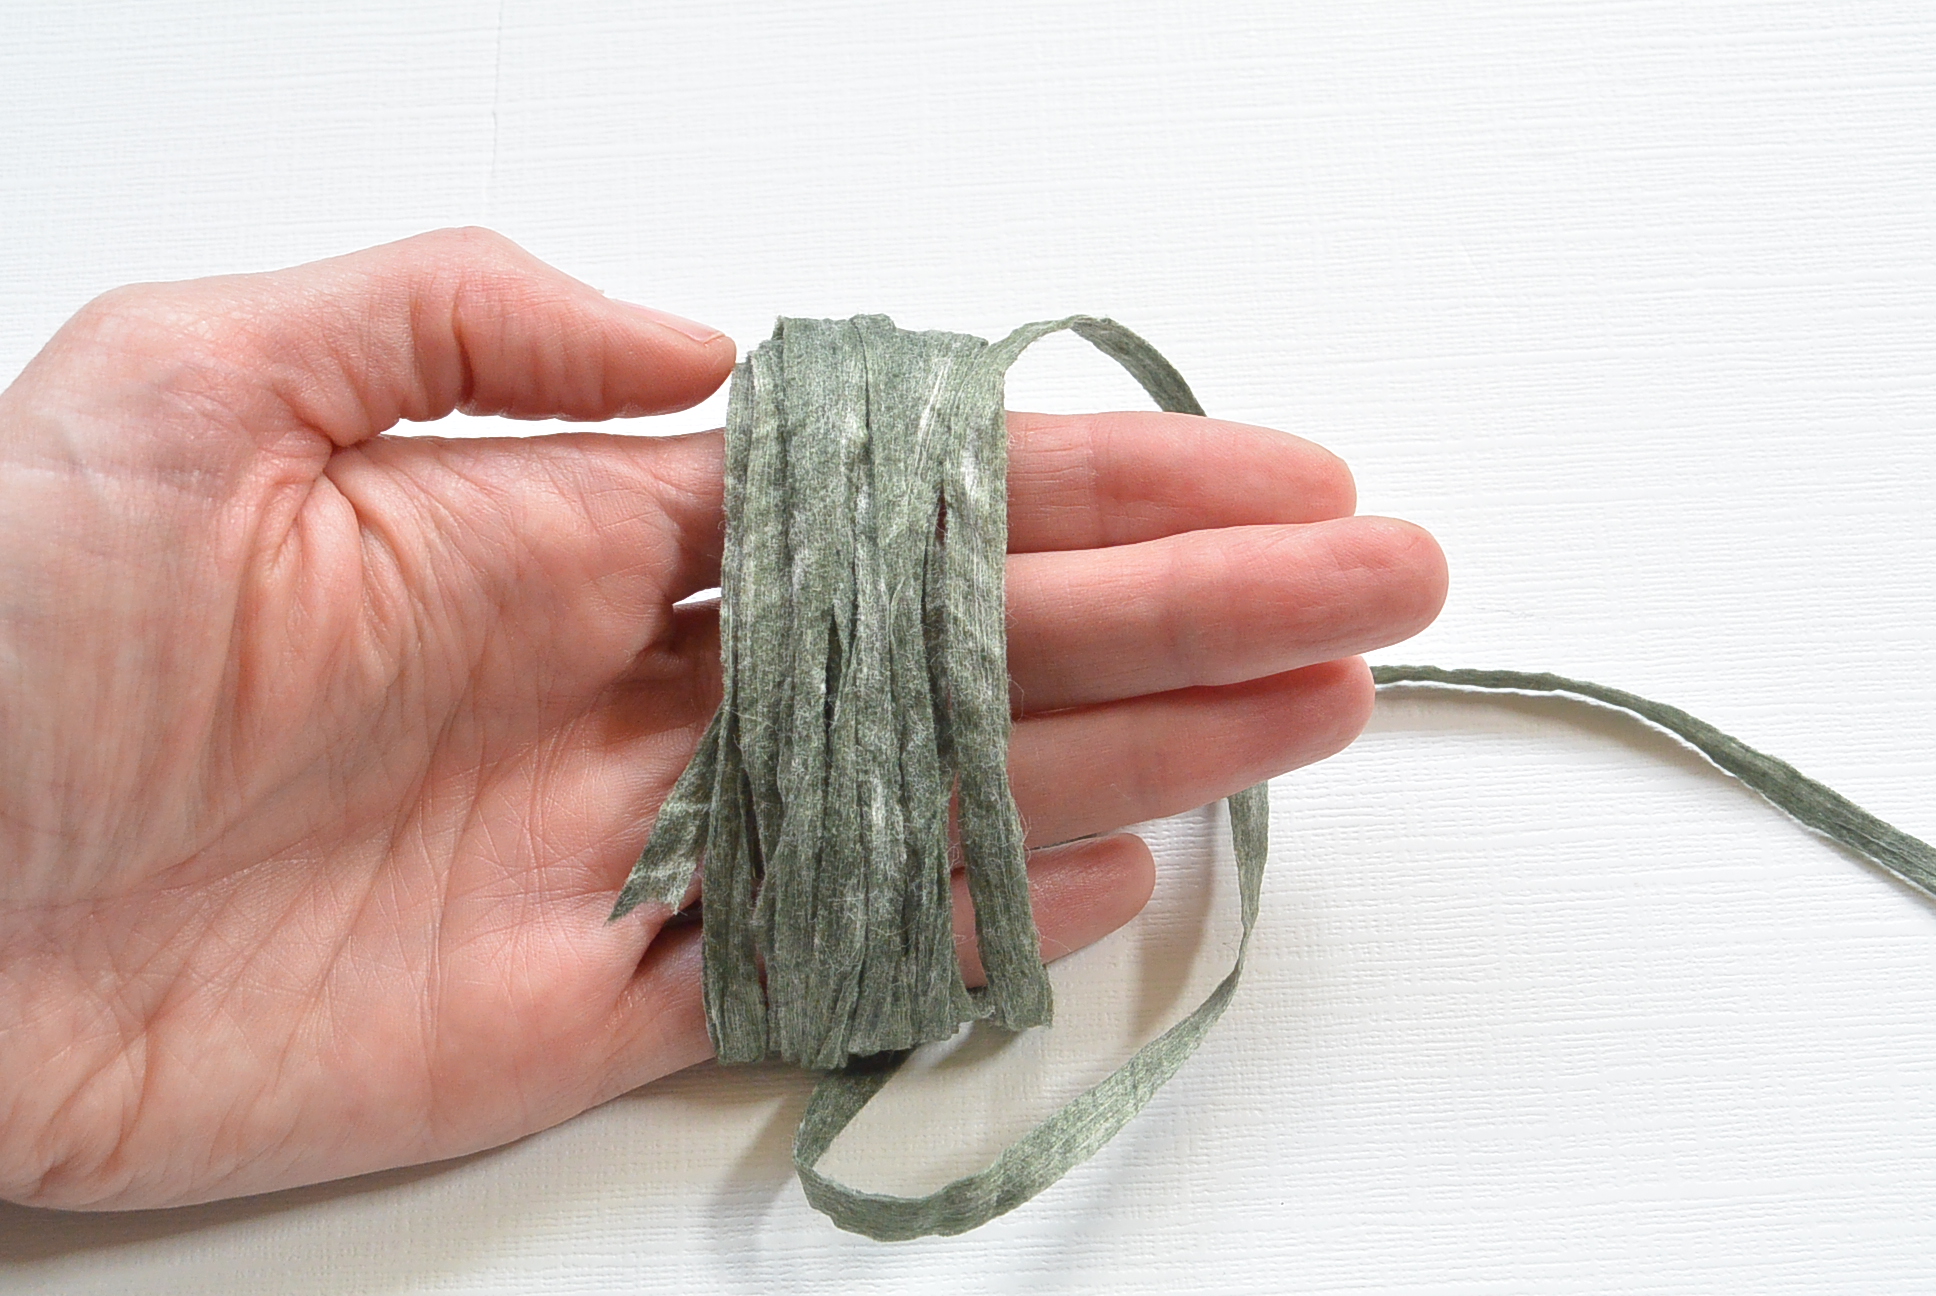
Step 6 Add Optional Tassels
You can easily make some fun tassels with your extra yarn!
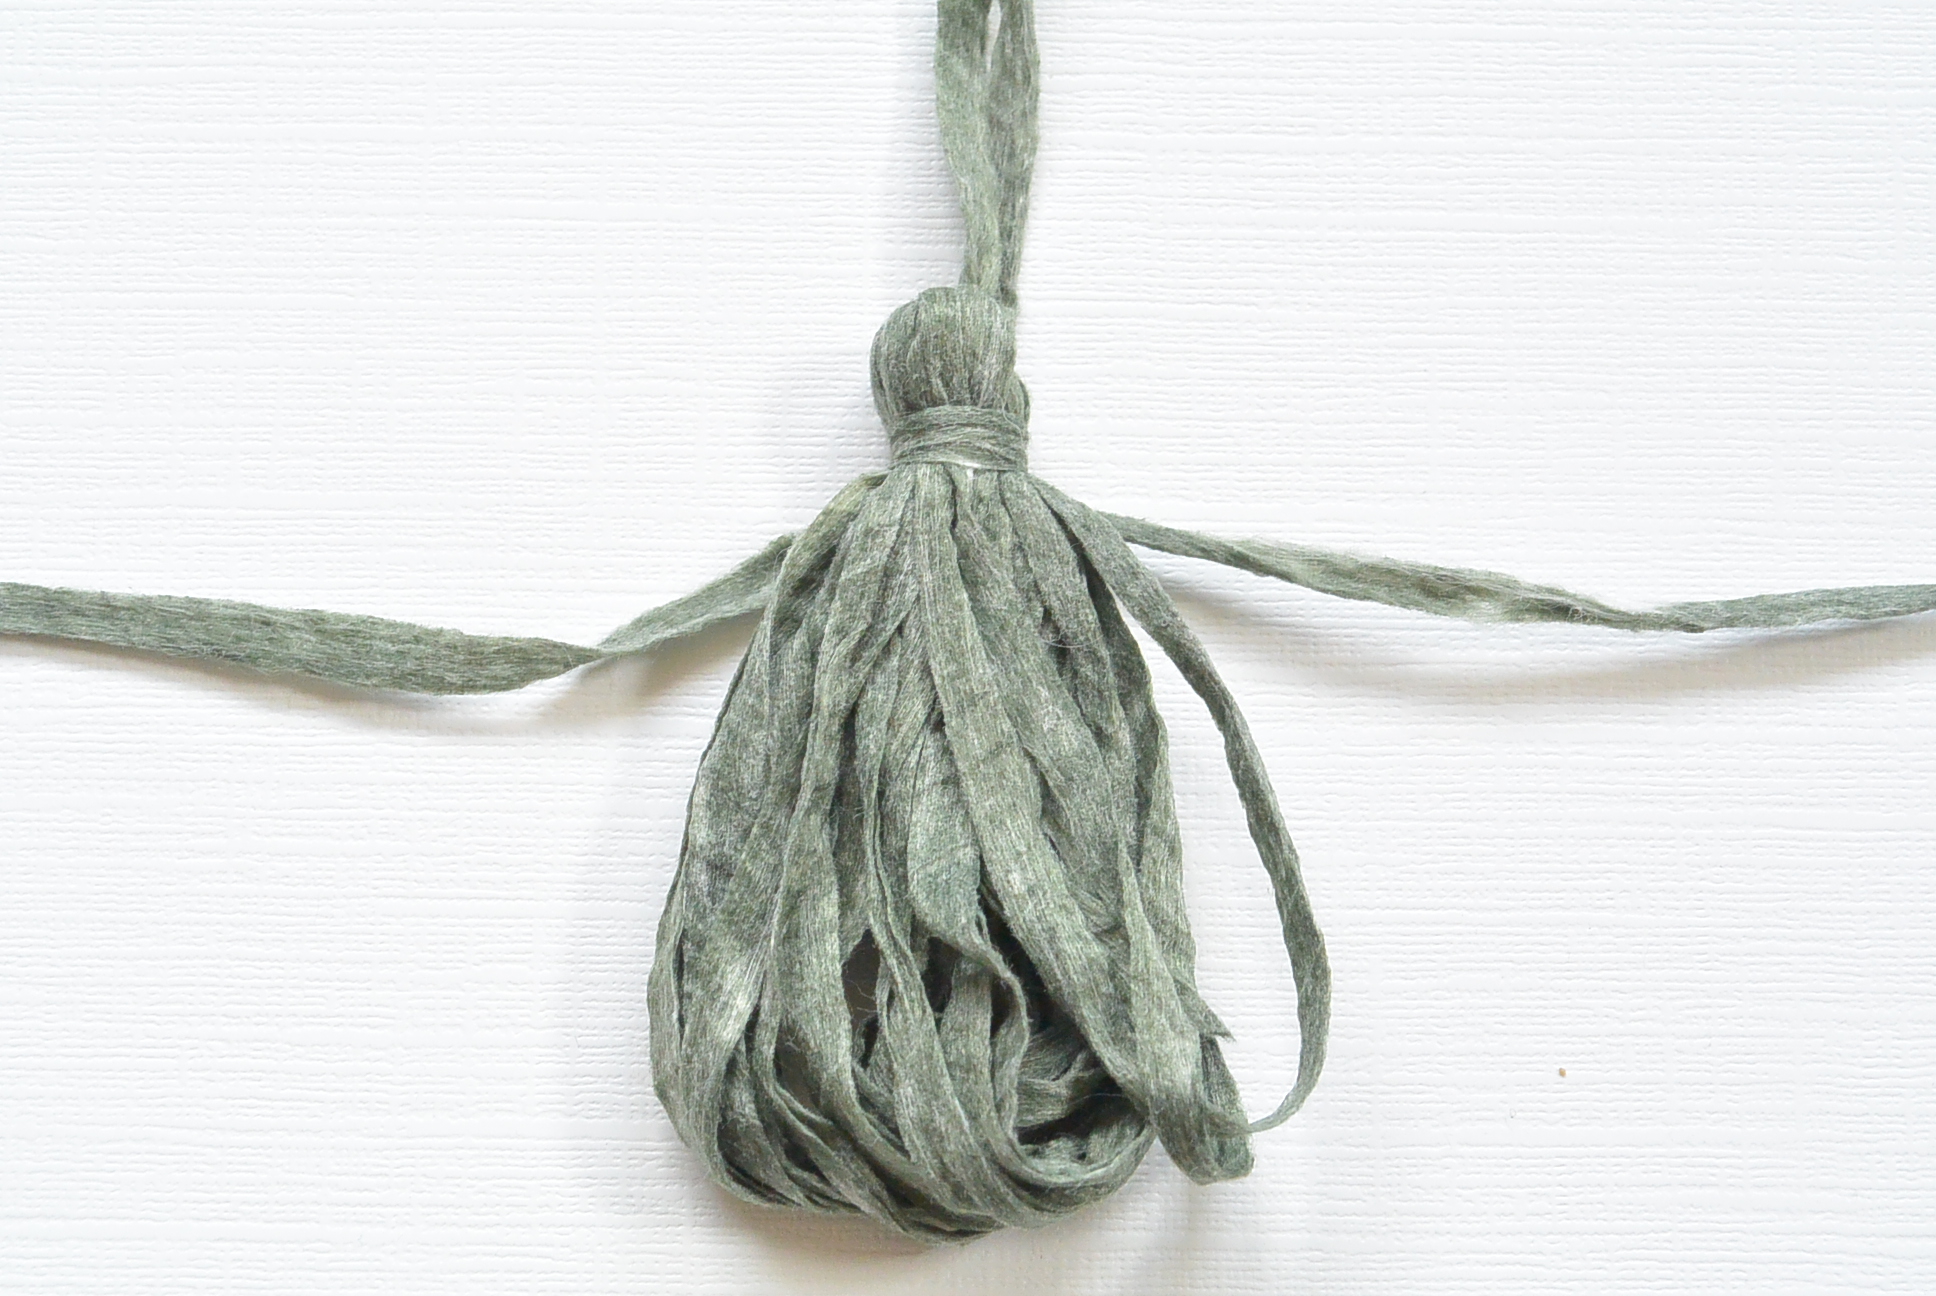
Trim your tassels and attach them to the handles on the bag!
That’s all there is to it my friends!
I hope that you enjoy your new bag and happy spring!
XO
Jessica
If you liked this, you might also like:
![]()
It looks so much like raffia it is hard to imagine what it must feel like to work with. I bet it would make a great sun hat!
One of the things I LOVE about your blog is the fantastic instructions you so graciously provide for your readers. Your written instructions are great, but we all know that a picture is worth a thousand words! Love your patterns, love your colorways and love your use of yarns. You’re the bomb, girl!
Ah that means a lot to me Judy! Thanks so much! It’s so much fun to post these projects. I’m so obsessed. Lol….can you tell?!
What a great bag, and I love the added tassels! I’ll have to check out that yarn!
I thought you might be a South Carolina girl, as we are the Palmetto State! I luv the pattern.
I had no idea South Carolina was the Palmetto State! Too cool… I received an email telling me that as well!
Bought this kit from the Lion Brand website without knowing it was your pattern. No wonder I love it!
Love this tote! Please let me know if you do a youtube tutorial of this pattern. I love watching and following step by step videos – that’s my favorite way to crochet. Thank you for the inspiration.
Love love the green grass market bag. Gonna make that someday.
Yay!
Going to make this bag for our upcoming beach trip. This would make a great beach bag. Think I will make a second one for our friends to enjoy with us on the beach.
Thank you for the inspiration.
Awesome Pam!
Would this be a good yarn to make a sun hat?
Hi Bethany! I love the look of the yarn and it has the perfect look to be a sun hat! It’s hard to say thought because it’s super soft and pretty drapey. You might have to crochet really tightly for it to hold it’s shape as a sun hat. Just my opinion on that!
Hi, I have the bag mostly done. Love the yarn. Very easy to work with – soft and does not fray. I’m not sure about the directions for the handles. What do you mean by 8 stitches or 3″ inward? That doesn’t make sense to me. Otherwise, great pattern.
So glad you like it! When you lay the bag flat in front of you, you can simply measure three inches inward on each side. This is where your handle will attach to the bag. Does that make any sense? You then do this on the other side as well for the other handle.
OK got it. I think saying toward the center might be clearer. Thanks.
I just finished my bag in the LB Rewind and I love the look…only change I made was longer handles. I am short but the 40 stitches didn’t give me the length I wanted. This is one of things I love about your patterns is how easy they adjust to my preferences…also made the Summer Kimono Cardigan with LB Mandala with no changes to the pattern and it is perfect for our cool New England summer evenings. Thank you for the time you put into making patterns that give room for the the crafters own creativity.
Hi Toni! I’m thrilled to hear you were able to adjust the handles – great job! Thanks so much for taking the time to write to me Toni. So glad to hear that the Summer Kimono is working for you too. 🙂 And you’re welcome of course – it’s so fun to share!
Love this bag! Started and finished it on a road trip from PA to Massachusetts last weekend. Love this yarn – I also ordered the June sun hat pattern with the Rewind Tape yarn. Love your patterns!
So cool Judy! It’s awesome to hear that you enjoyed making it and like the yarn. Isn’t it fun? I love that hat too!
I made this tote but unfortunately I could not find this tape yarn! Instead I used Caron Chunky Cake #6 and it turned out great! Still looking for the Rewind though….What color did you use for the bag above? Thanks for posting this pattern. I see a lot of market totes in my near future:)
Hi Carol – This is the color “Olive You”. So glad you like the pattern!
Jessica, does this yarn stretch? I love the pattern and the yarn looks so pretty. I know it’s considered a bulky yarn but it looks so thin. Thanks for the beautiful pattern!
looking at your photos, are you working with the inside of the bag facing you?
Is there a way to download this pattern? I cannot see crocheting and always looking at the computer screen and I do not want to download many pages with coloured pictures. Thanks.
Hi! You can copy and paste the pattern into Word and print from there, or the ad-free, printable PDF is available for purchase in my Etsy shop. Hope this helps!
I just made this bag and I love the yarn. Was having a problem with the handles , was not sure now I was suppose to go around the bag with it. I just improvised but I love the pattern. What else would be simple to make with this yarn since I am a advanced Beginner.
Am I doing something wrong in trying to download this pattern? When I tried to copy and paste it really didn’t work. So what I had to do was copy and paste each line of text. Is there any easier way for the pattern to be laid out so that it can be printed without all the pictures? Help. Thank you.
Hi! This free version here on the blog can’t be downloaded as I don’t have a “download” button. But you did what most folks do – copy and paste to print.
Your pattern lists 2 skeins. Lion brand kit lists 3. I bought 2 kits and I barely used the second skein. ! Instructions say pattern uses 125 grams but they list 3 skeins. And you buy 3 skeins.
Hi Susan!
Sorry to hear! I believe the yardage/weight of the skeins changed at some point and so they adjusted the kits. I list what I used at the time. Definitely reach out to them and sorry for the confusion and troubles!