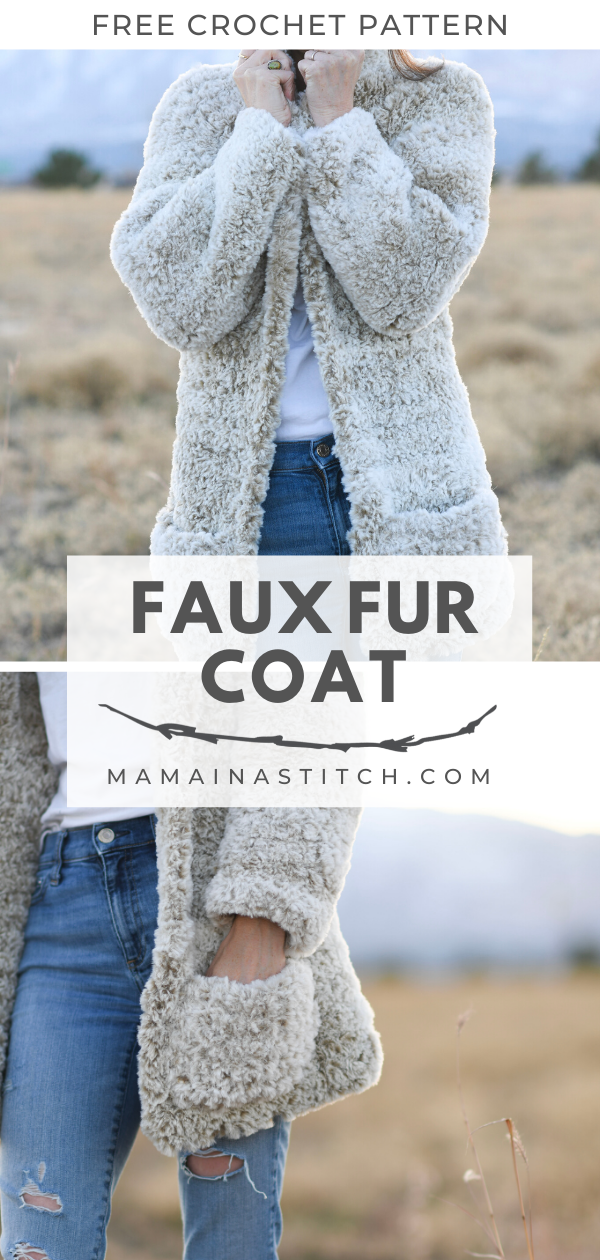
How To Crochet A Faux Fur Coat – Free Pattern
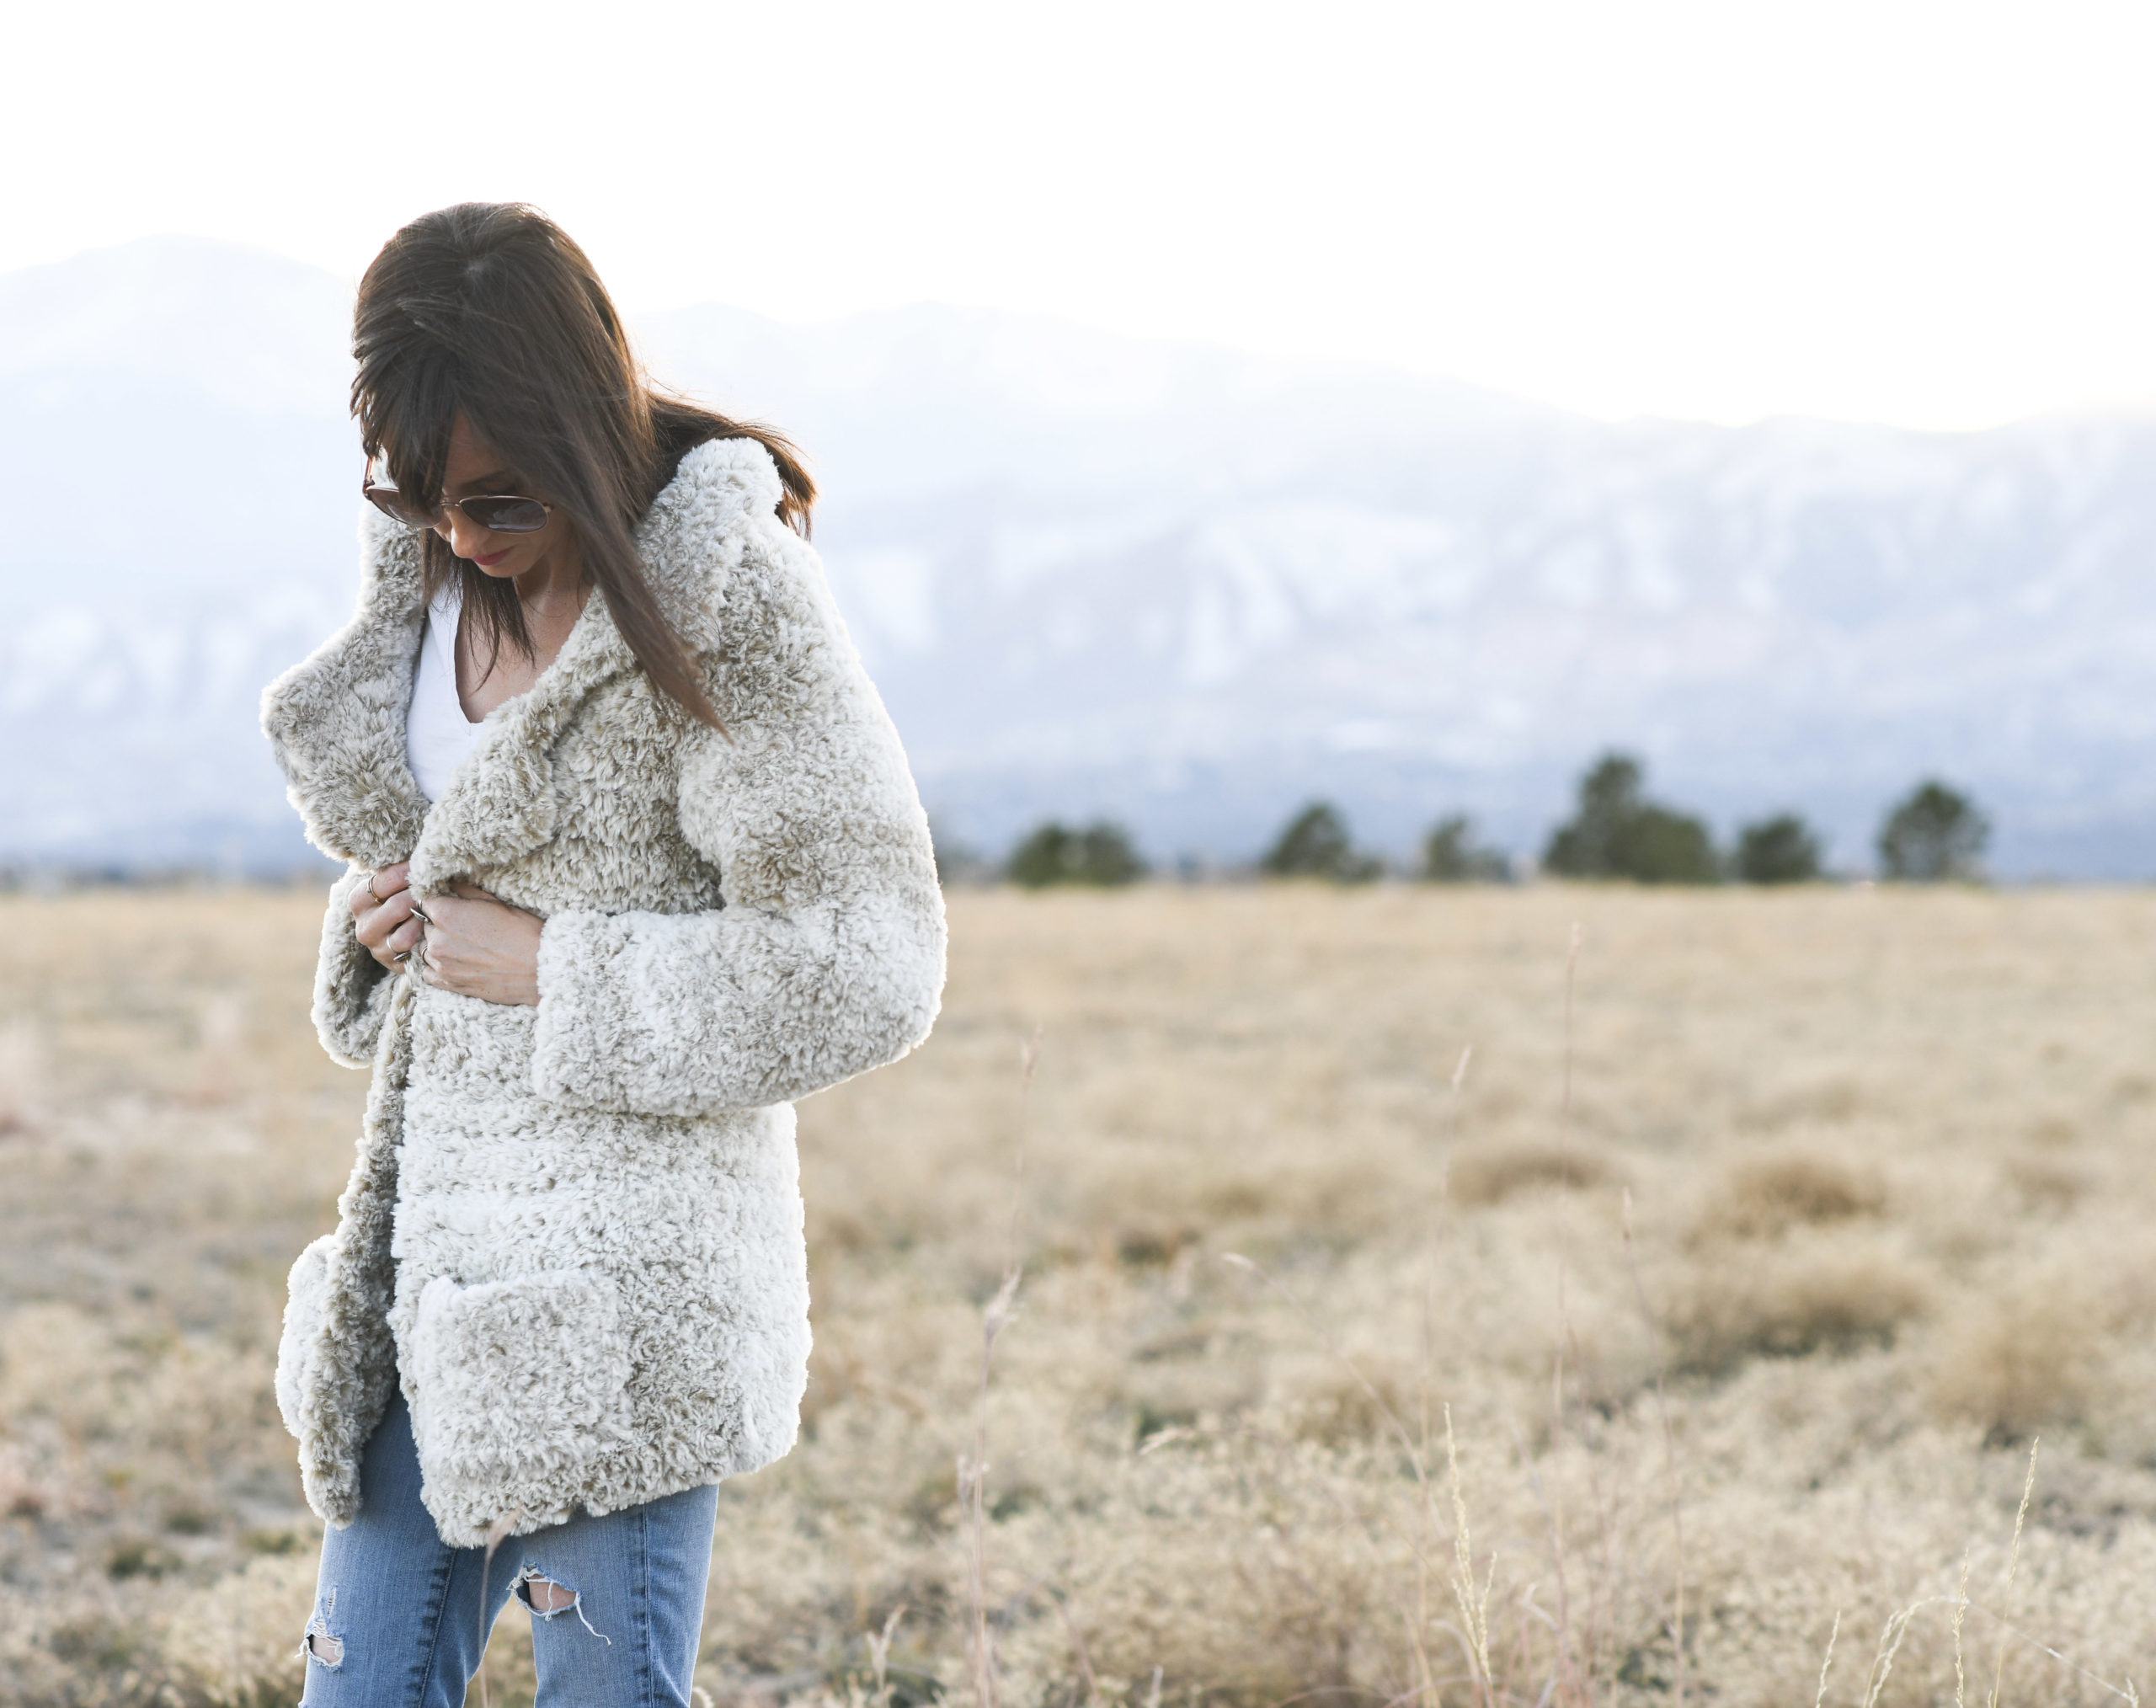
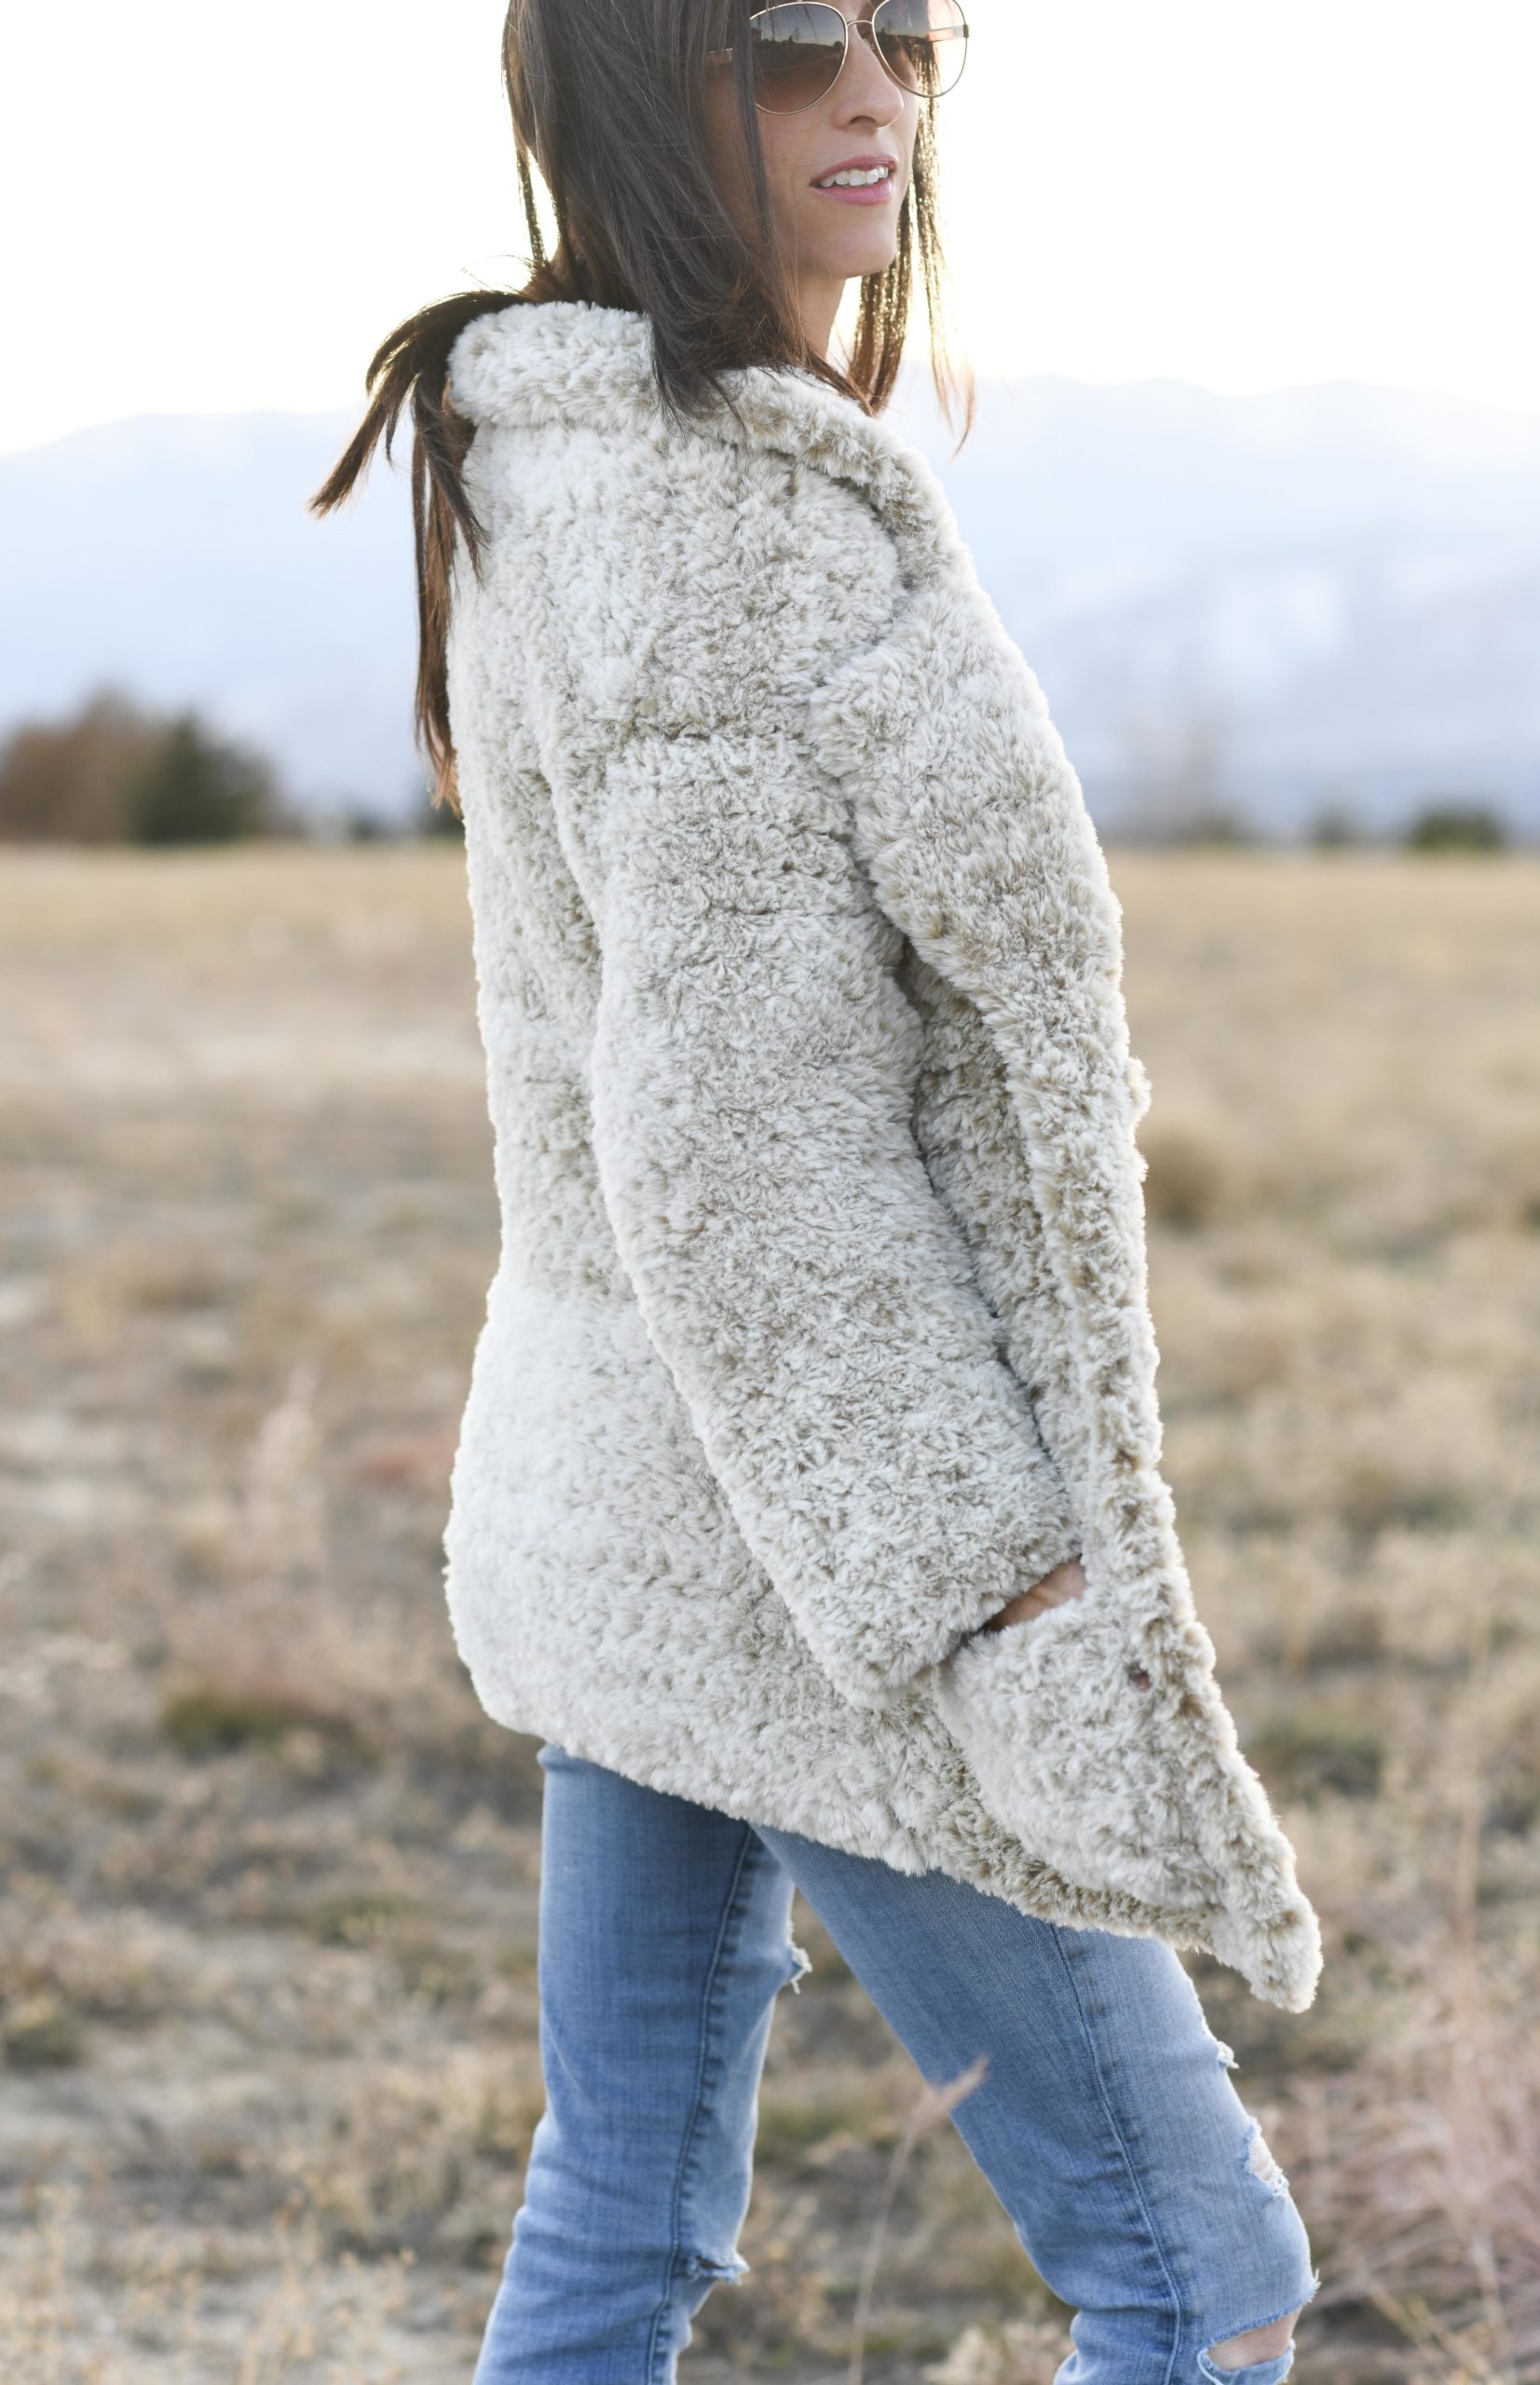
You’ve seen the faux fur coats all over the stores, so of course we want to make our own, right? This fur coat, or teddy bear coat, is easy and quick to make. It took me a while to design, but that doesn’t matter! Last year I made a fur vest (here) and had dreamed of one day tackling a coat. When Lion Brand reached out to me with an idea to make a fur coat, I was thrilled! Scroll down to see the free pattern below, or you may choose to purchase the ad-free, printable version from Etsy here or the kit from Lion Brand here.
Like I just mentioned, these coats are everywhere, from the expensive stores like Banana Republic and Anthropologie, to the less pricey places like Amazon and Target. Faux fur coat, teddy bear coat, call it what you will, but call it super soft and cozy for sure. Ha!
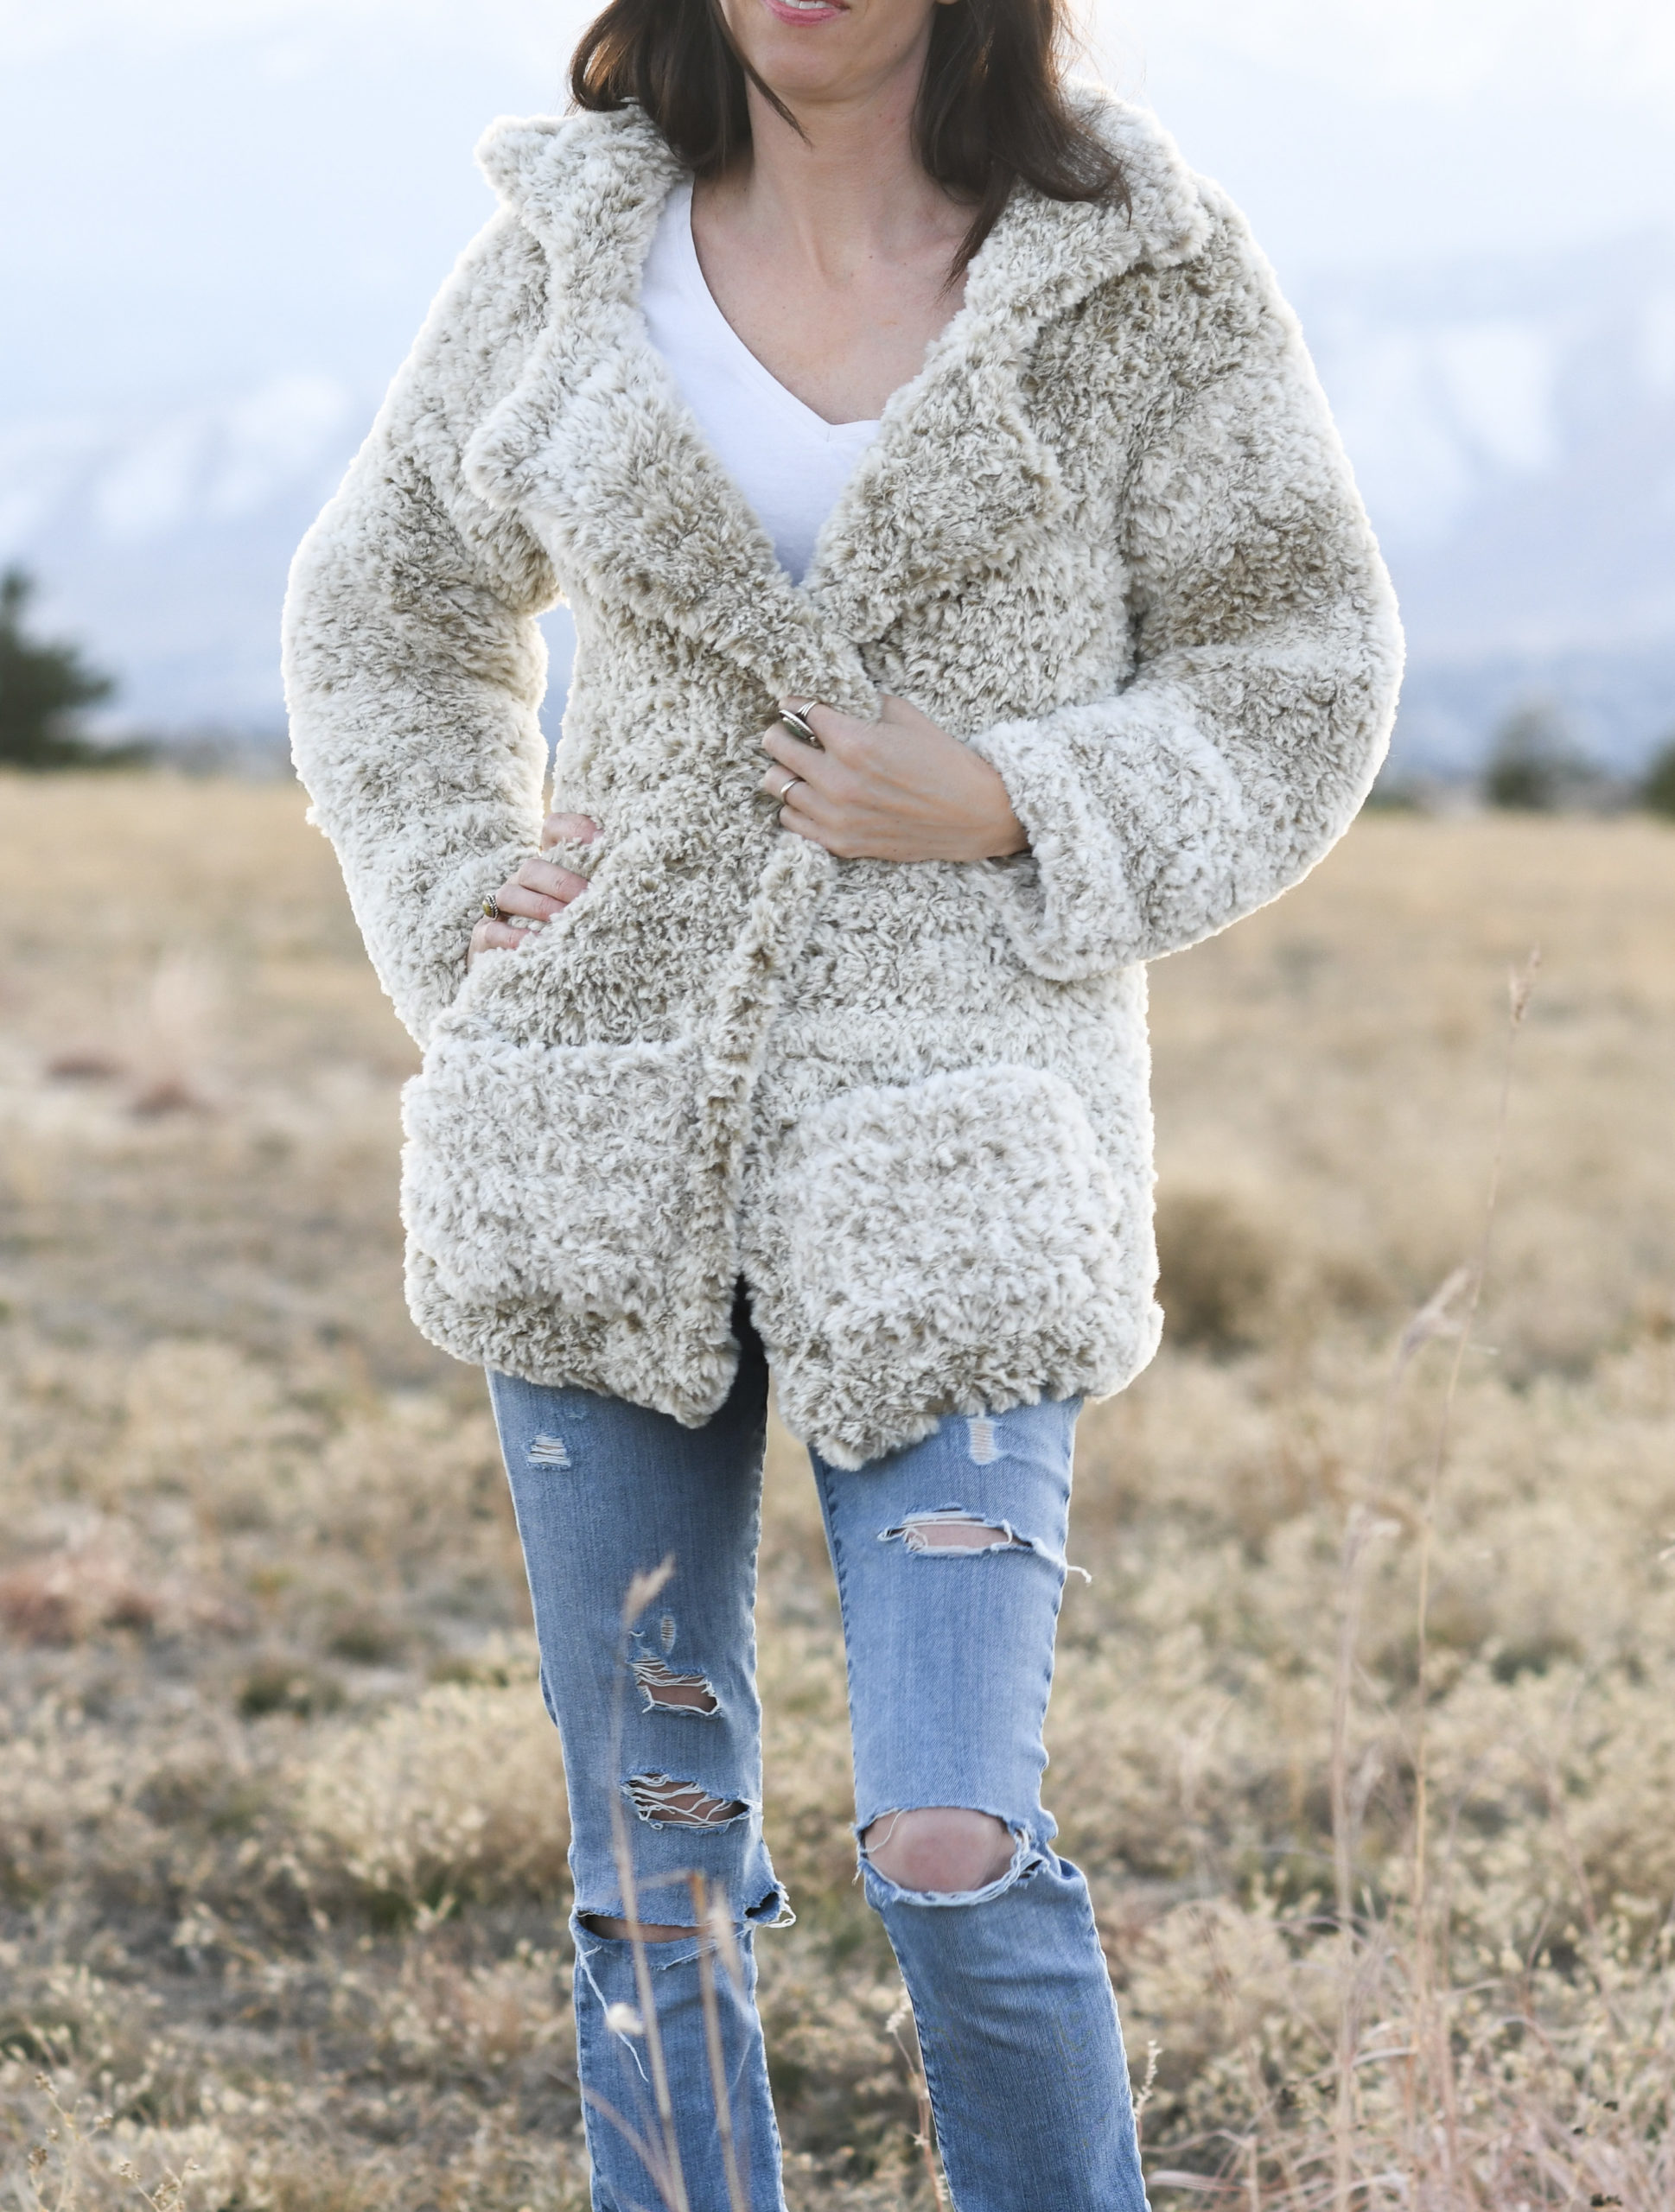
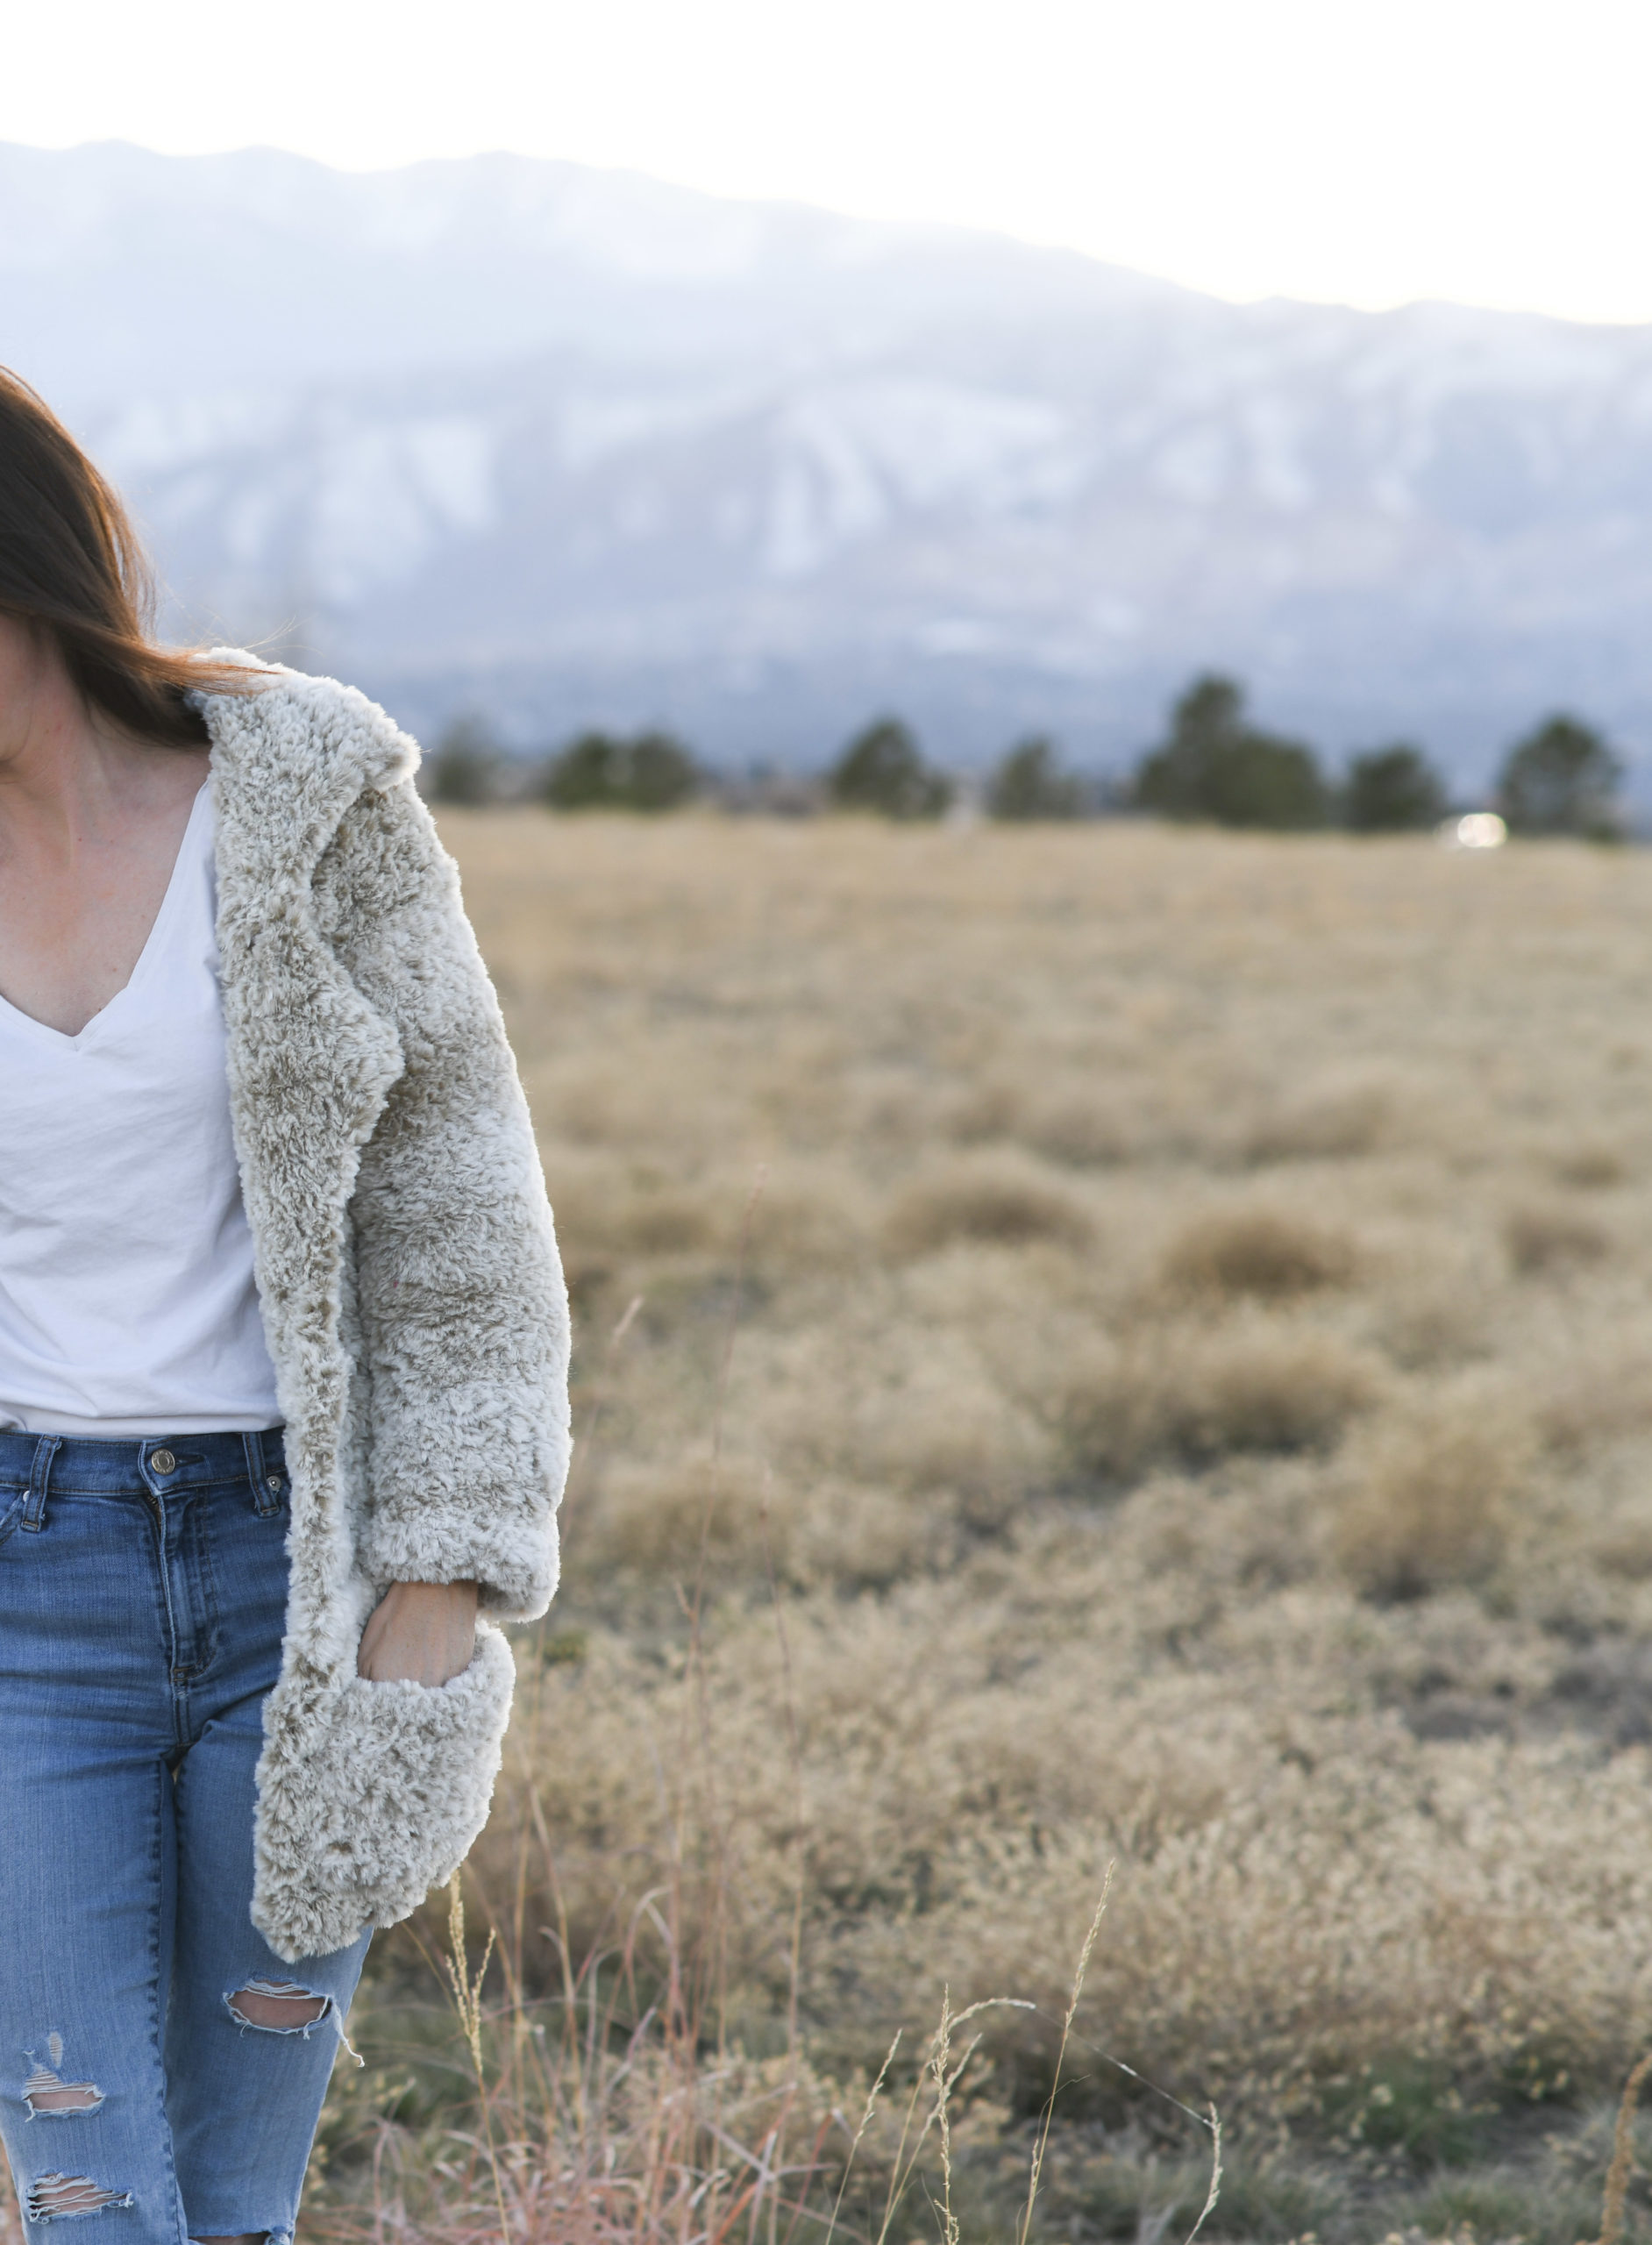
I made sure that this coat was long enough to keep us warm and wanted to include pockets for practical and cozy purposes. It can be casual or fancy, depending on the color you choose and the outfit you pair with it. While designing this piece, I had to frog the entire back panel and part of the front panel at one point. It’s always a fun little challenge to work with a unique yarn, and I realized I had made my jacket too large. While I wanted it to be comfortably oversized, I didn’t hope to look like marshmallow man. Ugh! However, I’m so thrilled with the final result and fit. Yay!
Let me get to the details of this softest ever, cozy jacket. 😉
How Do You See Your Stitches?
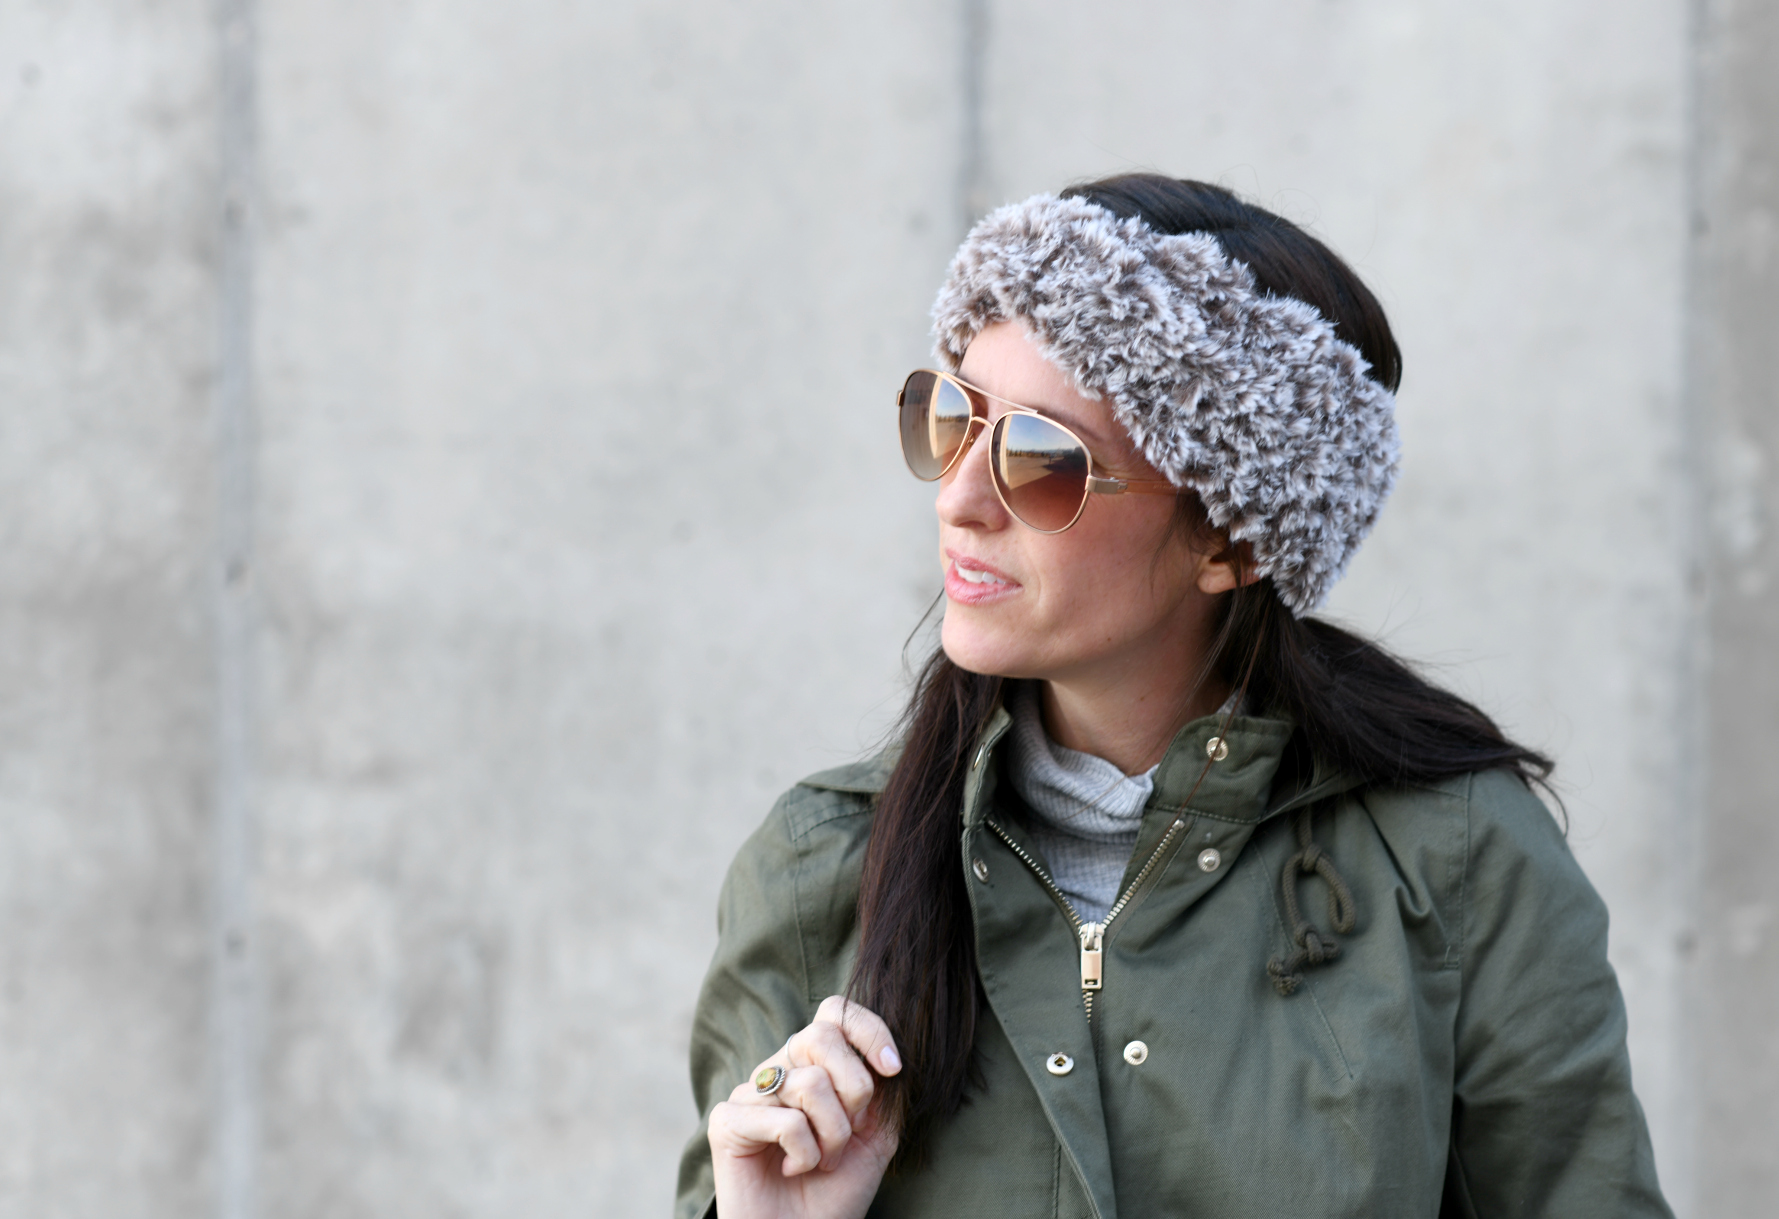
First, if you’re scared about being able to see your stitches, let me tell you. You can’t see your stitches. BUT, it’s not a problem! It was so easy for me to feel each stitch with my fingers. This sounds like it might be difficult, but you may be surprised! If you are scared to tackle a big project like this one right away, you could first try something small like my Faux Fur Headband (here) to make sure you’re good to go. Personally, I crocheted faster with this fur yarn than I do with many of the other regular yarns. Oh! You might also wonder if this yarn sheds. It does shed when you’re crocheting, but not terribly. It’s not near enough to stop me from using the yarn.
How Do You Make the Coat?
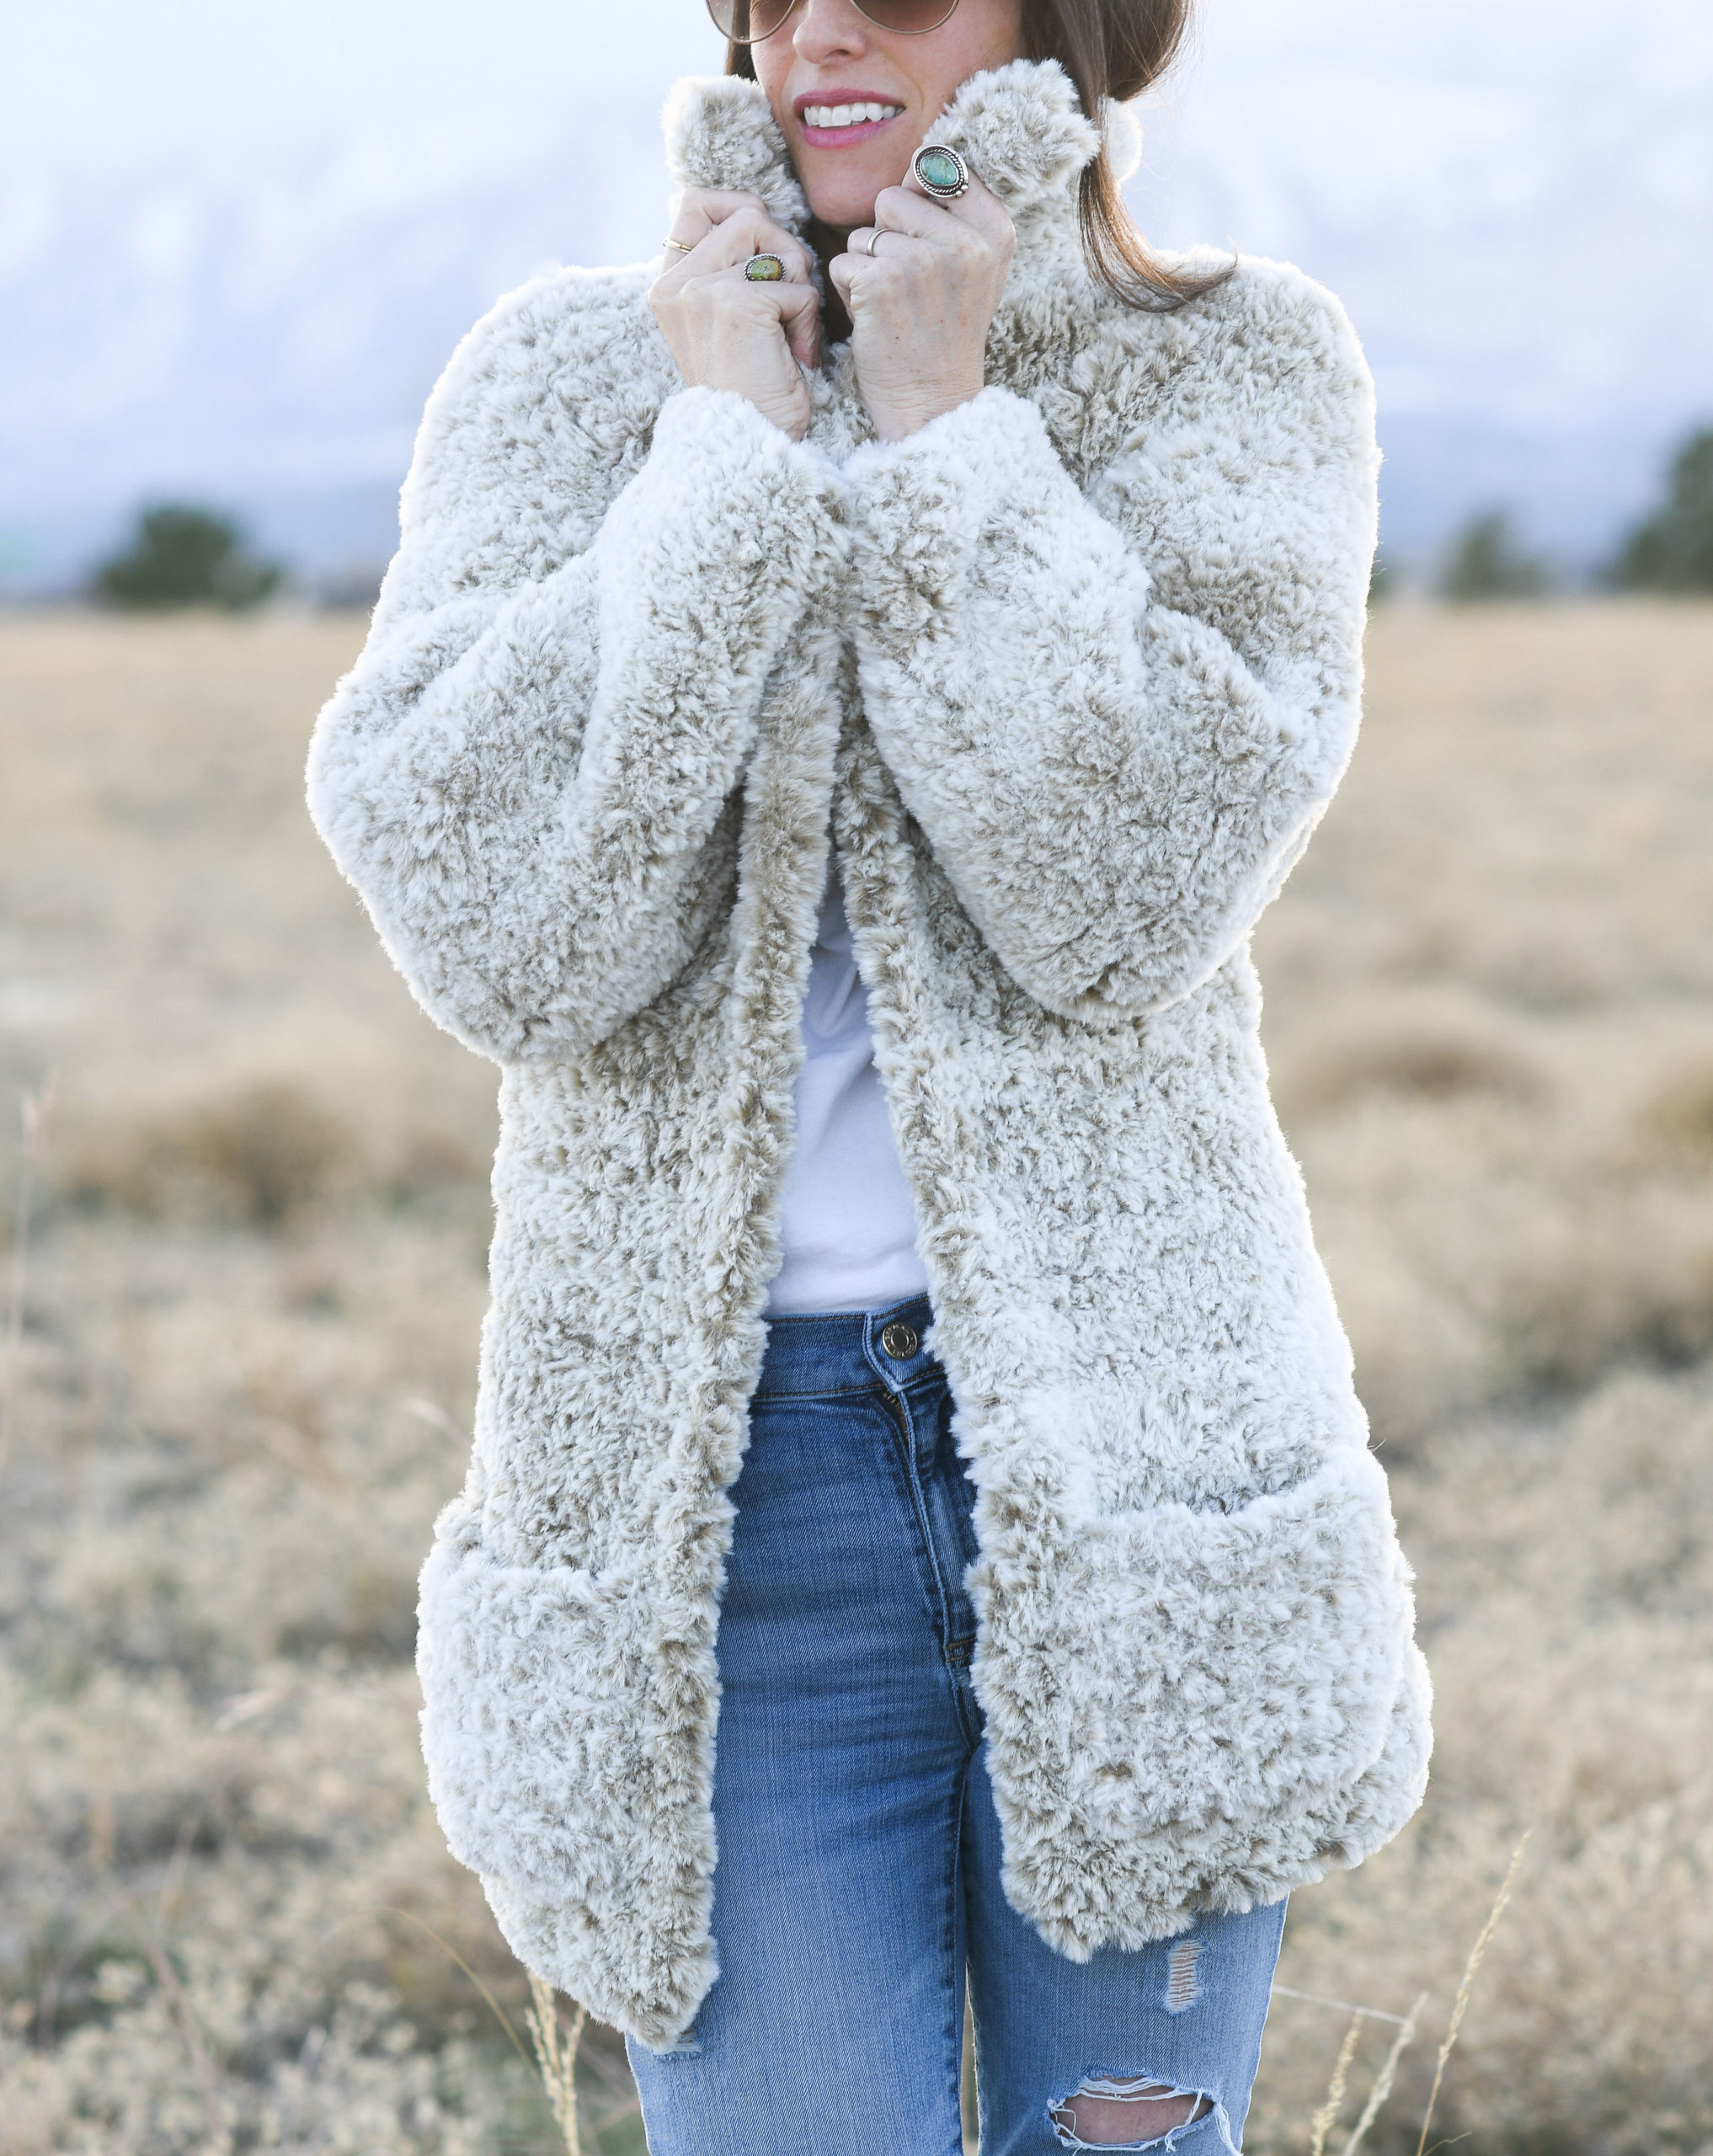
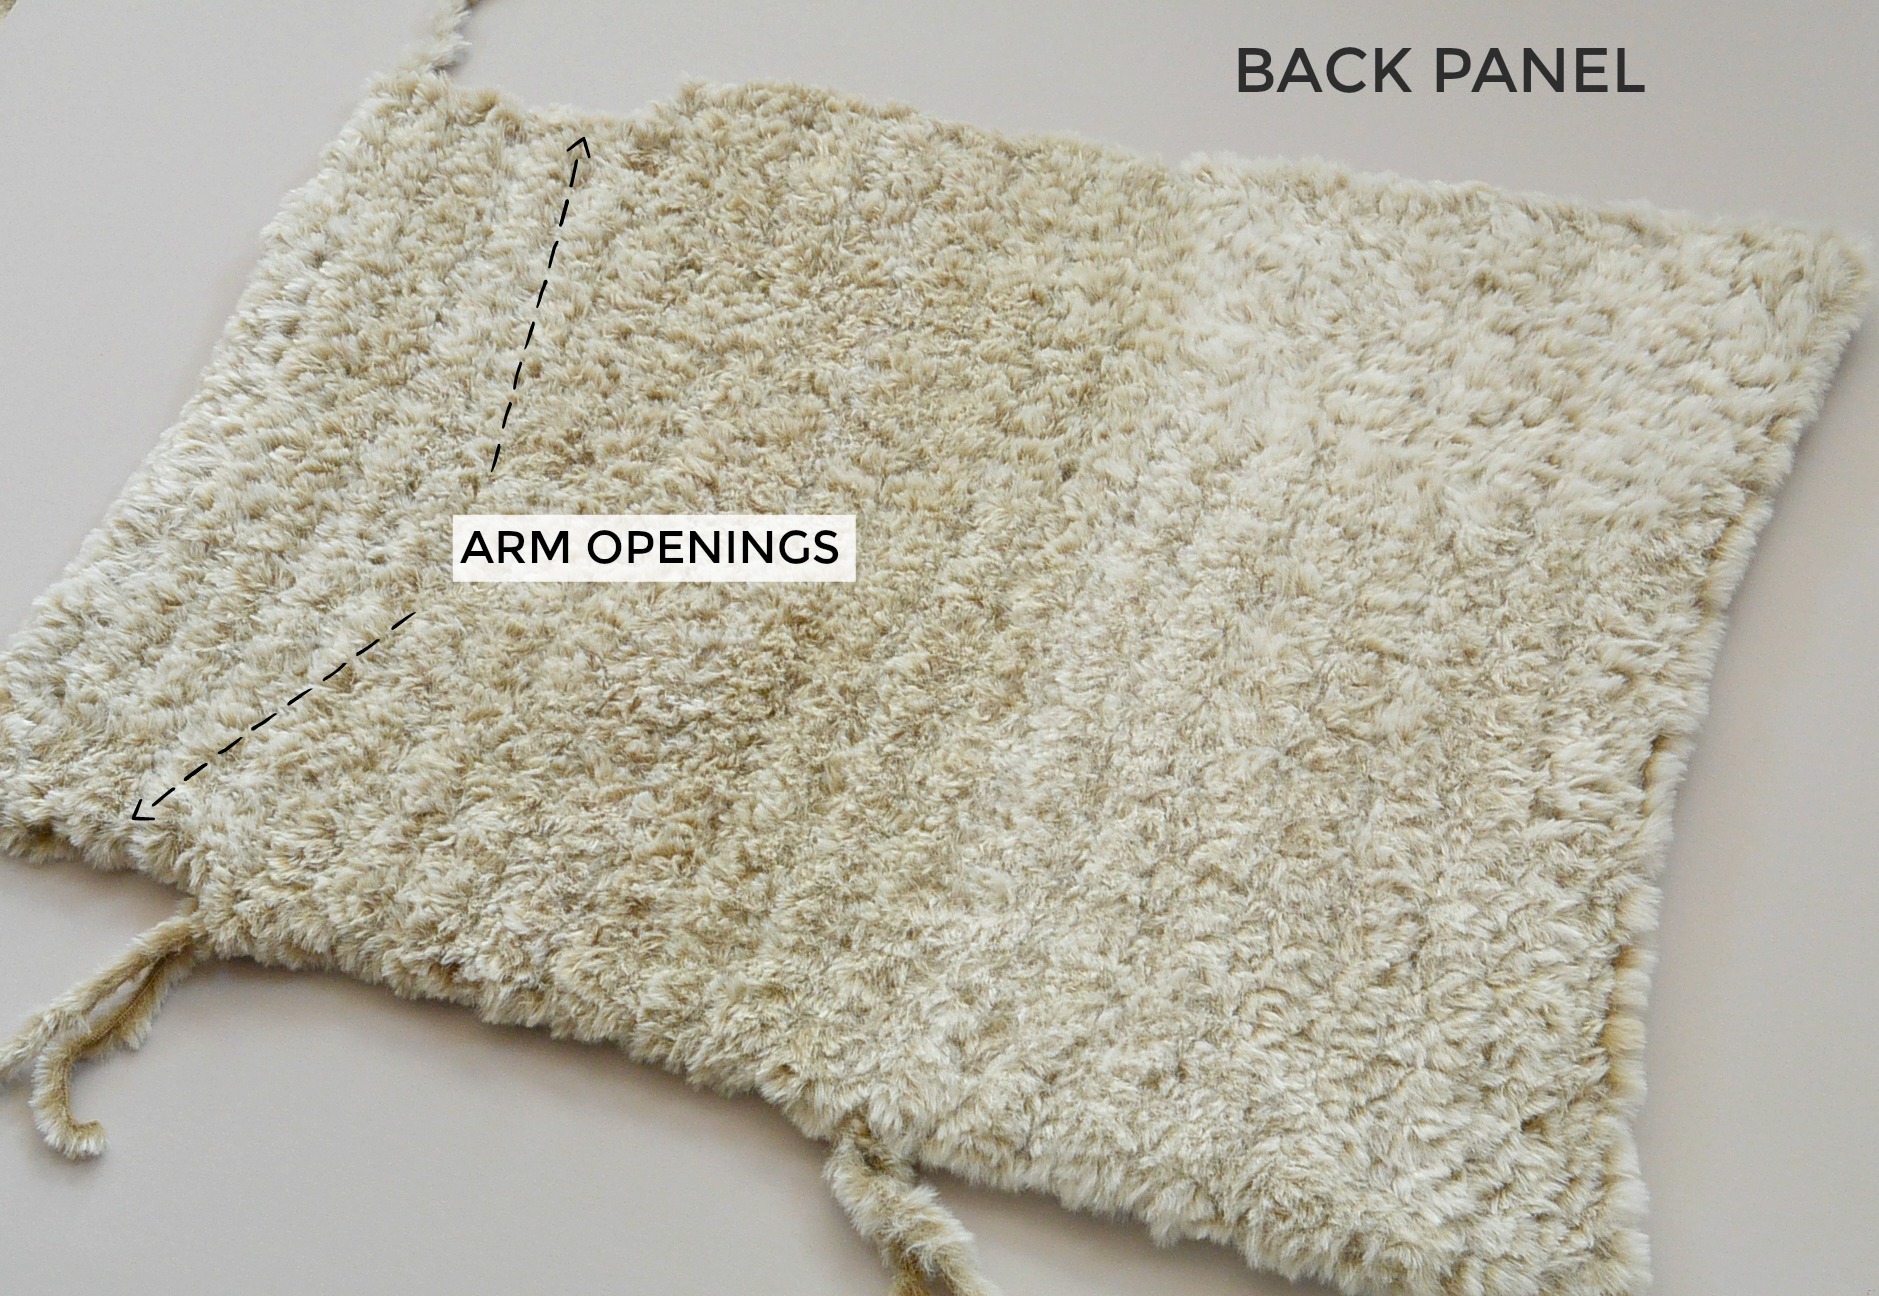
As is the case with most of my patterns, this is super simple. The construction of the jacket is very easy as you’ll make fairly basic shapes and seam them together. While this coat has more shaping than some of my other patterns, it’s totally worth it! You get that glorious collar and sleeves that fit just right. You will crochet this coat in three pieces. There’s a back panel, two front panels and sleeves are added at the end (they’re crocheted in rounds).
What Color Did You Use?
For my coat, I used the color Blonde Elk. This color gives the jacket a casual look which is my personal style and taste. Choose a bold, solid color for a more refined look if you’d like! I love ALL the color options of the Go For Faux.
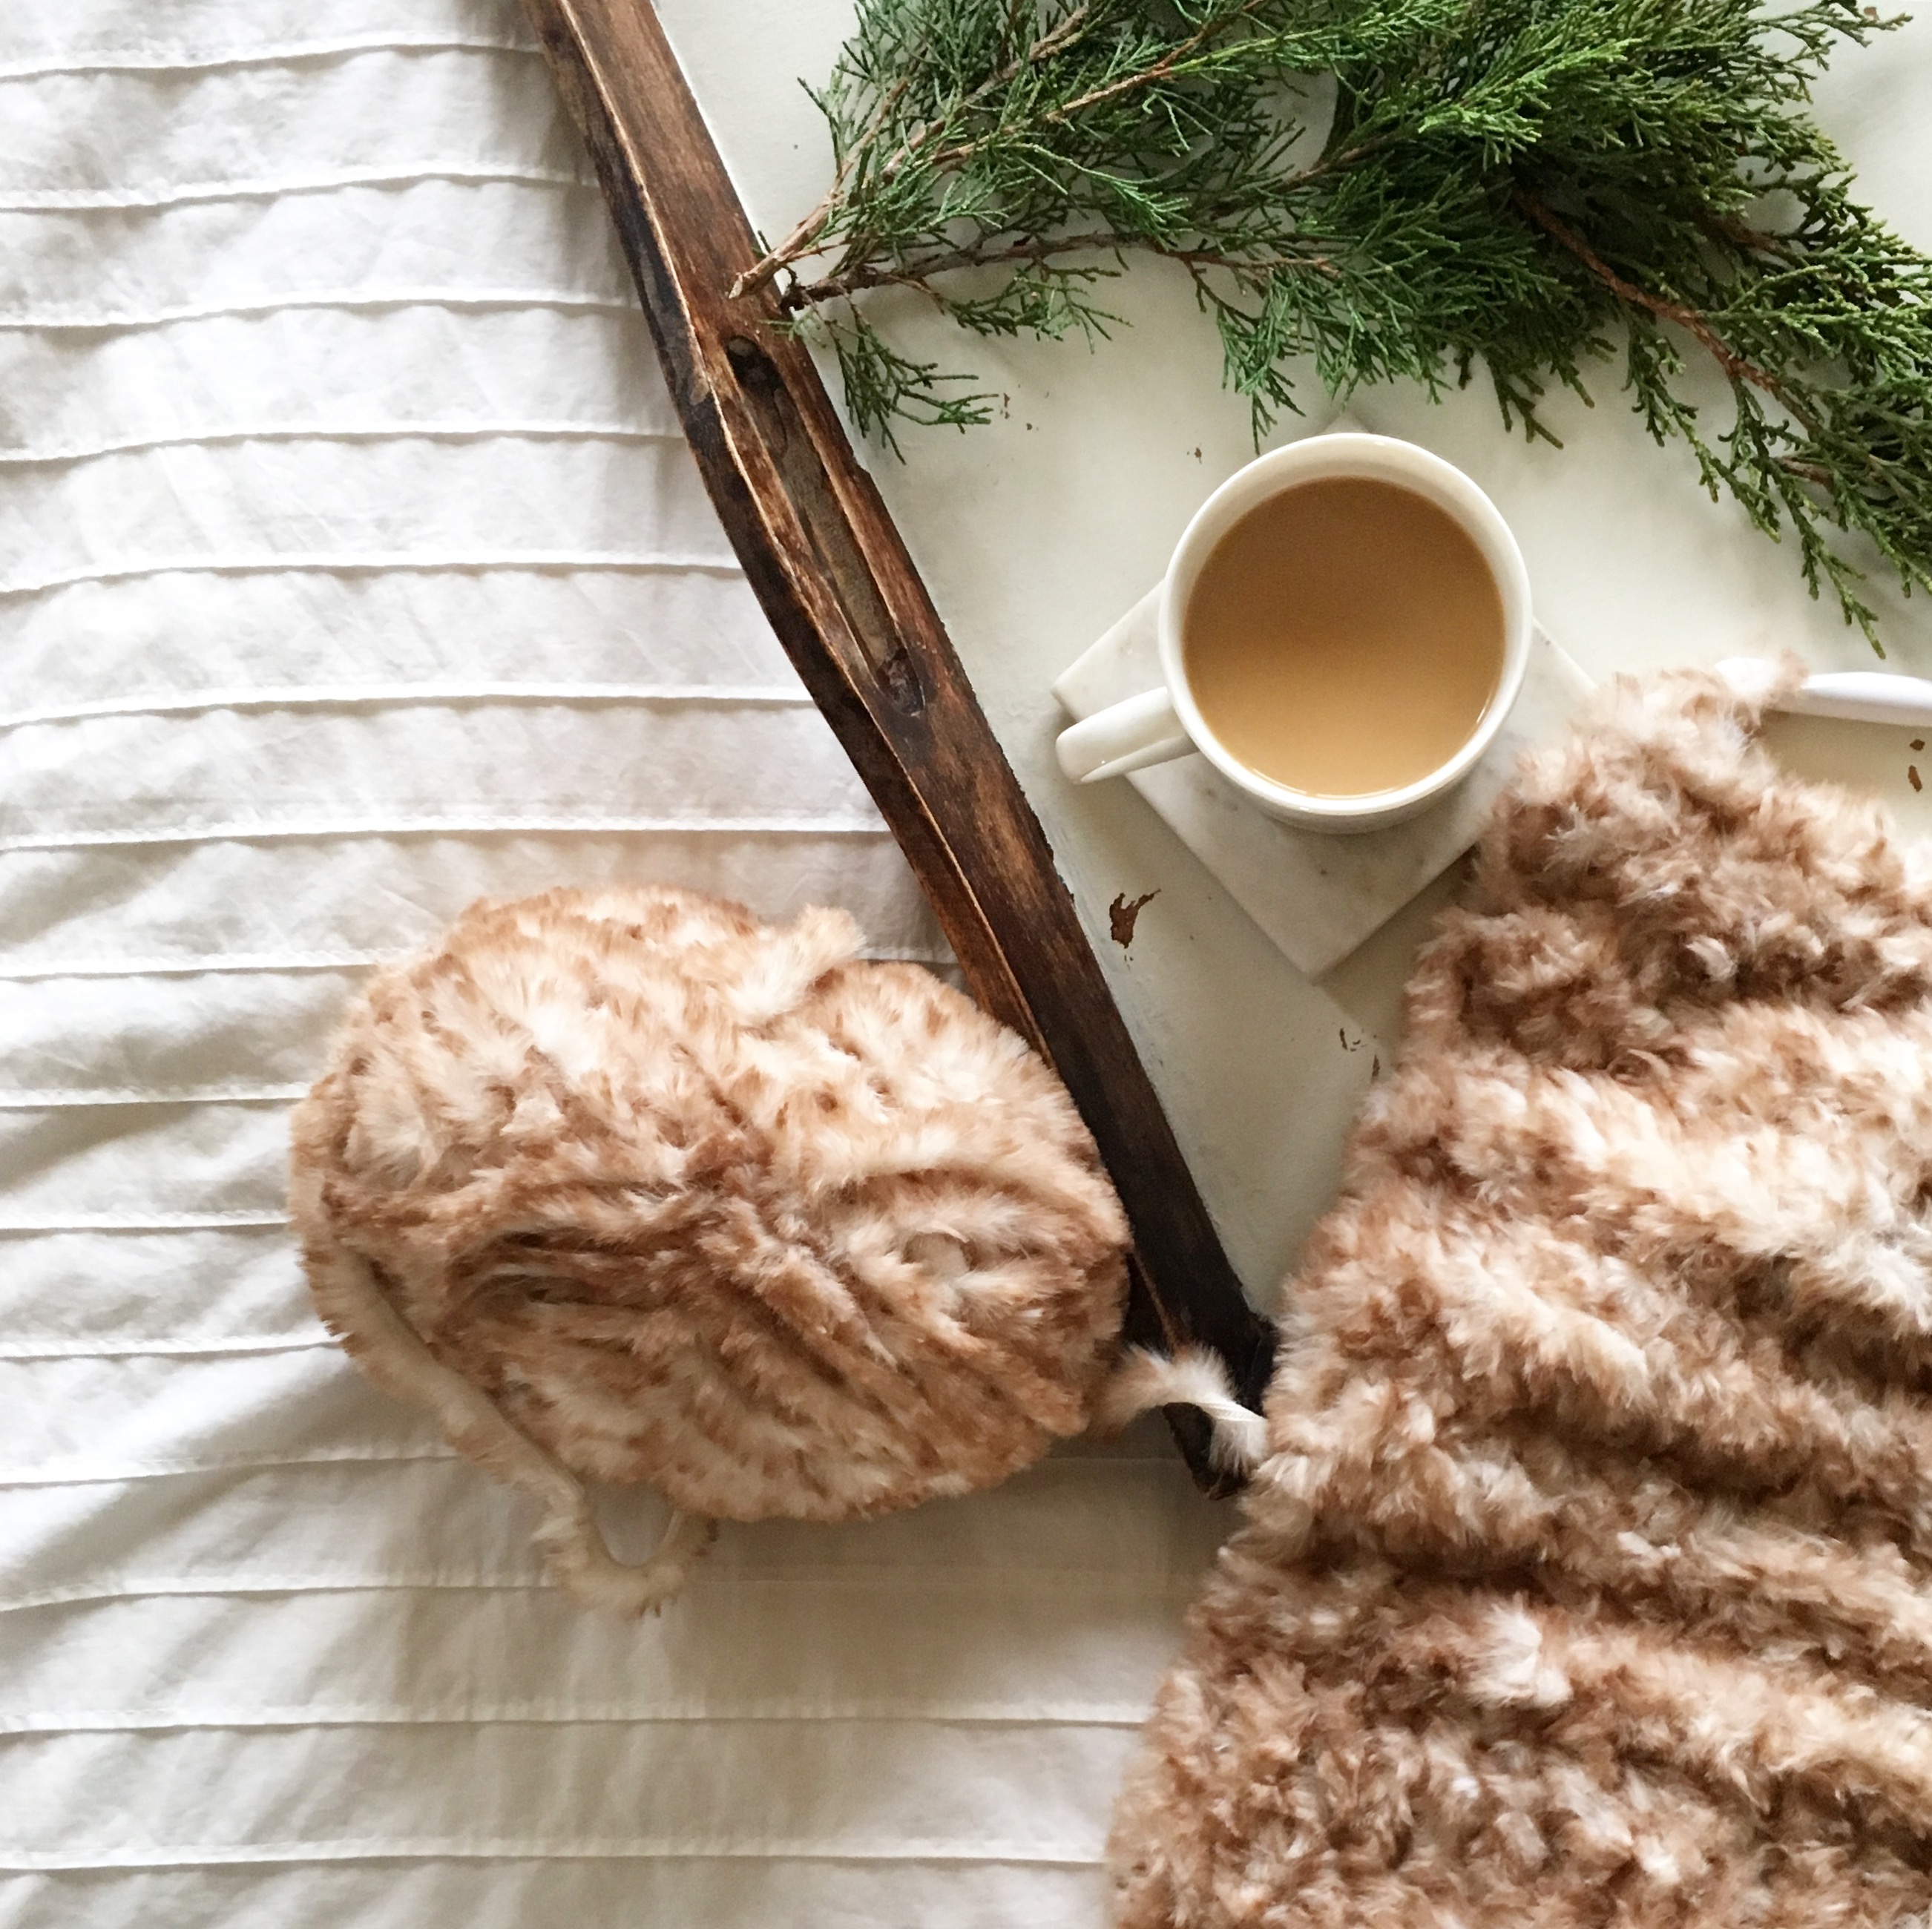
Here’s a little throw-back photo. The time I used the color Pomeranian for my vest.
Shall we get to this pattern? First, let me show you some helpful photos so you can visualize how it’s made!
The printable version on Etsy (HERE) includes these helpful photos and diagrams as well. 😉 If you’re a Mamas Maker Member, your printable is waiting (HERE). Scroll down to view the free pattern!
Description:
You’d never guess, but this trendy coat is crocheted! The gorgeous faux fur is soft as can be and the flattering fit looks great on everyone. Featuring a wide collar and generous length, you’ll want to wear this cozy coat all winter long! Teddy Bear jackets and faux fur coats are super popular and so versatile. Dress it up for work or dress it down for a coffee break with friends. The simple pattern features basic stitches and minimal shaping. Enjoy!
Skill Level:
Easy +
Materials:
US Size P, 11.5 mm crochet hook
(10, 11, 13, 14 skeins) Lion Brand Yarn Go For Faux (100 g/skein) in Blonde Elk
Pattern uses approximately (983 g, 1050 g, 1201 g, 1310 g)
Measuring Tape
Scissors
Stitch Markers
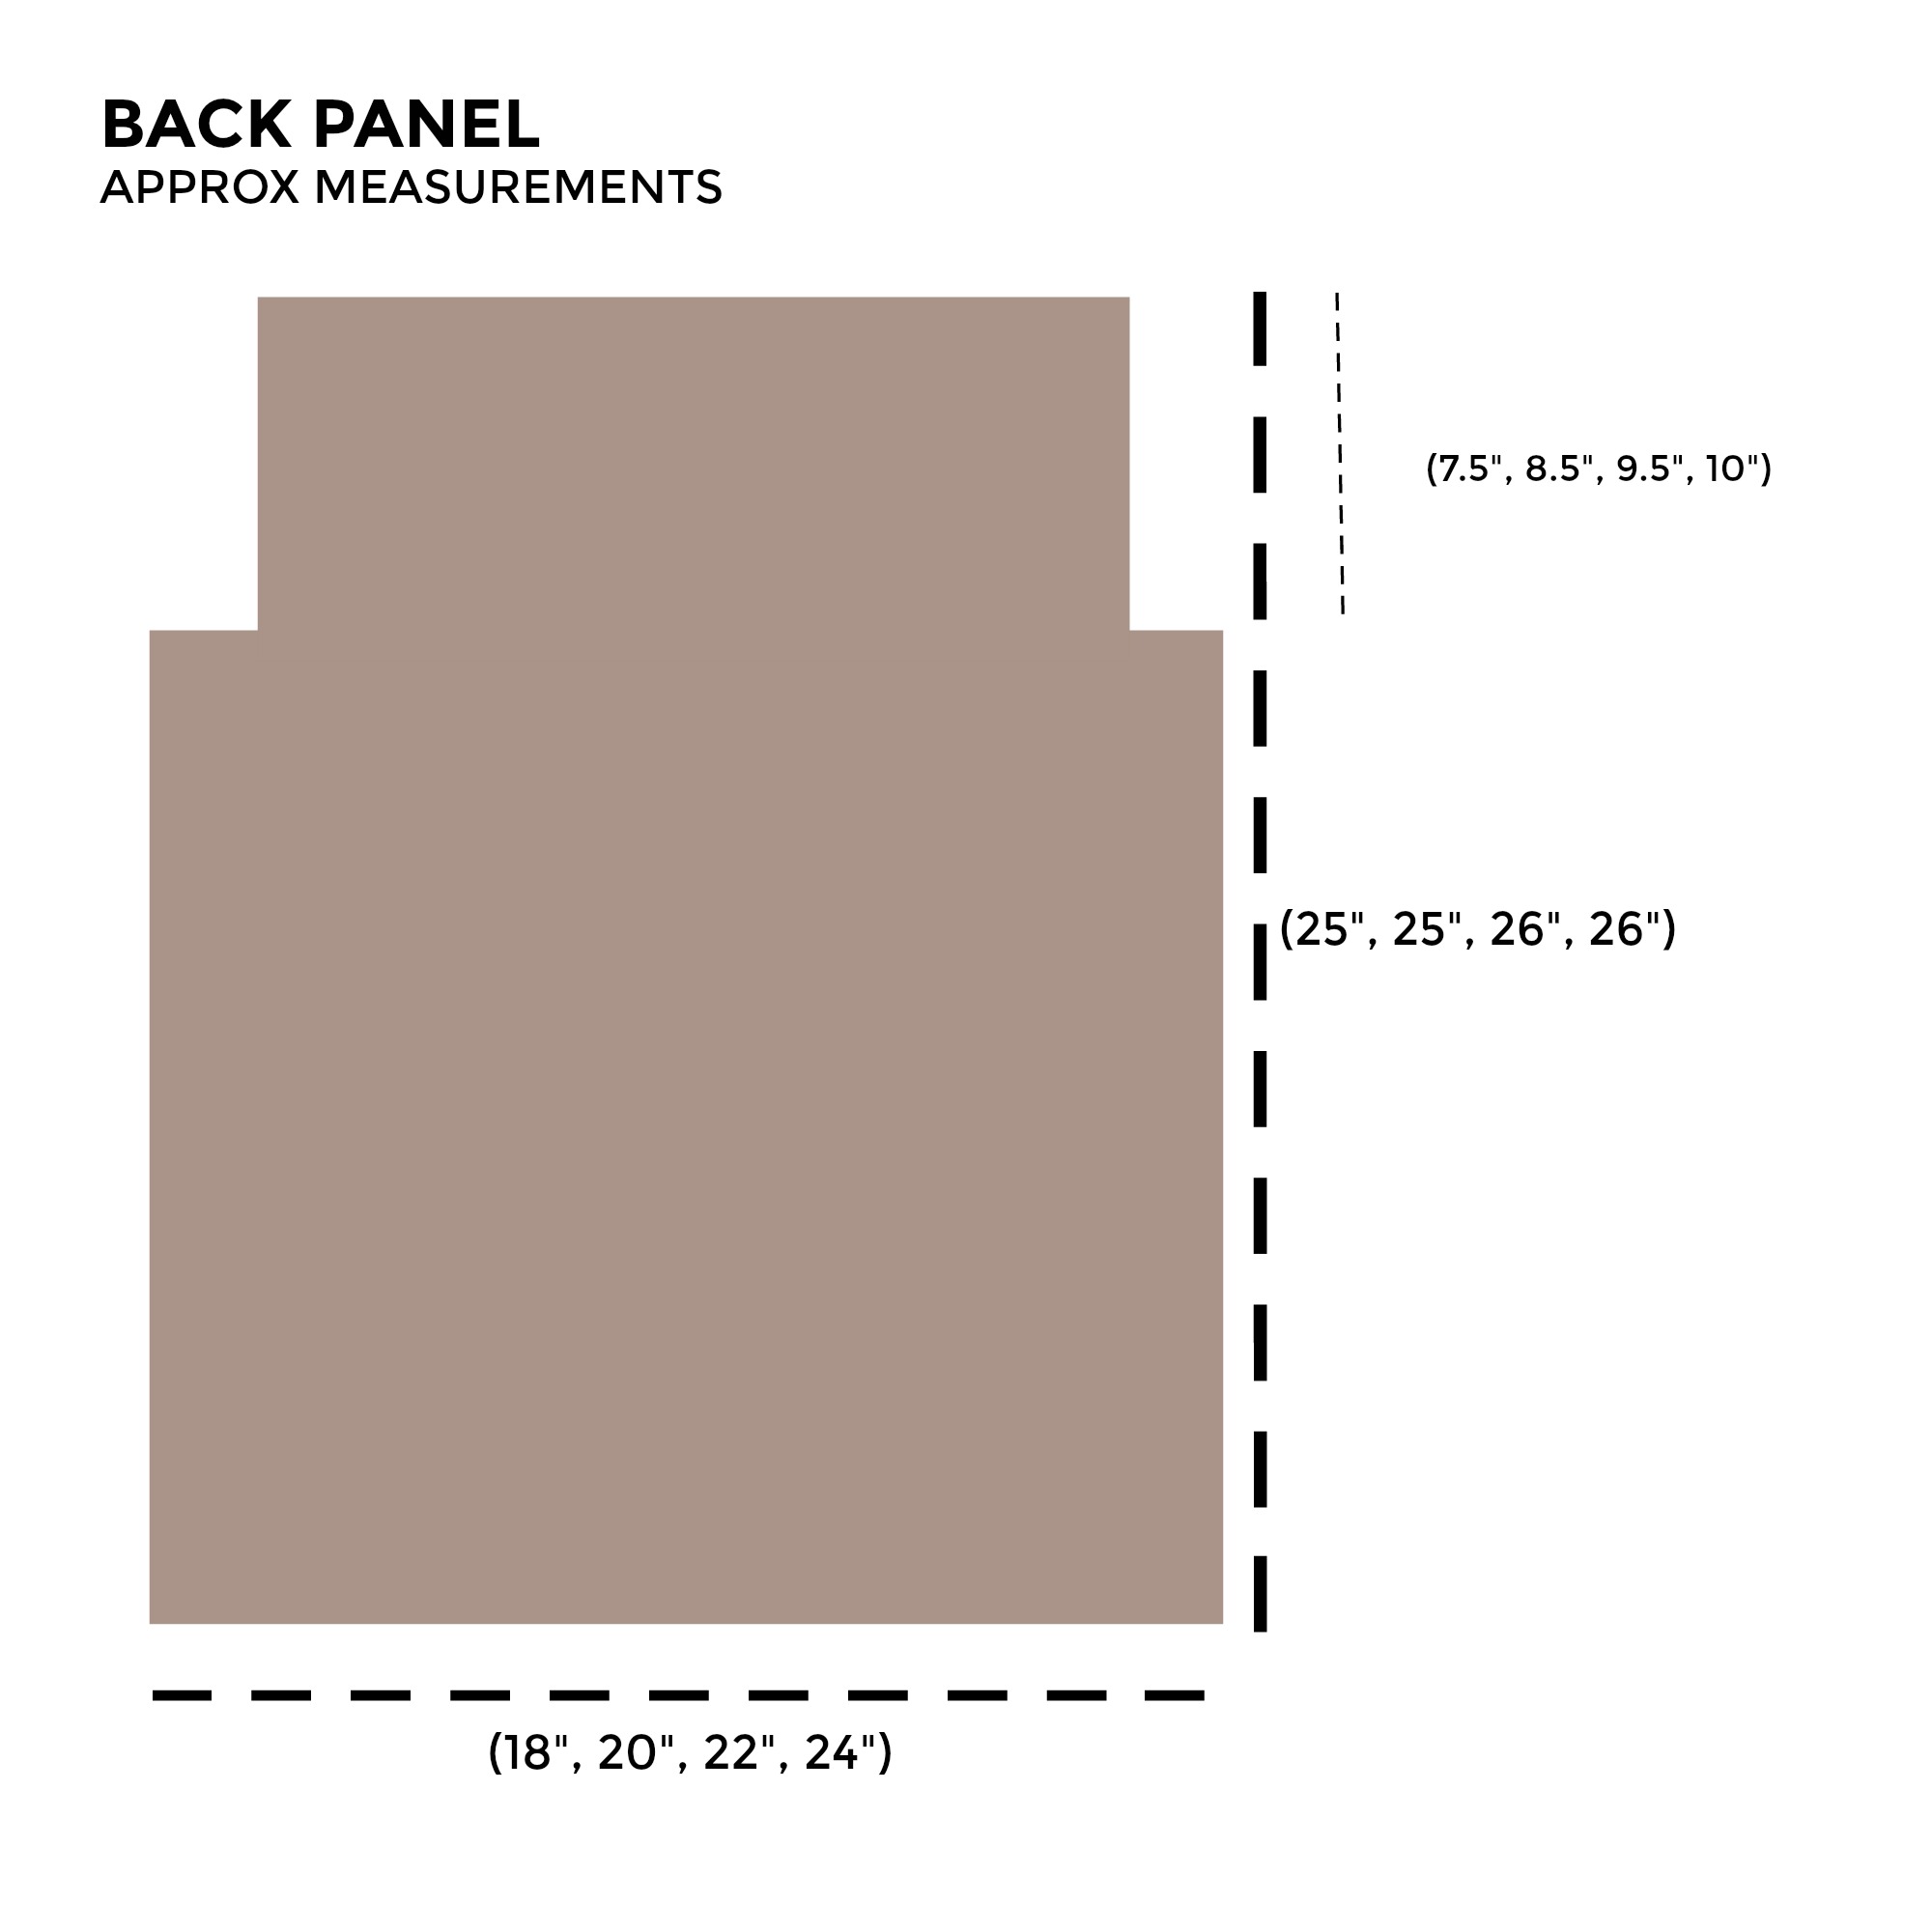
Dimensions (approximate):
Small, Medium, Large, XL
Please follow the key throughout the pattern according to the
size you are crocheting:
(S, M, L, XL)
Bust Circumference (approximate):
S – 36”
M – 40”
L – 44”
XL – 48”
Length (approximate):
S – 25”
M – 25”
L – 26”
XL – 26”
Sleeves Measurements (approximate):
Length: Approximately 17.5” all sizes
Approximate width at widest point at upper portion of sleeve: (”7.5, 8.5”, 9.5”, 10”)
Approximate circumference at widest point at upper portion of sleeve: (15”, 17”, 19”, 20”)
Approximate width at narrowest point at end of sleeve: (5.5”, 6.5”, 7.5”, 8”)
Abbreviations & Skills:
ch – chain
sc – single crochet
sc2tog – single crochet two together (decrease)
Gauge:
Approximately 6.5 stitches & just over 6.5 rows of single crochet in 4” x 4” Adjust hook size to obtain correct gauge if needed.
Notes:
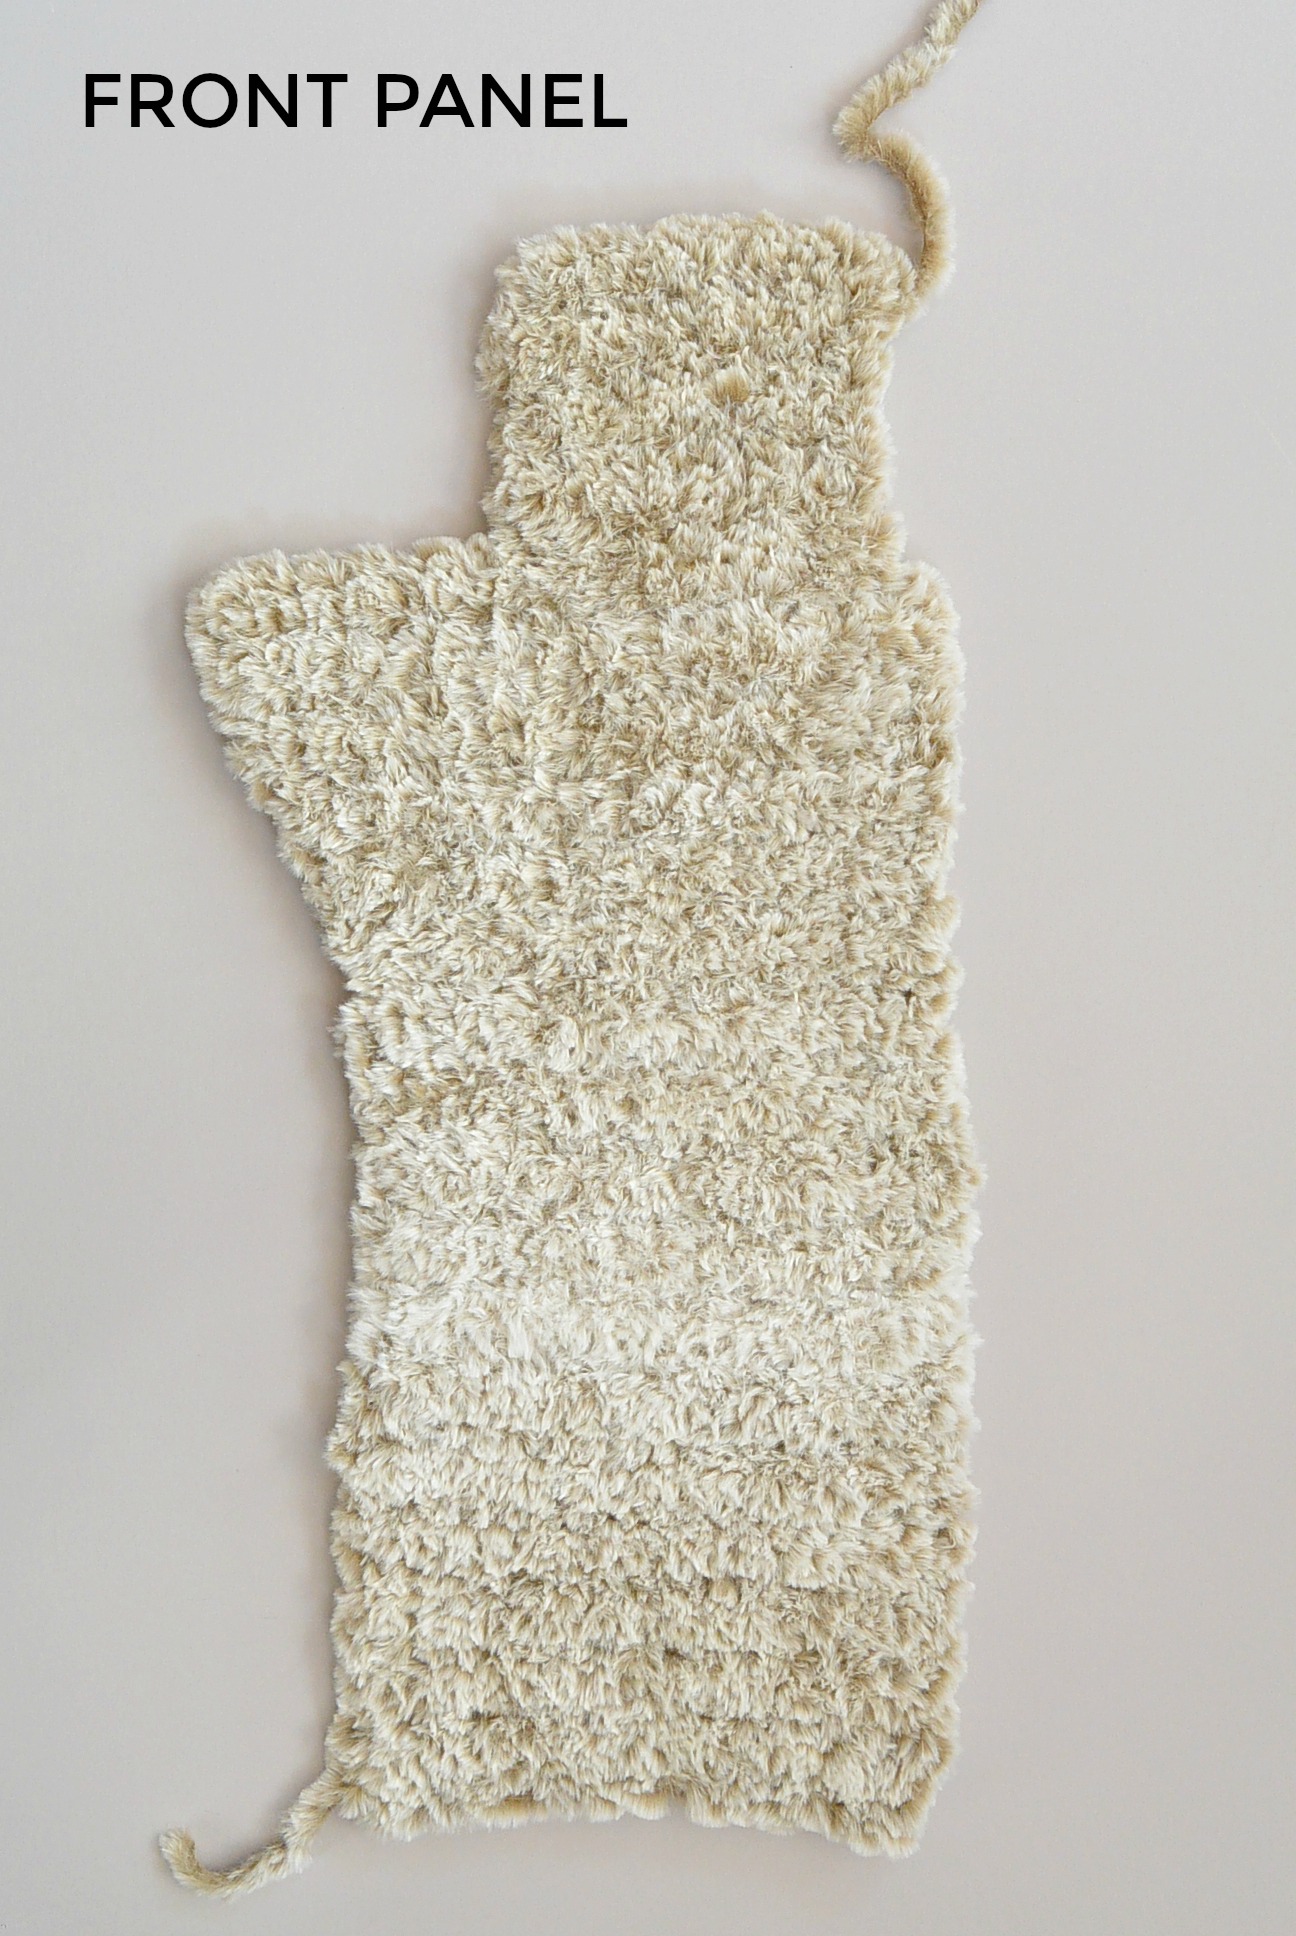
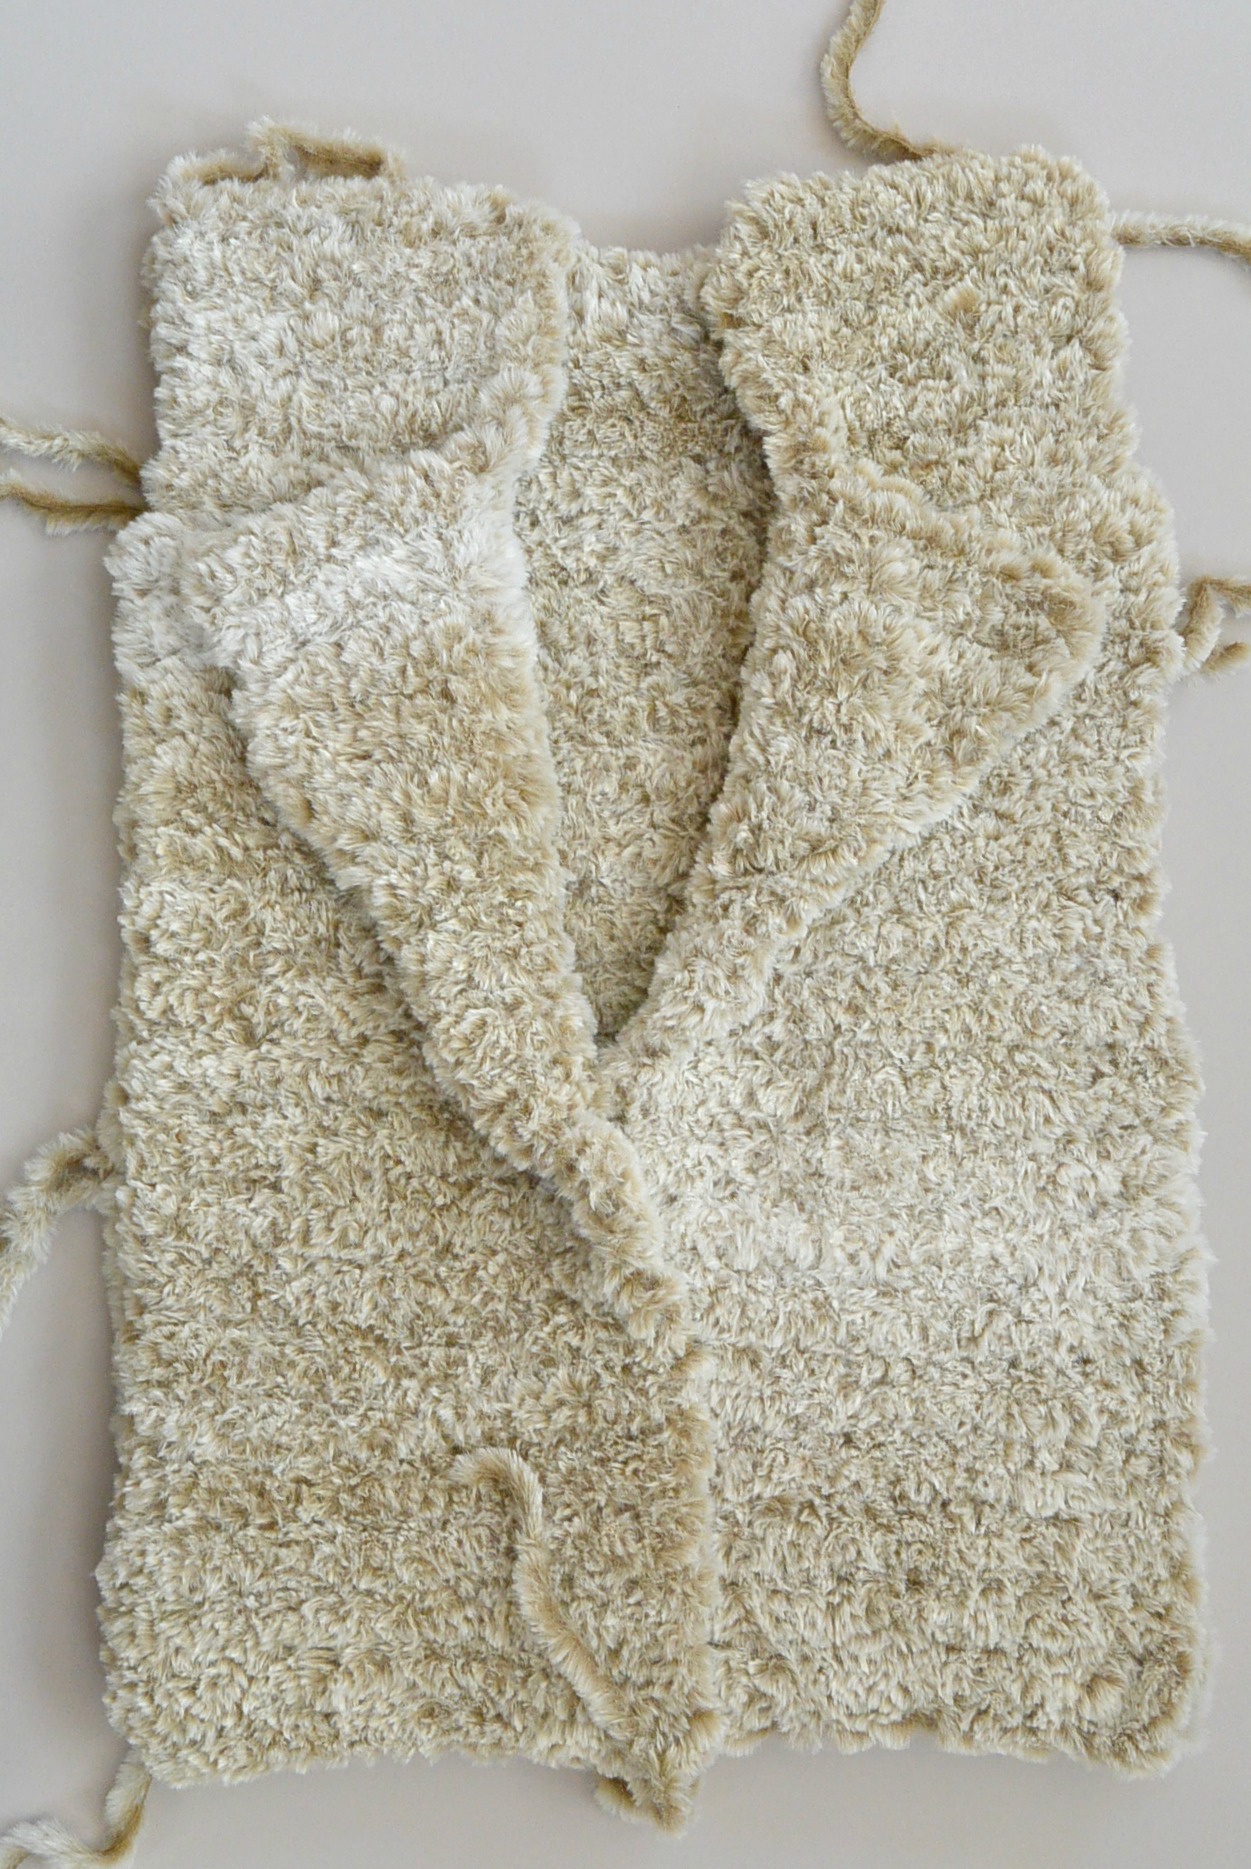
This coat is crocheted by making a rectangular back panel and two lightly shaped front panels. The pieces are then seamed and sleeves are added. Sleeves are crocheted by picking up the yarn at the arm openings and crocheting in continuous rounds. The upper portion of the collar is crocheted onto the coat once the panels are assembled. Because it is difficult to see the stitches, you may choose to weave in your ends once you’ve completely finished the piece. In case any adjustments are necessary, this will help you to find the ends of the yarn. Feel for your stitches in order to count stitches. See photos for additional assistance with collar, assembly and seaming.
Pattern Instructions
Back Panel of Coat (worked from bottom – up)
Ch (30, 33, 36, 39)
Row 1 Sc in 2nd ch from hook and in each st across the row (29, 32, 35, 38)
Row 2 Ch 1, turn, sc in 2nd st from hook and in each st across the row (29, 32, 35, 38)
Repeat row 2 for 28 more rows for all sizes (piece should measure approximately 18”). Tie off yarn and weave in ends.
Arm Opening
Next, you will work the center (27, 30, 33, 36) stitches only to make a “notch” on each side where the arm openings will be. To do so, pick up yarn in 2nd st from end. (See Picture of Back Panel for additional help)
Row 1 Sc in same st and in each st across to 2nd st from opposite end. Work into 2nd st from end. (27, 30, 33, 36)
Row 2 Ch 1, turn, sc in each st across the row (27, 30, 33, 36)
Repeat row 2 until this arm opening portion only measures (7.5”, 8.5”, 9.5”, 10”). Tie off and weave in ends.
Entire length of back panel should measure approximately (25.5”, 26.5”, 27.5”, 28”)
Front Panels (make 2) (worked from bottom up and all panels are reversible)
Ch (17, 19, 21, 23)
Row 1 Sc in 2nd ch from hook and in each st across the row (16, 18, 20, 22)
Row 2 Ch 1, turn, sc in each st across the row (16, 18, 20, 22)
Rows 3 – 28 Repeat row 2 for all sizes (piece should measure approximately 17”).
Increase – Front Collar Panel Shaping
Row 29 Ch 1, turn, sc in each st across to last st, 2sc in last st of row (17, 19, 21, 23)
Row 30 Ch 1, turn, sc in each st across the row
Next, you will make a “notch” for the arm opening on one side while continuing to increase on the opposite side. Tie off yarn and weave in ends.
Next, pick up yarn in 2nd stitch from end where you just tied off.
Row 31 Sc in same st and in each st across to last st, 2sc in last st of row (17, 19, 21, 23)
Row 32 Ch 1, turn, sc in each st across the row (17, 19, 21, 23)
Row 33 Ch 1, turn, sc in each st across to last st, 2sc in last st of row (18, 20, 22, 24)
Row 34 Ch 1, turn, sc in each st across the row (18, 20, 22, 24)
Row 35 Ch 1 , turn, sc in each st across to last st, 2 sc in last st of row (19,21,23,25)
Row 36 Ch1, turn, sc in each st across the row (19,21,23,25)
Row 37 Ch 1, turn, sc in each of the next (12, 14, 16, 18) sts
Repeat row 37 (all sizes) until arm opening is approximately (7.5”, 8.5”, 9.5”, 10”) and entire piece measures the same length as back panel. Tie off and weave in ends.
Assembly & Sleeves
Place two front panels directly on top of back panel, with the shaped collars on the inside and outer edges aligned (see photos).
Shoulders
Seam the shoulders with a whip stitch.
Seam Sides and Create Arm Openings
Seam each side with a whip stitch from the bottom-up. Leave arm openings that are approximately (7.5”, 8.5”, 9.5”, 10”) wide.
Sleeves
Sleeves are crocheted in continuous rounds. Do not slip stitch to join at the end of each round.
Important – Mark the first stitch of each round
Attach yarn to bottom of arm opening.
Round 1 Sc evenly around the arm opening (25, 28, 31, 33)
Row 2 Repeat row 1
Row 3 Sc2tog, sc in each st around (24, 27, 30, 32)
Repeat rows 1 – 3, in that order, until sleeve is approximately 17.5” long. The stitch count will decrease by one stitch every third row. Count stitches to ensure decreasing is correct.
Repeat this pattern for the second sleeve
Once the sleeve has reached 17.5” or your desired length, finish the last stitch of row by skipping a stitch and slip stitching into the next stitch. Tie off and weave in ends.
Upper Collar
Attach yarn to upper collar area, just above the widest part of the front panel (see picture). Crocheting from one side to the opposite side, work approximately 8 rows of single crochet stitches or until desired size is reached. Tie off and weave in ends.
You may find that the collar needs secured with a length of faux fur where the Upper Collar meets the Front Panel. If it appears to stretch apart, secure it with a length of yarn, knot and weave in ends. Next, tie down collar in order to hold in place (if desired) with a small length of yarn on each side. Weave in ends.
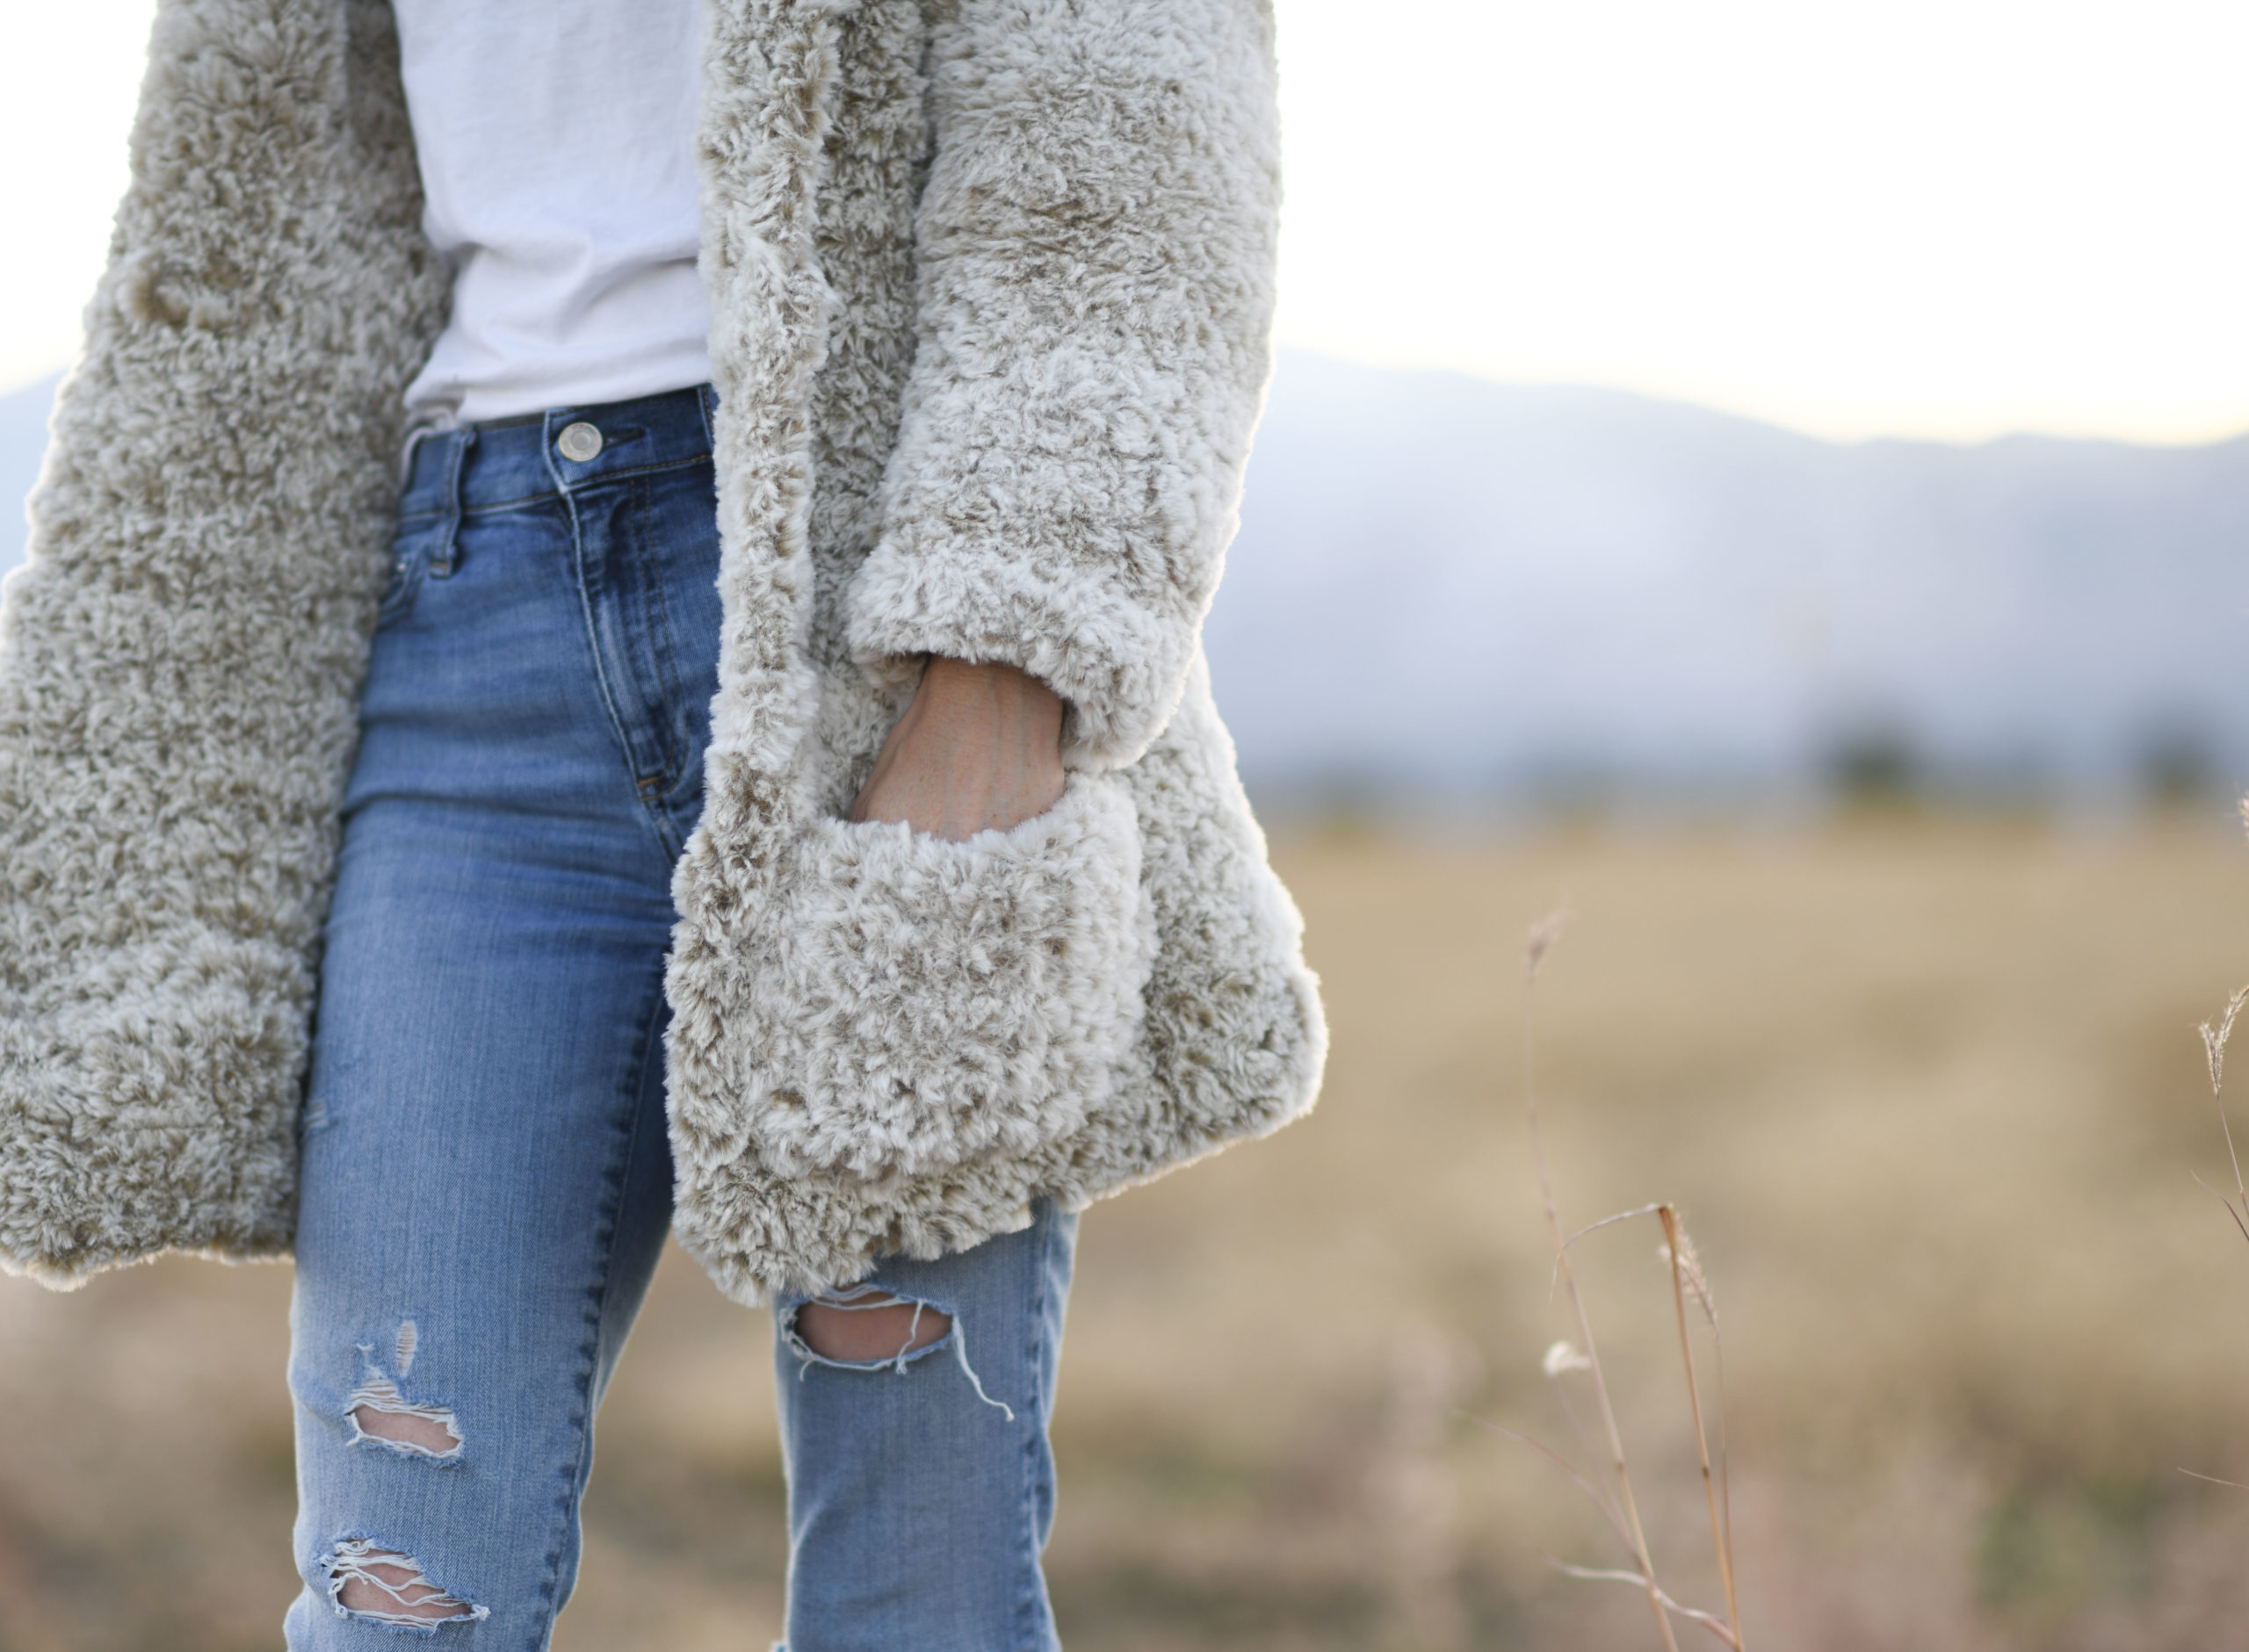
Pockets
All sizes
Ch 12
Row 1 Sc in 2nd st from hook and in each st across the row (11 sts)
Row 2 Ch1, turn, sc in 2nd st from hook and in each st across the row (11 sts)
Repeat row 2 until piece measures approximately 5.5” long. Tie off and weave in ends.
With a length of yarn, whip stitch each pocket to the lower front panels, leaving the top of each pocket open. Weave in ends.
Optional: Add two to three large buttons on the front to close the coat when worn.
That’s it! Enjoy your beautiful new faux fur coat!
That’s it! Enjoy your beautiful new faux fur coat!
If you make one, I’d love to see it!
XO,
Jessica
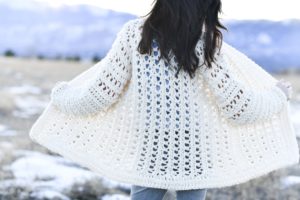
If you liked this, you might also like:
This post sponsored by Lion Brand Yarn. All opinions are 100% my own.
OMG! I absolutely love this! I wish I could crochet! I’m going to have to do one of your very simple patterns, maybe a scarf to learn how..lol
Dear Jessica,
I have purchased the faux fur yarn And when I am crocheting a chain and when I turn to go back the other way is there a truck to see where you put them he hook. I am having a real hard time crocheting with this yarn.
Thank you for your help
Anita
Hi Anita! I hear ya. It is a challenge because you can’t see the stitches, you must feel for them. Maybe holding a strand of worsted weight yarn along with the fur would help? Here is a video that also might have some tips:
I love this pattern but wish it was knitted. I have never learned to crochet but maybe I should so that I can have this lovely coat.
Are you going to make this pattern for knitting?
I’d love to see a knitted pattern too. I’d love to make it.
I would love to try this pattern but I’m a big gal. Is there a pattern available for 3xl?
I too wound love them to see this pattern in knit, any chance this will happen
I *love* this coat! Thank you so much for taking the time to put together such great instructions. I have a question. I want to make this for my daughter – she’s small but curvy – and I was wondering if I could make the back panel “small” and the front panels “medium” to give a little extra room. I don’t want to make the whole thing medium, because that might swallow her. Think that would work? I’m going to try the headband first to get a feel for the yarn. Thanks again for the amazingly clear instructions!
A quick note, if you purchase the kit from lion brand the instructions need correcting and the gauge is different in the kit , anyone doing this beautiful coat should follow the instructions in Jess ‘s blog. Mine is coming along Great it is a very easy pattern ( once you get it written our right) hope this helps anyone who encountered what a did, Maureen
Well I made this and made a sizing error; I based my size on my actual size not thinking this needed be sized up being a coat over clothes. Any suggestion on how to adjust or do I just rip out and redo??
I am making the XL and have had to rip it out 3 times. If I use a hook small enough hook to get the right amount of stitches across the bottom then after doing 16 rows it’s only about 12 inches vertically. If I use a bigger hook the bottom is 27 in across even doing the amount of stitches for a large. HELP! What am I doing wrong? I had to do 20 rows to get 18in for the back using. P hook.
I’m sorry! That must be so frustrating! My only thought is to really adjust your tension quite a bit. It sounds like you’re not getting the height on each stitch that I got on mine. The most important is to get the measurements right, so if you have to crochet more rows, you could potentially do this. But it will take experience and more yarn than the pattern calls for.
Hi Loranger I have to reply to you as I had to rip mine out 3 times too very frustrating. If you purchased the kit from lion Brand versus the pattern on jess’s blog follow the blog, I hope someone sees the errors and corrects them as this coat and yarn and pattern; once you figure it out) is very simple and easy to do. First error which when done right will get you going . Ex, med sz ch 33 do row 1 and2 then repeat row 2, 28 more times for all sizes you will then be 18 inches . Kit pattern says repeat 14 times, that’s the first error and as far as I have got, hope this helps
My measurements are nowhere near what they should be. My sm ch 30 comes at 15” and only 7” high after the row 2 repeat indent. I’m not sure how to remedy this problem.
That’s too bad! This yarn is tricky, but I would try to adjust your hook size as a first step to get closer to my measurements.
Hi Jessica,
I loosened my tension and my width ended up 18” w/chain 30 but my height is still half what it should be.
I noticed in your photos that the 15 rows actually looks like what I’d get if I did 28 repeats After the chain and 1st row of sc (meaning the row is double wide/2 rows of sc=1 visible row).
This would also make sense for my measurements as it would be twice as many rows and twice as high getting me to 18”.
I’m feeling pretty confident in this and am hoping I don’t run into issues with yarn yardage as I’ve only used 1 skein for half of the back.
Thanks for your response; I’m excited to see how this turns out!
Hi Chevy!
There was most definitely an issue with gauge, which in turn caused the row counts to be off. I appreciate you reaching out with your experience with this!! I’ve corrected the pattern above. Let me know if you have any other questions!
Jessica
You can also feel free to email me for a quicker response at mamainastitch@gmail.com
Hi Jessica, I’m ready to assemble my first cost, one three, but I have a question where exactly does the collar start, at the top of the widest point? It says see arrows I can’t see any. And do you pick up on outside or inside of the coat thanks I wait your answer so I can continue, maureen
I saw this yarn and was so curious on how to use it! Love your design but any idea how to make it for a child?? Would love to make matching ones for my daughter and I.
My 7 year old REALLY wants one of these – anyone have any advice on adjusting to child sizing?
Jessica I used faux yarn and it’s a nightmare. Not easy at all.
Hi Jessica,
My mom passed away 7 years this September, she crocheted everything. I could never get the hang of it, my stitches were always so tight. Now that she’s gone ( watching me) I’m obsessed! I crochet all day and night, I’ve made hats, scarfs, blankets, crown and a SWEATER… my husband and daddy say I’m picking up were she left off. Thank you for the tips and patterns, you teach very well. I’m starting another sweater, but this time I’m going to use your pattern, I might take on the faux fur coat, I think I can do it. I’ll let you know how it goes.
Thank you,
Princess Andrea
Hi Jessica, I am a big fan of your patterns <3 and I keep looking at this jacket, but I am a knitter. Any chance you will make same pattern in knitting? Would LOVE it! This is awesome yarn, too 🙂
I am going to make your faux fur coat but my Clover N/P crochet hook is 10.0 mm. Or I have a Clover 12.0 mm hook. Which will work best? Or should I just get another brand 11.5 mm hook?
Thanks!
I’d use the 12 without a worry!
Hello Jessica,
I would love to make a throw blanket (full size) with this yarn and stitch. Do you have an idea how much yarn that would take?
Thank you,
Kathy
Hi Jessica!
Just wanted to let you know that I started my jacket and I cannot tell how pleased I am to work with such cool yarn. I do have to say however, that the Lion’s brand Faux Fir I used is Baked Alaska and I am 5 skeins of yarn into the back of the jacket and can definitely see a difference in colors between the skeins. So disappointed! I was so excited with the pattern you gave and the softness and weight of the yarn. Tomorrow I will be calling JoAnn fabrics where I purchased the yarn to see how to get my money back. Are there any other companies that make faux fir yarn that you would recommend?
Thanks so much for your help…
Oh, that’s too bad Lorraine! Ugh! I haven’t personally tried any of the other faux fur yarns, so unfortunately, I don’t have any good advice about it. So sorry for the disappointment and hope you can get a refund from JoAnn!