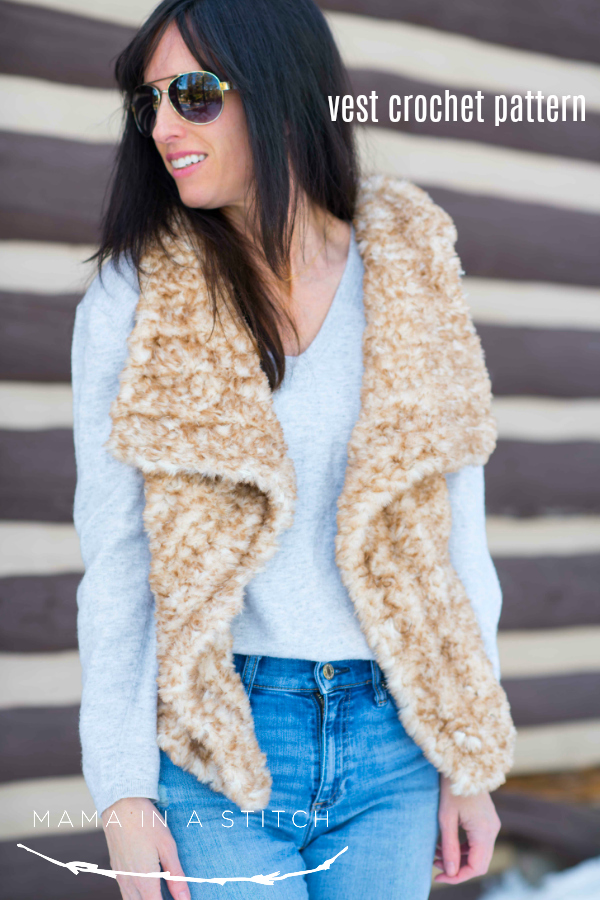
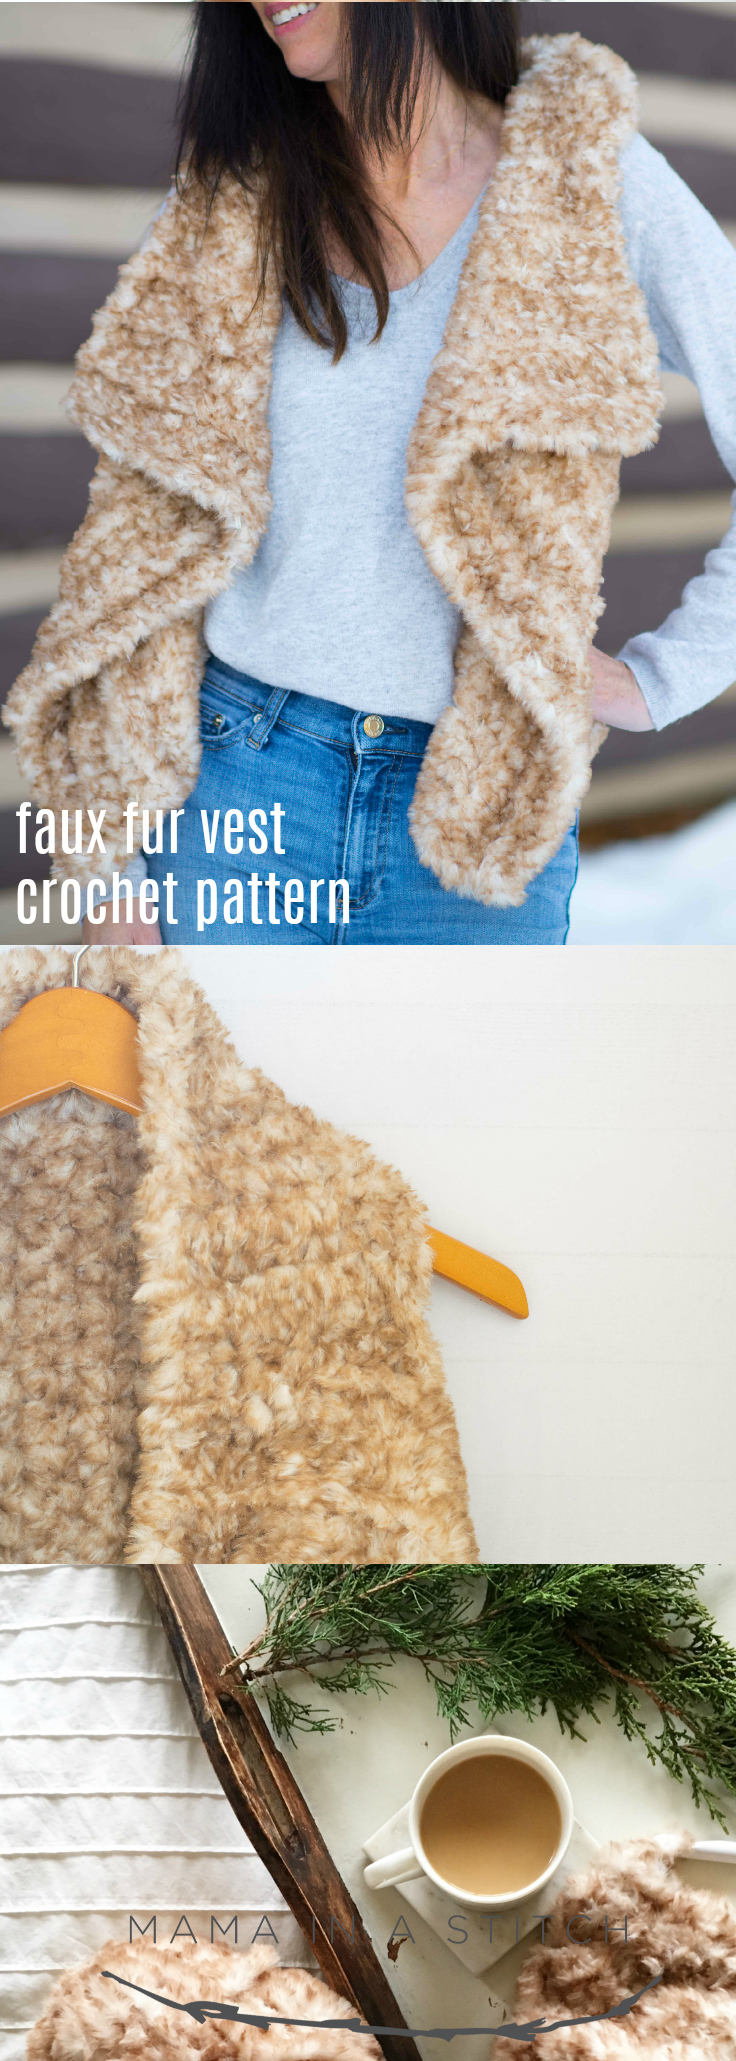
Faux Fur Vest Crochet Pattern
Scroll down for the free pattern below, or you may choose to purchase the ad-free, printable version from my Etsy shop HERE or the kit (currently on sale) from Lion Brand Yarn HERE NOW AVAILABLE in Color Mink & Chinchilla
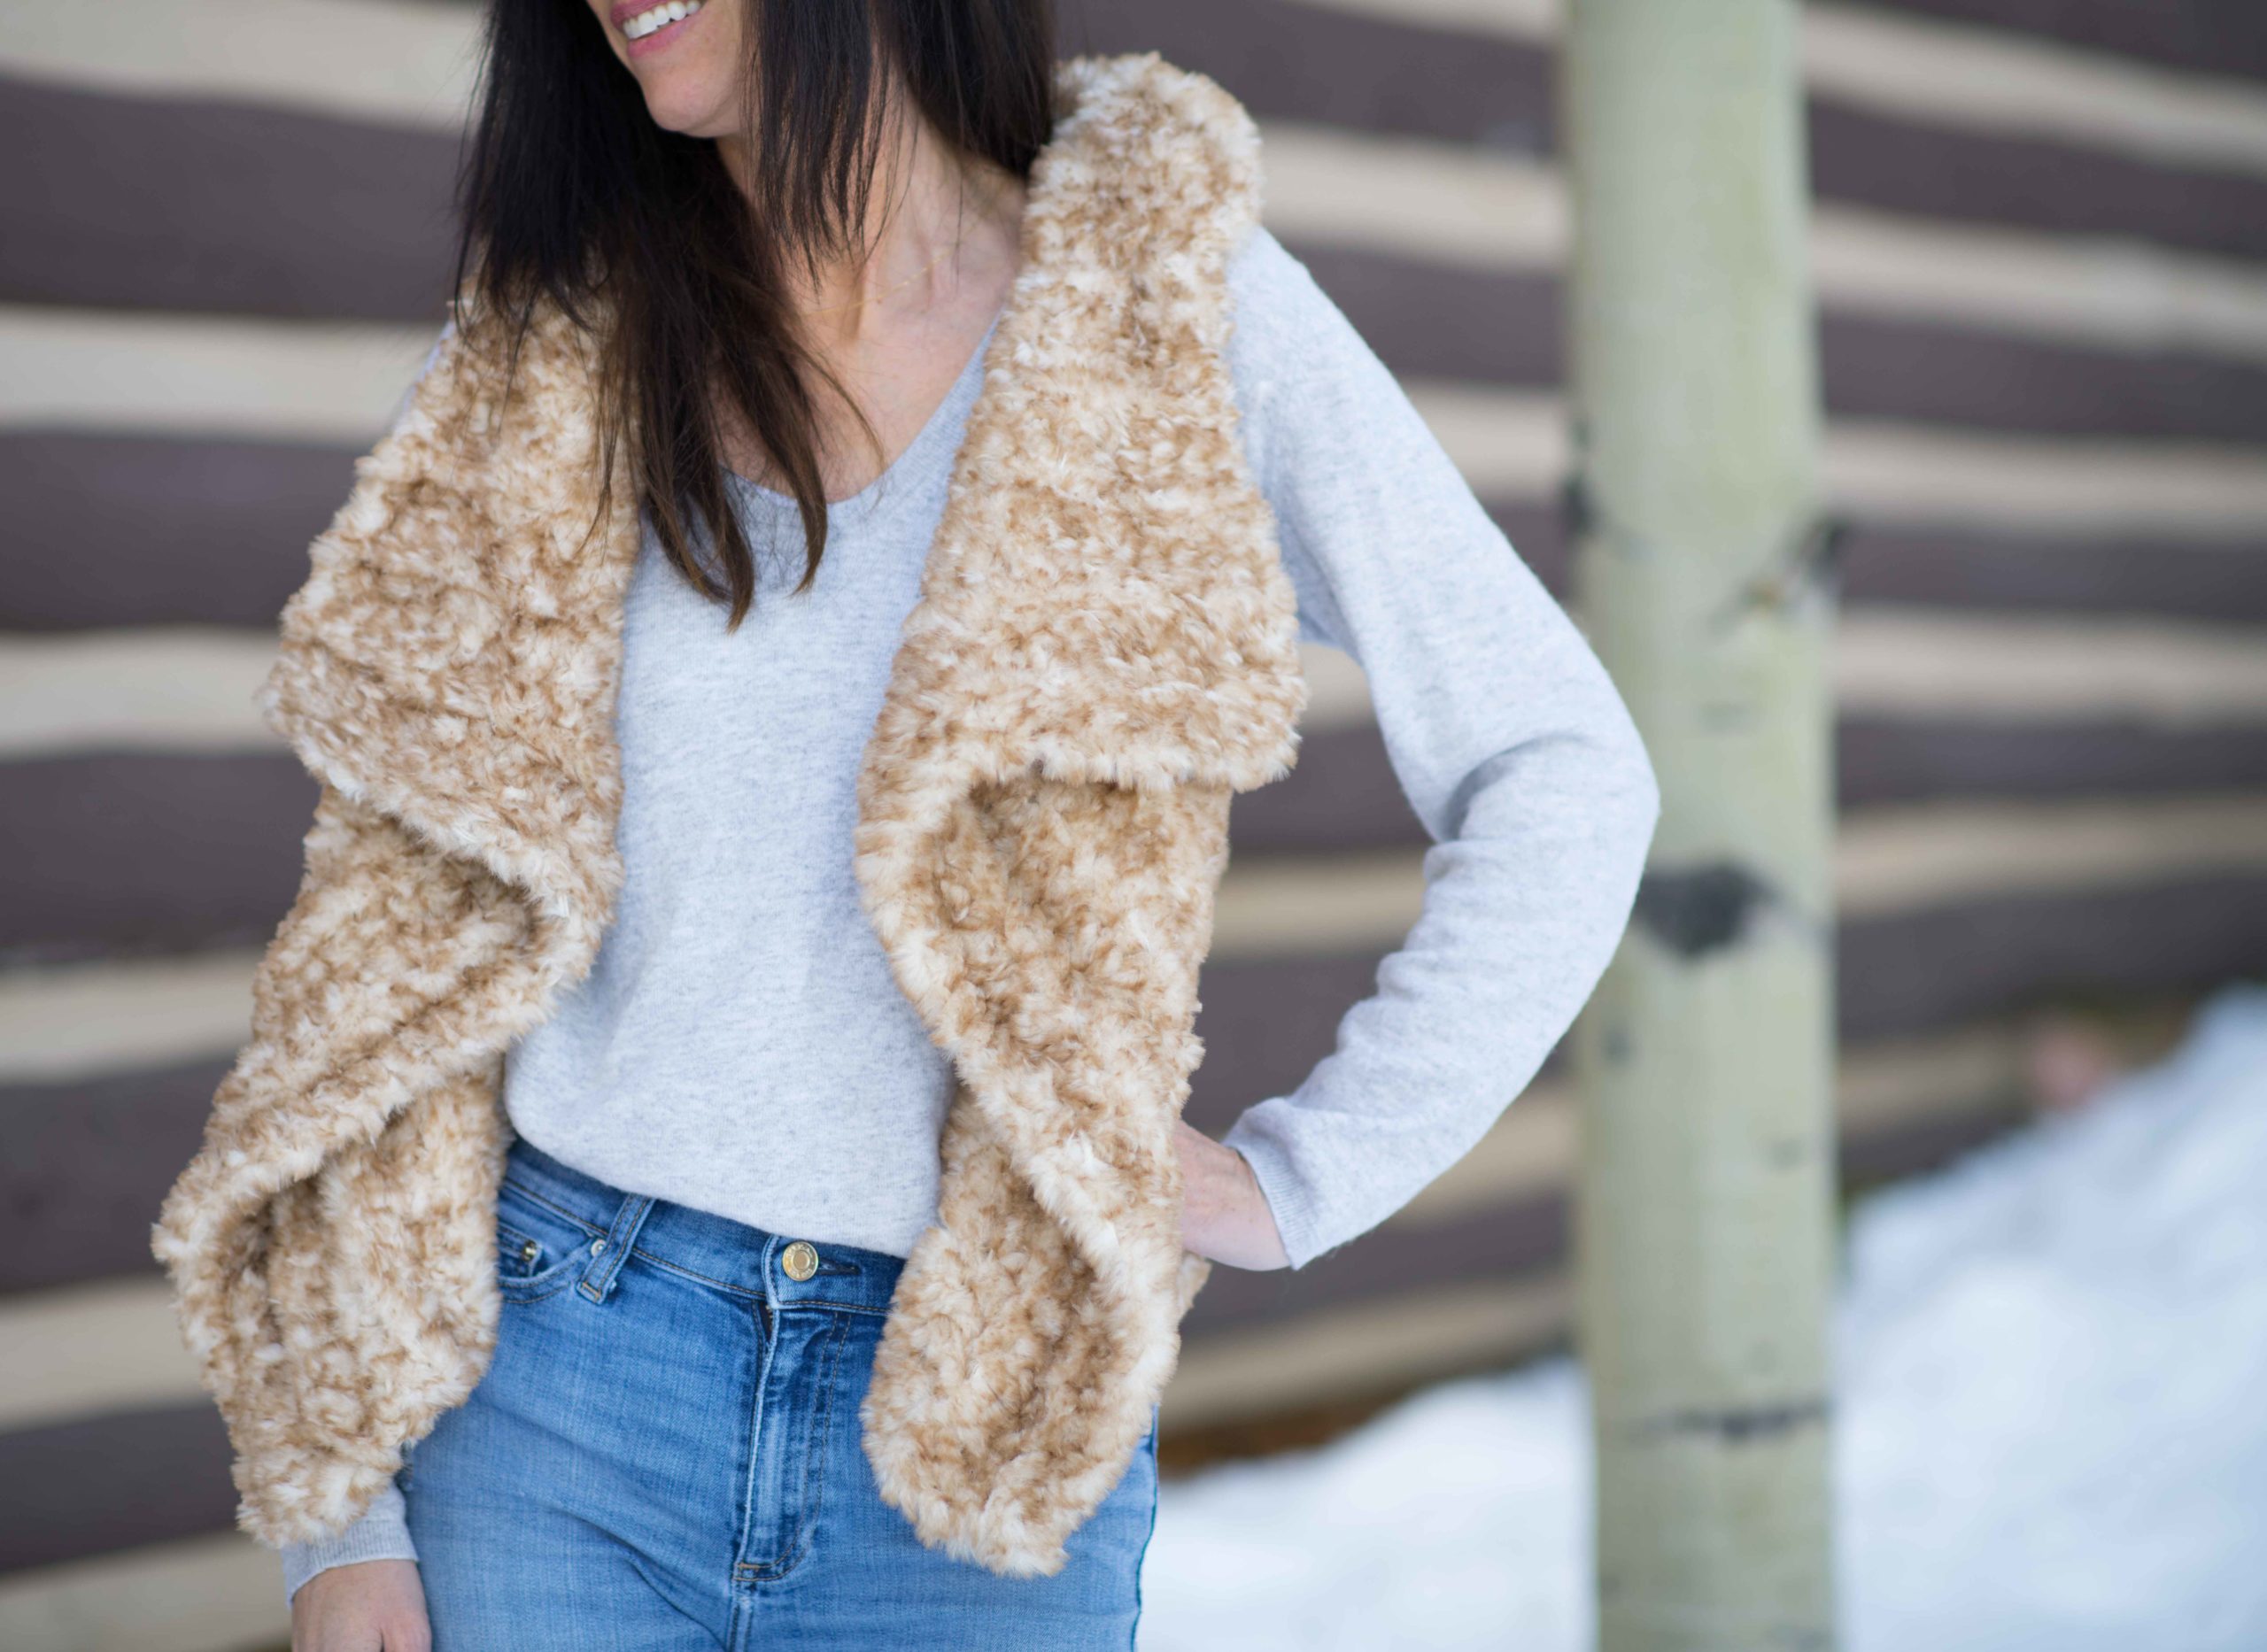
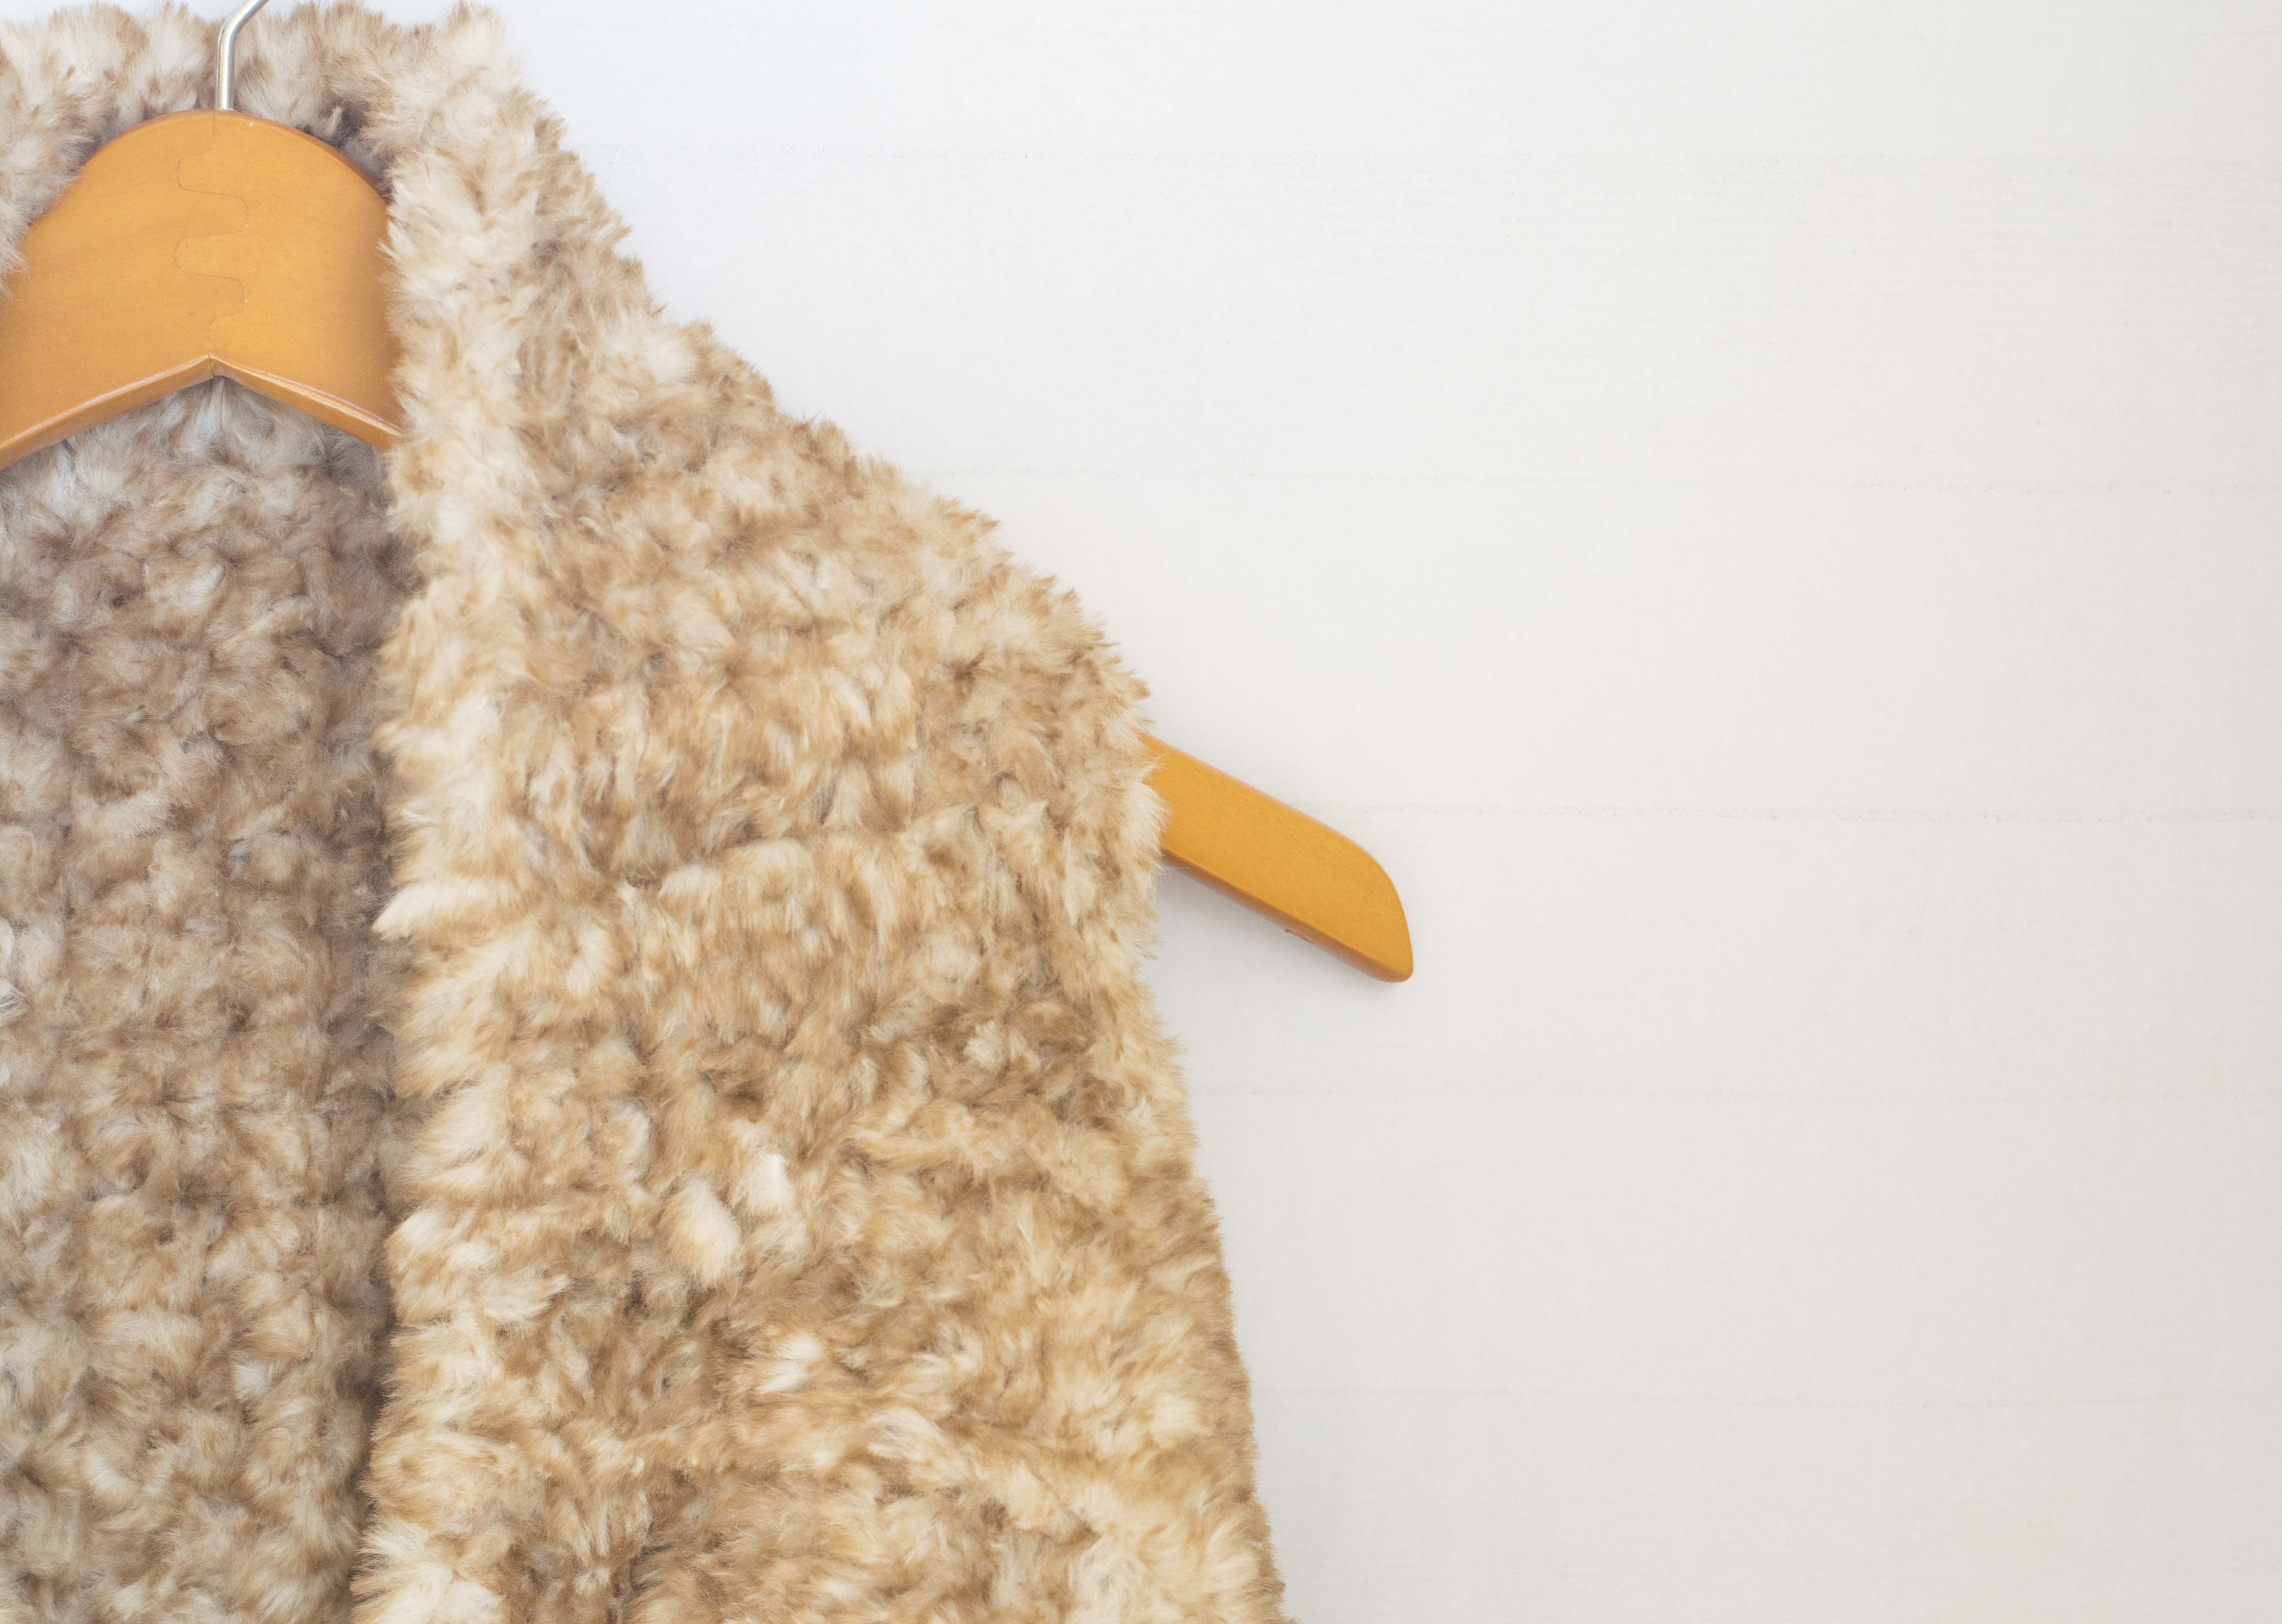
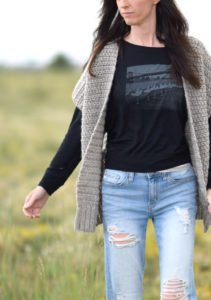
Most of us knit and crochet lovers have seen some variation of a faux fur yarn, but I had never seen one like this! Have you?! It is the most realistic, softest faux fur I’ve touched. It was so difficult to decide what I wanted to make with the “Go For Faux” yarn (here) because there are so many cozy options this time of year. Blankets, trims, even the thought of a coat crossed my mind! However, I went with a fur vest because they are currently all over store fronts and I’ve been wanting one for myself. This fur vest is easy enough for anyone to crochet, even if you are a new beginner. If you’re like me, you’re wondering if it sheds, if you can see the stitches, and how it works up. I’ll get into those details below. 😉
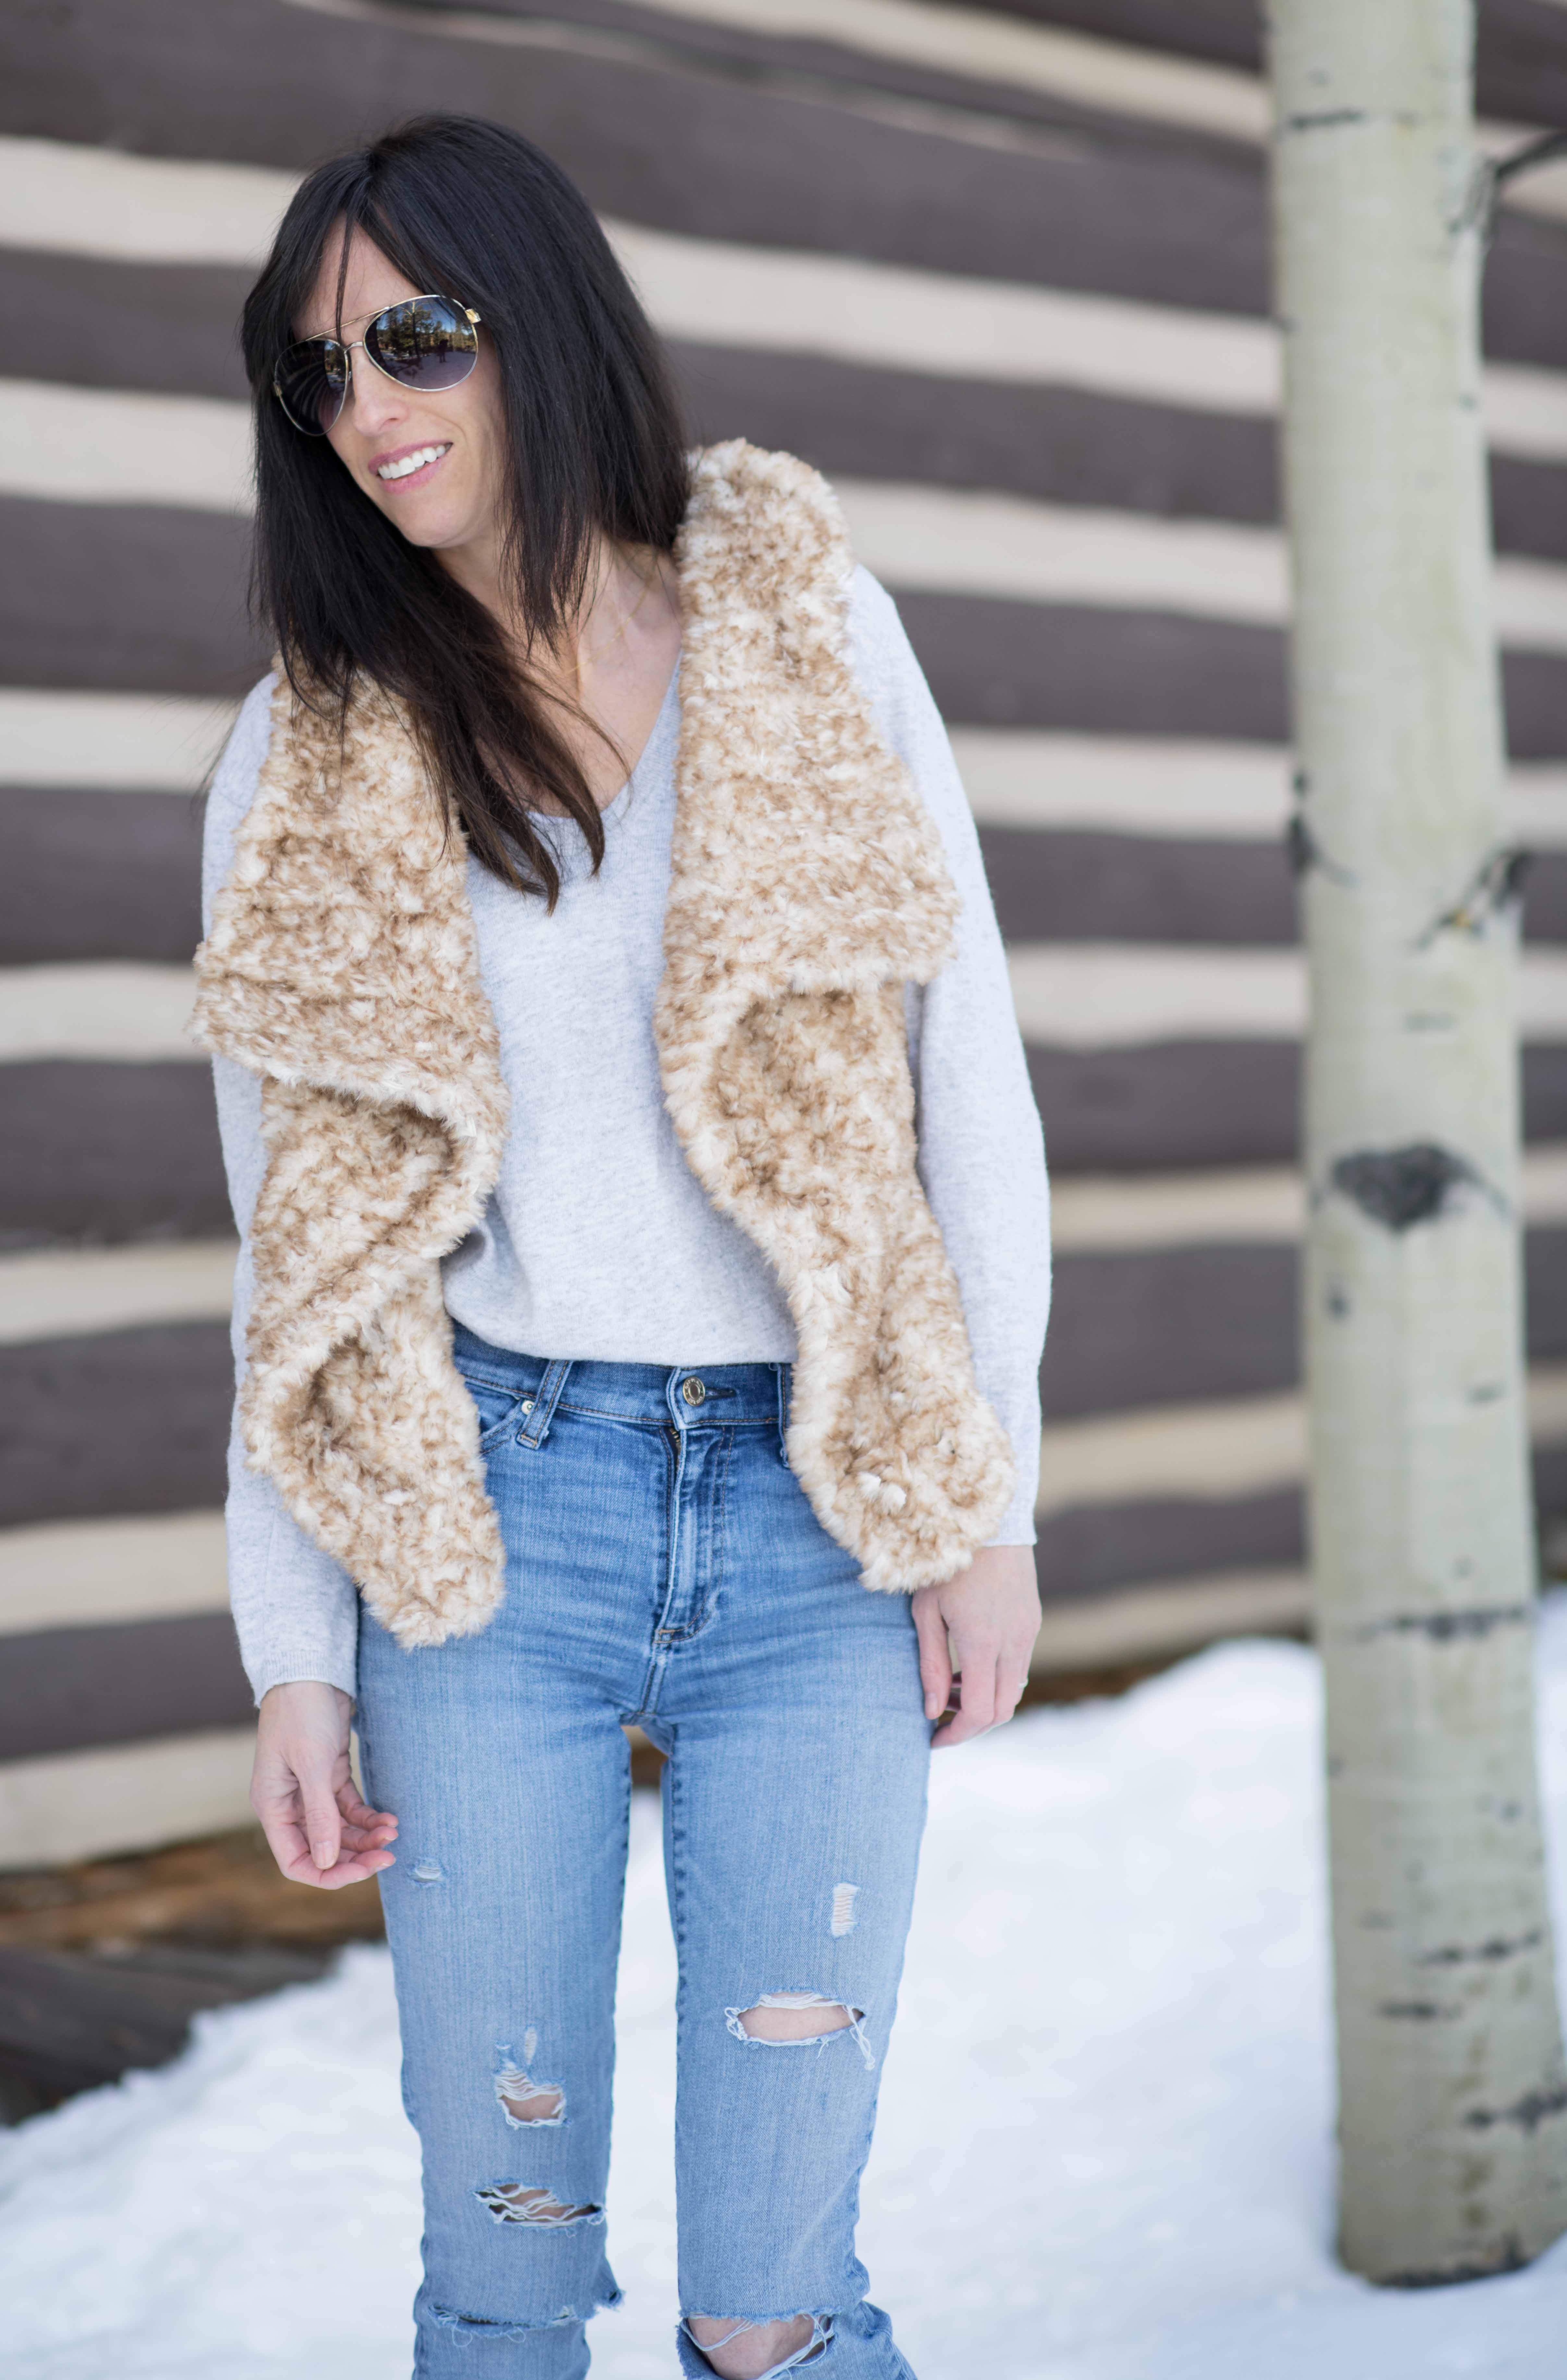
This thing is so cuddly! It was such a pleasure to wear my vest on this freezing cold day. My body was warm, but let me tell you that my toes were frozen. Note to self – wear appropriate boots in snow. 🙂
So how does this yarn work up? The short answer is, really nicely with some shedding. However, it hasn’t shed since I’ve worn it. From what I saw, the friction from the movement of crocheting and hooking the yarn was causing it to shed. Once wearing the vest, it hasn’t seemed to shed at all. You also want to avoid frogging it and that’s why I’ve made this pattern as absolutely simple as possible so you won’t need to frog!
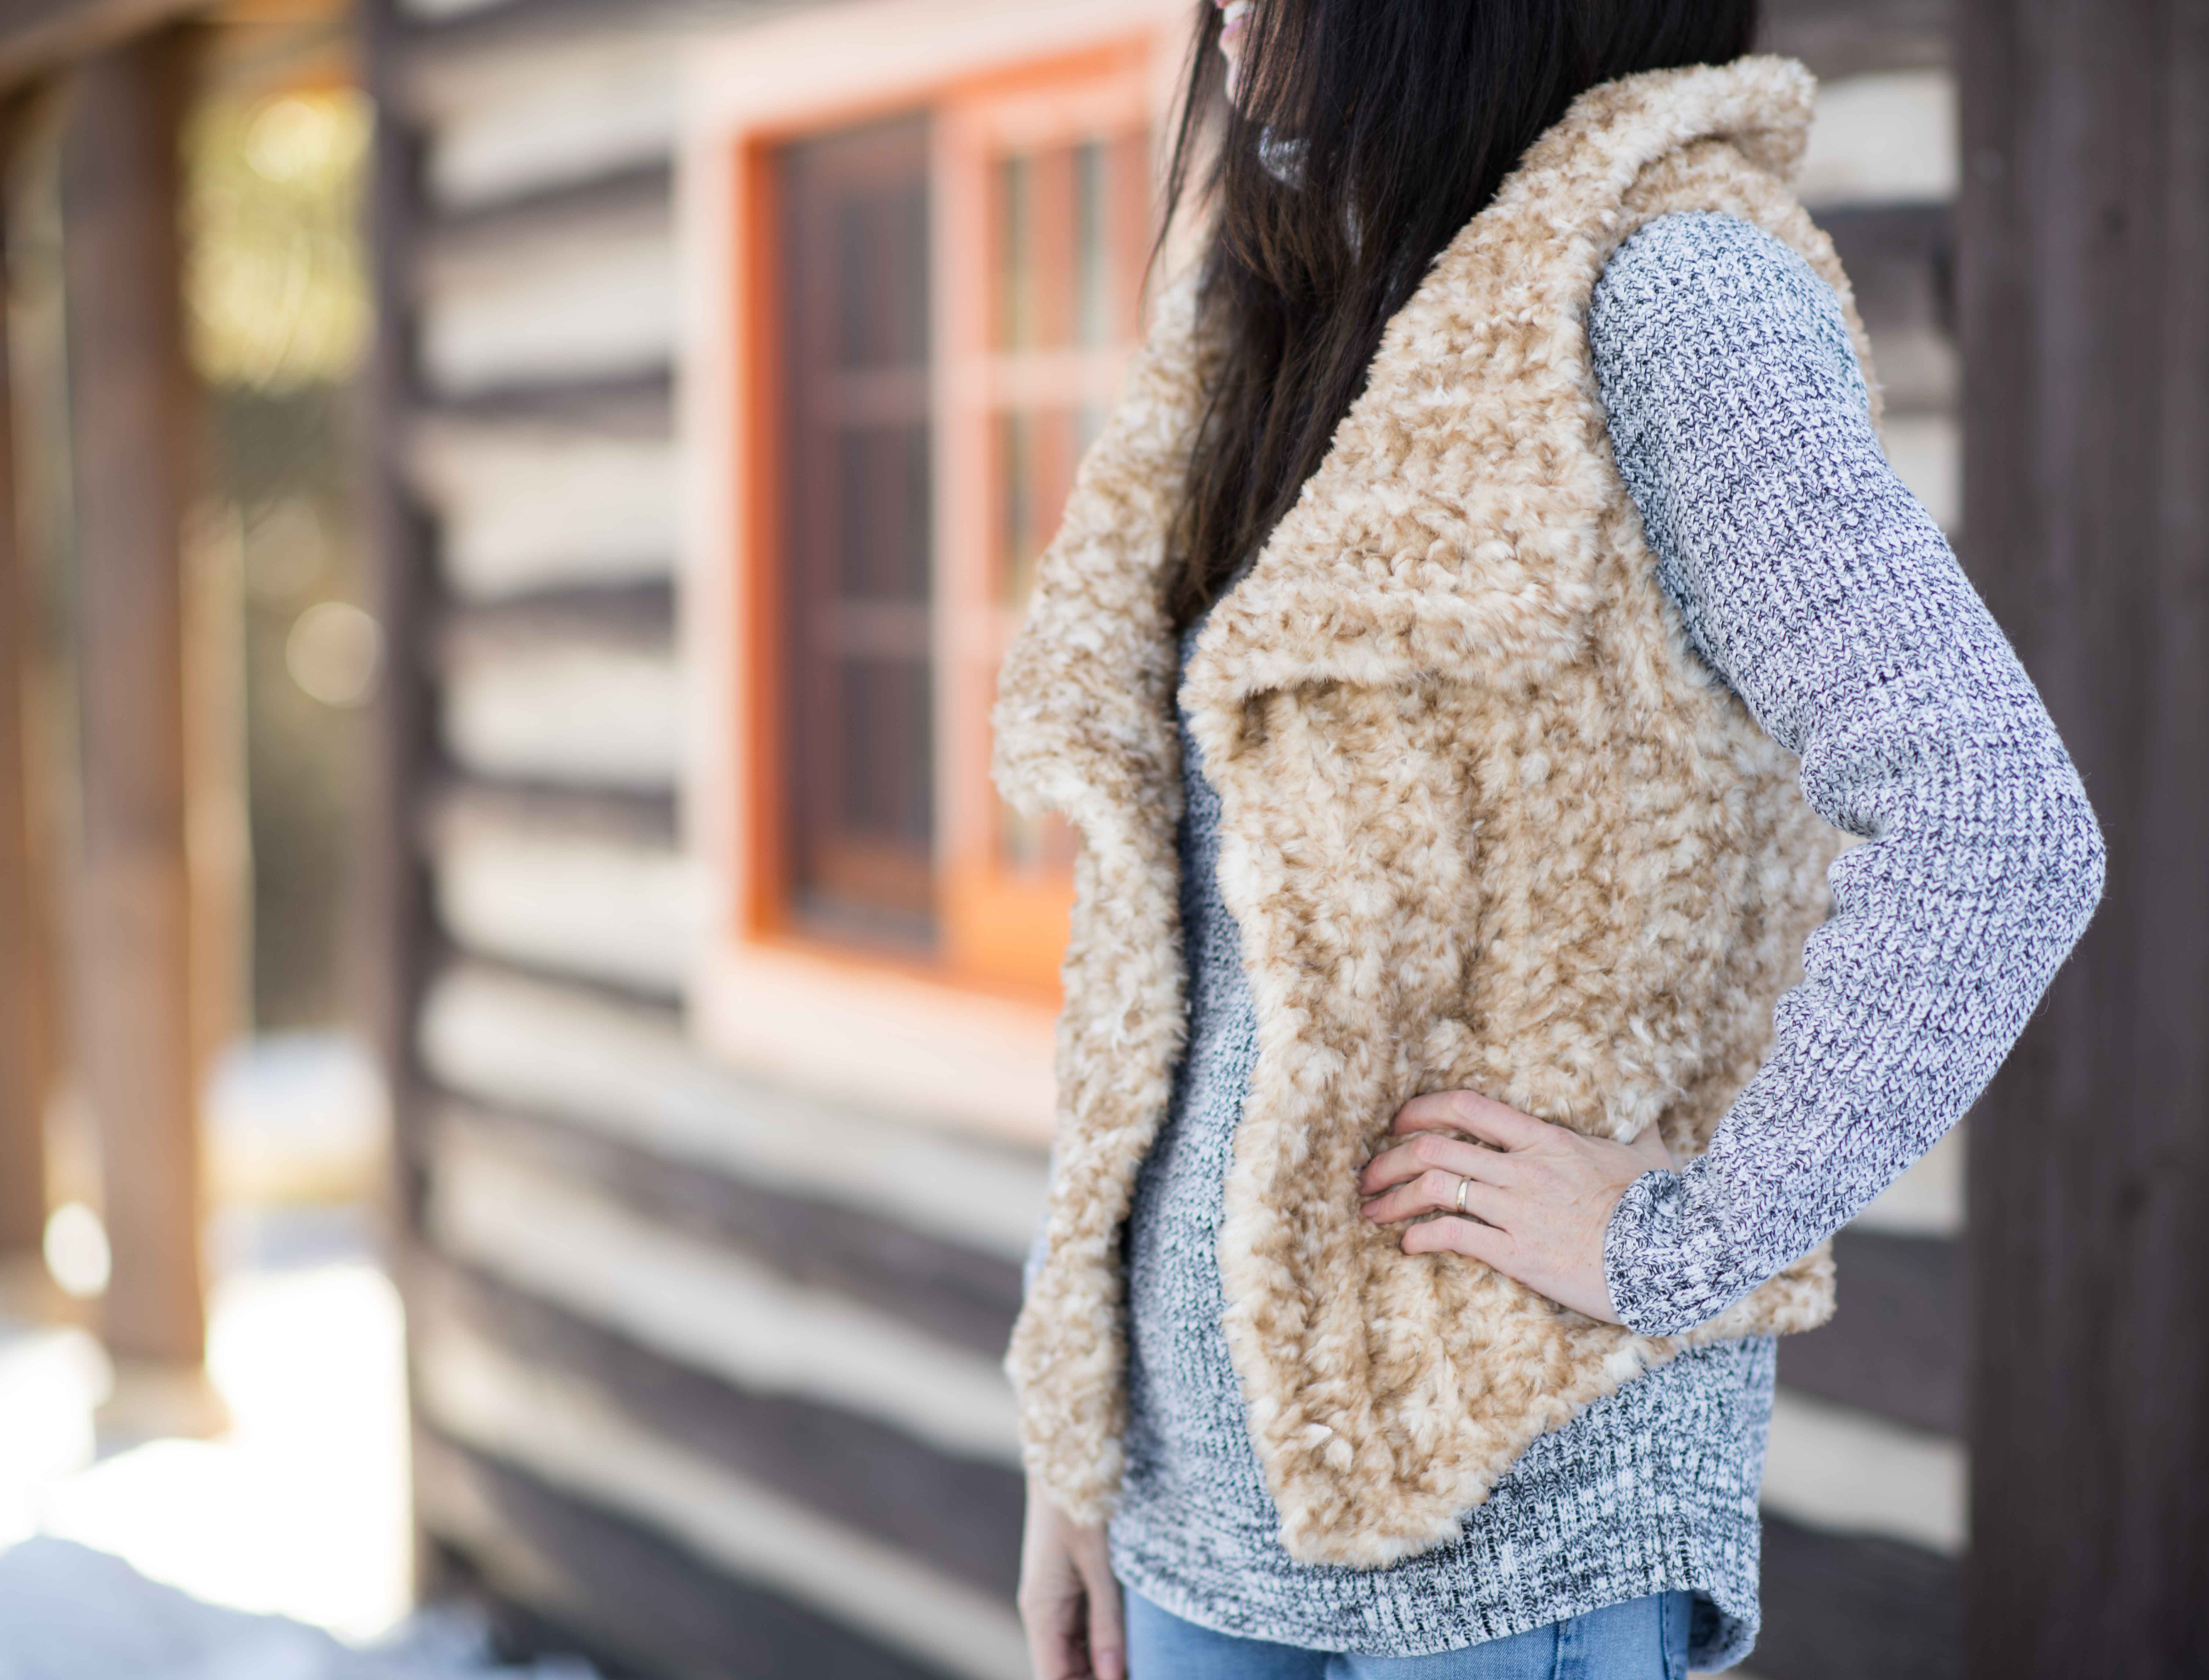
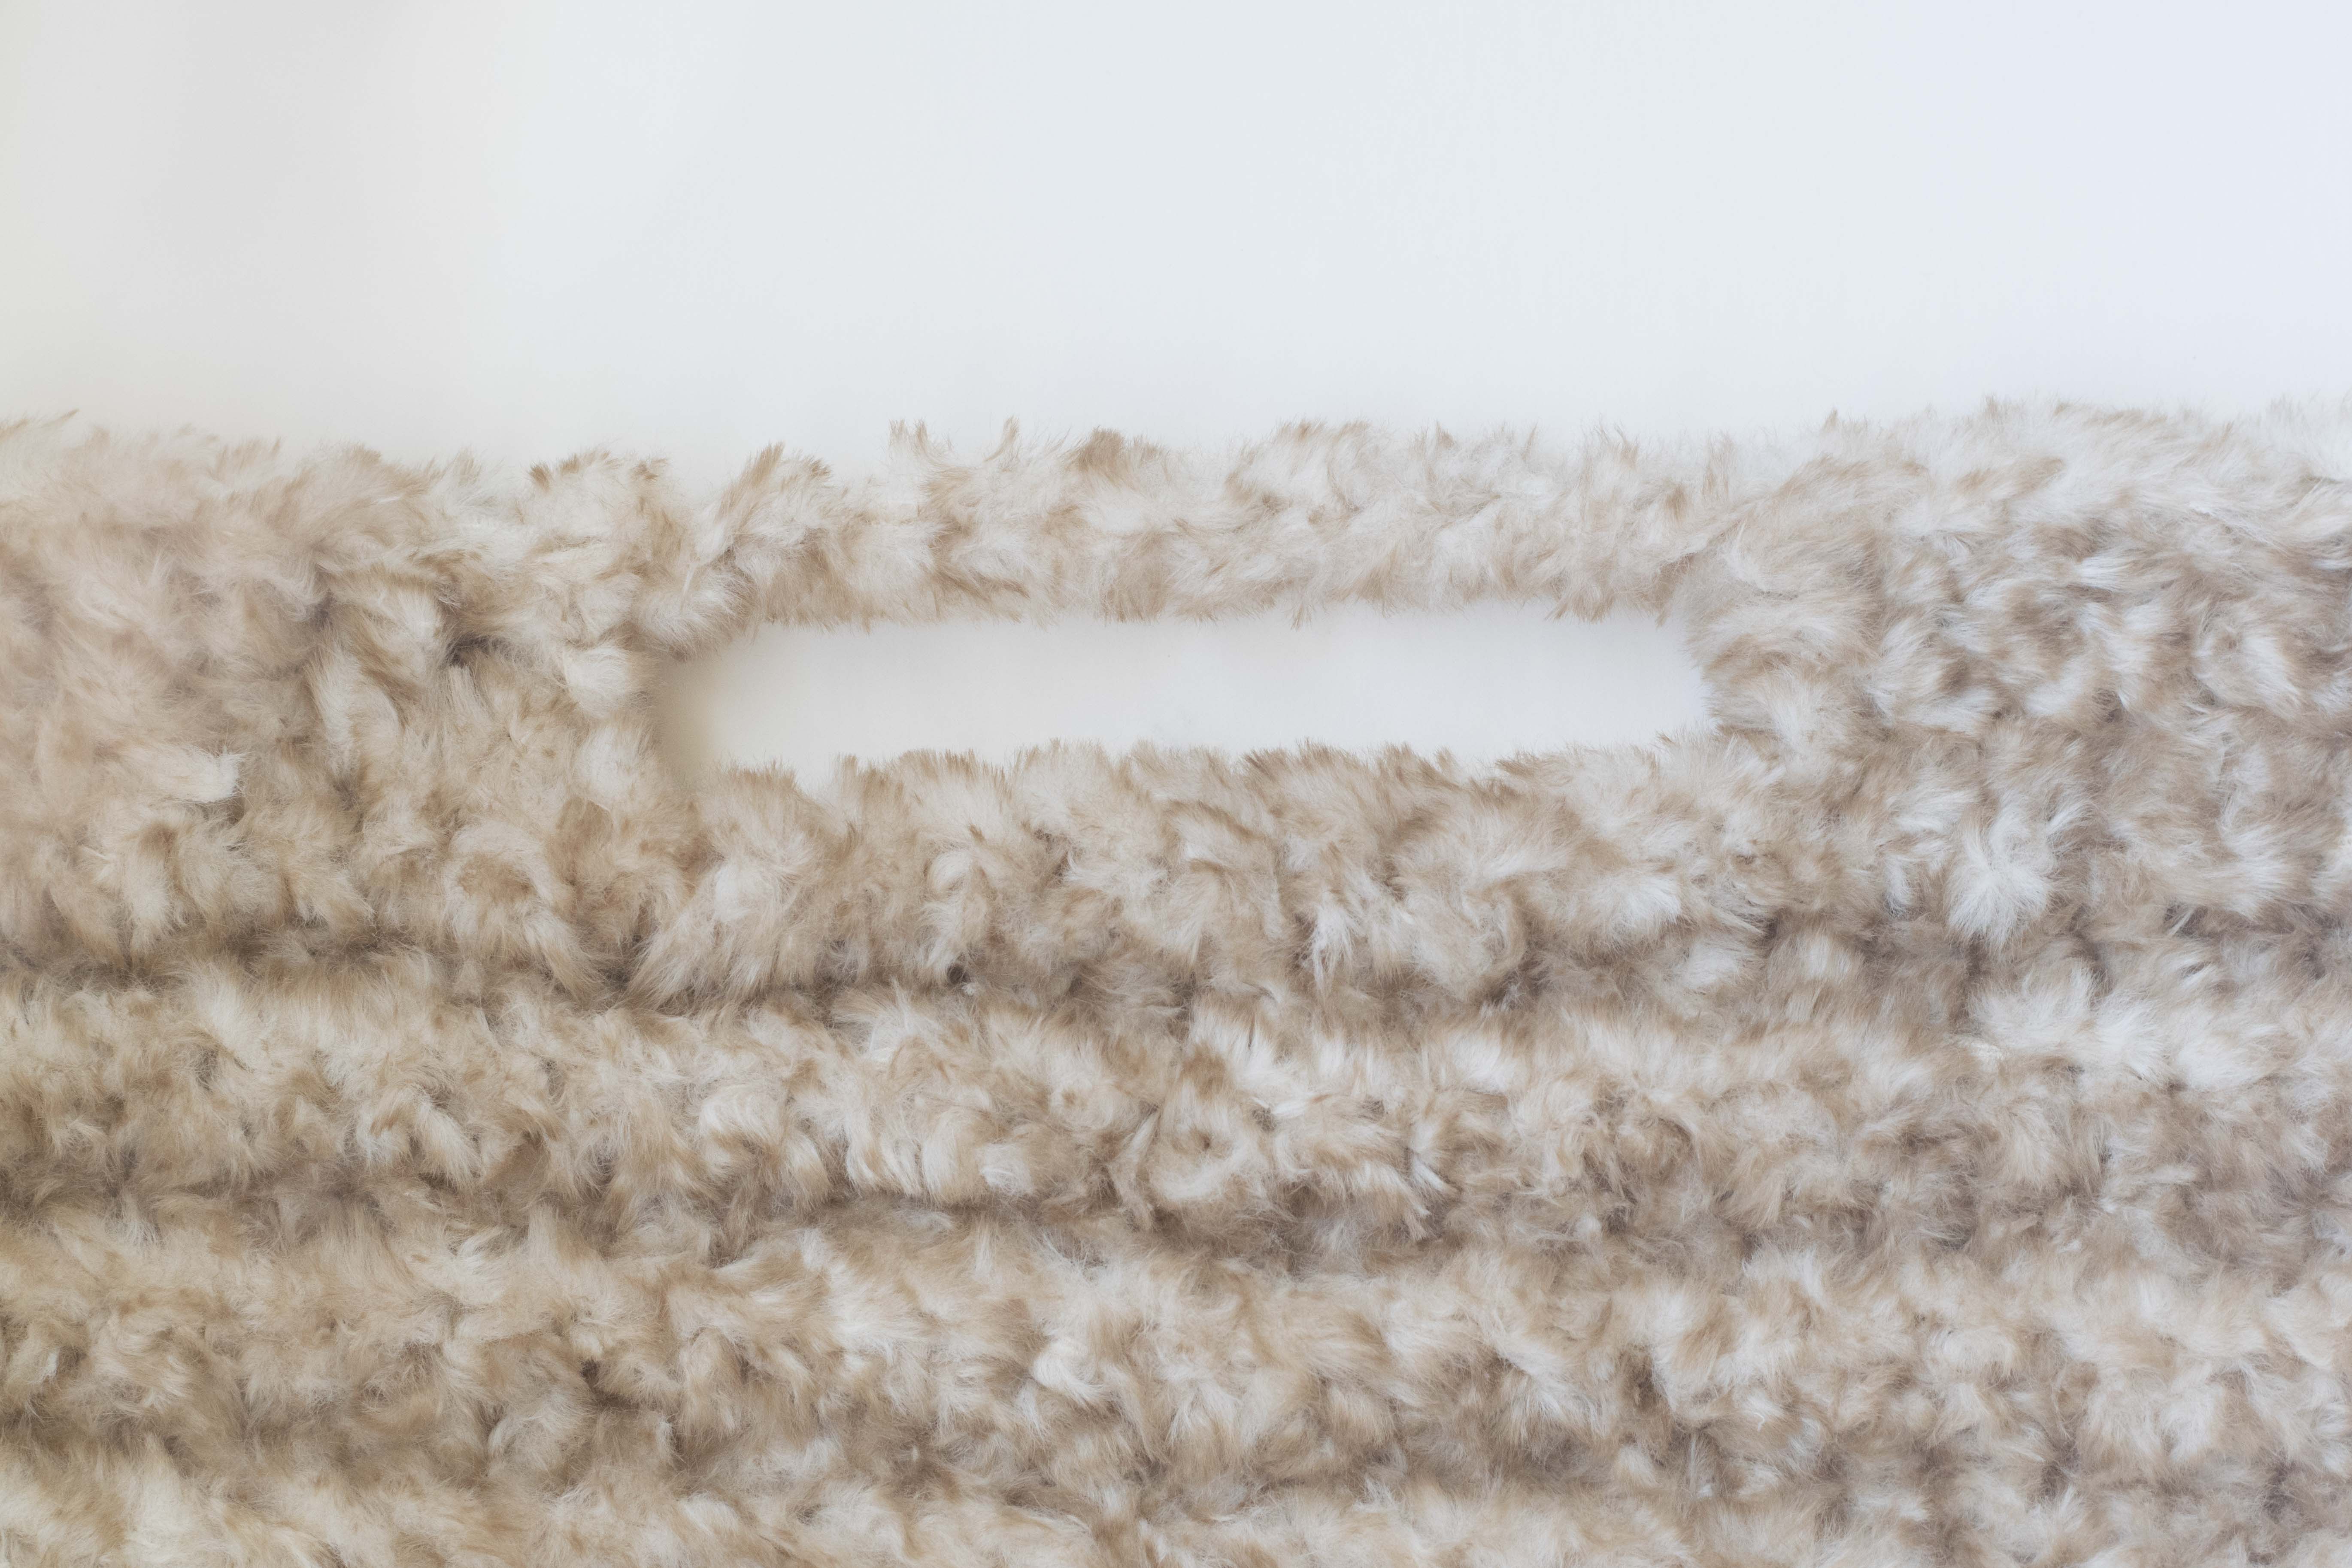
Is it difficult to see the stitches? Yes, it’s hard to see your stitches, but by using a large hook and simple stitches, I had no trouble at all. As I worked across the row there were times that I would feel the fabric to find my stitches. Once I got going though, it was easy to get in the groove and crochet as normal across each row. If you can’t see your stitches, use your fingers and feel for the next stitch in order to work through it.
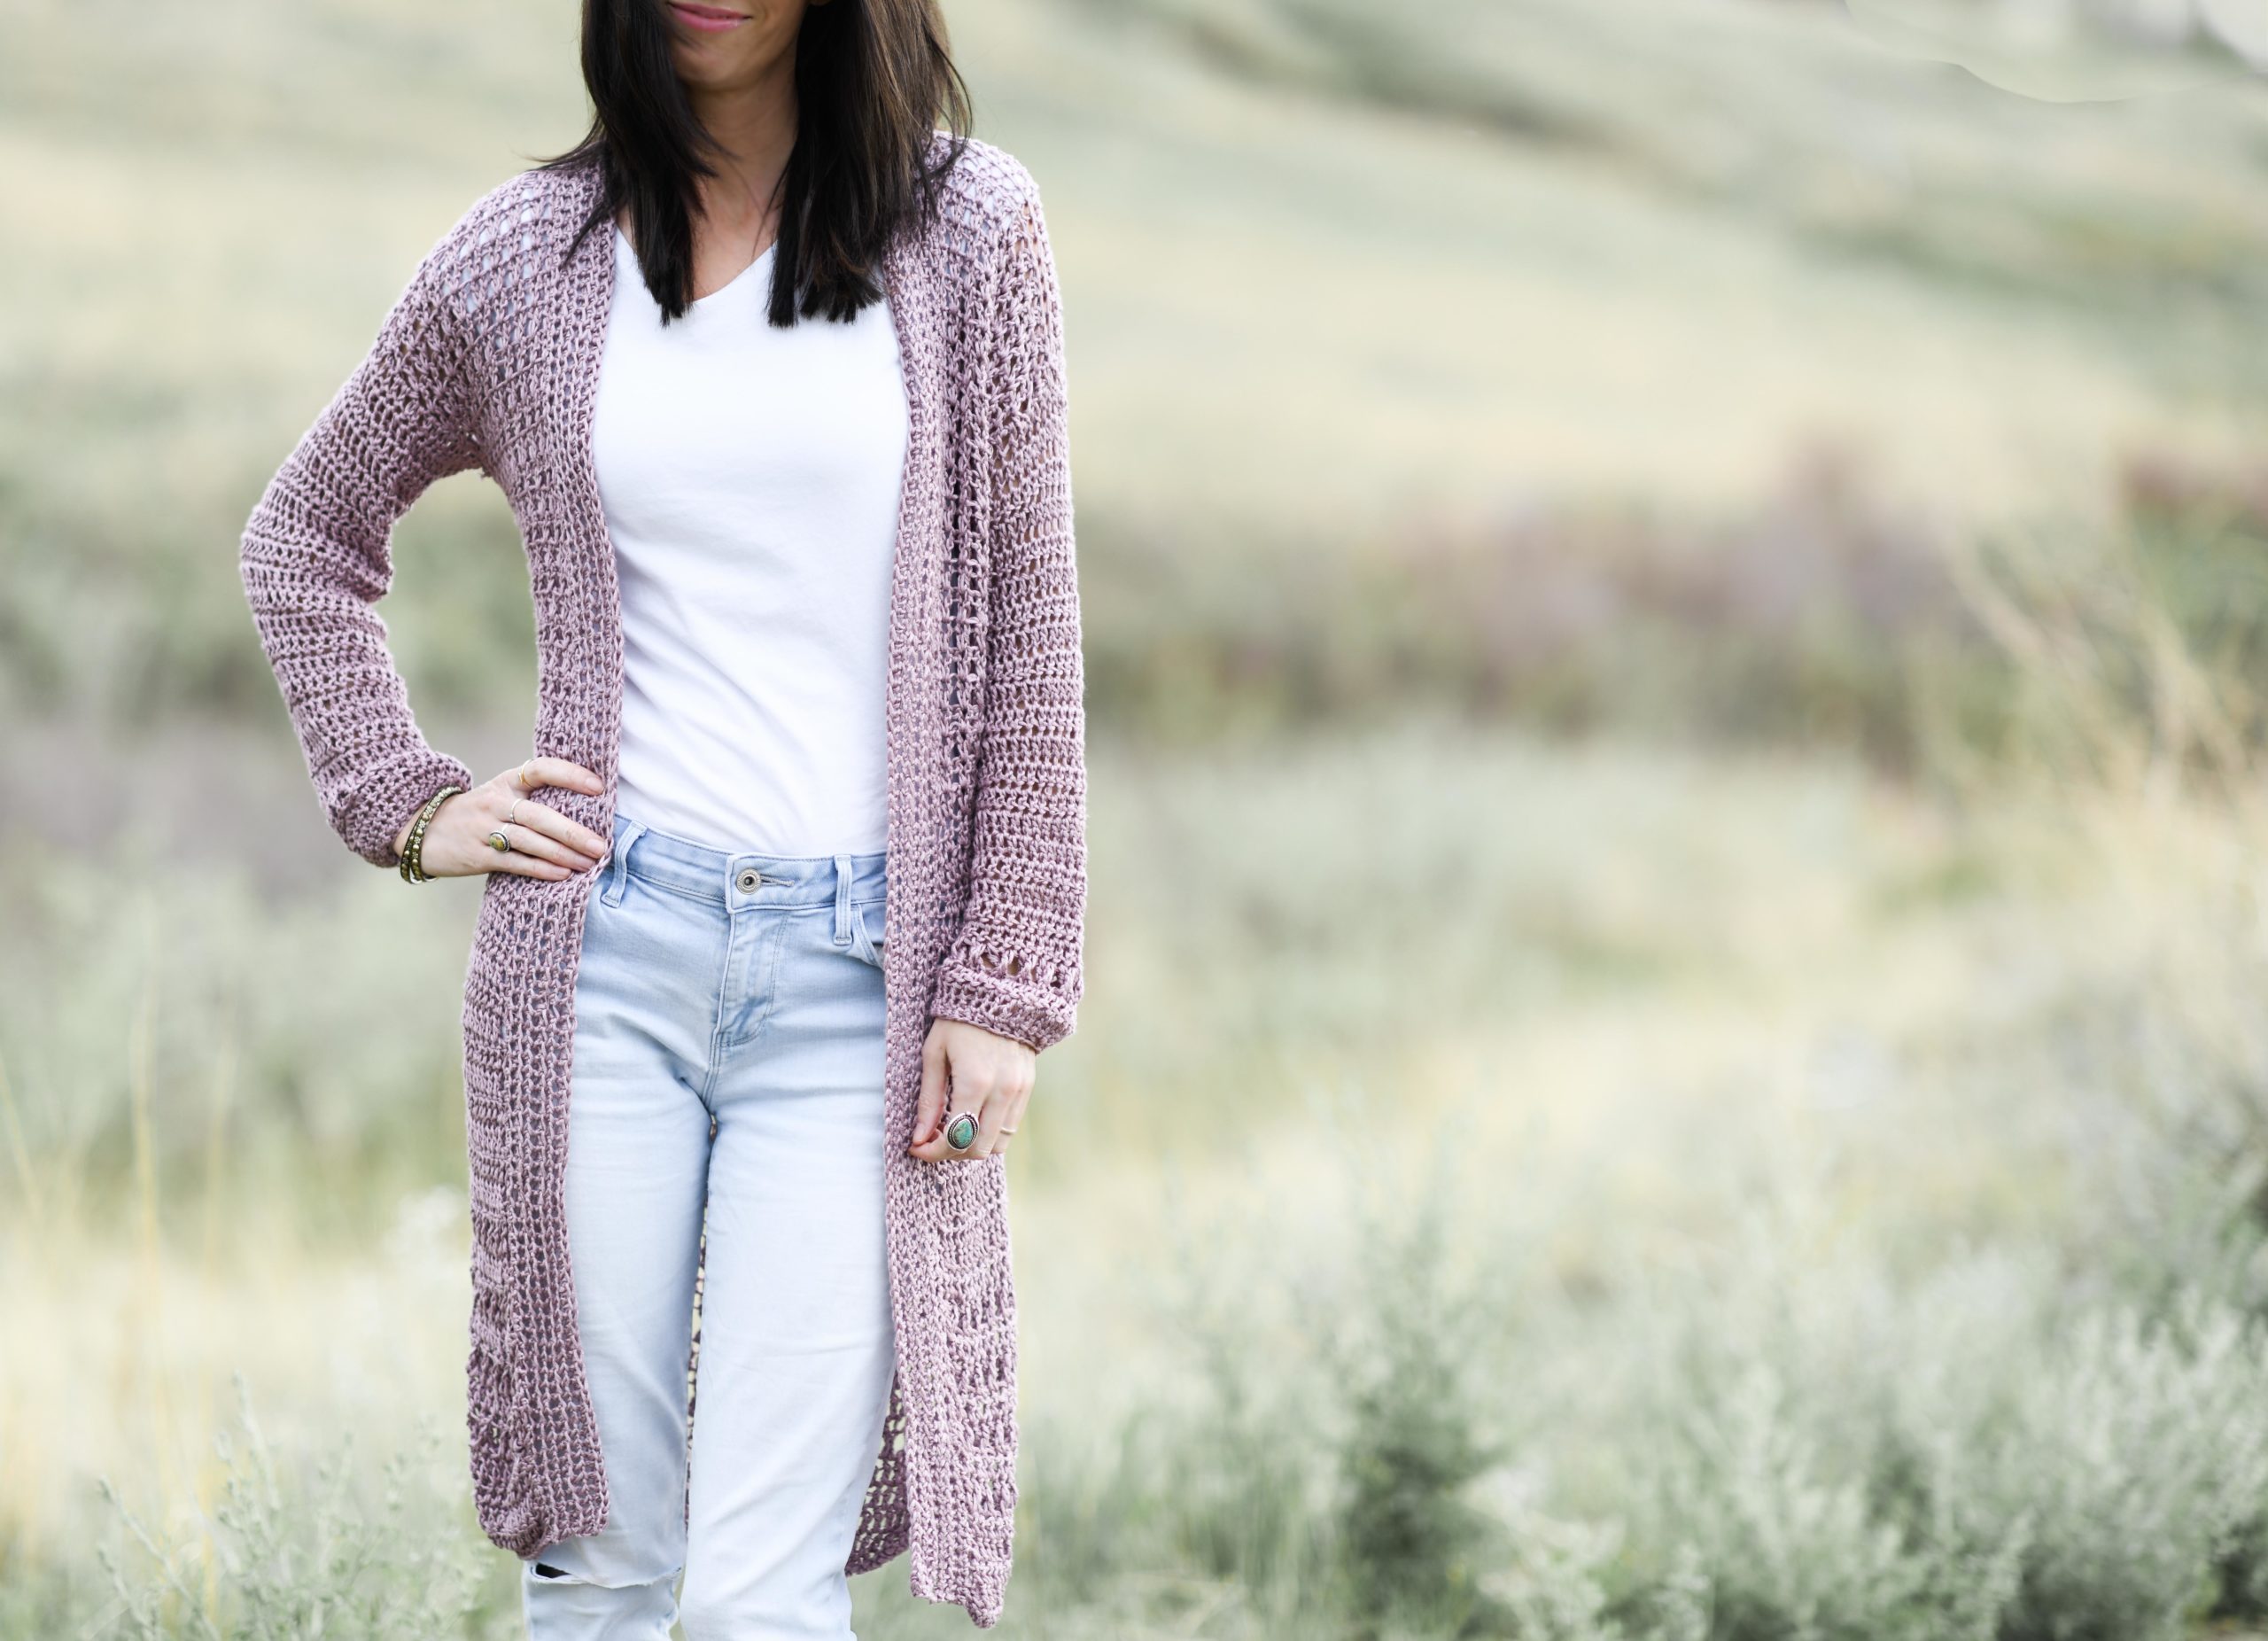
Below: Also loving this darker brown option. I’d like to make a cowl with it! You can see all of the color options on the Lion Brand website HERE
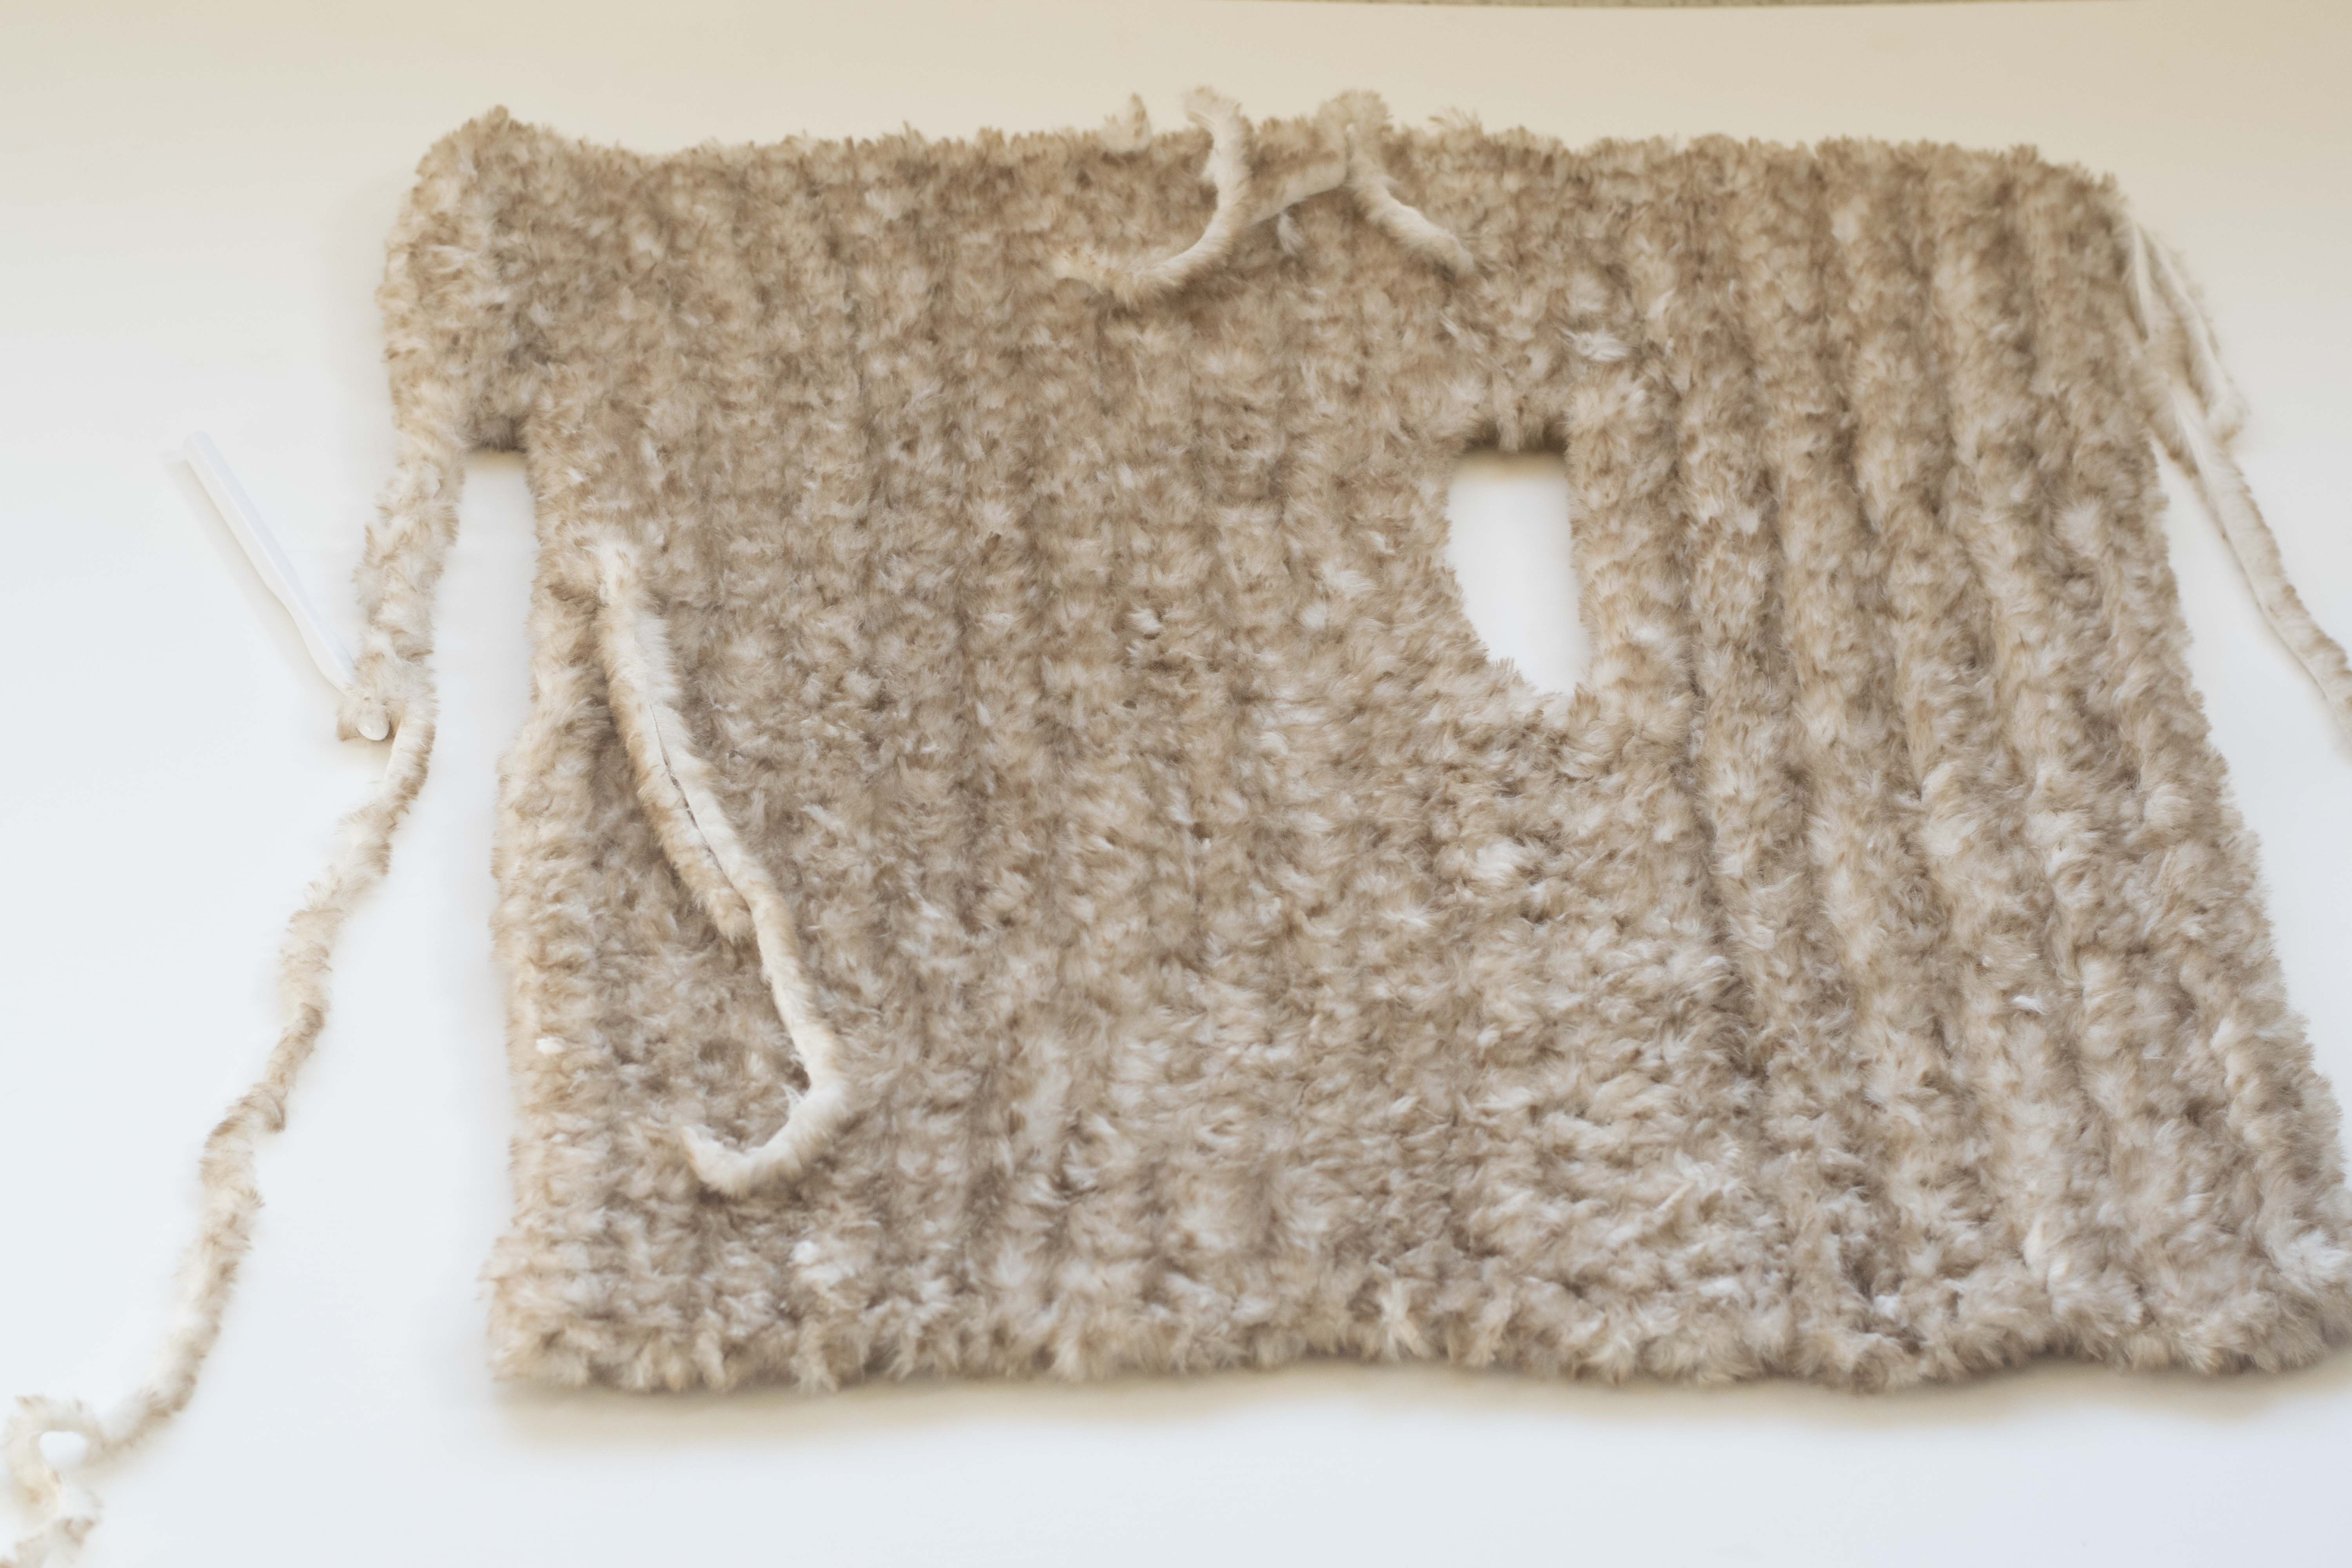
I hope that you enjoy this project and I’m thrilled that it’s the second in my Hygge Winter Collection. Sign up for my newsletter to follow along if you want to see all of my newest winter patterns! And scroll down for the free pattern and some photos to help you along 😉 You’ll see that it’s essentially a rectangle with shaping for the arm openings – keeping it simple so you can easily make this furry goodness!
Faux Fur Vest Crochet Pattern
Pattern Description: This incredibly soft faux fur vest makes a cozy and fashionable accessory for any winter outfit. Wear it with your sweater dress or pair it with jeans and a flannel top for an ultra-casual, comfortable look. You’ll find that it’s made with basic crochet stitches and includes minimal shaping so it’s great for beginners and experienced crochet artists alike. Beautiful ribbed stitching on the collar shows off the hues in the fur and the fit is sure to flatter.
Skill Level: Beginner +
Materials:
US Size P 11.5 crochet hook
(5, 5, 6, 7) Lion Brand Yarn Go For Faux in Pomeranian (100g/skein 65 yards/skein) Kit available with yarn and pattern HERE Pattern uses approximately (411 g, 489 g, 573 g, 628 g)
Scissors
Tapestry needle
Dimensions (approximate)
4 sizes available – XS, S, M, L/XL
Please follow the key throughout the pattern (XS, S, M, L/XL) The key refers to the stitch count or the number of rows (where indicated) for each size
Bust Circumference:
XS – 34”
S – 38”
M – 42”
L/XL – 46”
Length:
XS – 18”
S – 19.5”
M – 21”
L/XL – 21”
Cross Back:
XS – 15”
S – 15”
M – 17”
L/XL – 19”
Abbreviations & Skills:
ch – chain
sc – single crochet
sc blo – single crochet through the back loop only
st – stitch
sts – stitches
tr – treble crochet
Gauge:
Approximately 6 stitches and 4 rows in 4” of single crochet
It’s important that your gauge matches the gauge indicated in the pattern for the size to turn out correctly. Adjust your tension or change hooks accordingly to obtain correct gauge.
Notes: This vest is worked from one side to the other side with shaping for the arm openings. (See diagram and photos for additional assistance) The pattern is written in sections starting with the first collar, moving onto the arm opening, center back, final arm opening and second collar. If you don’t clearly see the stitches due to the nature of the fur yarn, it may be helpful to feel for them within the fabric as you work across the rows.
Pattern Instructions
Ch (37, 38, 39, 39)
First Collar Portion
Row 1 Sc in 2nd st from hook and each st across (36, 37, 38, 38)
Row 2 Ch 1, turn, sc blo in each st across (36, 37, 38, 38)
Rows 3 – (11, 13, 14, 15) Repeat row 2 (note that the numbers in parenthesis here are rows worked, not stitch counts. For example, the size XS will be a repeat of row 2 starting at row 3 through row 11)
First Arm Opening Shaping
Row 1 Ch 1, turn, sc in 2nd st from hook and in each of next 8 stitches (9)
Row 2 Ch 1, turn, sc in each st across the row (9)
Row 3 Ch 1, turn, sc in each st across, then ch (10, 11, 11, 12) skip (10, 11, 11, 12) sts from final row of First Collar Portion, tr in next st, tr in each st to end (36, 37, 38, 38 total stitches including ch sts)
Center Back Portion
Row 1 Ch 1, turn, sc in each st across (36, 37, 38, 38)
Rows 2 – (11, 11, 13, 15) Repeat row 1 (note that the numbers in parenthesis here are rows worked, not stitch counts)
Second Arm Opening Shaping
Row 1 Ch 1, turn, sc in 2nd st from hook and in each of next 8 sts (9)
Row 2 Ch 1, turn, sc in each st across the row (9)
Row 3 Ch 1, turn, sc in each st across, then ch (10, 11, 11, 12) skip (10, 11, 11, 12) sts from final row of Center Back Portion, tr in next st, tr in each st to end (36, 37, 38, 38 total stitches including ch sts)
Second Collar Portion
Row 1 Ch 1, turn, sc blo in each st across to chain stitches, sc in each ch st, sc blo in each st to end (36, 37, 38, 38)
Row 2 Ch 1, turn, sc blo in each st across (36, 37, 38, 38)
Rows 3 – (11, 13, 14, 15) Repeat row 2 (note that the numbers in parenthesis here are rows worked, not stitch counts)
Tie off and weave in ends.
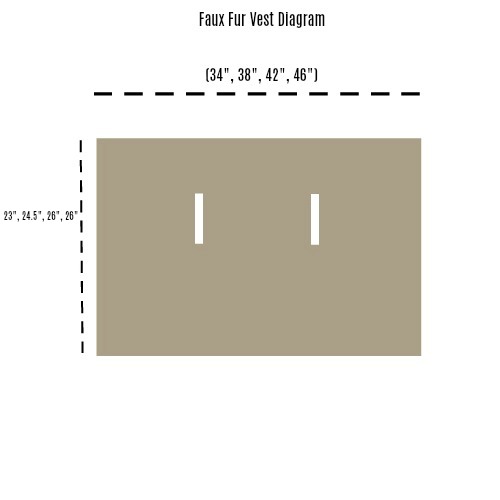
Photo Tutorial Arm Openings
Below: Make a chain as indicated in pattern, skip stitches and treble crochet to attach.
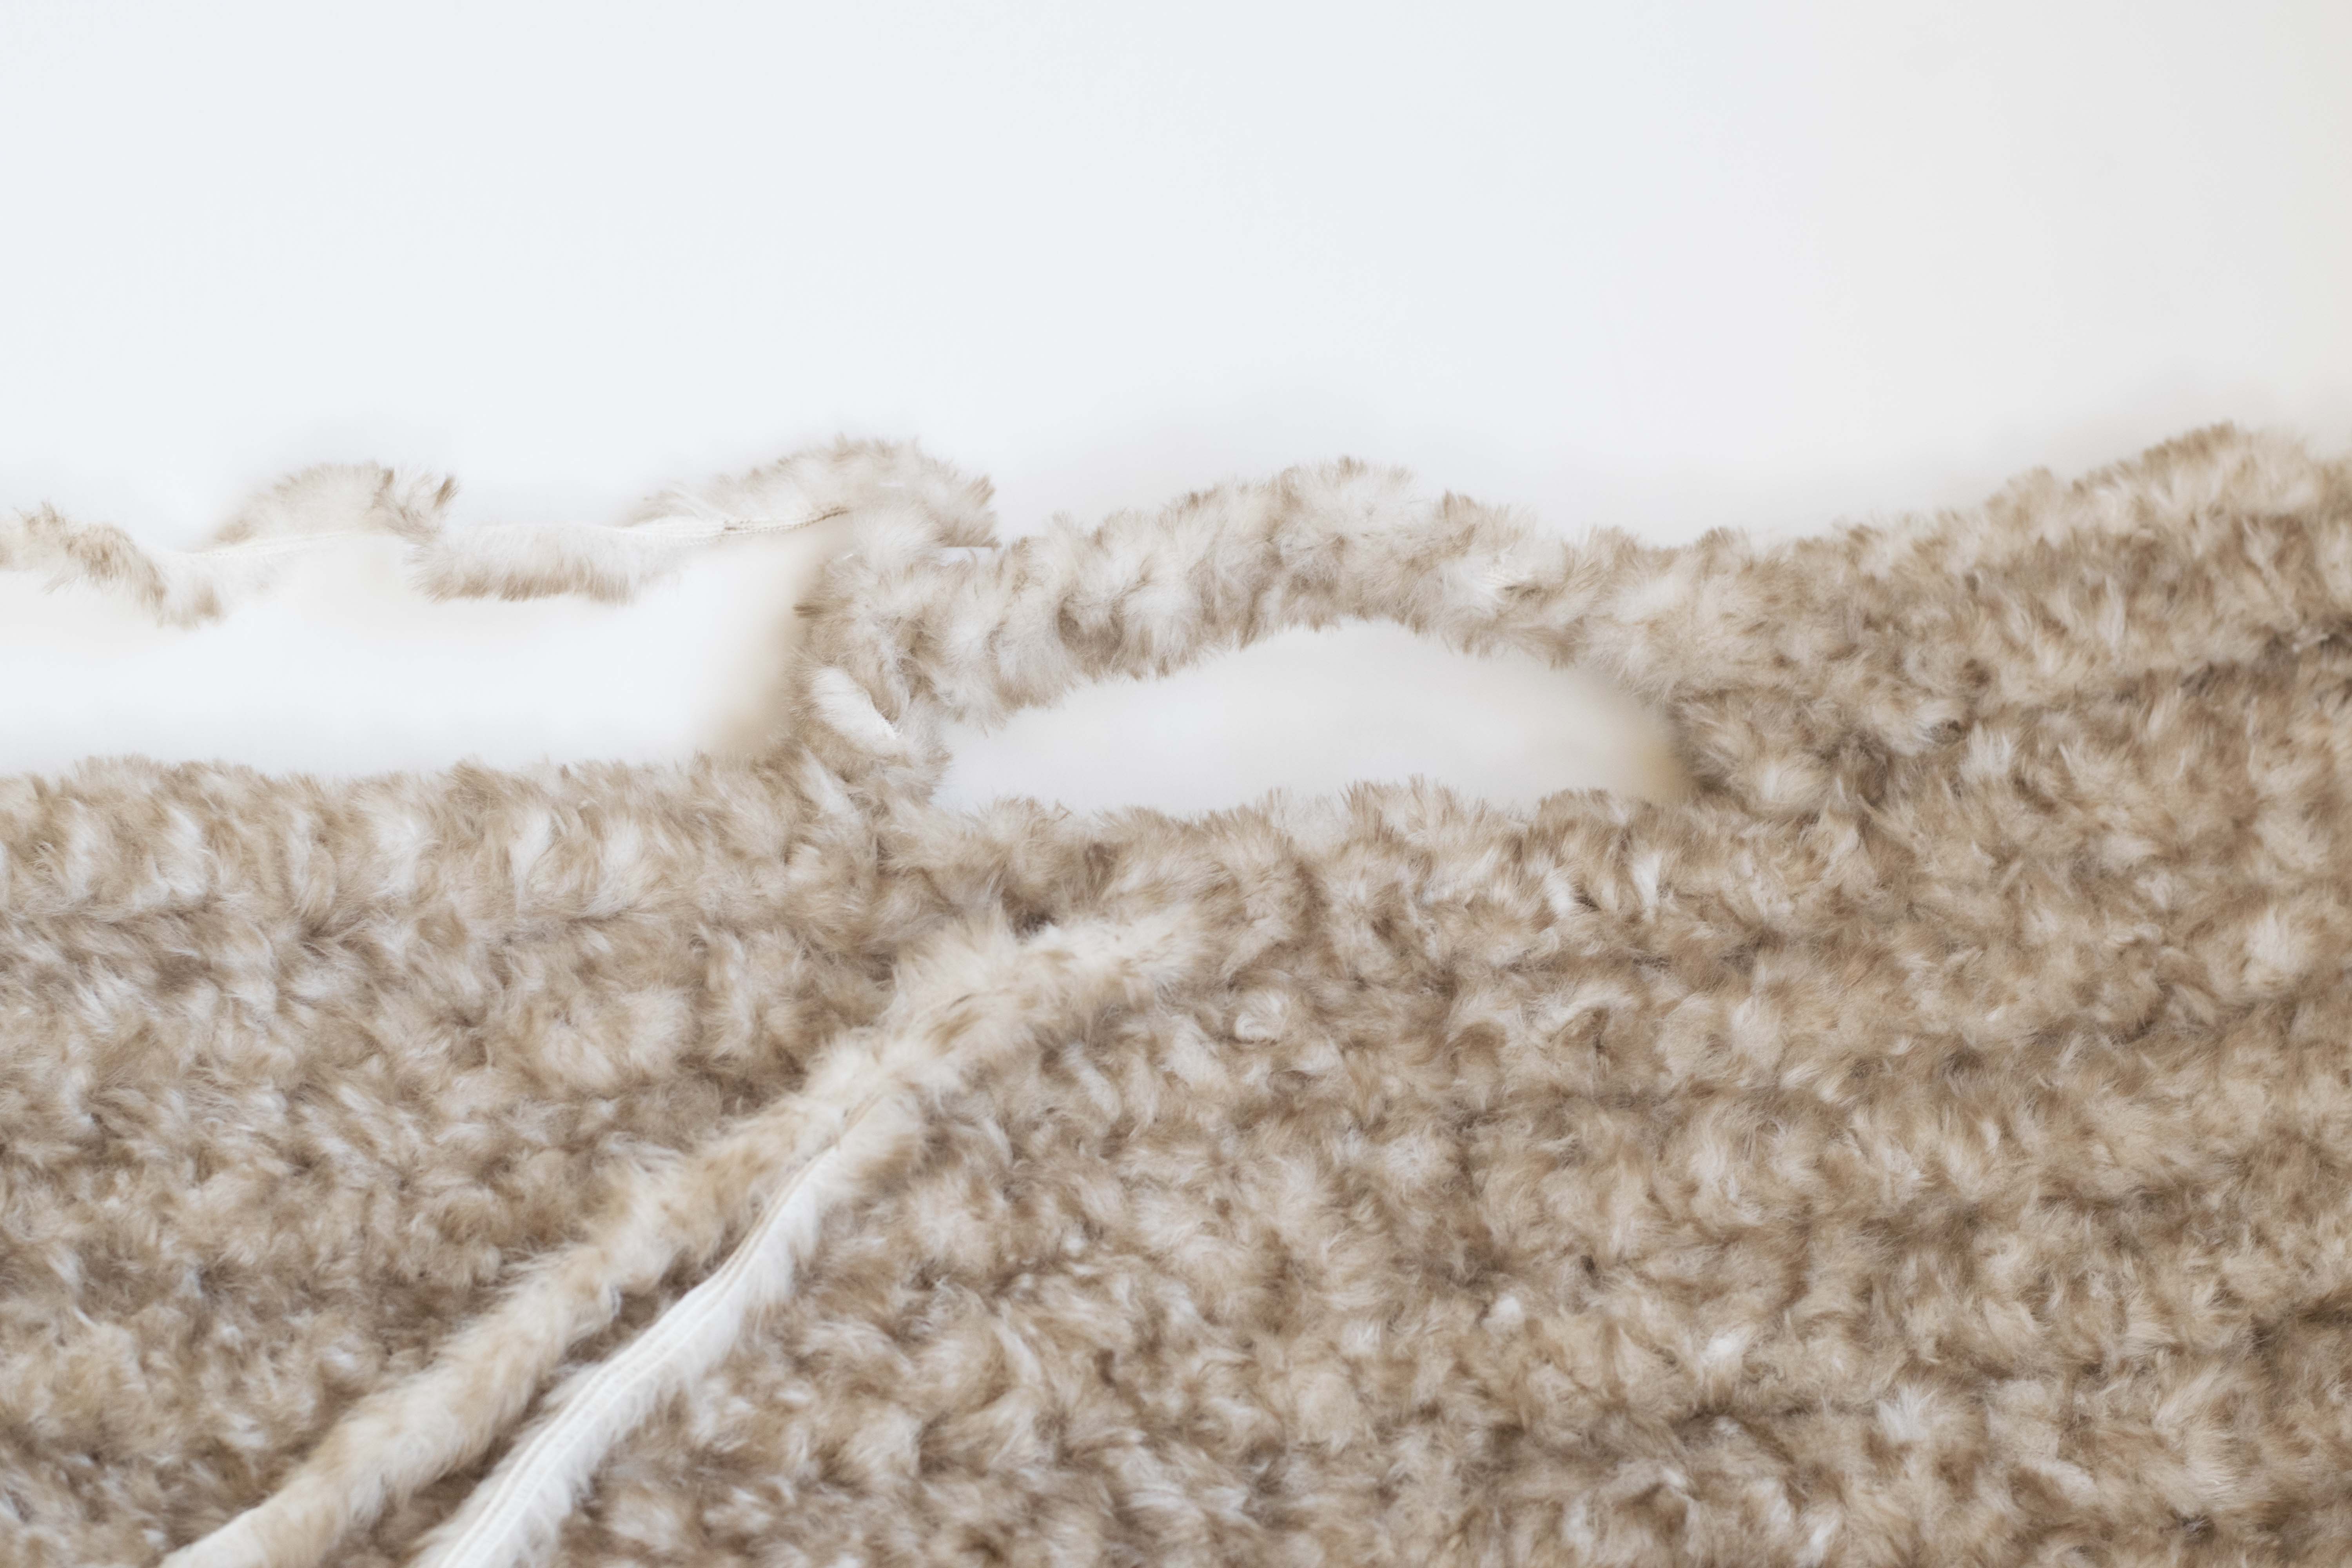
Below: Chain stitches were made, then treble crochet stitches worked until end of row
Enjoy your new, furry vest!
It was awesome to read some of your ideas on what you’d make with this fur yarn on Instagram and Facebook! Feel free to share your ideas in the comments section here as well so we can dream up other things to make with this luscious faux fur.
XO,
Jessica
If you liked this, you might also like:
![]()
Thank you to Lion Brand Yarn for sponsoring this post. All opinions are 100% my own.
Jessica, that is absolutely beautiful!!!
Your patterns are so easy to undetand doable for a newbie like me
Thank you for another great project
Nancy
This is so perfect for the winters out here in the West!!! Was 18 when I left for work this morning… this would have been perfect for today!!! Gotta go get me some new yarn now!!! Thank you for such a great pattern!!!!!!!!!!!
So dang cute❣️ Now I just need to wait for yarn to be more readily available. Not at Joanns or Michaels in my area yet. Thank you
You can order it through her link to Lion Brand yarn
I love this! I will be working this in in Chinchilla!
Jessica!!! I love this so much! Can’t wait to make it. What size are you wearing, if you don’t mind me asking? Im trying to decide between the xs or small. The yarn makes me nervous but the pattern seems simple and the style is adorable so it will be worth it!! Thanks for the great patterns!
Jessica . . . . . you read my mind. I spent all afternoon yesterday searching for faux fur vest patterns. Just one thing . . . I can’t crochet. Any chance you’ll be adding more knitting patterns this winter. P.S. the vest is stunning on you!
I LOVE this! I hope you can make a knitting pattern since I don’t crochet
Lovely! the wheels are turning again!
Jessica, this is gorgeous. Can’t wait to make one. Love the name of the yarn – Pomeranian, ha! Looks like one. Question – if I order the kit with the yarn will the pattern instructions be the same as listed here or more detailed?
Thanks!
Love this so much!! I just don’t know how you continue to come up with such fabulous items. You are truly inspired! I’m going to definitely be making this and think I’ll make it a little longer to keep my backside warm! Thanks for ANOTHER fabulous piece!
So glad you like it Judy!!
Too cute! I’m definitely going to have to knit me one 🙂
Please make a knitting pattern!
Thanks for the suggestion Jenn! You can look up Knitatude as she has a knit version!
Love this! I have a friend who is so hard to pick out gifts for and I think she would love this! Wears vests all the time. Thank you for continuing to share such beautiful patterns!
OMG I love this pattern. You continue to keep coming out with amazing looks. Very unique! Will be making this for sure. Thanks again
This is beautiful, but like many others I dont crochet . I do knit though so if you ever decide to convert this to a knitting pattern I would be very grateful.
Can I please just print the pattern for the faux vest without printing so many pages?
Thank you.
Hi Susan! You can copy and paste the pattern into Word and print from there. That’s the easiest! Or you can always purchase the printable version (without all the ads and extras) from my etsy shop.
I crocheted the medium and when I got to the second armhole there was no way that it could fit across my back. I took it out and am trying again with the larger size but I even counted it and it was correct. Any thoughts on what I could have done wrong?
Hi Susan,
Oh no! Can you measure how wide it is from one arm hole to the next? You certainly need to simply crochet for more rows through the middle. Does your gauge match mine, and are you using the correct hook? This can also make a huge difference.
I also had this same problem while trying to make the XS, I ended up adding an additional 7 rows after the suggest 11 and it still didn’t fit. (my bust is also 32″ so it definitely should’ve worked with the XS) My gauge and hook were the same as yours but the pattern is very simple and easy so I will just take it out and continue to add rows until it works!
I too had this problem working the S size. 11 rows after the first armhole was not enough to cover my back before starting the next armhole. My gauge and hook size were not the issue. So I’m just going to keep adding rows until I reach my arm and then make the second armhole.
I also had a real hard time finding the back loop so just single crocheted in both loops as normal instead. This yarn is beautiful but I had to count every stitch of every row to make sure I hadn’t skipped or added any stitches. There is no way to see the stitch due to the texture and two toned color of the yarn. I choose MINK for my project and its a dark grey/white mix and think it will look fantastic over my black leather jacket =)
Thanks MAMA for this fun pattern and for all your great projects
Jessica what a beautiful faux fur vest!!! Any chance us knitters might see a pattern?❤️
I was so excited to find this pattern! I had been thinking I would love to make a furry vest; the hard part is out of the way for me with your free pattern. Thank you!
Yes! Please make a knitting pattern! Knitatude’s is not the same style.
I’m having some trouble with the armholes: I start with 38 stitches (size XL), but when I begin row 1 with the sc into the 2nd stitch from the hook I keep finishing row 3 of the arm opening with 37 stitches. I have no idea how I’m supposed to end up with 38 stitches. Please help!
Blo…I’m having a hard time finding the blo. Is there a reason not single crocheting the regular way? The yarn is so furry, I can’t see the stitches…I have to feel for them.
Thank you in advance.
Hi I posted a comment yesterday. No need to post it. I’m just frustrated trying to find the BLO. Most of my frustration has to do with the fact that I have a wrist that is unable to bend or move back and forth. I’ll try again and if I need to I’ll just to a regular sc.
Thank you,
Terry
Hi,
I also found that the pattern did not give enough rows to make it wide enough across the back. I am having to add many more rows. Yes, my gauge is correct. Also across the back the pattern only has do sc, which when I look at the pictures, does not match. In order to get the “striped” effect it would have to be done through the blo of the sc. I just wanted to confirm are all of the sc done through the back loop, blo, or as a regular single crochet as the pattern states?
Thanks,
Mary
Did you have enough yarn? I ordered the kit for a size s. Now I don’t know if I should return.
This is beautiful! Could you please make something like this for the knitters in the community? Thank you for sharing your inspiring work!
Hi Jessica! Love all your patterns! Thank you for sharing so much and for the inspiration! So I have to tell you all–the major mistake I made this year with a Christmas Gift. I’ve been wanting to make this vest pattern of yours since it came out for a friend of mine, but thought it would be “easier & quicker” to sew a vest (with everything that has to be done at the holidays). Well, all I can say is I wish I had just bought the yarn and crocheted it! I’m still working on finishing the vest! Hope this helps anyone trying to decide whether to make this beautiful vest! I am sure it will be worth it! I’ve finally found the yarn at my local craft shop and am going to buy it and make the vest!
This pattern is working up super easy in spite of the fact that I am using the Go for Faux Thick and Quick yarn. I definitely have to use touch to find my stitches. But I do have one question: what is the WIDTH of each panel for each size? I am having trouble counting the number of rows (and I didn’t use markers at each row) and having a width would be more helpful than a row count. Help!