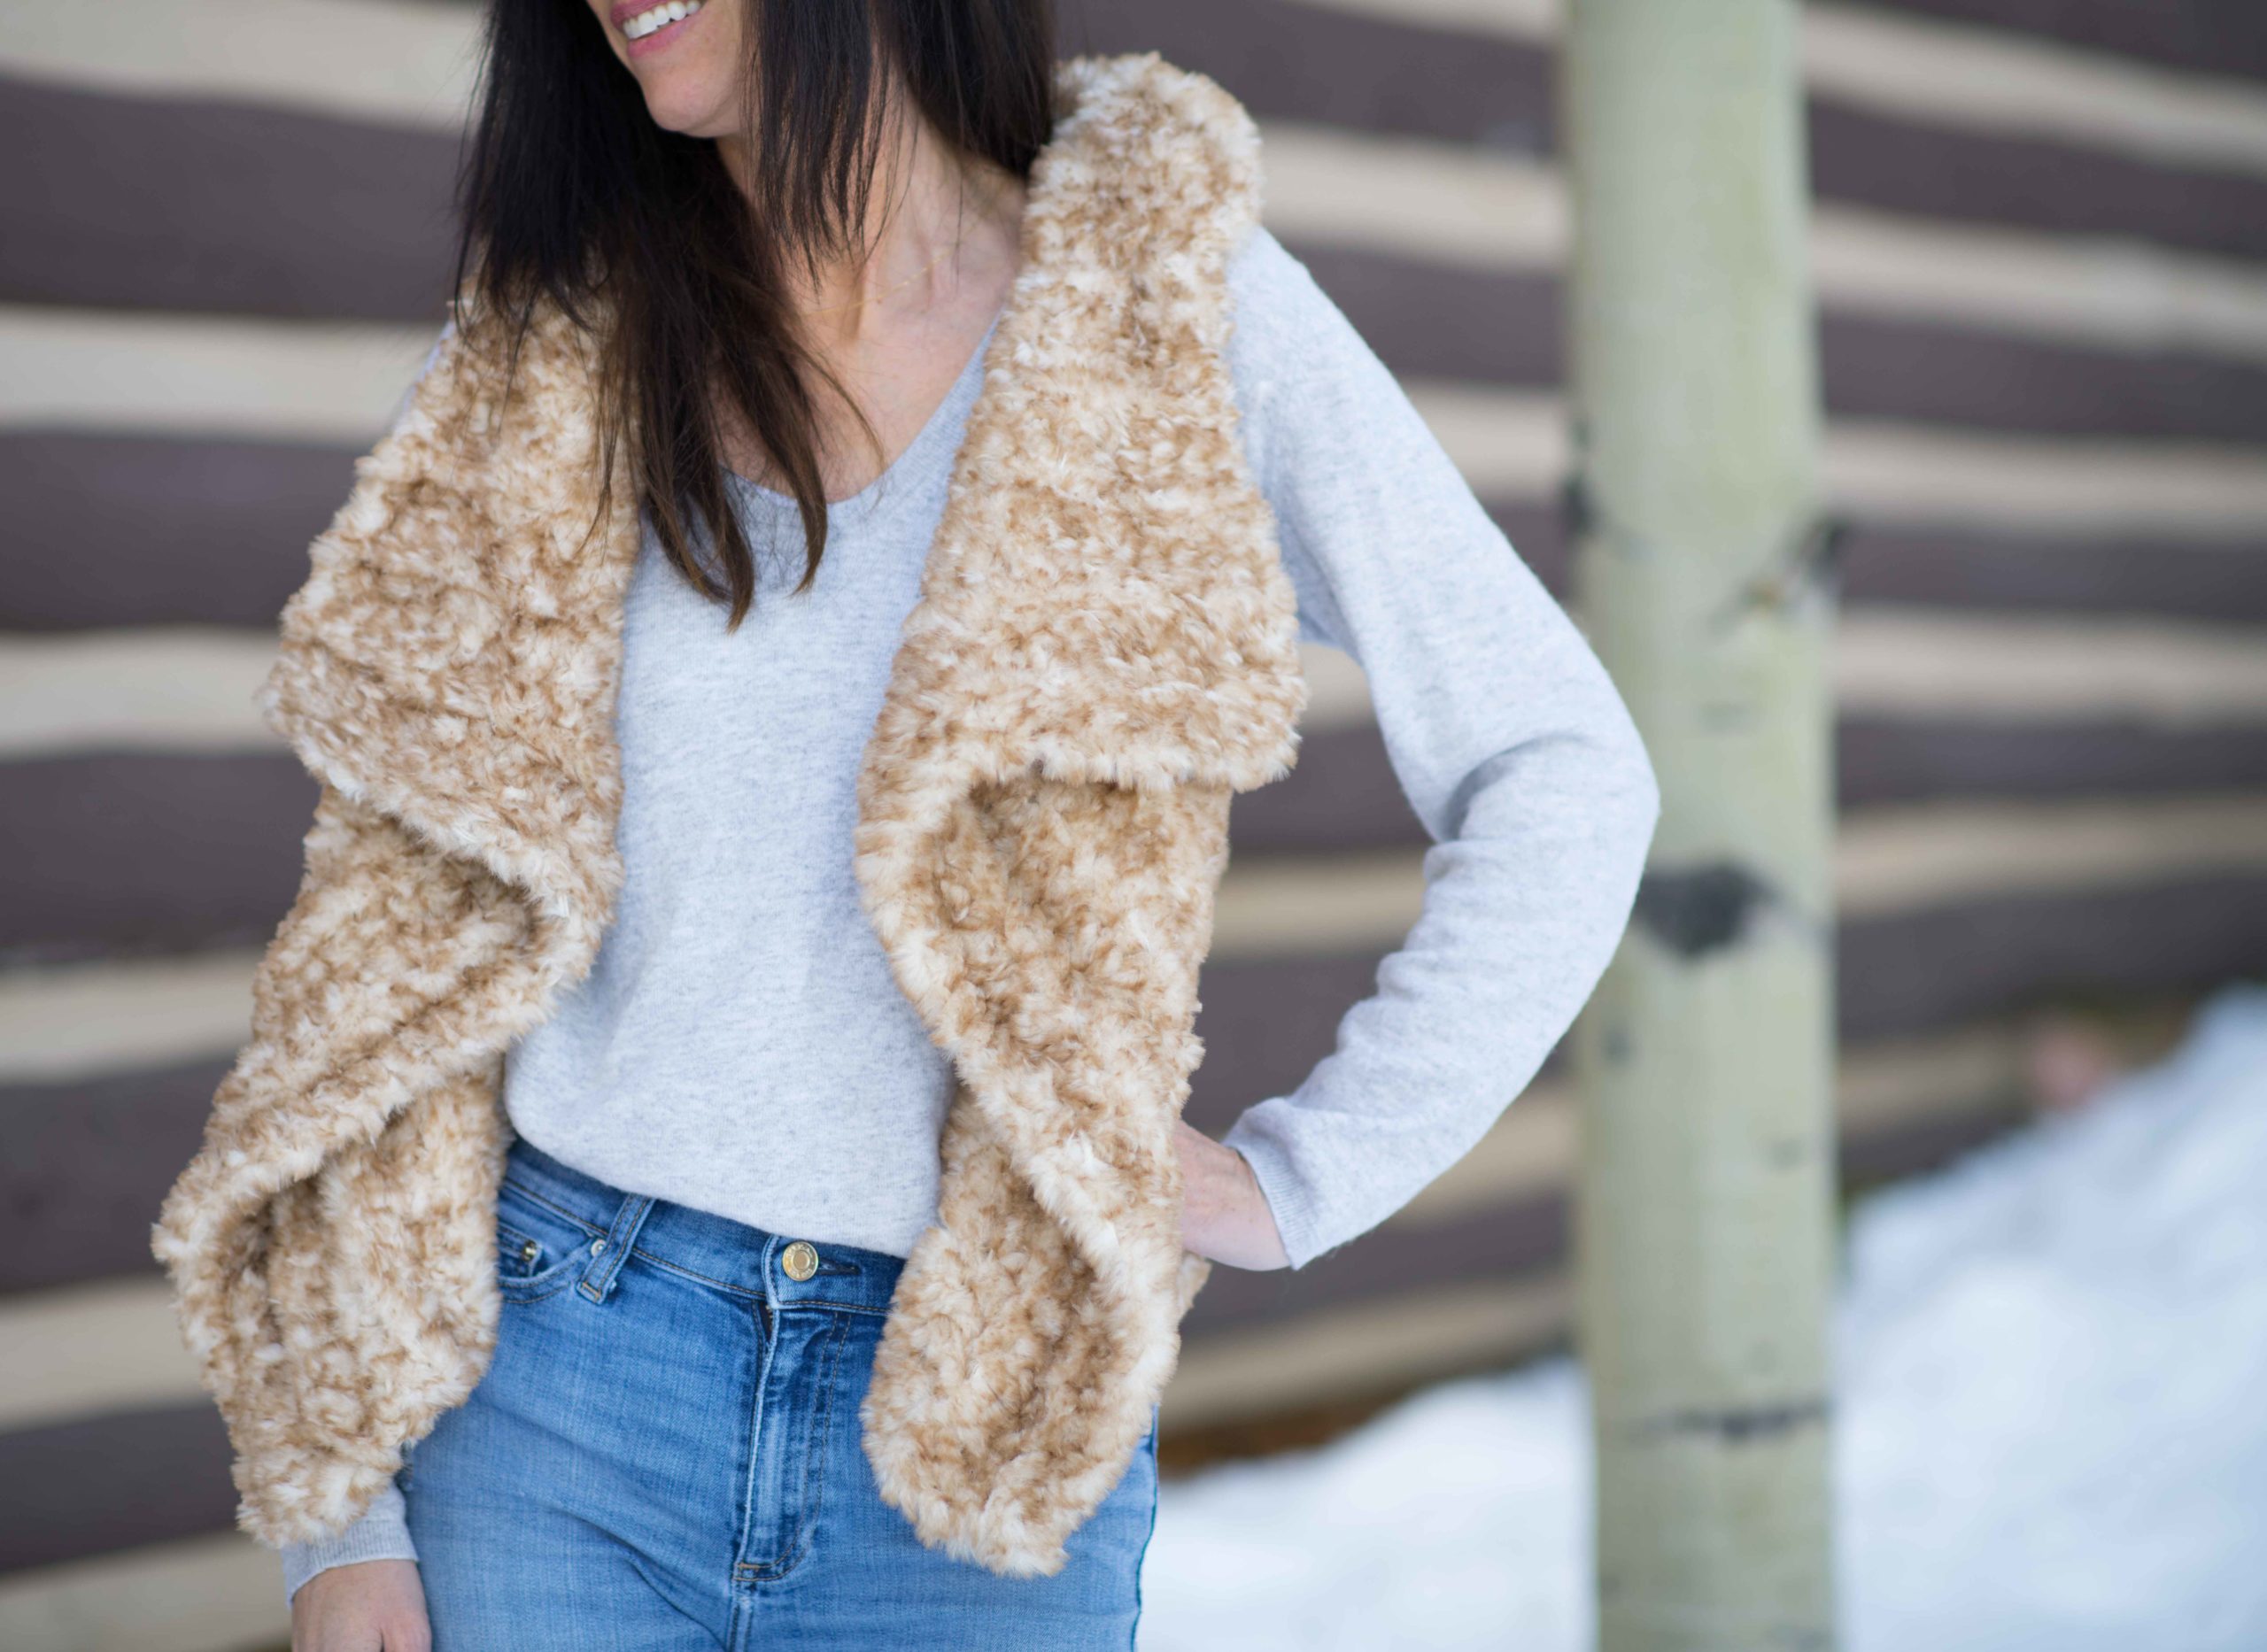
Done In A Day Quick Shrug Crochet Pattern
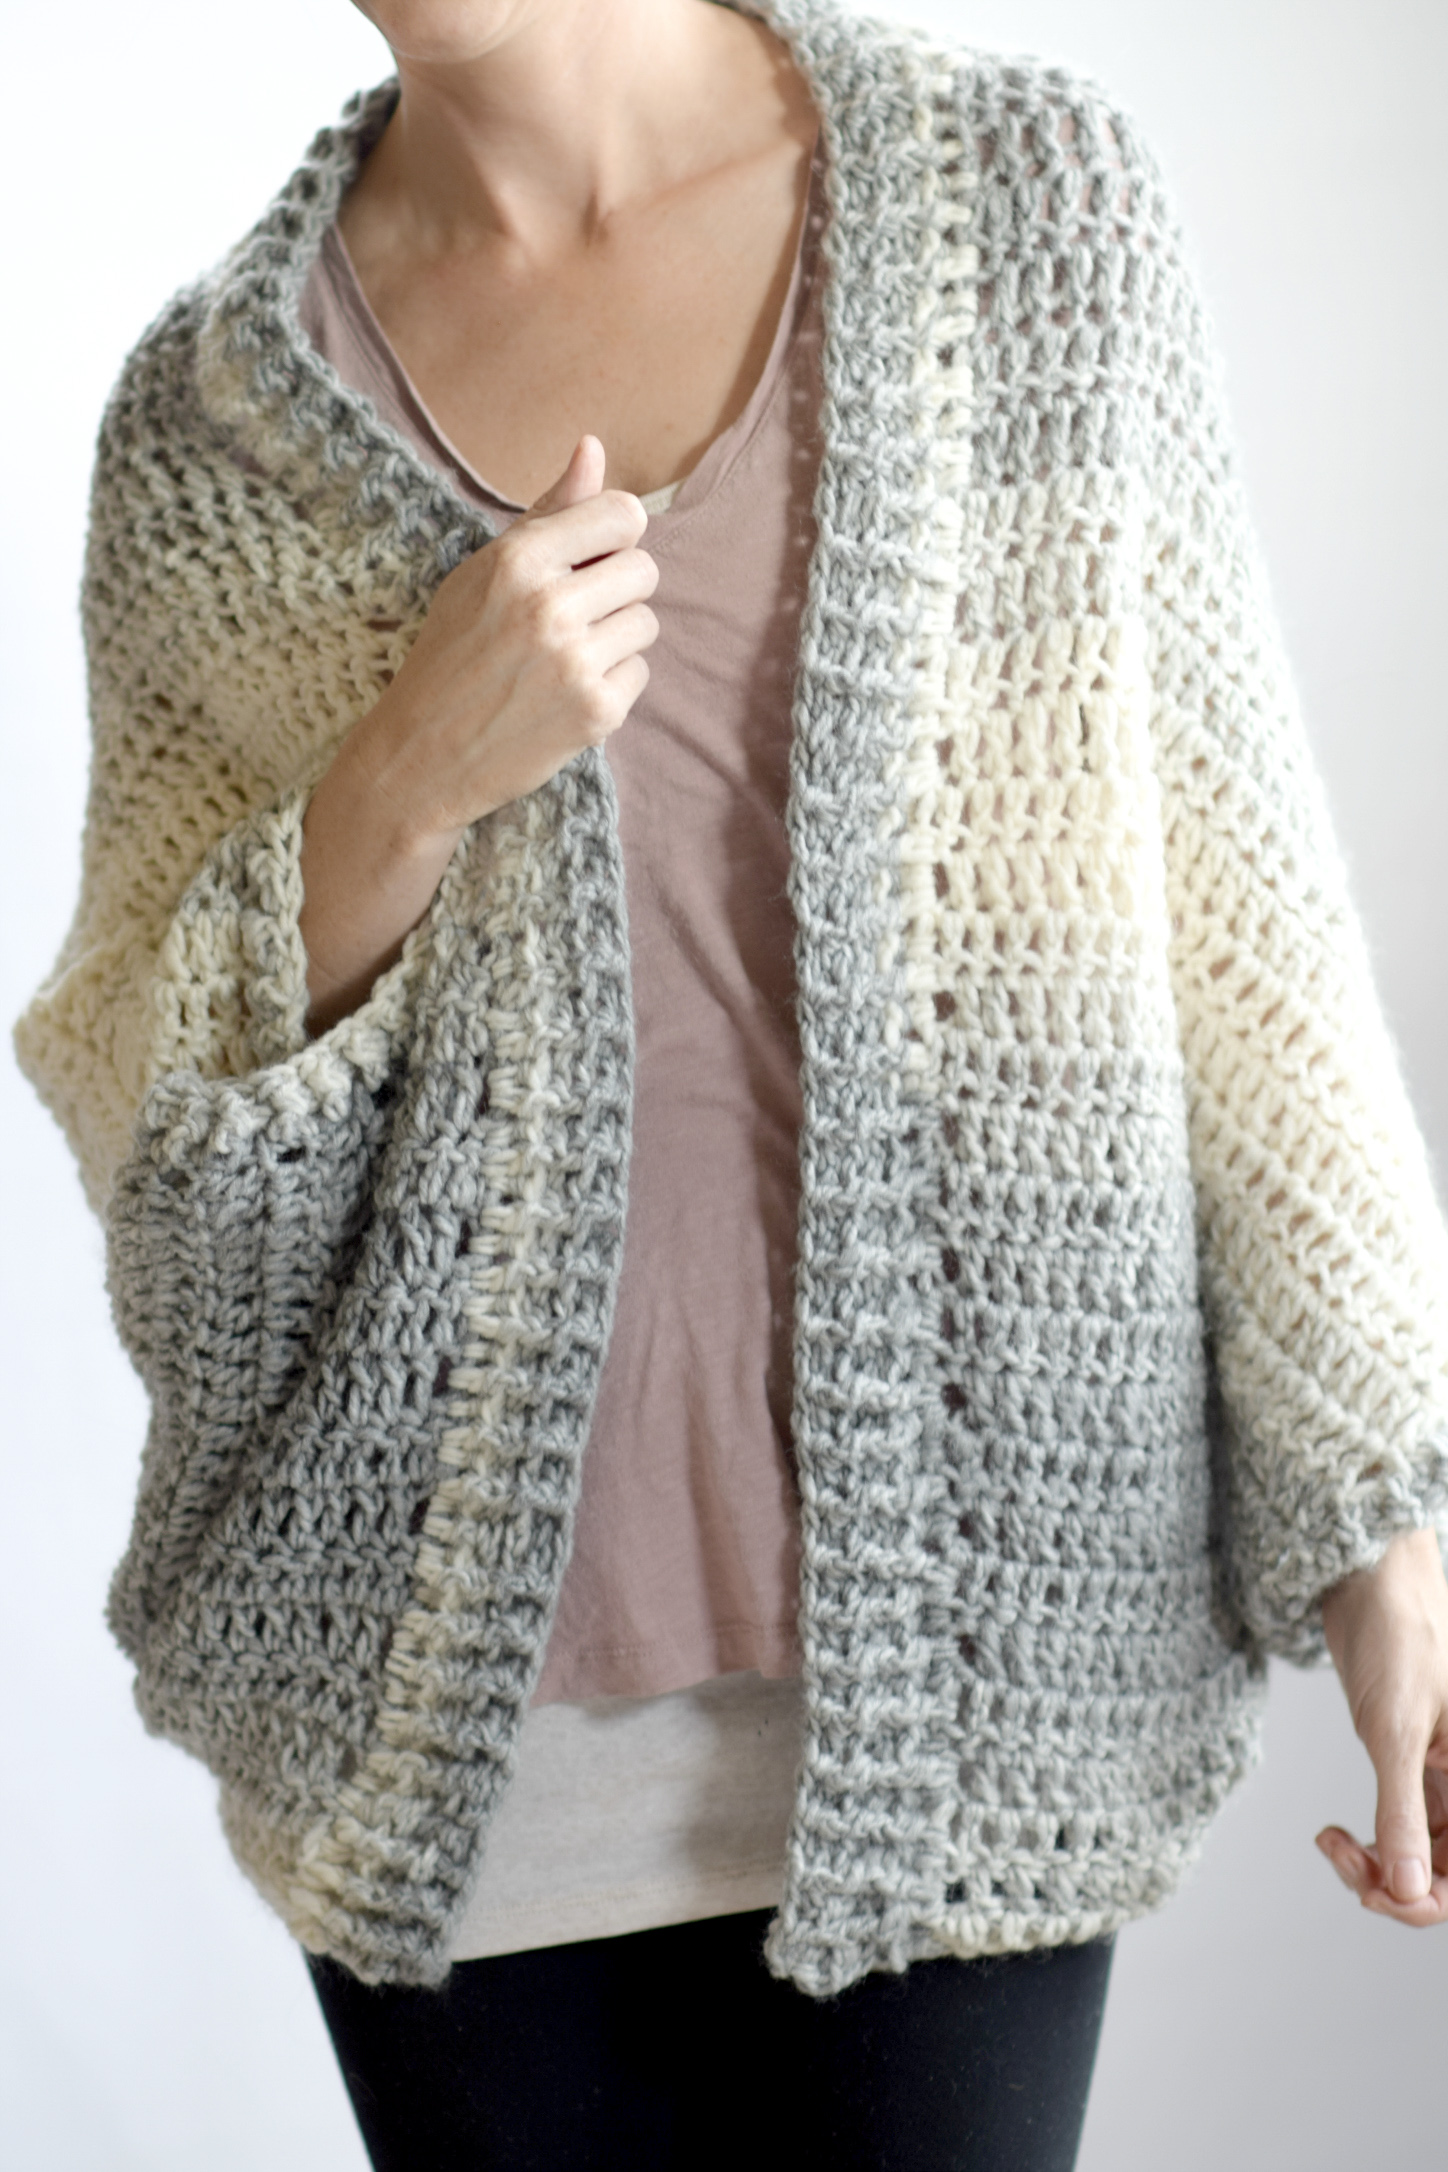
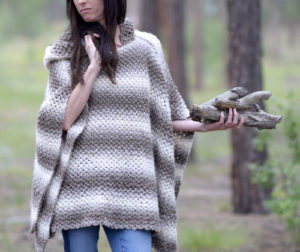
Quick projects will most likely always have my heart. This “Done In A Day” shrug crochet project is a good example of that as it’s very fast to make. And yes, you can crochet this shrug in one day! Currently, there’s a big blanket on my hook, and blankets take time. It was nice to break things up and make something fast to keep my brain going (and who has only one crochet project going at a time anyway?) 🙂 This shrug is good for those times when you want instant gratification but you also want to make something pretty and useful. I also love it because chunky sweaters are still all the rage and this is super comfy. With double crochet stitches and chunky Scarfie yarn, you can make this in no time.
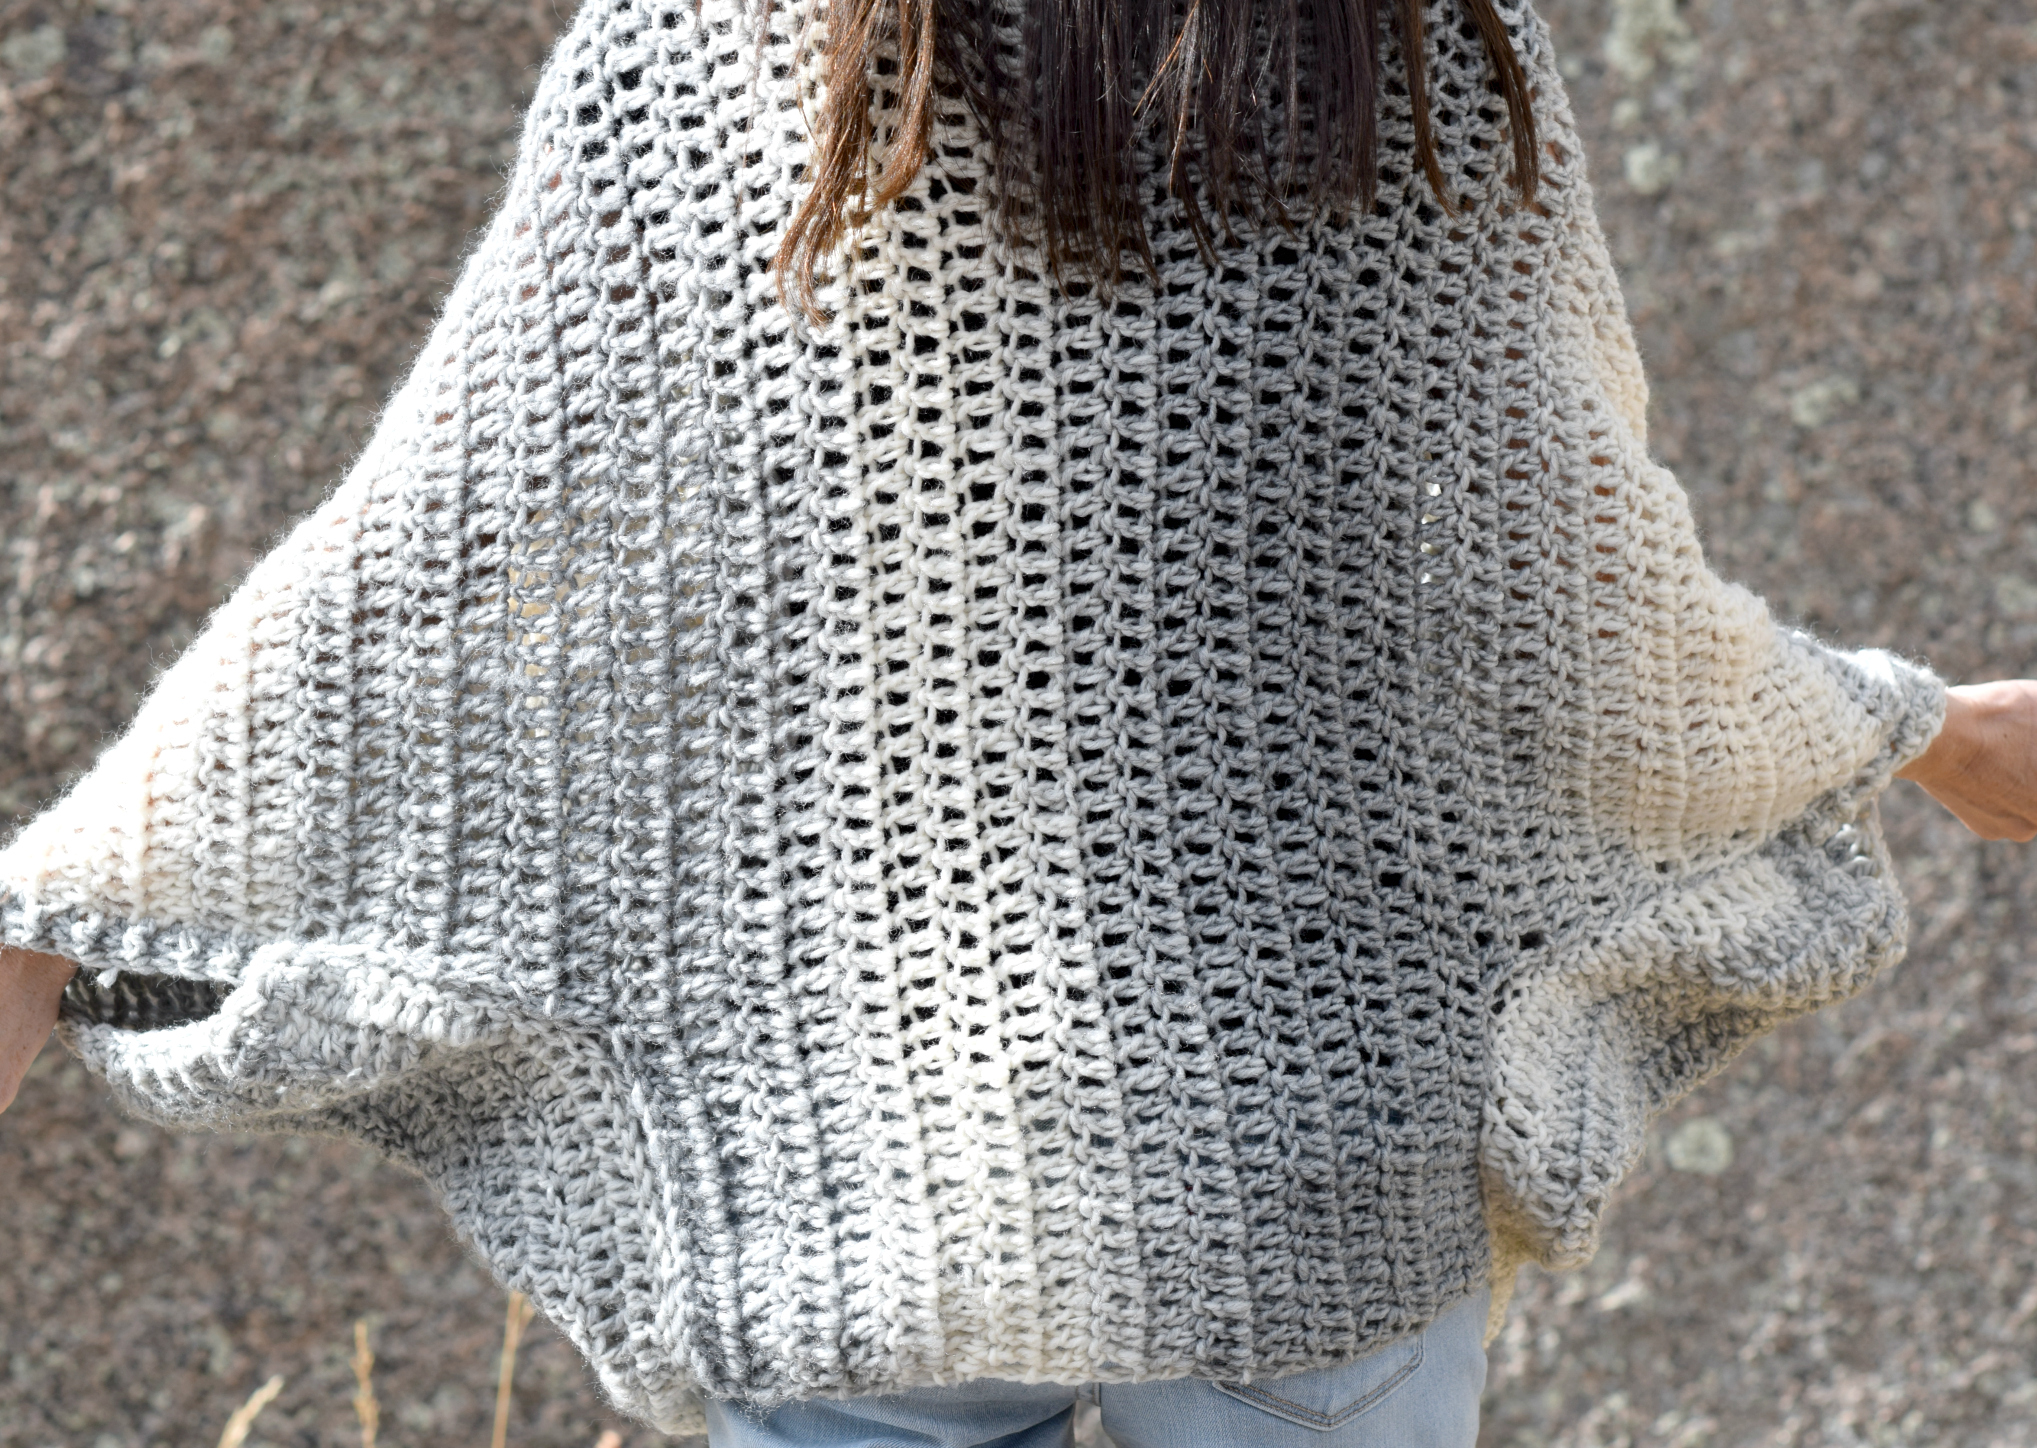
As you’ll see, this piece is essentially a big scarf or rectangle shawl that is folded and seamed to wear as a shrug. I can’t tell you how many times I’ve stood in front of the mirror with a rectangular shawl saying “How can I wrap and seam this to make it work like a shrug?” Well, hear ya go! It’s different than my blanket sweaters and I actually think the fit is a bit more comfortable as I don’t see the need for a button in the front to hold it in place (as is the case with many blanket sweaters).
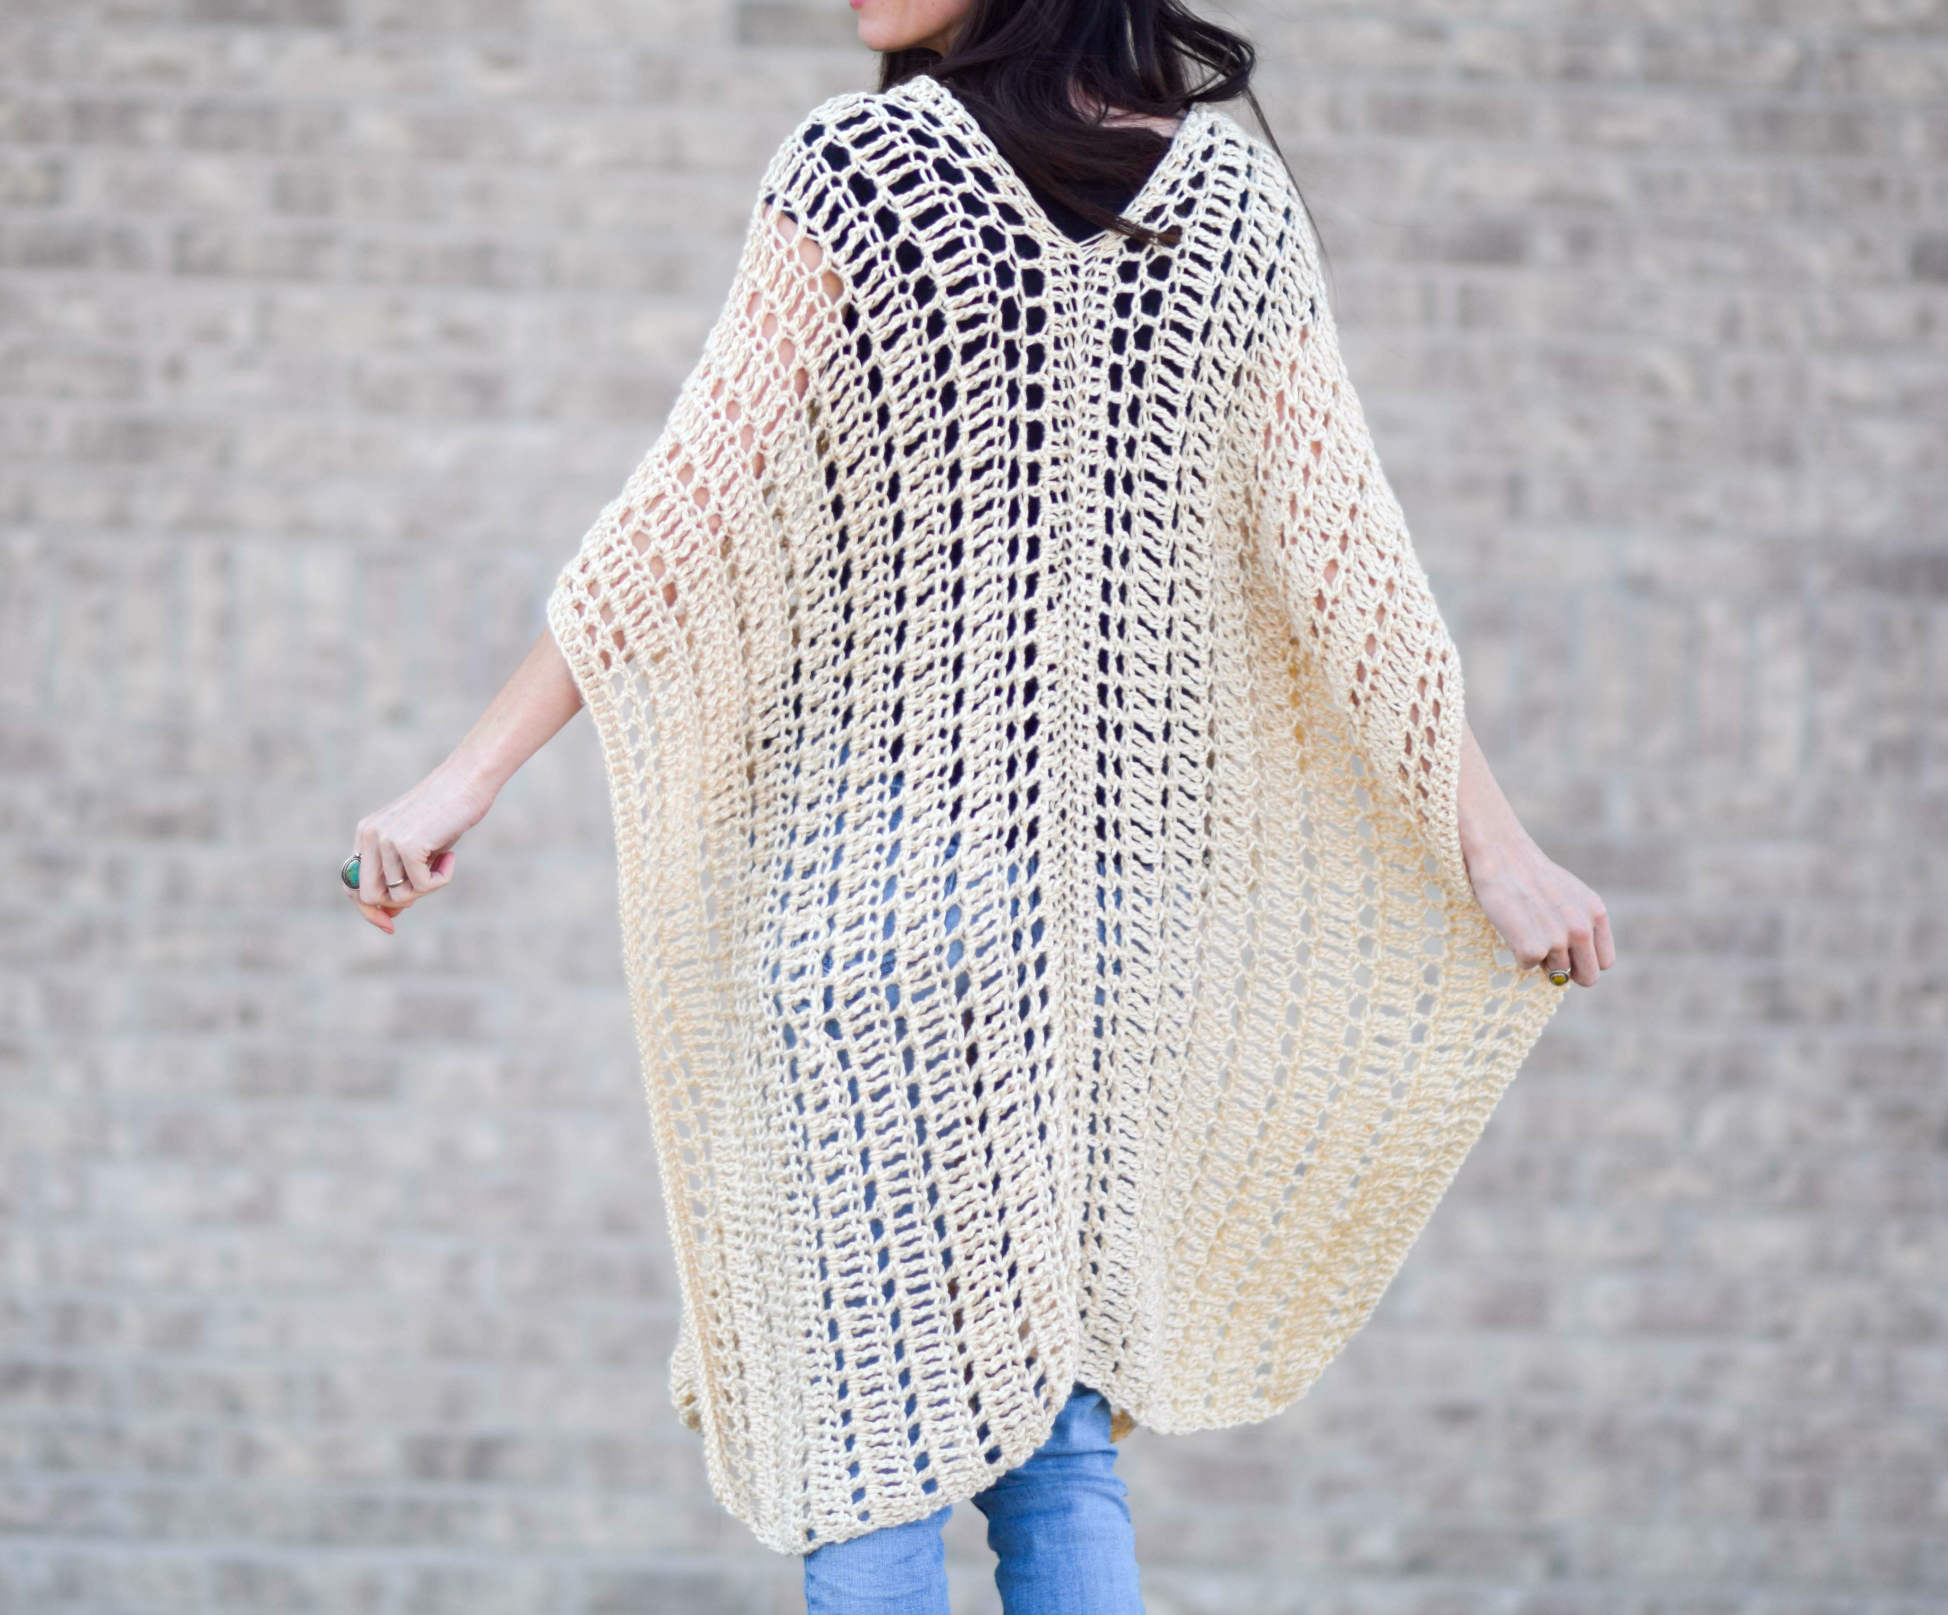
The inspiration for this shrug actually came from this knit Pre-Wrapped Wrap from Purl Soho. Their patterns are so gorgeous! If you’re a knitter, there’s your knit version. 😉 I love the clean look of knitting, but it takes more time for me than crochet. Because of this, I decided to come up with a similar crocheted project. So like I mentioned earlier, it’s a wrap, turned shrug that uses basic double crochet stitches, which is a super fast stitch. When crocheting with basic stitches, I like to use a variegated or colorful yarn to add interest so this Scarfie worked out great.
The chunky yarn (here) and large hook also lend to the speediness of the shrug. So let’s get to this easy “Done In A Day” cardigan, shrug, wrap, etc!
And you are right, I’ve used this yarn multiple times. It’s a an ongoing yarn crush of mine apparently. You can see it in the Bonfire Crocheted Scarf Pattern and the Light Frost Blanket Sweater!
You will need:
3 skeins Lion Brand Yarn Scarfie (312 yards/skein) 150 g/skein Pattern uses approx 307 g
US Size L 8.0 mm crochet hook
Scissors
Tapestry Needle to weave in ends
Abbreviations and Skills
ch – chain
dc – double crochet
fpdc – front post double crochet (see how to do this stitch here)
bpdc- back post double crochet (see how to do it here)
Size:
One Size – this pattern is written as one size. Length is approx 27″ and bust circumference is about 44″.
It’s pictured on me, a size small so the fit will vary on different sizes. 😉 You can easily make this larger by beginning with a longer chain (add a couple of stitches for each size up, and then crochet for longer (a couple extra inches for each size up). It’s a forgiving shape in my opinion!
Done In A Day Shrug Pattern
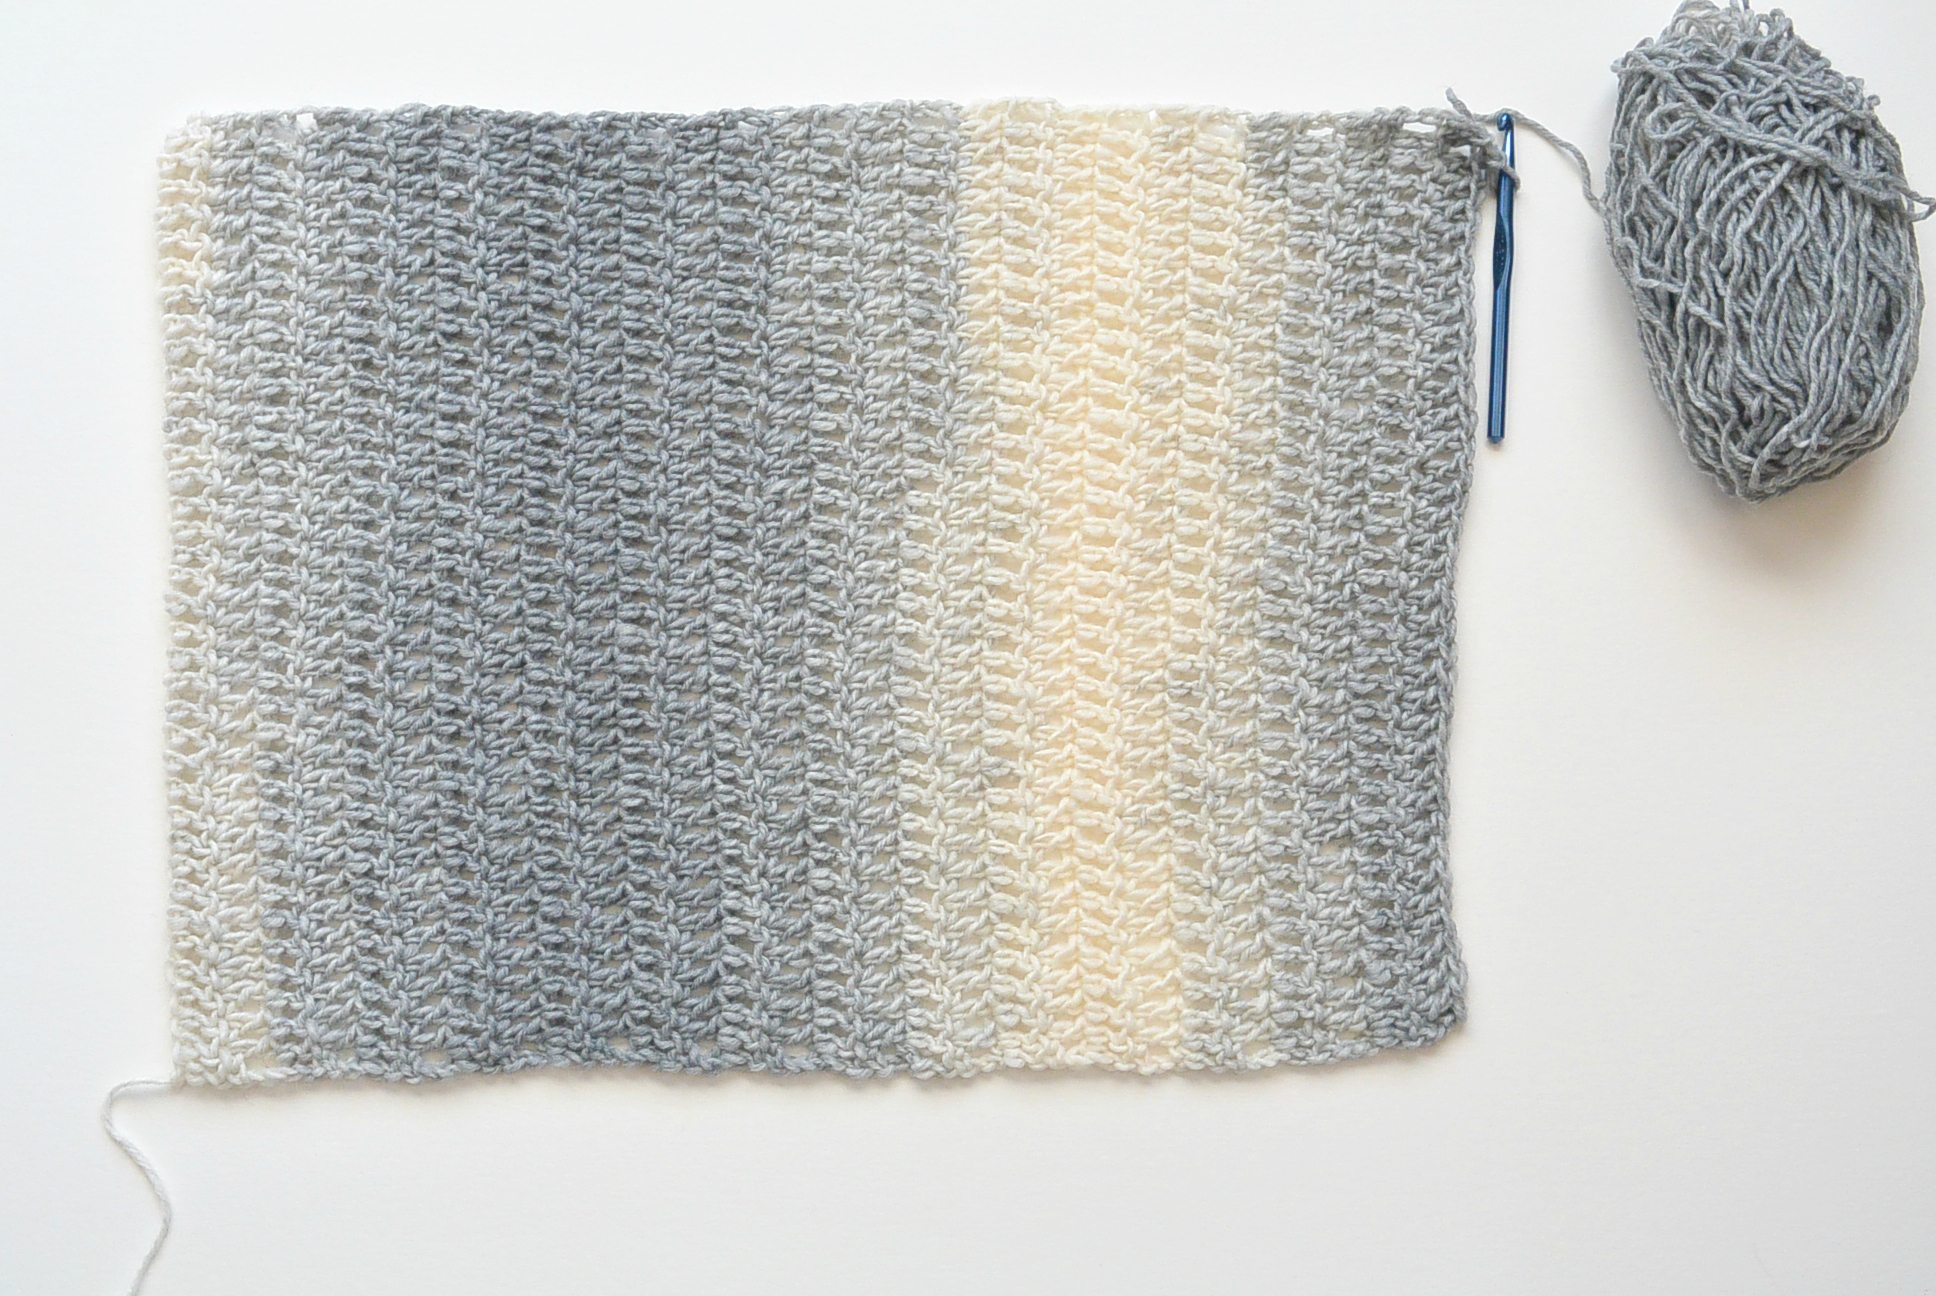
Ch 39
Row 1 Dc in 3rd ch from hook and each st across the row (37)
Row 2, Ch 3 (counts as dc), turn, dc in each st across the row (37) (Note: after a couple of rows measure your piece – it should be at least 18″ wide. You can adjust the length of your original chain if needed to make it wider – any number of chains will work in this pattern)
Repeat row 2 until piece measures approximately 22″ or for approximately 28 rows
Once piece measures approximately 22″, finish current row and ch 17 stitches (see photo below)
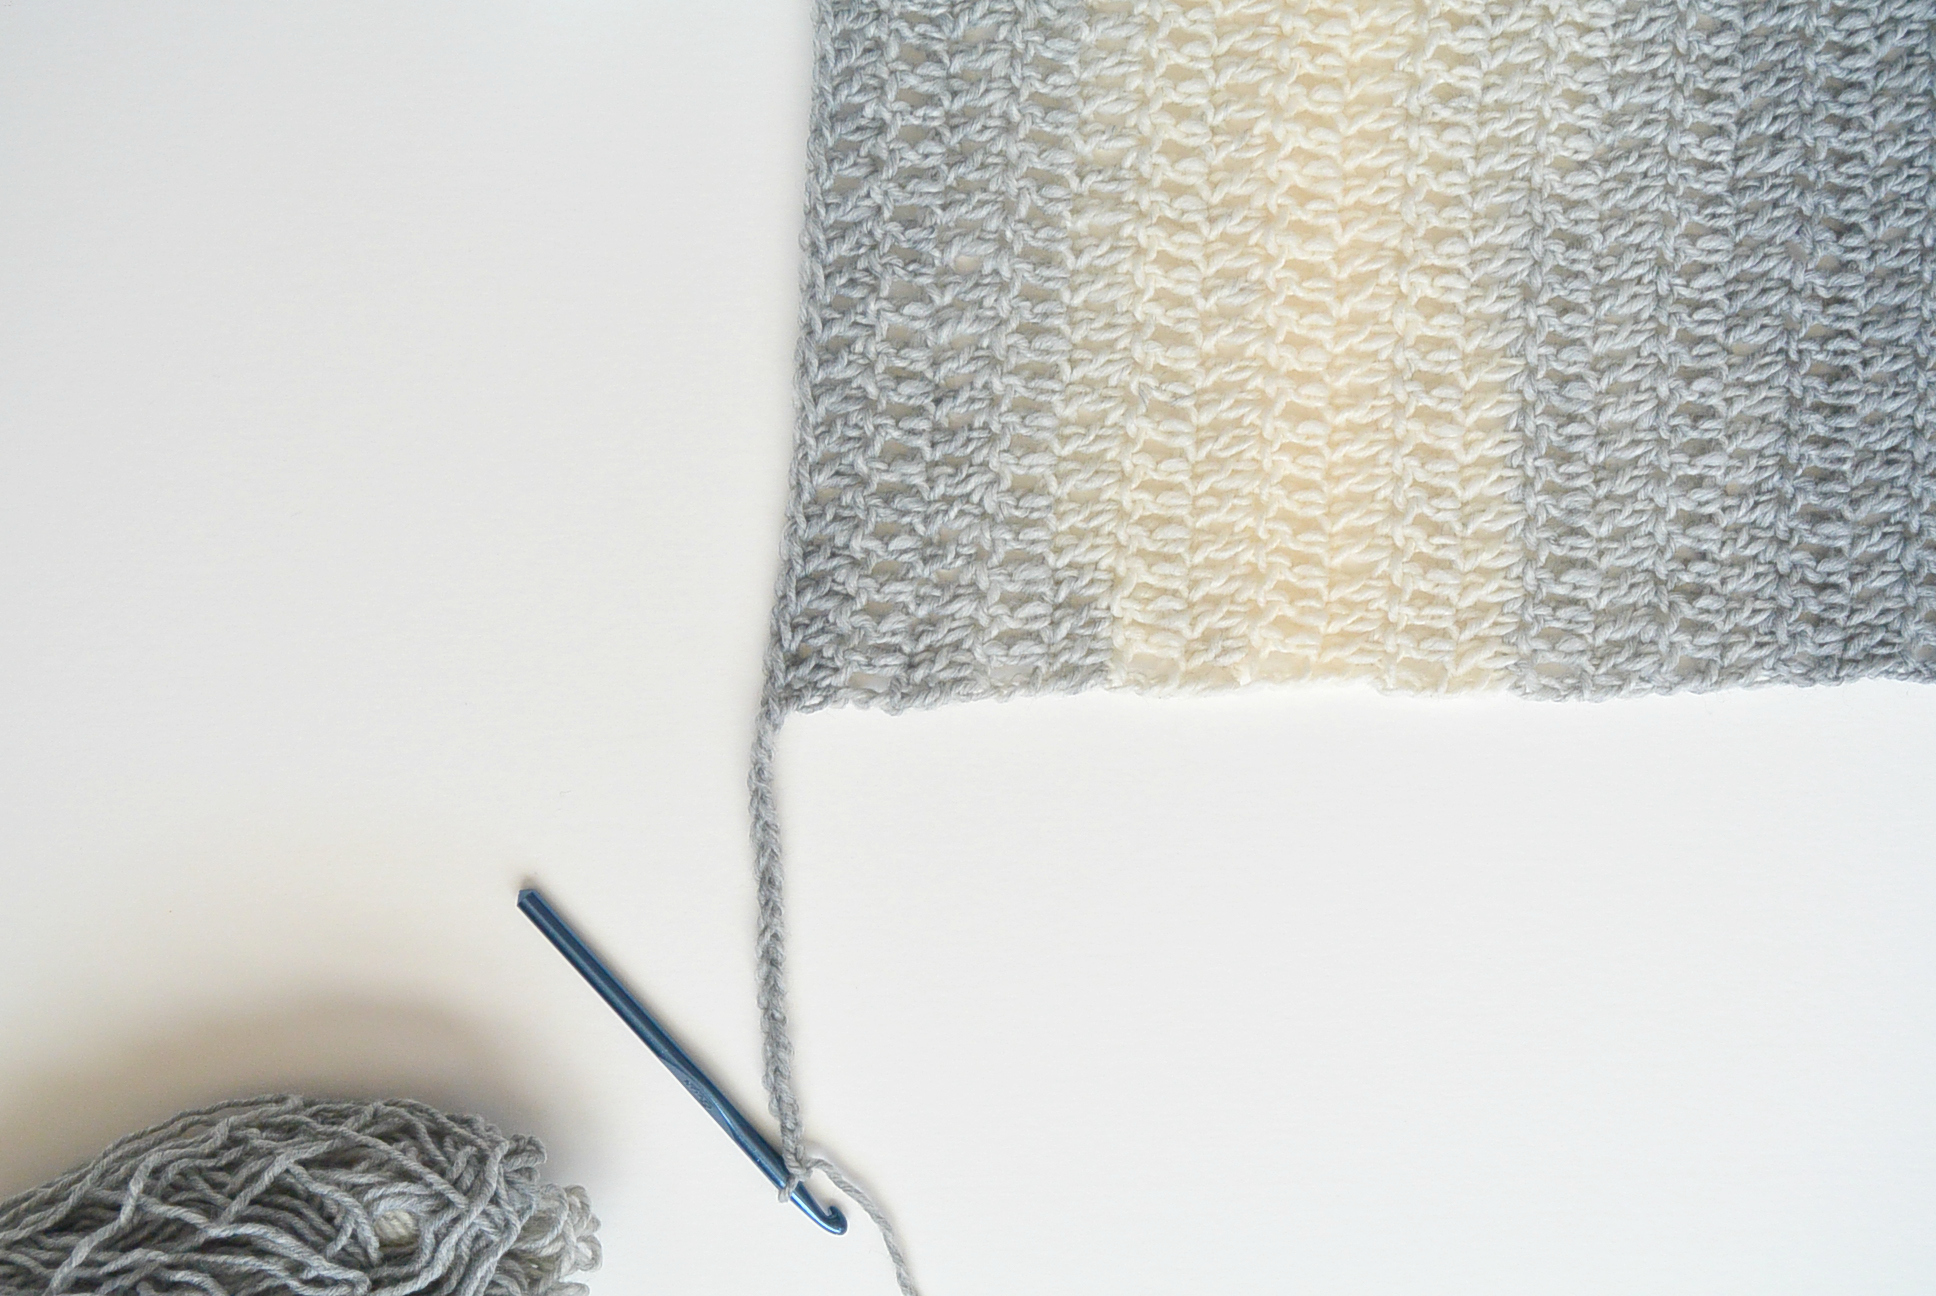
Next, dc in 3rd ch from hook and each st across the row (52 ) (sorry, my pictures got flipped around – but you will see that there’s a chain and then you simply crochet across)
Next, dc across each row until entire piece measures approximately 37″ inches (you’ve worked about 15″ of this middle section, or what I’ll also refer to as the “tail”)
Once piece measures approximately 37″, tie off at end of row. Pick up yarn to match opposite end, 37 stitches from the top.
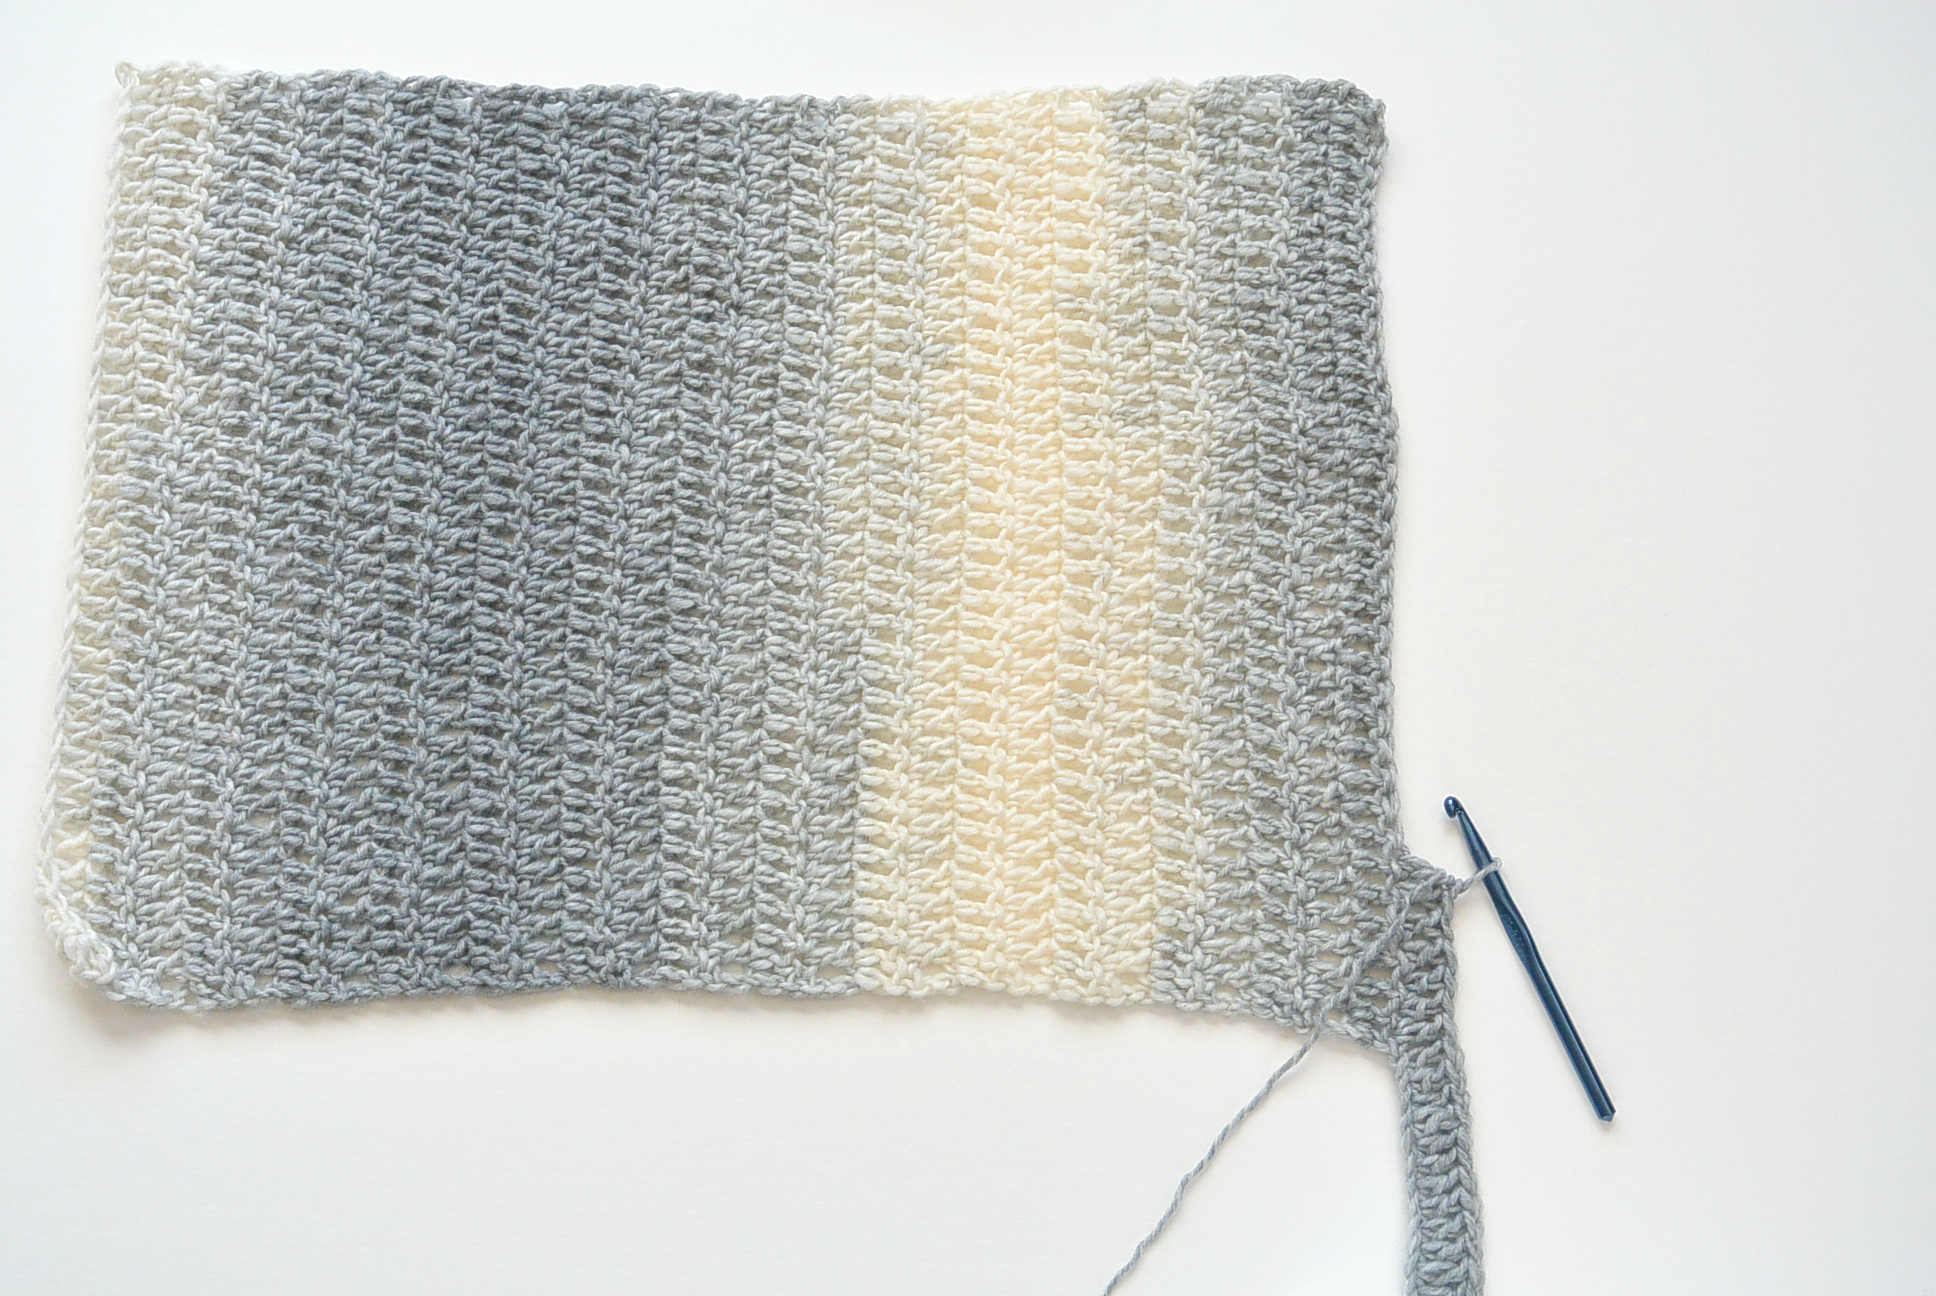
Double crochet each row across until entire piece measures approximately 59″ across.
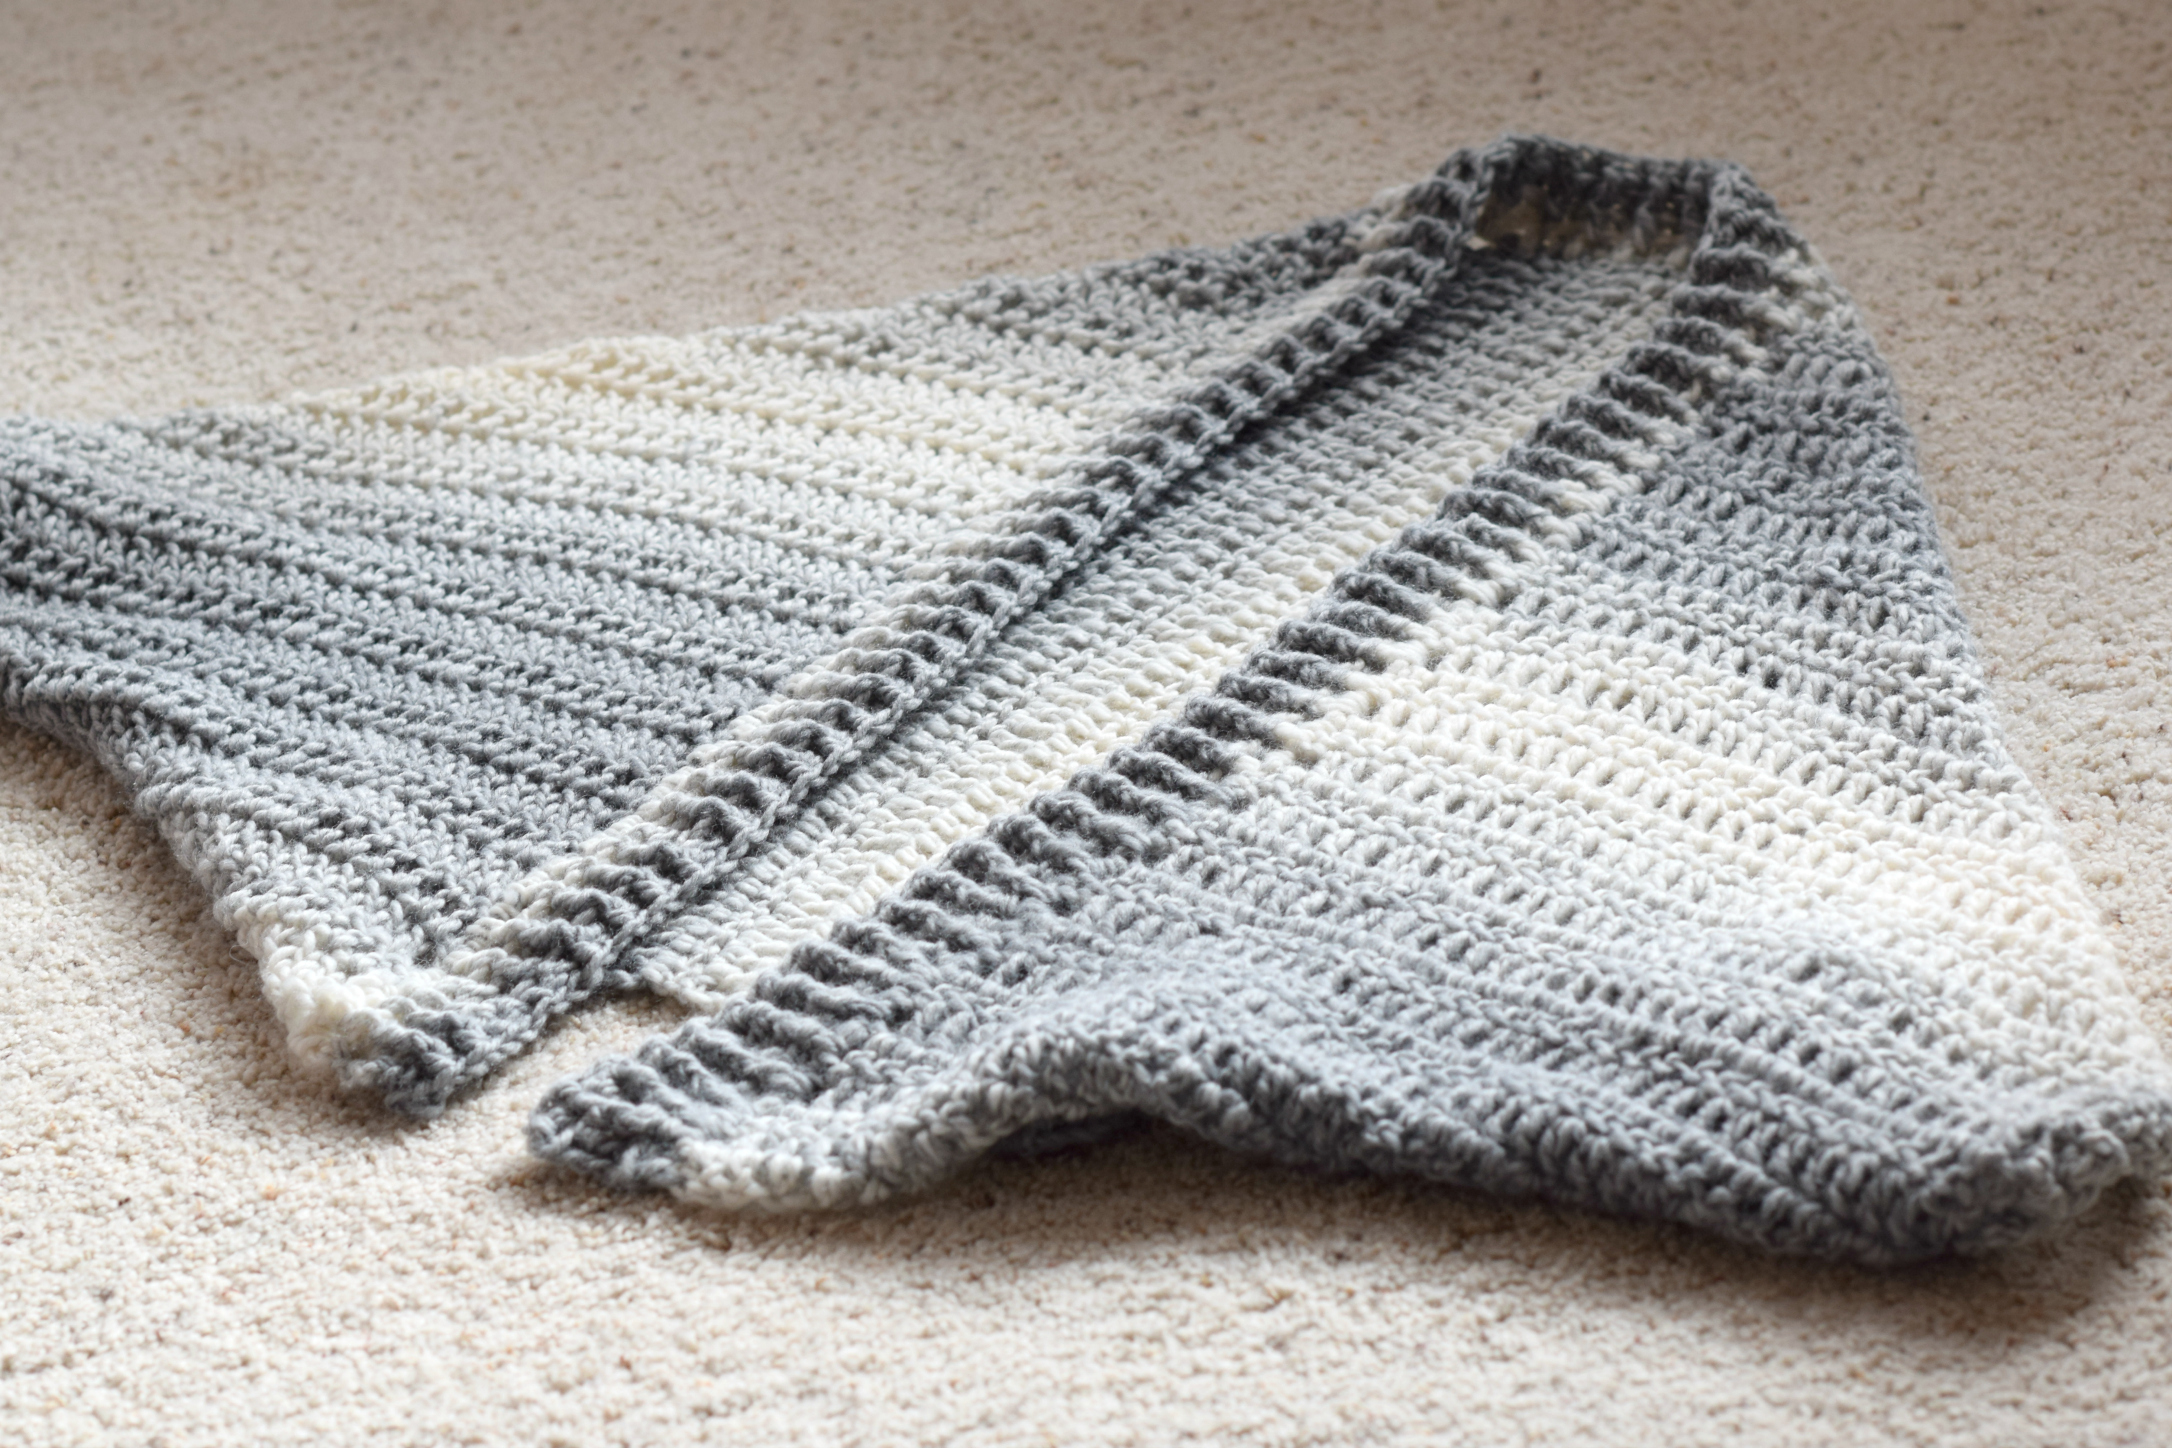
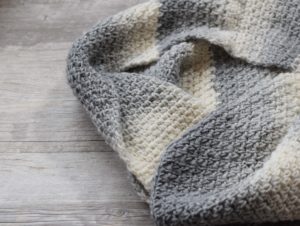
Below: This is what your piece will look like at this point. It measures approximately 59″ from end to end including that middle “tail” section that’s 15″ wide. You are now done with the main section and you will fold, seam and crochet the ribbed edge.

Tie off and weave in ends. Next, you will fold it to assemble! See the pictures on how to do that below. 🙂
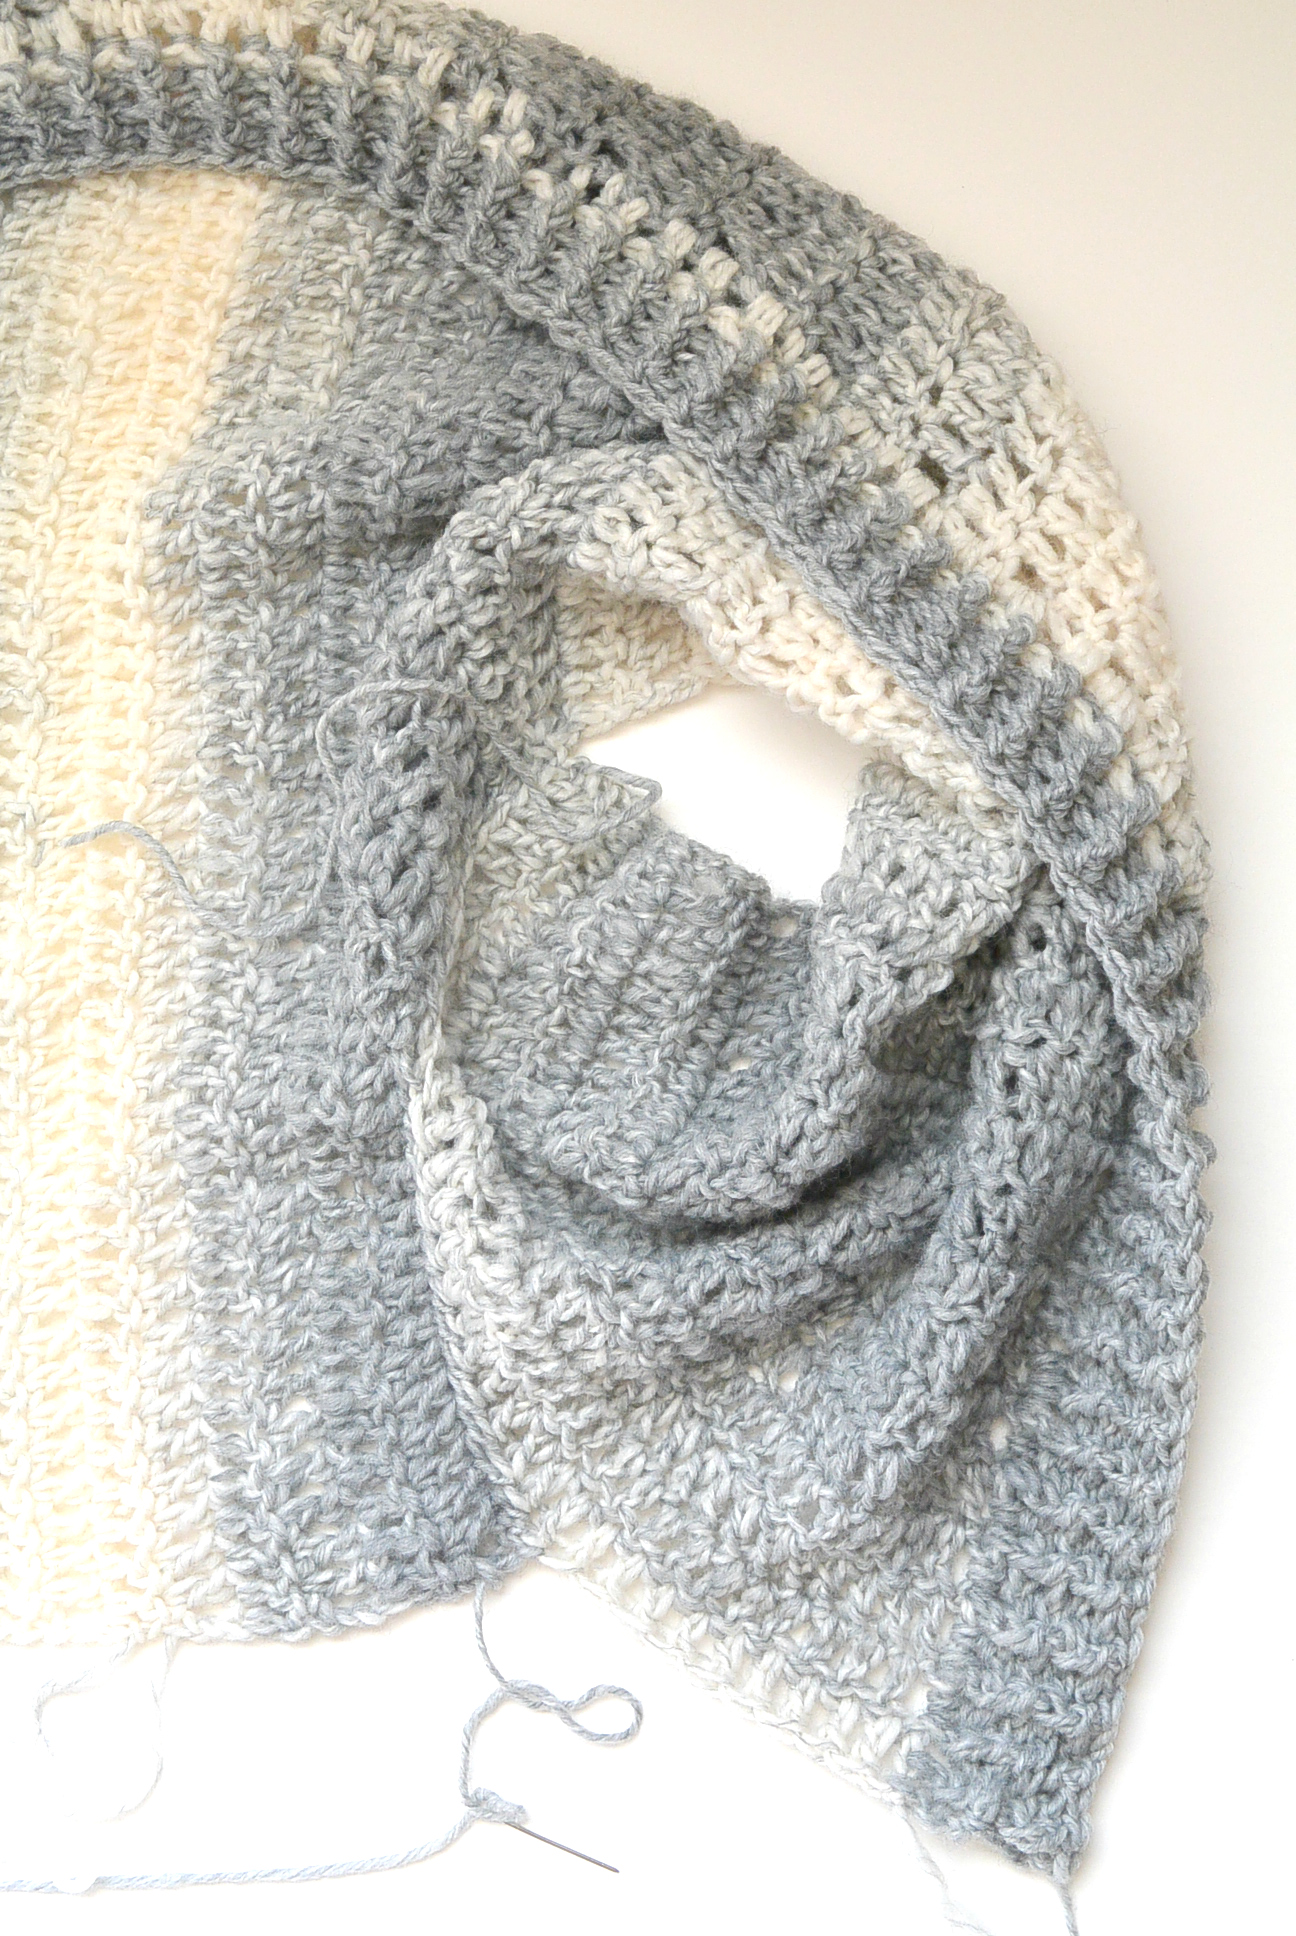
Assemble Your Wrap Into a Shrug!
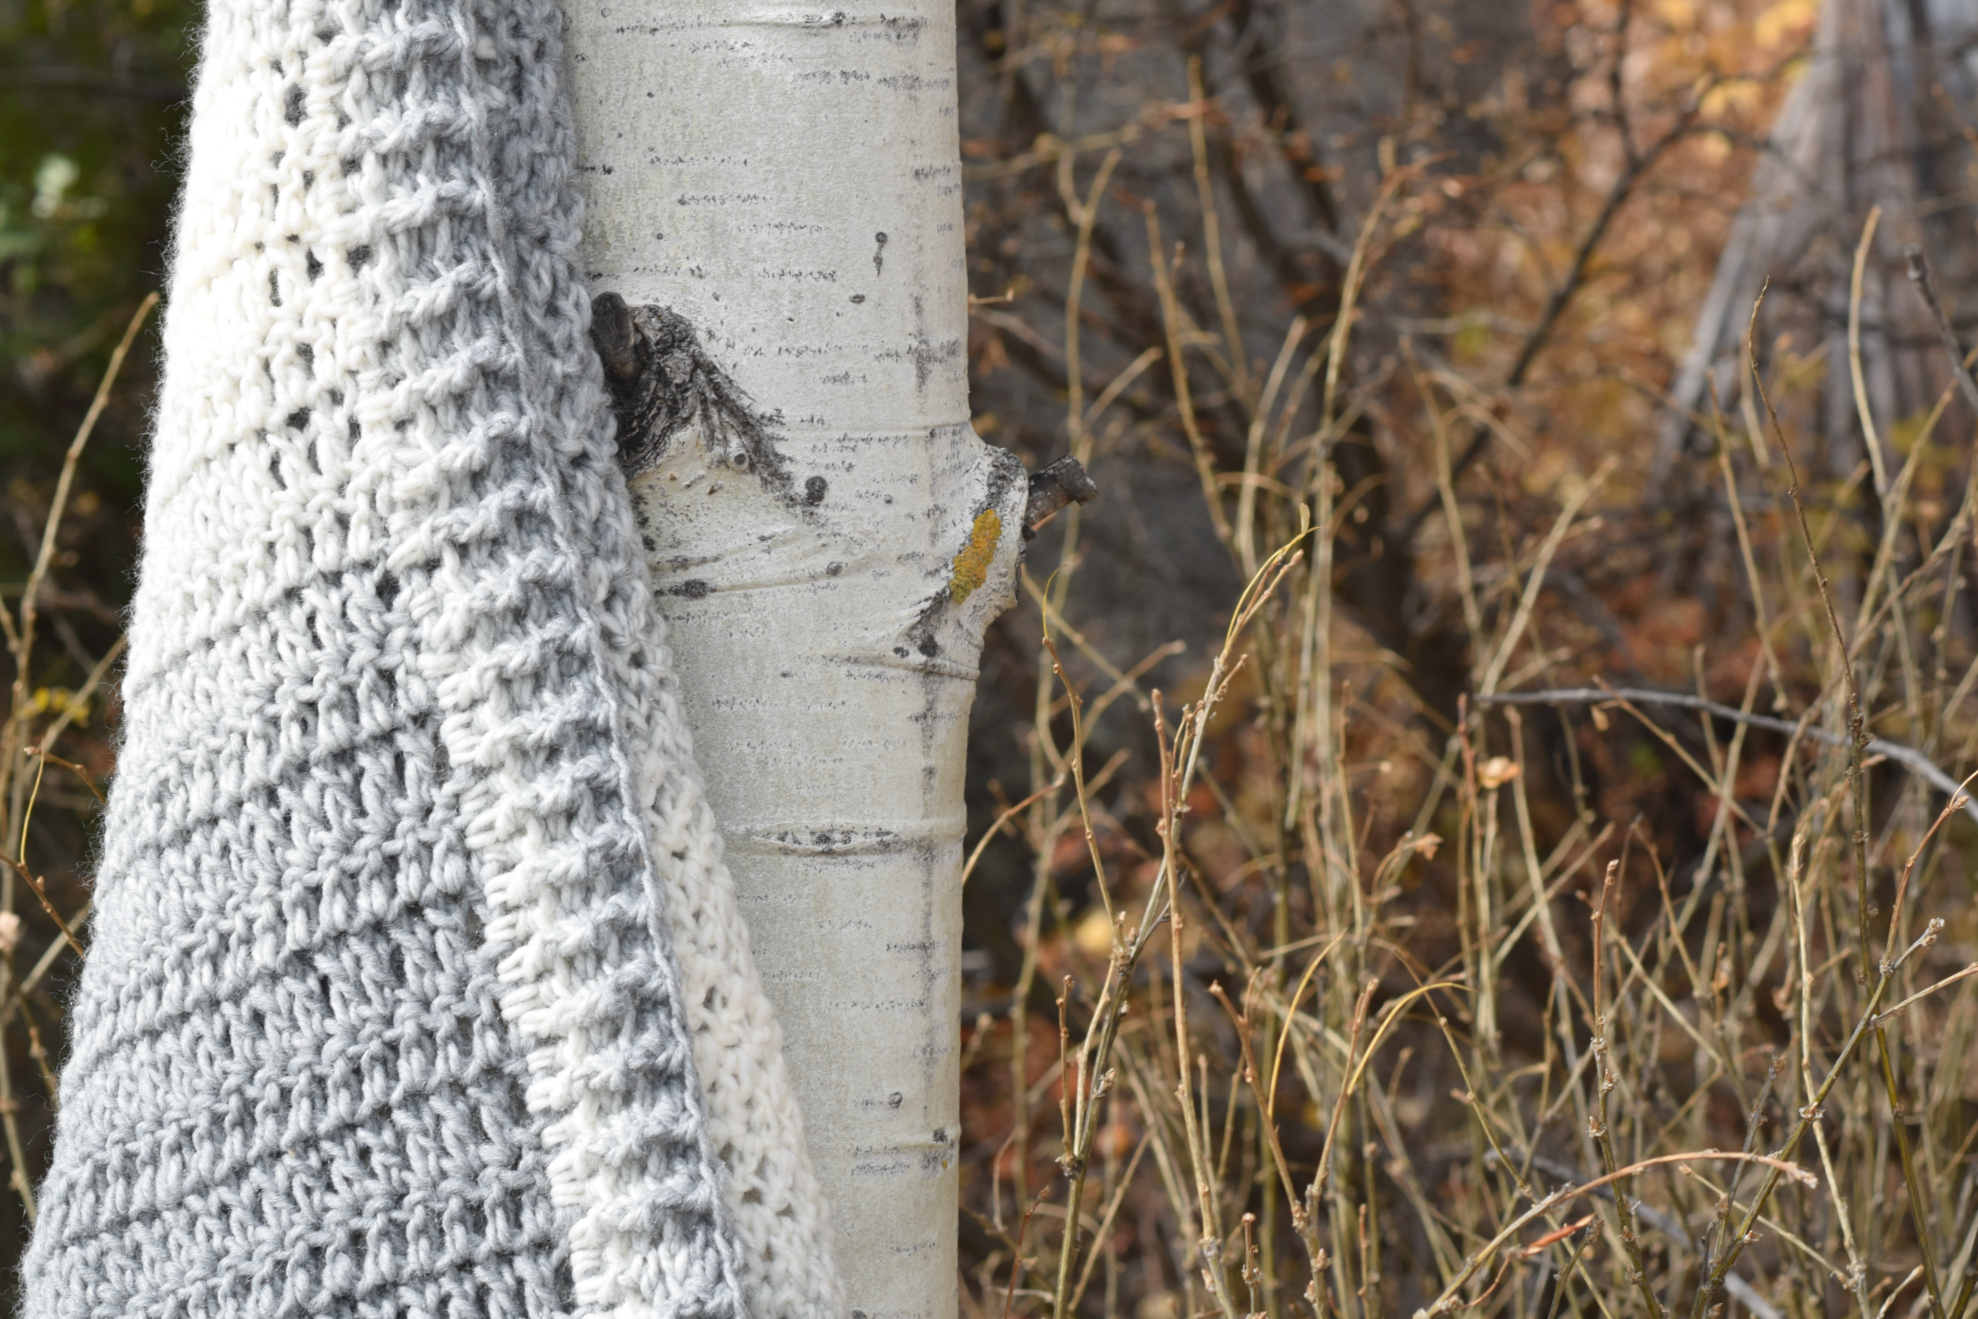
Fold your wrap as pictured below and seam. This is the trickiest part, but you can check out the photos to see how it’s done.
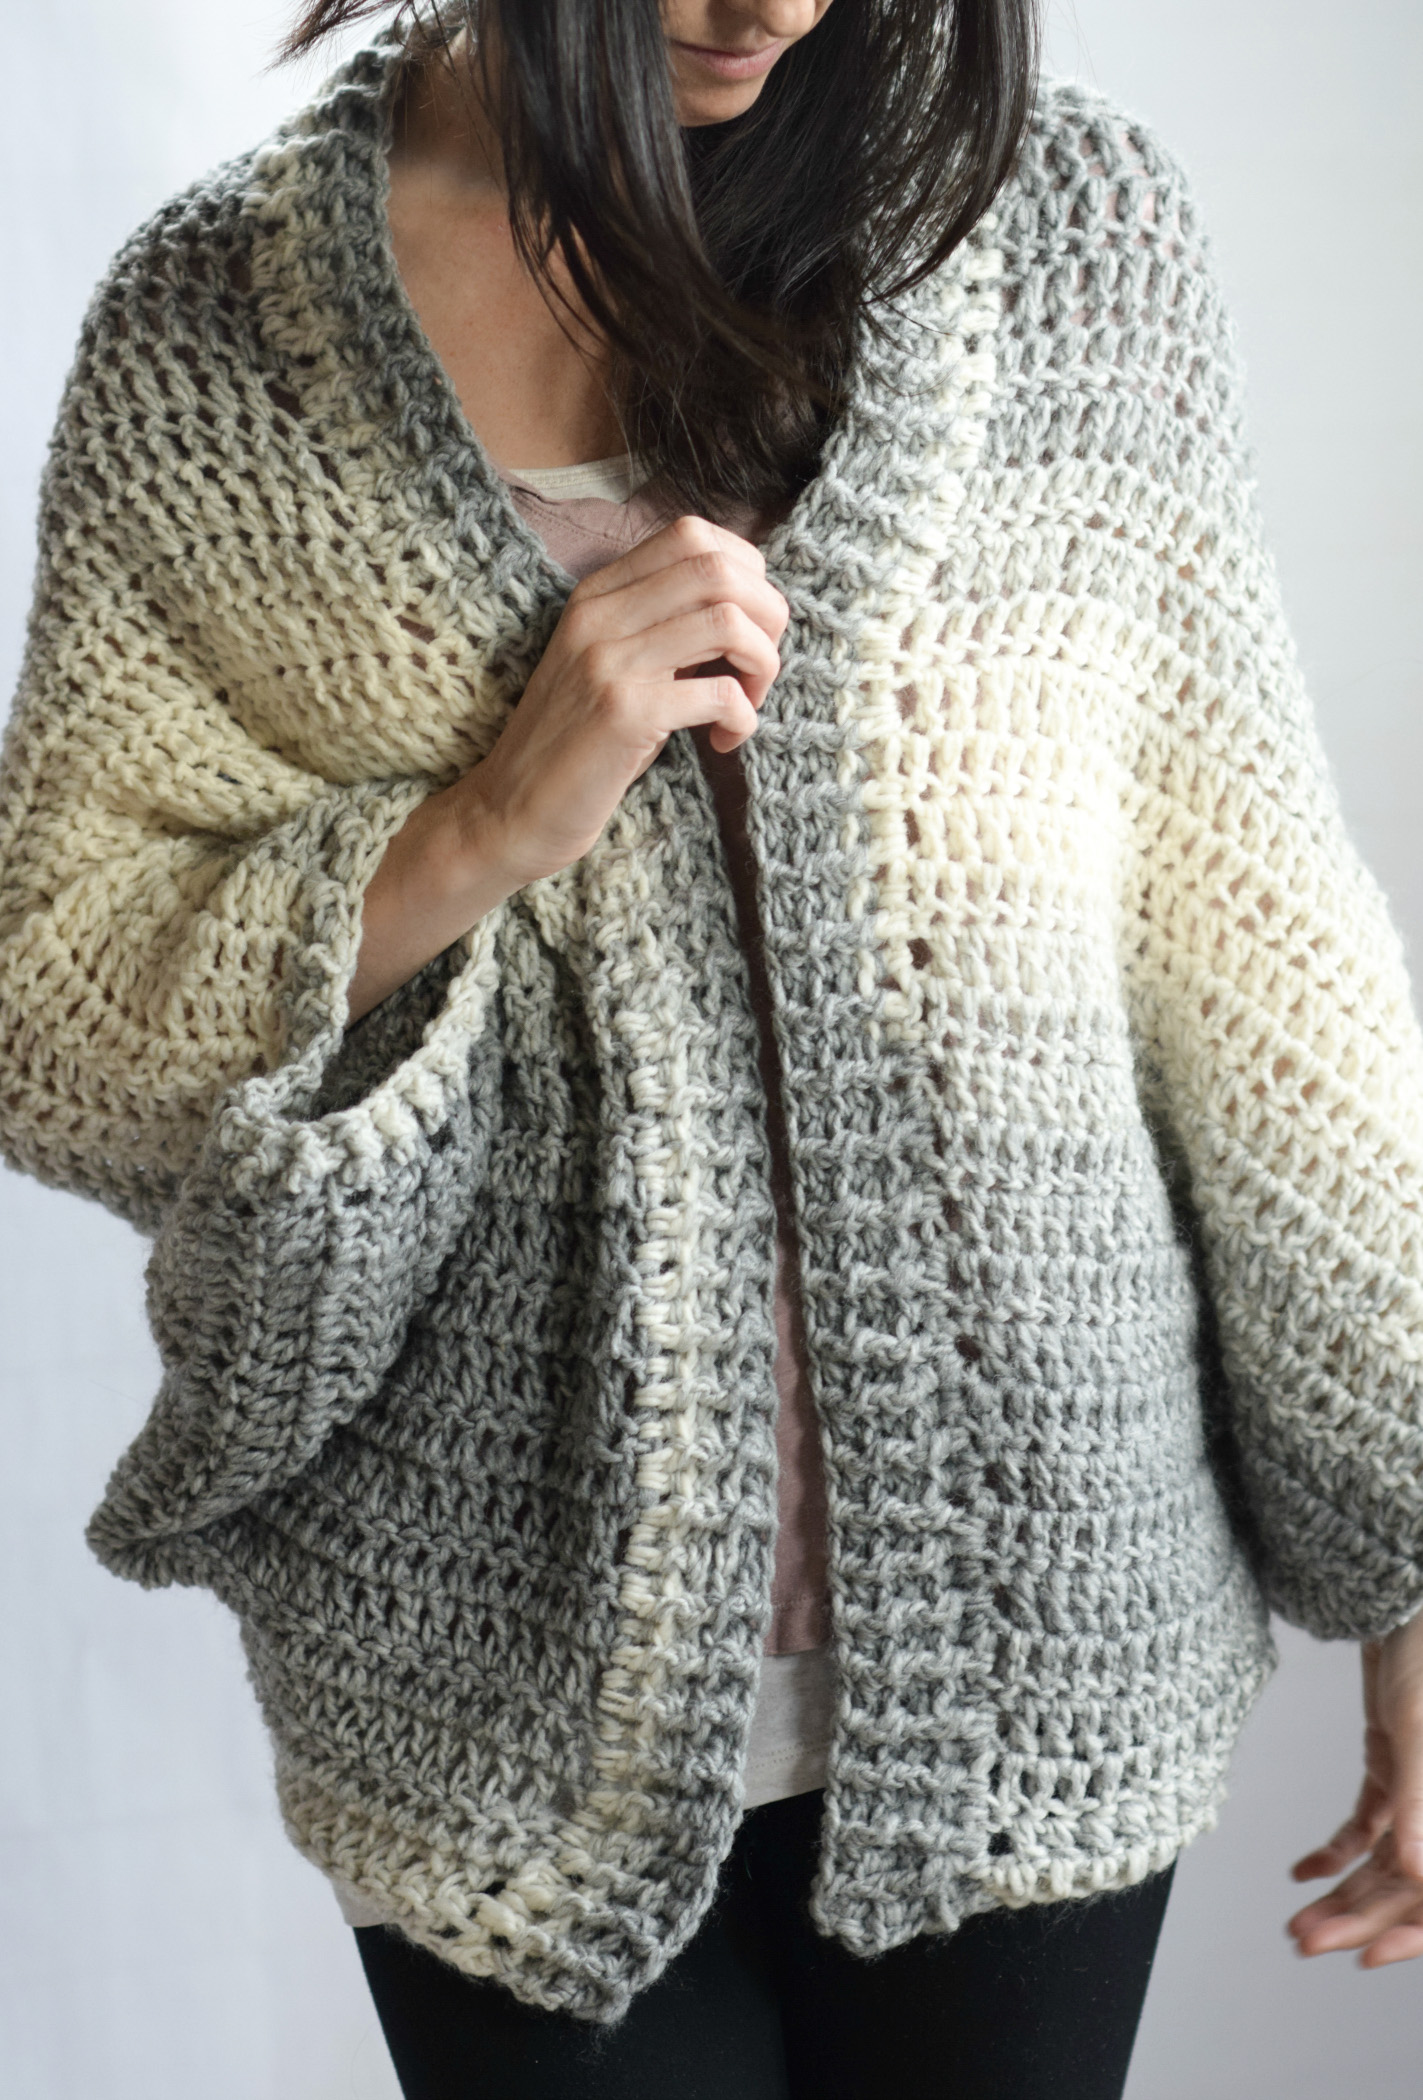
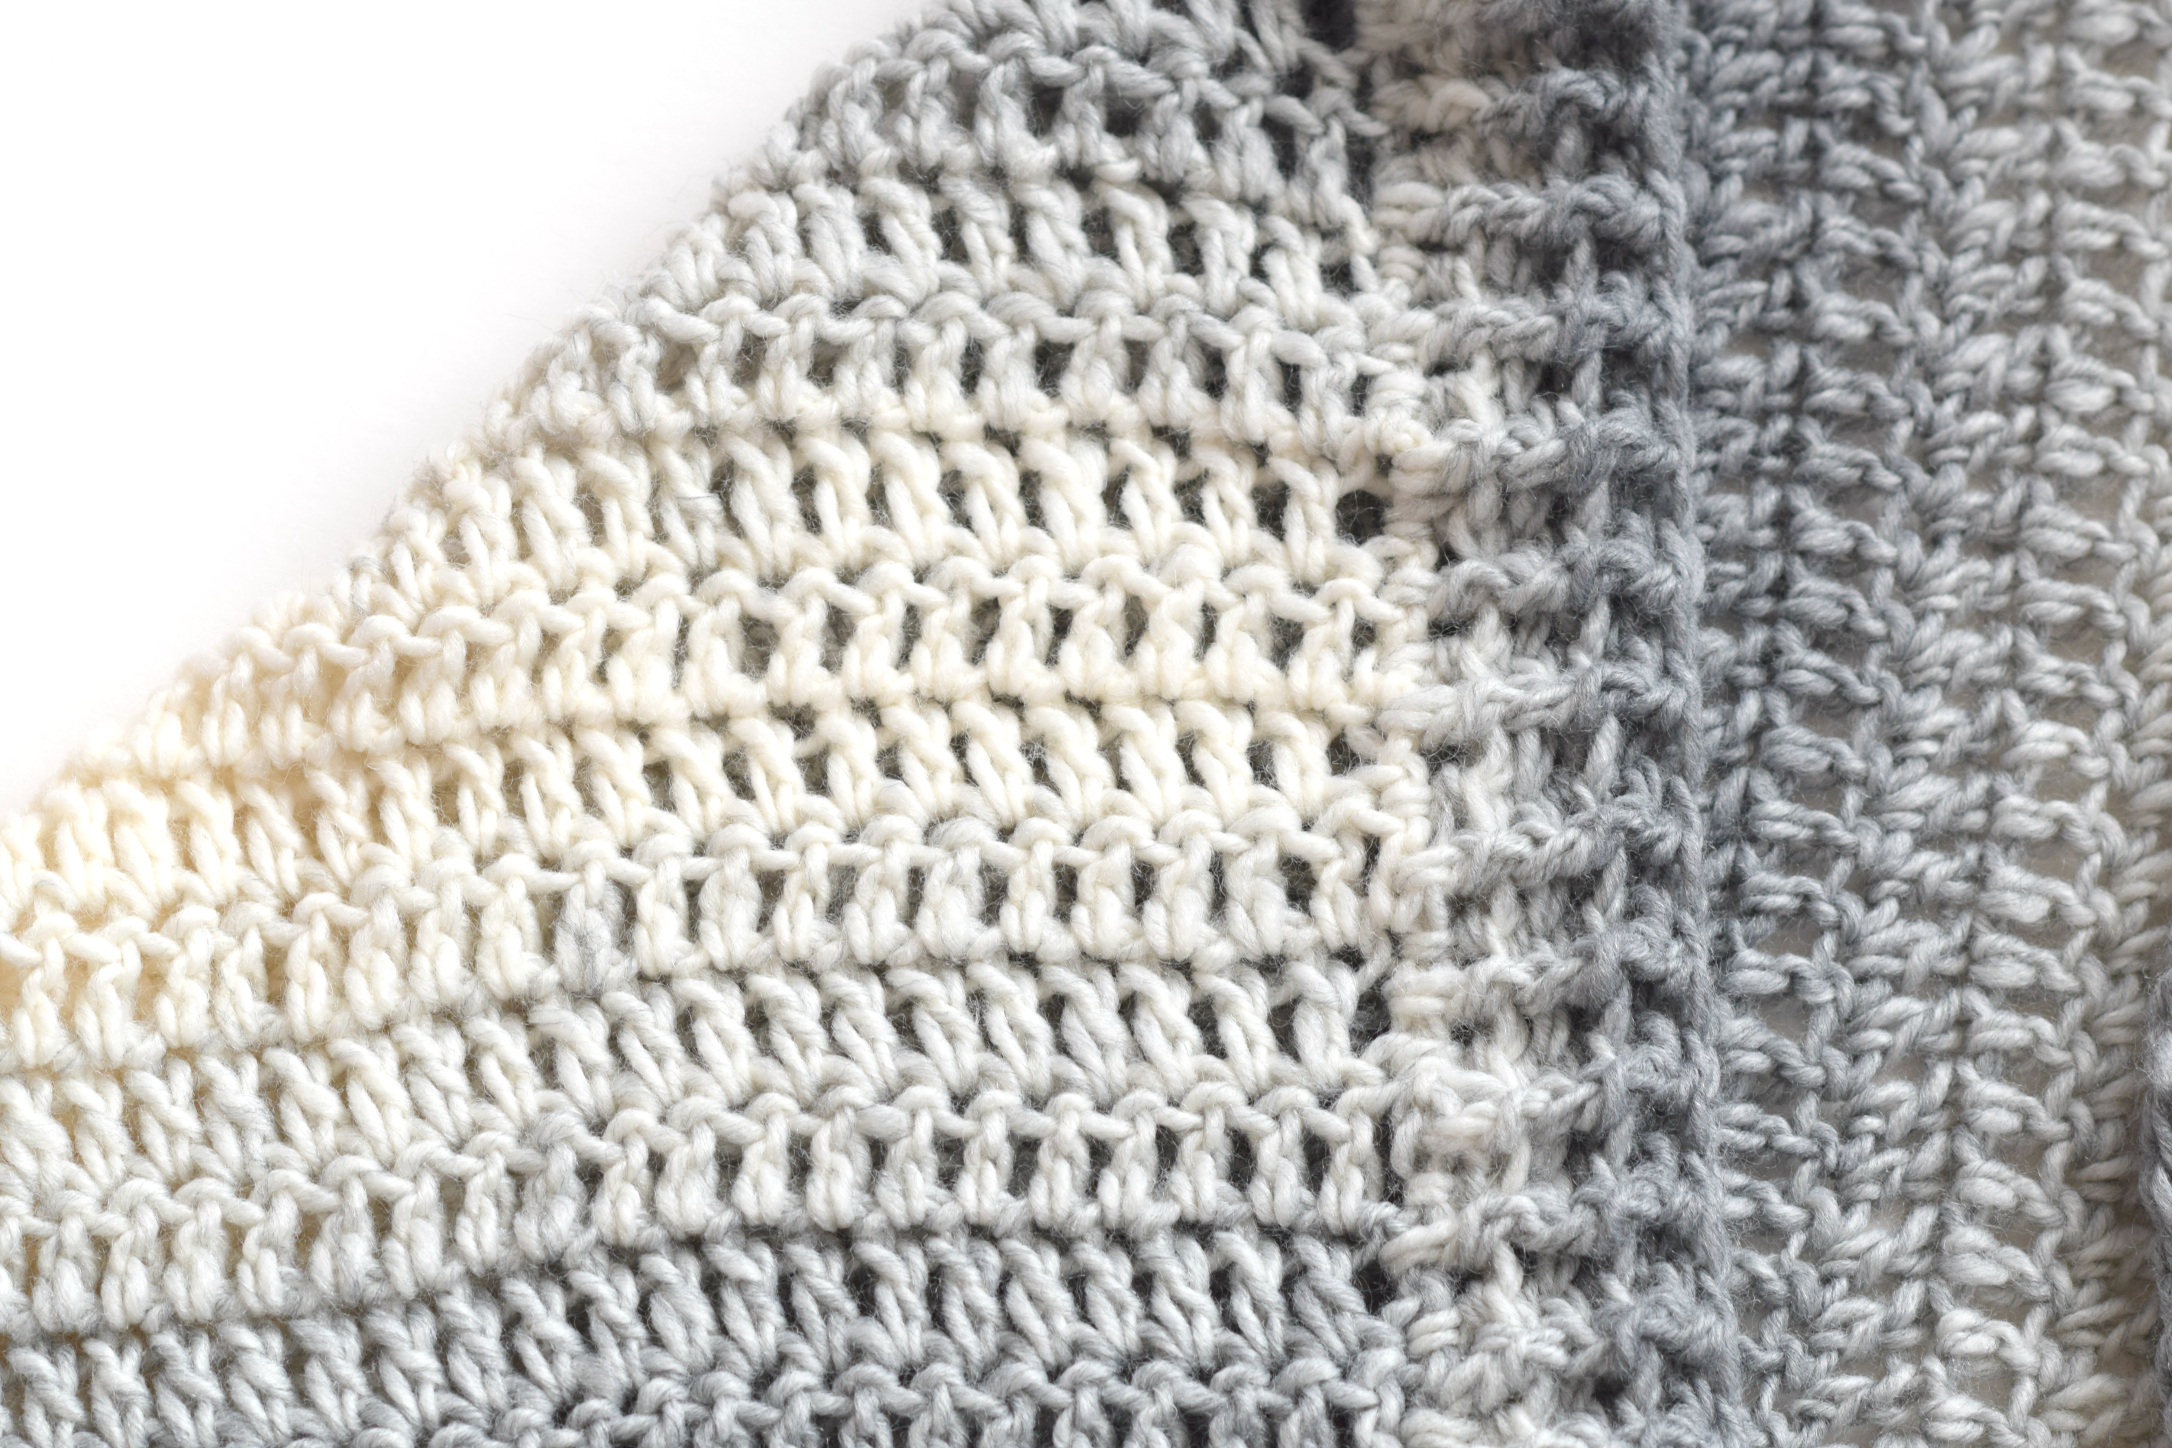
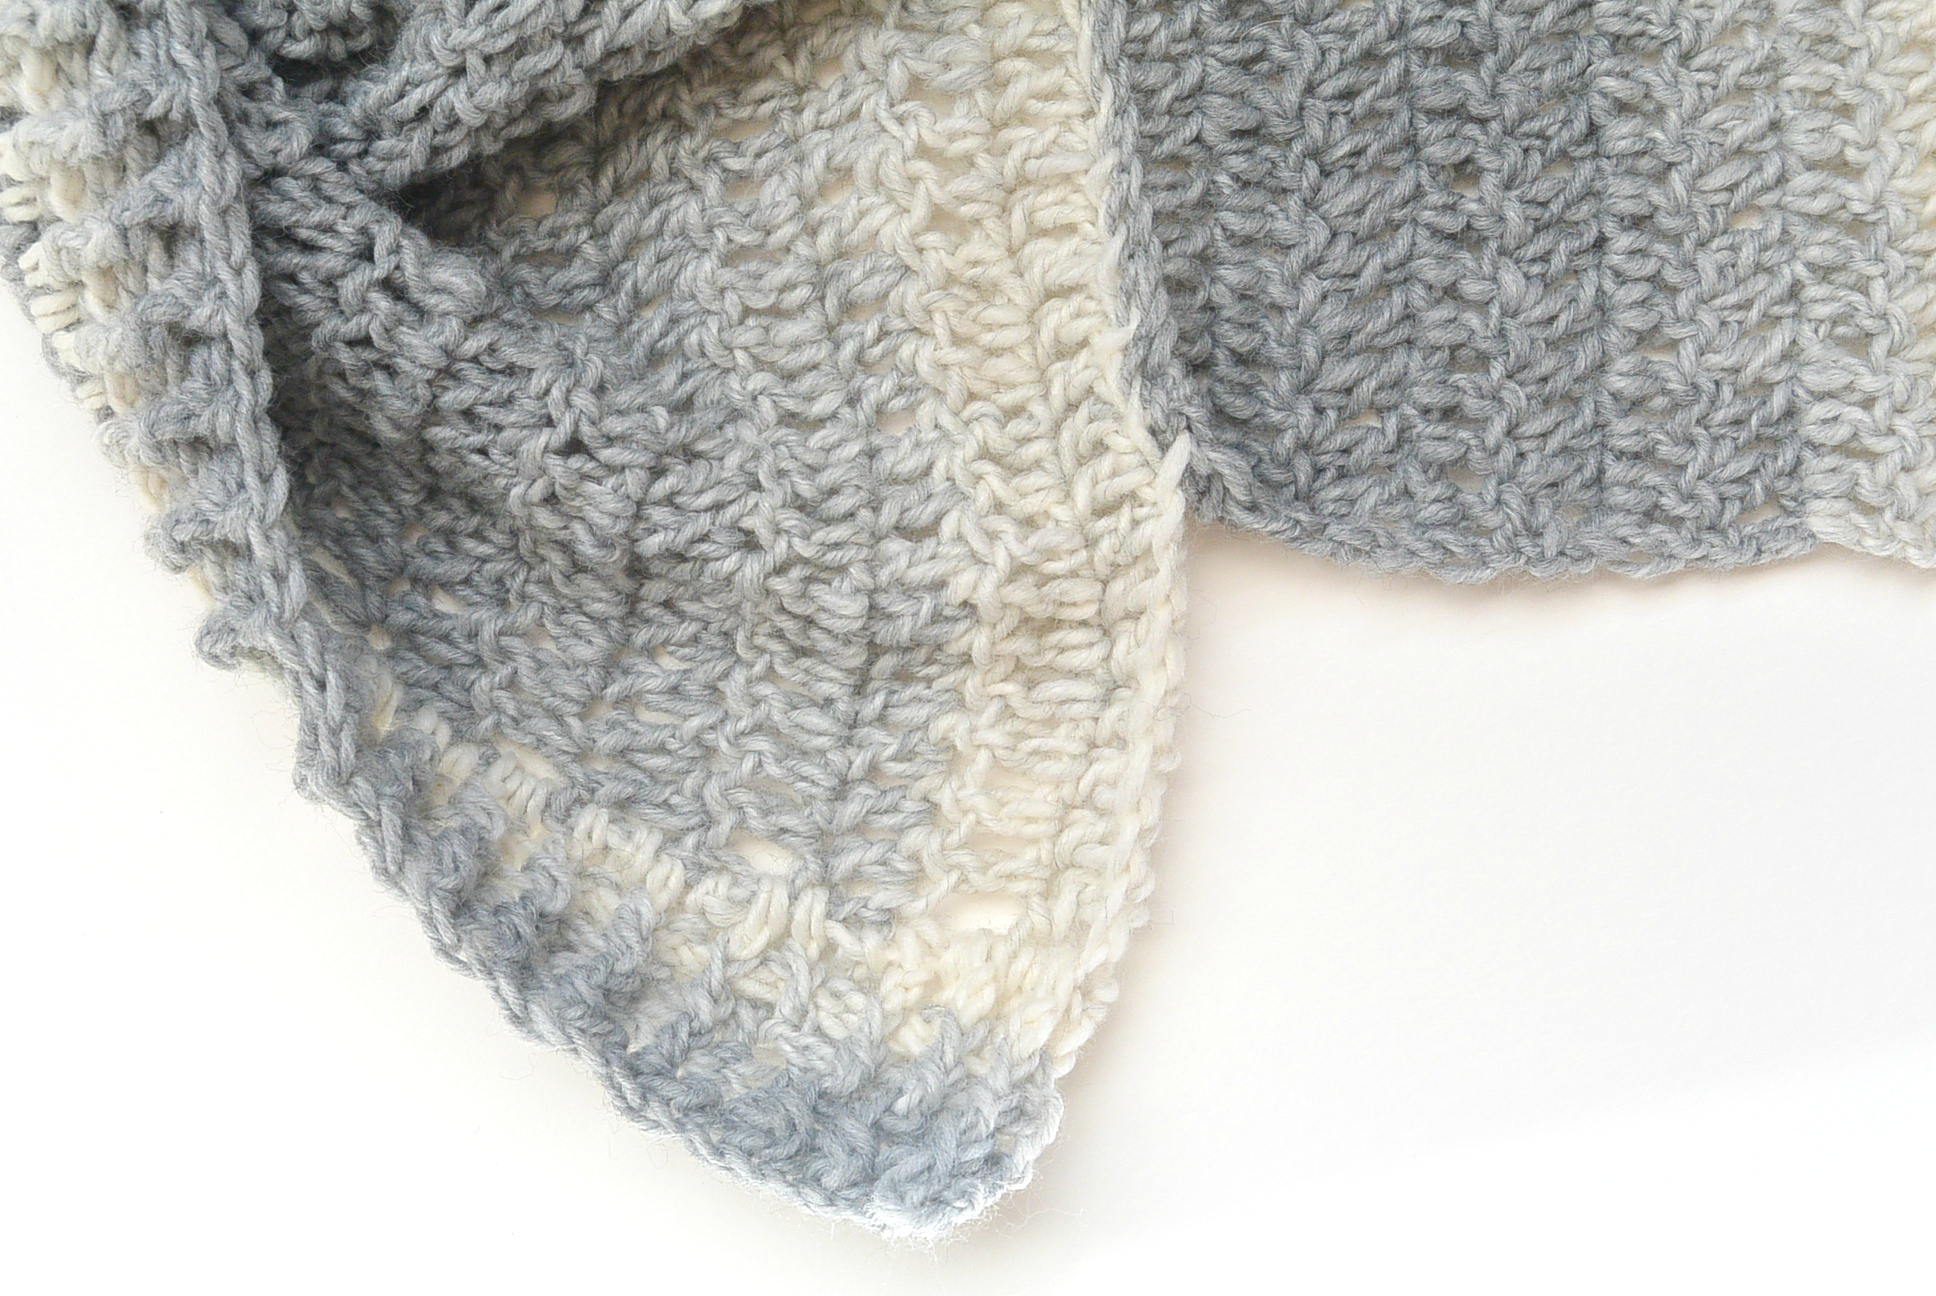
Finally, you will want to add the ribbed collar. This ribbing is worked by alternating front post and back post double crochet stitches evenly along the collar edge. Make your collar as wide as you’d like by crocheting as many or as few rows as you want. Mine has three rows of front post, back post double crochet stitches.
I also chose to made two rounds of front post and back post double crochet stitches around the arm openings to give them a ribbed cuff.
Below: A close up of the ribbed edging. This is made with front post back post double crochet.
To assemble this shrug, you will be folding each side inward and seaming to the middle “tail” and up the side of it as pictured below. I left about 7″ of the side at the bottom which gave my a good size arm opening. The opening you see in the picture below is where the arm goes through.
So that’s it my friends!

I hope you enjoyed this quick little crochet project my friends!
XO
Jessica
PS If you like Scarfie Yarn as much as I do, you might also like:
Bonfire Crocheted Scarf Pattern
Driftwood Hooded Poncho Pattern

Love to see this knitted
I have finished one sweater, several dishrags, wash clothes for the kitchen, and have TWO sweaters started. Hadn’t crocheted in years, loving it.
Wondering how it feels to make and wear ALPACA yarn!
Haven’t been brave enough to spend the extra until I find a worthy project. And confidence that I can do a good job.
Love this shrug. It’s spring in Australia. How would this work in cotton (10ply)? Don’t want to wait till winter
The yarn for this shrug doesn’t look chunky
Will you do this on you tube??
It’s lovely and looks so soft and comfortable. Not bulky at all. A very wearable shrug.
Beautiful – now bring on the knit version. 🙂
It’s so pretty! Purl Soho kits are out of my price range but would you use the same amount of the Lion Brand yarn in their pattern? 3 skeins?
Hi Dianne!
The yarn they used appears to be a #4 weight (it might be listed in the pattern actually). And I’m not sure how many yards in a skein, so I don’t think it’s safe to say 3 skeins unless they are comparable (unfortunately).
I would also loooove to see a knitted version for the shrug. It is now summer in South Africa and I would love to knit it for our next winter. Thanks a stack and all the best from sunny Cape Town.
Jessica, pretty pattern. I’m confused about the sewing up. The pale grey print in the blog is very pretty, but impossible to read Please change print to black. How would the dimensions of the “T” change to fit a 55 inch bust?
Thank you, Julie in San Diego
I’ll try to darken up the print over the weekend. Thanks Julie! I didn’t size it out for specific sizing, so I’m sorry about that! You would have to brave trying to figure it out for yourself on this one my friend.
Looks like something I would make, wear an x-large, do u think I would need to increase the number of chains and if so how many. Thanks
will there be a kit?
There’s not kit for this one – thanks for asking Deborah!
I’m not seeing a picture of how you put this together. Maybe I’m being very dull, but can you draw it out or something? I really want to try it, but not before I understand what I’m doing.
What color Scarfie yarn did you use in the pictures please?
Cream and silver
Got it all crocheted up, but for the life of me I can’t figure out how to fold it to finish it! Lol
Hi Dottie! This is the hardest part to visualize. I should have done a video but for now my best suggestion is to really study the close up photo of the folded sleeve that’s seamed. You don’t fold it over, you kind of wrap it around sideways to attach to the tail. So hard to describe! You might look at the knit link to purl soho also in case their diagram and photos are more helpful.
Can you be more specific about the link? The other idea is, can you upload more photos with clarity?
I don’t understand how the “tail” is seamed in.
If anyone figured out how to put this thing together and could give me directions or post better photos I would be very grateful. I spent a lot of time and money to make this shrug and what I ended up with is a useless T shape and frustration
Ugh! So sorry Michelle. I did my best with the photos as I know how, but next time realize I should do a video. Please look at the link to the Purl Soho knit version above in the blog post to see if those diagrams of photos are more helpful than mine.
Me too!!! I’ve been working on putting this thing together for a month now! Nothing I try seems to look like the finished pictures!
I agree! I have no idea how to put the thing together!
I cant for the life of me, figure out the assembly part if this shrug. I have a big T and nothing I try works. Help. I have looked at the pics, the diagram for the knitted version. I have no idea how to do this
Is the first part you make the “tail”? Just trying to figure out sizing.
It kinda looks the tail almost goes from the back of one hip to the other, so if that is the first chain number, it would give me an idea of how long my starting chain needs to be to fit me (I am muuuuuuuuuuch larger than you).
Hello Jessica, I have been admiring your beautiful Cozy Blanket Cardi and was wondering whether this pattern an crochet with Aran wool and if so how can adopt the pattern and how much wool would I need. Look forward to hearing from you soon. Best wishes for 2019! Jasu x
Hello Jessica, I have been admiring your beautiful Cozy Blanket Cardi and was wondering whether this pattern can be crocheted with Aran wool and if so how can I adopt the pattern and how much wool would I need and what size hook should I use. Many thanks. Look forward to hearing from you soon. Best wishes for 2019! Jasu x
I’m unsure what I’m doing wrong, I’ve frogged this 3 times & can’t get the same measurements as you.. I now have 28 rows but it only measures 14″. What am I missing????. I’m in love with this but can’t make it !!!! Ugghhhh
Hi Jessica. A little confused about the chain 17. Do you chain 17 across & then chain 17 at the end of the row? Then you would be working across 67 stitches until the entire piece measures 37”. I’ve re-read the directions multiple times but I feel like I’m missing something. Thanks!
I was struggling with the assembly as well, but I think the link to the knit inspiration helps a lot. There is a drawn diagram instead of just photos.
Go about half way down to side seams and it will make sense, there is a drawing.
https://www.purlsoho.com/create/2014/08/23/prewrapped-wrap/
So you chain 3 and double crochet only in the beginning? I double crocheted in the center, but in the last section I went to back to chain 3 and double crochet or the end will be different. The directions did not say chain 3 and double crochet in each row in the middle section or the end.
I ended up having to do more rows in the center, maybe that is why? Hopefully it will still work out.
I’m having trouble figuring out how to sew the sides to the “tail” piece. Just not getting it right. Can you help me?
I so wish I would have read comments before starting this project. the pictures are not clear enough in terms of seeing how this is seamed. I even looked at the recommended knitted project website. And I see as of August 1, 2019, on comment was left without a response after the person asked for help. SO disappointed and I’m a rather seasoned crocheter. UGH!!!!!
Jessica please do this project again and take more specific pictures. PLEASE!
I am wanting to make the quick shrug with a medium weight (4) instead of the Lion Brand Scarfie weight (5) yarn. Will it work? If so should I make the initial chain longer? What size crochet hook should I use? The wrapper on the yarn I want to use says to use a H-8 hook. The wrapper on Scarfie yarn says to use a size K-10.5 hook. Your pattern says to use a size L 8.0 hook. Can I use the size 8 hook with the weight (4) yarn or what size should I use?
I am a novice crocheter and I got how to put it together, it looks easy, come on Ladies you can figure this out, take the ends of the T, wrap them around and sew them to the little flappie thing, it looks easy to me, gonna try it
I agree that this is easy enough for one to figure it out. But I will try to help lay your piece out in the shape of a letter T. Look at the T the T has one vertical line and one horizontal line. The top line (horizontal line) see it as it has a top and a bottom as well as a left and right side. The left and right are separated in the middle by the vertical line of the T. And the vertical line has a topvlband bottom as well as a left and right side. Now take the bottom left of horizontal and bring it down to the bottom left of the vertical line of the letter T. Now Seam it up but leave enough room for your arm Then do the same with the right. Hope that helps couldn’t upload diagram sorry
I’m not sure if it’s just me or what but I am at quite a bit more than 28 rows to get to 22” for the first panel??
Well, I made this (I’m supposed to making 5 for Christmas gifts) and I’m a little disappointed. I’m 5 feet 0 inches, I followed the pattern to a T and it’s too small for me, so I’m not sure how small the model is. Without the extra ribbing, it stops at my elbows and above my derriere and without all the room shown in the pictures. Hopefully the next one is bigger….
Putting the arm holes together-my suggestion is turn it over, line up the corners of the T and the front, use stitch markers to put it together, then sew. When I turn it over and lay it mostly flat, the front crosses over at an angle.