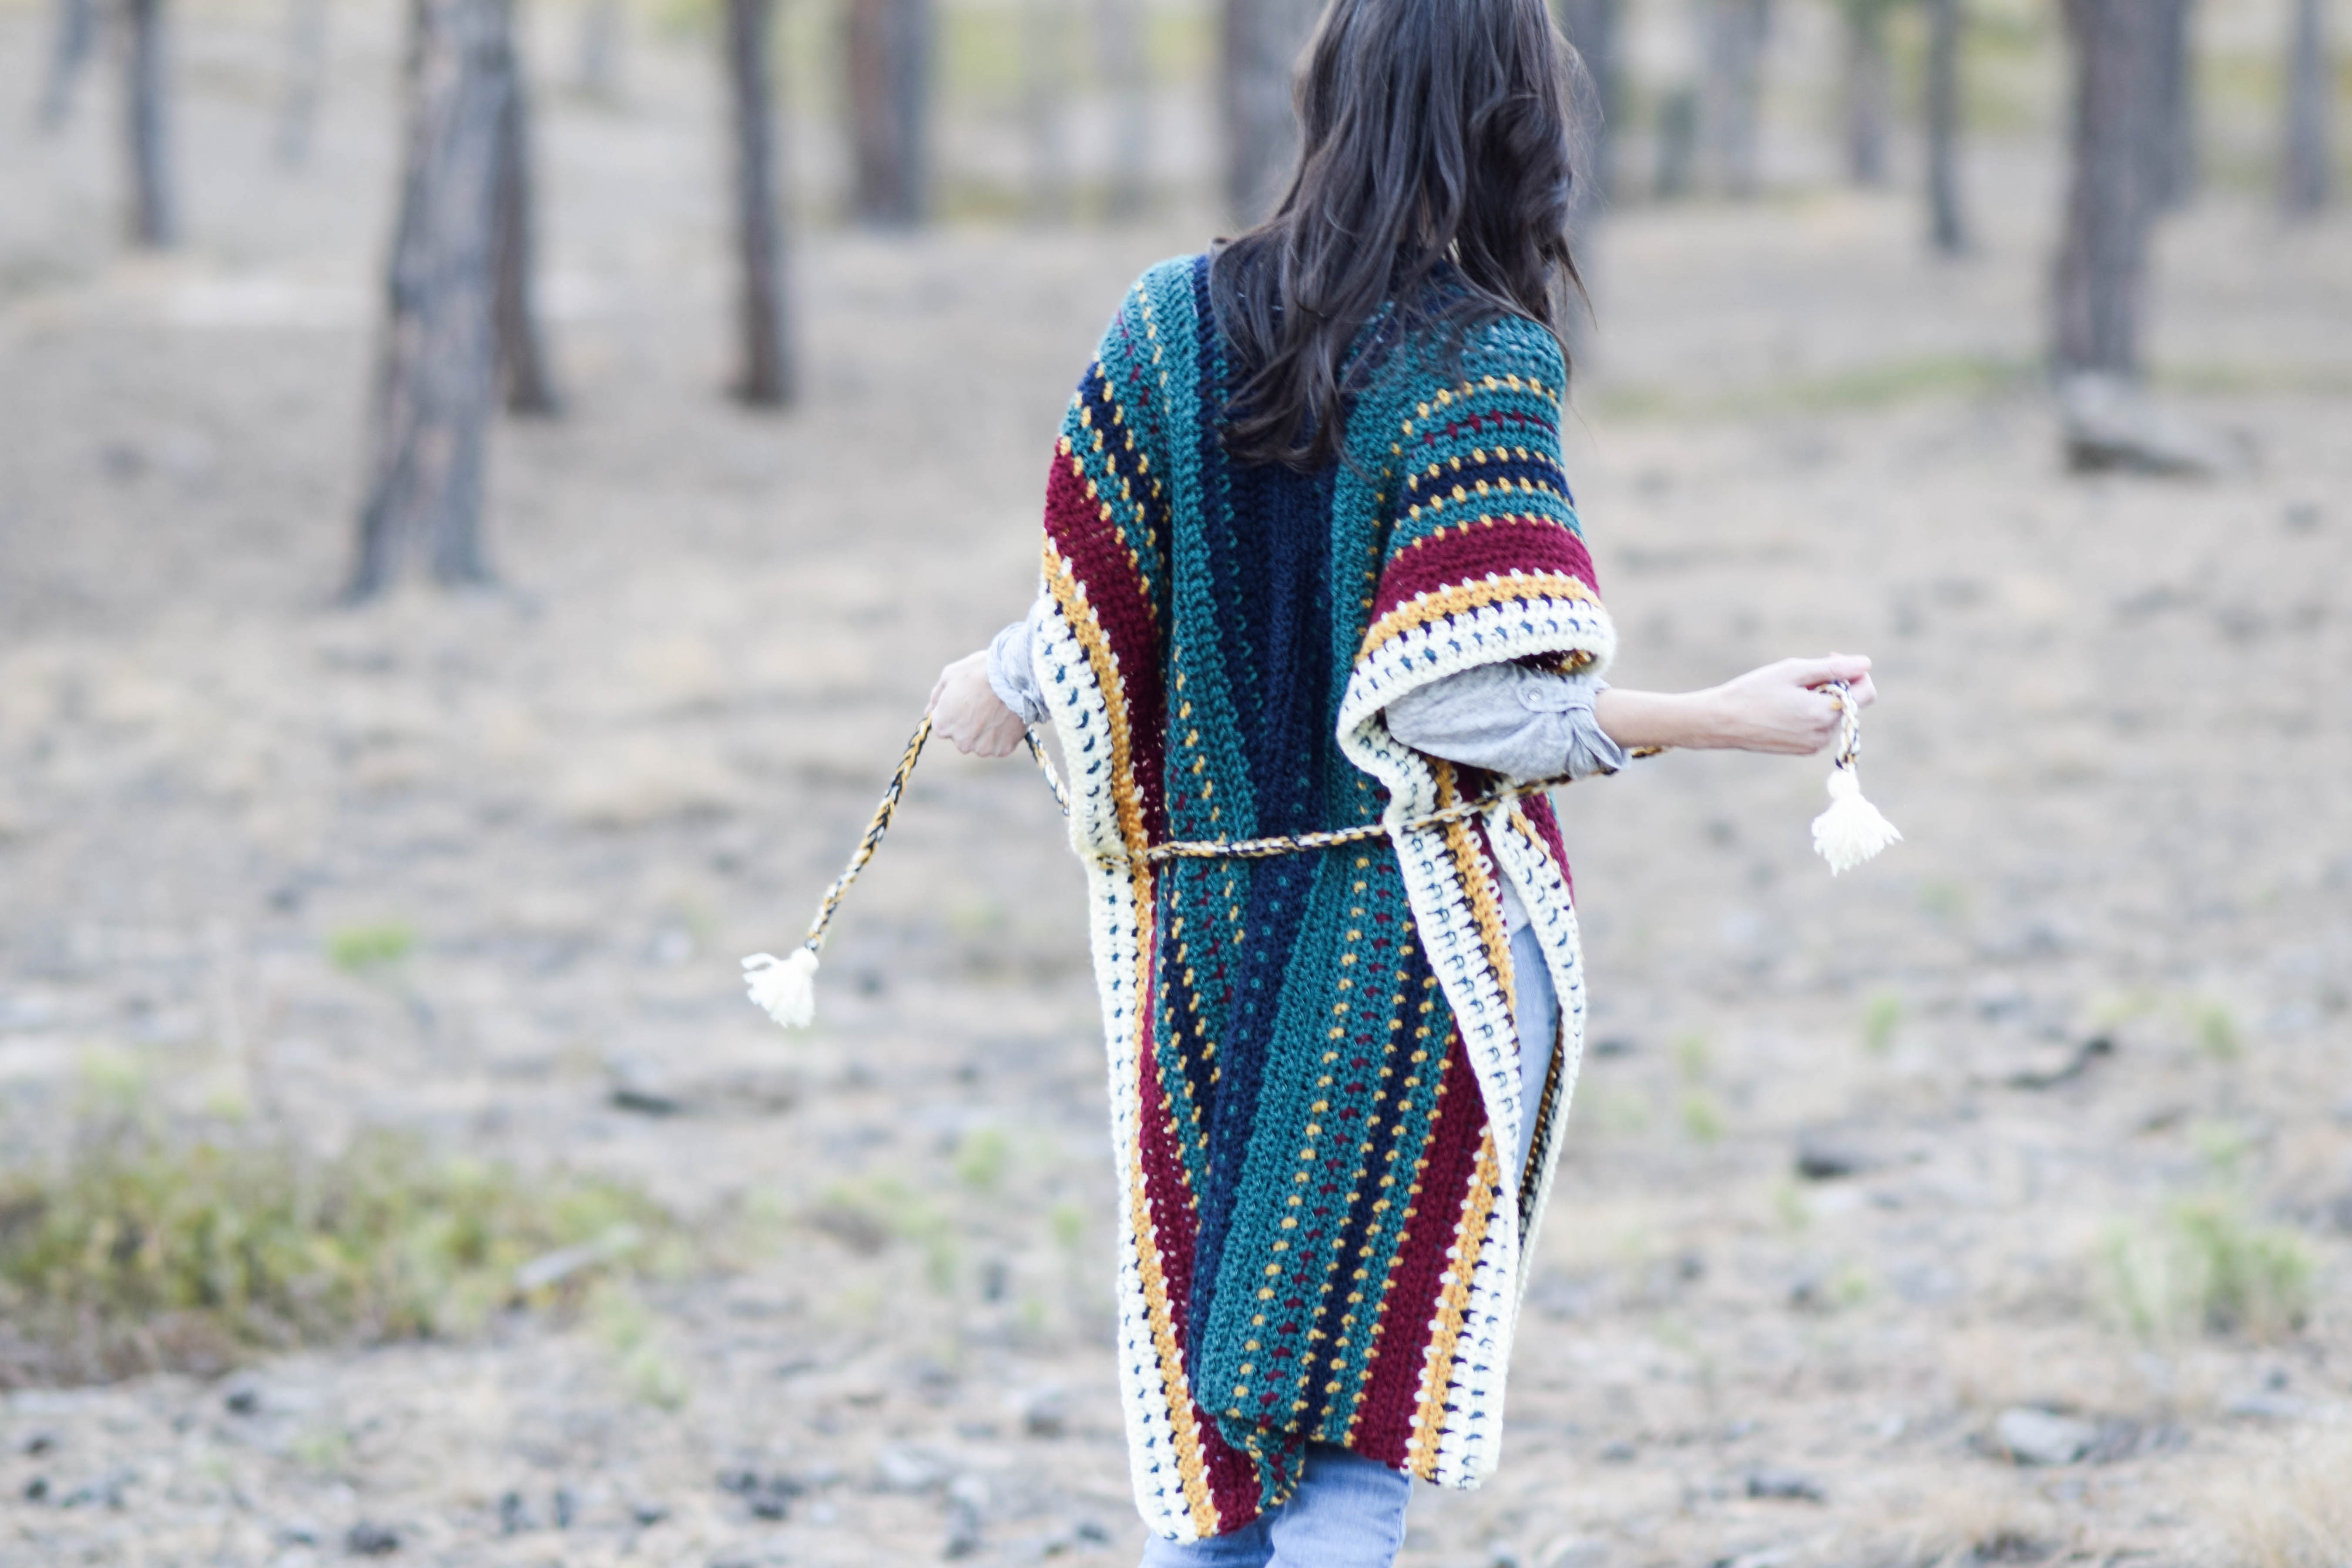
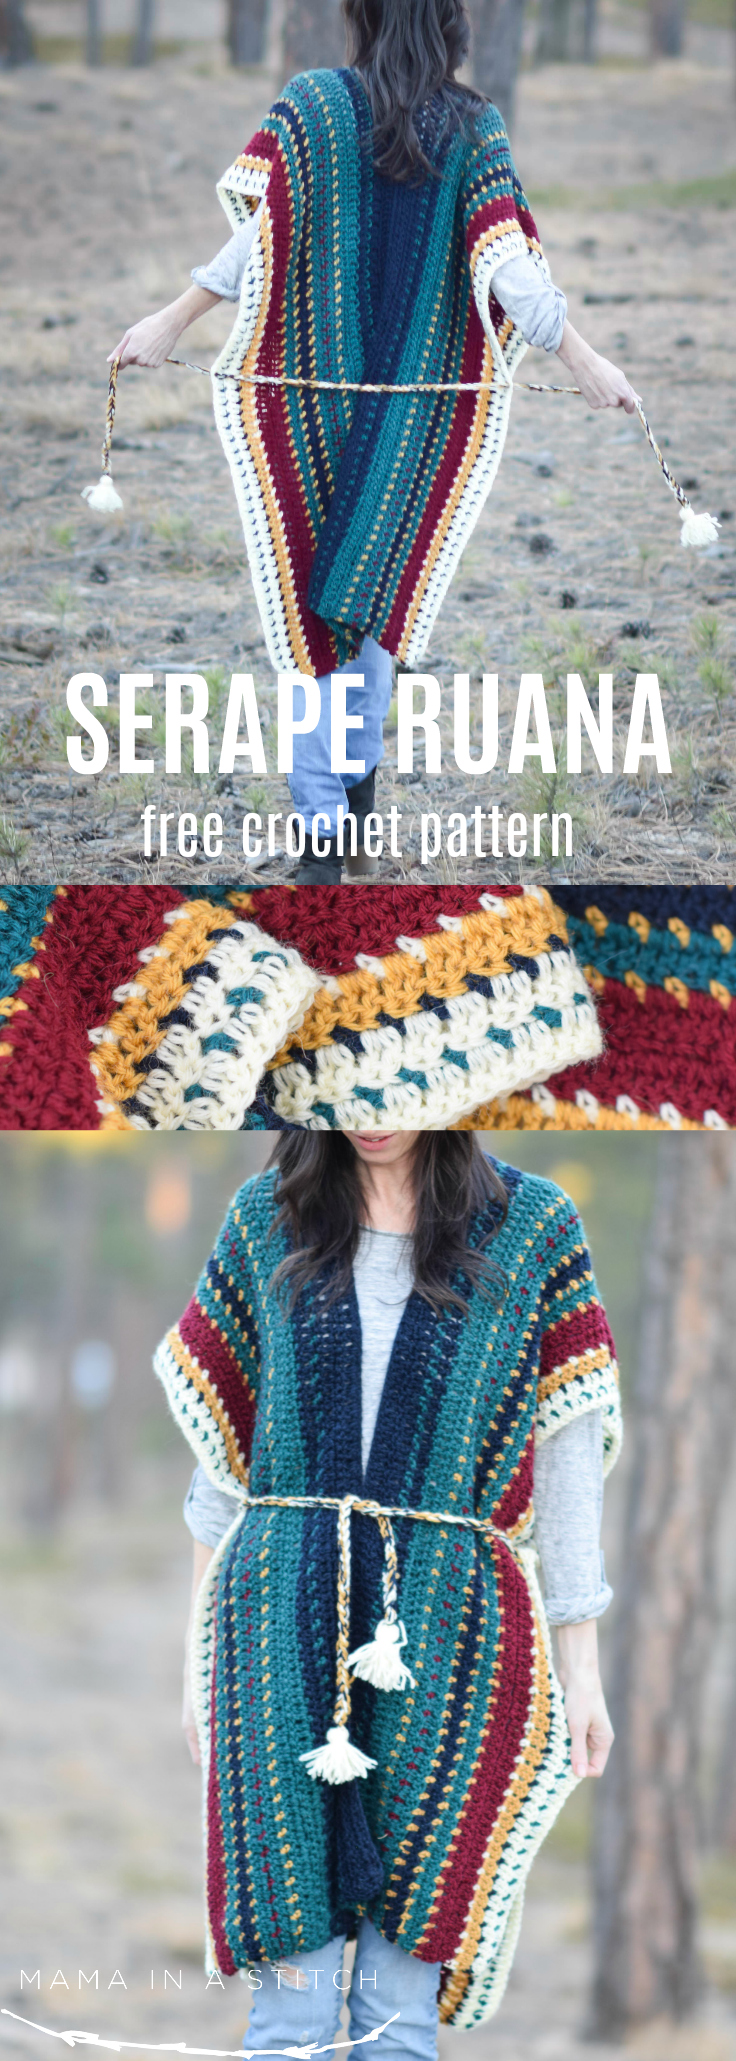
All The Colors Serape Crocheted Ruana Pattern
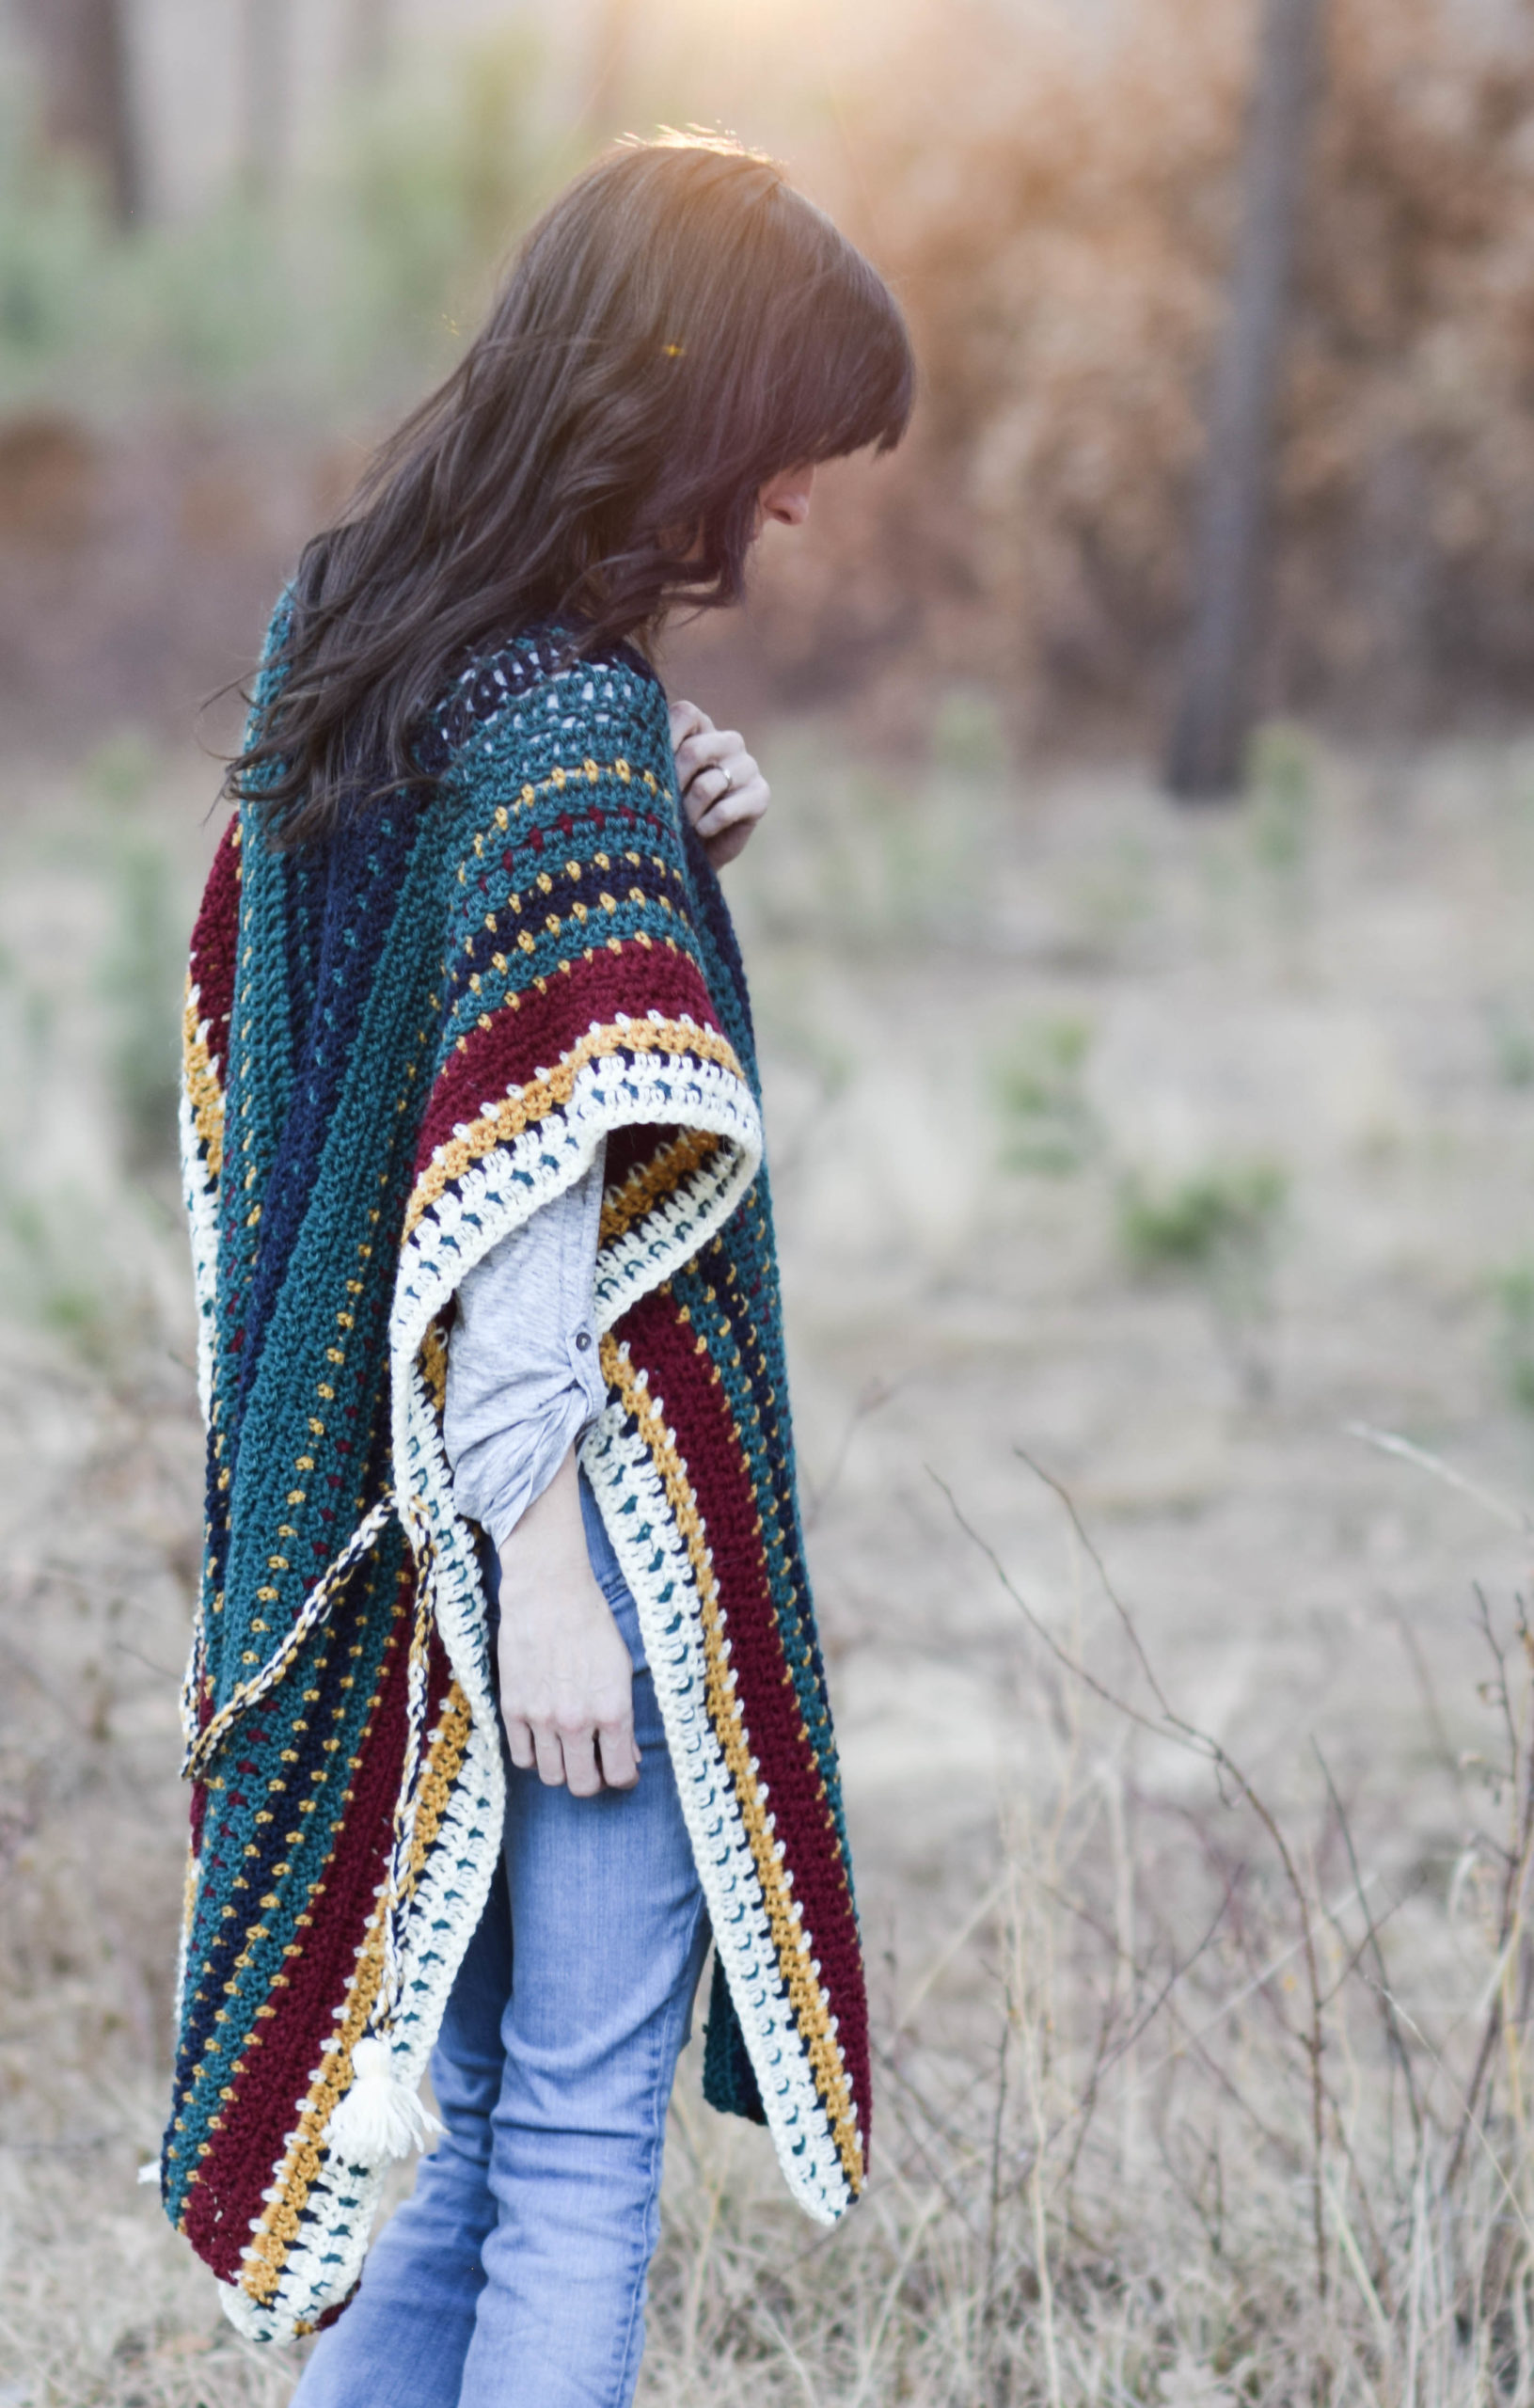
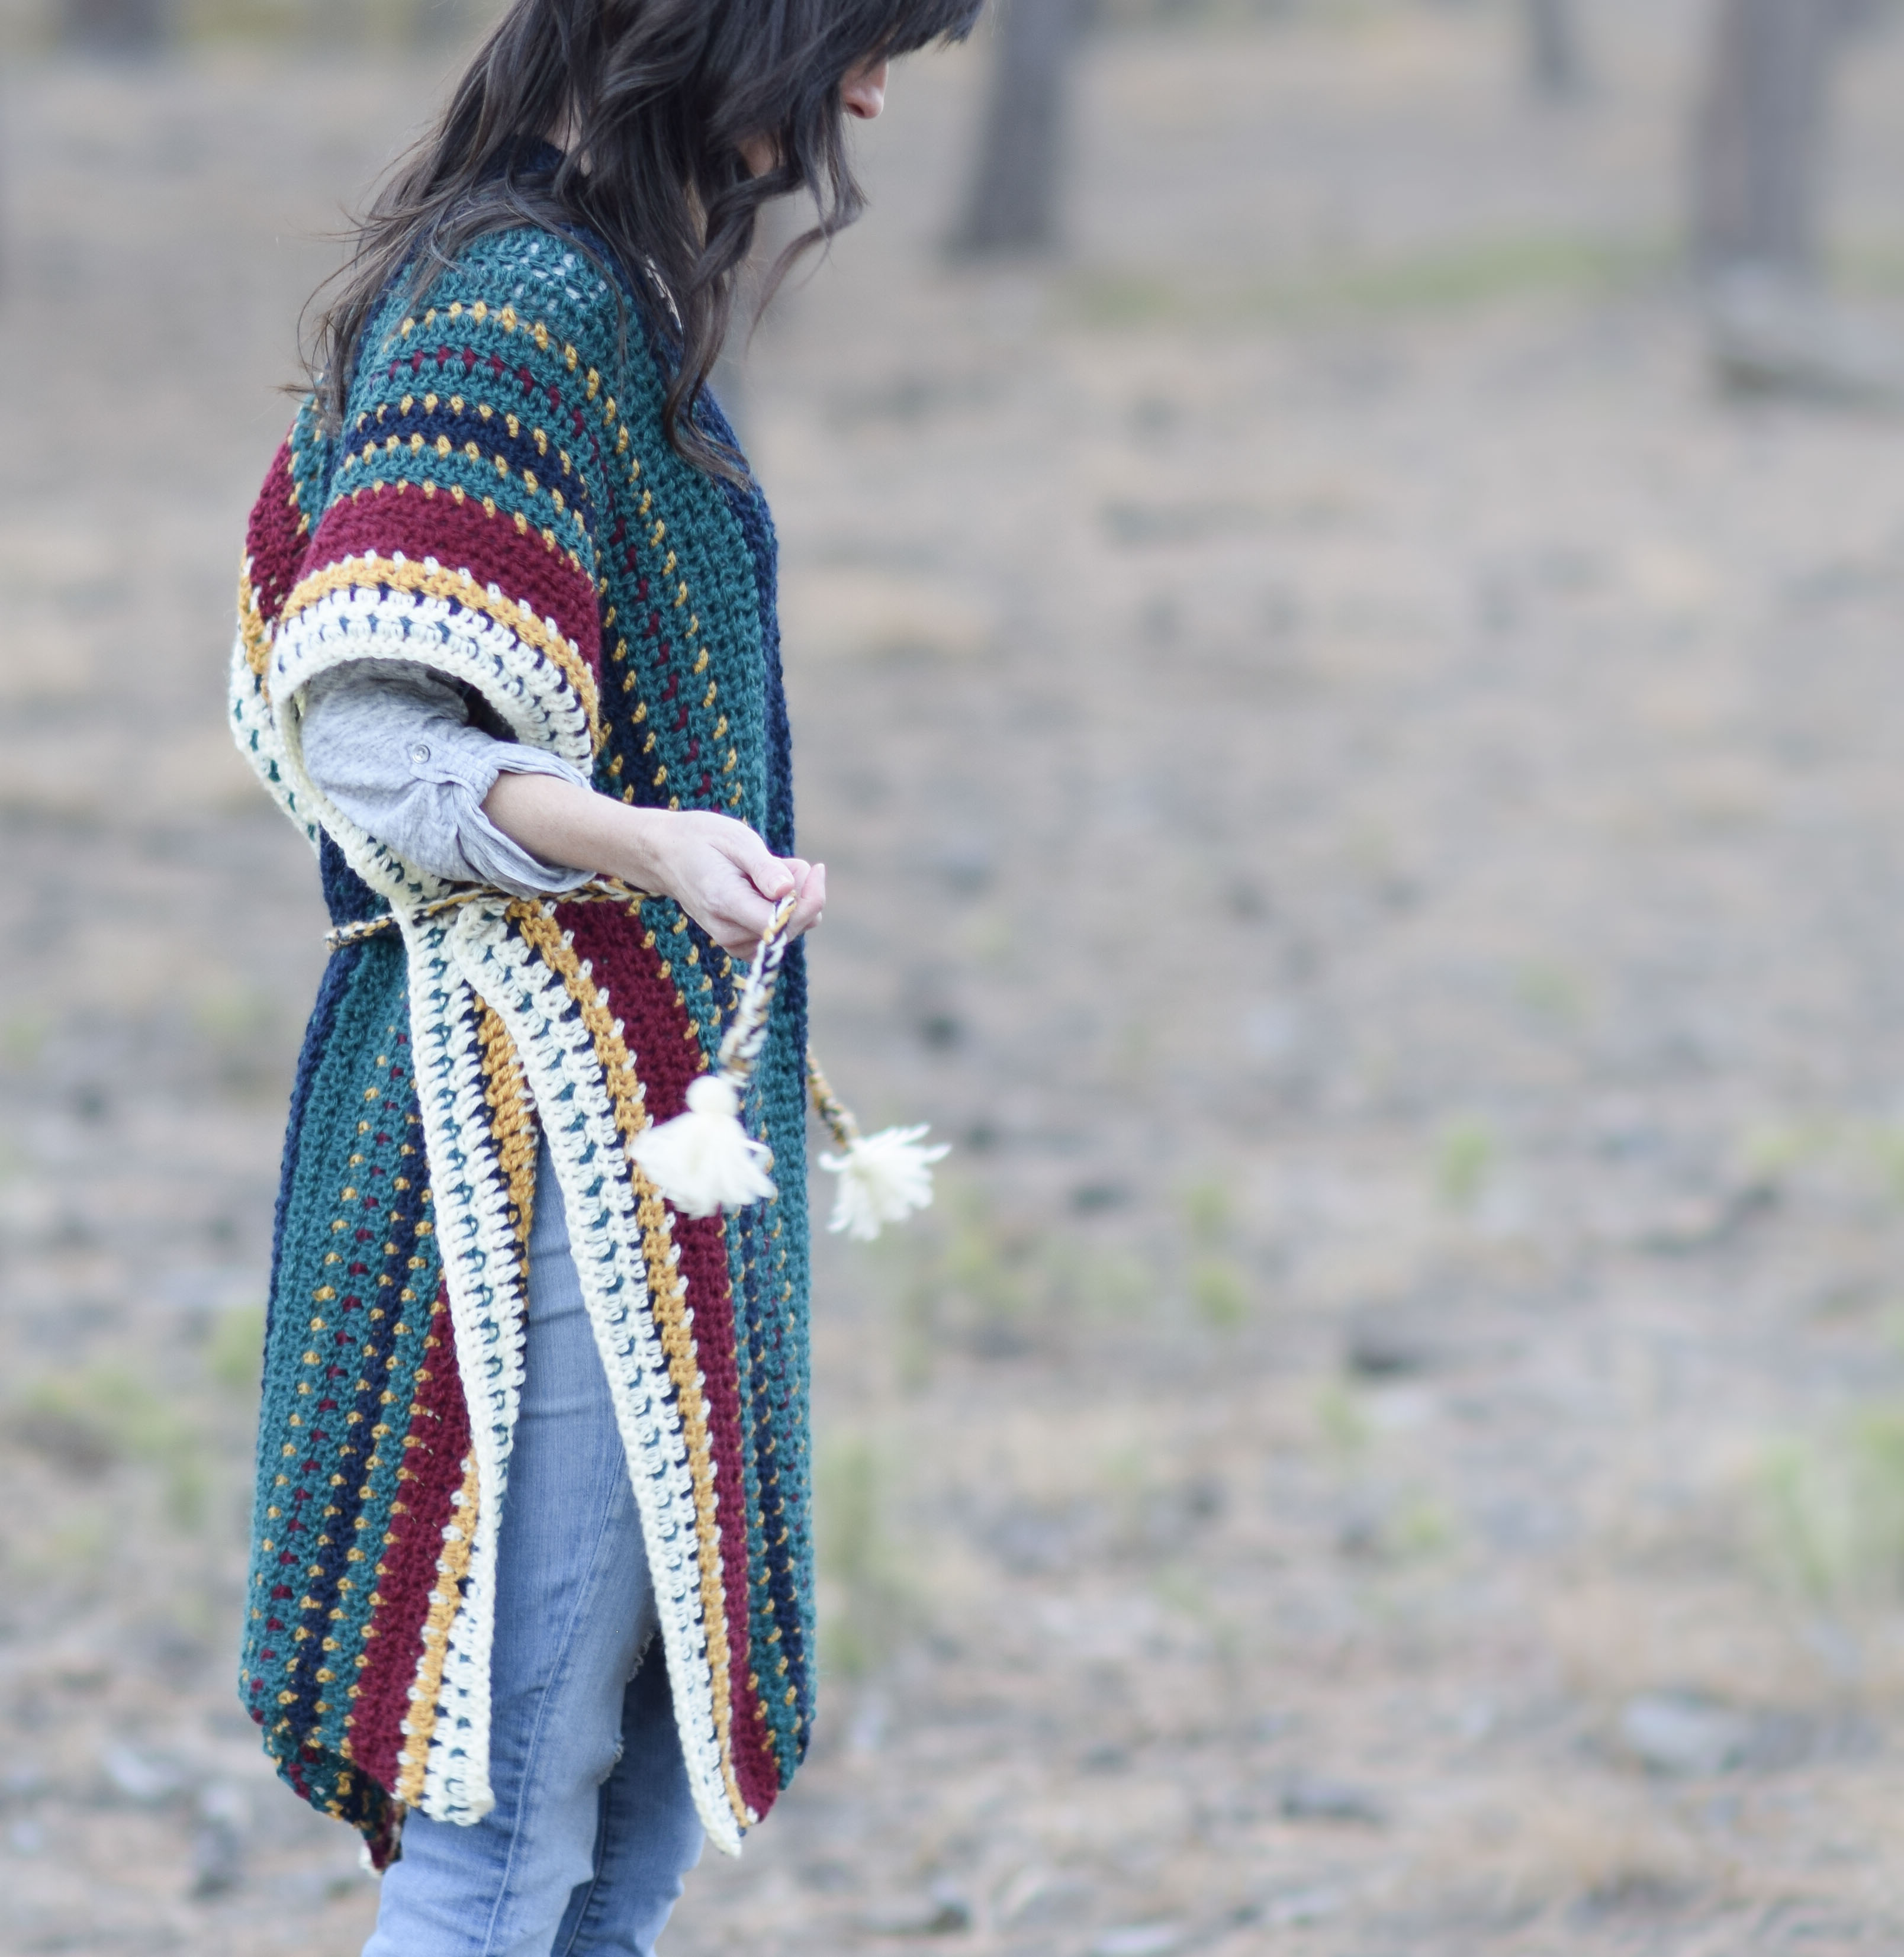
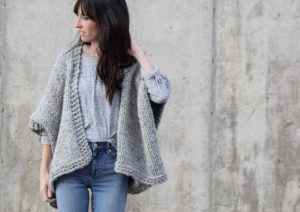
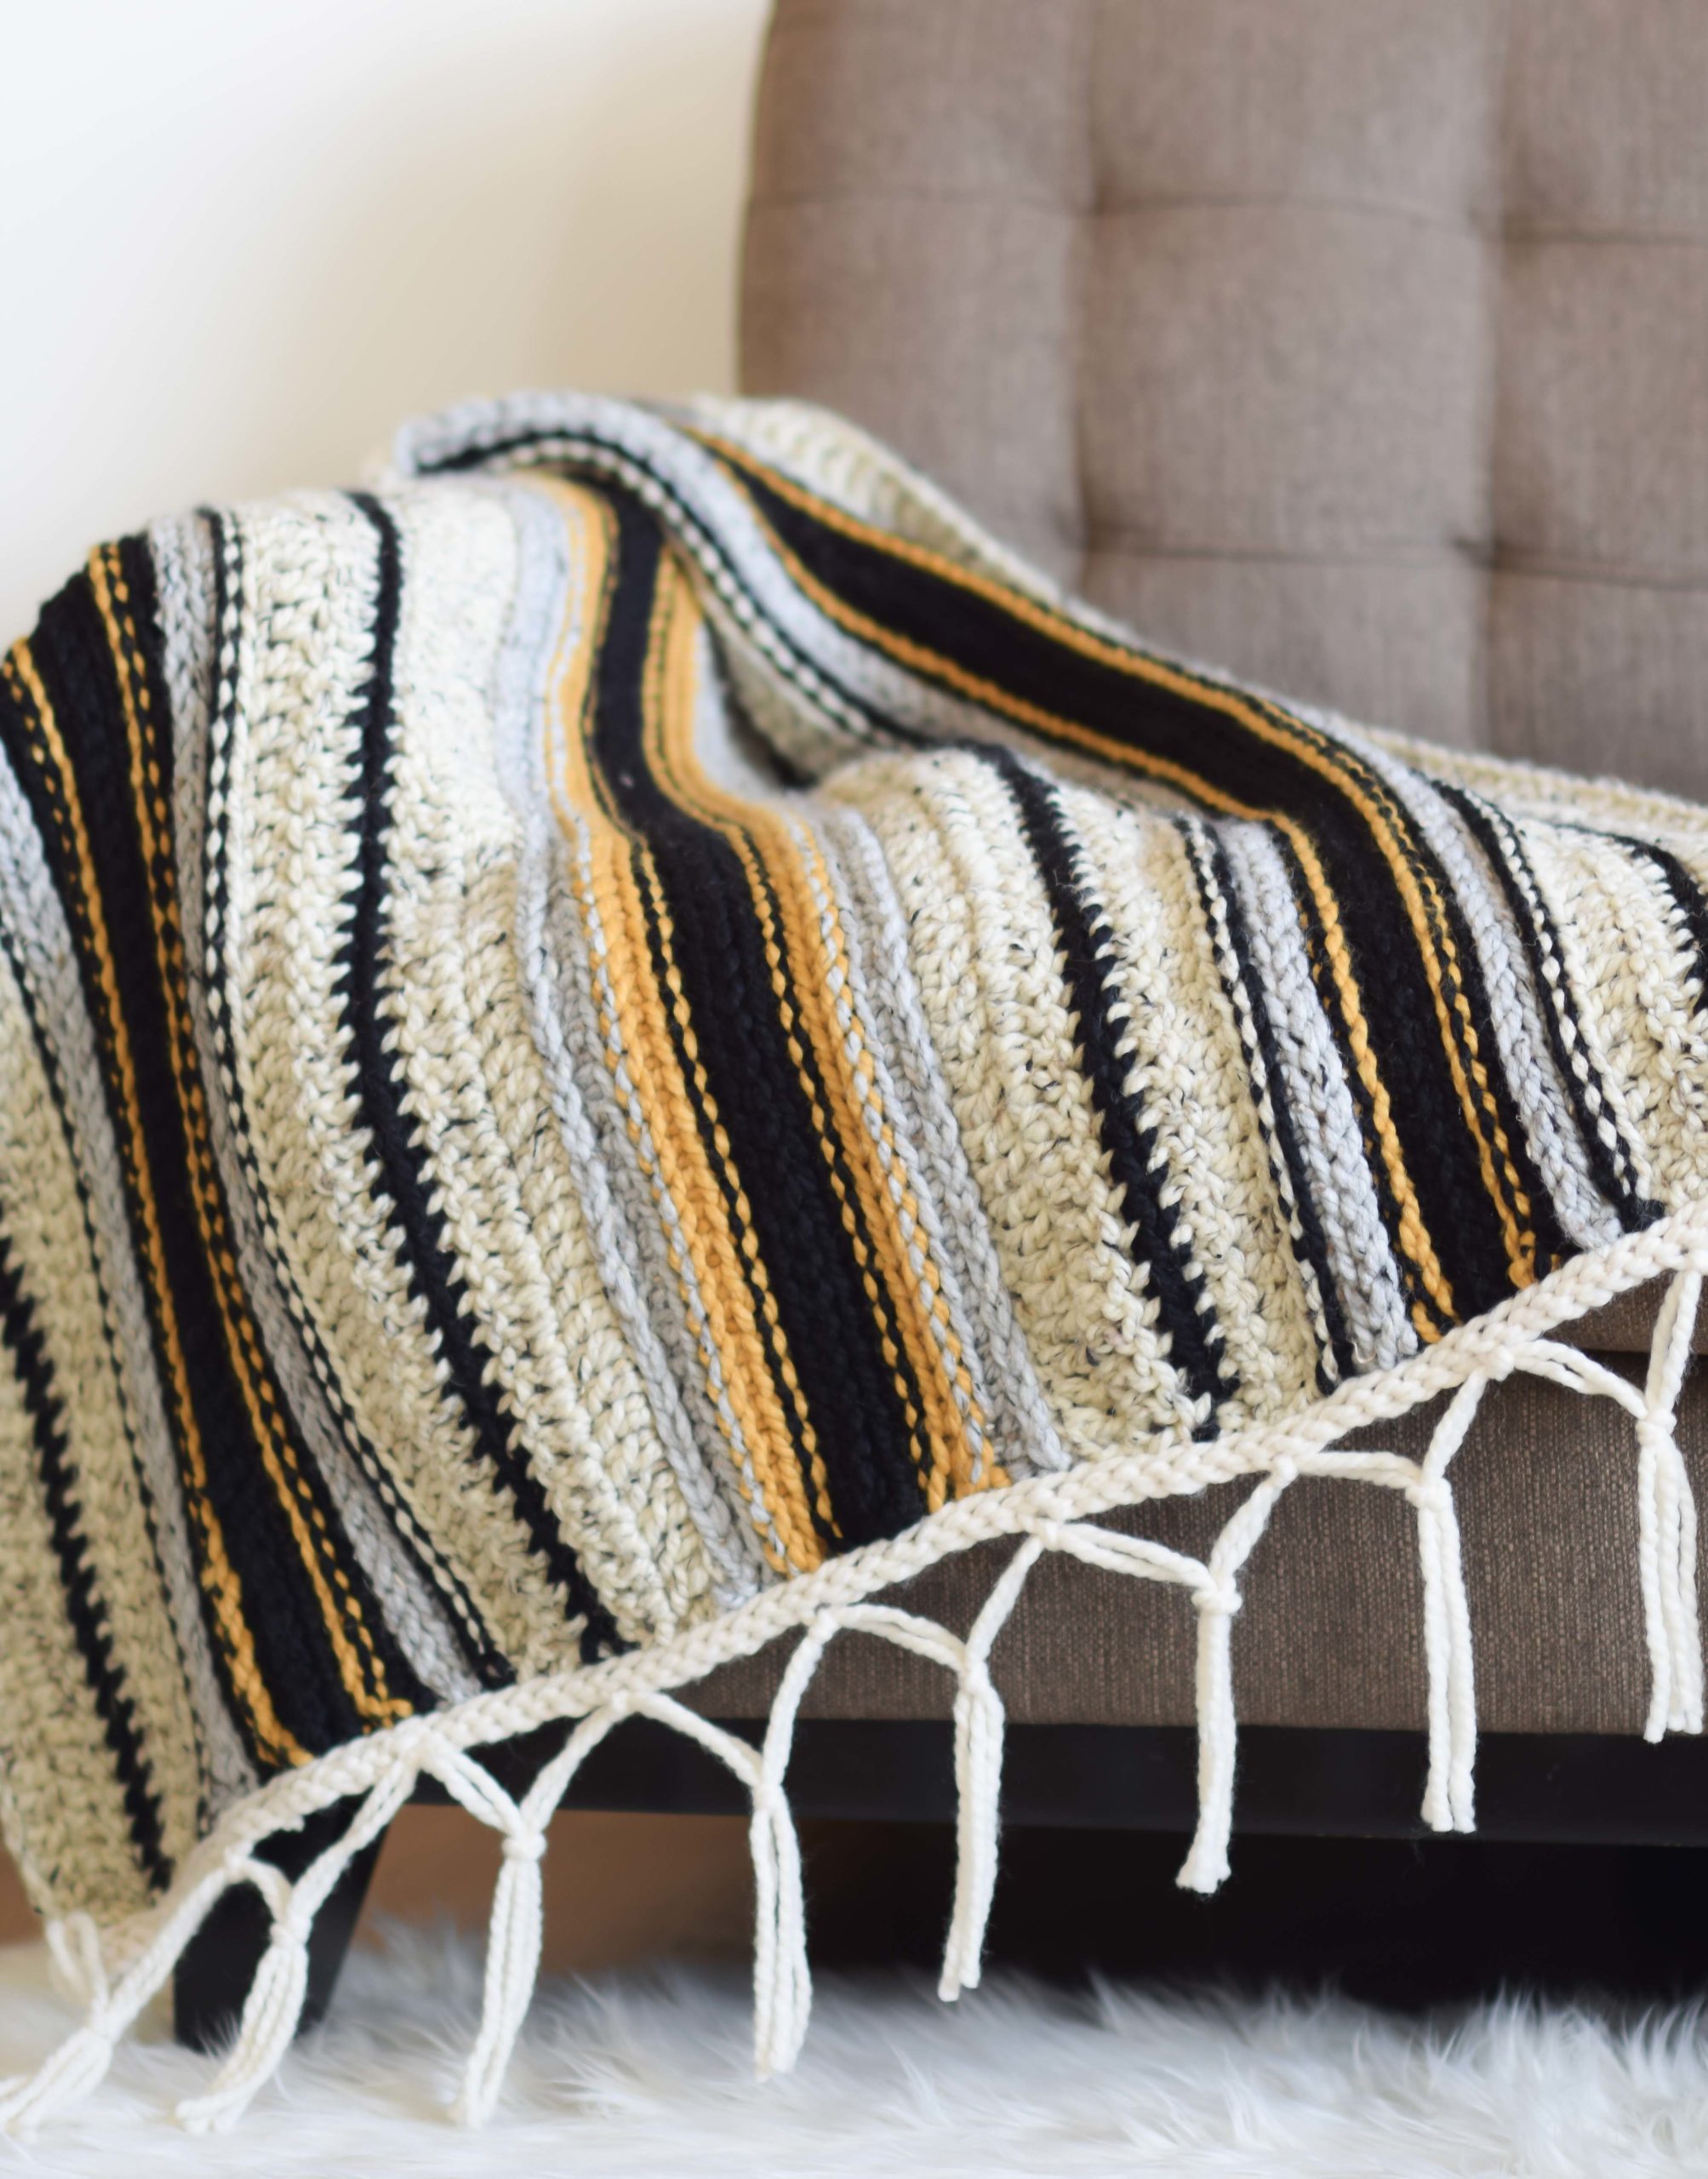
I’m so excited to share this colorful pattern with you today! This crocheted ruana is so comfortable and I think it has a wonderfully unique yet laid back look. The inspiration for this piece comes from the colorful serape shawls and blankets found in Mexico. You might remember the Native Stripes Knit Blanket that I made which was also inspired by the gorgeous serape, but it’s been a while since I’ve used color in this way! This beautiful alpaca blend yarn from Lion Brand also gives the ruana that soft look and feel while the bold colors and vertical striping are flattering and eye catching, don’t you think? As usual, it’s also made with a super simple stitch pattern! You can scroll down to see the free crocheted ruana pattern below, or you may choose to buy the kit from Lion Brand HERE or my ad-free, printable PDF version HERE!

Are you a color lover? While often times I shy away from color, it’s so enjoyable when I actually work with it. This was a special project in particular as I have a special place in my heart for Mexican culture. In fact, I had the honor of living with a Mexican family during college while I studied Spanish in Monterrey, Mexico. The beautiful colors, vibrant culture and delicious food found in Mexico make it one of my very favorite countries on earth. I am still so grateful for the experience I had during my time with the Garcia family in Mexico and this Serape Ruana reminds me of that amazing time.
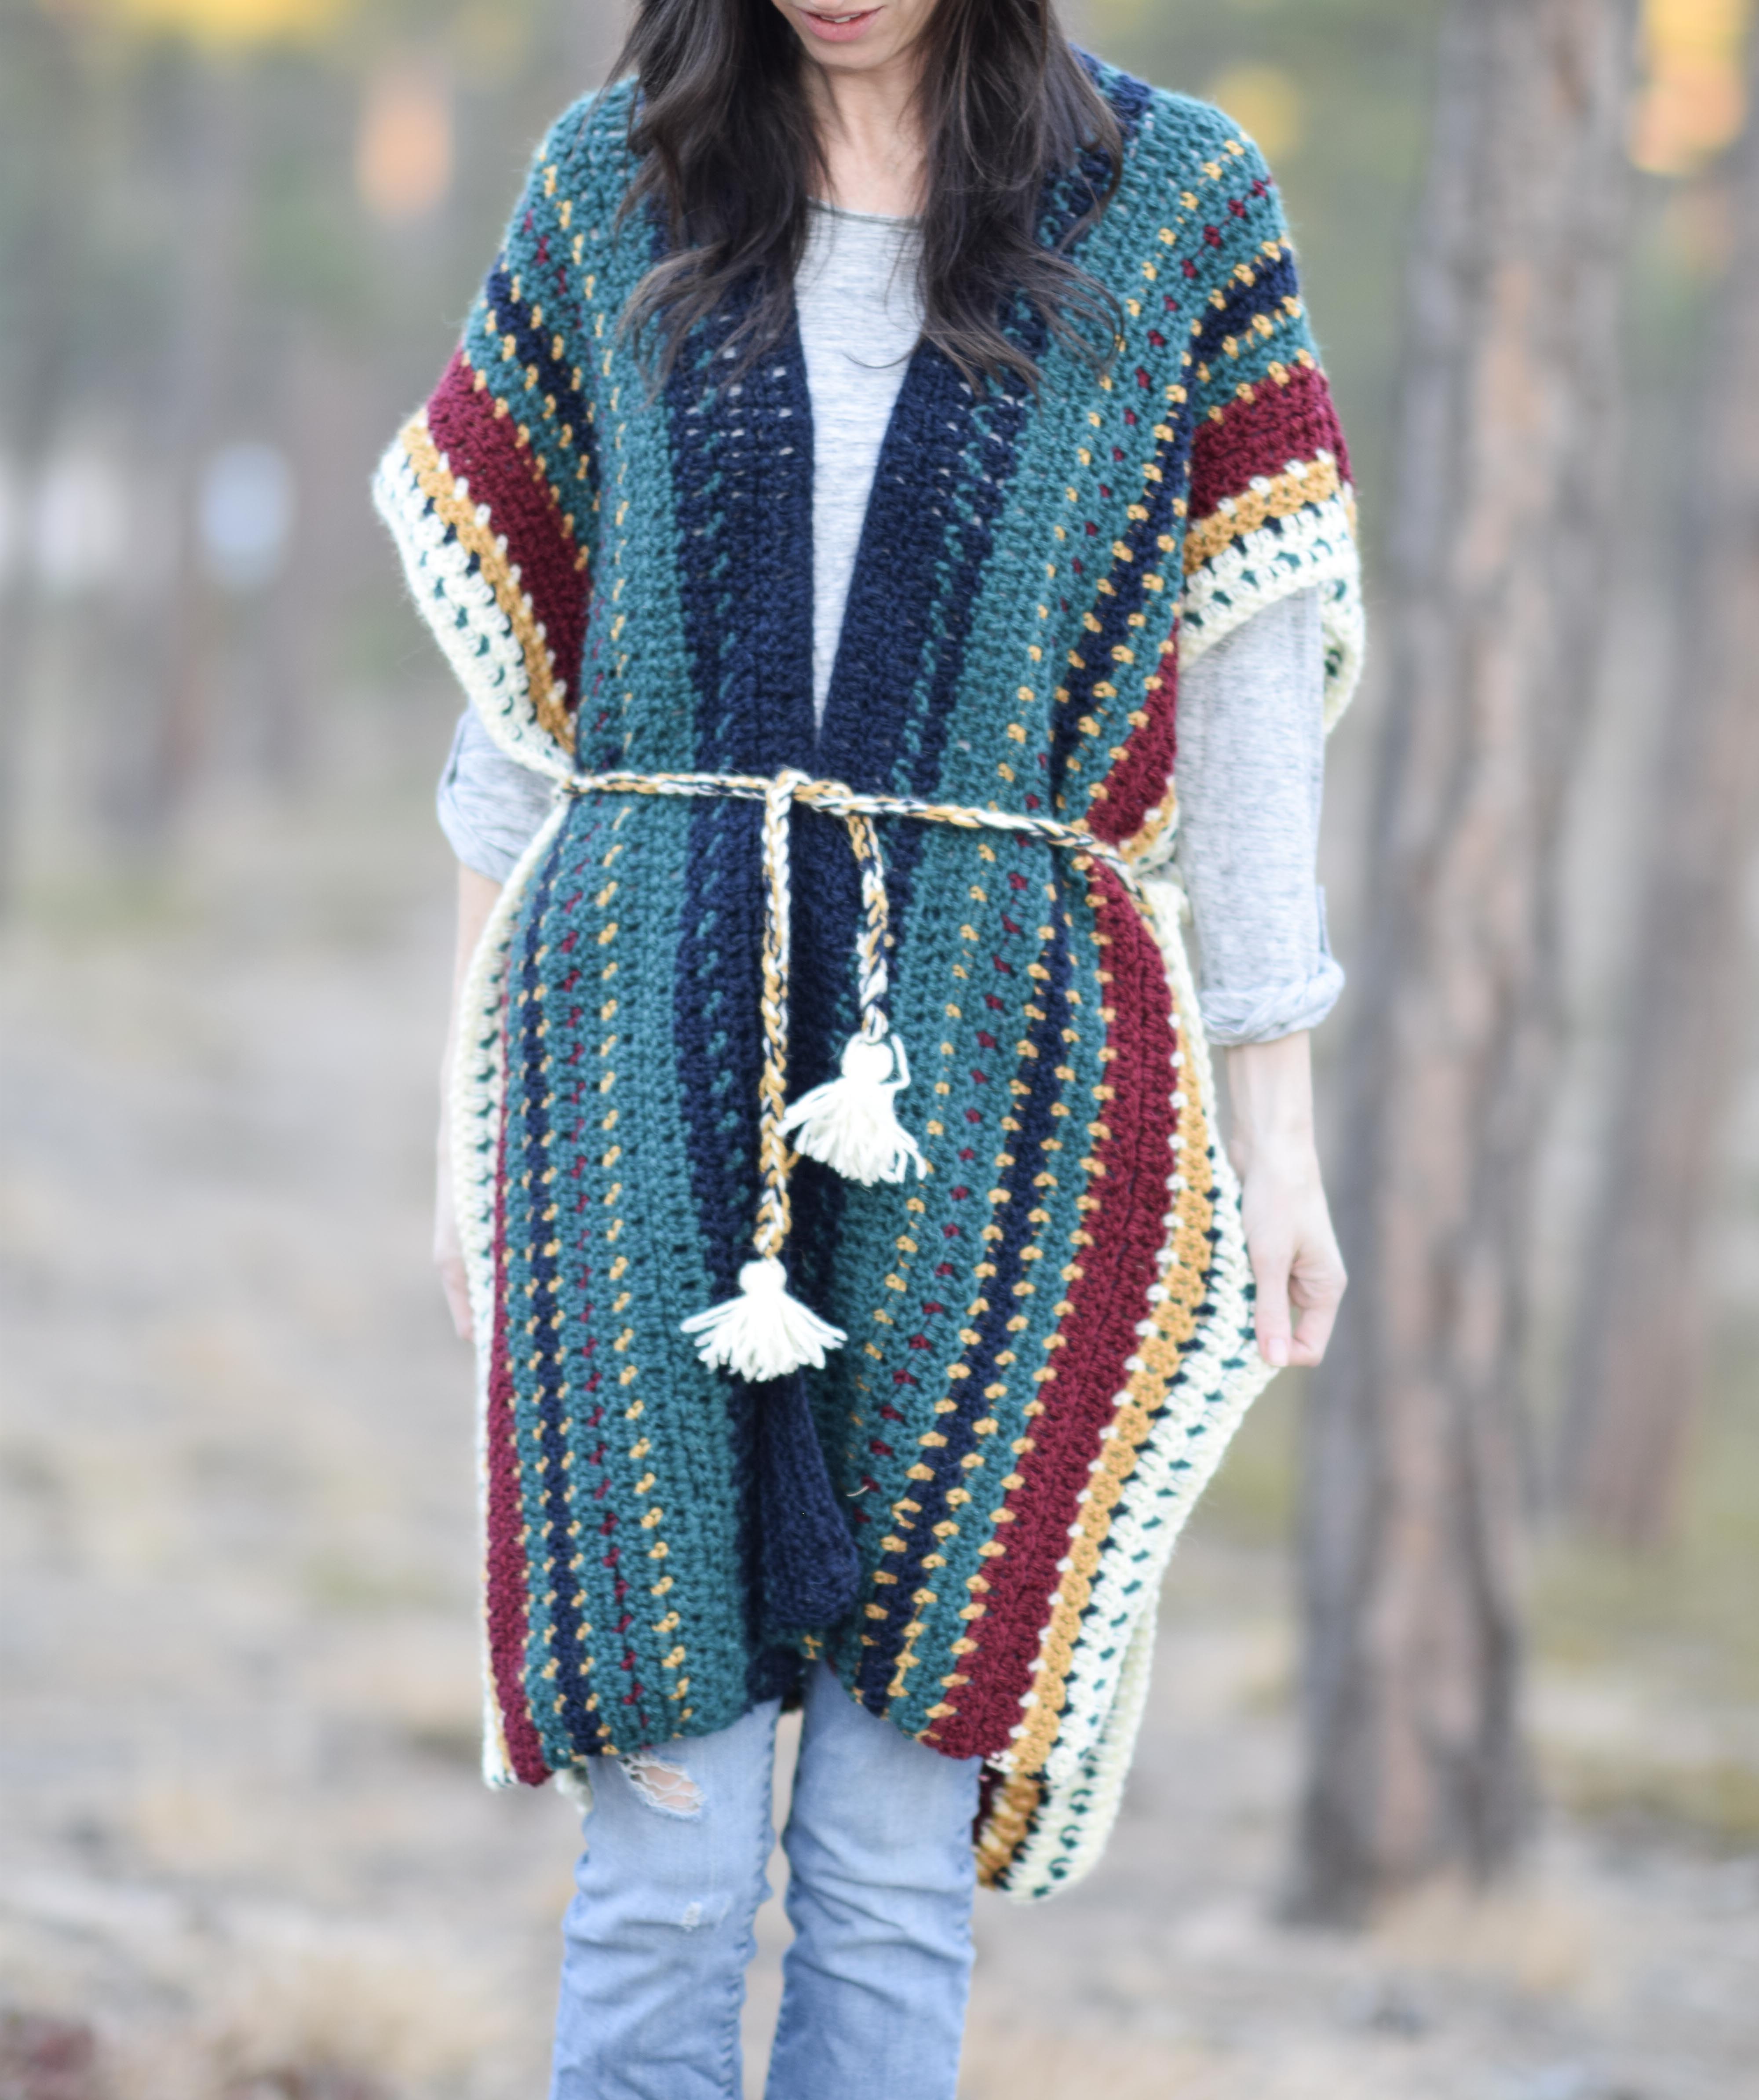
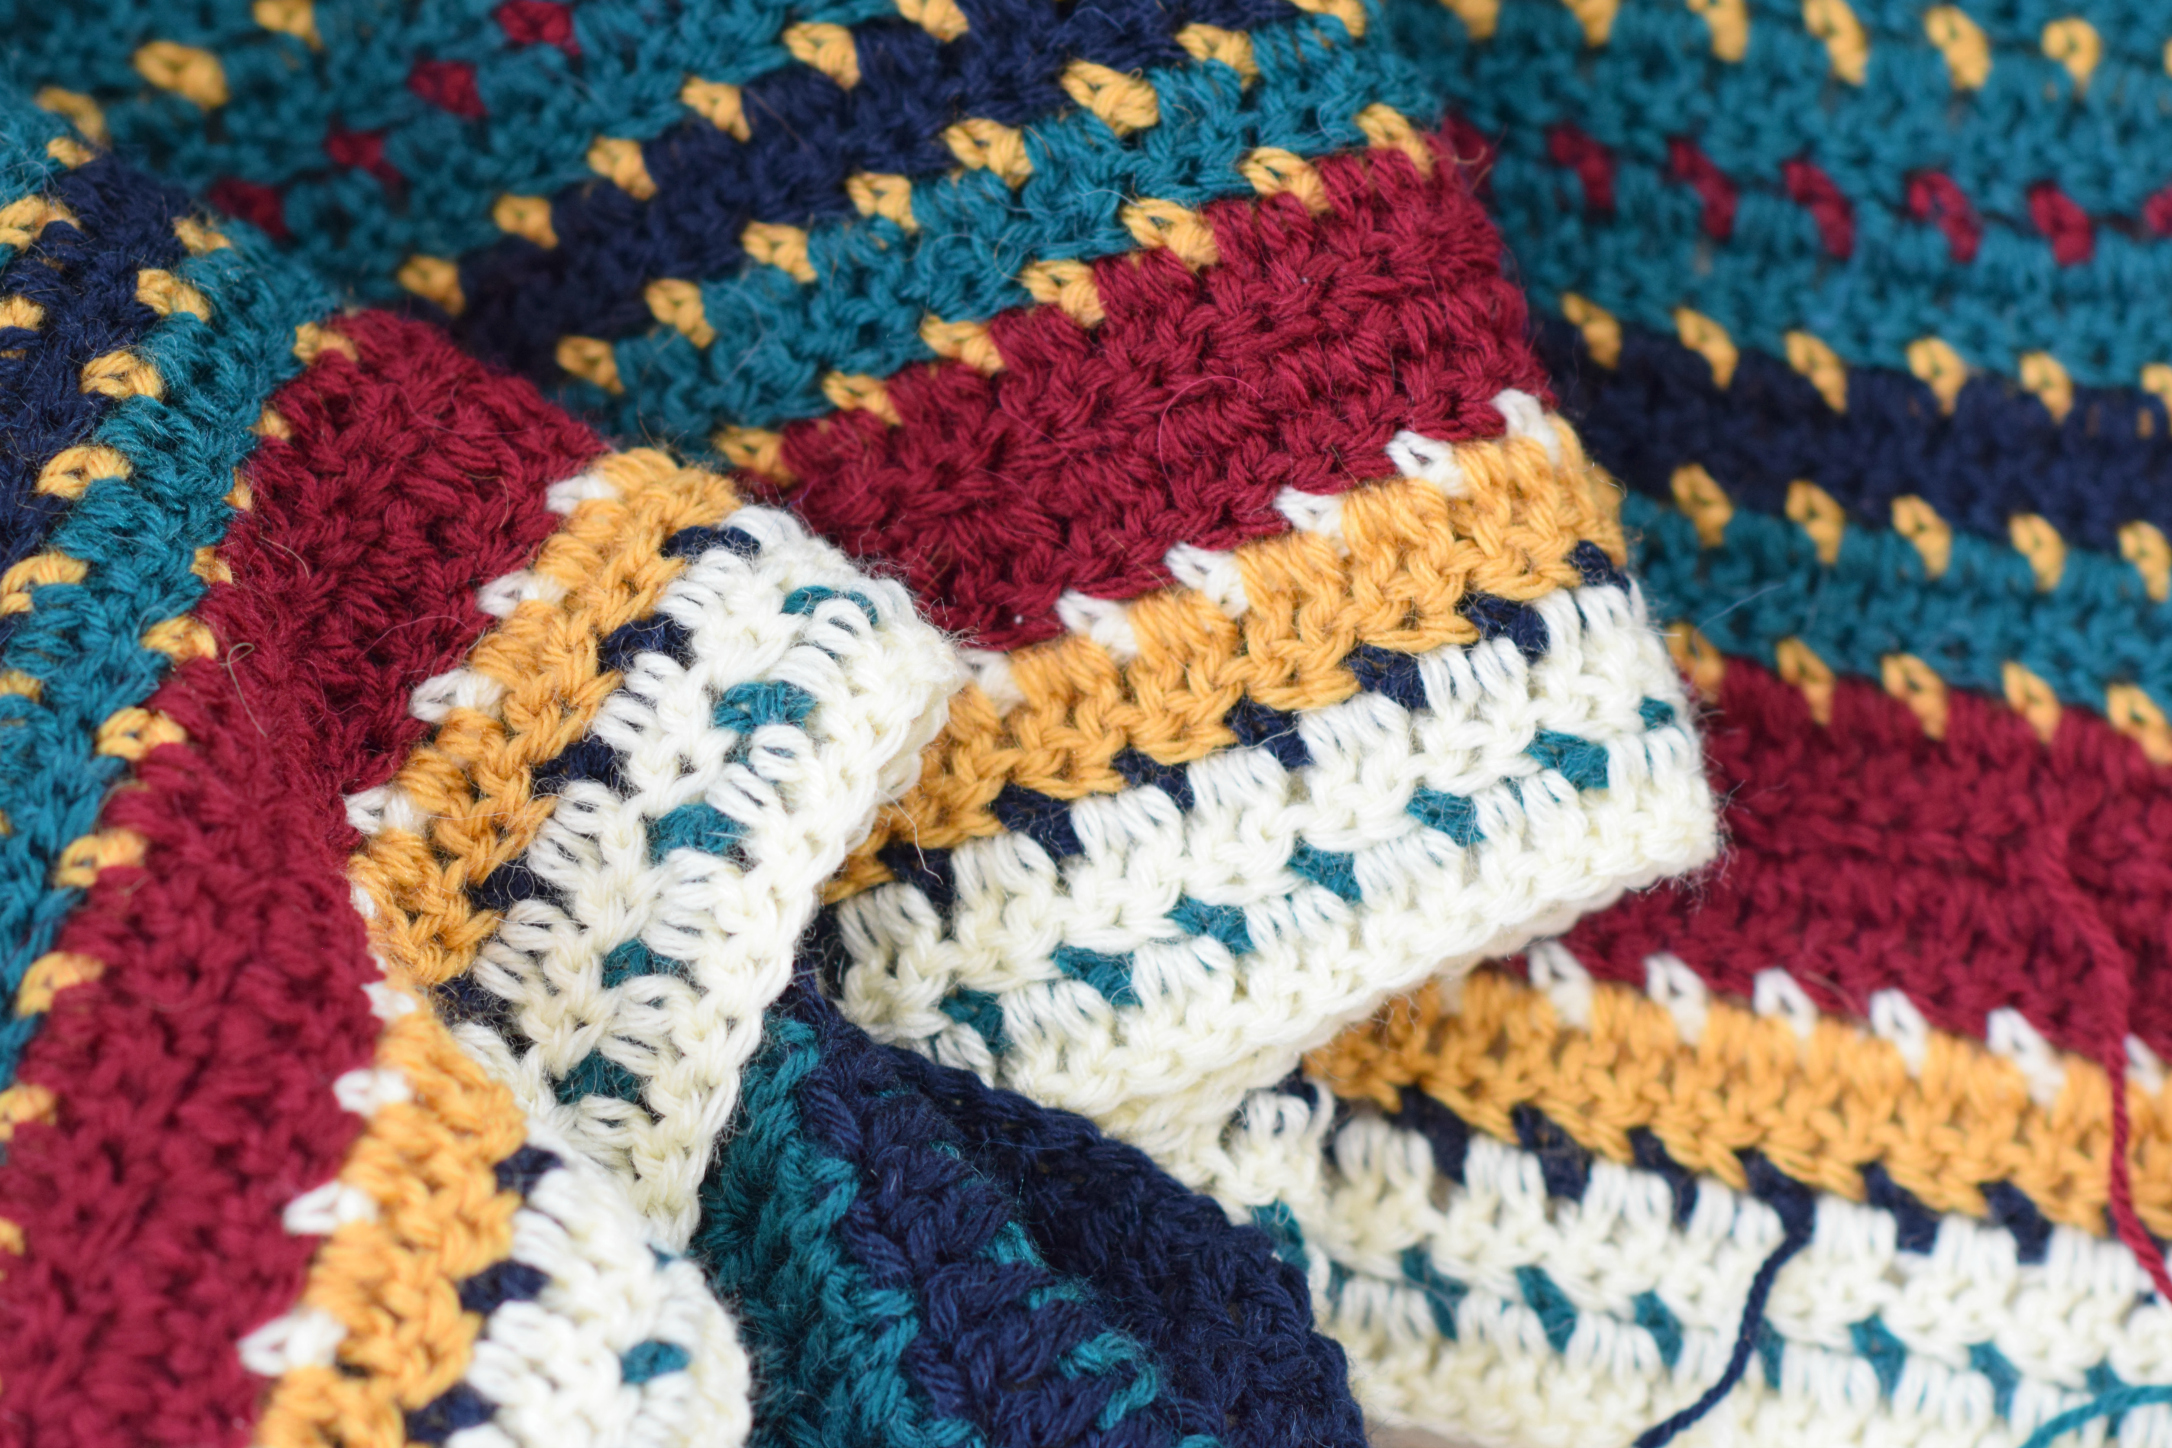
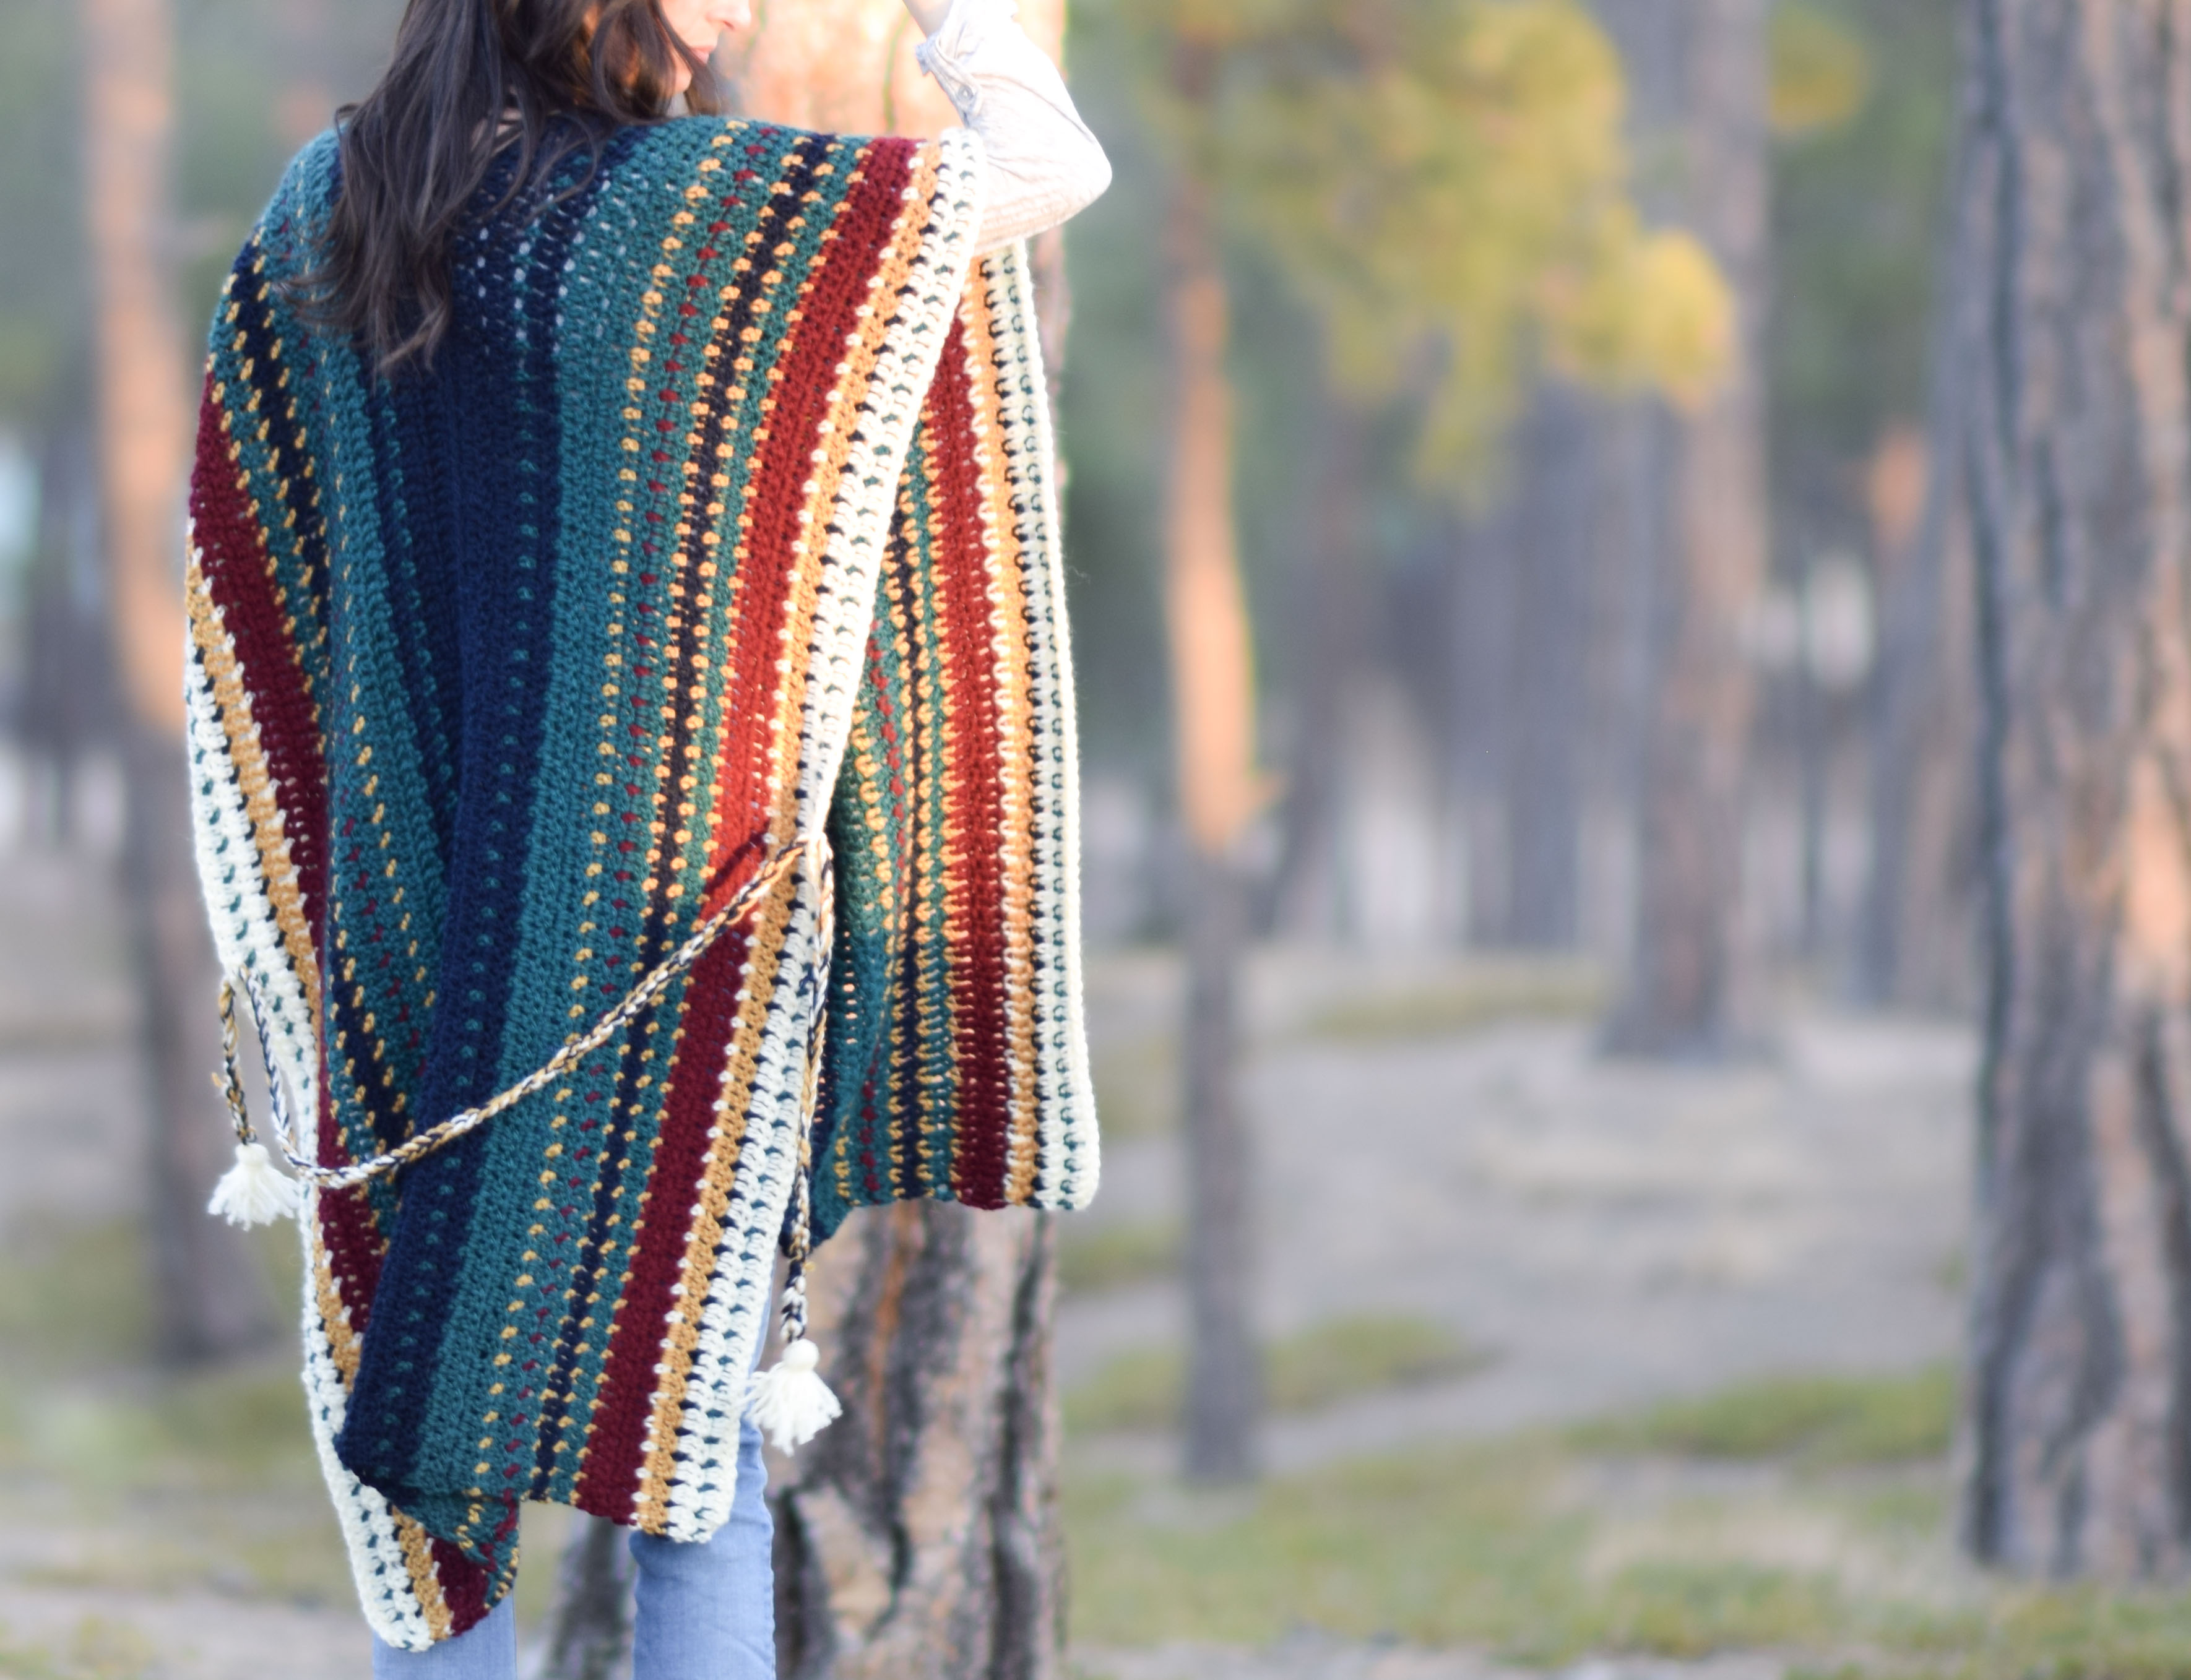
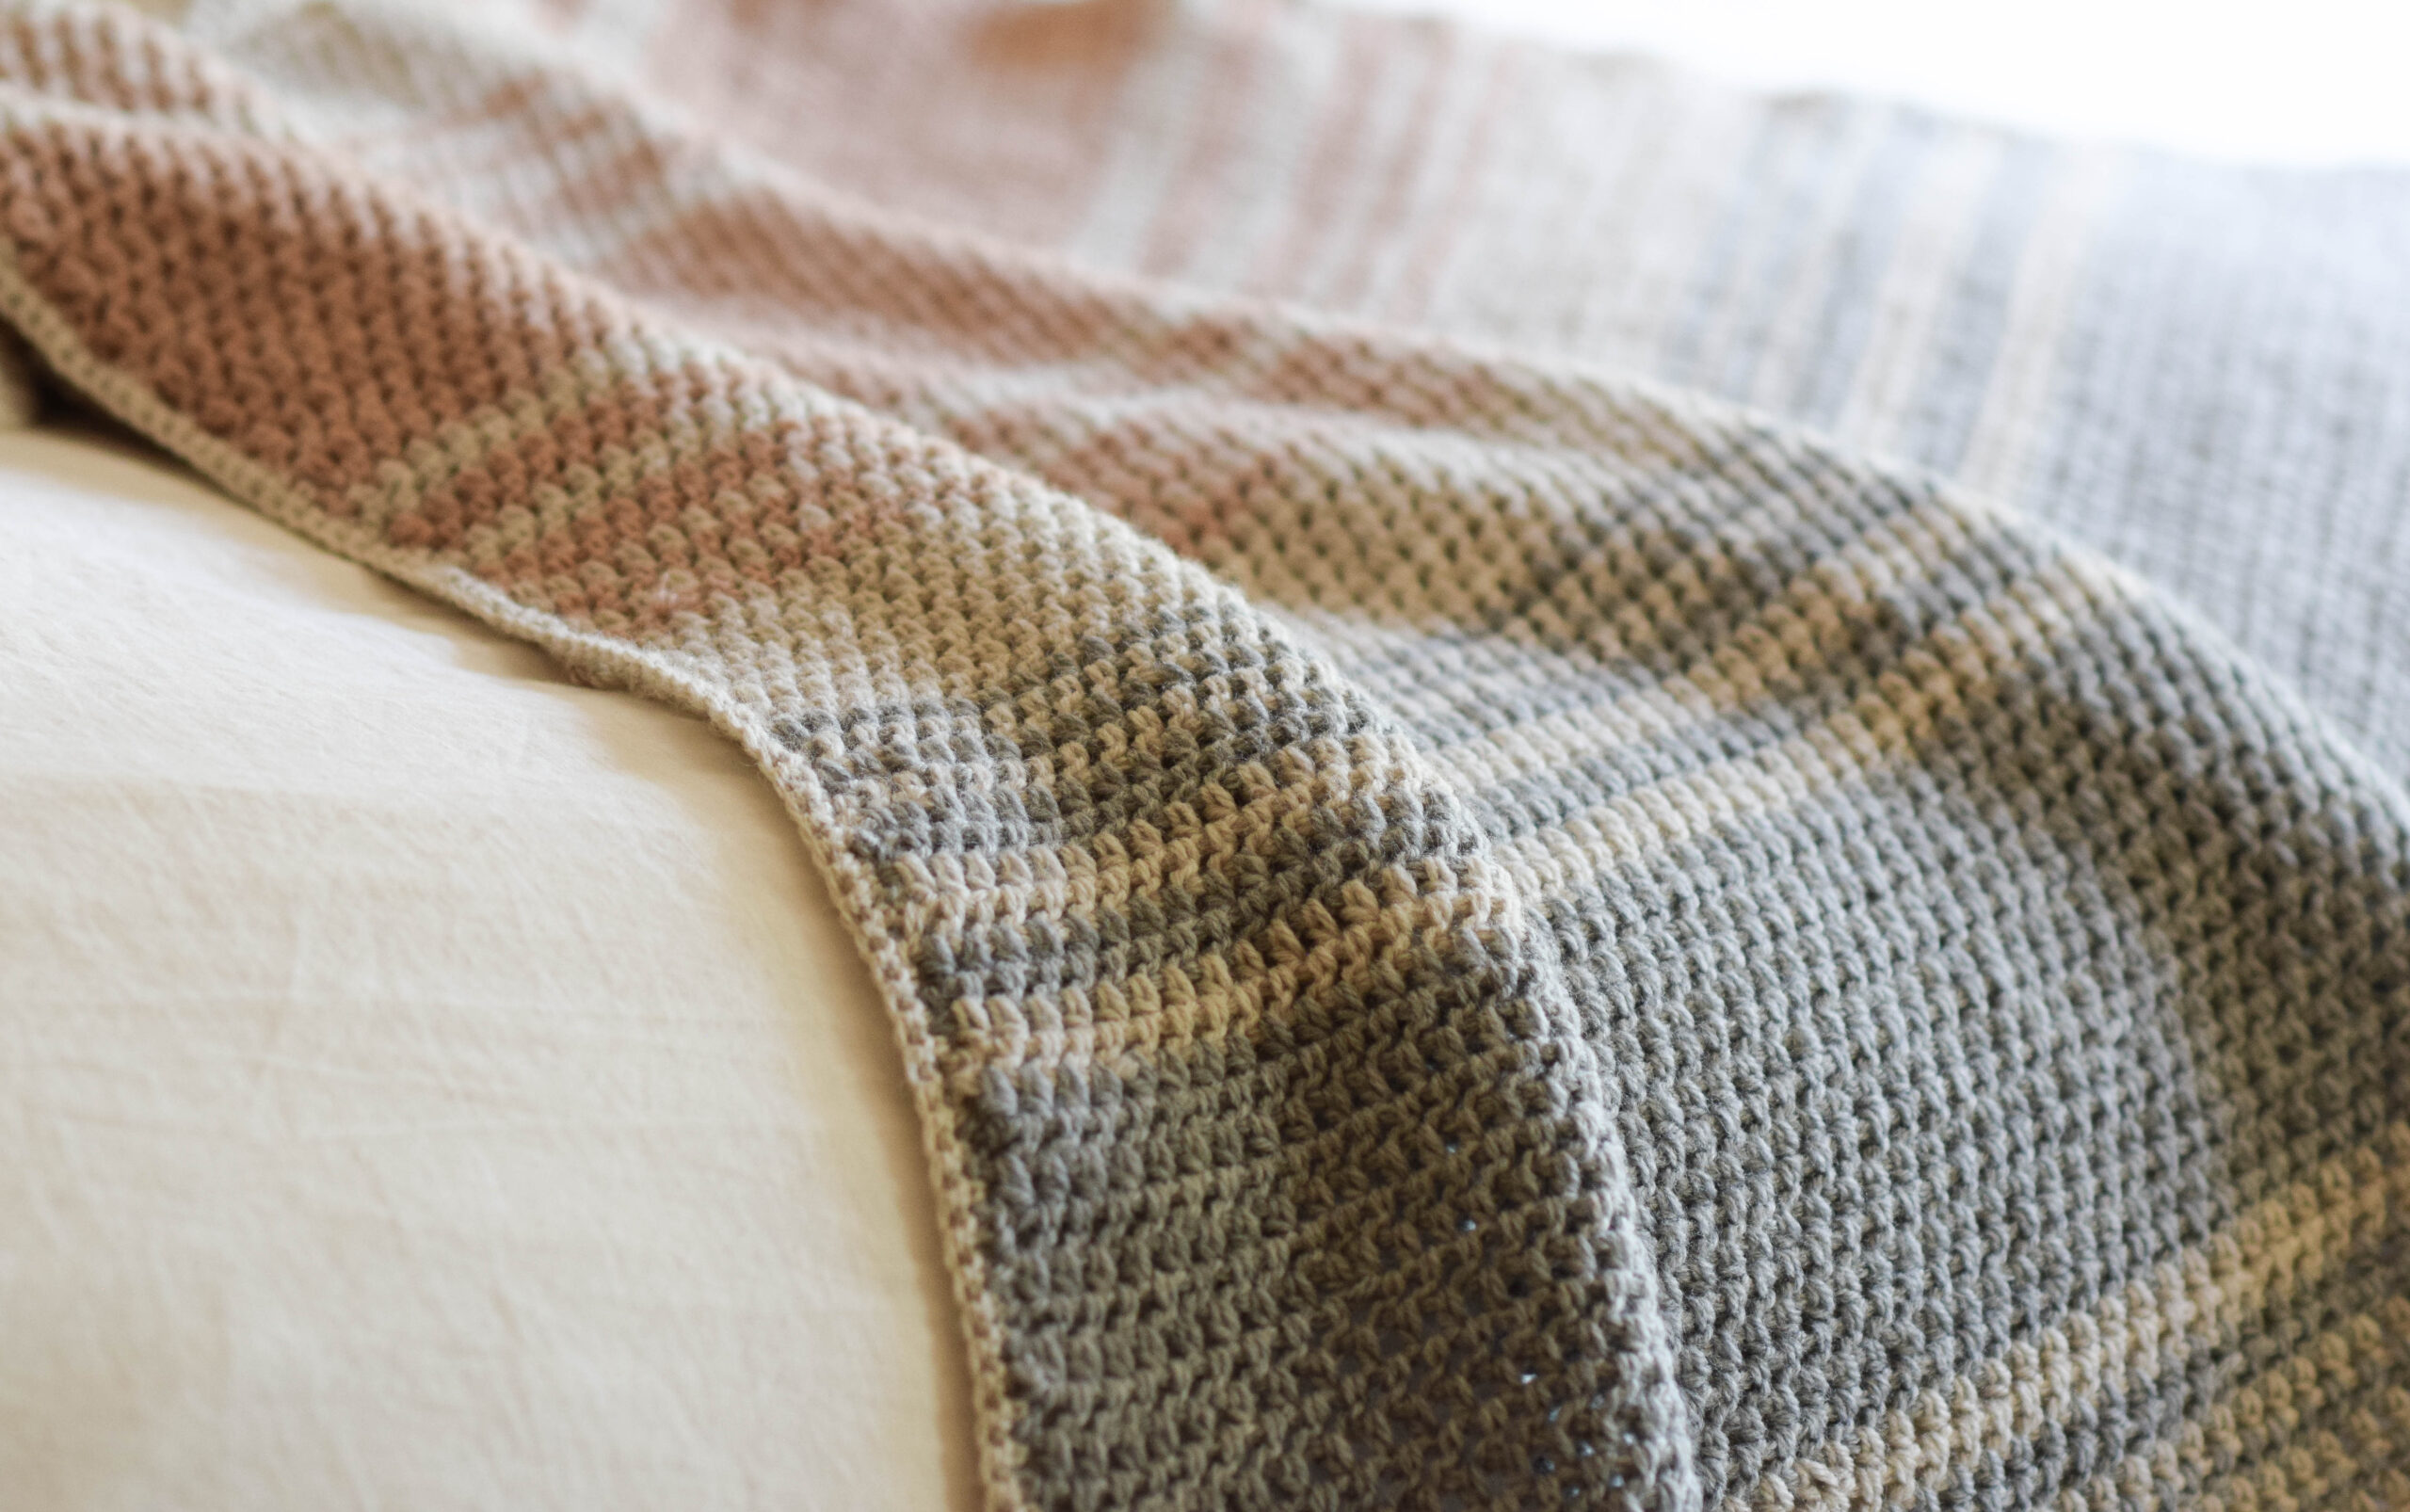
I also can’t say enough about this yarn! The Touch of Alpaca gives it a high end look and feel that I really appreciate yet the yarn is still practical with the acrylic blend. Have you worked with Alpaca before? This ruana would also look lovely in neutral tones, but it certainly pops with the variety of bold colors. And do you see how the stitches look a bit different in the photo above? This is the reverse side of the ruana which is actually as lovely as the right side. In fact, you can choose whichever side you prefer!
Without further ado, let’s get to this colorful piece!
All The Colors Serape Ruana
Inspired by the colorful serapes of Mexico, this long ruana is a statement piece that is also comfortable and casual. Wear it with leggings and boots or jeans and your comfiest top.
You will need:
US Size J 6.0 mm crochet hook
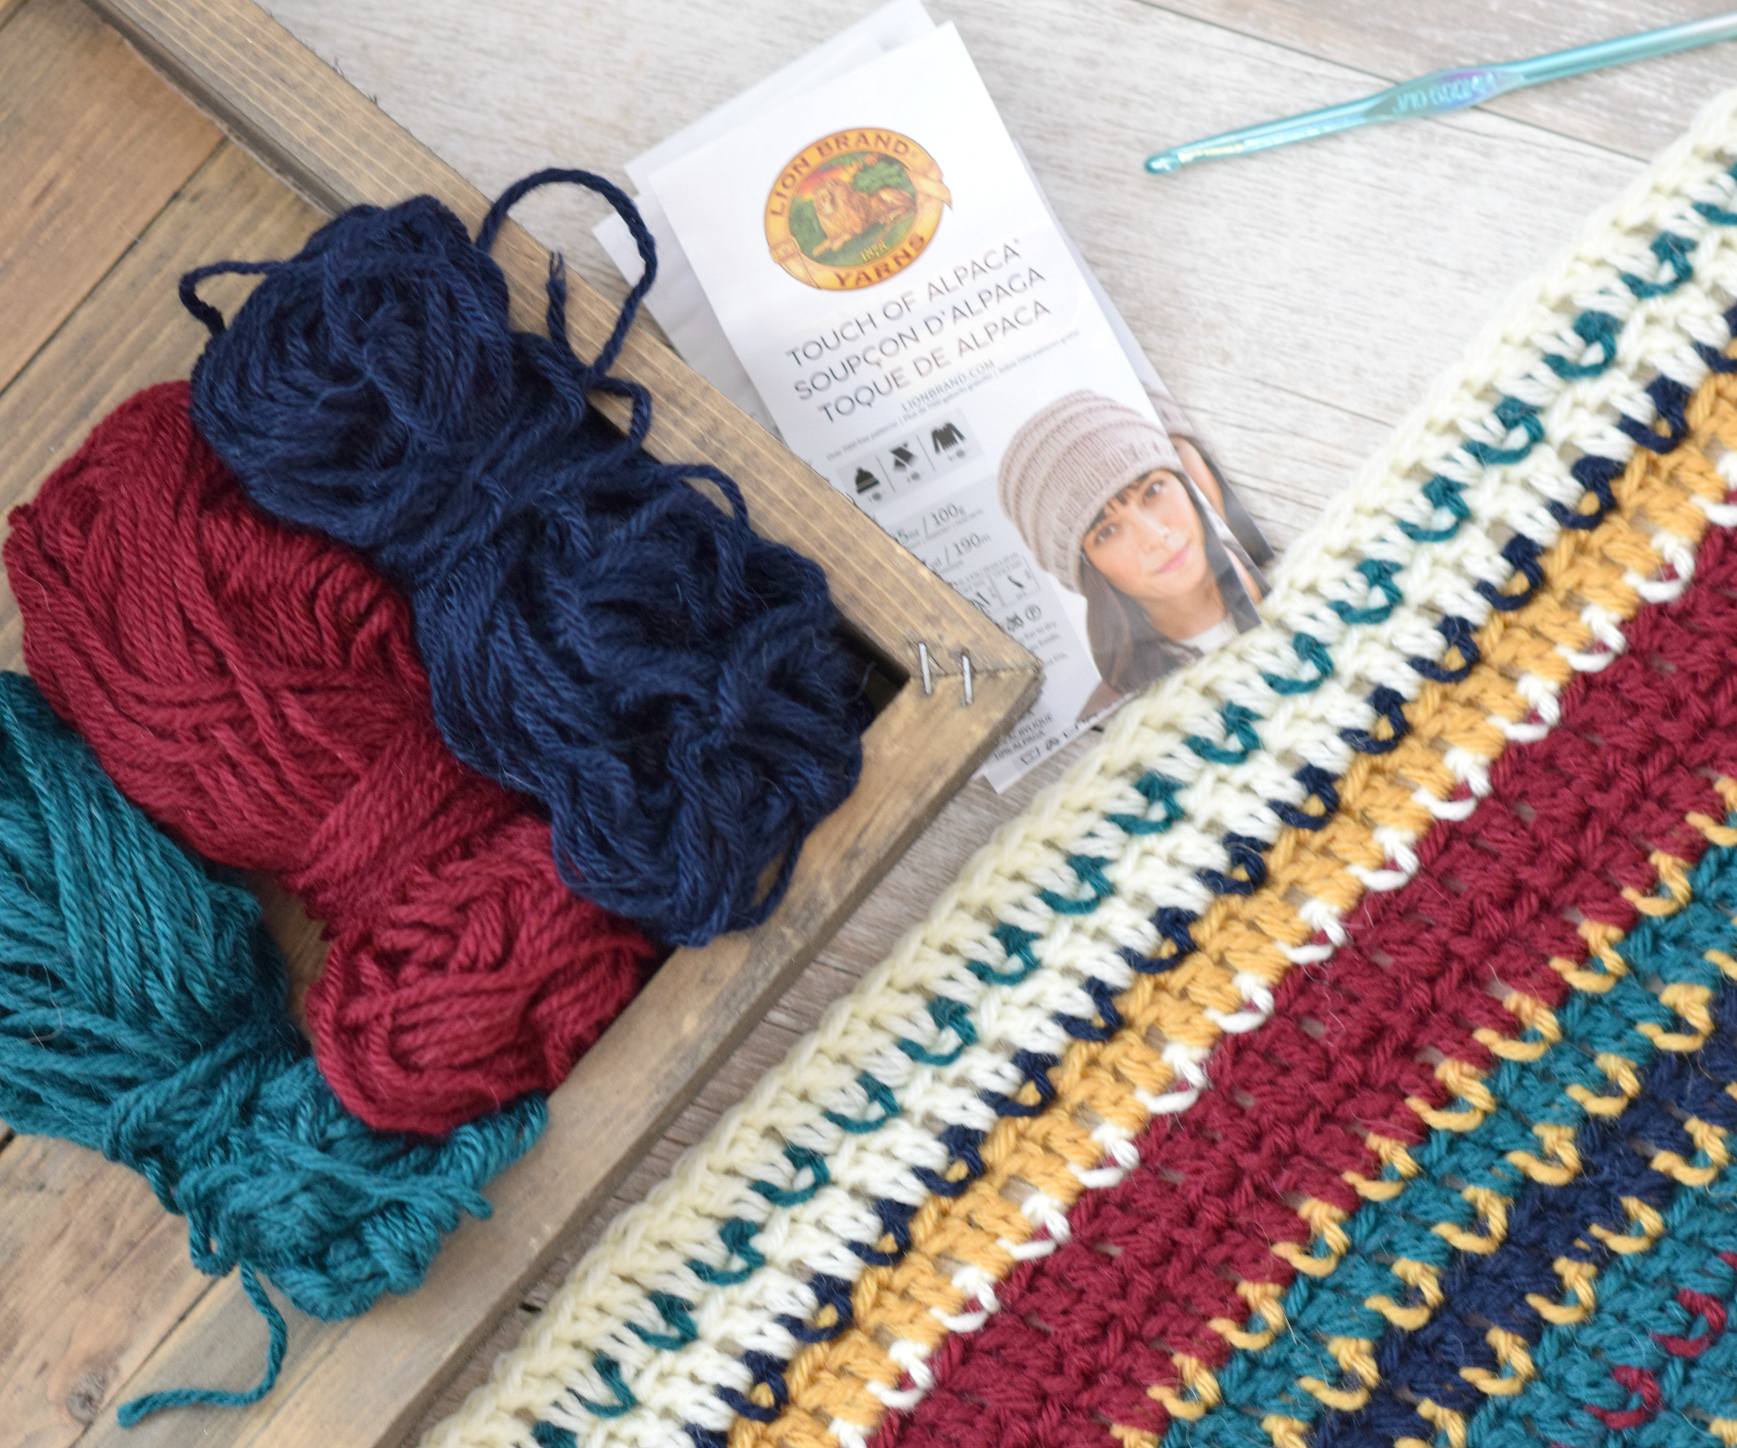
2 Lion Brand Yarn Touch of Alpaca in Jade (100 g/skein) (Kit from Lion Brand here)
2 Lion Brand Yarn Touch of Alpaca in Navy (100 g/skein)
1 Lion Brand Yarn Touch of Alpaca in Goldenrod (100 g/skein)
1 Lion Brand Yarn Touch of Alpaca in Crimson (100 g/skein)
1 Lion Brand Yarn Touch of Alpaca in Cream (100 g/skein)
(Pattern uses approximately 570 grams total)
Scissors
Tapestry Needle to seam and weave in ends
Size:
Top to bottom approximately 33” inches
Width is approximately 26” and bust circumference is approximately 52”
Skill Level:
Easy +
Gauge:
Approximately 11 stitches per 4” and just over 8 ½ rows in repeated stitch pattern per 4”
Skills & Abbreviations:
ch – chain
sk – skip
sc – single crochet
st – stitch
dc – double crochet
ch sp – chain space
Notes:
This Serape Ruana is made in two pieces. A right half and a left half are created and then seamed in the center to join.
It’s a good idea to check your gauge and measure as you work the pattern to ensure the size is turning out correctly. Each rectangle should measure approximately 66” long and 13” wide. You may make your ruana wider by adding more rows, but keep yarn needs in mind.
The entire piece is made with a two row repeat. Color changes are noted througout.
Pattern
With Navy, Chain 186
Row 1 Sc in 2nd st from hook, *ch1, sk st, sc in next st. Repeat from * across the row. (185)
Row 2 Ch 3 (counts as dc), dc in next ch sp, dc in each sc st & ch sp across the row. (185)
Row 3 Ch 1, sc in 2nd st from hook, *ch1, sk st, sc in next st. Repeat from * across the row. (185)
Row 4 Repeat row 2
Change to Jade
Row 5 Repeat row 3
Change to Navy
Row 6 Repeat row 2
Change to Jade
Row 7 – 10 Repeat rows 3 & 2
Change to Goldenrod
Row 11 Repeat row 3
Change to Jade
Row 12 Repeat row 2
Change to Crimson
Row 13 Repeat row 3
Change to Jade
Row 14 Repeat row 2
Change to Goldenrod
Row 15 Repeat row 3
Change to Navy
Row 16 Repeat row 2
Change to Goldenrod
Row 17 Repeat row 3
Change to Jade
Row 18 Repeat row 2
Change to Goldenrod
Row 19 Repeat row 3
Change to Crimson
Row 20 Repeat row 2
Row 21 – 22 Repeat row 3 & 2
Change to Cream
Row 23 Repeat row 3
Change to Goldenrod
Row 24 Repeat row 2
Change to Navy
Row 25 Repeat row 3
Change to Cream
Row 26 Repeat row 2
Change to Jade
Row 27 Repeat row 3
Change to Cream
Row 28 Repeat row 2
Tie off and weave in ends.
Repeat the pattern above to make second rectangular panel. (Remember that you can add more rows to make the ruana wider but keep yarn needs in mind)
Assembly and Seaming:
Place both rectangular pieces with the original chain stitches at the center. Each side has a different look, so ensure that matching sides are facing upward. You may make whichever side that you like the “right side” of the ruana. With a tapestry needle and length of navy yarn, whip stitch seam from the bottom up until you reach the center of the two pieces. Tie off and weave in ends.
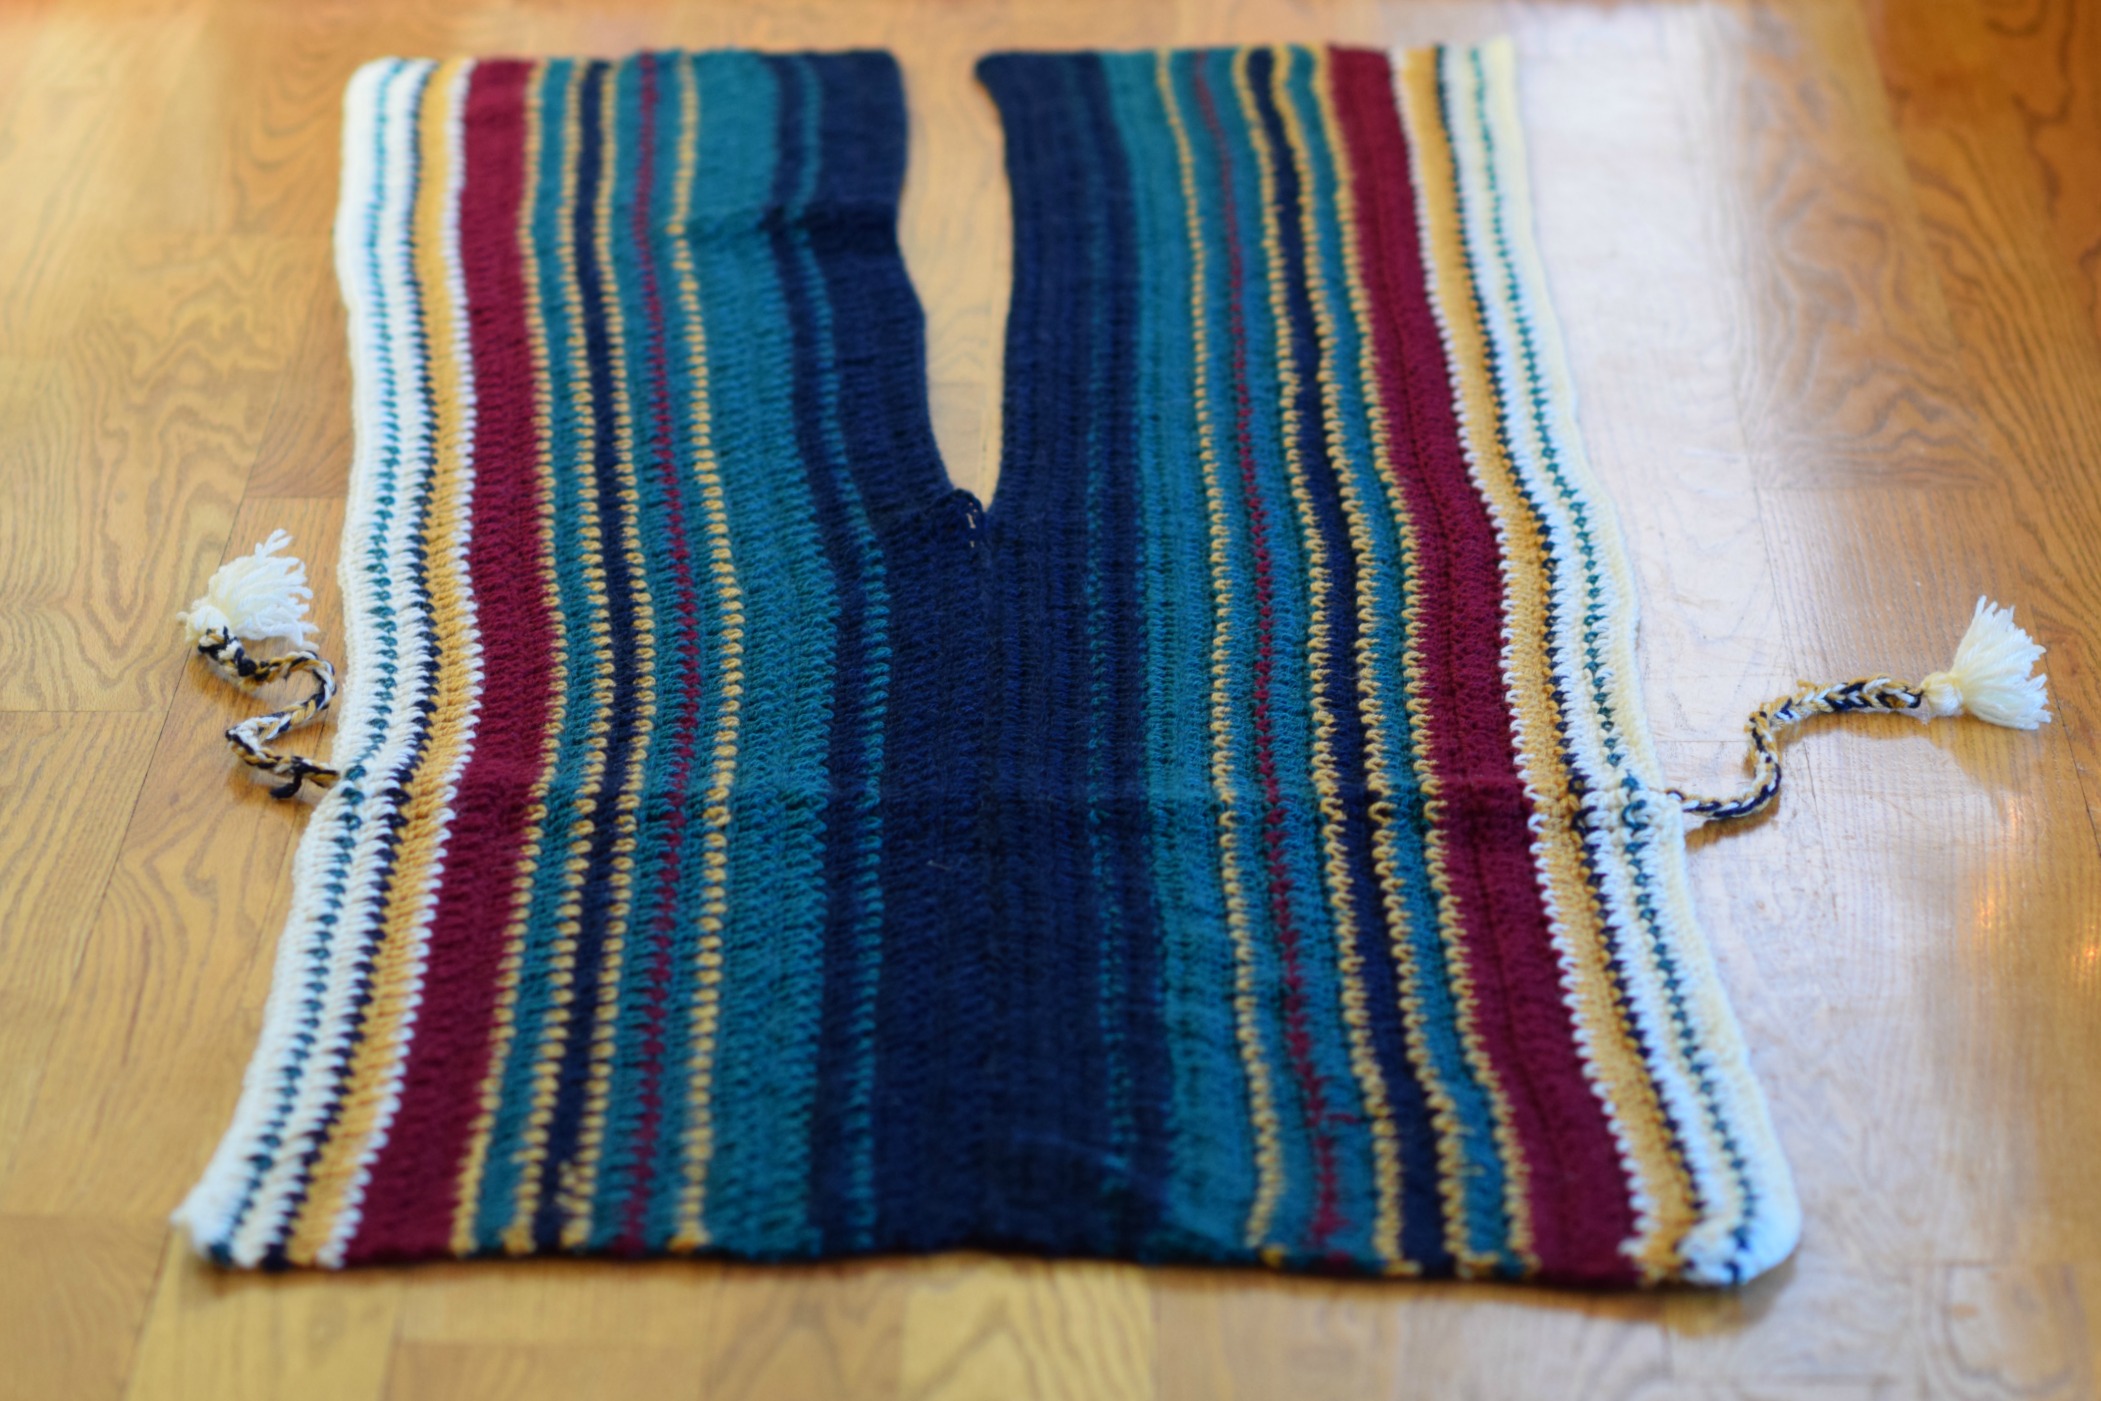
Above: See how it’s just two rectangles that are seamed together in the center? Such a simple construction.
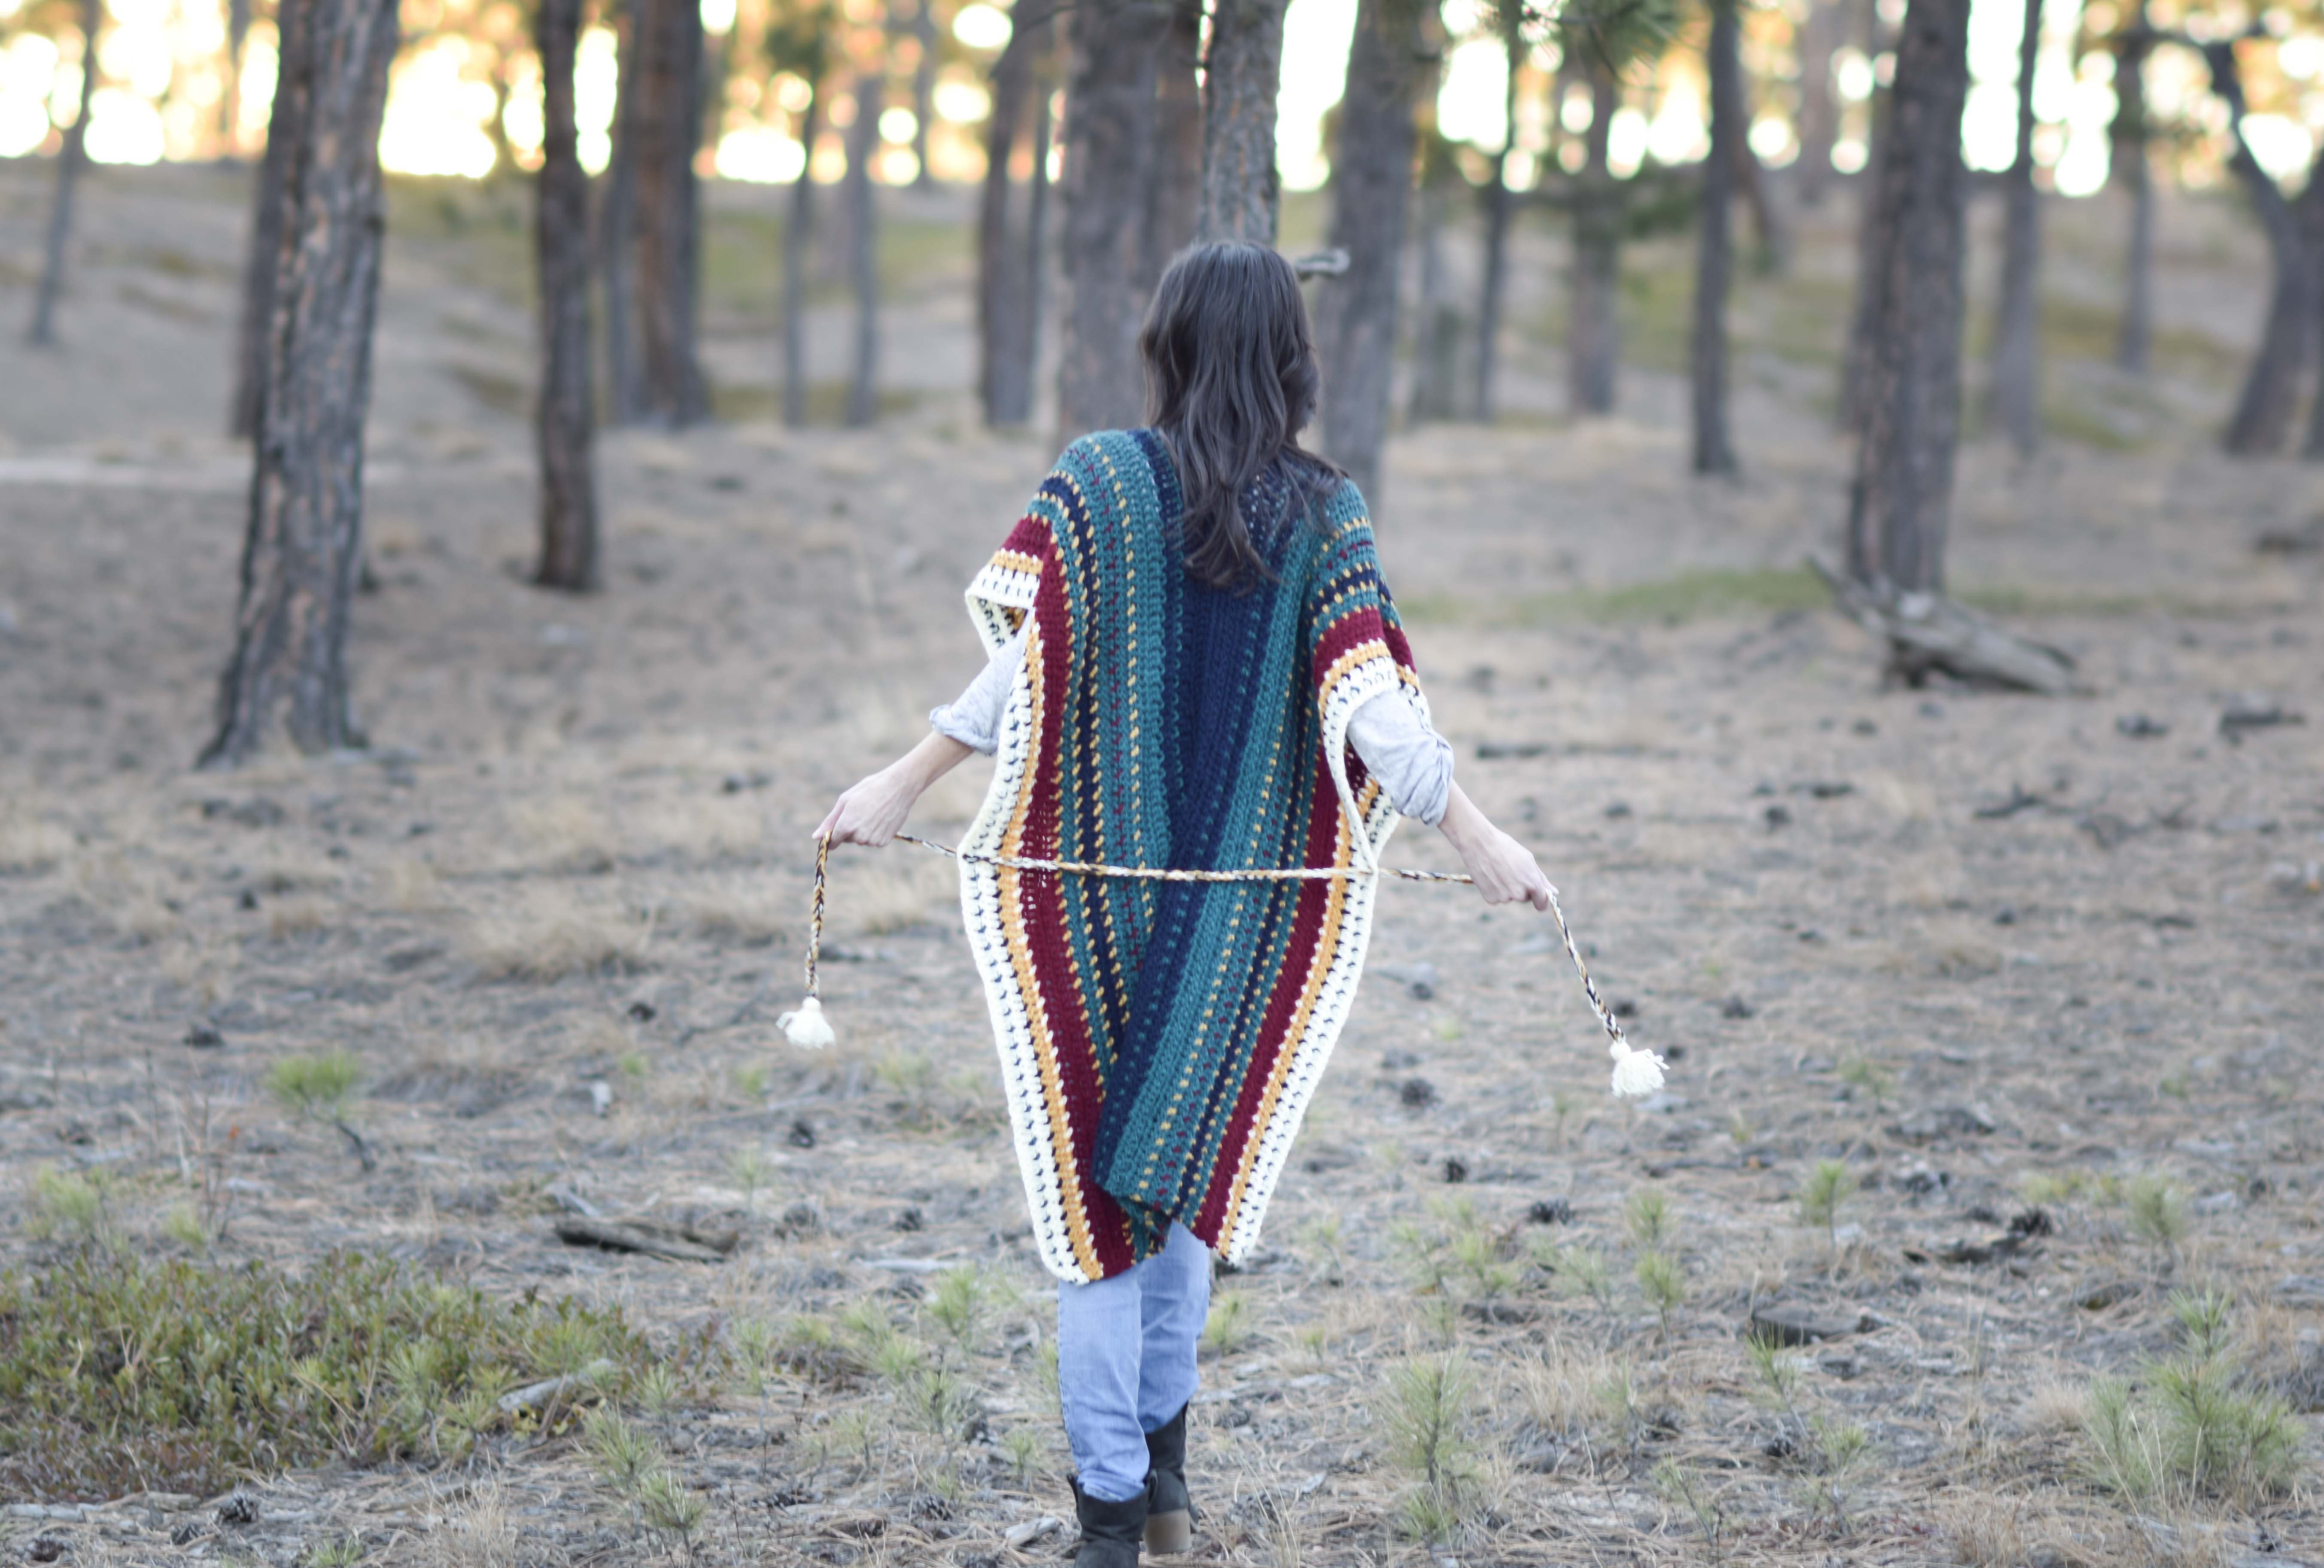
Optional Waist Tie:
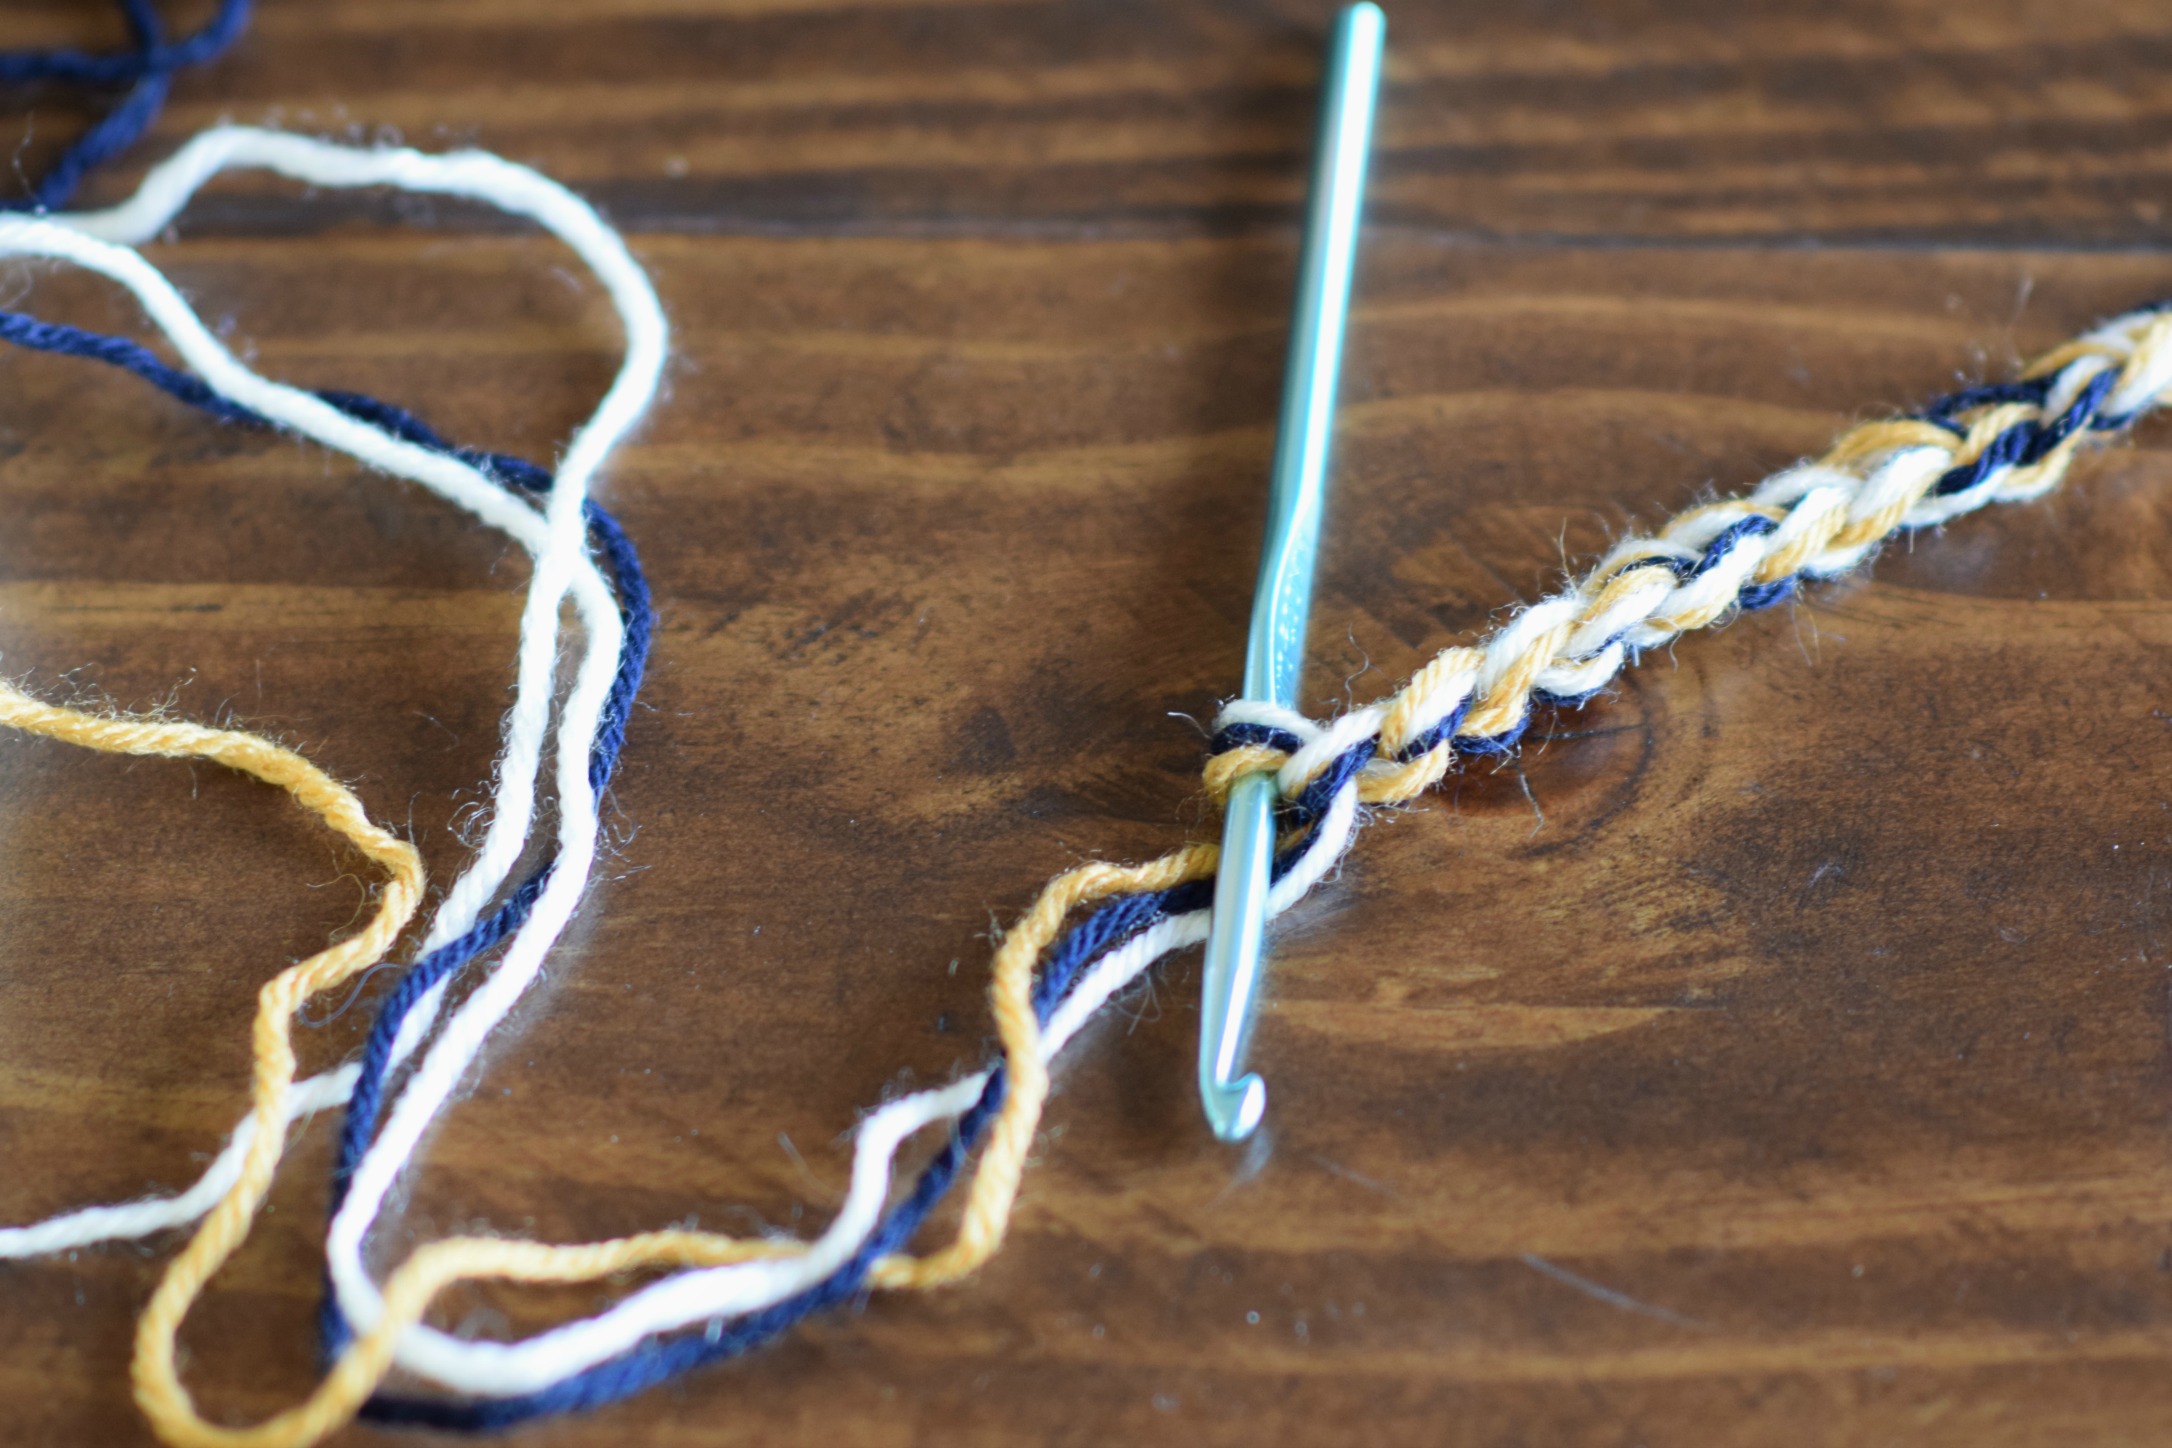
To create the tie, hold three strands of yarn together and make a crocheted chain as long as you’d like to wrap around the waist and tie. Crochet the chain very loosely. Tie off and weave in ends. Add tassels as desired. To make a tassel, cut about 23 lengths of yarn approximately 4” long. With a separate length of yarn, tie around the center of your lengths of yarn and knot. This will attach the tassel to the belt. Fold down the lengths of yarn and wrap another length of yarn around the lengths of yarn at the top and knot. Weave ends into tassel and trim ends of tassel. There’s no need to add belt loops; simply work each end of the waist belt through a stitch on each side of the back panel.
I hope you enjoyed this pattern and please let me know if you plan to make one! It’s a ton of fun to work with all the different colors. While I’m not always down for big projects, this one really held my attention and I watched the colors come together! Let me know if you have any questions my friends.
XO
Jessica
 If you liked this, you might also like:

It´s lovely.
Thanks so much!
I like the colors – I teach Spanish so I may make one for the class or the other Spanish teacher – gracias 🙂
Que bueno! That’s so cool you teach Spanish! Glad you like the colors Susan.
You did it again Jessica! This is so beautiful! I just love it!
Aww thanks Maya! You’re always so kind.
This is absolutely beautiful! I have never crocheted before and I want to learn so bad but I think this project would be too hard for me as a beginner.
Well, for someone who doesn’t often “do color” I think you are hiding yet another talent!! It’s gorgeous Jessica!!
Hehe – thanks Patty. That means a lot coming from you as you’re so great with color! Merry Christmas friend!
Jessica, this is so lovely! I definitely plan on making one for myself. The colors are so vibrant; quite a change from your usual more muted feminine colors, which I always adore, but this is so terrific. We are being inundated with ponchos in the crochet world lately, but as in your unique and talented fashion, you took the poncho and made it your own and I LOVE it. Blessings, Elisabeth (in CO too)
Hi Elisabeth! It is definitely different from my usual, but I really appreciate your kind words! Let me know if you have any questions as you make it. Hugs to you from your neighbor to the Southwest. 🙂
New subscriber and new fan – I love this ruana pattern, and thank you for sharing. I’m thinking I’ll get the kit from Lion so I’ll have just the right yarn without having to hunt it down, lol.
Hi Nancy! Thanks so much for taking the time to leave me a comment. So glad you found me and my blog! If you try the Ruana please let me know if you have any questions at all!
I enjoy all your patterns. I am currently working on the Easy Knit Blanket Sweater. You have given me more for the que.
Hi Diane!
So glad you like it! Thanks so much for taking the time to let me know.
Hello mine was not even close to the length or width please advise i even did it with a 206 stitches
Your gauge must have been different than mine, though there could be other reasons it turned out smaller. You can try going up a hook size to start!